

containerd环境搭建指南
一.container概述
1.什么是containerd
- 早在2016年3月,Docker 1.11的Docker Engine里就包含了containerd,而现在则是把containerd从Docker Engine里彻底剥离出来,作为一个独立的开源项目独立发展,目标是提供一个更加开放,稳定的容器运行基础设施。和原先包含在Docker Engine里containerd相比,独立的containerd将具有更多的功能,可以涵盖整个容器运行时管理的所有需求。

- 然而,containerd并不是直接面向最终用户的,而是主要用于集成到更上层的系统里,比如Swarm,kubernetes,Mesos等容器编排系统。

- containerd以Daemon的形式运行在系统上,通过暴露底层的gRPC API,上层系统可以通过这些API管理机器上的容器。

- 每个containerd只负责一台机器,pull精选,对容器的操作(启动,停止等),网络,存储都是由containerd完成。具体运行容器由runC负责,实际上只要是负责OCI规范的容器都可以支持。

- 对于容器编排服务来说,运行时只需要使用containerd + runC,更加轻量,容易管理。
	- contained更专注于容器的生命周期管理,容器的存储管理,容器的网络管理。
	- runC是实际的容器运行工具。

- 独立之后containerd的特性严禁可以和Docker Engine分开,专注容器运行时管理,可以更稳定。
2.为什么要学习containerd
众所周知,K8S已经是云原生的基础设施,对于传统运维在就业找工作时,都会或多或少接触到K8S相关面试题。

而在K8S 1.24之后的版本官方已经将原有的docker-shim容器运行时弃用,而是改用containerd作为容器运行时。

因此,很多企业也在转型使用containerd,因此课程设计上,也要紧跟企业的步伐,我们要对标企业。因此在Docker的后续课程中引入containerd的知识板块。

当然,并不是说学习containerd就不用学习docker了,事实上,大多数公司依旧是在使用docker作为容器管理工具哟。小孩子才做选择题,咱们成年人自然都得学习。
二.基于yum方式安装containerd
1.获取软件源
wget -O /etc/yum.repos.d/docker-ce.repo https://mirrors.aliyun.com/docker-ce/linux/centos/docker-ce.repo


参考链接:
	https://developer.aliyun.com/mirror/docker-ce
2.查看yum源中containerd软件版本

yum list | grep containerd
3.安装containerd的
yum -y install containerd.io
4.查看containerd的版本信息
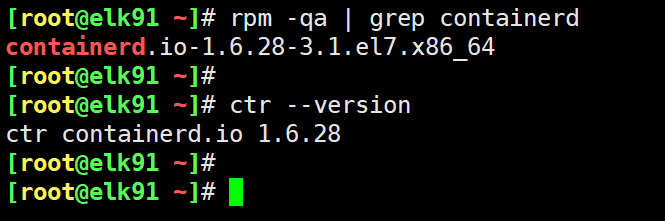
[root@elk91 ~]# rpm -qa | grep containerd
containerd.io-1.6.28-3.1.el7.x86_64
[root@elk91 ~]#
[root@elk91 ~]# ctr --version
ctr containerd.io 1.6.28
[root@elk91 ~]#
5.设置containerd开机自启动
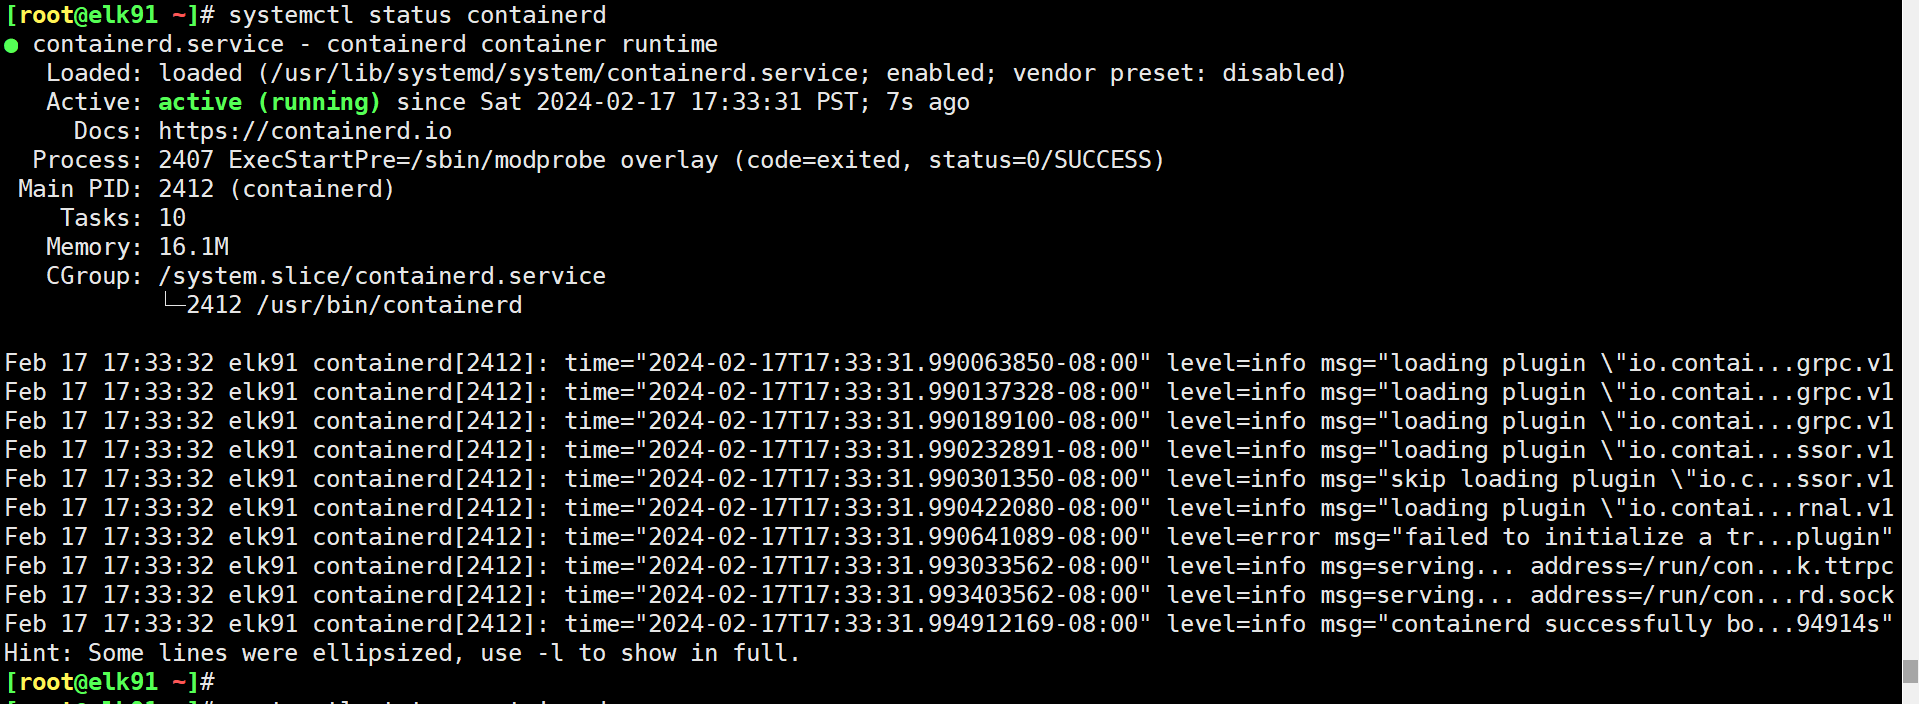
[root@elk91 ~]# systemctl enable --now containerd
[root@elk91 ~]#
[root@elk91 ~]# systemctl status containerd
6.查看containerd的客户端和服务端的版本信息
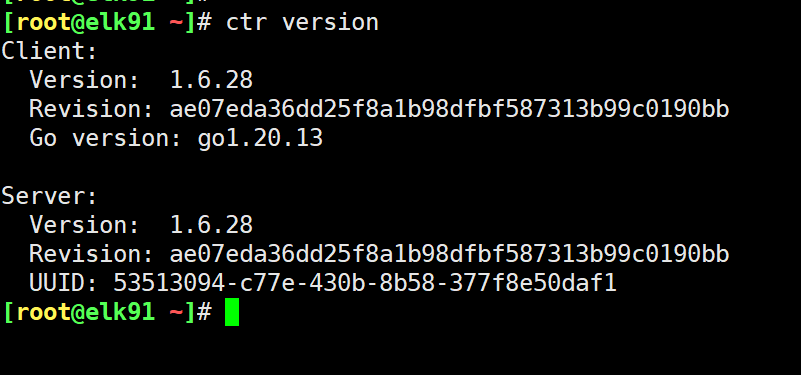
[root@elk91 ~]# ctr version
Client:
  Version:  1.6.28
  Revision: ae07eda36dd25f8a1b98dfbf587313b99c0190bb
  Go version: go1.20.13

Server:
  Version:  1.6.28
  Revision: ae07eda36dd25f8a1b98dfbf587313b99c0190bb
  UUID: 53513094-c77e-430b-8b58-377f8e50daf1
[root@elk91 ~]#
三. 基于二进制方式安装
1.二进制安装包说明
containerd有两种安装包:
	- containerd-xxx:
		这种安装包用于单机测试没问题,不包含runC,需要提前安装。

	- cri-containerd-cni-xxx:
		包含runc及符合K8S的CNI接口的相关软件包。
		虽然包含runC,但是依赖系统中的Seccomp(用于系统资源调用的相关模块)来配合使用。因此建议大家手动安装runC即可。
2.下载containerd
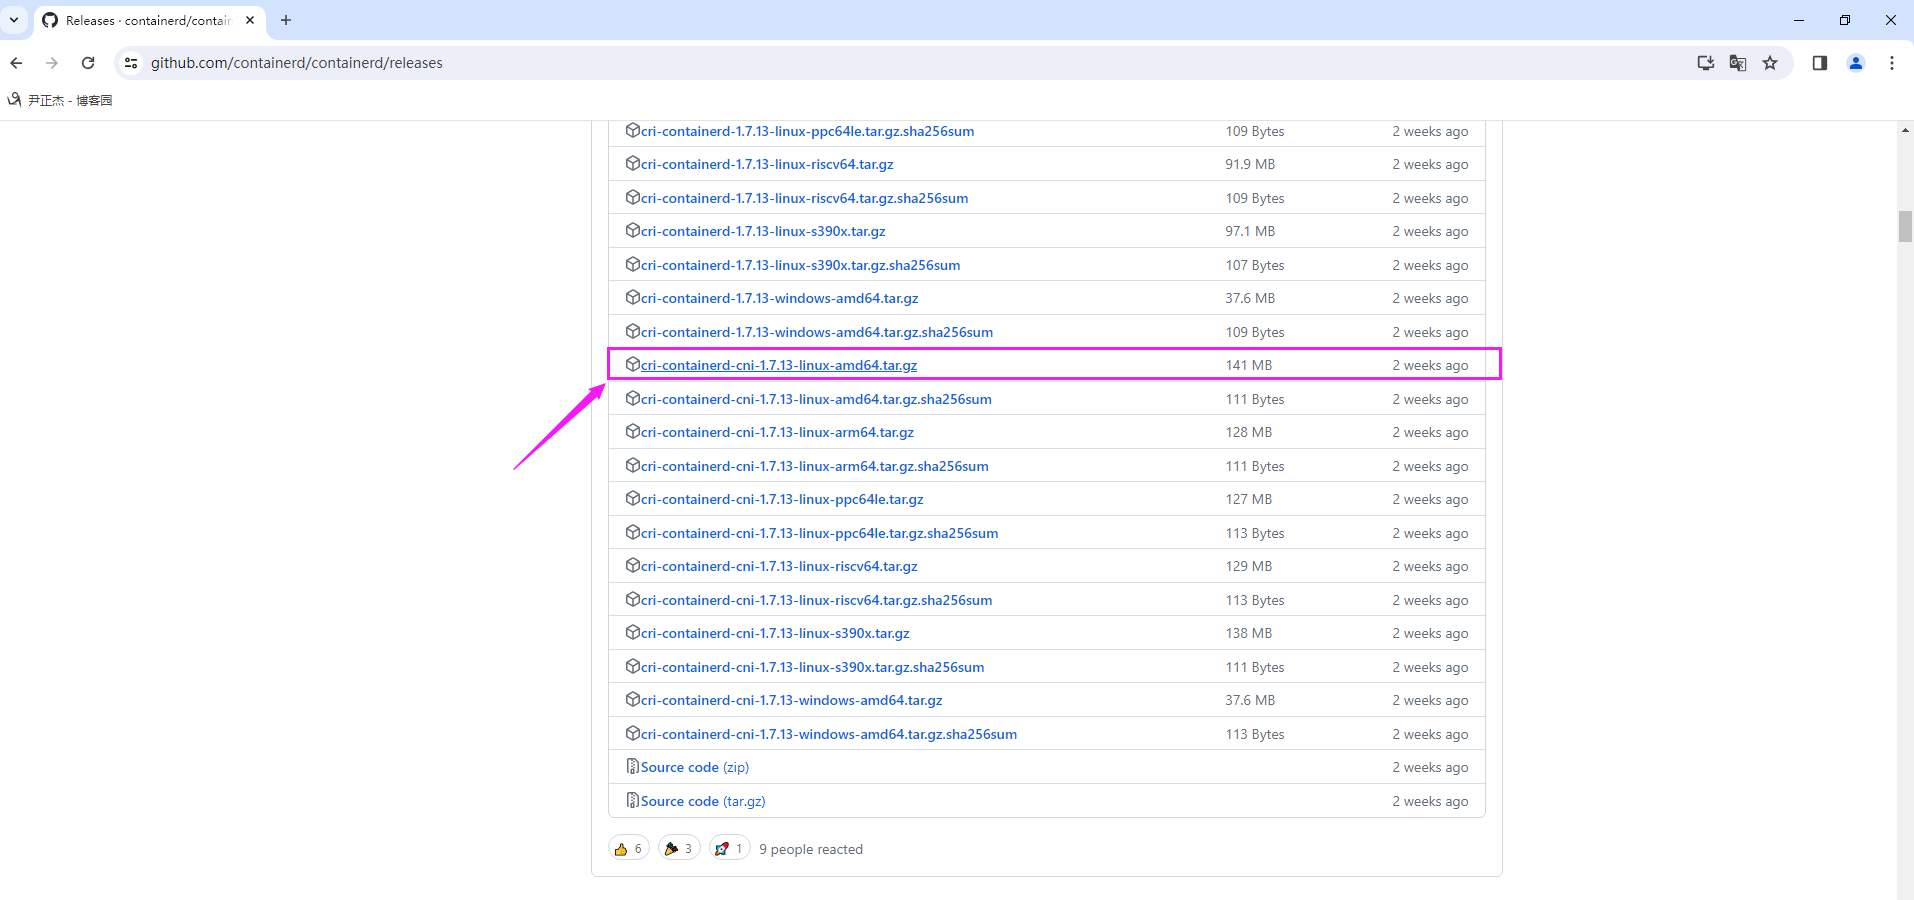
[root@elk92 ~]# wget https://github.com/containerd/containerd/releases/download/v1.7.13/cri-containerd-cni-1.7.13-linux-amd64.tar.gz


推荐阅读:
	https://github.com/containerd/containerd/releases
3.解压软件包
[root@elk92 ~]# tar xf cri-containerd-cni-1.7.13-linux-amd64.tar.gz
[root@elk92 ~]#
[root@elk92 ~]# ls etc opt usr
etc:
cni  crictl.yaml  systemd

opt:
cni  containerd

usr:
local
[root@elk92 ~]#


如上所示,解压软件包后会声场三个目录,作用说明如下:
	- etc
		存放的是containerd服务管理配置文件及cni虚拟网卡配置文件。

	- opt
		存放的是GCE环境中使用containerd配置文件及CNI插件。

	- usr
		存放的是containerd运行时文件,包含runC。


[root@elk92 ~]# ls etc opt usr -R
etc:
cni  crictl.yaml  systemd

etc/cni:
net.d

etc/cni/net.d:
10-containerd-net.conflist

etc/systemd:
system

etc/systemd/system:
containerd.service

opt:
cni  containerd

opt/cni:
bin

opt/cni/bin:
bandwidth  dhcp   firewall     host-local  loopback  portmap  sbr     tuning  vrf
bridge     dummy  host-device  ipvlan      macvlan   ptp      static  vlan

opt/containerd:
cluster

opt/containerd/cluster:
gce  version

opt/containerd/cluster/gce:
cloud-init  cni.template  configure.sh  env

opt/containerd/cluster/gce/cloud-init:
master.yaml  node.yaml

usr:
local

usr/local:
bin  sbin

usr/local/bin:
containerd  containerd-shim  containerd-shim-runc-v1  containerd-shim-runc-v2  containerd-stress  crictl  critest  ctd-decoder  ctr

usr/local/sbin:
runc
[root@elk92 ~]#
4.拷贝containerd运行时文件到宿主机指定路径

[root@elk92 ~]# ll /usr/local/bin/
total 0
[root@elk92 ~]#
[root@elk92 ~]# cp usr/local/bin/containerd /usr/local/bin/
[root@elk92 ~]#
[root@elk92 ~]# ll -h /usr/local/bin/
total 38M
-rwxr-xr-x. 1 root root 38M Feb 17 18:17 containerd
[root@elk92 ~]#
5.拷贝containerd的systemd的配置文件
[root@elk92 ~]#  cp etc/systemd/system/containerd.service  /usr/lib/systemd/system/
[root@elk92 ~]#
[root@elk92 ~]# ll -h /usr/lib/systemd/system/containerd.service
-rw-r--r--. 1 root root 1.4K Feb 17 18:20 /usr/lib/systemd/system/containerd.service
[root@elk92 ~]#
6.查看containerd帮助信息
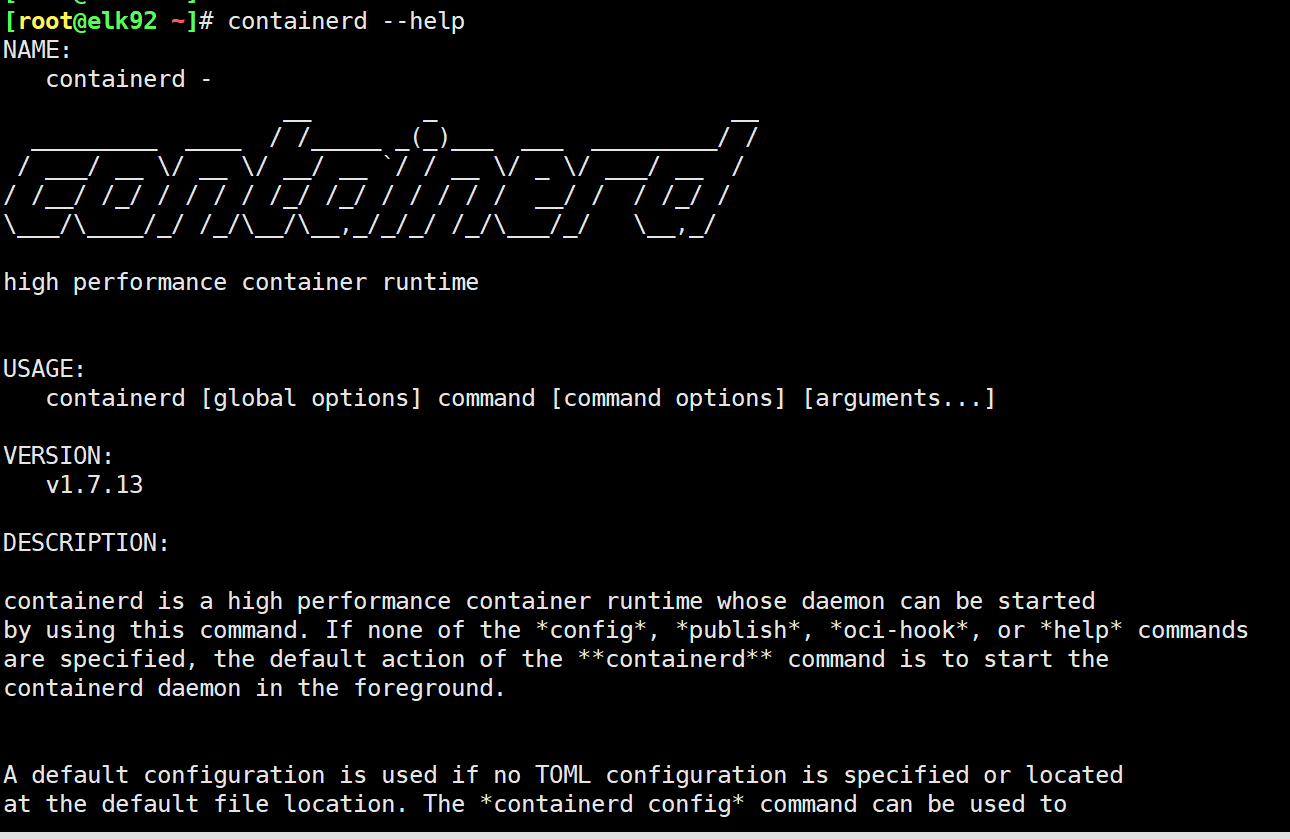
[root@elk92 ~]# containerd --help
NAME:
   containerd -
                    __        _                     __
  _________  ____  / /_____ _(_)___  ___  _________/ /
 / ___/ __ \/ __ \/ __/ __ `/ / __ \/ _ \/ ___/ __  /
/ /__/ /_/ / / / / /_/ /_/ / / / / /  __/ /  / /_/ /
\___/\____/_/ /_/\__/\__,_/_/_/ /_/\___/_/   \__,_/

high performance container runtime


USAGE:
   containerd [global options] command [command options] [arguments...]

VERSION:
   v1.7.13

DESCRIPTION:

containerd is a high performance container runtime whose daemon can be started
by using this command. If none of the *config*, *publish*, *oci-hook*, or *help* commands
are specified, the default action of the **containerd** command is to start the
containerd daemon in the foreground.


A default configuration is used if no TOML configuration is specified or located
at the default file location. The *containerd config* command can be used to
generate the default configuration for containerd. The output of that command
can be used and modified as necessary as a custom configuration.

COMMANDS:
   config    Information on the containerd config
   publish   Binary to publish events to containerd
   oci-hook  Provides a base for OCI runtime hooks to allow arguments to be injected.
   help, h   Shows a list of commands or help for one command

GLOBAL OPTIONS:
   --config value, -c value     Path to the configuration file (default: "/etc/containerd/config.toml")
   --log-level value, -l value  Set the logging level [trace, debug, info, warn, error, fatal, panic]
   --address value, -a value    Address for containerd's GRPC server
   --root value                 containerd root directory
   --state value                containerd state directory
   --help, -h                   show help
   --version, -v                print the version
[root@elk92 ~]#
7.生成配置文件
	1.创建配置文件目录
[root@elk92 ~]# mkdir /etc/containerd


	2.生成默认的配置文件
[root@elk92 ~]# containerd config default > /etc/containerd/config.toml


	3.修改Cgroup的管理者为systemd组件
[root@elk92 ~]# grep SystemdCgroup /etc/containerd/config.toml
            SystemdCgroup = false
[root@elk92 ~]#
[root@elk92 ~]# sed -ri 's#(SystemdCgroup = )false#\1true#' /etc/containerd/config.toml
[root@elk92 ~]#
[root@elk92 ~]# grep SystemdCgroup /etc/containerd/config.toml
            SystemdCgroup = true
[root@elk92 ~]#


	4.修改pause的基础镜像名称
[root@elk92 ~]# grep sandbox_image /etc/containerd/config.toml
    sandbox_image = "registry.k8s.io/pause:3.8"
[root@elk92 ~]#
[root@elk92 ~]# sed -i 's#registry.k8s.io/pause:3.8#registry.cn-hangzhou.aliyuncs.com/google_containers/pause:3.8#' /etc/containerd/config.toml
[root@elk92 ~]#
[root@elk92 ~]# grep sandbox_image /etc/containerd/config.toml
    sandbox_image = "registry.cn-hangzhou.aliyuncs.com/google_containers/pause:3.8"
[root@elk92 ~]#


	5.添加私有仓库信息
[root@elk92 ~]# grep registry.mirrors /etc/containerd/config.toml -A 2  # 修改前
      [plugins."io.containerd.grpc.v1.cri".registry.mirrors]

    [plugins."io.containerd.grpc.v1.cri".x509_key_pair_streaming]
[root@elk92 ~]#
[root@elk92 ~]#
[root@elk92 ~]# vim /etc/containerd/config.toml
[root@elk92 ~]#
[root@elk92 ~]#
[root@elk92 ~]# grep registry.mirrors /etc/containerd/config.toml -A 3  # 修改后
      [plugins."io.containerd.grpc.v1.cri".registry.mirrors."harbor.yinzhengjie.com"]
        endpoint = [
          "https://harbor.yinzhengjie.com"
        ]
[root@elk92 ~]#
8.启动containerd服务
	1.启动containerd服务
[root@elk92 ~]# systemctl enable --now containerd


	2.查看服务的状态
[root@elk92 ~]# systemctl status containerd
9.拷贝ctr客户端工具及runc容器运行时
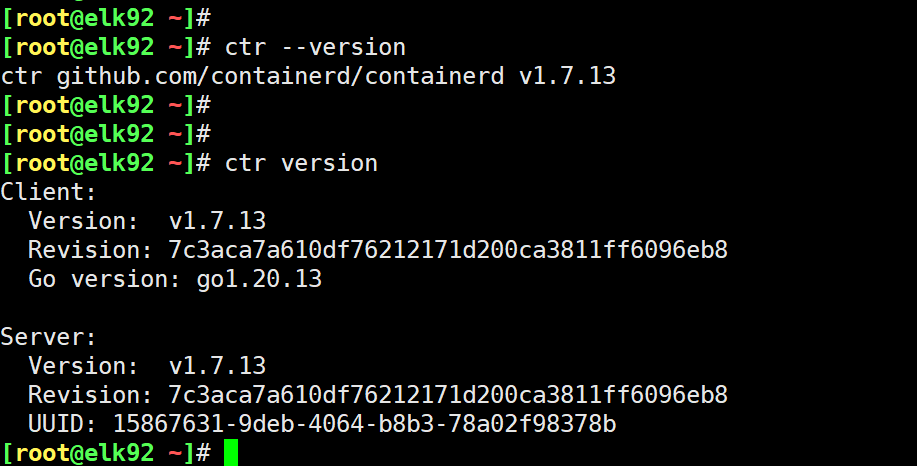
	1.拷贝ctr客户端工具到PATH环境变量
[root@elk92 ~]# cp usr/local/bin/ctr /usr/bin/


	2.查看contrainerd服务版本信息
[root@elk92 ~]# ctr --version
ctr github.com/containerd/containerd v1.7.13
[root@elk92 ~]#
[root@elk92 ~]#
[root@elk92 ~]# ctr version
Client:
  Version:  v1.7.13
  Revision: 7c3aca7a610df76212171d200ca3811ff6096eb8
  Go version: go1.20.13

Server:
  Version:  v1.7.13
  Revision: 7c3aca7a610df76212171d200ca3811ff6096eb8
  UUID: 15867631-9deb-4064-b8b3-78a02f98378b
[root@elk92 ~]#


    5.拷贝容器的运行时,用于后期启动容器
[root@elk92 ~]# cp usr/local/bin/containerd-shim-runc-v2 /usr/bin/
10.安装runC
10.1 为什么要单独安装runC

如上图所示,由于二进制包中提供的runC默认需要安装seccomp支持,需要单独安装,且不同runC对seccomp版本要求不尽相同。这会导致安装后无法使用runC的情况。

所以建议单独下载runC二进制包进行安装,里面会包含seccomp模块的支持。

如下图所示,我们发现直接在containerd中下载的runC软件包大小仅仅只有13MB,而我们单独安装的runC要比这个软件包小哟~

10.2 下载runC软件包

[root@elk92 ~]# wget https://github.com/opencontainers/runc/releases/download/v1.1.12/runc.amd64


参考链接:
	https://github.com/opencontainers/runc/releases
10.3 拷贝runC到环境变量
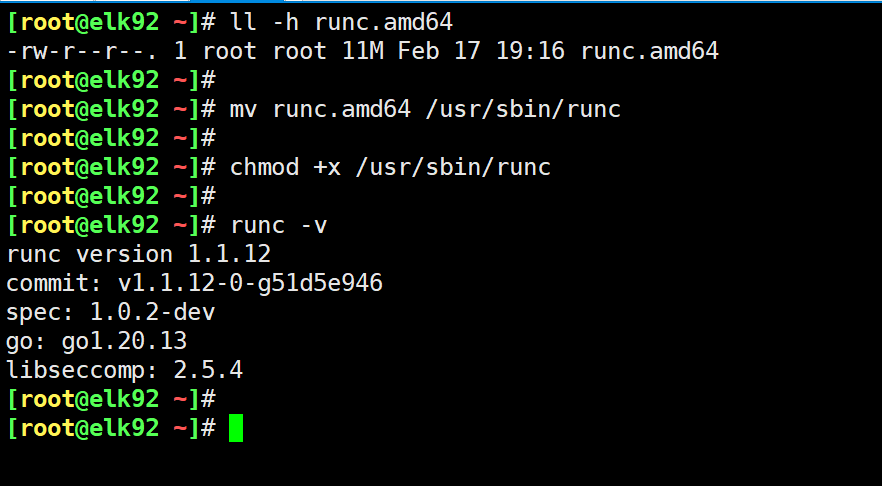
	1.查看runC软件包大小
[root@elk92 ~]# ll -h runc.amd64
-rw-r--r--. 1 root root 11M Feb 17 19:16 runc.amd64
[root@elk92 ~]#

	2.移动runc软件包到PATH环境变量
[root@elk92 ~]# mv runc.amd64 /usr/sbin/runc
[root@elk92 ~]#


	3.为runc程序添加执行权限
[root@elk92 ~]# chmod +x /usr/sbin/runc
[root@elk92 ~]#

	4.查看runC的版本信息
[root@elk92 ~]# runc -v
runc version 1.1.12
commit: v1.1.12-0-g51d5e946
spec: 1.0.2-dev
go: go1.20.13
libseccomp: 2.5.4
[root@elk92 ~]#
本文来自博客园,作者:尹正杰,转载请注明原文链接:https://www.cnblogs.com/yinzhengjie/p/18030527,个人微信: "JasonYin2020"(添加时请备注来源及意图备注,有偿付费)
当你的才华还撑不起你的野心的时候,你就应该静下心来学习。当你的能力还驾驭不了你的目标的时候,你就应该沉下心来历练。问问自己,想要怎样的人生。

 浙公网安备 33010602011771号