Rabbitmq+HAproxy+Keepalived 高可用
环境:
centos 7
| ip | 主机名 | 软件 |
|---|---|---|
| 192.168.137.126 | node01 | rabbitmq镜像集群节点+ha+keeplived |
| 192.168.137.125 | node02 | rabbitmq镜像集群节点+ha+keeplived |
| 192.168.137.127 | vrrp | 虚拟vip |
这里将ha跟ke集群部署在mq集群所在服务器上了。生产环境建议单独拿出两台做ha跟ke!
所有服务器需关闭
selinux 跟 firewalld(实验环境),必须开启ip 转发功能net.ipv4.ip_forward = 1
参考:https://blog.csdn.net/xjjj064/article/details/110822339
1.部署mq集群
这里略过,详细步骤可参考:https://www.cnblogs.com/yhy223/p/14453418.html
2.安装所需软件
yum install haproxy keepalived
3.部署HAproxy(node01,node02)
修改配置文件
vim /etc/haproxy/haproxy.cfg
[root@server1 ~]# vim /etc/haproxy/haproxy.cfg
global	#全局配置
    log         127.0.0.1 local2
    chroot      /var/lib/haproxy
    pidfile     /var/run/haproxy.pid
    maxconn     4000
    user        haproxy
    group       haproxy
    daemon
    stats socket /var/lib/haproxy/stats
defaults	#默认配置
    mode                    http
    log                     global
    option                  httplog
    option                  dontlognull
    option http-server-close
    option forwardfor       except 127.0.0.0/8
    option                  redispatch
    retries                 3
    timeout http-request    10s
    timeout queue           1m
    timeout connect         10s
    timeout client          1m
    timeout server          1m
    timeout http-keep-alive 10s
    timeout check           10s
    maxconn                 3000
listen admin_stats	#这里定义监控统计界面的一些配置
        stats   enable	#自动开启
        bind    0.0.0.0:8080	#访问入口绑定的端口跟地址
        mode    http	#http的七层模型
        option  httplog	#采用http日志格式
        log     global
        maxconn 10	#默认最大连接数
        stats refresh 30s	#统计页面自动刷新时间
        stats uri /admin_stats	#统计页面url
        stats auth admin:admin	#设置监控页面的用户和密码:admin,可以设置多个用户名
        stats hide-version	#隐藏统计页面上HAProxy的版本信息
        stats admin if TRUE	#设置手工启动/禁用,后端服务器(haproxy-1.4.9以后版本)
frontend http-in	#这里定义mq连接端口:5672的frontend前端配置
        bind 0.0.0.0:55672	#绑定端口,避免跟5672mq端口冲突
        mode http
        log global
        option httplog
        option httpclose
        default_backend rabbitmq-server	#指定默认的backend的页面作用域

backend rabbitmq-server	#这里定义mq连接端口:5672的后端配置
        mode http
        balance roundrobin	#balance roundrobin 负载轮询,balance source 保存session值,支持static-rr,leastconn,first,uri等参数。
        server  rabbitmq1 192.168.137.125:5672 maxconn 2000 weight 1  check inter 5s rise 2 fall 2
        server  rabbitmq2 192.168.137.126:5672 maxconn 2000 weight 1  check inter 5s rise 2 fall 2
        #rise 2是2次正确认为服务器可用,fall 2是2次失败认为服务器不可用,weight代表权重,check inter 5s 表示检查心跳频率,maxconn 2000 当前服务器支持的最大并发连接数,超出此值的连接将被放置于请求队列中

frontend web
        bind 0.0.0.0:35672
        mode http
        log global
        option httplog
        option httpclose
        default_backend rabbitmq-server-web
backend rabbitmq-server-web
        mode http
        balance roundrobin
        server  rabbitmq1 192.168.137.125:15672 maxconn 2000 weight 1  check inter 5s rise 2 fall 2
        server  rabbitmq2 192.168.137.126:15672 maxconn 2000 weight 1  check inter 5s rise 2 fall 2
global;defaults 里的配置使用默认应该也可以。使用以上贴出的也可以,请自行验证,主要添加跟修改
- listen 通过关联前后端定义一个完整的代理服务器
- frontend 定义监听的套接字,用于接收客户端请求并与之连接
- backend 定义后端服务器组,用于处理frontend转发来的请求
复制配置文件到另一台节点上
scp /etc/haproxy/haproxy.cfg root@node02:/etc/haproxy/
haproxy rsyslog日志配置(暂不清楚是否有效)
vim /etc/rsyslog.conf
# Provides UDP syslog reception
$ModLoad imudp
$UDPServerRun 514

# Provides TCP syslog reception
$ModLoad imtcp
$InputTCPServerRun 514

local1.*  /var/log/haproxy/rabbitmq.log
重启日志服务跟启动haproxy代理服务
mkdir -p /var/log/haproxy
systemctl restart rsyslog.service
systemctl start haproxy
systemctl enable haproxy
sysetmctl status haproxy
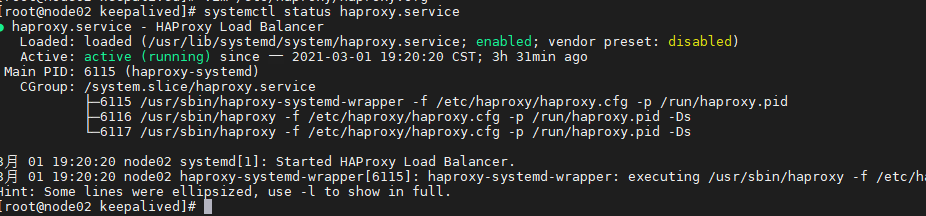
无报错即为启动成功
如有报错可查看/var/log/message 系统日志查看详细错误信息
查看启动的端口
ss -ptln | grep haproxy

8080 #haproxy web状态查看端口
35672 #mq网页管理端口
55672 #mq连接端口
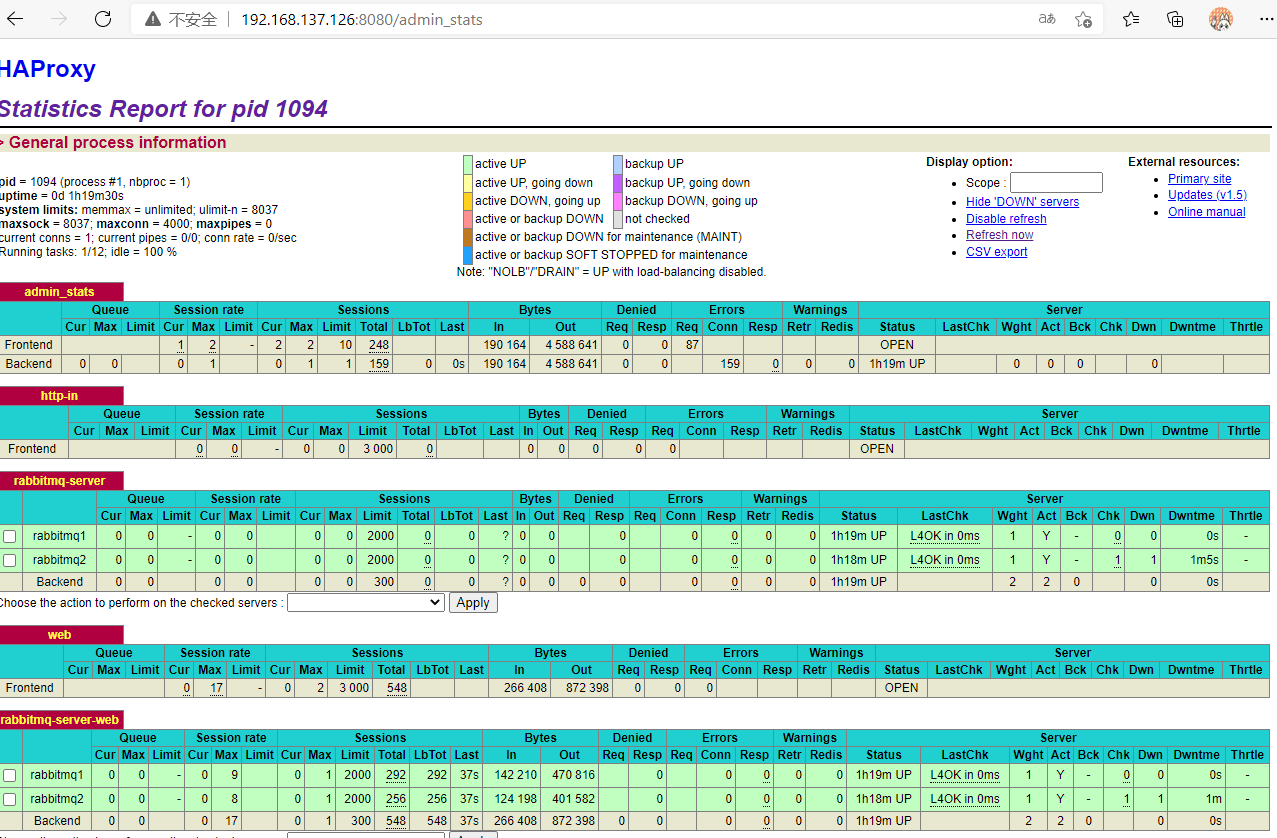
访问web 统计界面
4.部署keepalived(node01,node02)
编辑配置文件
cp /etc/keepalived/keepalived.conf{,.bak}
vim /etc/keepalived/keepalived.conf
! Configuration File for keepalived

global_defs {
   router_id director1
}
vrrp_script check_haproxy {
   script "/etc/keepalived/haproxy_chk.sh"
   interval 5
}

vrrp_instance VI_1 {
    state MASTER  # server1 服务vrrp状态为MASTER
    interface ens32  # 服务器网口名称
    virtual_router_id 80
    priority 100
    advert_int 1
    authentication {
        auth_type PASS
        auth_pass 1111
    }
    virtual_ipaddress {
        192.168.137.127/24
    }
    track_script {
        check_haproxy
    }
}
拷贝文件到node02并修改配置文件里的选项
router_id director2
state BACKUP
priority 80
配置haproxy 检测脚本
脚本同样需要复制到两台ha+ke节点上
vim /etc/keepalived/haproxy_chk.sh
#!/usr/bin/env bash
# test haproxy server running
systemctl status haproxy.service &>/dev/null
if [ $? -ne 0 ];then
    systemctl start haproxy.service &>/dev/null
    sleep 5
    systemctl status haproxy.service &>/dev/null
    if [ $? -ne 0 ];then
        systemctl stop keepalived
    fi
fi
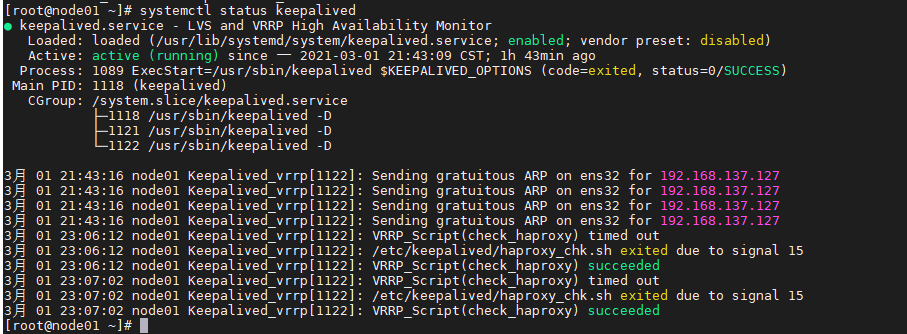
启动keepalived的服务
先启动master再启动backup
systemctl enable keepalived
systemctl start keepalived
systemctl status keepalived
再master上查看ip信息
ip addr

绑定在ens32上的vip正常出现在master节点上
查看backup上的ip信息则没有该ip
测试vip漂移
关闭master服务器的keepalived服务。
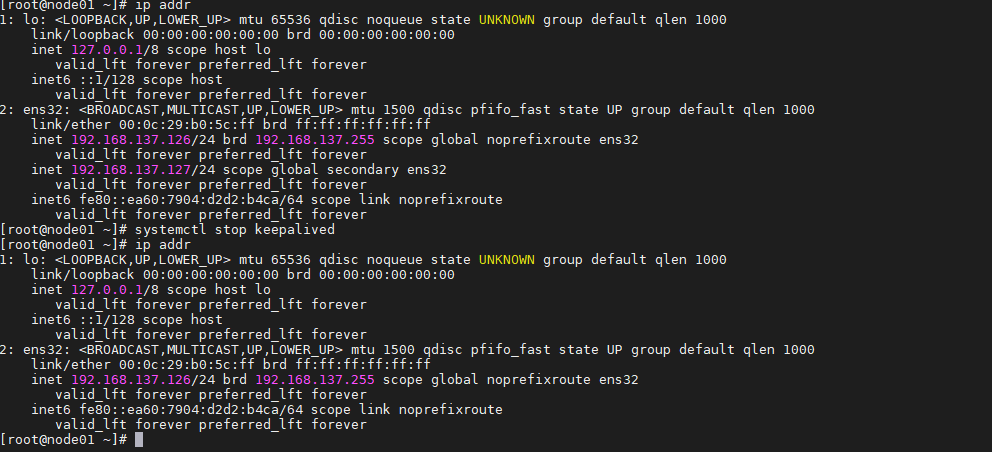
可以看到vip已经自动移除,我们再查看backup服务器的ip信息
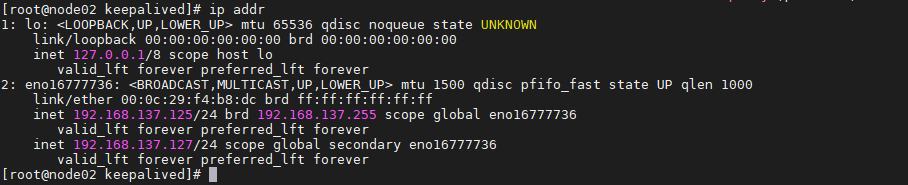
可以看到,vip已经成功漂移过来了
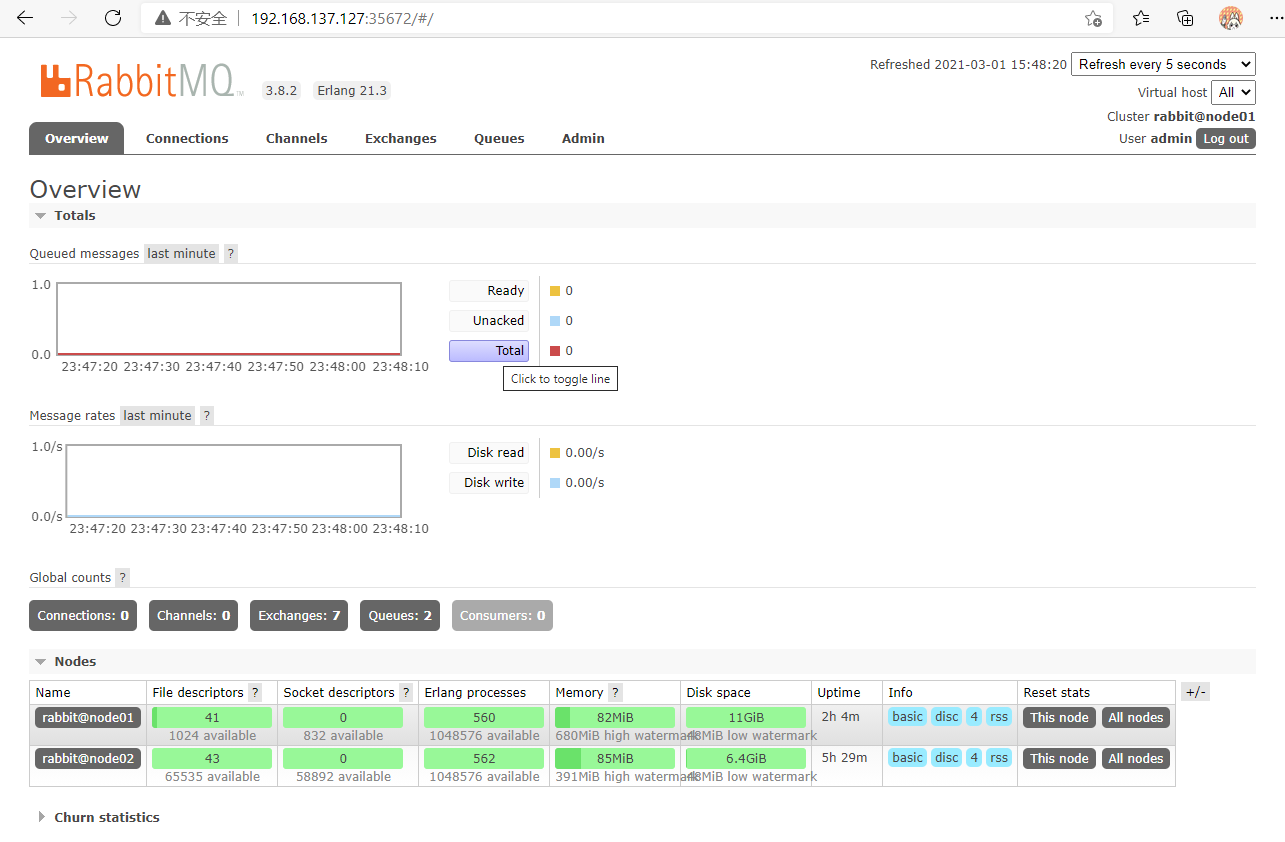
测试vip是否可用
访问ha web管理页面

访问mq web界面

 浙公网安备 33010602011771号