
rhel7.5安装Oracle19c单实例数据库
一、配置磁盘
[root@yeshuo ~]# fdisk /dev/sdb
[root@yeshuo ~]# pvcreate /dev/sdb1
[root@yeshuo ~]# vgcreate vg_data /dev/sdb1
[root@yeshuo ~]# lvcreate -n lv_data -l +100%FREE vg_data
[root@yeshuo ~]# mkfs.xfs /dev/vg_data/lv_data
[root@yeshuo ~]# mkdir -p /data
[root@yeshuo ~]# mount /dev/vg_data/lv_data /data/
[root@yeshuo ~]# cat /etc/fstab ###添加以下行
/dev/mapper/vg_data-lv_data /data xfs defaults 0 0
[root@yeshuo ~]# df -Th
Filesystem Type Size Used Avail Use% Mounted on
/dev/mapper/rhel-root xfs 9.0G 5.4G 3.7G 59% /
devtmpfs devtmpfs 908M 0 908M 0% /dev
tmpfs tmpfs 920M 0 920M 0% /dev/shm
tmpfs tmpfs 920M 8.6M 911M 1% /run
tmpfs tmpfs 920M 0 920M 0% /sys/fs/cgroup
/dev/sda1 xfs 1014M 143M 872M 15% /boot
tmpfs tmpfs 184M 0 184M 0% /run/user/0
/dev/mapper/vg_data-lv_data xfs 50G 33M 50G 1% /data
二、禁用numa和透明大页
[root@yeshuo ~]# cat /etc/default/grub
GRUB_TIMEOUT=5
GRUB_DISTRIBUTOR="$(sed 's, release .$,,g' /etc/system-release)"
GRUB_DEFAULT=saved
GRUB_DISABLE_SUBMENU=true
GRUB_TERMINAL_OUTPUT="console"
GRUB_CMDLINE_LINUX="crashkernel=auto rd.lvm.lv=rhel/root rd.lvm.lv=rhel/swap rhgb quiet numa=off transparent_hugepage=never"
GRUB_DISABLE_RECOVERY="true"
[root@yeshuo ~]# grub2-mkconfig -o /etc/grub2.cfg
Generating grub configuration file ...
Found linux image: /boot/vmlinuz-3.10.0-862.el7.x86_64
Found initrd image: /boot/initramfs-3.10.0-862.el7.x86_64.img
Found linux image: /boot/vmlinuz-0-rescue-50b224cd35fe8b41b3ecb27d9d4b50d5
Found initrd image: /boot/initramfs-0-rescue-50b224cd35fe8b41b3ecb27d9d4b50d5.img
done
重启操作系统生效
[root@yeshuo ~]# dmesg | grep -i numa ###检查numa是否禁用
[ 0.000000] Command line: BOOT_IMAGE=/vmlinuz-3.10.0-862.el7.x86_64 root=/dev/mapper/rhel-root ro crashkernel=auto rd.lvm.lv=rhel/root rd.lvm.lv=rhel/swap rhgb quiet numa=off transparent_hugepage=never
[ 0.000000] NUMA turned off
[ 0.000000] Kernel command line: BOOT_IMAGE=/vmlinuz-3.10.0-862.el7.x86_64 root=/dev/mapper/rhel-root ro crashkernel=auto rd.lvm.lv=rhel/root rd.lvm.lv=rhel/swap rhgb quiet numa=off transparent_hugepage=never
[root@yeshuo ~]# grep AnonHugePages /proc/meminfo###检查是否禁用透明大页
AnonHugePages: 0 kB
三、关闭防火墙和selinux
[root@yeshuo ~]# systemctl stop firewalld
[root@yeshuo ~]# cat /etc/selinux/config
SELINUX=disabled
[root@yeshuo ~]# setenforce 0
四、修改login文件
[root@yeshuo ~]# cat /etc/pam.d/login
session required pam_limits.so###在文件最后追加这一行
五、创建用户与用户组
[root@yeshuo ~]# groupadd -g 54321 oinstall
[root@yeshuo ~]# groupadd -g 54322 dba
[root@yeshuo ~]# groupadd -g 54323 oper
[root@yeshuo ~]# groupadd -g 54324 backupdba
[root@yeshuo ~]# groupadd -g 54325 dgdba
[root@yeshuo ~]# groupadd -g 54326 kmdba
[root@yeshuo ~]# groupadd -g 54327 racdba
[root@yeshuo ~]# useradd -u 54321 -g oinstall -G dba,oper,backupdba,dgdba,kmdba,racdba oracle
[root@yeshuo ~]# echo '123456'|passwd --stdin oracle
Changing password for user oracle.
passwd: all authentication tokens updated successfully.
六、创建目录与授权
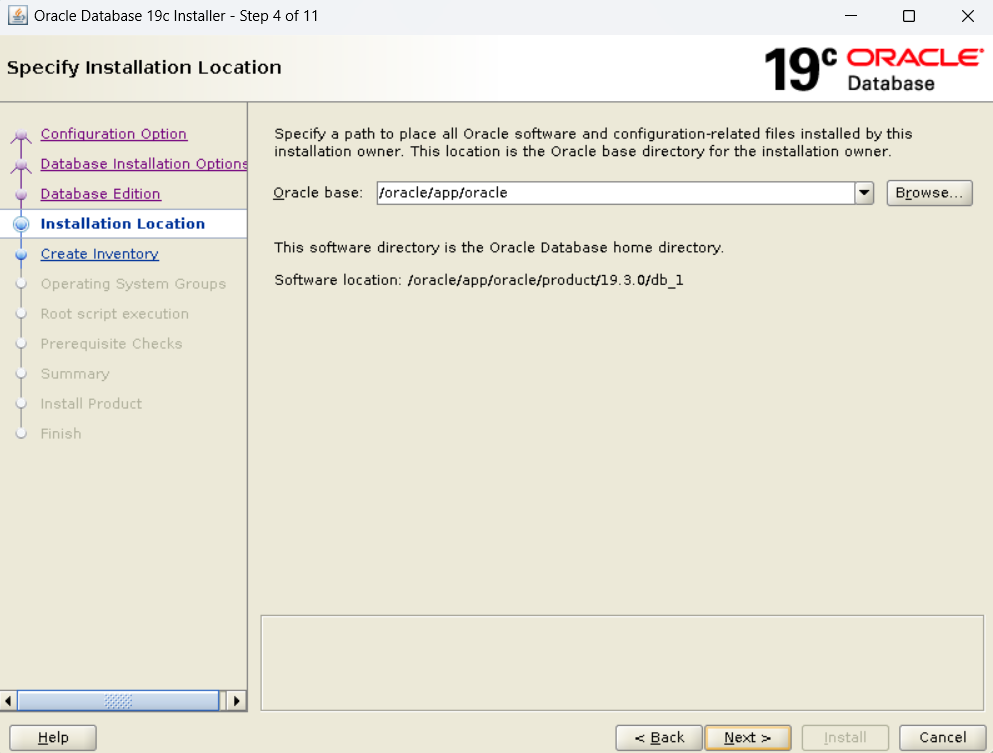
[root@yeshuo ~]# mkdir -p /oracle/app/oracle/product/19.3.0/db_1
[root@yeshuo ~]# chown -R oracle:oinstall /oracle/
[root@yeshuo ~]# chmod -R 775 /oracle/
[root@yeshuo ~]# chown -R oracle:oinstall /data/
七、修改用户限制
[root@yeshuo ~]# cat >>/etc/security/limits.conf <<EOF
oracle soft nproc 2047
oracle hard nproc 16384
oracle soft nofile 1024
oracle hard nofile 65536
oracle soft stack 10240
oracle hard stack 32768
EOF
八、修改network文件
[root@yeshuo ~]# cat >>/etc/sysconfig/network <<EOF
NOZEROCONF=yes
EOF
九、修改内核参数
[root@yeshuo ~]# cat >>/etc/sysctl.conf <<EOF
fs.aio-max-nr = 1048576
fs.file-max = 6815744
kernel.shmall = 268435456
kernel.shmmax = 549755813760
kernel.shmmni = 4096
kernel.sem = 250 32000 100 128
net.ipv4.ip_local_port_range = 9000 65500
net.core.rmem_default = 262144
net.core.rmem_max = 4194304
net.core.wmem_default = 262144
net.core.wmem_max = 1048576
EOF
[root@yeshuo ~]# sysctl -p
fs.aio-max-nr = 1048576
fs.file-max = 6815744
kernel.shmall = 268435456
kernel.shmmax = 549755813760
kernel.shmmni = 4096
kernel.sem = 250 32000 100 128
net.ipv4.ip_local_port_range = 9000 65500
net.core.rmem_default = 262144
net.core.rmem_max = 4194304
net.core.wmem_default = 262144
net.core.wmem_max = 1048576
十、修改ORACLE用户的环境变量
[root@yeshuo ~]# su - oracle
[oracle@yeshuo ~]$ vi .bash_profile
[oracle@yeshuo ~]$ cat .bash_profile
export ORACLE_BASE=/oracle/app/oracle
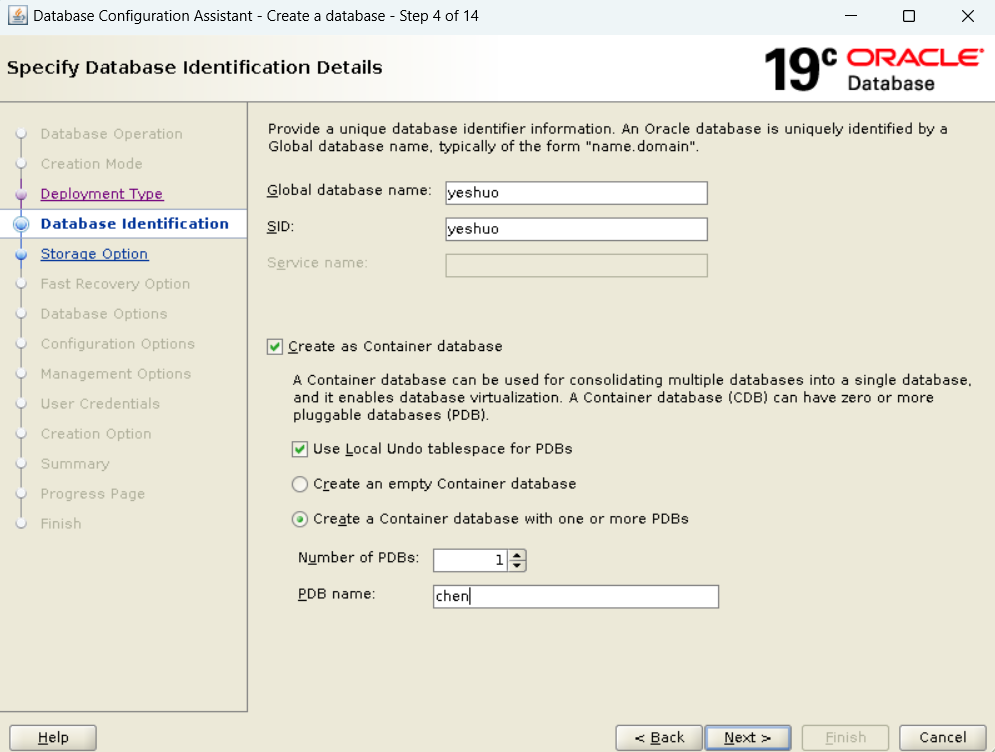
export ORACLE_SID=yeshuo
export ORACLE_HOME=$ORACLE_BASE/product/19.3.0/db_1
export PATH=$ORACLE_HOME/bin:$PATH:$ORACLE_HOME/OPatch
export LD_LIBRARY_PATH=$ORACLE_HOME/lib:$LD_LIBRARY_PATH
[oracle@yeshuo ~]$ source .bash_profile
十一、挂载yum源
[root@yeshuo ~]# mount -o loop rhel-server-7.5-x86_64-dvd.iso /mnt
mount: /dev/loop0 is write-protected, mounting read-only
十二、上传Oracle安装包和需要的rpm包
[root@yeshuo ~]# chown oracle:oinstall /home/oracle/LINUX.X64_193000_db_home.zip
[root@yeshuo ~]# chown oracle:oinstall /home/oracle/compat-libstdc++-33-3.2.3-72.el7.x86_64.rpm
[root@yeshuo ~]# ll /home/oracle/
total 2988188
-rw-r--r--. 1 oracle oinstall 194824 Mar 14 10:37 compat-libstdc++-33-3.2.3-72.el7.x86_64.rpm
-rw-r--r--. 1 oracle oinstall 3059705302 Mar 14 10:37 LINUX.X64_193000_db_home.zip
十三、Linux系统安装图形界面
安装图形界面
[root@yeshuo ~]# yum -y groupinstall "Server with GUI"
[root@yeshuo ~]# systemctl start graphical.target
[root@yeshuo ~]# systemctl set-default graphical.target
补充需要的rpm包
[root@yeshuo ~]# yum install -y unzip
[root@yeshuo ~]# rpm -ivh compat-libstdc++-33-3.2.3-72.el7.x86_64.rpm
[root@yeshuo ~]# yum install -y ksh
[root@yeshuo ~]# yum install -y compat-libcap1
[root@yeshuo ~]# yum install -y libstdc++-devel
[root@yeshuo ~]# yum install -y gcc-c++-4.8.5
[root@yeshuo ~]# yum install -y libaio-devel
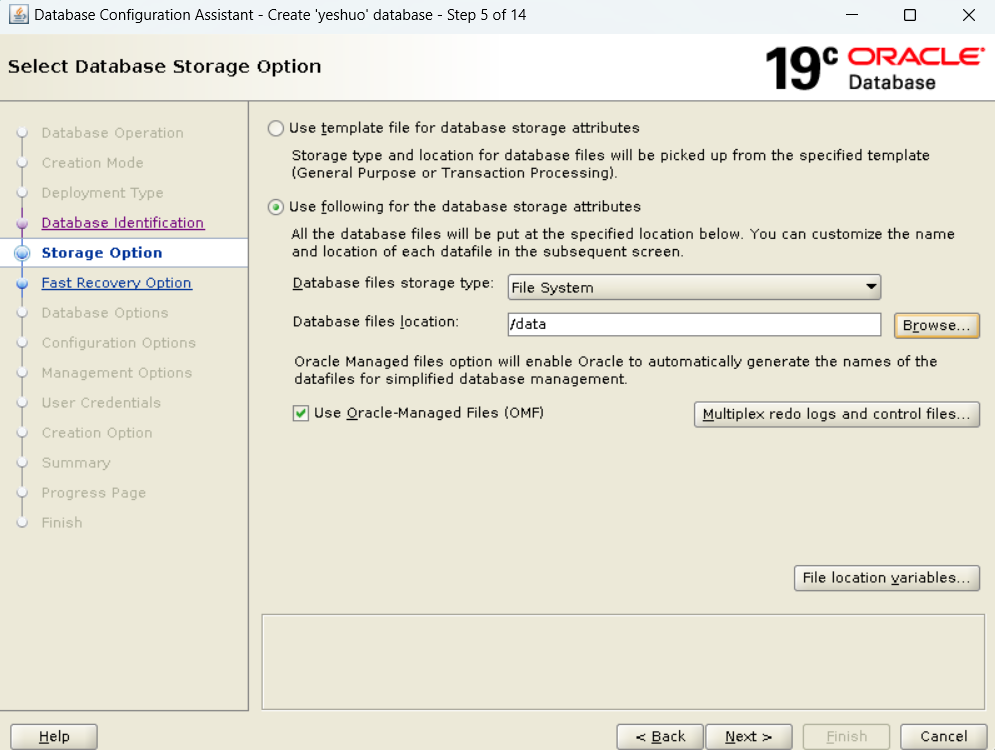
十四、解压Oracle安装包到Oracle安装目录
[oracle@yeshuo ~]$ unzip LINUX.X64_193000_db_home.zip -d /oracle/app/oracle/product/19.3.0/db_1/
[oracle@yeshuo db_1]$ export DISPLAY=10.0.0.1:1.0
[oracle@yeshuo db_1]$ ./runInstaller
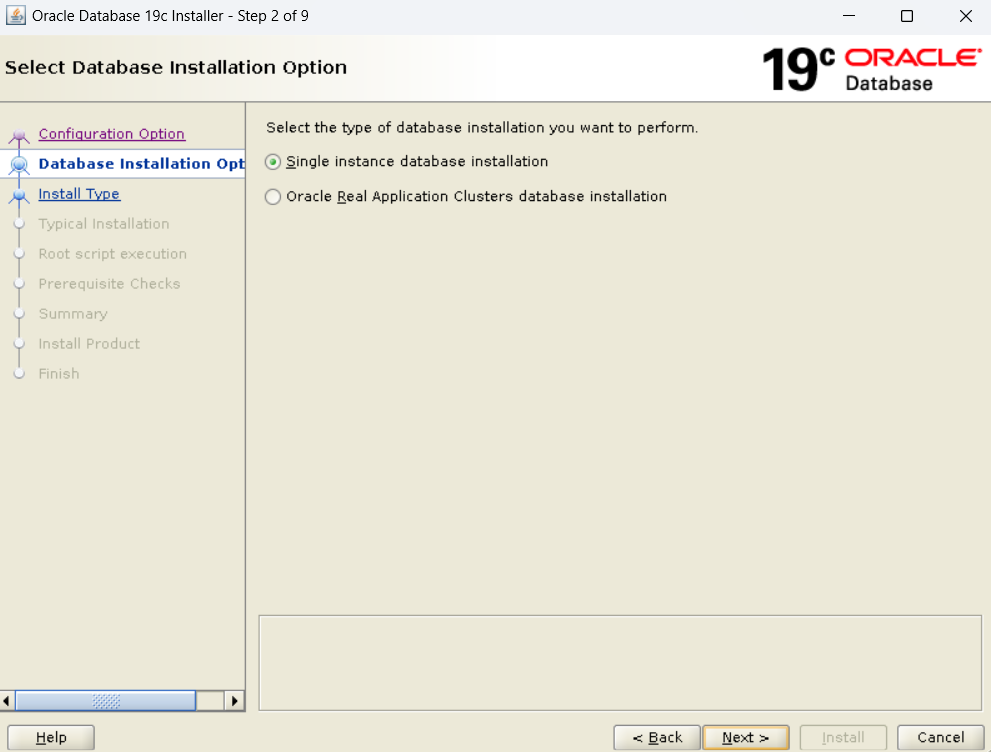
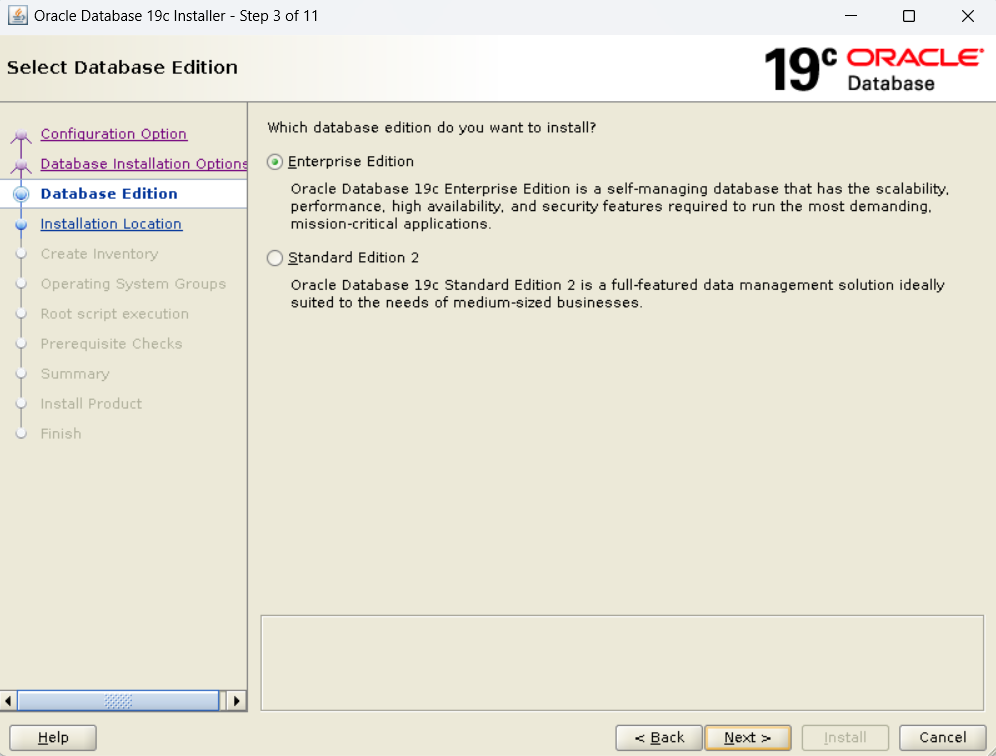
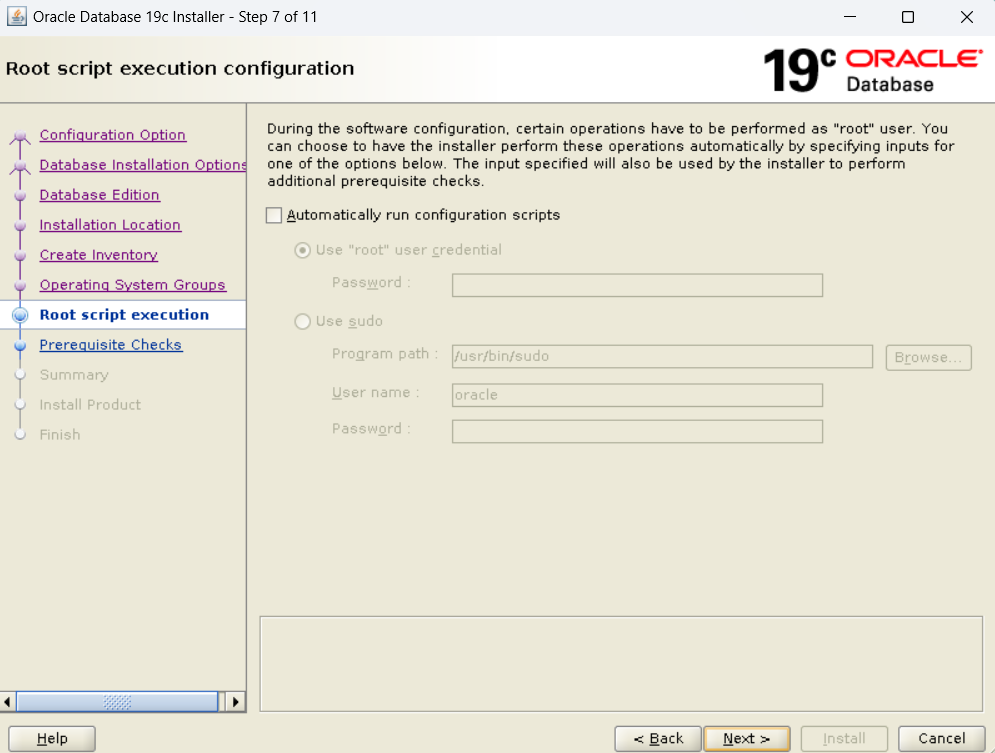
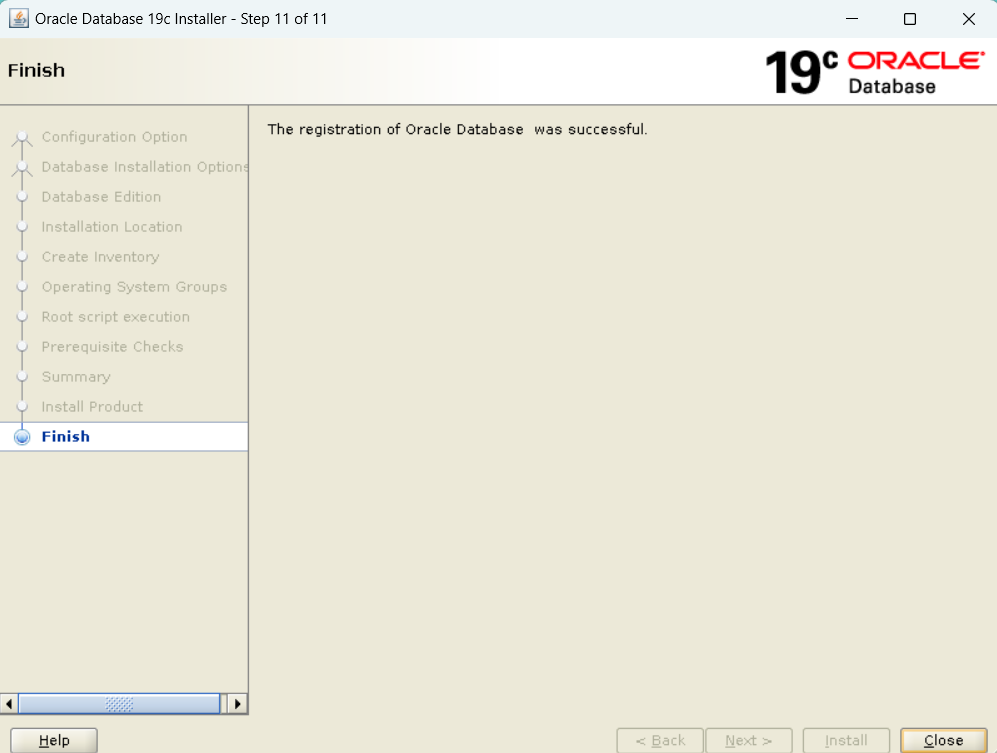
十六、图形化安装oracle软件
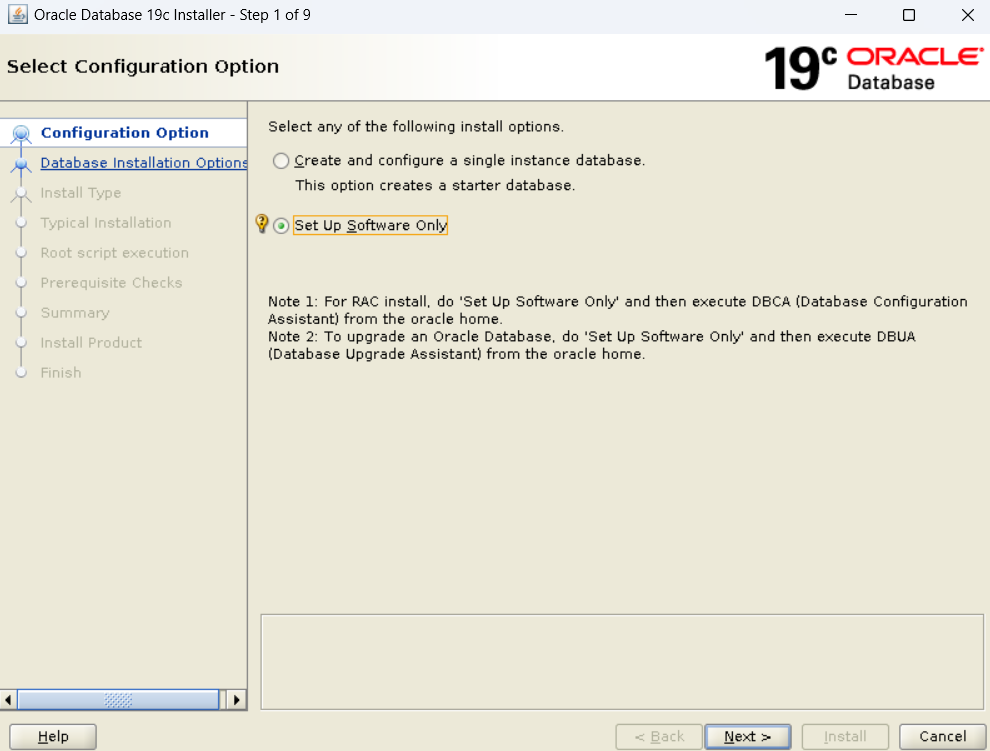

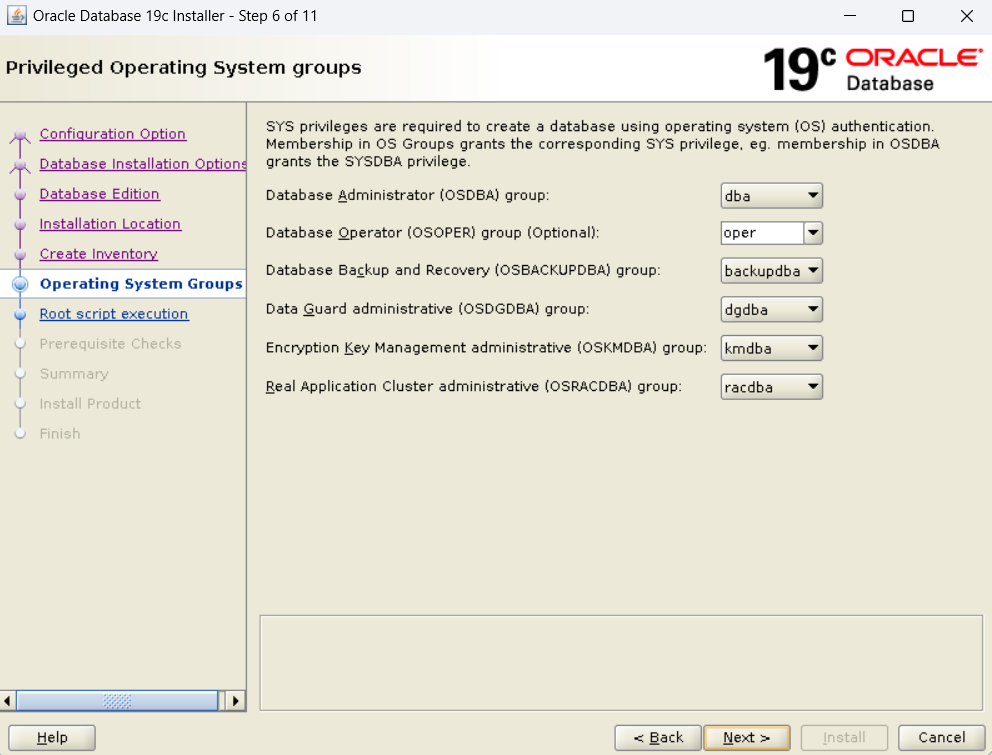

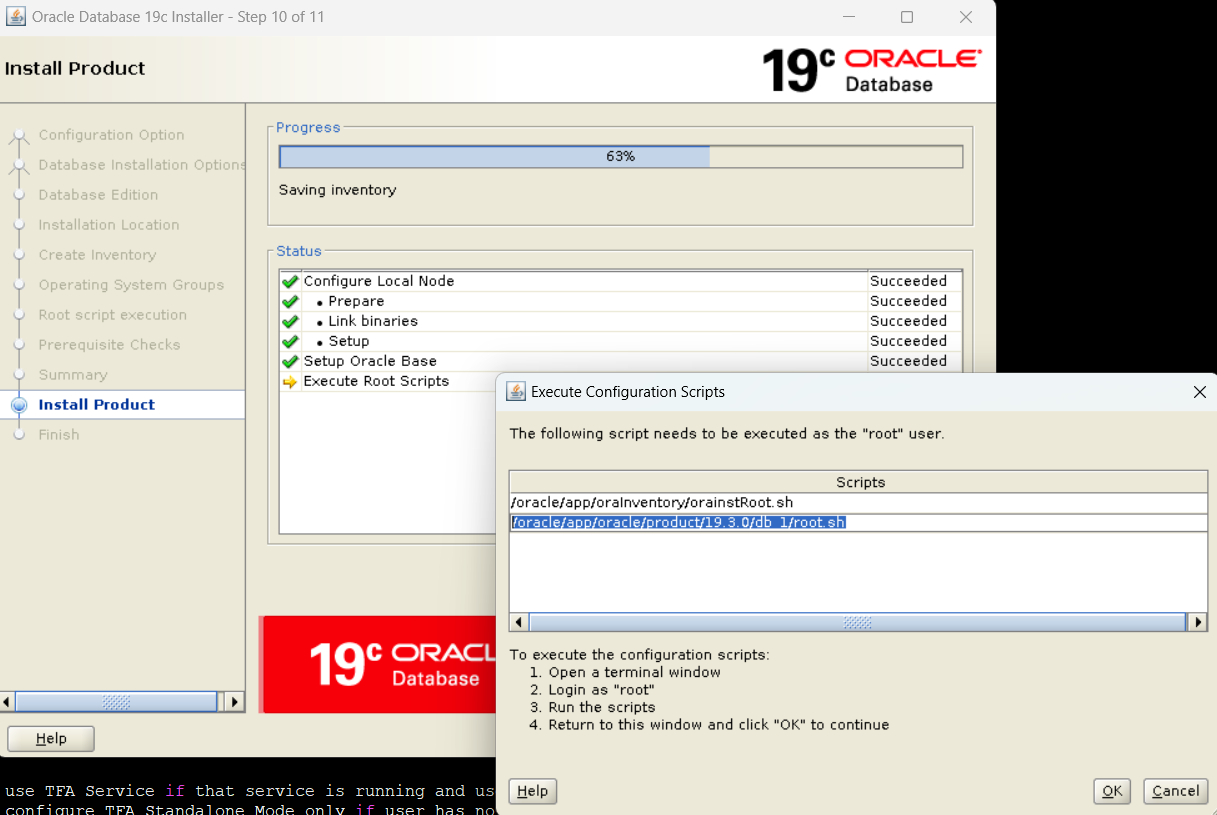
[root@yeshuo ~]# /oracle/app/oraInventory/orainstRoot.sh
Changing permissions of /oracle/app/oraInventory.
Adding read,write permissions for group.
Removing read,write,execute permissions for world.
Changing groupname of /oracle/app/oraInventory to oinstall.
The execution of the script is complete.
[root@yeshuo ~]# /oracle/app/oracle/product/19.3.0/db_1/root.sh
Performing root user operation.
The following environment variables are set as:
ORACLE_OWNER= oracle
ORACLE_HOME= /oracle/app/oracle/product/19.3.0/db_1
Enter the full pathname of the local bin directory: [/usr/local/bin]:
Copying dbhome to /usr/local/bin ...
Copying oraenv to /usr/local/bin ...
Copying coraenv to /usr/local/bin ...
Creating /etc/oratab file...
Entries will be added to the /etc/oratab file as needed by
Database Configuration Assistant when a database is created
Finished running generic part of root script.
Now product-specific root actions will be performed.
Oracle Trace File Analyzer (TFA - Standalone Mode) is available at :
/oracle/app/oracle/product/19.3.0/db_1/bin/tfactl
Note :
- tfactl will use TFA Service if that service is running and user has been granted access
- tfactl will configure TFA Standalone Mode only if user has no access to TFA Service or TFA is not installed
![]()
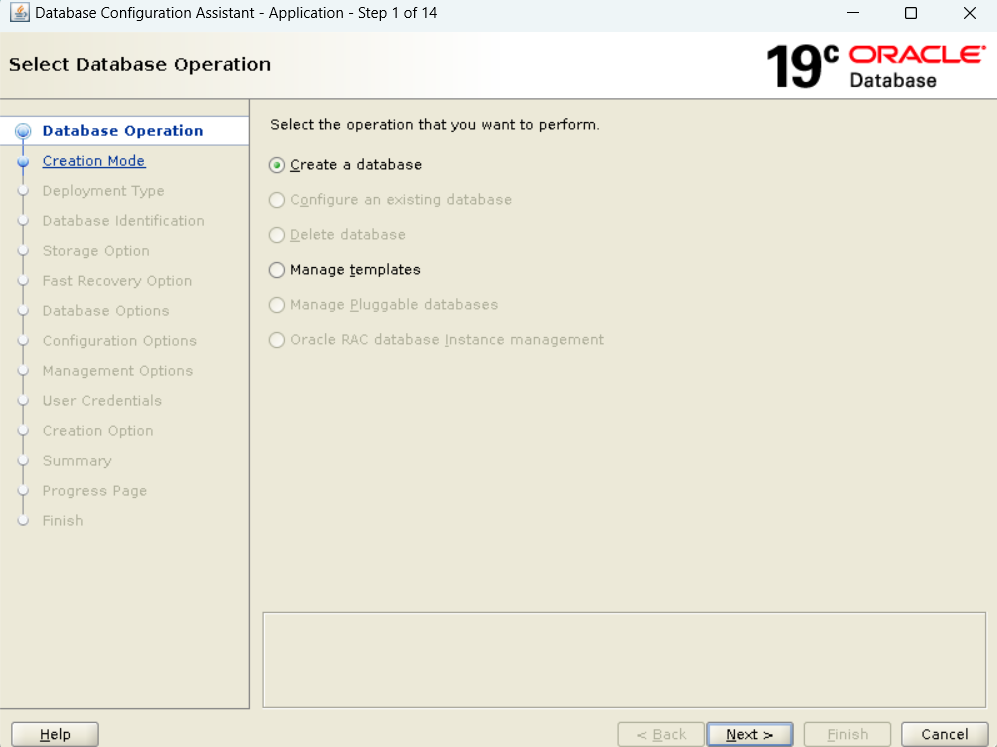
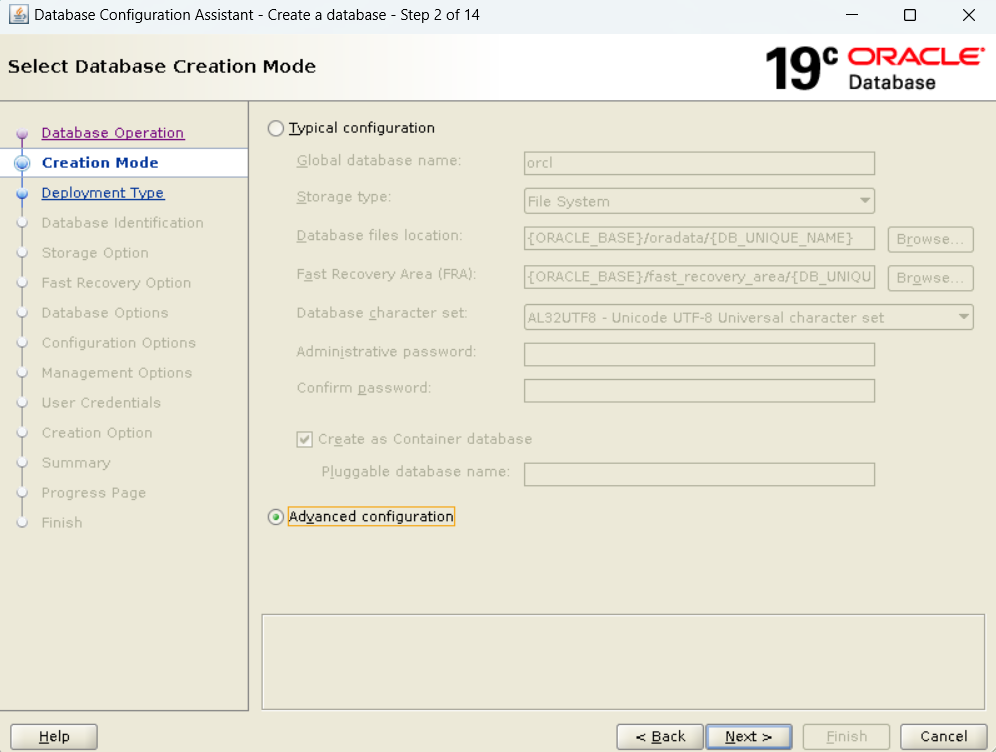
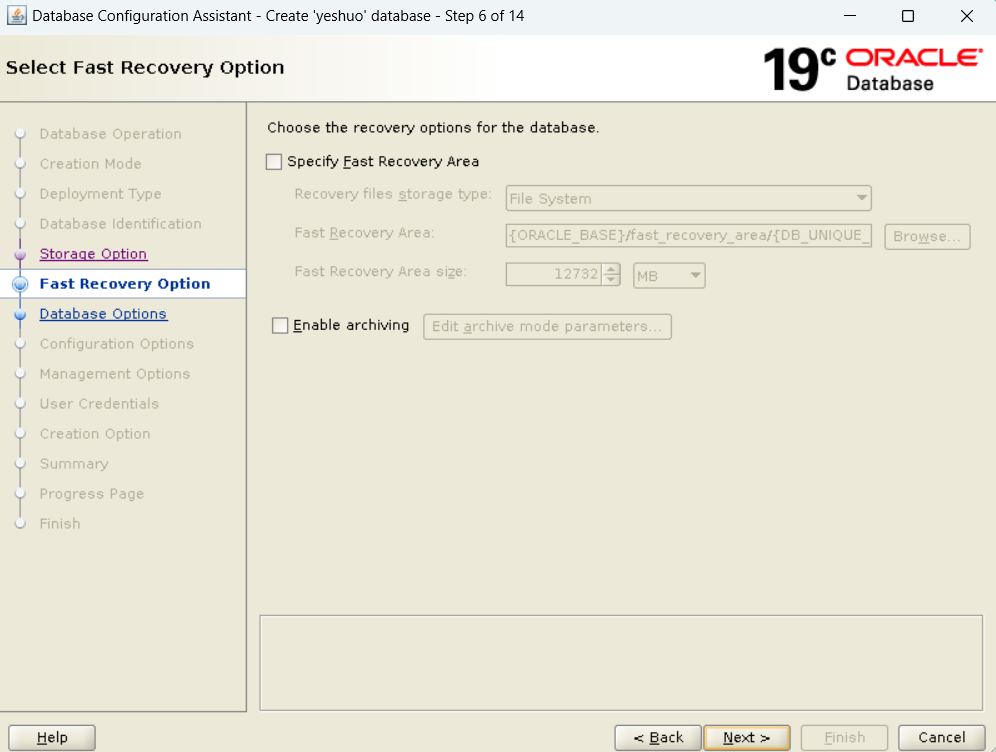
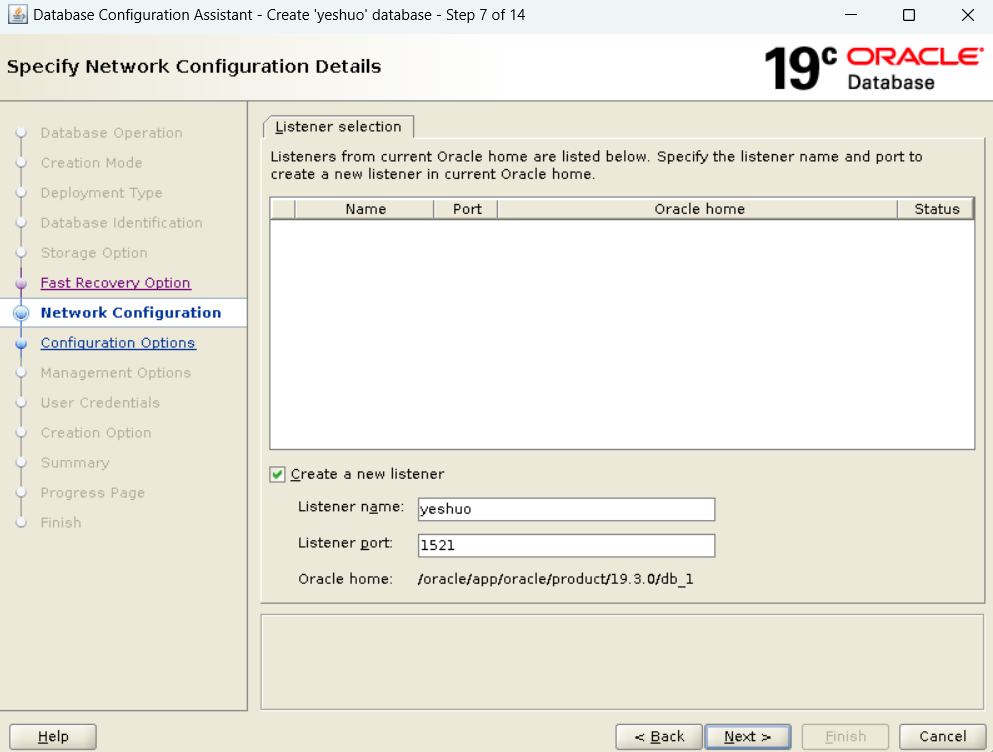
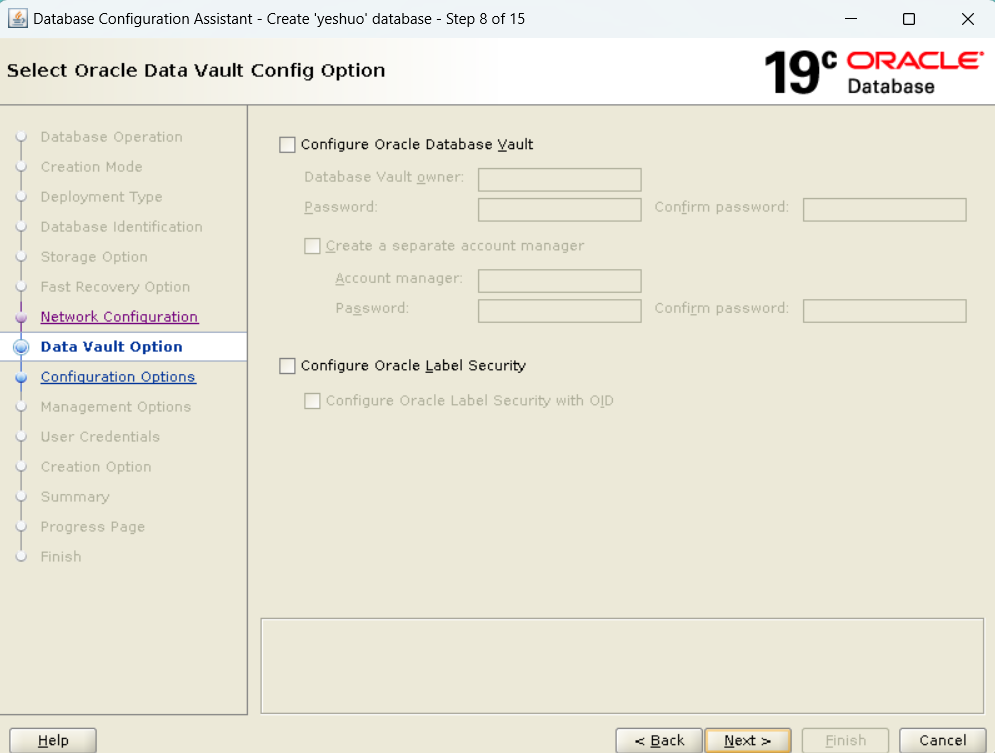
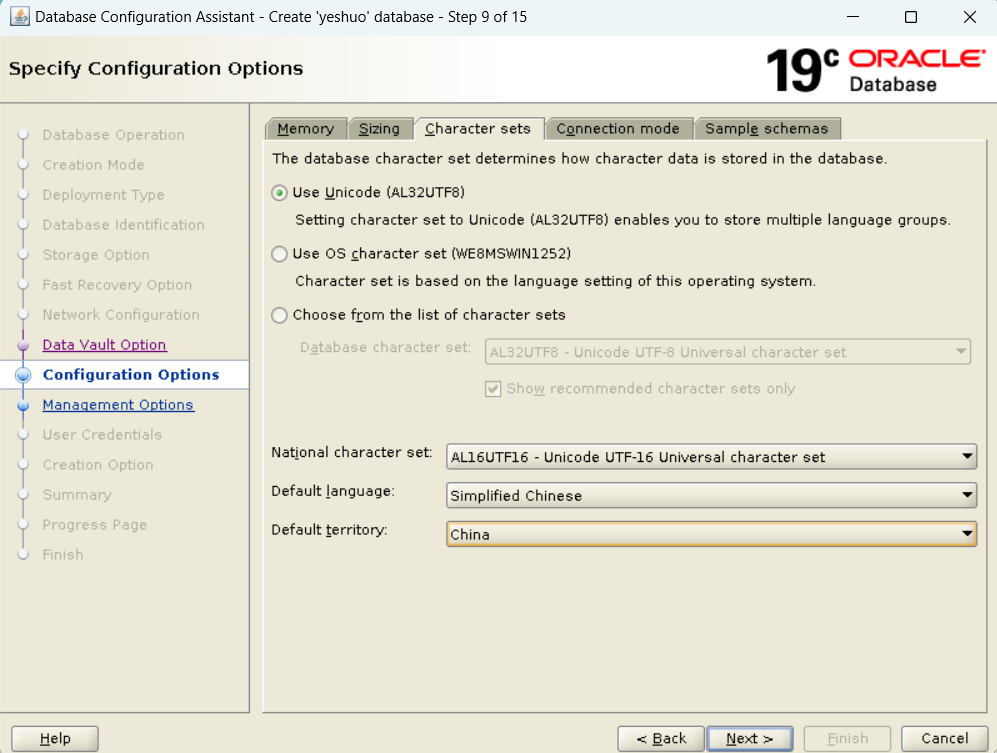
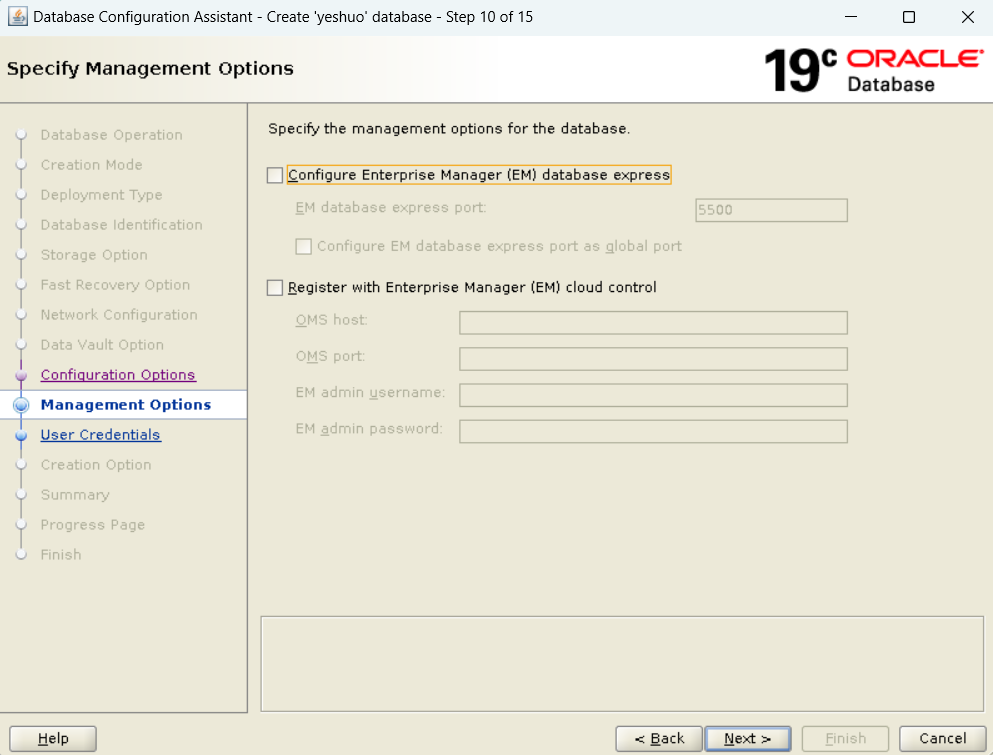
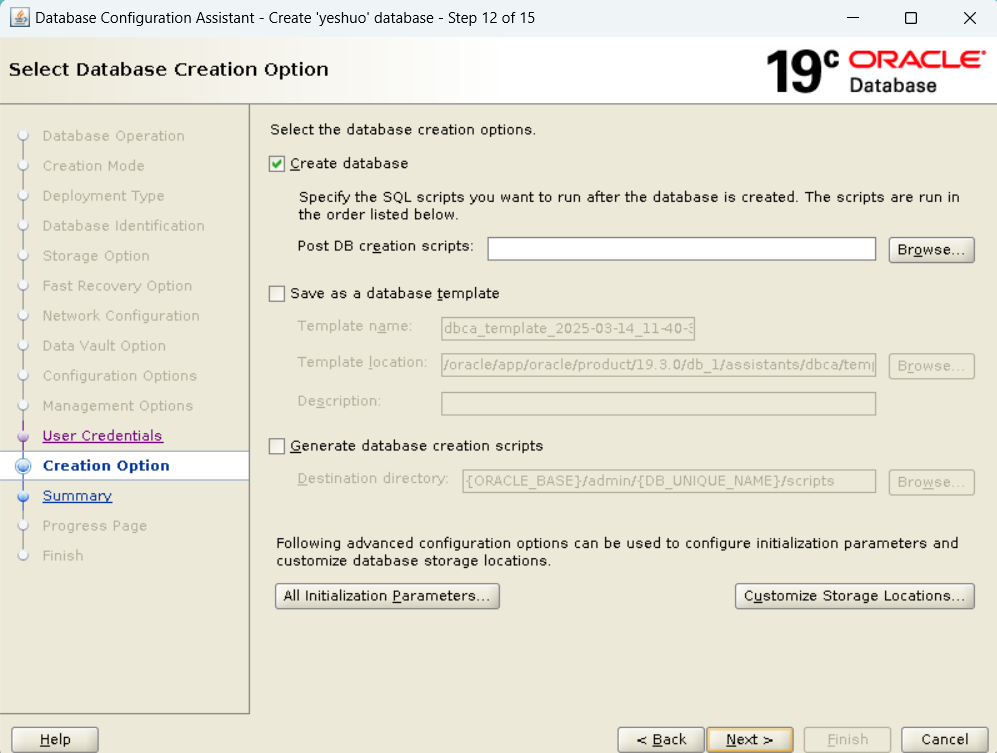
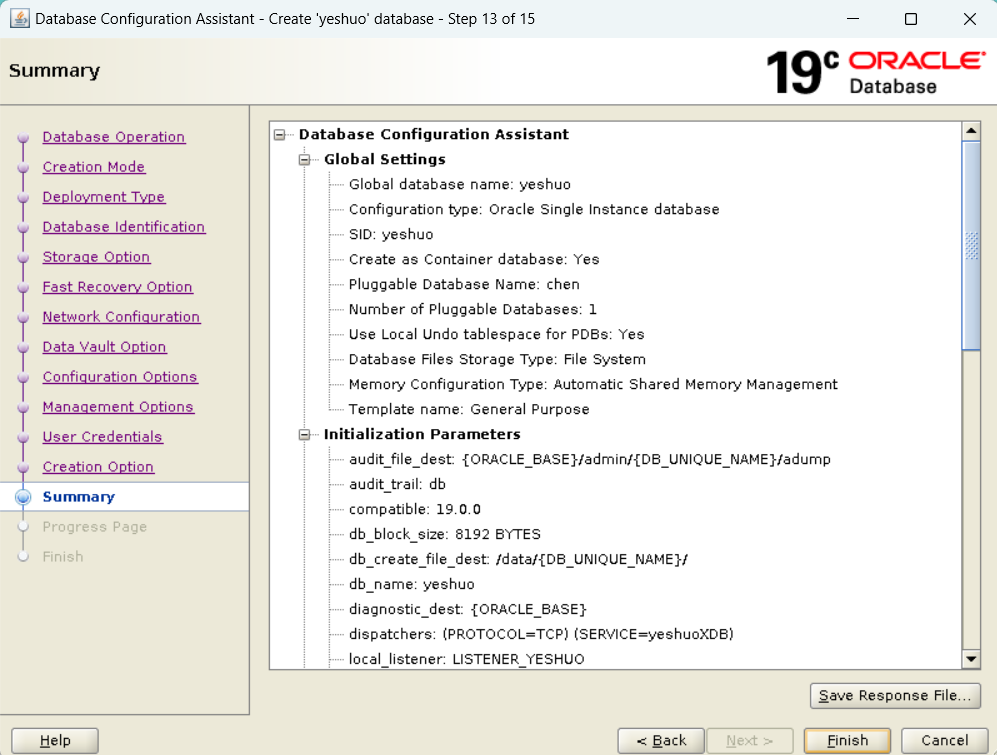
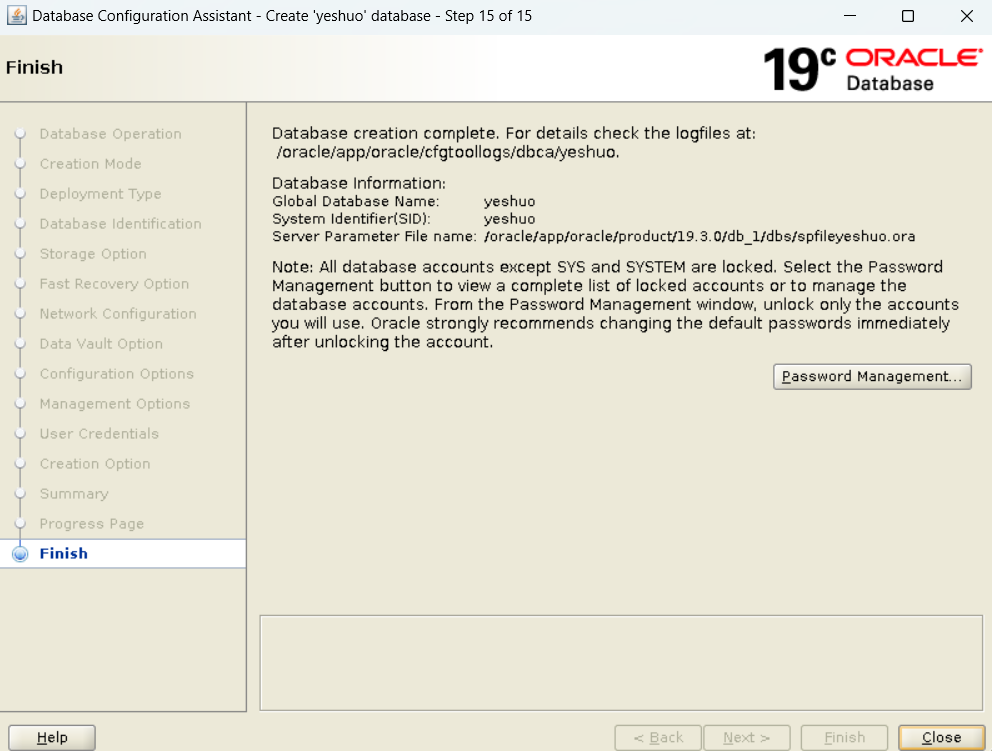
十七、图形化安装Oracle数据库
[oracle@yeshuo ~]$ export DISPLAY=10.0.0.1:1.0
[oracle@yeshuo ~]$ dbca
![]()
![]()
![]()
![]()
![]()
![]()
![]()
![]()
![]()
![]()
![]()
![]()
![]()
![]()
![]()
登录验证是否正常
[oracle@yeshuo ~]$ sqlplus / as sysdba


SQL*Plus: Release 19.0.0.0.0 - Production on Fri Mar 14 12:16:45 2025
Version 19.3.0.0.0
Copyright (c) 1982, 2019, Oracle. All rights reserved.
???:
Oracle Database 19c Enterprise Edition Release 19.0.0.0.0 - Production
Version 19.3.0.0.0
SQL> show pdbs
CON_ID CON_NAME OPEN MODE RESTRICTED
2 PDB$SEED READ ONLY NO
3 CHEN READ WRITE NO
SQL>
以上。

 浙公网安备 33010602011771号