

第七节:Centos系统安装.Net Core环境、部署WebApi8.0项目、WebApi8.0项目发布为服务、使用Nginx反向代理
一. DotNet Core环境安装
1. 准备
(1). 宿主机:centos stream 9.0
(2). 运行时:ASP.NET Core Runtime
PS:如果要开发 .NET 应用,请安装 SDK(包括了运行时)。
如果只需运行应用程序,只需要安装运行时。
如果要安装该运行时,建议安装 ASP.NET Core 运行时,因为它同时包括 .NET Core 和 ASP.NET Core 两个运行时。
2. 在线安装(推荐!)
(说明:centos7x版本和centos8x版本安装步骤略有差异,centos7x需要将Microsoft 包签名密钥添加到受信任密钥列表,并添加 Microsoft 包存储库,centos8x不需要,下面是以centos8.0为例)
参考微软官方文档:https://docs.microsoft.com/zh-cn/dotnet/core/install/linux-centos
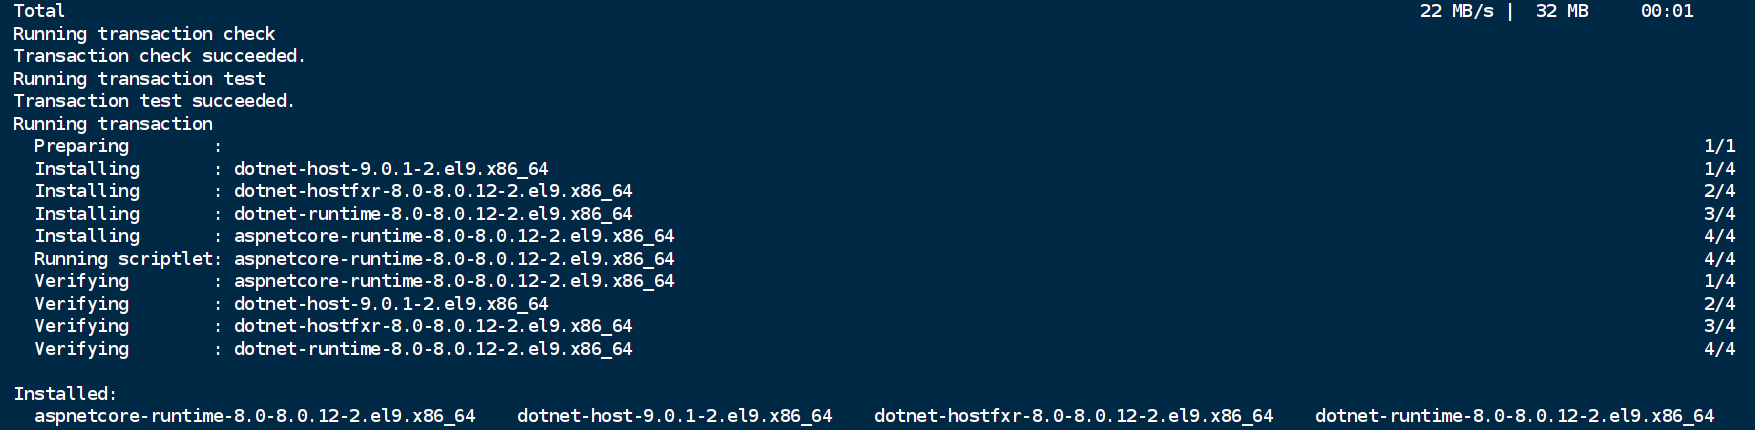
(1). 运行下面指令
【sudo dnf install aspnetcore-runtime-8.0 -y】
如图:
补充:如果上述指令无法直接安装,可以运行下面代码
使用以下命令添加 Microsoft 包签名密钥并添加包源(centos7.x版本需要)
【sudo rpm --import https://packages.microsoft.com/keys/microsoft.asc】
【sudo dnf config-manager --add-repo https://packages.microsoft.com/config/centos/9/prod.repo】
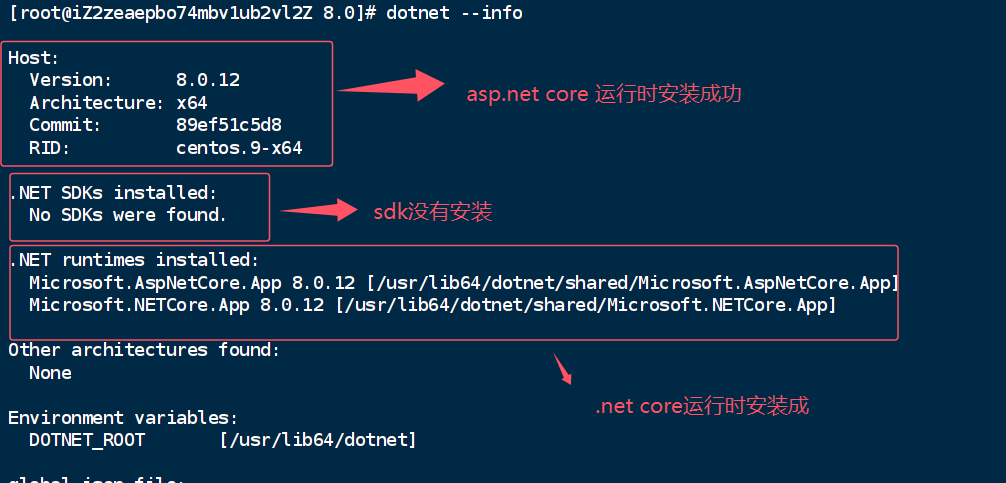
(2). 查看是否安装成功
dotnet --info
如图:
(3). 补充几个其它指令
A. 安装sdk
【sudo dnf install dotnet-sdk-8.0】
B. 只安装.Net Core Runtimes
【sudo dnf install dotnet-runtime-8.0】
C. 查看安装的运行时
【dotnet --list-runtimes】
D.查看安装的sdk
【dotnet --list-sdks】
3. 离线安装(不推荐)
参考:https://www.cnblogs.com/dotnet261010/p/12169294.html https://docs.microsoft.com/zh-cn/dotnet/core/install/linux-centos(底部)
(1). 去微软官网下载Asp.net Core的运行时
下载地址:https://dotnet.microsoft.com/download/dotnet-core/3.1
PS:这里是二进制发布包,解压修改配置即可。

下载后的安装包为:aspnetcore-runtime-3.1.8-linux-x64.tar.gz
(2). 将上述压缩包上传到工作目录下,新建一个dotnetcore文件夹,用于存放解压后的文件;然后进行解压缩指令。
【mkdir dotnetcore】
【tar -zxvf aspnetcore-runtime-3.1.8-linux-x64.tar.gz -C ./dotnetcore/】
解压后文件如下:

(3). 设置环境变量
export DOTNET_ROOT=/root/dotnetcore
export PATH=$PATH:/root/dotnetcore
如图:

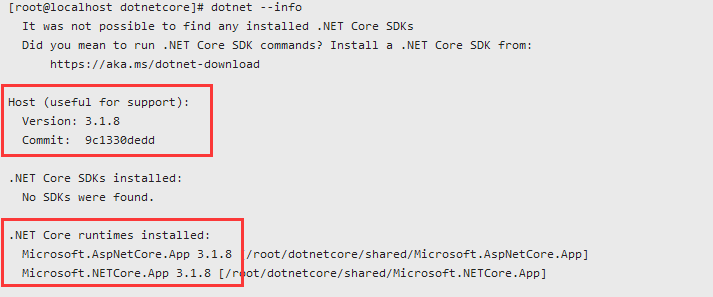
(4). 查看是否安装成功
【dotnet --info】,如下图,说明安装成功。
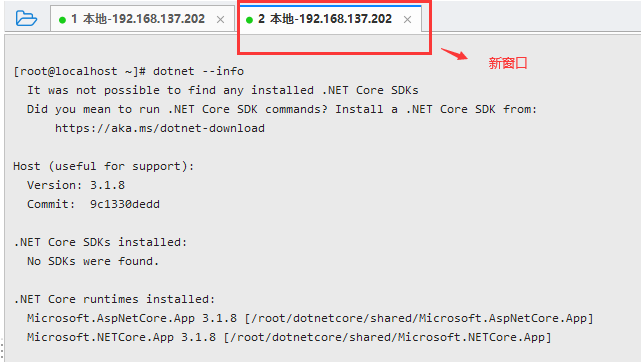
注:存在一个问题,只有当前窗口有效,在另外的窗口中则不起作用了!!!!
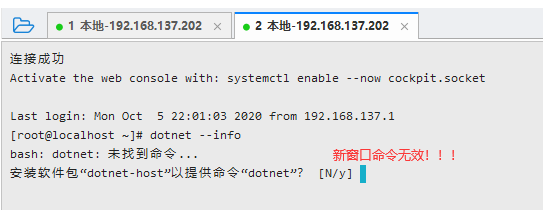
(5). 如何让所有窗口都有效???
通过建立软连接的方式解决
ln -s /root/dotnetcore/dotnet /usr/local/bin
如下图:新的窗口也生效了。

二. webapi8.0 项目部署
1. 制作项目发布包
平台 必须选择【可移植】的
2. 上传到服务器
然后上传到centos的工作目录下的 8.0 文件夹下。
如下图:

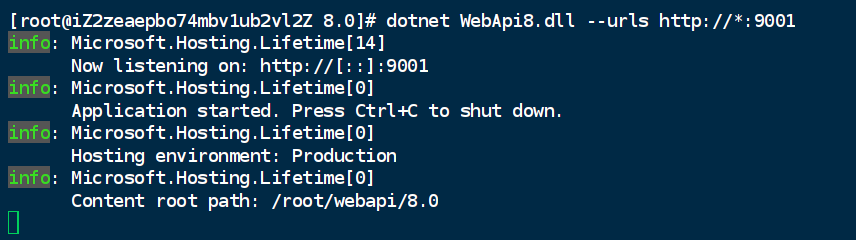
3. 运行指令
在当前目录下运行指令【dotnet WebApi8.dll --urls http://*:9001】
PS:也可以在程序中通过 UseUrls 指令端口,则上述命令则不需要指定urls了
4. 关闭防火墙
(1). 查看防火墙状态
service firewalld status
如下图 ,说明防火墙是开启的。

(2). 添加 9001端口永久开放,并且重启一下防火墙
【sudo firewall-cmd --add-port=9001/tcp --permanent】
【firewall-cmd --reload】
如下图:

(3). 也可以直接把防火墙关闭
service firewalld stop
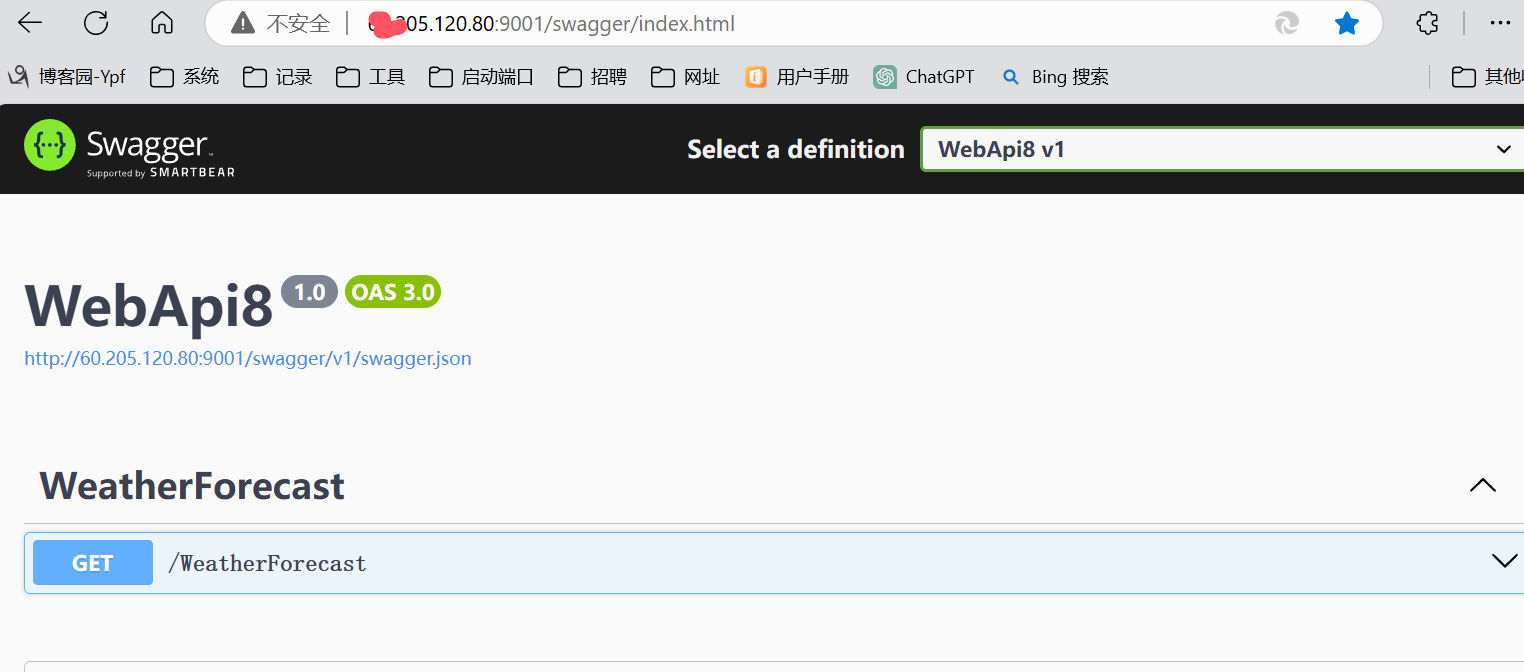
4. 测试
在本机输入:http://xxx:9001/,进行访问,可以正常访问,如下图
5. 局限性
上述3中的指令 【dotnet WebApi8.dll --urls http://*:9001】 ,需要保持当前窗口是打开状态,一旦窗口关闭了,这个项目就关了
如何解决?
详见下面,发布为服务
三. Webapi项目发布为服务
1. 目标
将项目发布为服务,端口为 9001,并设置为开机自动启动,服务名称为:webapi8.service
2. 步骤
(1) 设置端口为9001
方法A:在代码中配置
var builder = WebApplication.CreateBuilder(args);
builder.WebHost.UseUrls("http://*:9001");
方法B:在系统中执行下面命令
【export ASPNETCORE_URLS=http://*:9001】
(2) 创建服务文件
在 /etc/systemd/system 目录下创建文件 webapi8.service

内容如下:
[Unit]
Description=Your ASP.NET Core Web API
After=network.target

[Service]
WorkingDirectory=/root/webapi/8.0
ExecStart=/usr/bin/dotnet /root/webapi/8.0/WebApi8.dll
Restart=always
RestartSec=10
KillSignal=SIGINT
SyslogIdentifier=dotnet-app
User=root
Environment=ASPNETCORE_ENVIRONMENT=Production
Environment=ASPNETCORE_URLS=http://*:9001

[Install]
WantedBy=multi-user.target
(3) 重新加载 Systemd 管理器配置
【sudo systemctl daemon-reload】
(4) 启动服务
【sudo systemctl start webapi8.service】
(5) 设置开机自动启动
【sudo systemctl enable webapi8.service】
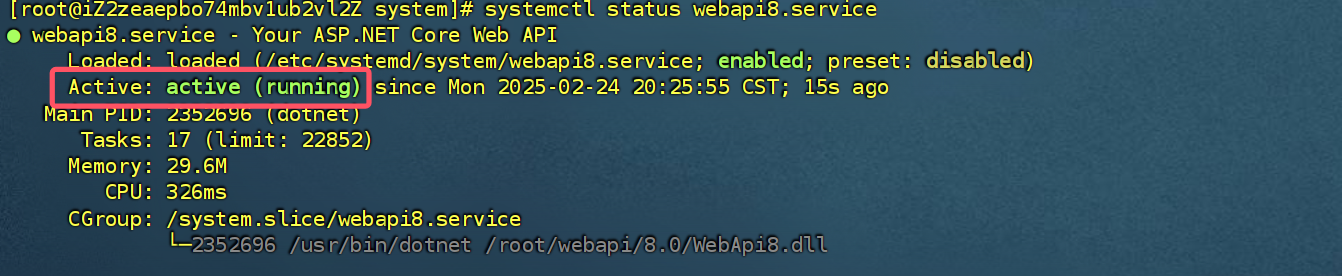
(6) 检查服务是否正常
【sudo systemctl status webapi8.service】
若服务正常运行,会显示 Active: active (running) 信息。
(7) 其他指令
【sudo journalctl -u webapi8.service】 查看服务日志
【sudo systemctl stop webapi8.service】关闭服务
【sudo systemctl disable webapi8.service】关闭开机自动启动
四. 使用Nginx反向代理
1. 目标
使用nginx反向代理coremvc项目,nginx为80端口,coremvc项目的端口为5000.
2. 步骤
(1). 启动coremvc项目,运行下面指令,由于是用nginx做反向代理,coremvc的5000端口可以不对外开放,5000端口可以不用配置防火墙允许。
【 dotnet coremvc1.dll --urls http://*:5000 】
(2). 修改nginx的配置文件,位于:/usr/local/nginx/conf/nginx.conf , 需要配置一个server_name和proxy_pass,如下图:

代码分享:


  server {
        listen       80;
        server_name  ypf1;

        #charset koi8-r;
        #access_log  logs/host.access.log  main;

        location / {
            root   html;
            index  index.html index.htm;
            proxy_pass   http://localhost:5000/;
        }

        #error_page  404              /404.html;

        # redirect server error pages to the static page /50x.html
        #
        error_page   500 502 503 504  /50x.html;
        location = /50x.html {
            root   html;
        }

        # proxy the PHP scripts to Apache listening on 127.0.0.1:80
        #
        #location ~ \.php$ {
        #    proxy_pass   http://127.0.0.1;
        #}

        # pass the PHP scripts to FastCGI server listening on 127.0.0.1:9000
        #
        #location ~ \.php$ {
        #    root           html;
        #    fastcgi_pass   127.0.0.1:9000;
        #    fastcgi_index  index.php;
        #    fastcgi_param  SCRIPT_FILENAME  /scripts$fastcgi_script_name;
        #    include        fastcgi_params;
        #}

        # deny access to .htaccess files, if Apache's document root
        # concurs with nginx's one
        #
        #location ~ /\.ht {
        #    deny  all;
        #}
    }
(3). 启动nginx
进入对应目录:【cd /usr/local/nginx/sbin/】
启动nginx:【./nginx】
如下图:

3. 测试
在浏览器中直接访问:http://192.168.137.201/ ,映射到coremvc页面,说明配置成功。

4. 常见错误
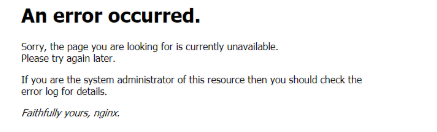
(1). nginx重启后会报下面的错误,如图:
通过上面nginx安装时MakeFile文件中配置的错误日志,可以查看错误日志:/var/log/nginx/error.log
解决方案:运行下面指令
setsebool -P httpd_can_network_connect 1
!
- 作 者 : Yaopengfei(姚鹏飞)
- 博客地址 : http://www.cnblogs.com/yaopengfei/
- 声 明1 : 如有错误,欢迎讨论,请勿谩骂^_^。
- 声 明2 : 原创博客请在转载时保留原文链接或在文章开头加上本人博客地址,否则保留追究法律责任的权利。

 浙公网安备 33010602011771号