基于IdentityServer4 鉴权授权
IdentityServer4与jwt(全称为:json web token) 之间的关系,要弄清二者的关系,我们必须搞清两者到底是什么?
IdentityServer4 是一种框架,而我们的jwt是 基于 OAuth 2.0协议下的一种token的格式,
所以identityServer4是包含了jwt这个token格式,
identityServer4还有另外一种格式几乎用的很少,ids4主要还是用jwt格式的token
然后现在开始撸码
在传统的http请求当中,
由于http请求是无状态的,
所以在早期的互联网项目当中http请求只是为了去获取数据,
但是随着社会的进步与发展,人们的需求变的更加的多了,所以演变出了更多的使用场景,
而http处于无状态这个缺点就暴露出来了,因为如果Http请求没有标识物的话,
服务器上根本无法分得清繁多的http请求都是由谁发出? 而为了解决这个问题 大佬们就发明了 cookie session 来标记http请求, 但是了? 随着技术的迭代社会的进一步发展,这种模式也有很大的局限性
由于我们的分布式和微服务的出现,服务实例的集群 导致了session也不再适用于高频率高压力下的场景了,而在这个时候为了解决这个问题所以出现了identityserver4和jwt 来应对此类场景
废话不多说了,直接开凎!!!!!~~~~~~~~~~
ids4 服务端(生成token) 代码
我们先新建一个webApi的项目啊,记得带上swagger组件
然后去NuGet上面 安装包(identityServer4)这个时候是4.12版本的,反正你下载最稳定的版本就好啦。
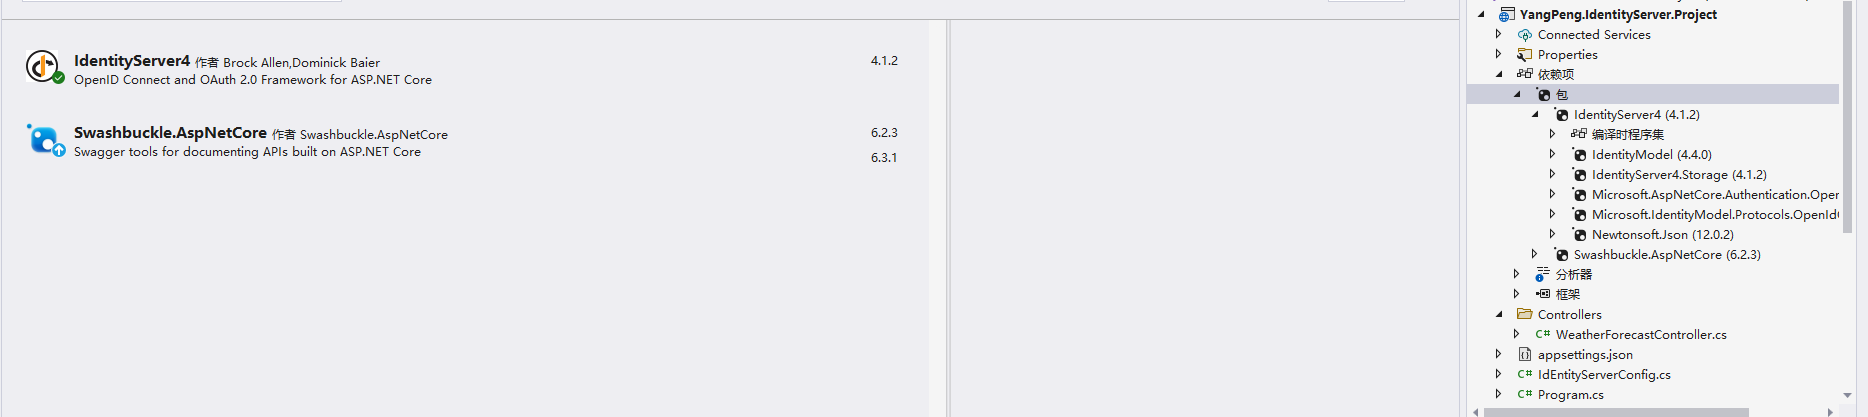
安装完了后
我们去Program下得去 注册服务和配置
代码如下
using YangPeng.IdentityServer.Project;

var builder = WebApplication.CreateBuilder(args);

// Add services to the container.


builder.Services.AddIdentityServer()
    .AddDeveloperSigningCredential() //开发模式生成token
    .AddInMemoryApiScopes(IdEntityServerConfig.GetApiScopes()) //配置作用域集合
    .AddInMemoryApiResources(IdEntityServerConfig.GetOneApiResources())  //配置授权范围集合.  授权范围是包括 作用域的
    .AddInMemoryClients(IdEntityServerConfig.GetClients()) // 这是配置客户端集合
    .AddTestUsers(IdEntityServerConfig.GetTestUsers());  //这个是配置测试用户的


builder.Services.AddControllers();
// Learn more about configuring Swagger/OpenAPI at https://aka.ms/aspnetcore/swashbuckle
builder.Services.AddEndpointsApiExplorer();
builder.Services.AddSwaggerGen();

var app = builder.Build();

// Configure the HTTP request pipeline.
if (app.Environment.IsDevelopment())
{
    app.UseSwagger();
    app.UseSwaggerUI();
}

app.UseIdentityServer(); // 使用identityserver4

app.UseAuthorization();

app.MapControllers();

app.Run();
IdEntityServerConfig这个类 是统一配置identityServer4的类
代码如下:
using IdentityModel;
using IdentityServer4.Models;
using IdentityServer4.Test;

namespace YangPeng.IdentityServer.Project
{
    public class IdEntityServerConfig
    {

        /// <summary>
        /// 获取作用域
        /// </summary>
        /// <returns></returns>
        public static List<ApiScope> GetApiScopes()
        {
            return new List<ApiScope>() {

                new ApiScope("ScopeOne"),
                new ApiScope("ScopeTwo")


            };
        }
        //获取授权范围
        public static List<ApiResource> GetOneApiResources()
        {
            return new List<ApiResource>()
            {
                new ApiResource("OneApiResources","描述")  //  请大家一定要重点关注这个 授权范围,一定要记住这个名字,因为后面客户端有一个apiName 两者需要一致
                {
                    Scopes={ "ScopeOne", "ScopeTwo" }
                },
                new ApiResource("TwoApiResources","描述2")
                {
                    Scopes={ "ScopeOne", "ScopeTwo" }
                }
            };
        }
        //获取客户端信息
        public static List<Client> GetClients()
        {
            return  new List<Client>()
            {
                new Client(){
                    ClientId="webClient",  //客户端ID 全场唯一的
                    ClientName="网页端",   // 客户端名称
                    ClientSecrets =
                    {
                        new Secret("baishikele".Sha256()),  //这是客户端的密码 允许多个
                        new Secret("baishikele123".Sha256())
                    },
                    AllowedGrantTypes=GrantTypes.ClientCredentials,  //这个是模式,有密码模式 客户端模式 客户端和密码模式, 我们这里采用的是客户端模式.
                                                                     //客户端模式 是针对的任意客户端,不管你是移动端,还是PC端,亦或是各种乱七八糟的端.
                                                                     //用户模式 是针对的用户本身.也就是系统的用户好吧.
                    AllowedScopes={ "ScopeOne", "ScopeTwo" },// 这个是作用域

                    // 这里是token生成后 token解析后的第二段公开的数据
                    Claims =
                    {
                        new ClientClaim("name","杨朋"),
                        new ClientClaim("email","1430633118@qq.com"),
                        new ClientClaim("age","28"),
                        new ClientClaim("gy","直线谁不会加速啊? 弯道快才是真的快!"),
                        new ClientClaim(JwtClaimTypes.Name,"杨朋JWT")

                    }
                }
            };
        }
        //获取测试用户
        public static List<TestUser> GetTestUsers()
        {
            return new List<TestUser>() {
                new TestUser() {
                    Username="杨朋",
                    Password="123456",
                    IsActive=true,
                    SubjectId="1"
                }
            };
        }

    }
}
运行的话就是 dotnet run urls=http://*:端口号
以上就搭建好了,接下来开始搭建 我们的客户端
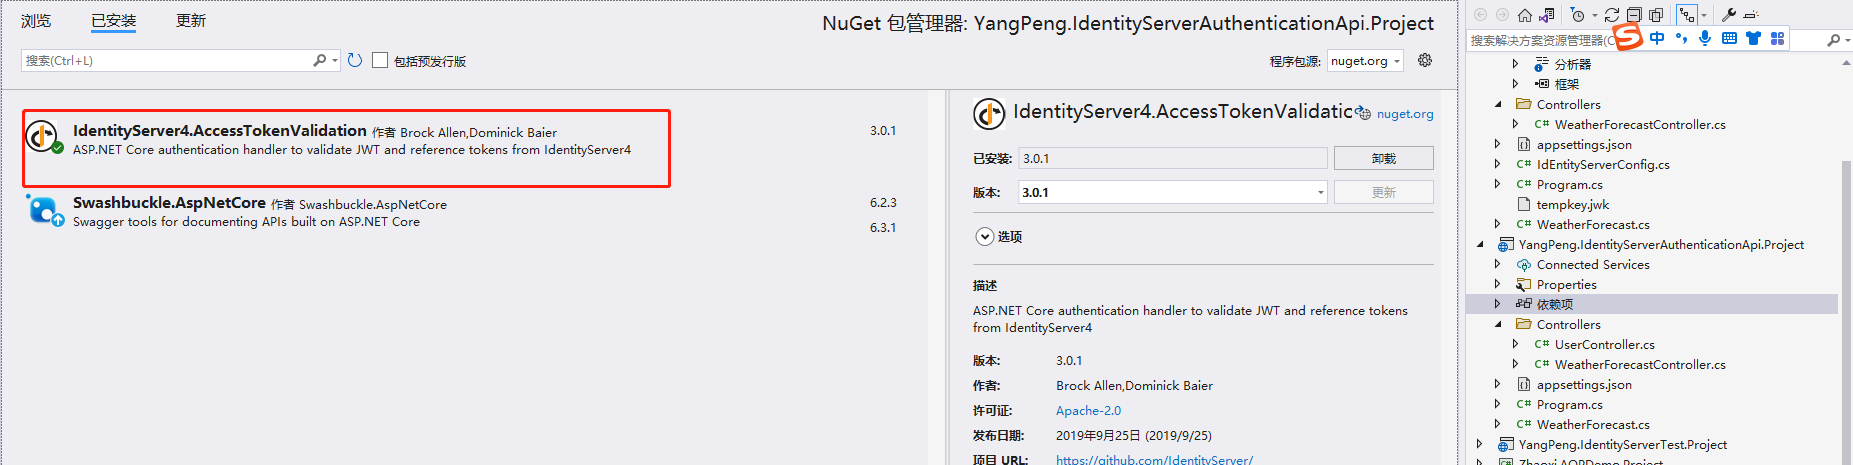
还是新建一个weiApi的项目,然后去nuget下安装IdentityServer4.AccessTokenValidatic
也是安装最稳定的版本就好了啊!!!
接着 还是去Program下面配置:
var builder = WebApplication.CreateBuilder(args);

// Add services to the container.

builder.Services.AddControllers();
// Learn more about configuring Swagger/OpenAPI at https://aka.ms/aspnetcore/swashbuckle
builder.Services.AddEndpointsApiExplorer();
builder.Services.AddSwaggerGen();

builder.Services.AddAuthentication("Bearer")  //这个是Token的开头 一般格式为: bearer xxxxxxxxxxxxxxxx
    .AddIdentityServerAuthentication(option => {

    option.Authority = "http://127.0.0.1:7200";// token一般是非对称加密的形式,所以这个配置的是我们服务端获取公钥的地址 用以解密
    option.ApiName = "OneApiResources";     // 这个就是我们在搭建服务端的时候 授权范围的名称, 必须与其一致,要不然就会导致鉴权失败。
    option.RequireHttpsMetadata = false;    // htpps就设置为true

});

var app = builder.Build();

// Configure the HTTP request pipeline.
if (app.Environment.IsDevelopment())
{
    app.UseSwagger();
    app.UseSwaggerUI();
}

app.UseAuthentication();  //鉴权 --读取用户凭据

app.UseAuthorization();  // 授权。 根据用户凭证 判断是否有权限

app.MapControllers();

app.Run();
以上就是客户端的搭建方法,
然后我们在客户端上面弄几个API接口
using Microsoft.AspNetCore.Authorization;
using Microsoft.AspNetCore.Http;
using Microsoft.AspNetCore.Mvc;

namespace YangPeng.IdentityServerAuthenticationApi.Project.Controllers
{
    [Route("api/[controller]")]
    [ApiController]
    public class UserController : ControllerBase
    {
        //这是不需要授权的接口
        [HttpGet]
        [Route("Get")]
        public string Get()
        {
            return "没有授权的哈!";
        }


        //这个是需要授权的接口
        [HttpGet]
        [Route("GetAll")]
        [Authorize]
        public string GetAll()
        {
            return "授权成功!";
        }
    }
}
然后我们去测试一波 ,我这边采用的是PostMan
1.先去服务端去获取token
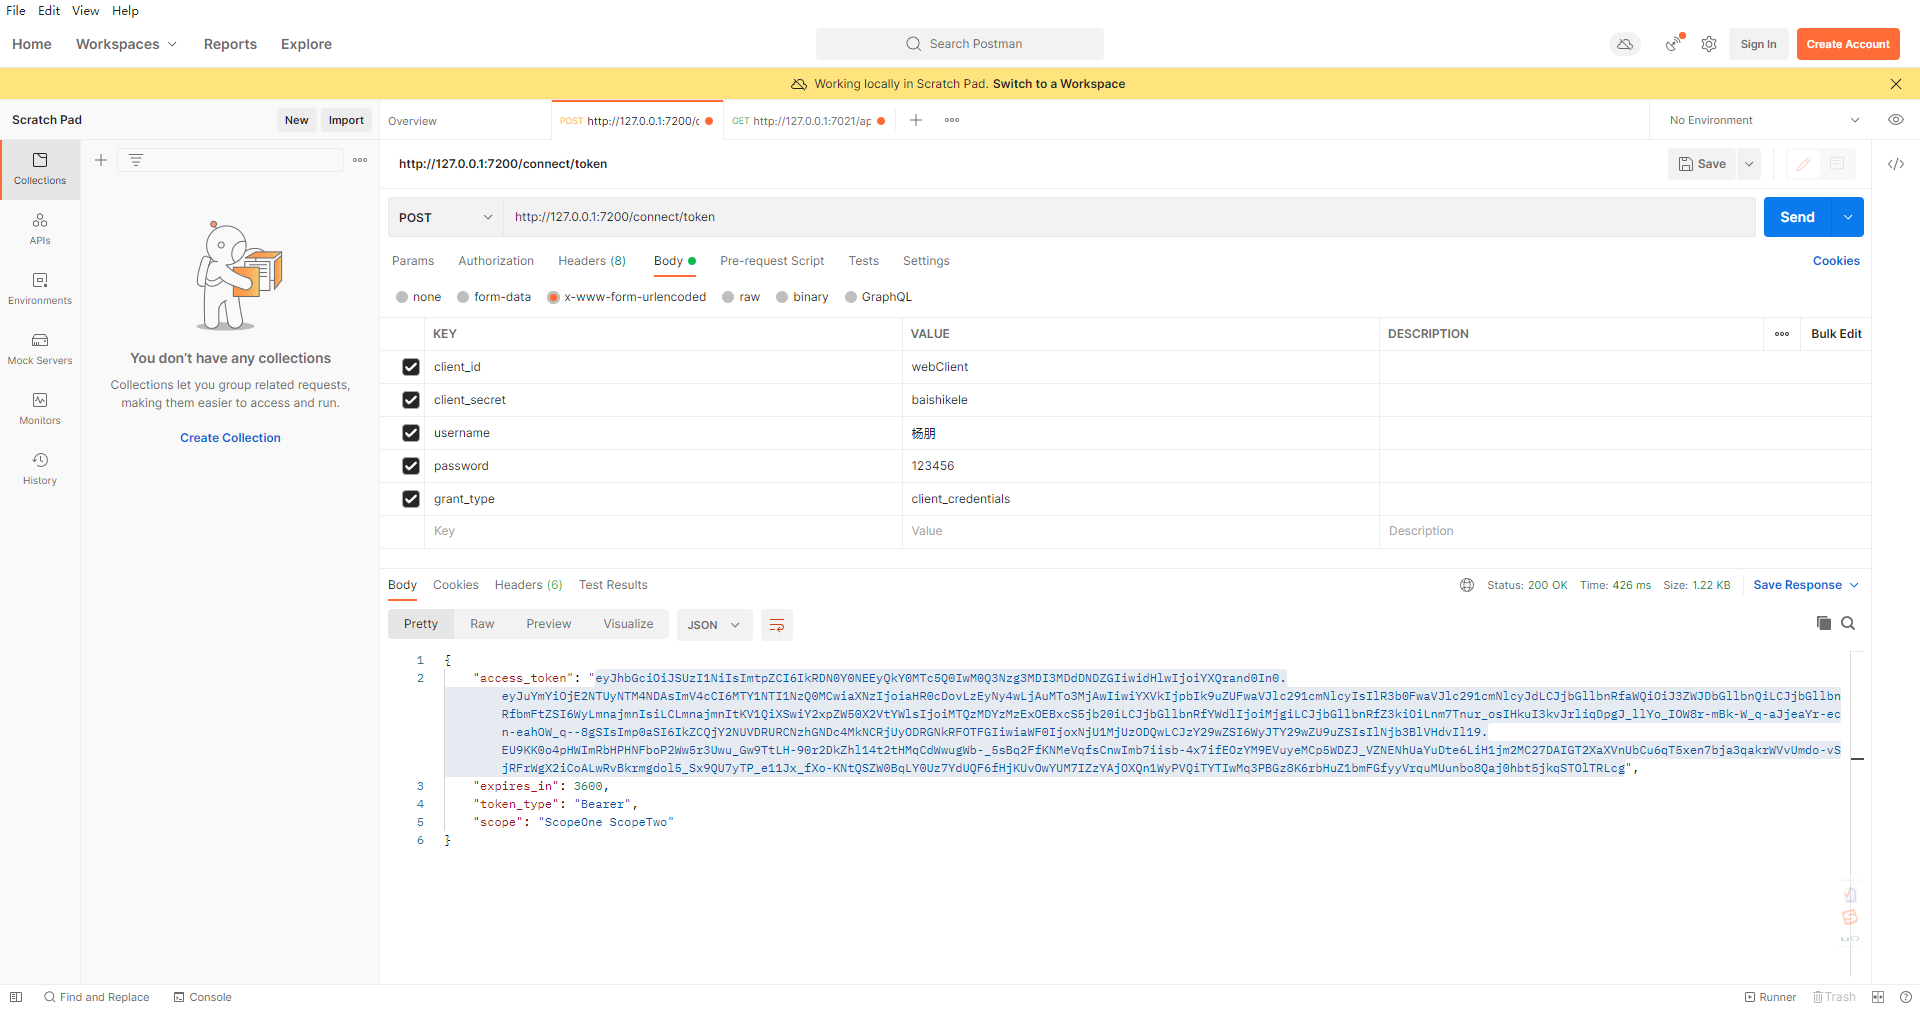
请求是POST的方式,地址是:http://127.0.0.1:7200/connect/token (这是规定好的地址,人家封装的就是这个地址)
client_id 客户端的ID
client_secret 这是客户端的密码
username 测试用户名称
password 测试用户的密码
grant_type 这是模式类型 我们是采用的客户端 所以填写 credentials
第二步 我们先不用token调用需要授权的接口 试试
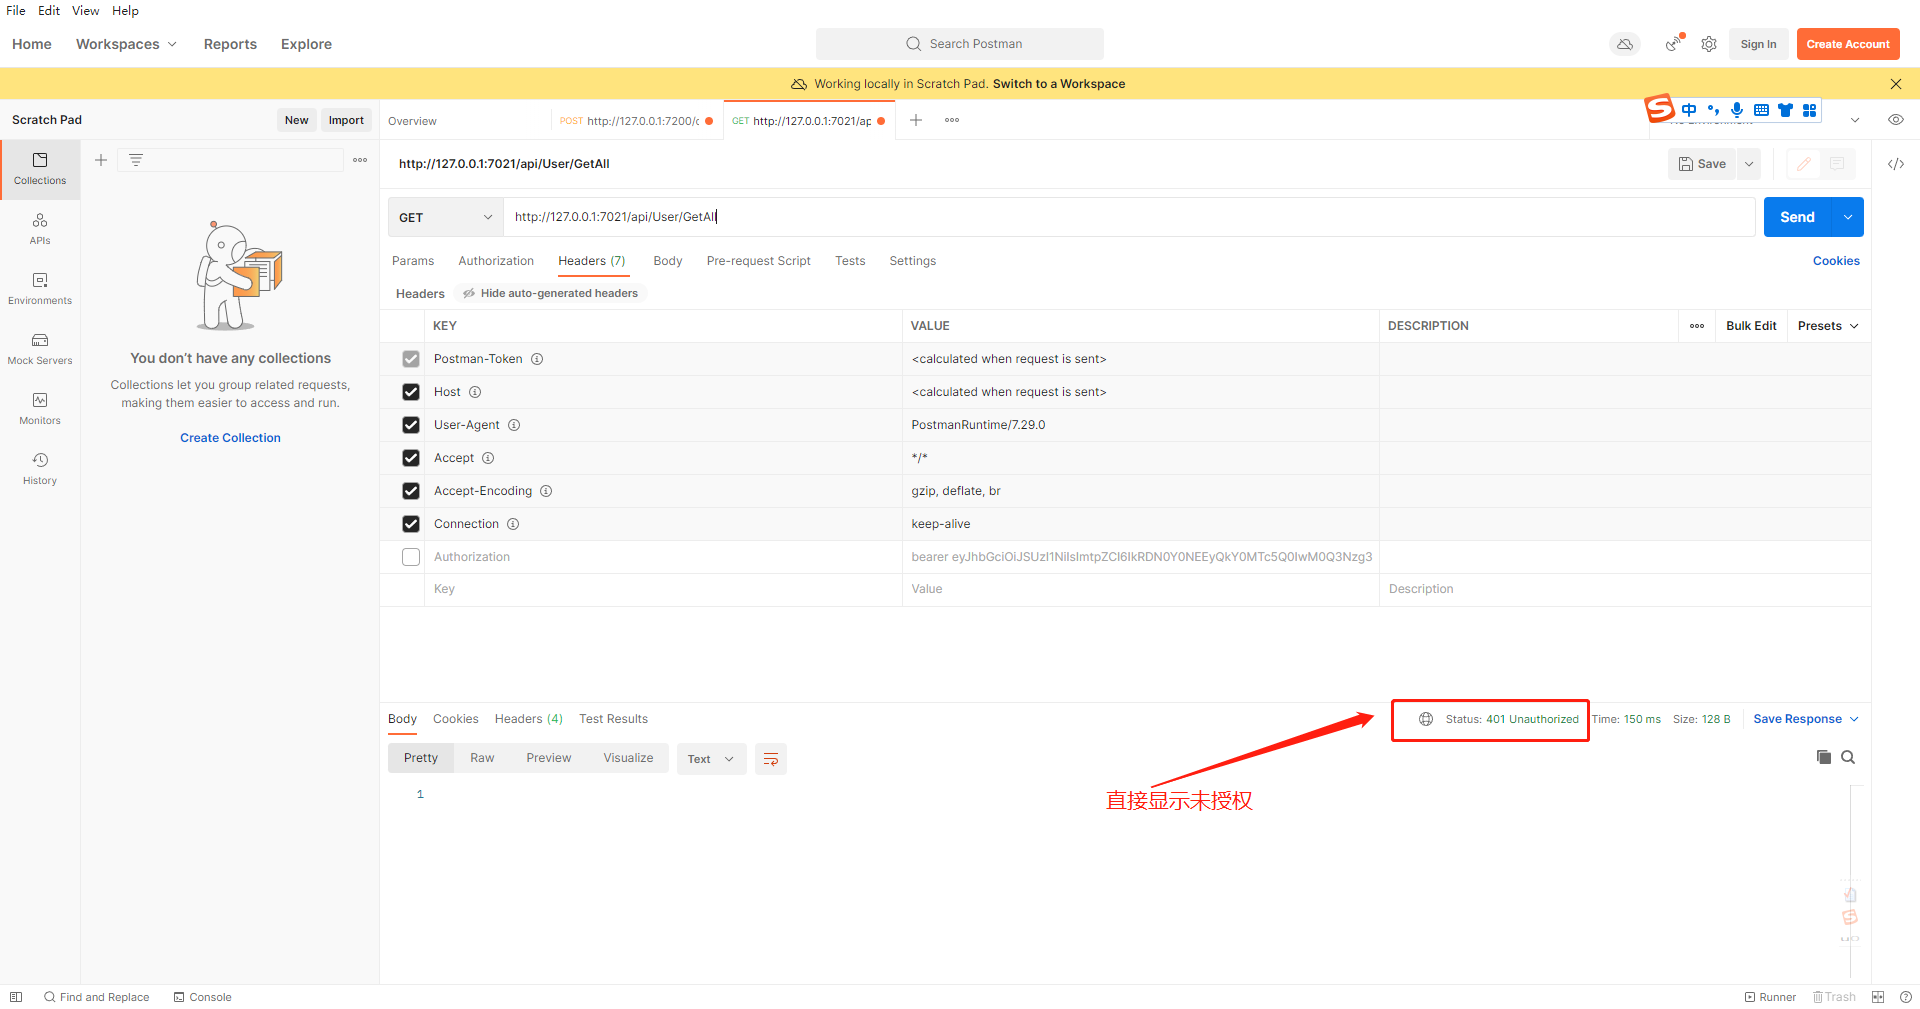
直接返回了401
然后我们带上token请求试试

成功了,直接OK!
赶紧试试吧, 兄弟萌。
补充下:
1.oAthou2.0是token的规范协议
2.token的格式 如下 我们可以将token复制下来,放到jwt.io 这个站点下 去看这个格式, 格式分为三个部分 我上图和大家说吧
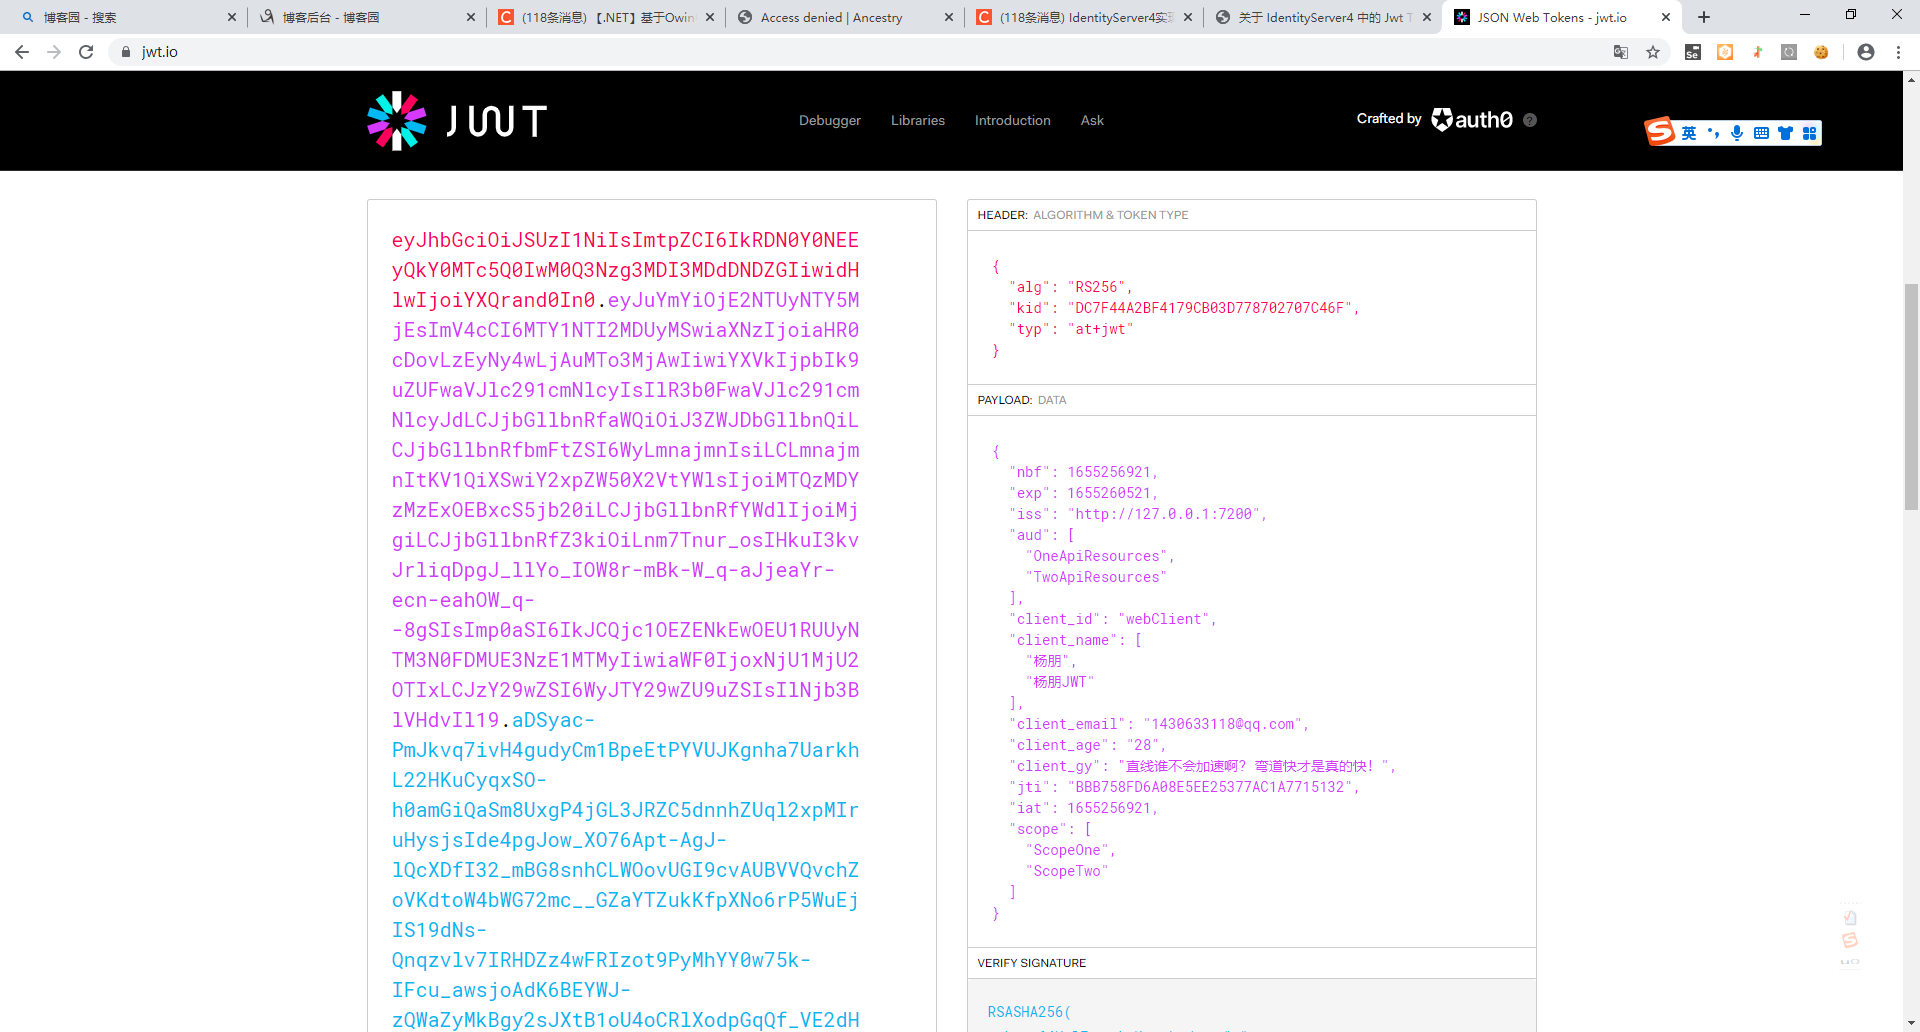
图片左侧是我们生成的token 分为 红色.紫色.蓝色 中间都是由点分成了三个部分,前面两个部分是公开的信息, 第一部分是一个token的描述信息(不必关注) 第二个就是我们在配置客户端时候的信息(专业名称叫:有效载荷,由于是公开的切勿将敏感信息放到里面) 第三部分是一个签名必须使用公钥解密后才能看到,但是看到的也是一段字符串这段字符串是一个md5得摘要, 是为了防止token被篡改得作用,具体是将第三段使用公钥解密后,在把第二部分使用md5加密得到md5得摘要 两者相对比 如果一致就是没有被篡改

 浙公网安备 33010602011771号