


PHP由浅入深
1. 什么是CGI
CGI的全称为"通用网关接口",为HTTP服务器与其他机器上的程序通信交流的一种工具。
缺点:性能较差,因为每次HTTP服务器遇到动态程序都发给CGI,CGI会启动一个CGI进程,该进程把动态程序文件交给脚本语言(PHP),脚本语言执行完的结果返回给CGI,CGI再交给HTTP服务器,HTTP服务器返回给浏览器客户端,CGI处理完毕以后,会关闭CGI进程。当处理高并发访问时,很耗服务器性能,于是就产生了FastCGI。
2. 什么是FastCGI
FastCGI是一个可伸缩地、高速地在HTTP服务器和动态脚本语言间通信的接口。
优点:把动态语言和HTTP服务器分离开来。
特点:
1. HTTP服务器和动态脚本语言间通信的接口或工具。
2. 可把动态语言解析和HTTP服务器分离开。
3. Nginx、Apache、Lighttpd,以及多数动态语言都支持FastCGI。
4. FastCGI接口方式采用C/S结构,分为客户端(HTTP服务器)和服务器端(动态语言解析服务器)
5. PHP动态语言服务器端可以启动多个FastCGI的守护进程(php-fpm)
6. HTTP服务器通过(Nginx fastcgi_pass)FastCGI客户端和动态语言服务器端通信(php-fpm)
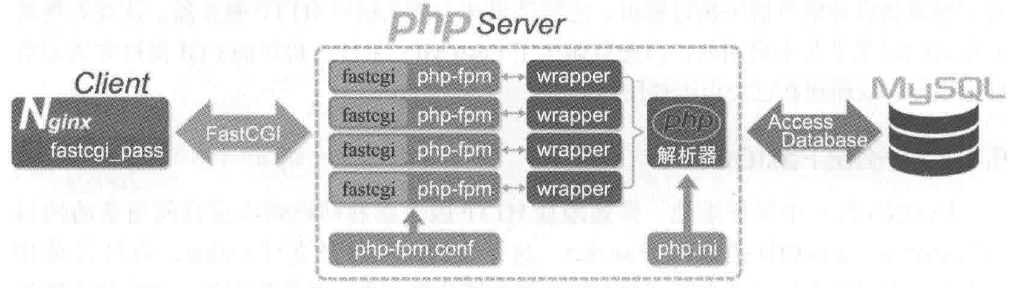
3. Nginx FastCGI的运行原理
Nginx不支持对外部动态程序的直接调用或者解析,所有的外部程序必须通过FastCGI接口来调用。流程图如下:
4. LNMP之PHP服务的安装准备
1. 检查安装PHP所需的lib库
yum install libxml2 libxml2-devel openssl openssl-devel bzip2 bzip2-devel libcurl libcurl-devel libjpeg libjpeg-devel libpng libpng-devel freetype freetype-devel gmp gmp-devel libmcrypt libmcrypt-devel readline readline-devel libxslt libxslt-devel gd-devel zlib-devel -y
2. 安装libmcrypt库
这是一个使用动态加载的模块化的libmcrypt。移除算法有用。
yum install -y epel-release
yum  install  php-mcrypt  libmcrypt  libmcrypt-devel -y
3. 安装mhash加密扩展库
基于离散数据原理不可逆向的PHP加密方式扩展库
yum install -y mhash
4. 安装mcrypt加密扩展库
yum install mcrypt -y
5. 安装gcc.
yum install gcc-c++ -y
5. 开始安装PHP
1. 官网下载php安装包
wget http://www.php.net/downloads.php,找到指定的版本下载就好了。 wget http://cn2.php.net/distributions/php-5.3.29.tar.gz
tar -zxvf php-5.3.29.tar.gz
2. 开始编译php
./configure \--prefix=/application/php \--with-config-file-path=/etc \--enable-fpm \--with-fpm-user=nginxuser \--with-fpm-group=nginxuser \--enable-inline-optimization \--disable-debug \--disable-rpath \--enable-shared \--enable-soap \--with-libxml-dir \--with-xmlrpc \--with-openssl \--with-mcrypt \--with-mhash \--with-pcre-regex \--with-sqlite3 \--with-zlib \--enable-bcmath \--with-iconv \--with-bz2 \--enable-calendar \--with-curl \--with-cdb \--enable-dom \--enable-exif \--enable-fileinfo \--enable-filter \--with-pcre-dir \--enable-ftp \--with-gd \--with-openssl-dir \--with-jpeg-dir \--with-png-dir \--with-zlib-dir \--with-freetype-dir \--enable-gd-native-ttf \--enable-gd-jis-conv \--with-gettext \--with-gmp \--with-mhash \--enable-json \--enable-mbstring \--enable-mbregex \--enable-mbregex-backtrack \--with-libmbfl \--with-onig \--enable-pdo \--with-mysqli=mysqlnd \--with-pdo-mysql=mysqlnd \--with-zlib-dir \--with-pdo-sqlite \--with-readline \--enable-session \--enable-shmop \--enable-simplexml \--enable-sockets \--enable-sysvmsg \--enable-sysvsem \--enable-sysvshm \--enable-wddx \--with-libxml-dir \--with-xsl \--enable-zip \--enable-mysqlnd-compression-support \--with-pear
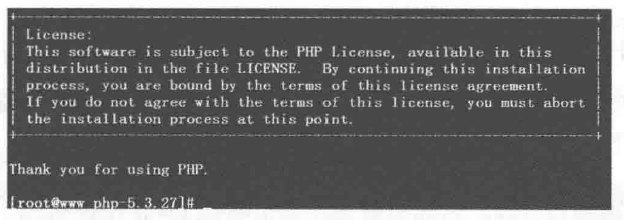
出现下面的界面,就是编译完成了。
其中一些参数,做一下解释:
1. --prefix: 指定PHP的安装路径
2. --with-mysql: 指定mysql的安装路径;如果没有mysql软件包,不需要单独安装,使用--with-mysql=mysqlnd替代--with-mysql=/application/mysql,因为PHP软件里已经自带连接mysql的客户端工具。
3. --with-fpm-user=nginxuser,表示指定PHP-FPM进程管理的用户为nginxuser,此处最好与nginx服务用户统一。
4. --with-fpm-group=nginxuser,表示指定PHP-FPM进程管理的用户组为nginxuser,此处最好与nginx服务用户组统一。
5. --enable-fpm,表示激活PHP-FPM方式服务。
3. 开始安装
make && make install
6. 配置PHP和PHP-FPM
进入/home/tools/php-5.3.29
cp php.ini-productio  /application/php/lib/php.ini
cp /application/php/etc/php-fpm.conf.default /application/php/etc/php-fpm.conf

启动php-fpm
/application/php/sbin/php-fpm

查看php-fpm的端口
netstat -anl | grep 9000
查看php-fpm进程数:
$ps aux | grep -c php-fpm
7. 测试php是否安装成功。
需要在nginx配置location,然后访问网站的php文件。出现下面的内容,就是安装成功了。
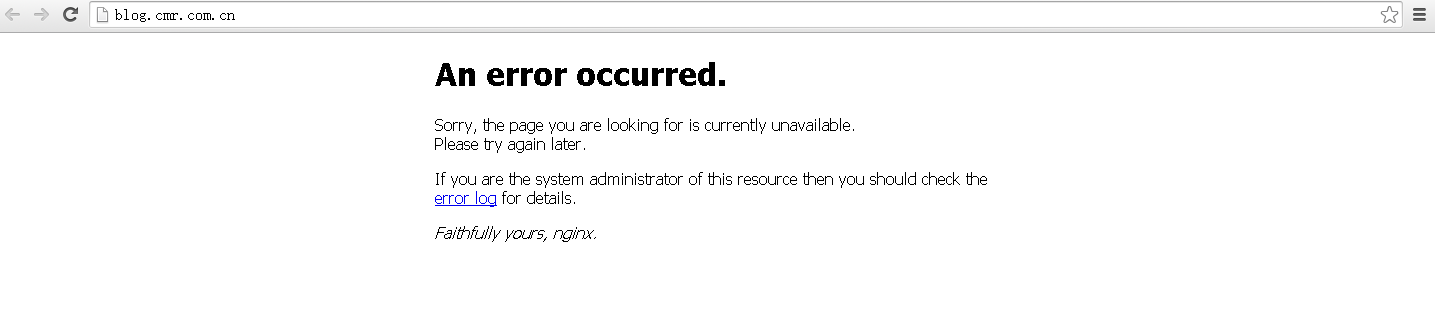
php-fpm未启动,出现下面的内容。
8. 测试php是否能够连接mysql数据库
$servername = "localhost";
$username = "root";
$password = "cmr2012";
$conn = mysqli_connect($servername, $username, $password);
if (!$conn) {
die("Connection failed: " . mysqli_connect_error());
}
echo "OK";
?>
9. PHP缓存加速器
10. php.ini配置参数优化
safe_mode = On       #开启安全模式
expose_php = Off     #关闭版本信息
display_errors = Off   #错误信息控制,测试的时候开启
error_reporting = E_ALL & ~E_DEPRECATED   #报错的级别
log_errors = On   #开启错误日志
error_log = php_errors.log    #log日志路径,需求log_errors开启
register_globals = Off   #关闭全局变量,一定不能打开
magic_quotes_gpc = On #防止SQL注入
allow_url_fopen = Off  #打开远程打开
cgi.fix_pathinfo=0   #防止nginx文件类型错误解析漏洞


max_execution_time = 30   #单个脚本最大运行时间,单位为秒
max_input_time = 60    #单个脚本等待输入的最长时间
memory_limit = 128M    #单个脚本最大使用内存,单位为K或者M
upload_max_filesize = 2M   #上传最大文件大小
max_file_uploads = 20   #单个请求上传的最大文件数
file_uploads =On  #是否允许HTTP file uploads
upload_tmp_dir  #上传文件的临时目录
11. php-fpm配置参数优化
最后. 开启启动php-fpm
在系统服务目录里创建php-fpm.service文件
vi /lib/systemd/system/php-fpm.service
 写入以下内容(路径改成自己的)

[Unit]
Description=php-fpm
After=network.target
[Service]
Type=forking
ExecStart=/www/lnmp/php/sbin/php-fpm
PrivateTmp=true
[Install]
WantedBy=multi-user.target
12. memcached缓存php扩展插件安装
1. 报错: appending configuration tag "CXX" to libtool
可以忽略。


 浙公网安备 33010602011771号