
shell实现https登录
- 服务端提供了两个api:
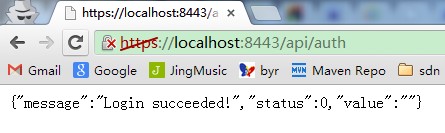
一个是用于用户认证,因为要传输密钥,所以用了https方式 如何在服务端配置https请见另外一个博文
https://192.168.1.190:8443/api/auth 参数api_key=***&secret_key=*** [post 方式提交]
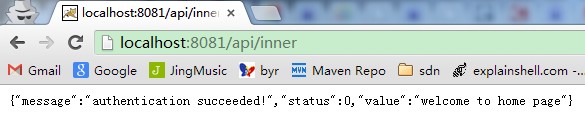
另外一个api,普通的http api,只有当通过第一个api的认证后,服务器下发一个cookie,之后的请求带上cookie,才能访问到内部页面,当然cookie对应的session定期失效。
http://192.168.1.190:8081/api/inner [get 方式提交]
- 下面是客户端(shell)部分:
[root@centos shell]# curl -v --insecure -d "api_key=test&secret_key=test" https://192.168.1.190:8443/api/auth
* About to connect() to 192.168.1.190 port 8443 (#0)
*   Trying 192.168.1.190... connected
* Connected to 192.168.1.190 (192.168.1.190) port 8443 (#0)
* Initializing NSS with certpath: /etc/pki/nssdb
* warning: ignoring value of ssl.verifyhost
* skipping SSL peer certificate verification
* SSL connection using TLS_DHE_RSA_WITH_AES_256_CBC_SHA
* Server certificate:
*     subject: CN=free4lab,OU=free4lab,O=free4lab,L=beijing,ST=beijing,C=CN
*     start date: 10月 26 11:54:31 2013 GMT
*     expire date:  1月 24 11:54:31 2014 GMT
*     common name: free4lab
*     issuer: CN=free4lab,OU=free4lab,O=free4lab,L=beijing,ST=beijing,C=CN
> POST /api/auth HTTP/1.1
> User-Agent: curl/7.19.7 (i686-pc-linux-gnu) libcurl/7.19.7 NSS/3.12.7.0 zlib/1.2.3 libidn/1.18 libssh2/1.2.2
> Host: 192.168.1.190:8443
> Accept: */*
> Content-Length: 28
> Content-Type: application/x-www-form-urlencoded
>
< HTTP/1.1 200 OK
< Server: Apache-Coyote/1.1
< Set-Cookie: JSESSIONID=84AB6E3414D8E639959745CBA5DA448F; Path=/; Secure
< Set-Cookie: login_cookie=c7be27c2-fe79-4772-ae2b-dae485da47d8; Expires=Sat, 09-Nov-2013 14:48:17 GMT
< Content-Type: text/html;charset=UTF-8
< Content-Length: 52
< Date: Sat, 26 Oct 2013 14:48:17 GMT
<
* Connection #0 to host 192.168.1.190 left intact
* Closing connection #0
{"message":"Login succeeded!","status":0,"value":""}
可以看见,我提供正确的api_key和secret_key后,服务端发回两个cookie并且返回json,提示认证成功。
其中: JSESSIONID是用来定位服务端的session的,简单的说,客户端发送http请求时,只有在cookie里带上了正确的JSESSIONNID,java后端 HttpSession session = request.getSession(); 这样的语句才能获取到与之对应的session信息。
所以之后的请求我就都带上以上两个cookie信息即可!
[root@centos shell]# curl -v  --cookie "login_cookie=c7be27c2-fe79-4772-ae2b-dae485da47d8;JSESSIONID=84AB6E3414D8E639959745CBA5DA448F" http://192.168.1.190:8081/api/inner
* About to connect() to 192.168.1.190 port 8081 (#0)
*   Trying 192.168.1.190... connected
* Connected to 192.168.1.190 (192.168.1.190) port 8081 (#0)
> GET /api/inner HTTP/1.1
> User-Agent: curl/7.19.7 (i686-pc-linux-gnu) libcurl/7.19.7 NSS/3.12.7.0 zlib/1.2.3 libidn/1.18 libssh2/1.2.2
> Host: 192.168.1.190:8081
> Accept: */*
> Cookie: login_cookie=c7be27c2-fe79-4772-ae2b-dae485da47d8;JSESSIONID=84AB6E3414D8E639959745CBA5DA448F
>
< HTTP/1.1 200 OK
< Server: Apache-Coyote/1.1
< Content-Length: 81
< Date: Sat, 26 Oct 2013 14:52:53 GMT
<
* Connection #0 to host 192.168.1.190 left intact
* Closing connection #0
{"message":"authentication succeeded!","status":0,"value":"welcome to home page"}
这样,我们就用shell脚本实现了https的登录!
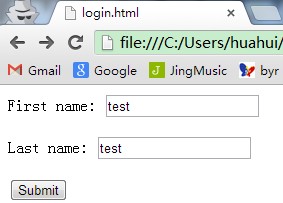
- 用浏览器登录就很简单了,随便写一个html的post代码
<form action="https://localhost:8443/api/auth" method="post">
  <p>First name: <input type="text" name="api_key" /></p>
  <p>Last name: <input type="text" name="secret_key" /></p>
  <input type="submit" value="Submit" />
</form>
然后输入api_key和secret_key就认证完成了
E-mail: huahuiyang@gmail.com
https://www.linkedin.com/in/huahuiyang/

 浙公网安备 33010602011771号