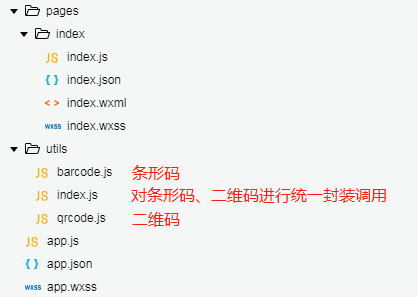
小程序条形码插件wxbarcode的使用及改进
前言:
适用于小程序的条形码插件不多,目前只找到这一个能用的,工期限制,暂时就先用这一个了。
在使用插件的过程中也发现了不少问题,也做了一些改进,这里就做下总结,希望能给其它遇到下面问题的小伙伴有所帮助。
插件地址:
方法1——npm安装:
npm install wxbarcode
import wxbarcode from 'wxbarcode'
//条形码
wxbarcode.barcode('barcode', '1234567890123456789', 680, 200);
//二维码
wxbarcode.qrcode('qrcode', '1234567890123456789', 420, 420);
支付宝小程序支持npm,所以这种用法还好,微信小程序用就有点麻烦了。所以可以单独的把插件脚本拿出来直接用。
方法2——直接饮用插件脚本:
调用:
var wxbarcode = require('../../utils/index.js');
Page({
  onLoad: function() {
    wxbarcode.barcode('barcode', '1234567890123456789', 680, 200);
    wxbarcode.qrcode('qrcode', '1234567890123456789', 420, 420);
  }
})
如果现有项目已经有了二维码插件,只需要条形码插件,那么可以单独使用条形码插件就好了,如下:
utils/index.js
//调用封装脚本改造
var barcode = require('./barcode');

function convert_length(length) {
    return Math.round(wx.getSystemInfoSync().windowWidth * length / 750);
}

function barc(id, code, width, height) {
    barcode.code128(wx.createCanvasContext(id), code, convert_length(width), convert_length(height))
}
export function barc(id, code, width, height) {
  barcode.code128(wx.createCanvasContext(id), code, convert_length(width), convert_length(height))
}
page.js
//方法调用
import {
  barc
} from '../../utils/index.js'
Page({
  data: {},
  onLoad: function() {
    barc('barcode', '1234567890123456789', 680, 200);
  }
})
page.wxml
<!--多个条形码生成-->
<view class="barcode" wx:for="{{code}}">
  <view class="barnum">{{item}}</view>
  <canvas canvas-id="barcode{{index}}" />
</view>
utils/index.js
//调用封装脚本改造
var barcode = require('./barcode');

function convert_length(length) {
    return Math.round(wx.getSystemInfoSync().windowWidth * length / 750);
}

function barc(id, code, width, height) {
    barcode.code128(wx.createCanvasContext(id), code, convert_length(width), convert_length(height))
}
export function barc(id, code, width, height) {
  barcode.code128(wx.createCanvasContext(id), code, convert_length(width), convert_length(height))
}
page.wxml
//方法调用
import {
  barc
} from '../../utils/index.js'
Page({
  data: {
    code: ['11111111', '22222222', '33333333']
  },
  onLoad: function() {
    var code = this.data.code
    for (var i in code) {
      barc('barcode' + i, code[i], 680, 200);
    }
  }
})
如果需要在多个页面模板中生成条形码,那么最好封装成组件。
支付宝小程序中,封装组件正常。
具体代码如下:
barcode/index.axml
<view class="barcode">
  <canvas id="barcode{{index}}"/>
  <view class="couponNumber">{{couponNumber}}</view>
</view>
barcode/index.js
import barcode from './barcode';
Component({
  mixins: [],
  data: {},
  props: {
    couponNumber: [String] || '',
    index: [Number] || 0
  },
  didMount() {
    this.barc("barcode" + this.props.index, this.props.couponNumber, this.convert_length(960), this.convert_length(440));
  },
  methods: {
    convert_length(length) {
      return Math.round(my.getSystemInfoSync().windowWidth * length / 750);
    },
    barc(id, code, width, height) {
      barcode.code128(my.createCanvasContext(id), code, this.convert_length(width), this.convert_length(height))
    }
  }
});
page.wxml
<barcode class="iblock" value="{{item.couponNumber}}" width="540"/>
如上,支付宝小程序中将条形码组件的合成放到组件中是没问题的。
但是在微信小程序中则不然,微信小程序中按这种方法条形码是不展示的,估计是跟微信小程序的一些机制有关吧,时间有限,就不做深入研究了。
如果一定要封装到组件中,那么可以采取马甲的方式来封装,即把 插件中的 canvas 通过组件的slot插槽放到页面中去进行渲染,这样条形码就能正常展示了。
具体实现如下:
barcode/index.wxml
 <view class='barcode'>
  <slot name="content2" bindlongpress="saveImg" data-index="{{index}}"></slot>
  <view class="couponNumber">{{couponNumber}}</view>
</view>
barcode/index.js
// components/barcode/index.js
import barcode from './barcode';
Component({
  /**
   * 组件的属性列表
   */
  options: {
    multipleSlots: true // 在组件定义时的选项中启用多slot支持
  },
  properties: {
    couponNumber: String,
    index: Number
  },
  attached: function() {
    setTimeout(()=>{
      this.barc("barcode" + this.data.index, this.data.couponNumber, this.convert_length(960), this.convert_length(440));
    },500)
  },
  /**
   * 组件的方法列表
   */
  methods: {
    convert_length(length) {
      return Math.round(wx.getSystemInfoSync().windowWidth * length / 750);
    },
    barc(id, code, width, height) {
      barcode.code128(wx.createCanvasContext(id), code, this.convert_length(width), this.convert_length(height))
    },
    saveImg: function() {
      //获取画布中图片的临时地址
      wx.canvasToTempFilePath({
        canvasId: 'barcode' + this.data.index,
        success: function(data) {
          //保存图片
          wx.showActionSheet({
            itemList: ['保存图片'],
            success: function(res) {
              console.log(res.tapIndex)
              if (res.tapIndex == 0) {
                wx.saveImageToPhotosAlbum({
                  filePath: data.tempFilePath,
                  complete(e){
                    console.log(e)
                  }
                })
              }
            }
          })
        }
      })
    }
  }
})
注:
1.条形码合成的逻辑进行了延迟500ms的处理——解决华为部分机型不展示条形码的问题
2.长按保存图片的实现——插件本身没有实现,这里先用 wx.canvasToTempFilePath 获取canvas中图片的临时地址,然后再调用 wx.saveImageToPhotosAlbum 进行保存。当然,感兴趣的小伙伴可以直接对插件进行改造。
3.支付宝小程序中提供的保存图片的api并不支持base64格式的图片,所以支付宝小程序中暂时未做保存图片处理,后续有时间再研究。
1.条码识别不正确:条形码长款尺寸最好按demo提供的比例配置,不然可能会导致生成出来的条形码展示不全,扫码识别会出现不对的结果;
2.微信小程序组件封装:微信小程序不能把canvas封装到组件中,要用插槽放到页面中;
3.微信小程序华为手机不显示条形码:加500ms延迟吧;
4.奇数字符串生成条形码识别最后一位是下划线:

插件bug,做如下调整:
barcode.js
    //ok some type of shift is nessecary
    if (shifter != -1) {
      result.push(shifter);
      result.push(codeValue(chr1));//插件中是chr2,改成chr1就可以了
    }
    else {
      if (currcs == CODESET.C) {
        //include next as well
        result.push(codeValue(chr1, chr2));
      }
      else {
        result.push(codeValue(chr1));
      }
    }
如上,高亮部分即为原插件bug修复,调整后奇数字符串最后一位就正常了。

 浙公网安备 33010602011771号