

WebvirtCloud安装(CentOS7)
1、安装依赖包
wget -O /etc/yum.repos.d/epel.repo http://mirrors.aliyun.com/repo/epel-7.repo
yum -y install python-pip
yum -y install python-virtualenv python-devel libvirt-devel glibc gcc nginx supervisor python-lxml git python-libguestfs
2、下载webvirtcloud并初始化webvirtcloud
git clone https://github.com/retspen/webvirtcloud
mv webvirtcloud /opt
cd /opt/webvirtcloud && cp webvirtcloud/settings.py.template webvirtcloud/settings.py
pip install -r conf/requirements.txt
cp conf/nginx/webvirtcloud.conf /etc/nginx/conf.d/
sed -i "s#SECRET_KEY = ''#SECRET_KEY = 'abcd12345'#g" /opt/webvirtcloud/webvirtcloud/settings.py
python manage.py migrate
3、编辑一个webvirtcloud.ini的新文件并粘贴以下内容到文件中
vim /etc/supervisord.d/webvirtcloud.ini
[program:webvirtcloud]
command=/usr/bin/gunicorn webvirtcloud.wsgi:application -c /opt/webvirtcloud/gunicorn.conf.py
directory=/opt/webvirtcloud
user=nginx
autostart=true
autorestart=true
redirect_stderr=true

[program:novncd]
command=/usr/bin/python /opt/webvirtcloud/console/novncd
directory=/opt/webvirtcloud
user=nginx
autostart=true
autorestart=true
redirect_stderr=true
4、更改webwirtcloud文件夹的权限为nginx
chown -R nginx:nginx /opt/webvirtcloud
systemctl start nginx && systemctl start supervisord
5、在所有KVM主机上新增webvirtcloud账户用于webvirtcloud连接虚拟化服务
useradd webvirtcloud
echo "123456" | passwd --stdin webvirtcloud
usermod -G kvm -a webvirtcloud
6、安装虚拟化服务
wget -O - https://clck.ru/9V9fH | sudo sh
7、配置ssh免钥登陆kvm主机
su - nginx -s /bin/bash
ssh-keygen #生成id_rsa.pub文件,直接回车即可
touch ~/.ssh/config && echo -e "StrictHostKeyChecking=no\nUserKnownHostsFile=/dev/null" >>~/.ssh/config
chmod 0600 ~/.ssh/config
ssh-copy-id webvirtcloud@127.0.0.1 #拷贝id_rsa.pub文件到远端kvm主机
8、在所有kvm主机上新增以下文件
vim /etc/polkit-1/localauthority/50-local.d/50-org.libvirtd-group-access.pkla
[libvirtd group Management Access]
Identity=unix-group:kvm
Action=org.libvirt.unix.manage
ResultAny=yes
ResultInactive=yes
ResultActive=yes
service libvirtd restart
9、访问http://ip,默认用户名:admin,密码:admin
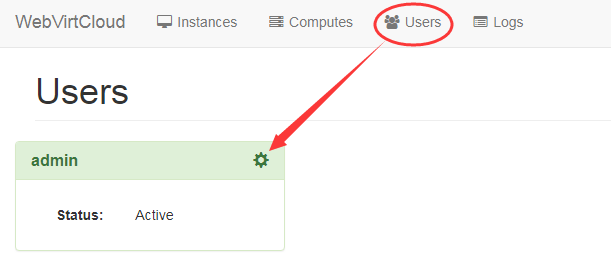
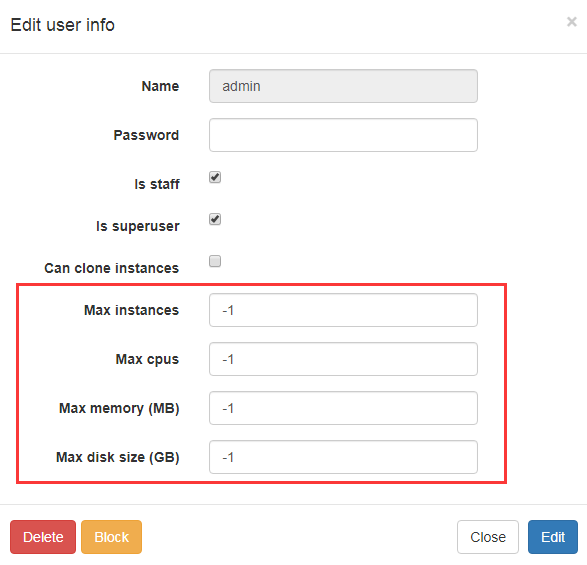
10、创建虚拟后出现下图中的错误,解决办法:点击Users,编辑admin用户,最下面四个选项填入-1即可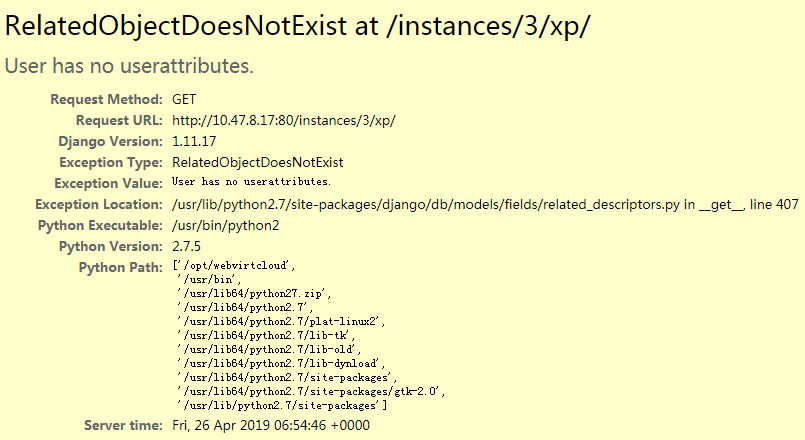
参考链接:
https://github.com/retspen/webvirtmgr/wiki/Setup-SSH-Authorization
https://github.com/retspen/webvirtcloud
https://github.com/luckman666 #一键部署k8s

 浙公网安备 33010602011771号