树莓派C语言控制继电器开关小灯泡(WiringPi 实现)
大家好,我是小智!
本文介绍了如何使用C语言结合 wiringPi 库,在树莓派上控制继电器,实现 LED 的开关控制。通过 wiringPi 操作 GPIO,完成电路连接、代码编写及运行测试。
硬件准备
1.树莓派(本文章使用树莓派3B做演示)
2.继电器模块
3.小灯泡
4.杜邦线
5.电池盒
6.干电池
软件准备
1.树莓派的操作系统
2.wiringPi库
若未安装wiringPi库,请点击 wiringPi安装教程!
3.gcc
若只安装gcc,则输入以下命令
sudo apt-get install gcc
若需要安装一套常用的C语言开发工具和库,则输入以下命令
sudo apt-get install build-essential
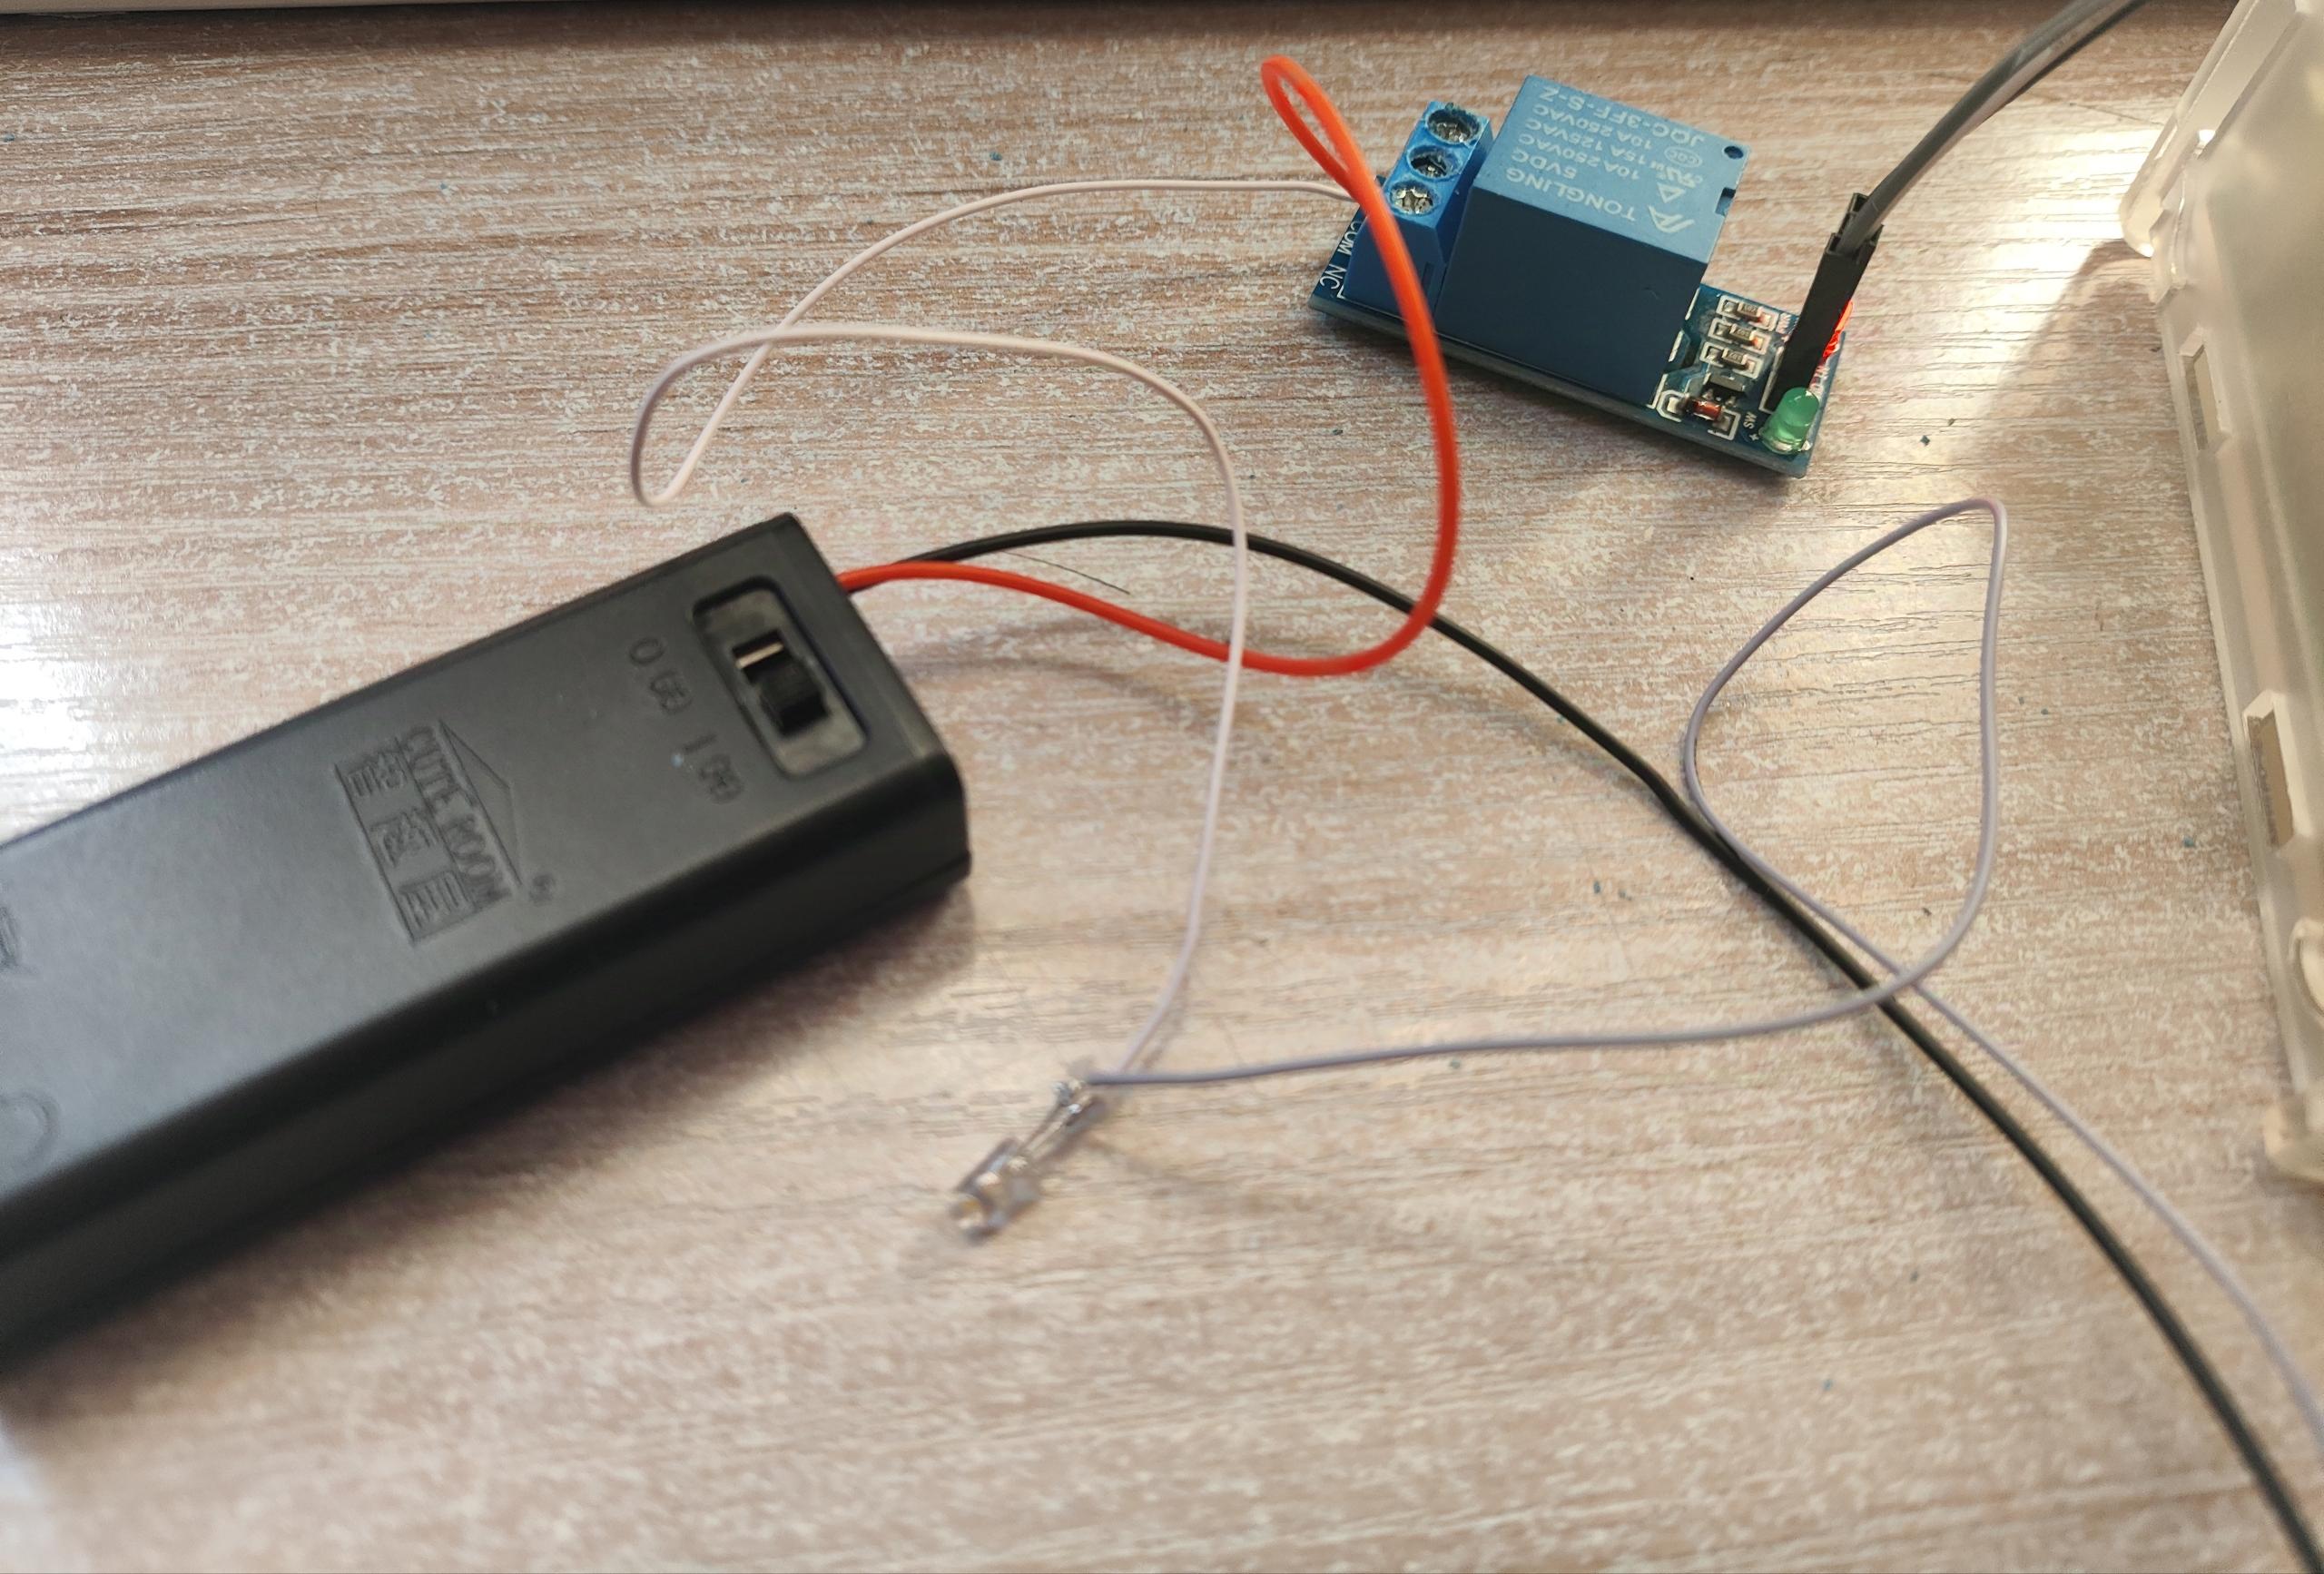
硬件连接文字描述
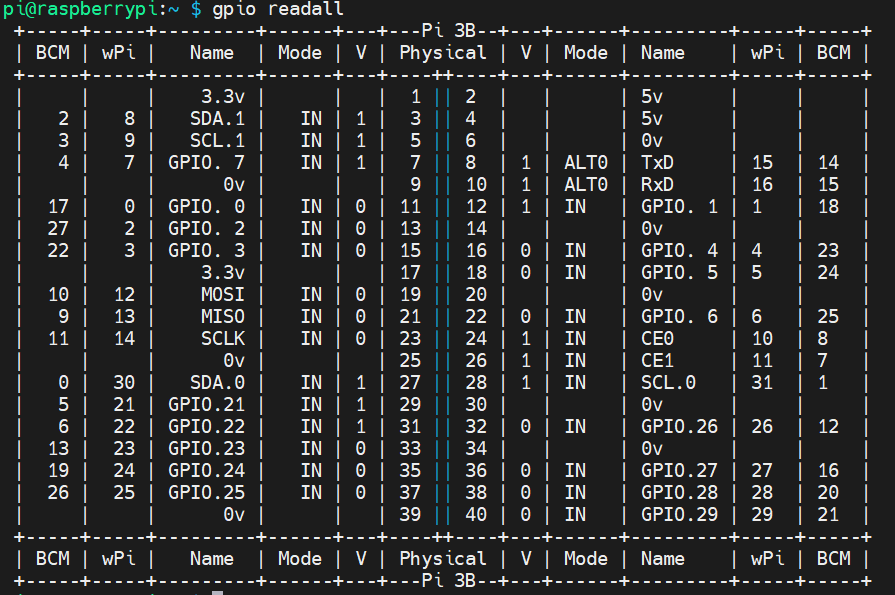
1.继电器的VCC连接到1号针脚,即3.3V对应的针脚
2.继电器的GND连接到9号针脚,即负极对应的针脚
3.继电器的IN连接到7号针脚
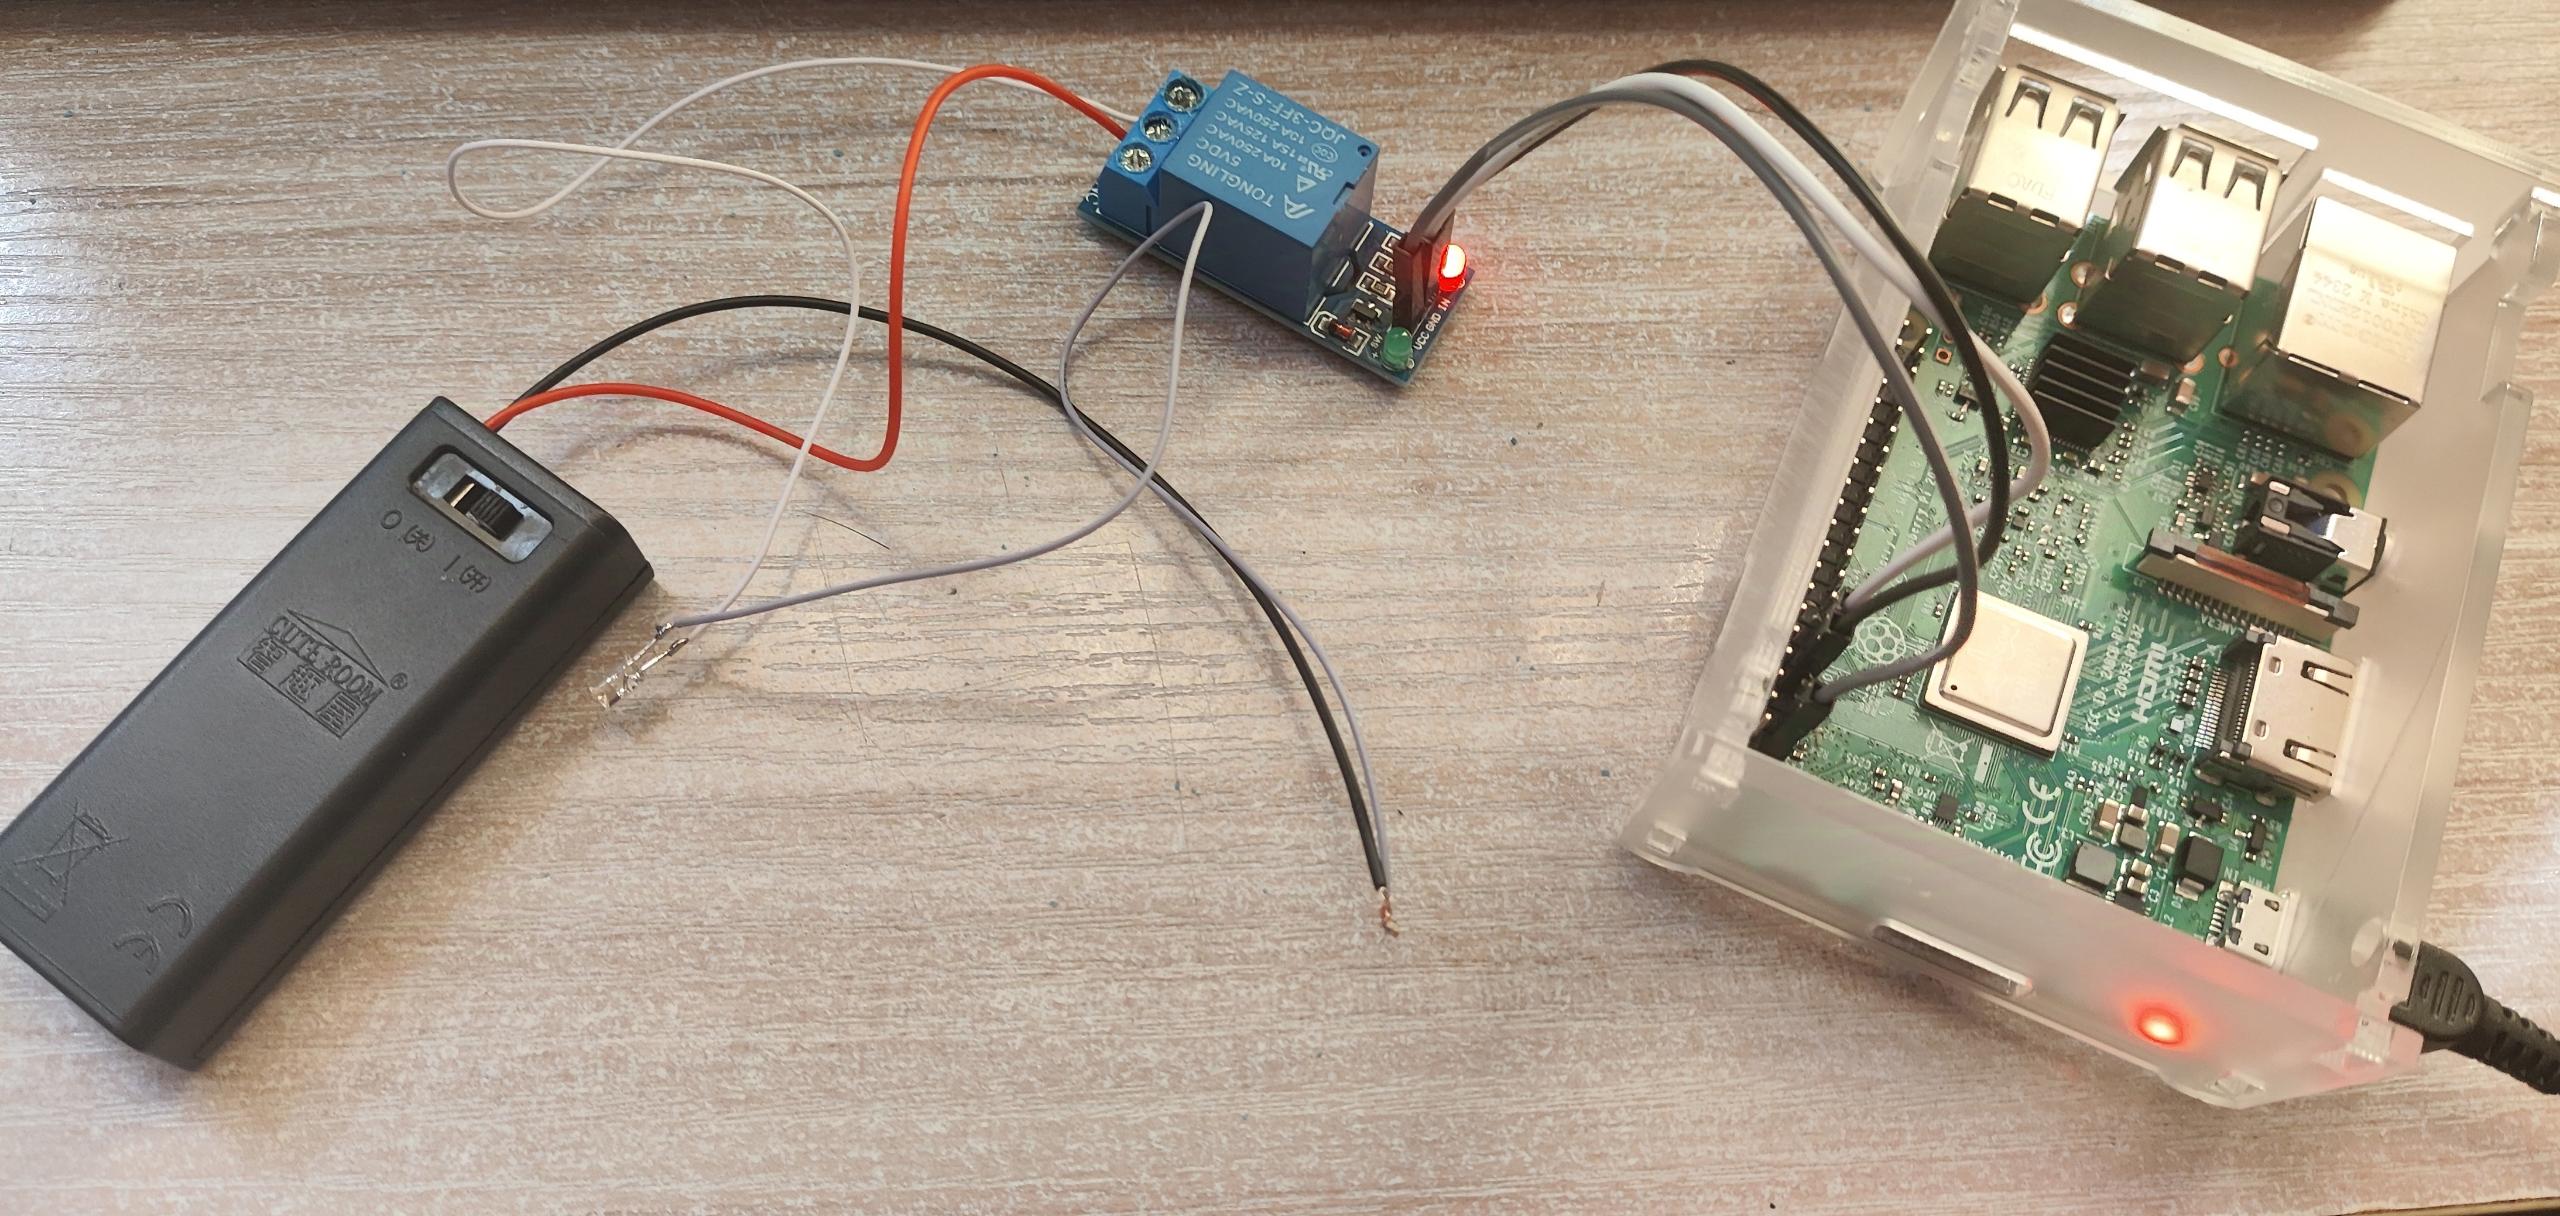
4.电池盒的正极线(红色线)连接到继电器的COM
5.小灯泡的正极线(白色线)连接到继电器的NO
6.电池盒的负极线与小灯泡的负极线相连
7.记得在电池盒里放电池
硬件连接图片描述
编写代码
/**
 * @file name : relay_control.c
 * @brief     : A simple program to control a relay switch using wiringPi.
 * @author    : xiaozhimakemoneys@163.com
 * @date      : 2025-03-11
 * @version   : 1.0
 * @note      : Initializes GPIO, reads user input (0/1) to control the relay,
 *              runs in a loop until the user exits.
 *
 * CopyRight (c)  2025-2026   xiaozhimakemoneys@163.com   All Rights Reserved.
 */

#include <wiringPi.h>
#include <stdio.h>
#include <stdbool.h>

#define ERROR -1
#define RELAY_PIN 7

/**
 * @name    setup
 * @brief   Initializes the wiringPi library and sets up the relay pin.
 * @param   None
 * @return  0 if initialization is successful, otherwise ERROR.
 *
 * @date    2025-03-11
 * @version 1.0
 * @note    This function must be called before using the relay.
 */
int setup()
{
    if (-1 == wiringPiSetup())
    {
        printf("Hardware interface initialization failed!\n");
        return ERROR;
    }

    pinMode(RELAY_PIN, OUTPUT);
    return 0;
}

/**
 * @name    controlRelay
 * @brief   Controls the relay based on user input.
 * @param   cmd - The command input (0: turn off, 1: turn on).
 * @return  None
 *
 * @date    2025-03-11
 * @version 1.0
 * @note    Ensure wiringPi is initialized before calling this function.
 */
void controlRelay(int cmd)
{
    if (1 == cmd)
    {
        digitalWrite(RELAY_PIN, LOW);
        printf("Switch turned ON.\n");
    }
    else if (0 == cmd)
    {
        digitalWrite(RELAY_PIN, HIGH);
        printf("Switch turned OFF.\n");
    }
    else
    {
        printf("Input Error! Please enter 0 or 1.\n");
    }
}

/**
 * @name    runControlLoop
 * @brief   Runs the main control loop, allowing users to turn the relay on/off.
 * @param   None
 * @return  None
 *
 * @date    2025-03-11
 * @version 1.0
 * @note    User can enter 0 (OFF), 1 (ON), or 9 (EXIT).
 */
void runControlLoop()
{
    int cmd;

    while (true)
    {
        printf("Please enter 0/1 (0: OFF, 1: ON, 9: EXIT):\n");
        printf("Input: ");

        if (scanf("%d", &cmd) != 1)
        {
            printf("Input Error! Please enter 0, 1, or 9.\n");
            while (getchar() != '\n');
            continue;
        }

        if (9 == cmd)
        {
            printf("Exiting...\n");
            break;
        }

        controlRelay(cmd);
    }
}

int main(void)
{
    if (setup() == ERROR)
        return ERROR;

    runControlLoop();

    return 0;
}
编译加链接,生成可执行文件
gcc relay_control.c -o relay_control -lwiringPi
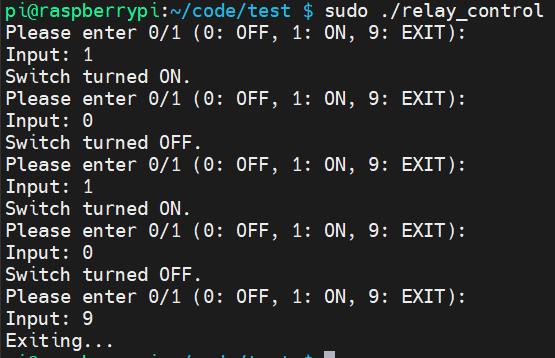
运行可执行文件
sudo ./relay_control
运行成功的终端截图
成功开灯的实物图
继电器的红灯和绿灯都亮了

成功关灯和退出程序的实物图
继电器仅有红灯亮了


 浙公网安备 33010602011771号