
RabbitMQ入门(1)——Hello World
这系列是官网的翻译和一些博客的参考,仅供自己复习使用。
介绍
官网定义:
RabbitMQ is the most widely deployed open source message broker.
RabbitMQ is lightweight and easy to deploy on premise and in the cloud. It supports multiple messaging protocols. RabbitMQ can be deployed in distributed and federated configurations to meet high-scale, high-availability requirements.
关于RabbitMQ的一些术语:
-
Producing:就是指发送,发送消息的程序就是生产者(producer)。
-
queue:队列,RabbitMQ内部存储消息的地方。 理论上一个队列的大小仅仅受限于主机的存储,可以是一个无限大的缓存。多个Producer可以向同一个队列发送消息,多个Consumer也可以从一个队列接收消息。
-
Consuming:就是接收,主要等待接收消息的程序就是消费者(consumer)。
注意:生产者、消费者、broker(RabbitMQ)并不需要部署在同一台机器上,实际上,对于大多数应用而言,它们都不是部署在同一台机器上。
在Window配置RabbitMQ环境
配置Erlang
首先,需要安装Erlang,进入下载页面,根据操作系统版本选择32位或64位。
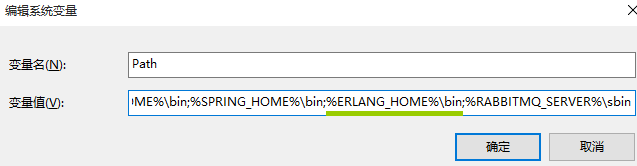
配置环境变量:

在path后面添加设置%ERLANG_HOME%\bin:
配置RabbitMQ
然后,安装RabbitMQ,根据提示下一步就好。
配置RabbitMQ环境变量:

在path后面添加设置%RABBITMQ_SERVER%\sbin:

启动RabbitMQ
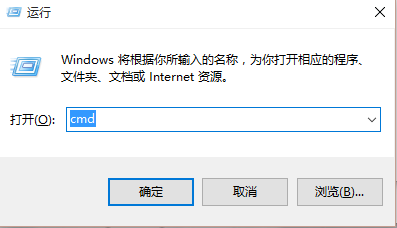
进入控制台:
安装管理插件,执行:
rabbitmq-plugins enable rabbitmq_management
启动RabbitMQ:

RabbitMQ启动后,可以进入管理界面:http://localhost:15672
账号/密码:guest/guest
Hello World实例
创建一个maven项目,创建两个java文件,分别模拟生产者发送消息、消费者接收消息,并将消息打印出来。引入rabbitmq依赖:
<dependency>
    <groupId>com.rabbitmq</groupId>
    <artifactId>amqp-client</artifactId>
    <version>4.1.1</version>
</dependency>

Producing
首先设置一个队列名:
private static final String queueName = "xxyh_test";
创建连接:
connectionFactory factory = new ConnectionFactory();
factory.setHost("localhost");
Connection connection = factory.newConnection();
Channel channel = connection.createChannel();
我们创建的Connection对socket连接进行了抽象,负责协议版本的协商和认证等工作。上例访问的是本机(localhost),如果需要访问另一台机器上的RabbitMQ,就需要指定主机名或IP地址。
声明队列和发送消息:
channel.queueDeclare(queueName, false, false, false, null);
channel.basicPublish("", queueName, null, message.getBytes());
一个队列只有在不存在的时候才会创建。发送的消息是以字节数组的形式传送的,所以支持任意类型的数据。
发送端:
package com.xxyh.rabbitmq;

import com.rabbitmq.client.Channel;
import com.rabbitmq.client.Connection;
import com.rabbitmq.client.ConnectionFactory;

import java.io.IOException;
import java.util.concurrent.TimeoutException;

public class Send {

    // 设置队列名称
    private static final String queueName = "xxyh_test";

    public static void main(String[] args) throws IOException, TimeoutException {
        // 创建连接工厂
        ConnectionFactory factory = new ConnectionFactory();
        // 设置RabbitMQ服务主机ip或主机名
        factory.setHost("localhost");
        // 创建一个连接
        Connection connection = factory.newConnection();
        // 创建一个通道
        Channel channel = connection.createChannel();
        // 声明队列
        channel.queueDeclare(queueName, false, false, false, null);
        System.out.println("准备发送消息................................................................");

        // 消息主体
        String message = "hello rabbitmq";
        // 发送消息到队列
        channel.basicPublish("", queueName, null, message.getBytes());
        System.out.println(Thread.currentThread().getName() + "发送消息:" + message);

        // 关闭资源
        channel.close();
        connection.close();
    }
}
Receiving
创建连接、创建通道、声明队列等操作与Producing基本一致。由于推送的消息是异步的,我们以对象的形式提供一个回调,该对象缓冲消息,直到我们准备好使用消息为止。这就是DefaultConsumer子类做的事情。
Consumer consumer = new DefaultConsumer(channel) {
    @Override
    public void handleDelivery(String consumerTag, Envelope envelope, AMQP.BasicProperties properties, byte[] body) throws IOException {
        String message = new String(body, "utf-8");
        System.out.println(Thread.currentThread().getName() + "接收到消息:" + message);
    }
};
接收端:
package com.xxyh.rabbitmq;

import com.rabbitmq.client.*;

import java.io.IOException;
import java.util.concurrent.TimeoutException;

public class Recv {
    private static final String queueName = "xxyh_test";

    public static void main(String[] args) throws IOException, TimeoutException, InterruptedException {
        ConnectionFactory factory = new ConnectionFactory();
        factory.setHost("localhost");
        Connection connection = factory.newConnection();
        final Channel channel = connection.createChannel();
        channel.queueDeclare(queueName, false, false, false, null);
        System.out.println("等待接收消息................................................");

        Consumer consumer = new DefaultConsumer(channel) {
            @Override
            public void handleDelivery(String consumerTag, Envelope envelope, AMQP.BasicProperties properties, byte[] body) throws IOException {
                String message = new String(body, "utf-8");
                System.out.println(Thread.currentThread().getName() + "接收到消息:" + message);
            }
        };
        channel.basicConsume(queueName, true, consumer);
    }
}

 浙公网安备 33010602011771号