线上炼丹,云端训练,基于Google Colab的深度学习环境搭建Bert-vits2
一、写在前面
在AI模型猖獗的时下,Bert-vits2无疑是最火的模型之一,但是由于其训练需要大量的算力,所以很多人都不敢尝试,本文将介绍如何使用Google Colab来搭建深度学习环境,以及如何使用Bert-vits2来进行个人音色训练。
二、Google Colab简介
Colab 是一项托管 Jupyter Notebook 服务,无需设置即可使用,并提供对计算资源(包括 GPU 和 TPU)的免费访问。 Colab 特别适合机器学习、数据科学和教育。
对于机器学习研究人员,Colab 可以免费提供 GPU 和 TPU。 无论你是 AI 研究人员、学生还是开发人员,Colab 都可以帮助你更轻松地完成工作。
在A卡与N卡价格飞涨的今天,Google Colab无疑是最好的选择。
可以看到,Google Colab提供了免费的GPU和TPU,这对于我们来说是非常有利的。
三、开始动手
3.1 登录Google Colab
首先,我们需要一个Google账号,如果没有的话,可以去Google注册一个。
然后,我们打开Google Colab,点击右上角的登录按钮,使用我们的Google账号登录。
3.2 创建一个Notebook
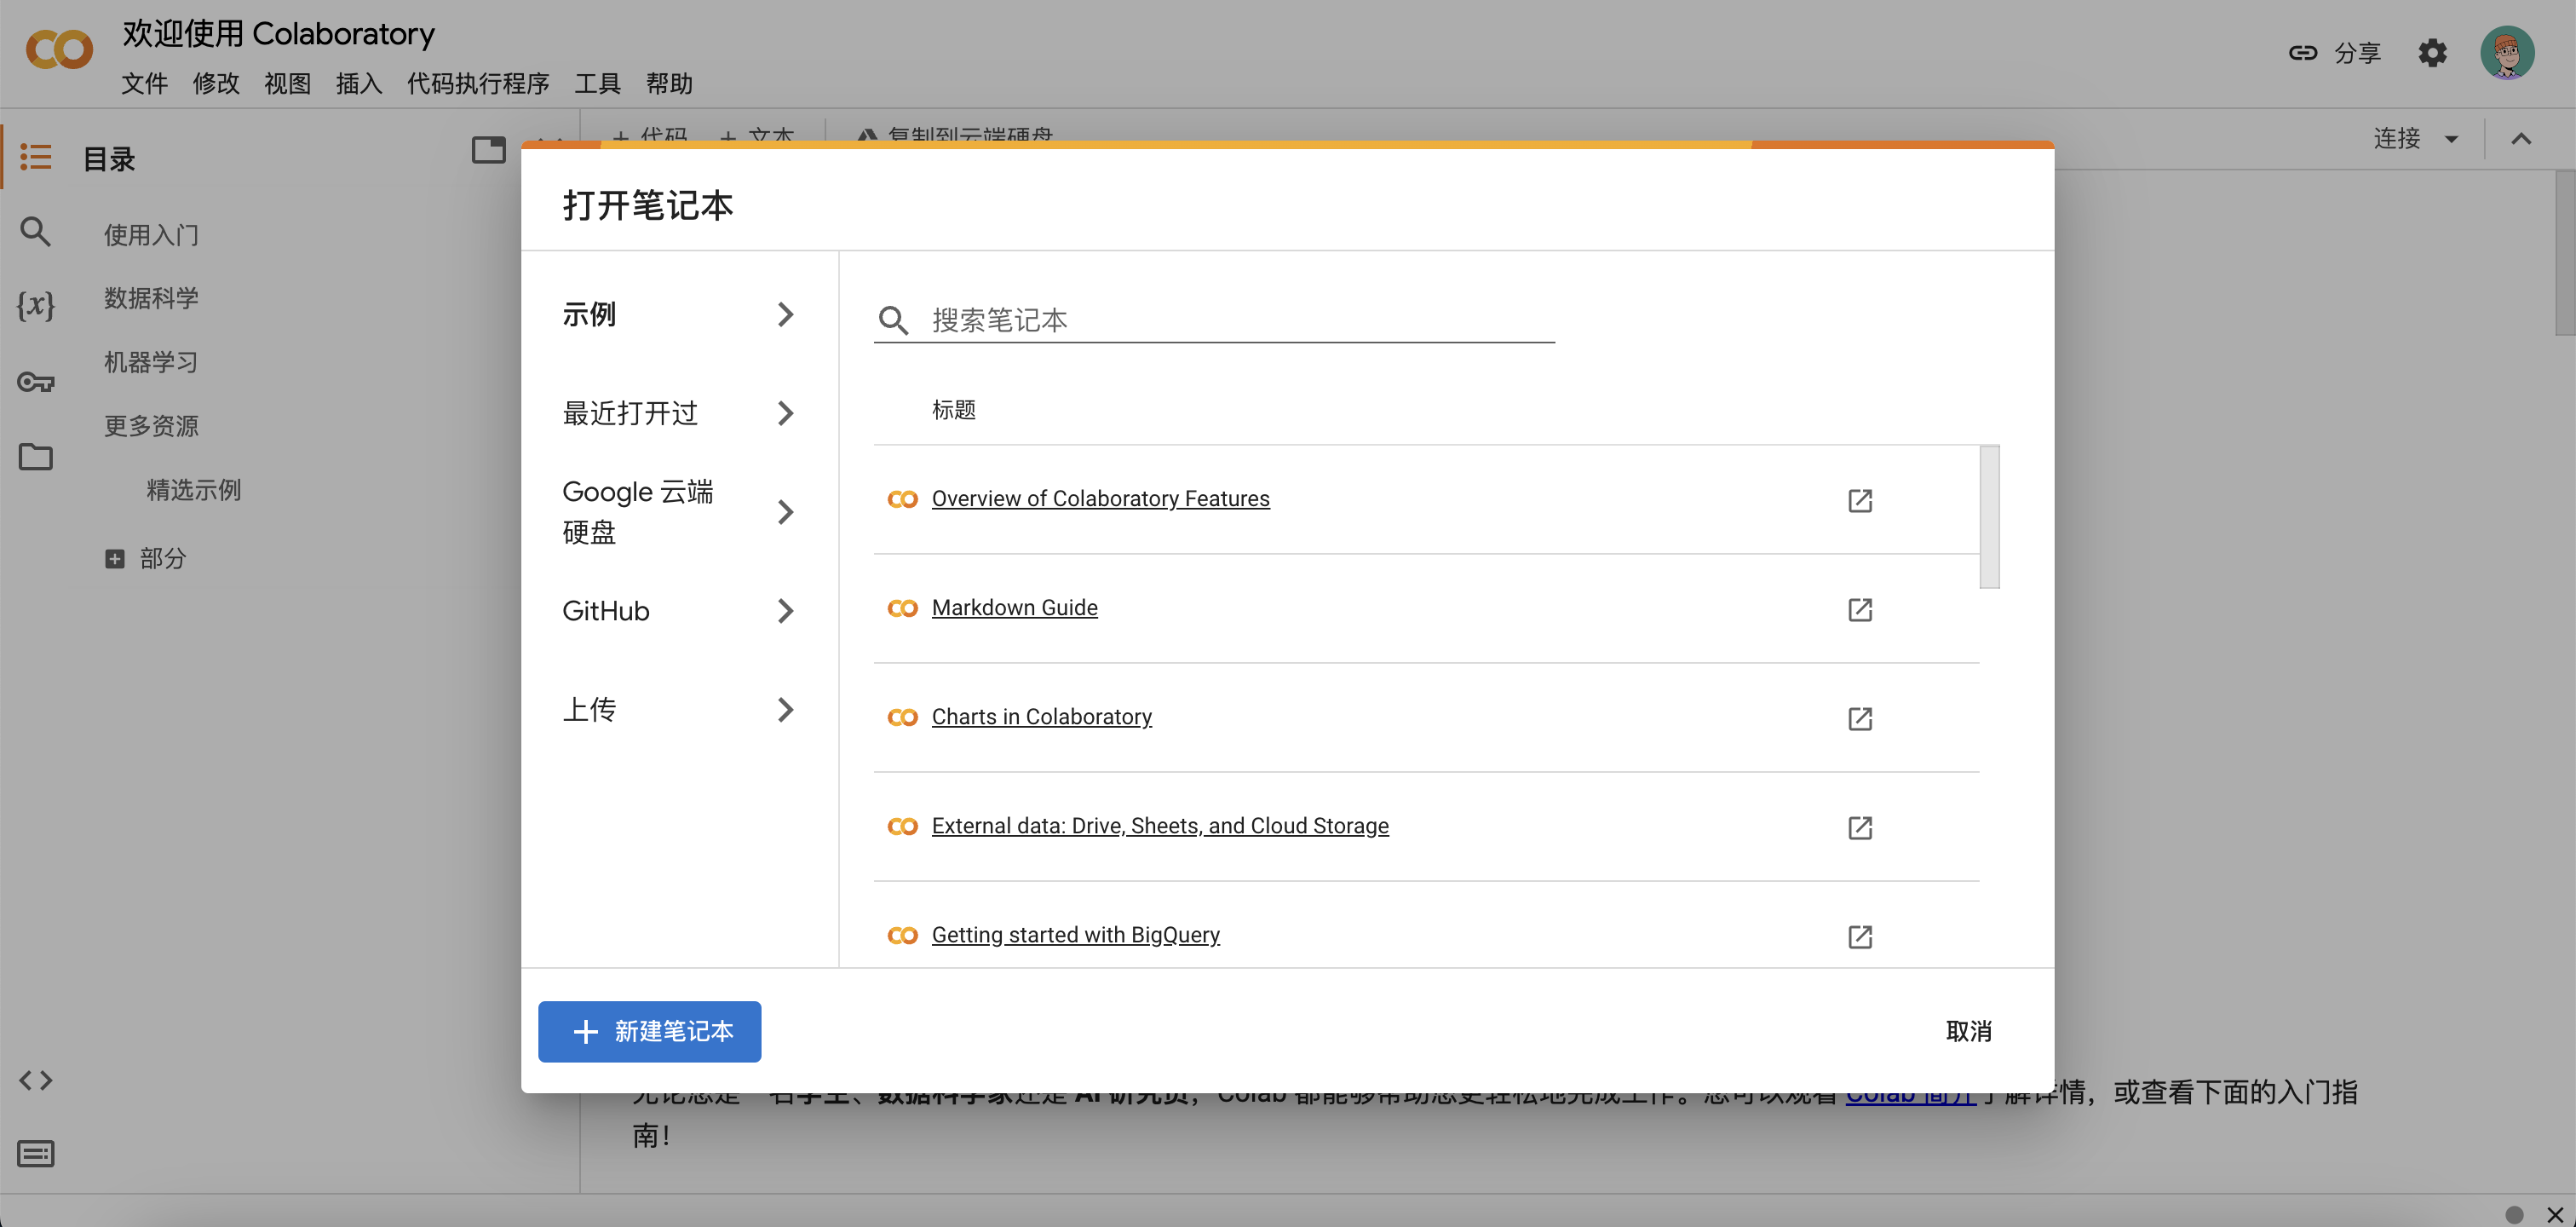
登录成功后,我们点击左下角的新建笔记本按钮,创建一个新的笔记本。
3.3 连接python后端,选择GPU
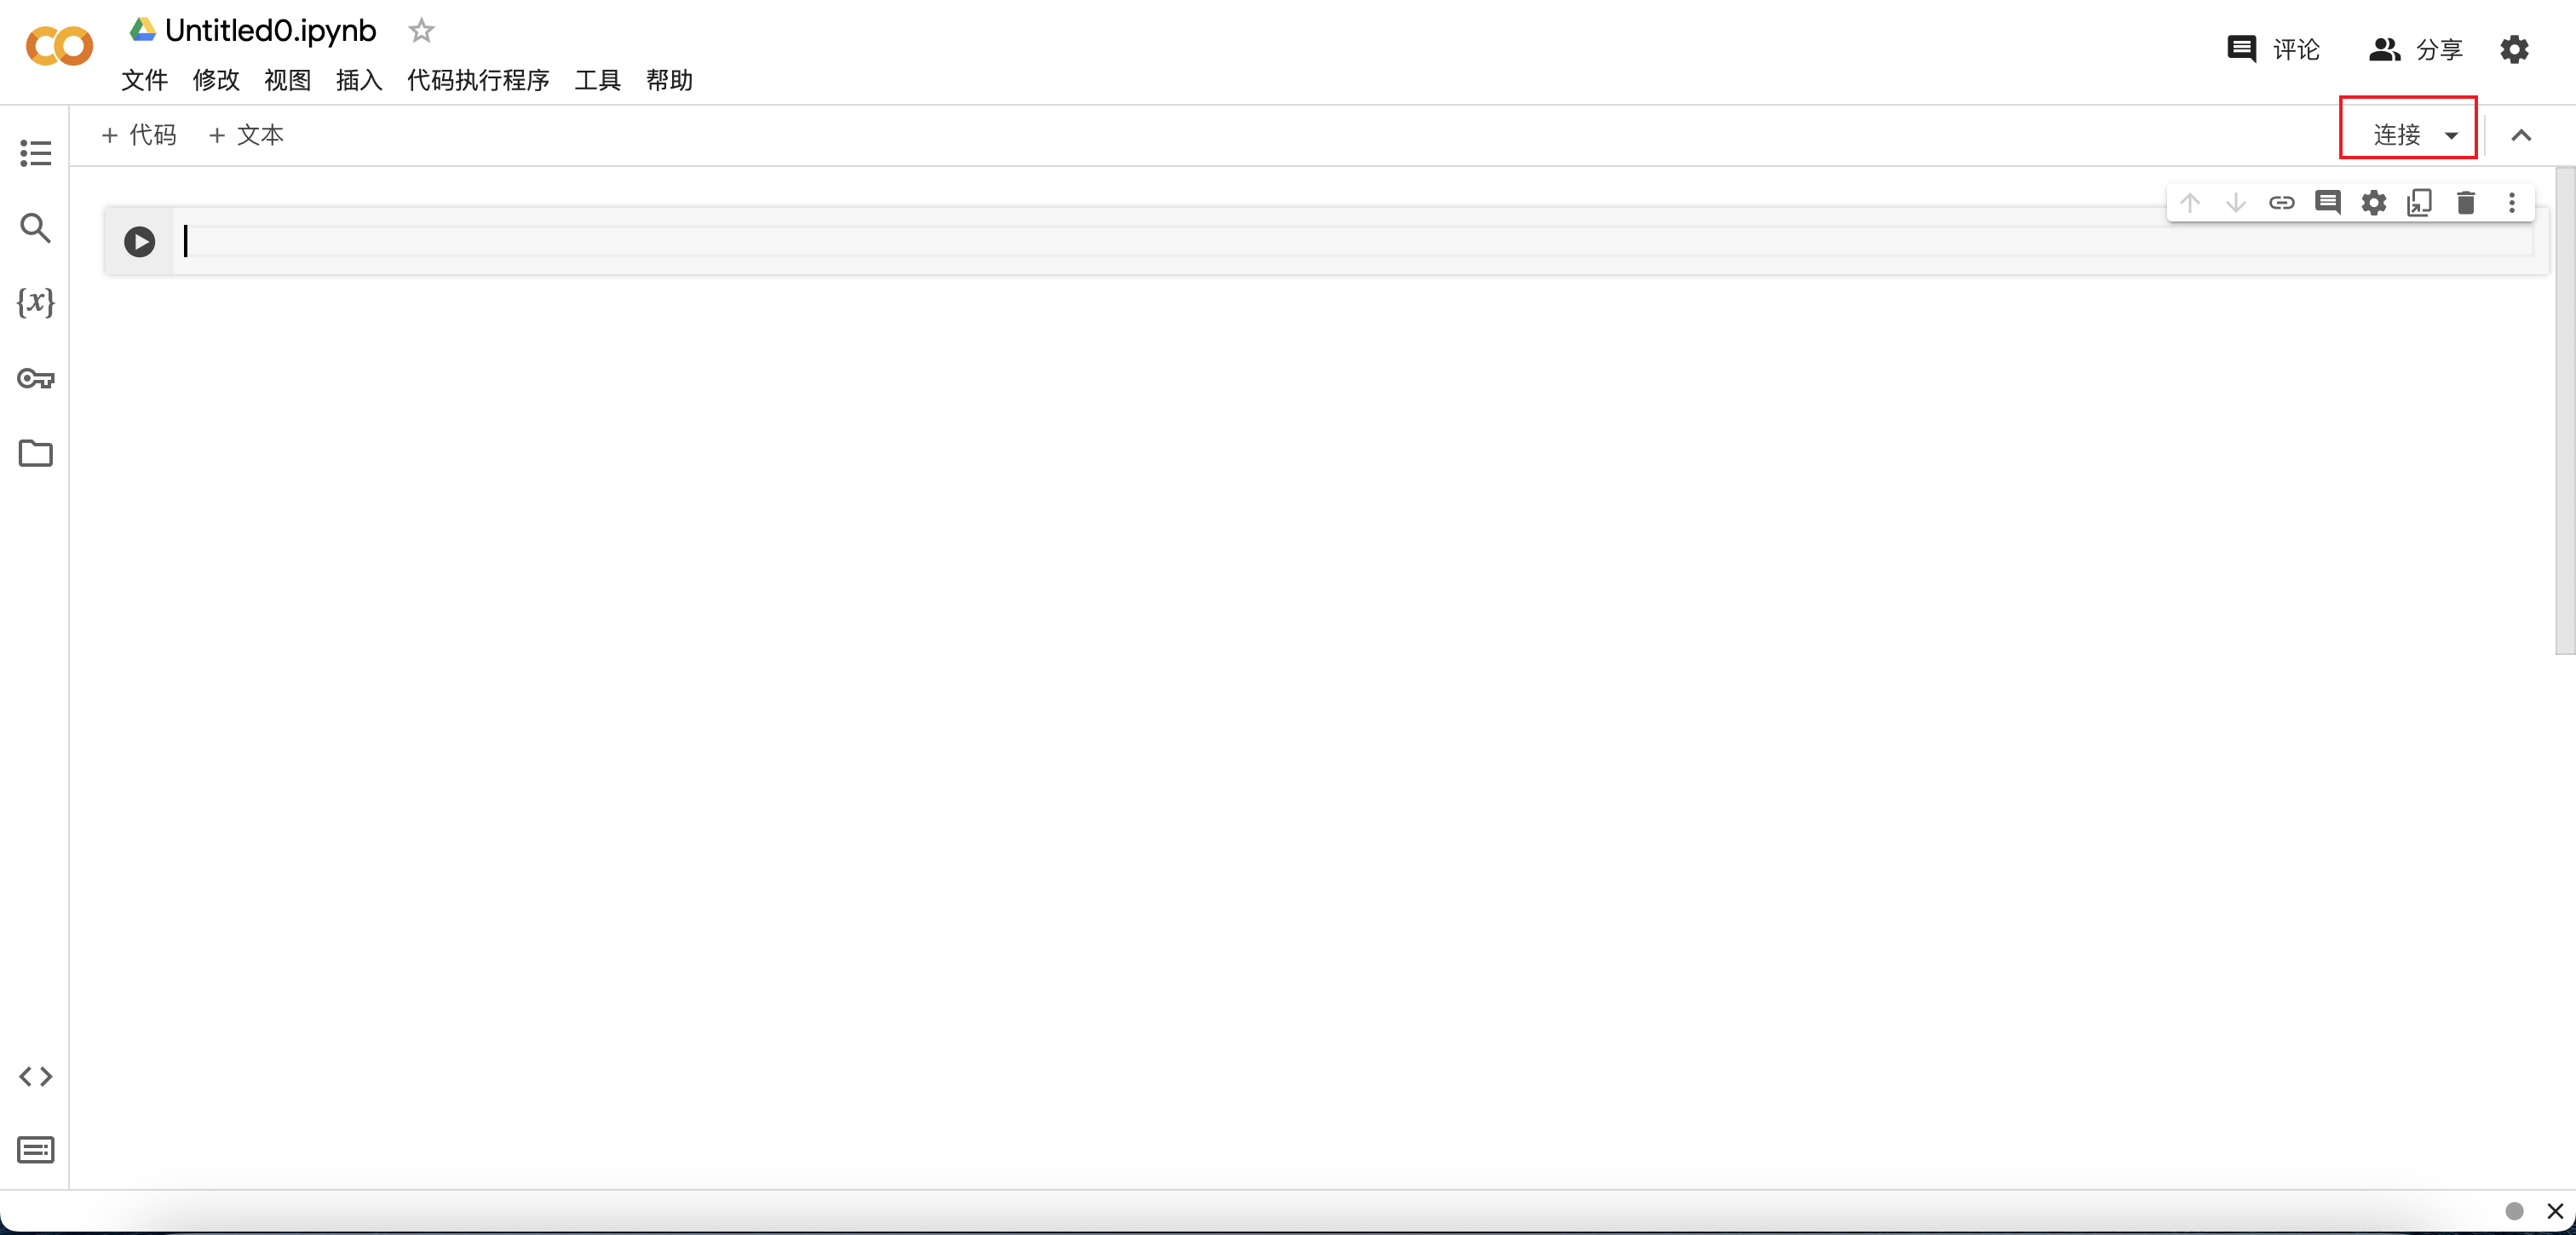
点击屏幕右上角连接按钮,连接到python后端。
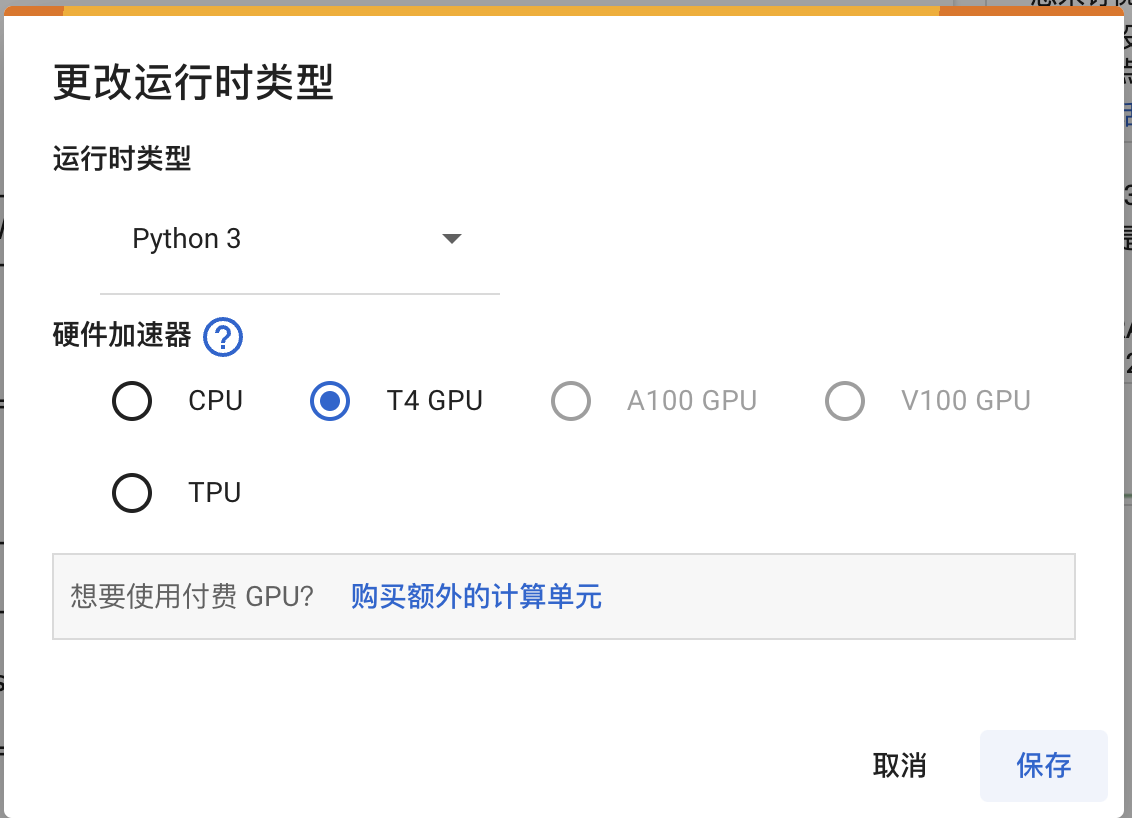
然后,点击运行时->更改运行时类型,选择GPU,点击保存。

3.4 查看GPU信息
#@title 查看显卡
!nvidia-smi
运行程序返回如下信息,说明我们已经成功连接到GPU后端。
Tue Dec 26 03:16:26 2023
+---------------------------------------------------------------------------------------+
| NVIDIA-SMI 535.104.05             Driver Version: 535.104.05   CUDA Version: 12.2     |
|-----------------------------------------+----------------------+----------------------+
| GPU  Name                 Persistence-M | Bus-Id        Disp.A | Volatile Uncorr. ECC |
| Fan  Temp   Perf          Pwr:Usage/Cap |         Memory-Usage | GPU-Util  Compute M. |
|                                         |                      |               MIG M. |
|=========================================+======================+======================|
|   0  Tesla T4                       Off | 00000000:00:04.0 Off |                    0 |
| N/A   34C    P8               9W /  70W |      0MiB / 15360MiB |      0%      Default |
|                                         |                      |                  N/A |
+-----------------------------------------+----------------------+----------------------+

+---------------------------------------------------------------------------------------+
| Processes:                                                                            |
|  GPU   GI   CI        PID   Type   Process name                            GPU Memory |
|        ID   ID                                                             Usage      |
|=======================================================================================|
|  No running processes found                                                           |
+---------------------------------------------------------------------------------------+
3.5 克隆代码仓库
#@title 克隆代码仓库
!git clone https://github.com/wxs0088/Bert-vits2-V2.2.git
运行程序返回如下信息,说明已经成功克隆代码仓库。
Cloning into 'Bert-vits2-V2.2'...
remote: Enumerating objects: 215, done.
remote: Counting objects: 100% (215/215), done.
remote: Compressing objects: 100% (140/140), done.
remote: Total 215 (delta 64), reused 215 (delta 64), pack-reused 0
Receiving objects: 100% (215/215), 5.01 MiB | 14.46 MiB/s, done.
Resolving deltas: 100% (64/64), done.
3.6 安装依赖
#@title 安装所需要的依赖
%cd /content/Bert-vits2-V2.2
!pip install wavfile
!pip install git+https://github.com/openai/whisper.git
!pip install zhconv==1.4.3
!pip install zhtools==0.3.1
!pip install langconv
!pip install -r requirements.txt
安装依赖需要一定的时间,耐心等待。
3.7 下载使用的模型
#@title 下载使用的模型
!wget -P emotional/clap-htsat-fused/ https://huggingface.co/laion/clap-htsat-fused/resolve/main/pytorch_model.bin
!wget -P emotional/wav2vec2-large-robust-12-ft-emotion-msp-dim/ https://huggingface.co/audeering/wav2vec2-large-robust-12-ft-emotion-msp-dim/resolve/main/pytorch_model.bin
!wget -P bert/chinese-roberta-wwm-ext-large/ https://huggingface.co/hfl/chinese-roberta-wwm-ext-large/resolve/main/pytorch_model.bin
!wget -P bert/bert-base-japanese-v3/ https://huggingface.co/cl-tohoku/bert-base-japanese-v3/resolve/main/pytorch_model.bin
!wget -P bert/deberta-v3-large/ https://huggingface.co/microsoft/deberta-v3-large/resolve/main/pytorch_model.bin
!wget -P bert/deberta-v3-large/ https://huggingface.co/microsoft/deberta-v3-large/resolve/main/pytorch_model.generator.bin
!wget -P bert/deberta-v2-large-japanese/ https://huggingface.co/ku-nlp/deberta-v2-large-japanese/resolve/main/pytorch_model.bin
3.8 下载底模文件
#@title 下载底模文件
!wget -P Data/lilith/models/ https://huggingface.co/OedoSoldier/Bert-VITS2-2.2-CLAP/resolve/main/DUR_0.pth
!wget -P Data/lilith/models/ https://huggingface.co/OedoSoldier/Bert-VITS2-2.2-CLAP/resolve/main/D_0.pth
!wget -P Data/lilith/models/ https://huggingface.co/OedoSoldier/Bert-VITS2-2.2-CLAP/resolve/main/G_0.pth
3.9 准备音频文件
音频需要自己录一段声音,10分钟以上,20分钟以下即可。尽可能的保持音频的清晰度,不要有杂音。
音频使用Ultimate Vocal Remover工具去掉背景杂音,使其为一段纯音频的干声。如何使用请自行百度。
将音频文件放入Data/lilith/文件夹下并删除目录下的esd.list文件。
/content/Bert-vits2-V2.2/Data
└── lilith
    ├── baiyansong.wav
    ├── config.json
    ├── configs
    │   └── config.json
    └── models
        ├── D_0.pth
        ├── DUR_0.pth
        └── G_0.pth
3.10 对音频进行预处理(切分、转写、标注)
#@title 对音频进行预处理(切分、转写、标注)
!python voice_processing.py ./Data/lilith/baiyansong.wav ./Data/lilith/esd.list
参数说明:
./Data/lilith/baiyansong.wav:音频文件路径,请根据自己的音频文件名称进行修改./Data/lilith/esd.list:标注文件保存路径
若运行程序返回如下错误信息。
AssertionError: libcuda.so cannot found!
则需要运行。
!echo /usr/lib64-nvidia/ >/etc/ld.so.conf.d/libcuda.conf; ldconfig
运行程序返回音频预处理完成!,说明已经成功对音频进行预处理。
3.11 对标注文件进行筛选
音频预处理完成后要对标注文件以及音频文件进行筛选,删除掉标注错误的音频以及标注错误的标注。这一步需要人工进行,所以需要打开esd.list文件,对标注文件进行筛选。
3.12 重采样
#@title 重采样
!python3 resample.py --sr 44100 --in_dir ./Data/lilith/raw/ --out_dir ./Data/lilith/wavs/
参数说明:
--sr:采样率,建议使用44100--in_dir:输入文件夹,即音频文件所在的文件夹--out_dir:输出文件夹,即重采样后的音频文件所在的文件夹
运行程序返回如下信息,说明已经成功对音频进行重采样。
473it [00:02, 157.71it/s]
音频重采样完毕!
重采样后的音频文件保存在./Data/lilith/wavs/文件夹下。
3.13 预处理标签文件
#@title 预处理标签文件
!python3 preprocess_text.py --transcription-path ./Data/lilith/esd.list --train-path ./Data/lilith/train.list --val-path ./Data/lilith/val.list --config-path ./Data/lilith/configs/config.json
参数说明:
--transcription-path:标注文件路径--train-path:训练集标注文件保存路径--val-path:验证集标注文件保存路径--config-path:配置文件路径
运行程序返回如下信息,说明已经成功对标注文件进行预处理。
Prefix dict has been built successfully.
100% 473/473 [00:01<00:00, 332.77it/s]
总重复音频数:0,总未找到的音频数:0
训练集和验证集生成完成!
预处理标签文件后,会在./Data/lilith/文件夹下生成train.list和val.list文件。分别是训练集和验证集的标注文件。
3.14 生成 BERT 特征文件
#@title 生成 BERT 特征文件
!python3 bert_gen.py --config-path ./Data/lilith/configs/config.json
参数说明:
--config-path:配置文件路径
运行程序返回如下信息,说明已经成功生成 BERT 特征文件。
100% 473/473 [00:28<00:00, 16.79it/s]
bert生成完毕!, 共有473个bert.pt生成!
由于我的音频文件被我分成了473个,所以生成了473个bert.pt文件。在./Data/lilith/wavs/文件夹下。
3.15 生成 clap 特征文件
#@title 生成 clap 特征文件
!python3 clap_gen.py --config-path ./Data/lilith/configs/config.json
参数说明:
--config-path:配置文件路径
运行程序返回如下信息,说明已经成功生成 clap 特征文件。
100% 473/473 [06:39<00:00,  1.18it/s]
clap生成完毕!, 共有473个emo.pt生成!
clap文件生成时间较长,需要耐心等待。
数量同样是473个,也就是说,每个bert.pt文件对应一个clap.pt文件。在./Data/lilith/wavs/文件夹下。
3.16 开始训练
#@title 开始训练
!python3 train_ms.py
训练轮次默认为1000轮,可以根据自己的需求进行修改。配置文件路径为./Data/lilith/configs/config.json。
正常情况下,训练1000轮可以看下效果,如果效果不好,可以继续训练。
模型会保存在./Data/lilith/models/文件夹下。
3.17 开始推理
在开始推理之前,我们还需要修改一些配置文件。在项目根目录下的config.yml文件中,我们需要修改model: "models/G_100.pth"为自己训练好后的模型文件名。
#@title 开始推理
!python3 webui.py
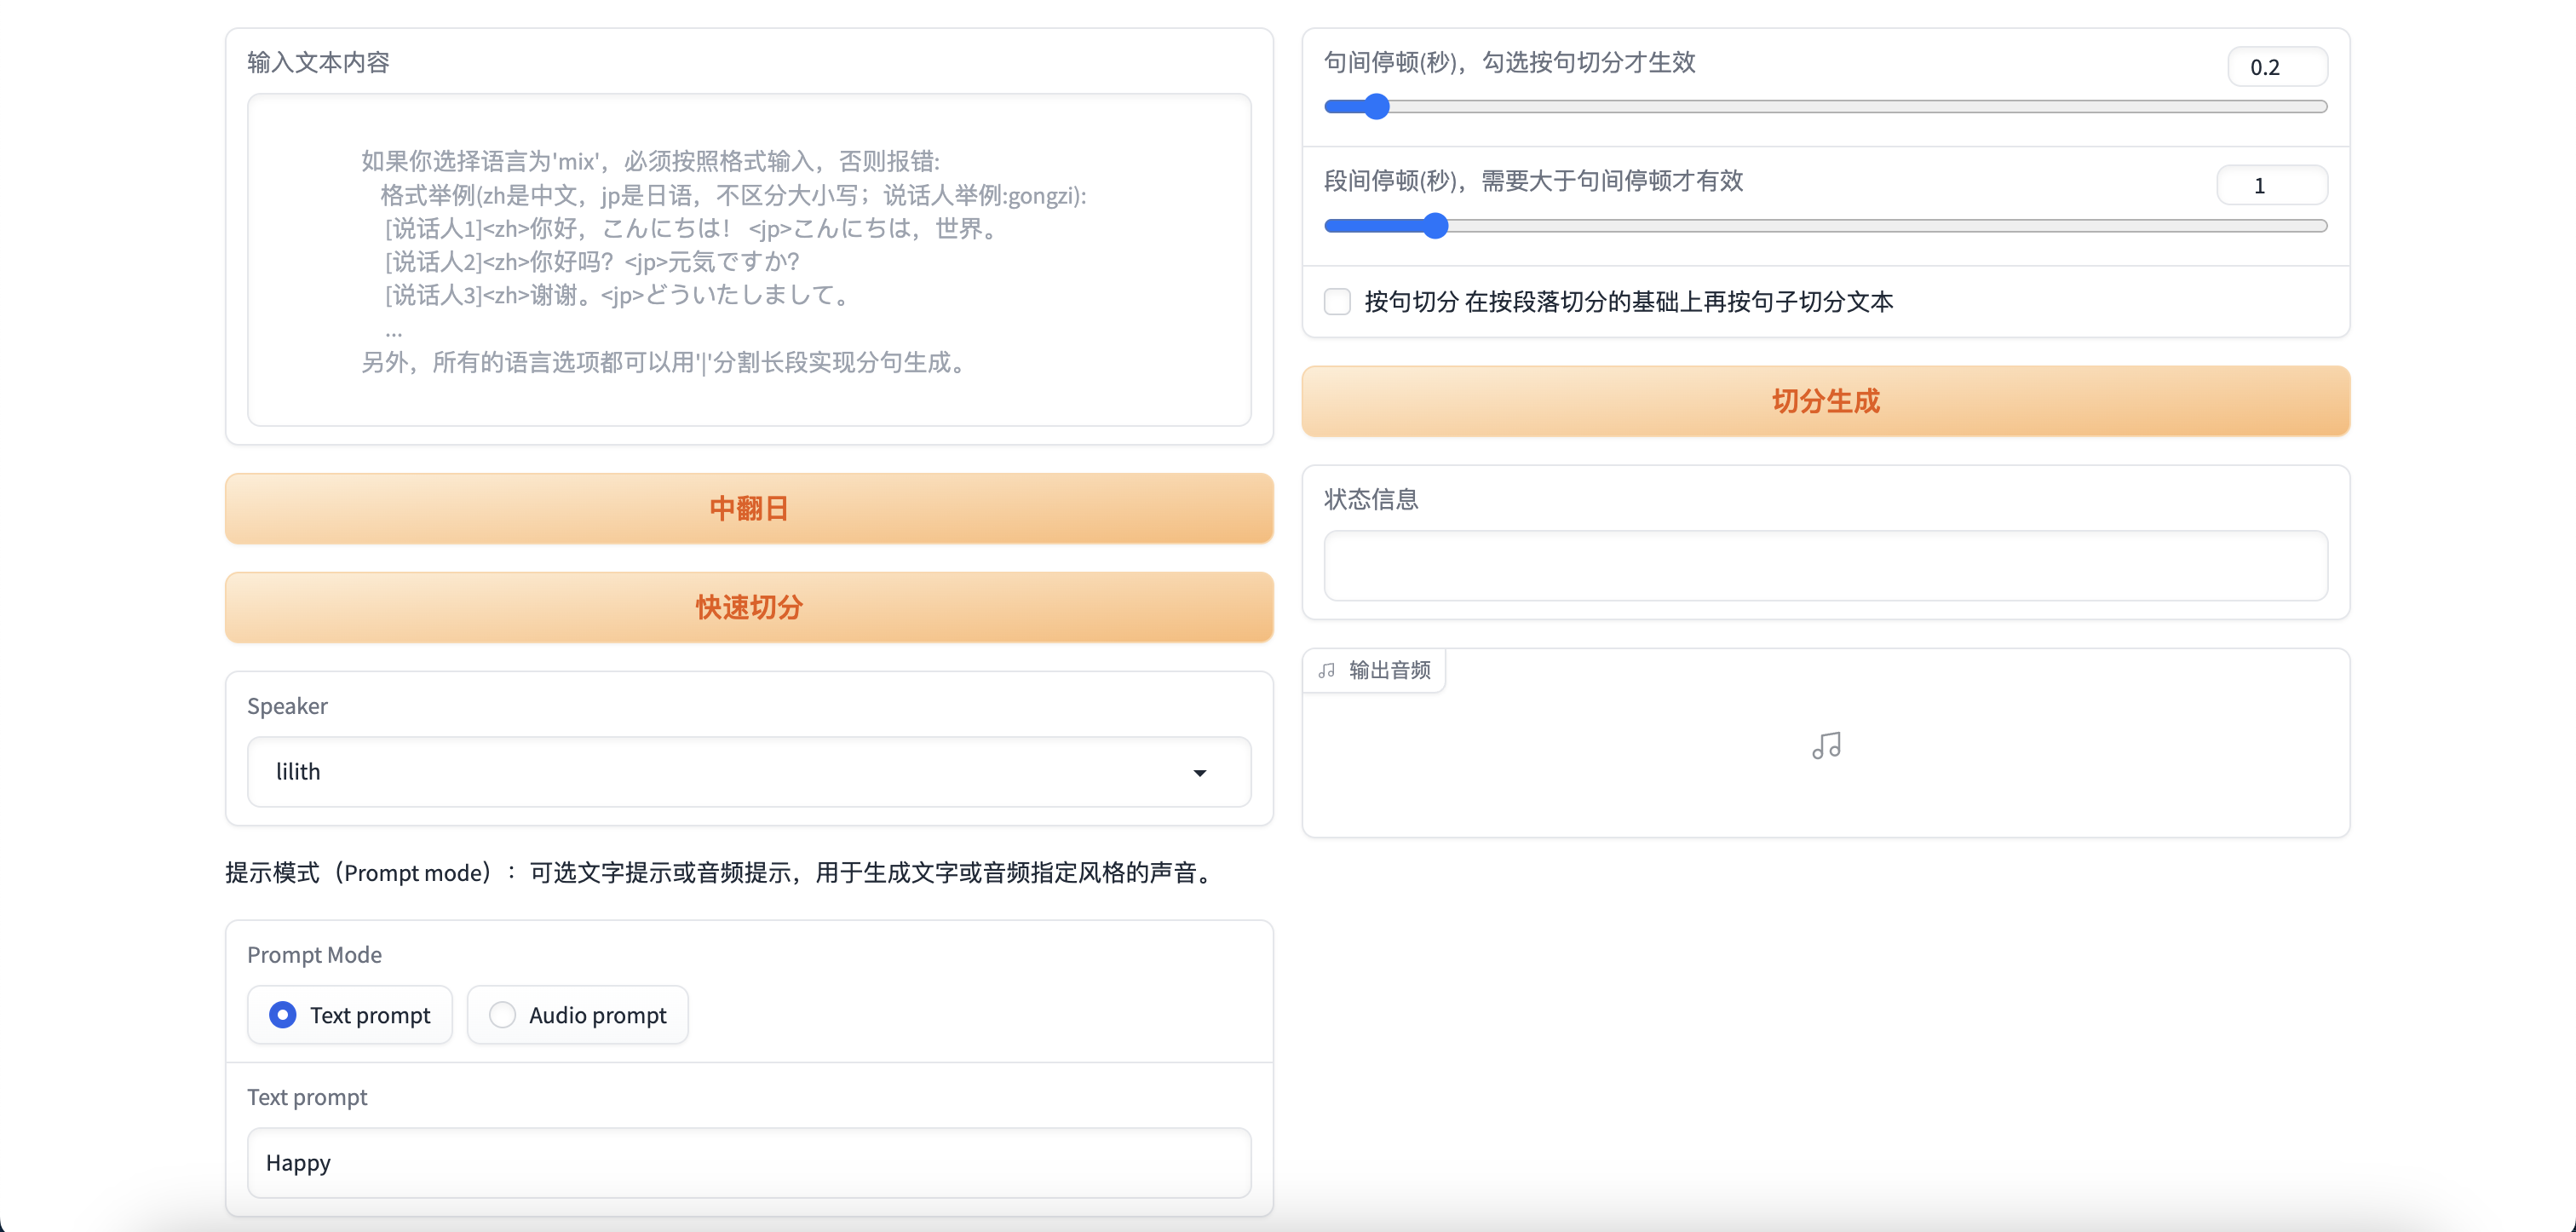
这里 Google Colab 也是给我们提供了一个可以访问的外网地址,我们可以直接访问这个地址,进行推理。
运行程序返回如下信息,说明已经成功启动推理服务。
| numexpr.utils | INFO | NumExpr defaulting to 2 threads.
/usr/local/lib/python3.10/dist-packages/torch/nn/utils/weight_norm.py:30: UserWarning: torch.nn.utils.weight_norm is deprecated in favor of torch.nn.utils.parametrizations.weight_norm.
  warnings.warn("torch.nn.utils.weight_norm is deprecated in favor of torch.nn.utils.parametrizations.weight_norm.")
| utils | INFO | Loaded checkpoint 'Data/lilith/models/G_200.pth' (iteration 3)
推理页面已开启!
Running on local URL:  http://127.0.0.1:7860
Running on public URL: https://266849db7a22927777.gradio.live

This share link expires in 72 hours. For free permanent hosting and GPU upgrades, run `gradio deploy` from Terminal to deploy to Spaces (https://huggingface.co/spaces)
可以看到,我们所挂载的模型为Data/lilith/models/G_200.pth,这是我们训练好的模型。直接访问Running on public URL: https://266849db7a22927777.gradio.live即可进行推理。
首次生成需要连接模型,速度会比较慢,之后都是秒生成。
四、总结
使用Google Colab搭建深度学习环境,可以说是非常方便了,不需要自己购买昂贵的显卡,也不需要自己搭建深度学习环境,只需要一个Google账号,就可以使用Google Colab来搭建深度学习环境,而且还是免费的。
最后奉上Google Colab笔记,与各位共勉。

 浙公网安备 33010602011771号