

Python进阶5---StringIO和BytesIO、路径操作、OS模块、shutil模块
StringIO
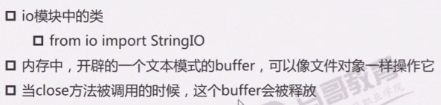
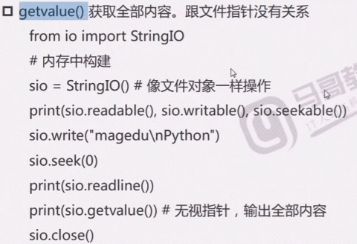
StringIO操作

BytesIO
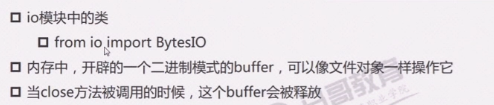
BytesIO操作

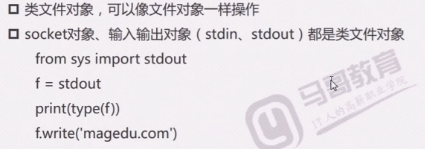
file-like对象
路径操作
路径操作模块
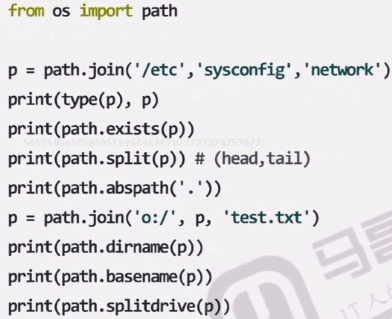
3.4版本之前:os.path模块
3.4版本开始
建议使用pathlib模块,提供Path对象来操作。包括目录和文件
pathlib模块
from pathlib import Path
目录操作
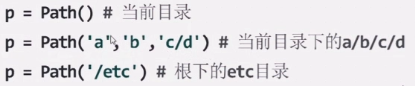
初始化
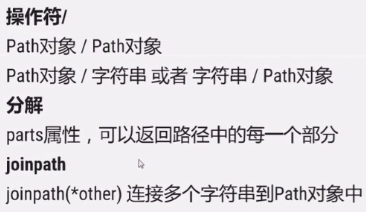
路径拼接和分解
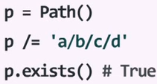
#在windows下的Pycharm中运行
p = Path()
print(type(p))    #<class 'pathlib.WindowsPath'>
p = p / 'a'
print(p)               #a
p1 = 'b' / p
print(p1)              #b\a
p2 = Path('c')
p3 = p2 / p1
print(p3)              #c\b\a
print(p3.parts)        #('c', 'b', 'a')
print(p3.joinpath('etc','init.d',Path('httpd')))    #c\b\a\etc\init.d\httpd
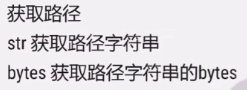
p = Path('/etc')
print(str(p),bytes(p))

p = Path('/a/b/c/d')
print(p.parent.parent)
for x in p.parents:
    print(x)
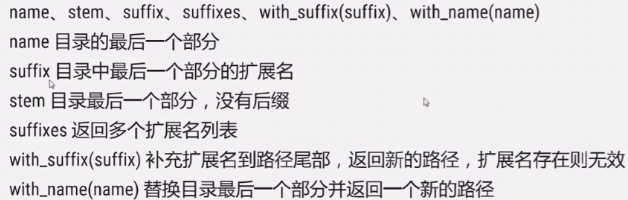
#四个属性,两个方法
p = Path('E:\learnshare\ArticleSpider\e.xex.txt')
print(p.name)    #e.xex.txt
print(p.stem)   #e.xex
print(p.suffix)  #.txt
print(p.suffixes) #['.xex','.txt']
print(p.with_name('c.y'))#E:\learnshare\ArticleSpider\c.y
print(p.with_suffix('.xxyy'))#E:\learnshare\ArticleSpider\e.xex.xxyy


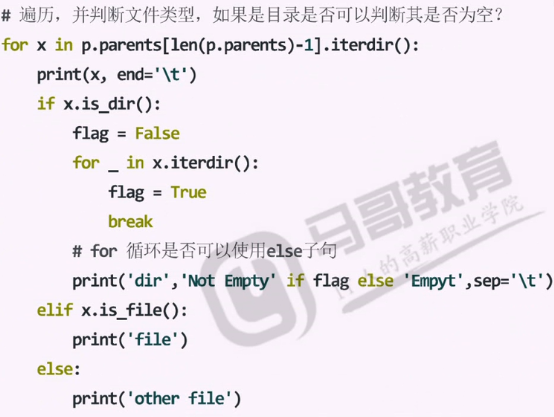
调用iterdir()方法后返回一个生成器对象

通配符
glob(pattern)通配给定的模式
rglob(pattern)通配给定的模式,递归目录
from pathlib import Path
print(1,list(Path().glob('test*')))#返回当前目录对象下的test开头的文件
print(2,list(Path().glob('*/test*')))#返回当前目录的下一级目录以test开头的文件
print(3,list(Path().glob('**/test*')))#递归当前目录以及其下所有目录,返回以test开头的文件
print(4,list(Path().rglob('test*')))#同上一样
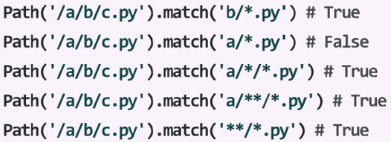
匹配
match(pattern)
模式匹配,成功返回True
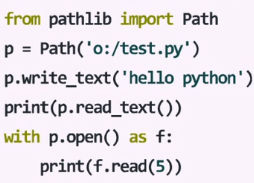
文件操作


OS模块
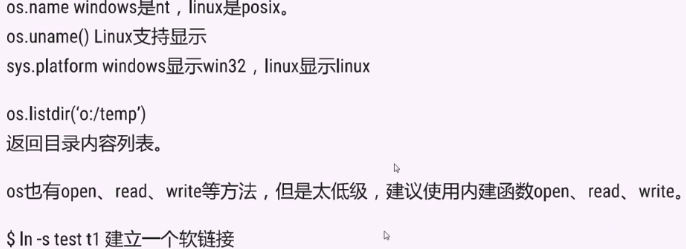

fd表示文件描述符


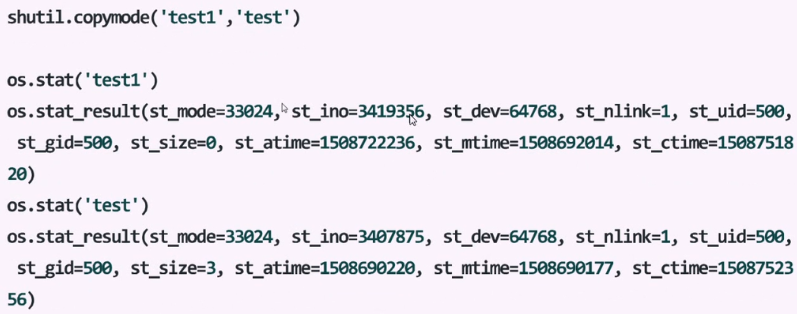
shutil模块
到目前为止
文件拷贝:使用打开2个文件对象,源文件读取内容,写入目标文件中来完成拷贝过程。但是这样会丢失stat数据信息(权限等),因为根本就没有复制过去。
目录怎么办呢?
Python提供了一个方便的库shutil(高级文件操作)
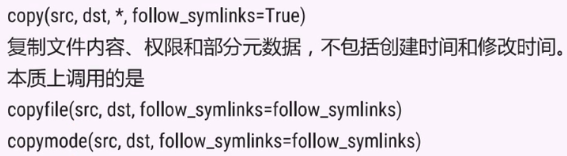
Copy复制

import shutil

with open('test1.txt','r+') as f1:
    f1.write('abcd\n1234')
    f1.flush()
    with open('test2.txt','w+')as f2:
        shutil.copyfileobj(f1,f2)
#注意:由于指针的缘故,可参见源码如下。上述代码中abcd\n1234内容确实会写入到test1.txt,但是并没有复制到test2.txt中。
#copyfileobj源码
def copyfileobj(fsrc, fdst, length=16*1024):
    """copy data from file-like object fsrc to file-like object fdst"""
    while 1:
        buf = fsrc.read(length)
        if not buf:
            break
        fdst.write(buf)


#copytree源码,这里主要了解一下ignore函数的使用技巧,过滤掉不需要拷贝的!
def copytree(src, dst, symlinks=False, ignore=None, copy_function=copy2,
    names = os.listdir(src)
    if ignore is not None:
        ignored_names = ignore(src, names)
    else:
        ignored_names = set()

    os.makedirs(dst)
    errors = []
    for name in names:
        if name in ignored_names:
            continue
        srcname = os.path.join(src, name)
        dstname = os.path.join(dst, name)
     ...return dst
def fn(src,file_names):
    filter(lambda x:x.startwith('t'),file_names)
#上面的语句等同于下面的语句
fn = lambda src,names:filter(lambda x:x.startwith('t').file_names)
#filter(function, iterable)
#注意: Pyhton2.7 返回列表,Python3.x 返回迭代器对象
#假设D:/temp下有a,b目录
def ignore(src,names):
    ig = filter(lambda x:x.startwith('a'),names) #忽略a
    return set(ig)

shutil.copytree('o:/temp','o:/tt/o',ignore=ignore)
rm删除

shutil.rmtree('D:/tmp') #类似rm -rf
move移动
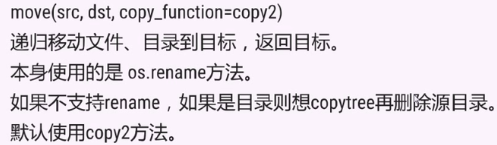
#在同一盘符下,其实质上就是rename,跨盘符的话才是真正的移动
os.rename('D:/temp/x.txt','D:/t.txt')
os.rename('test3','/tmp/py/test')

shutil对压缩包的处理是调用ZipFile和ZipFile两个模块来处理的
参考:https://www.cnblogs.com/zjltt/p/6957663.html
csv文件
csv文件简介(文本格式,半结构化数据)

手动生成CSV文件
from pathlib import Path
p = Path('F:\\百度网盘下载资料\\Python全栈开发\\python进阶1\\19Python的文件IO(三)(6)\\test.csv')
parent = p.parent
if not parent.exists():
    parent.mkdir(parents=True)
csv_body = '''\
id,name,age,comment
1,zs,18,"I'm 18"
2,ls,20,"This is a testing"
3,ww,232,"中

国"
'''
p.write_text(csv_body)
csv模块

from pathlib import Path
import csv
p = Path('F:\\test.csv')
with open(str(p)) as f:
    reader = csv.reader(f)
    print(next(reader))

row = [4,'cty',22,'tom']
rows = [
    (1,'2',3,'55'),
    (11,'123',22,"\"123123")
]
with open(str(p),'a+') as f:
    writer = csv.writer(f)
    writer.writerow(row)
    writer.writerows(rows)
ini文件
作为配置文件,ini文件格式很流行
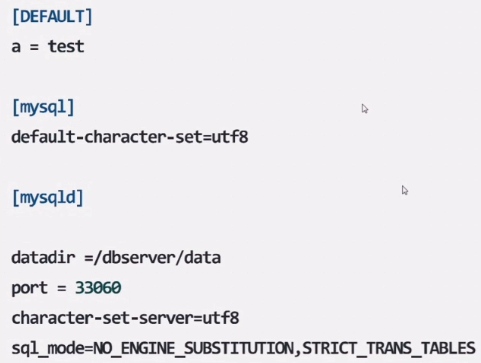
中括号里面的部分称为section。
每一个section内,都是key=value形成的键值对,key称为option选项。
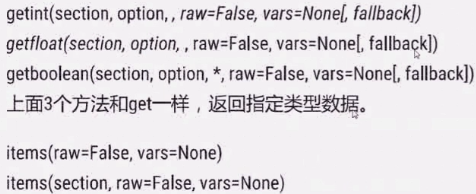
configparser


from configparser import ConfigParser

cfg = ConfigParser()
cfg.read('mysql.ini')
print(cfg.sections())
print(cfg.has_section('deploy'))
print(cfg.items('deploy'))

for k,v in cfg.items('deploy'):
    print(k,type(v))

tmp = cfg.get('deploy','a')
print(tmp,type(tmp))
print(cfg.get('deploy','a',fallback='python'))

print(cfg.getint('mysql','aa'))

if cfg.has_section('mysql'):
    cfg.remove_section('mysql')

cfg.add_section('cy')
cfg.set('cy','ly','5')
cfg.set('cy','ggz','2')

# 上面的删除和新增功能需要重新写入文件才会生效
with open('mysql.ini','w') as f:
    cfg.write(f)

print(cfg.getint('cy','ggz'))
print(cfg.remove_option('cy','ly'))

with open('mysql.ini','w') as f:
    cfg.write(f)
注意:配置文件一般加载后常驻于内存中,且读取操作远远多于写入操作。
做一枚奔跑的老少年!

 浙公网安备 33010602011771号