服务器基本配置(ubuntu)
服务器基本配置(ubuntu)
学习目标:
- 修改初始服务器名字(ubuntu 16.04 )
- 修改初始服务器名字(ubuntu 18.04 )
- ubuntu换源
- 更改默认python版本
- 安装软件出现的问题
- 阿里服务器控制台创建快照
修改初始服务器名字(ubuntu 16.04 ):
查看当前主机名:
hostname
修改主机名:
-
vi/vim /etc/hostname -
qw保存退出 -
vi/vim /etc/hosts -
# 在第二行添加 127.0.1.1 ubuntu(ubuntu为你刚才设置的主机名) -
sudo reboot ---->重启系统
修改初始服务器名字(ubuntu 18.04 ):
-
vi/vim /etc/cloud/cloud.cfg -
找到
preserve_hostname: false将其修改为preserve_hostname: true -
vi/vim /etc/hostname -
qw保存退出 -
vi/vim /etc/hosts -
# 在第二行添加 127.0.1.1 ubuntu(ubuntu为你刚才设置的主机名) -
sudo reboot ---->重启系统
ubuntu换源:
为什么换源,换源的好处:
- 默认的软件更新源是国外的,在国内使用速度很慢,需要更换成国内的源,这样才能正常安装和更新软件。
服务器换源(ubuntu 16.04 ):
-
sudo vi/vim/gedit /etc/apt/sources.list -
#阿里源 deb http://mirrors.aliyun.com/ubuntu/ xenial main deb-src http://mirrors.aliyun.com/ubuntu/ xenial main deb http://mirrors.aliyun.com/ubuntu/ xenial-updates main deb-src http://mirrors.aliyun.com/ubuntu/ xenial-updates main deb http://mirrors.aliyun.com/ubuntu/ xenial universe deb-src http://mirrors.aliyun.com/ubuntu/ xenial universe deb http://mirrors.aliyun.com/ubuntu/ xenial-updates universe deb-src http://mirrors.aliyun.com/ubuntu/ xenial-updates universe deb http://mirrors.aliyun.com/ubuntu/ xenial-security main deb-src http://mirrors.aliyun.com/ubuntu/ xenial-security main deb http://mirrors.aliyun.com/ubuntu/ xenial-security universe deb-src http://mirrors.aliyun.com/ubuntu/ xenial-security universe -
更新:
- sudo apt-get update
- sudo apt-get upgrade
-
ubuntu16.04以上版本类似于此,网上都有不在赘述。
更改默认python版本:
修改软链接实现
-
进入/usr/bin目录,如不进入目录,以后每次对文件操作要写绝对路径
cd /usr/bin -
查看该目录下与python有关的项
ls | grep python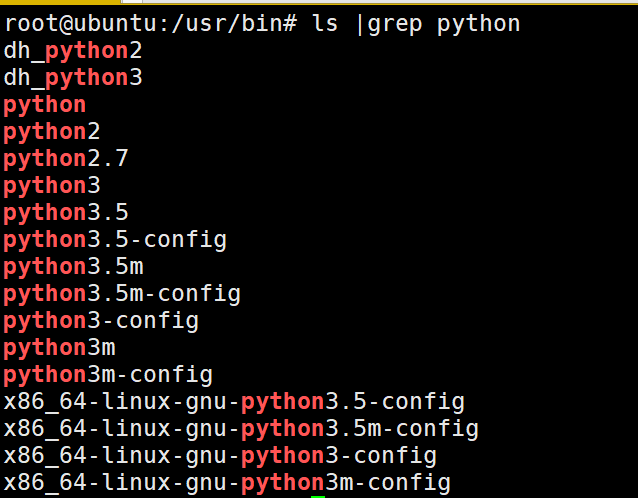
-
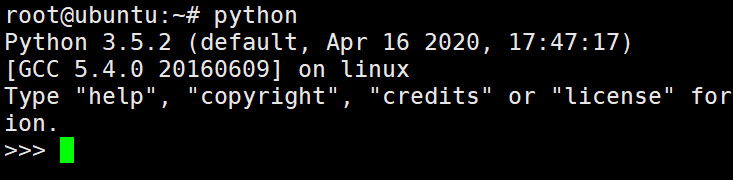
查看python详细信息
ls -l python
#软连接我修改了,未修改的话后面是python2.7
-
删除原软链接、建立新的指向python3的软链接
sudo rm python sudo ln -s python3.5 python -
最后结果:
安装软件出现的问题:
Ubuntu16.04下,遇到Unmet dependencies. Try 'apt-get -f install' with no packages的解决办法:
sudo apt-get -f install
按照相关提示进行解决。
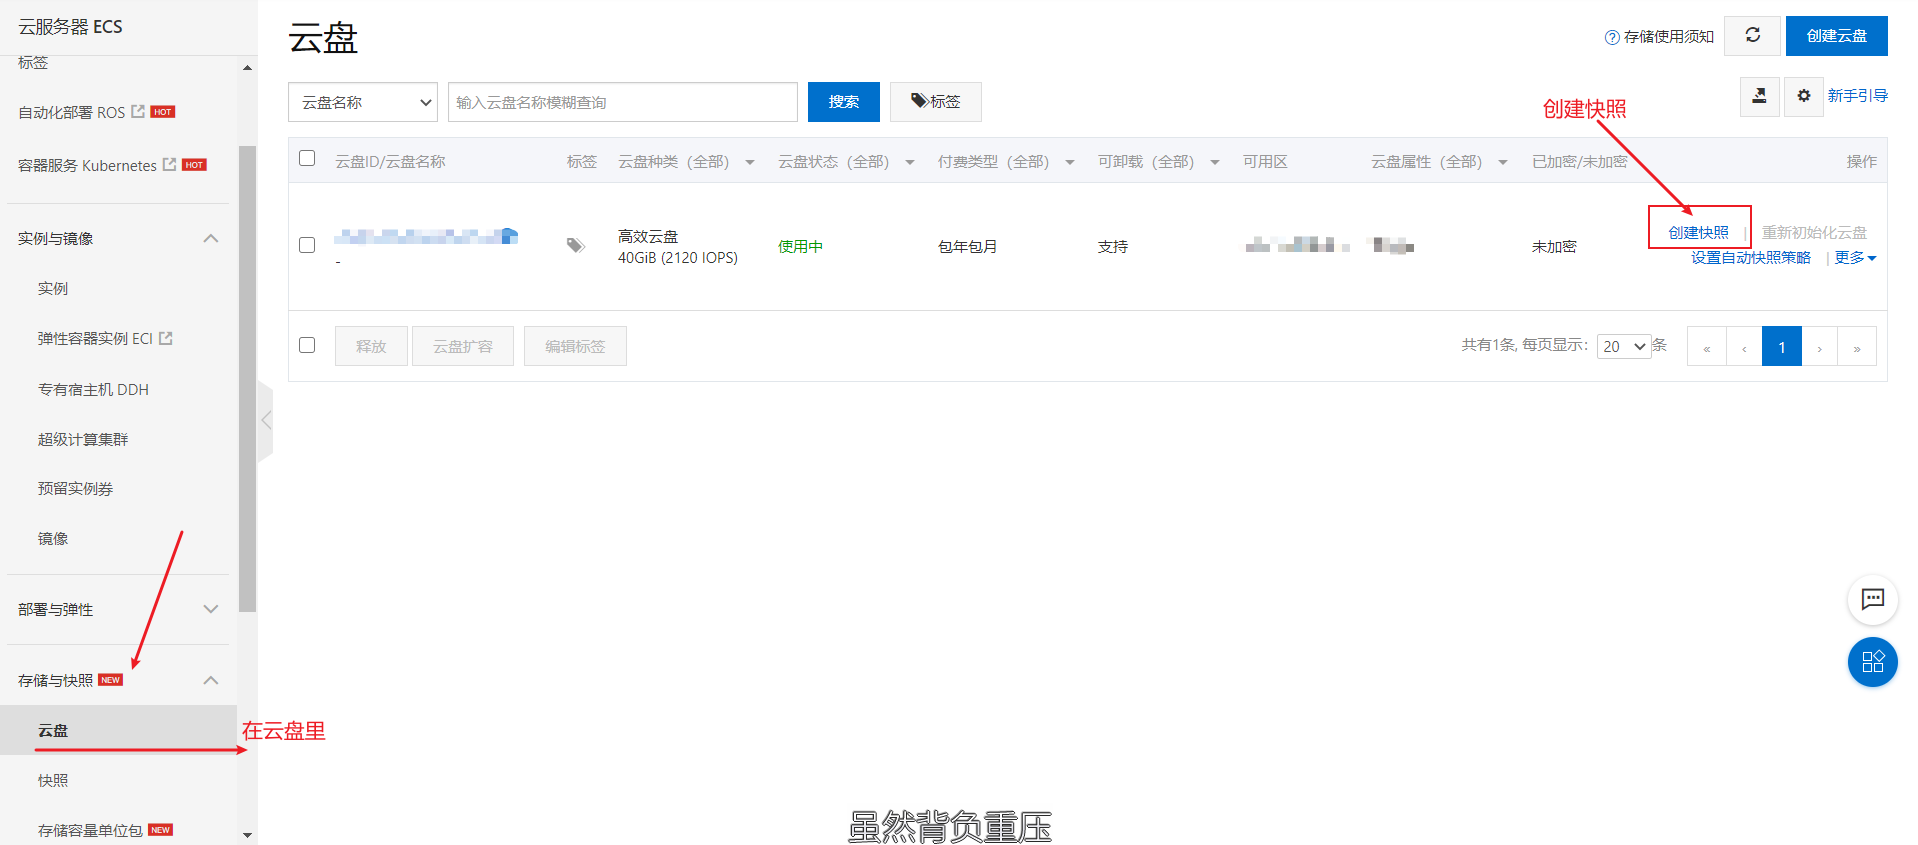
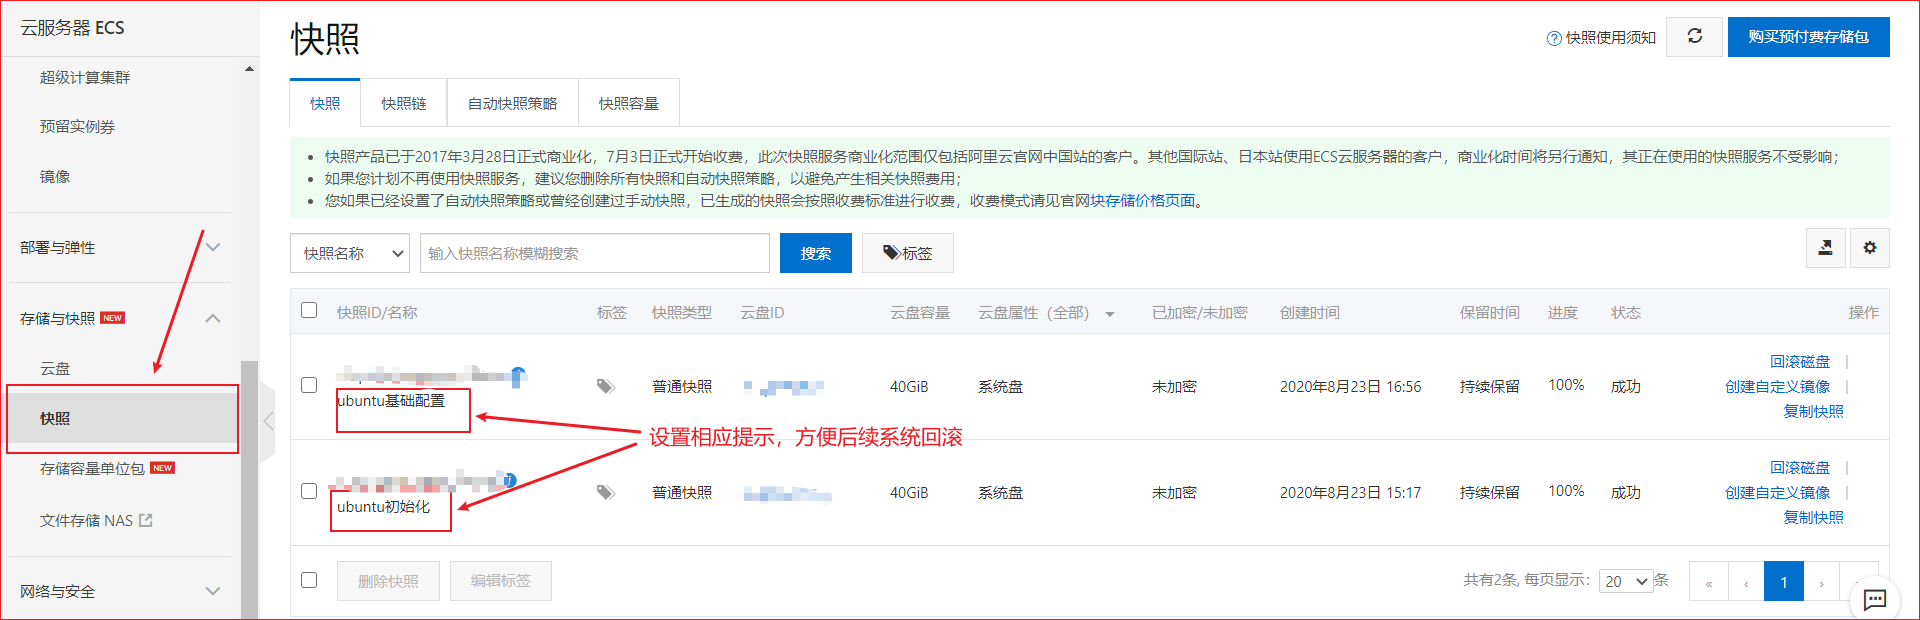
阿里服务器控制台创建快照:
为什么创建快照:
在配置软件时出现问题,造成系统混乱,或者环境依赖不同造成无法配置成功等。
补充:(2020.8.25)
MySQL下载安装:
通过apt-get 安装Mysql服务
#先更新下
sudo apt-get update

#安装
sudo apt-get install mysql-server
注:再安装的时候,如果是服务器会出现界面让输入密码,可以设置也可以后面初始化的时候设置
初始化设置:
sudo mysql_secure_installation
开始配置项:
#1
VALIDATE PASSWORD PLUGIN can be used to test passwords...
Press y|Y for Yes, any other key for No: N (选择N ,不会进行密码的强校验)

#2
Please set the password for root here...
New password: (输入密码)
Re-enter new password: (重复输入)

#3
By default, a MySQL installation has an anonymous user,
allowing anyone to log into MySQL without having to have
a user account created for them...
Remove anonymous users? (Press y|Y for Yes, any other key for No) : N (选择N,不删除匿名用户)

#4
Normally, root should only be allowed to connect from
'localhost'. This ensures that someone cannot guess at
the root password from the network...
Disallow root login remotely? (Press y|Y for Yes, any other key for No) : N (选择N,允许root远程连接)

#5
By default, MySQL comes with a database named 'test' that
anyone can access...
Remove test database and access to it? (Press y|Y for Yes, any other key for No) : N (选择N,不删除test数据库)

#6
Reloading the privilege tables will ensure that all changes
made so far will take effect immediately.
Reload privilege tables now? (Press y|Y for Yes, any other key for No) : Y (选择Y,修改权限立即生效)
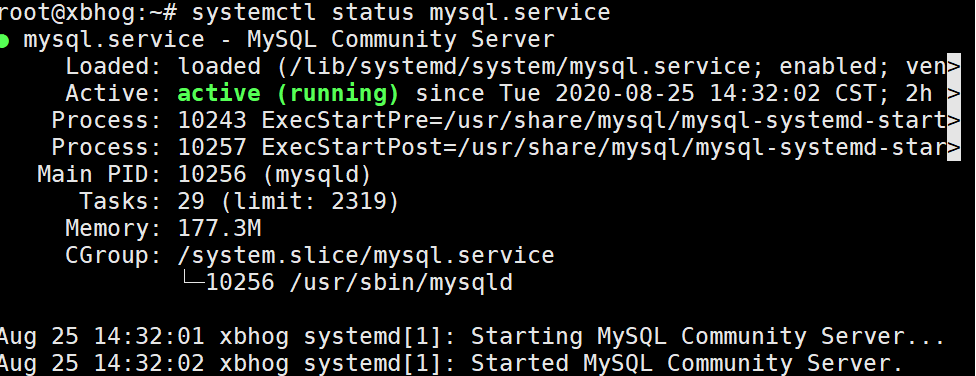
检查mysql服务状态:
systemctl status mysql.service
出现如图所示即成功:
MySQL远程访问设置:
远程设置:找到 bind-address 修改值为 0.0.0.0(如果需要远程访问)
#找到 bind-address 修改值为 0.0.0.0(如果需要远程访问)
sudo vim /etc/mysql/mysql.conf.d/mysqld.cnf

#重启mysql
sudo /etc/init.d/mysql restart
登录:
sudo mysql -uroot -p
输入密码:****
设置权限:
#设置权限与密码

#使用mysql_native_password修改加密规则
mysql> ALTER USER 'root'@'localhost' IDENTIFIED WITH mysql_native_password BY '密码';
#更新一下用户的密码
mysql> ALTER USER 'root'@'localhost' IDENTIFIED BY '密码' PASSWORD EXPIRE NEVER;
#允许远程访问
mysql> UPDATE user SET host = '%' WHERE user = 'root';

#刷新cache中配置 刷新权限
mysql>flush privileges;
mysql>quit;
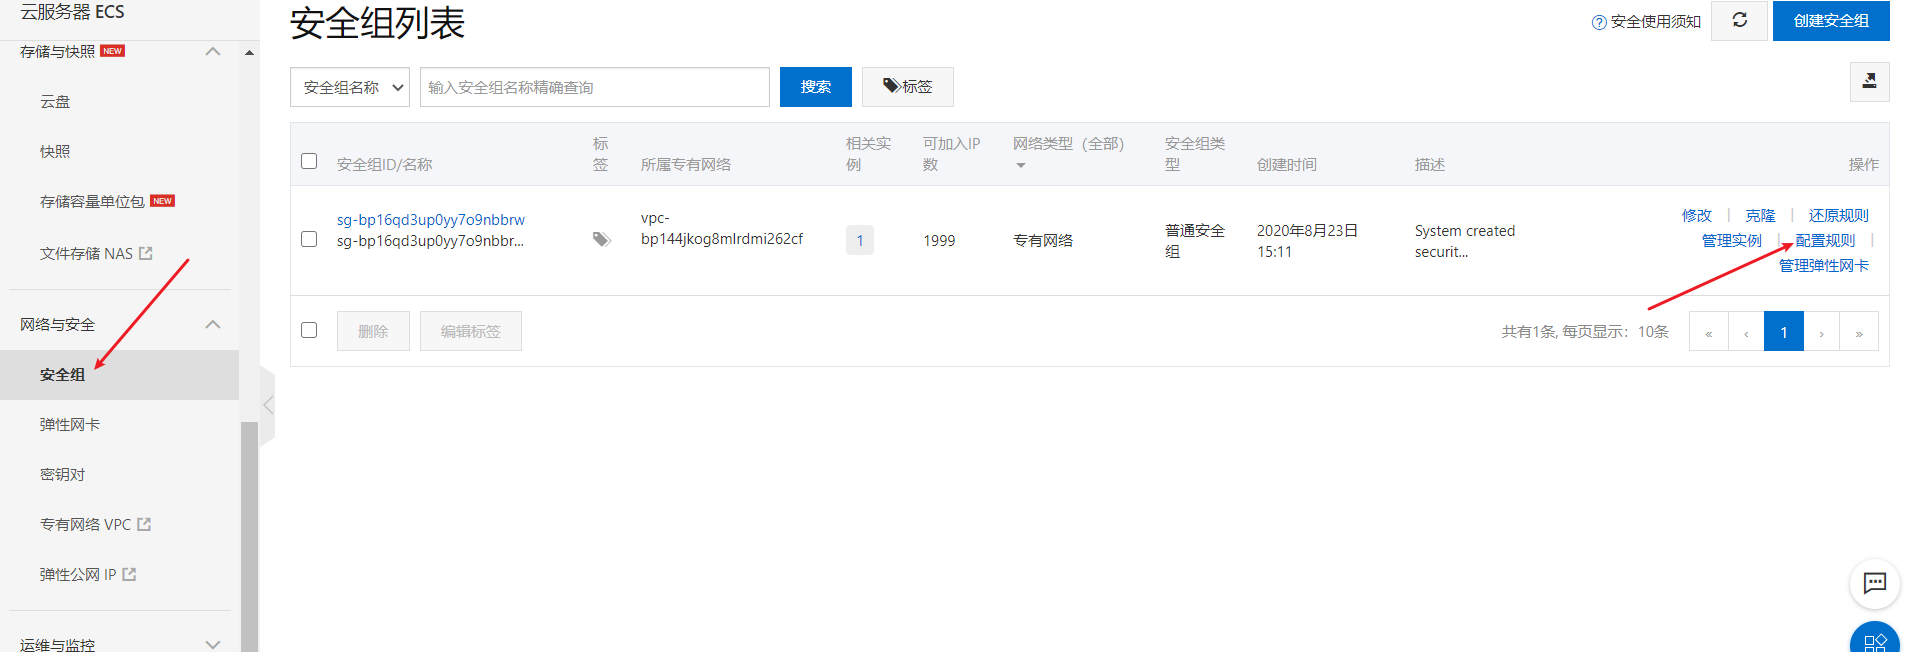
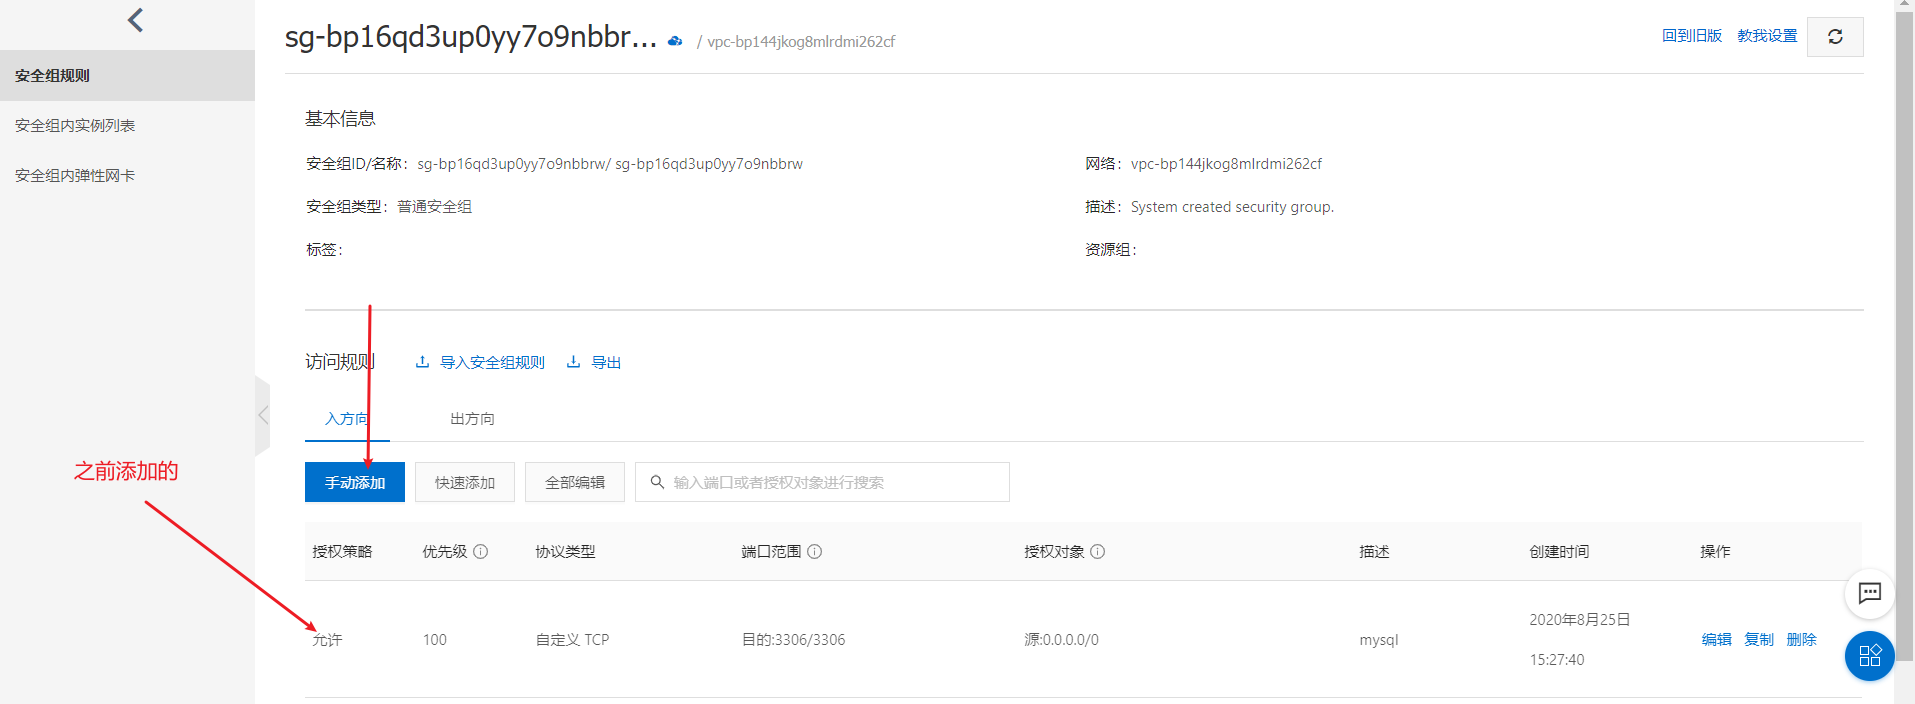
配置开放端口3306:

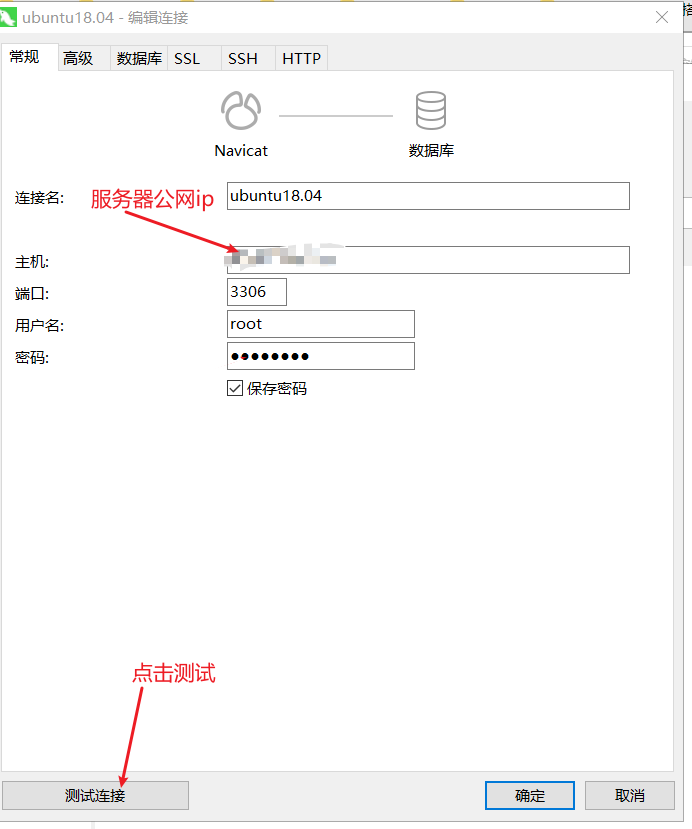
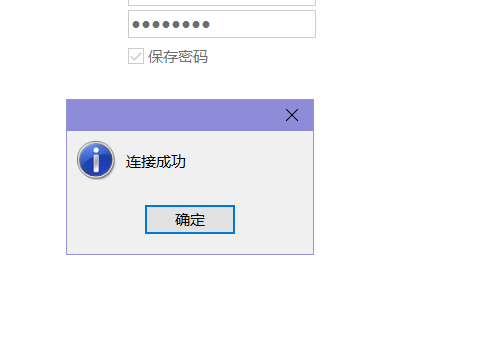
打开Navicat软件测试:
python虚拟环境选择:
Virtualenvwrapper使用:
介绍:
virtualenv是虚拟环境,virtualenvwrapper对virtualenv的命令进行了封装,使得其更加友好
Virtaulenvwrapper是virtualenv的扩展包,用于更方便管理虚拟环境,它可以做: - 将所有虚拟环境整合在一个目录下 - 管理(新增,删除,复制)虚拟环境 - 快速切换虚拟环境
安装:
sudo apt install python-virtualenv

sudo easy_install virtualenvwrapper
pip3安装:(推荐)
#pip3安装:
sudo pip install virtualenv

sudo pip install virtualenvwrapper
pip3安装virtualenvwrapper出现的问题:
........
raise DistutilsError(msg)

distutils.errors.DistutilsError: Could not find suitable distribution for Requirement.parse('pbr')

----------------------------------------

Command "python setup.py egg_info" failed with error code 1 in /tmp/pip-build-6hblrn57/virtualenvwrapper/
解决方法:
#个人使用的第一个命令就解决问题,后两条报错,仅供参考
sudo pip install-i https://pypi.tuna.tsinghua.edu.cn/simple pbr

sudo pip install-i https://pypi.tuna.tsinghua.edu.cn/simple--no-deps stevedore

sudo pip install-i https://pypi.tuna.tsinghua.edu.cn/simple--no-deps virtualenvwrapper
继续安装:
echo "source virtualenvwrapper.sh" >> ~/.bashrc
source ~/.bashrc
创建虚拟环境:
mkvirtualenv --python=python3.8 venv
激活环境:
workon #列出虚拟环境列表

workon [venv] #切换环境
退出环境:
deactivate
删除环境:
rmvirtualenv venv
补充:2021年一月十号
今天更新源时出现
Errors were encountered while processing:
 /var/cache/apt/archives/wireless-regdb_2020.11.20-0ubuntu1~16.04.2_all.deb
E: Sub-process /usr/bin/dpkg returned an error code (1)
解决方法:
cd /etc/apt
root@zjy:/etc/apt# rm -rf /var/lib/dpkg/info/*

apt-get update 更新源
apt-get upgrade 更新软件
总结:
如果后面遇到问题随时更新或开新帖.
前人栽树,后人乘凉;
站在巨人的肩膀上让我能看的更远;
借鉴网上的大佬们的方法,以下引自:
ubuntu 20.04最全的Python虚拟环境使用方法:https://blog.csdn.net/sirobot/article/details/107067577
pip安装virtualenvwrapper报错的解决办法:https://www.jianshu.com/p/842eced0df69
Ubuntu20.04安装Mysql:https://blog.csdn.net/weixin_38924500/article/details/106261971

 浙公网安备 33010602011771号