
实用指南:Nodejs学习
Node.js 是一个基于 Chrome V8 JavaScript 引擎构建的 JavaScript 运行时环境。简单来说,Node.js 让 JavaScript 可以在服务器端运行,而不仅仅局限于浏览器中。
创建第一个 Node.js 项目
在项目文件夹执行npm init -y
会出现package.json
然后新建app.js
输入测试代码:
const http = require('http');
const server = http.createServer((req,res)=>{
res.statusCode = 200;
res.setHeader('Content-Type','text/plain');
res.end('RUNOOB Node Test ~ hello,Node js\n');
});
const port = 3000;
server.listen(port,()=>{
console.log(`服务器运行地址:http://localhost:${port}/`);
})
访问3000,打印了
Nodejs包含哪几部分
1.使用 require 指令来加载和引入模块
const module = require('module-name');2.创建服务器
使用http.createServer()创建,
listen方法监听
函数通过request,response接收和响应
简便写法:
var http = require('http');
http.createServer(function (request, response) {
response.writeHead(200, {'Content-Type': 'text/plain'});
response.end('Hello World\n');
}).listen(8888);
console.log('Server running at http://127.0.0.1:8888/');
Nodejs路由控制
const http = require('http');
const server = http.createServer((req,res)=>{
if(req.url === '/'){
res.writeHead(200,{"content-type":'text/plain'});
res.end("welcome ");
}else if(req.url === '/about'){
res.writeHead(200,{"content-type":'text/plain'});
res.end("about");
}else{
res.writeHead(404,{"content-type":'text/plain'});
res.end('404 Not Found');
}
});
const port = 3000;
server.listen(port,()=>{
console.log(`服务器运行地址:http://localhost:${port}/`);
})
node实现打包工具webpack
蓝桥杯要求手写一个 Webpack,这是一道考察前端构建原理的综合题。
Webpack 本质是一个模块打包工具,它的核心工作流程包括:
- 解析入口文件:从入口文件开始,递归分析所有依赖。
- 构建依赖图:记录每个模块的依赖关系和源代码。
- 转换模块代码:通过 Loader 处理不同类型的文件(如 CSS、图片)。
- 打包输出:将所有模块合并为一个或多个 bundle 文件。
const fs = require('fs');
const path = require('path');
const babel = require('@babel/core');
class MyWebpack {
constructor(config) {
this.config = config;
this.entry = config.entry; // 入口文件路径
this.output = config.output; // 输出配置
this.modules = []; // 存储所有模块信息
}
// 启动打包
run() {
this.buildModule(this.entry, true);
this.emitFiles();
}
// 构建模块
buildModule(filename, isEntry) {
const moduleId = './' + path.relative(process.cwd(), filename);
const source = fs.readFileSync(filename, 'utf-8');
const { dependencies, transformedSource } = this.parseModule(source, filename);
const module = {
id: moduleId,
filename,
dependencies,
source: transformedSource
};
this.modules.push(module);
// 递归处理依赖
dependencies.forEach(dep => {
this.buildModule(path.join(path.dirname(filename), dep));
});
return module;
}
// 解析模块:转换代码并提取依赖
parseModule(source, filename) {
const dependencies = [];
// 使用 Babel 转换 ES6+ 代码为 CommonJS 格式
const { code } = babel.transformSync(source, {
presets: ['@babel/preset-env'],
plugins: [
[
// 自定义插件:分析 import 语句收集依赖
function() {
return {
visitor: {
ImportDeclaration(path) {
dependencies.push(path.node.source.value);
}
}
};
}
]
]
});
return { dependencies, transformedSource: code };
}
// 生成输出文件
emitFiles() {
const outputPath = path.join(this.output.path, this.output.filename);
// 创建模块映射函数
const modules = this.modules.reduce((acc, module) => {
acc[module.id] = `
function(module, exports, require) {
${module.source}
}
`;
return acc;
}, {});
// 生成自执行的 bundle 代码
const bundle = `
(function(modules) {
// 模块缓存
const installedModules = {};
// 自定义 require 函数
function require(id) {
if (installedModules[id]) {
return installedModules[id].exports;
}
const module = installedModules[id] = {
exports: {},
id: id,
loaded: false
};
// 执行模块函数
modules[id].call(
module.exports,
module,
module.exports,
require
);
module.loaded = true;
return module.exports;
}
// 从入口模块开始执行
return require('${this.entry}');
})({${Object.entries(modules).map(([id, fn]) => `
"${id}": ${fn}
`).join(',')}});
`;
// 写入输出文件
fs.writeFileSync(outputPath, bundle);
console.log(`Bundle created at ${outputPath}`);
}
}
module.exports = MyWebpack;
使用express构建node项目
1.npm install express
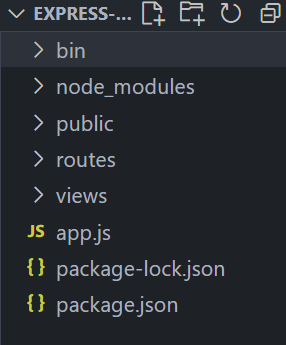
2.npx express-generator,就自动创建好了
3.基本路由
appis an instance ofexpress.METHODis an HTTP request method, in lowercase.PATHis a path on the server.HANDLERis the function executed when the route is matched.
app.method('path',handler)
app.get('/', (req, res) => {
res.send('Hello World!')
})
4.利用 Express 托管静态文件
为了提供诸如图像、CSS 文件和 JavaScript 文件之类的静态文件,请使用 Express 中的 express.static 内置中间件函数。
此函数特征如下:
express.static(root, [options])例如,通过如下代码就可以将 public 目录下的图片、CSS 文件、JavaScript 文件对外开放访问:
app.use(express.static('public'))现在,你就可以访问 public 目录中的所有文件了:
http://localhost:3000/images/kitten.jpg
http://localhost:3000/css/style.css
http://localhost:3000/js/app.js
http://localhost:3000/images/bg.png
http://localhost:3000/hello.html
要为 express.static 函数服务的文件创建虚拟路径前缀(该路径在文件系统中不存在),请为静态目录指定挂载路径,如下所示:
app.use('/static', express.static('public'))现在,你就可以通过带有 /static 前缀地址来访问 public 目录中的文件了。
http://localhost:3000/static/images/kitten.jpg
http://localhost:3000/static/css/style.css
http://localhost:3000/static/js/app.js
http://localhost:3000/static/images/bg.png
http://localhost:3000/static/hello.html更多例子Express examples

 浙公网安备 33010602011771号