pytest, Allure
本文参考链接:
https://learning-pytest.readthedocs.io/zh/latest/
https://blog.csdn.net/qq_42610167/article/details/101204066#8pytesthtml_773
https://qualitysphere.github.io/4_allure/
快速入门
测试文件以 test_ 开头或以 _test 结尾。
测试类以 Test 开头,并且不能有 __init__ 方法
测试函数以 test_ 开头
安装 Pytest
使用 pip 进行安装:
$ pip install pytest
第一个测试函数
Pytest 使用 Python 的 assert 进行条件判断,最简单的测试函数如:
# test1.py

def test_passing():
    assert (1, 2, 3) == (1, 2, 3)
运行测试函数
使用命令 pytest 运行测试函数:
$ pytest tests/test1.py
============================= test session starts =============================
platform win32 -- Python 3.6.4, pytest-3.6.1, py-1.5.2, pluggy-0.6.0
rootdir: F:\self-repo\learning-pytest, inifile:
collected 1 item

tests\test1.py .                                                         [100%]

========================== 1 passed in 0.09 seconds ===========================
pytest 使用
.标识测试成功(PASSED)。
小技巧:
使用
pytest -h查看 pytest 的所有选项。
可以使用 -v 选项,显示测试的详细信息:
$ pytest -v tests/test1.py
================================== test session starts ==================================
platform win32 -- Python 3.9.6, pytest-7.1.2, pluggy-1.0.0 -- c:\software\py3.9_32\python.exe
cachedir: .pytest_cache
rootdir: C:\Users\UNCO9CA\Desktop\test
collected 1 item

test_01.py::test_passing PASSED                                                                                                          [100%]

================================== 1 passed in 0.01s ==================================
测试失败
下面是一个失败的测试函数:
# test2.py

def test_failing():
    assert (1, 2, 3) == (3, 2, 1)
运行结果为:
$ pytest tests/test2.py
============================= test session starts =============================
platform win32 -- Python 3.6.4, pytest-3.6.1, py-1.5.2, pluggy-0.6.0
rootdir: F:\self-repo\learning-pytest, inifile:
collected 1 item

tests\test2.py F                                                         [100%]

================================== FAILURES ===================================
________________________________ test_failing _________________________________

    def test_failing():
>       assert (1, 2, 3) == (3, 2, 1)
E       assert (1, 2, 3) == (3, 2, 1)
E         At index 0 diff: 1 != 3
E         Use -v to get the full diff

tests\test2.py:2: AssertionError
========================== 1 failed in 0.19 seconds ===========================
pytest 使用
F标识测试失败(FAILED)。pytest 对失败的测试给出了非常人性化的提示。
断言
在 pytest 中,assert 是最常见的断言工具。如:
assert a == b

assert a <= b
具体的 assert 语法参考 The assert statement 。
捕获异常
在测试过程中,经常需要测试是否如期抛出预期的异常,以确定异常处理模块生效。在 pytest 中使用 pytest.raises() 进行异常判断:
# test_raises.py

import pytest


def add(num1, num2):
    try:
        return num1 + num2
    except:
        raise TypeError("Number must be int")


def test_raises():
    with pytest.raises(TypeError) as e: # 判断下面的 add 函数会抛出 TypeError 异常
        add(1, '2')
    exec_msg = e.value.args[0]
    assert exec_msg == 'Number must be int'
运行结果如下:
$ pytest test_raises.py
============================= test session starts =============================
platform win32 -- Python 3.6.4, pytest-3.6.1, py-1.5.2, pluggy-0.6.0
rootdir: F:\self-repo\learning-pytest, inifile:
collected 1 item

tests\test-function\test_raise.py .                                      [100%]

========================== 1 passed in 0.07 seconds ===========================
指定测试
默认情况下,pytest 会递归查找当前目录下所有以 test 开始或结尾的 Python 脚本,并执行文件内的所有以 test 开始或结束的函数和方法。
对于下面脚本:
# test_no_mark.py

def test_func1():
    assert 1 == 1

def test_func2():
    assert 1 != 1
直接执行测试脚本会同时执行所有测试函数:
$ pytest tests/test-function/test_no_mark.py
============================= test session starts =============================
platform win32 -- Python 3.6.4, pytest-3.6.1, py-1.5.2, pluggy-0.6.0
rootdir: F:\self-repo\learning-pytest, inifile:
collected 2 items

tests\test-function\test_no_mark.py .F                                   [100%]

================================== FAILURES ===================================
_________________________________ test_func2 __________________________________

    def test_func2():
>       assert 1 != 1
E       assert 1 != 1

tests\test-function\test_no_mark.py:6: AssertionError
===================== 1 failed, 1 passed in 0.07 seconds ======================
选择测试函数
由于某种原因(如 test_func2 的功能尚未开发完成),我们只想执行指定的测试函数。在 pytest 中有几种方式可以解决:
第一种,节点ID运行测试,通过 :: 标记。
每个收集的测试都被分配一个唯一的 nodeid 它由模块文件名和诸如类名、函数名和参数化参数等说明符组成,用 :: 字符来指定只运行某函数。
$ pytest tests/test-function/test_no_mark.py::test_func1
============================= test session starts =============================
platform win32 -- Python 3.6.4, pytest-3.6.1, py-1.5.2, pluggy-0.6.0
rootdir: F:\self-repo\learning-pytest, inifile:
collected 1 item

tests\test-function\test_no_mark.py .                                    [100%]

========================== 1 passed in 0.02 seconds ===========================
第二种,使用模糊匹配,标记关键字。使用 -k 选项标识。
$ pytest -k func1 tests/test-function/test_no_mark.py
============================= test session starts =============================
platform win32 -- Python 3.6.4, pytest-3.6.1, py-1.5.2, pluggy-0.6.0
rootdir: F:\self-repo\learning-pytest, inifile:
collected 2 items / 1 deselected

tests\test-function\test_no_mark.py .                                    [100%]

=================== 1 passed, 1 deselected in 0.03 seconds ====================
上面只会运行函数名中带有
func1关键字的测试函数,譬如文件中的test_func1函数
第三种,选择文件夹
pytest testing/
执行 testing 文件夹下所有的测试文件中的所有测试函数
第四种,使用 pytest.mark 在函数上进行标记。
带标记的测试函数如:
test_with_mark.py
import pytest

@pytest.mark.finished # 通过 mark 来打上标记,finished 需要在 pytest.ini 里面注册,否则会报 warning
def test_func1():
    assert 1 == 1

@pytest.mark.unfinished
def test_func2():
    assert 1 != 1
同时,需要在同目录下创建一个 pytest.ini 文件,注册 mark 选项,否则上面的代码会提示warning,内容如下:
[pytest]
markers =
    finished: mark a test as finished.
    unfinished: mark a test as unfinished.
上面的 finished 是标记的名字,冒号后面的描述是可选项
测试时使用 -m <标记名> 选择标记的测试函数:
$ pytest -m finished tests/test-function/test_with_mark.py
============================= test session starts =============================
platform win32 -- Python 3.6.4, pytest-3.6.1, py-1.5.2, pluggy-0.6.0
rootdir: F:\self-repo\learning-pytest, inifile:
collected 2 items / 1 deselected

tests\test-function\test_with_mark.py .                                  [100%]

=================== 1 passed, 1 deselected in 0.10 seconds ====================
使用 mark,我们可以给每个函数打上不同的标记,测试时指定就可以允许所有被标记的函数。
一个函数可以打多个标记;多个函数也可以打相同的标记。
运行测试时使用 -m 选项可以加上逻辑,如:
$ pytest -m "finished and unfinished"  # 选择 finished 标记和 unfinished 的标记

$ pytest -m "finished and not unfinished"  # 选项 finshed 标记和除了 unfinished 以外的其他标记
跳过测试
上一节提到 pytest 使用标记过滤测试函数,所以对于那些尚未开发完成的测试,最好的处理方式就是略过而不执行测试。
1. pytest.mark.skip 装饰器
pytest.mark.skip 可以无条件跳过任何测试,这个标记是 pytest 自带的标记,不需要额外在 pytest.ini 中注册。
# test_skip.py
import pytest

@pytest.mark.skip(reason='out-of-date api')
def test_connect():
    pass
执行结果可以看到该测试已被忽略:
$ pytest tests/test-function/test_skip.py
============================= test session starts =============================
platform win32 -- Python 3.6.4, pytest-3.6.1, py-1.5.2, pluggy-0.6.0
rootdir: F:\self-repo\learning-pytest, inifile:
collected 1 item

tests\test-function\test_skip.py s                                       [100%]

========================== 1 skipped in 0.13 seconds ==========================
pytest 使用
s表示测试被跳过(SKIPPED)。
2. pytest.mark.skipif 装饰器
Pytest 还支持使用 pytest.mark.skipif 为测试函数指定被忽略的条件。它的第一个参数是条件,当条件满足(返回True)时,被装饰的测试就会跳过。
import pytest

@pytest.mark.skipif(2<3, reason='2 is smaller than 3, so skip this.')
def test_api():
    pass
3. pytest.skip()
在函数内部进行判断,也可以主动跳过当前测试
def test_function():
    if not valid_config():
        pytest.skip("unsupported configuration")
也可以跳过整个模块(即整个测试脚本文件,而不仅仅是当前测试函数),使用 pytest.skip(reason, allow_module_level=True) 在模块级别,这样,可以跳过整个模块的所有测试:
import sys
import pytest

if not sys.platform.startswith("win"):
    pytest.skip("skipping windows-only tests", allow_module_level=True)

def test_one():
    assert 1 == 1
执行结果:
=================== test session starts ==========================
platform win32 -- Python 3.7.1, pytest-6.2.2, py-1.9.0, pluggy-0.13.1
rootdir: C:\Users\wztshine\Desktop\pyt, configfile: pytest.ini
collected 0 items / 1 skipped
4. 导入跳过 importorskip
如果能导入成功某个模块,则导入并返回导入的模块名。如果导入不成功,则跳过当前模块
req = pytest.importorskip("requests")
预见失败
1. 预见失败 : xfail
xfail 可以预见测试的失败。譬如说你认为这个测试应该失败,你给测试打上 xfail 以后,如果测试真的失败了,结果是: x: xfailed ; 而如果你预计错了,测试成功了,结果是:X: xpassed.
Pytest 使用 pytest.mark.xfail 实现预见错误功能:
# test_xfail.py
import pytest

# 预计失败
@pytest.mark.xfail
def test_fail():
    assert 3 == 4

def test_fail2():
    if 3 != 4:
        pytest.xfail('3 != 4') # 也可以用在函数内部
执行结果:
$ pytest tests/test-function/test_xfail.py
============================= test session starts =============================
platform win32 -- Python 3.6.4, pytest-3.6.1, py-1.5.2, pluggy-0.6.0
rootdir: F:\self-repo\learning-pytest, inifile:
collected 1 item

tests\test-function\test_xfail.py xx                                      [100%]

========================== 2 xfailed in 0.12 seconds ==========================
pytest 使用小写的
x表示预见的失败(xfailed)。如果预见的是失败,但实际运行测试却成功通过,pytest 使用大写的
X进行标记(xpassed)。
condition 参数
如果测试只在特定条件下失败,则可以将该条件作为第一个参数通过:
import pytest

@pytest.mark.xfail(2==2,reason='failed.')
def test_one():
    assert 2 == 2
reason 参数
可以使用 reason 参数:
import pytest

@pytest.mark.xfail(reason="known parser issue")
def test_function():
    ...
raises 参数
如果要更具体地说明测试失败的原因,可以在 raises 参数。
import pytest

@pytest.mark.xfail(raises=RuntimeError)
def test_function():
    ...
如果测试失败,则报告为常规失败,除非 raises .
run 参数
直接不执行这种 xfail 的测试
import pytest

@pytest.mark.xfail(run=False)
def test_function():
    ...
strict 参数
XFAIL 和 XPASS 默认情况下都没让测试失败(默认结果是x,而失败是f)。您可以通过设置 strict 关键字参数到 True ,让它们强制失败:
@pytest.mark.xfail(strict=True)
def test_function():
    ...
这将使测试的(“xpassed”)结果失败掉。(xfail会有两种结果,一种xfailed,一种xpassed,这个strict参数会让 xpassed的 变成 failed)
您可以更改 strict 参数使用 xfail_strict ini选项:
[pytest]
xfail_strict=true
忽略预估失败
通过在命令行上指定:
pytest --runxfail
这样就相当于没有给测试使用 xfail 装饰器。会将它们当成正常测试来执行。
参数化时预计失败
import sys
import pytest


@pytest.mark.parametrize(
    ("n", "expected"),
    [
        (1, 2),
        pytest.param(1, 0, marks=pytest.mark.xfail),  # 给这个参数加上预计失败选项
        pytest.param(1, 3, marks=pytest.mark.xfail(reason="some bug")), # 给这个参数加上预计失败选项
        (2, 3),
        (3, 4),
        (4, 5),
        pytest.param(
            10, 11, marks=pytest.mark.skipif(sys.version_info >= (3, 0), reason="py2k")
        ),
    ],
)
def test_increment(n, expected):
    assert n + 1 == expected
关于参数化,可以见后文
2. 失败后停止
命令行中可以指定出现几个测试用例失败后,就停止整个测试进程。譬如收集了20个测试用例,当出现一个测试用例失败时,就停止所有测试:
pytest -x           # 第一次失败后停止
pytest --maxfail=2  # 第二次失败后停止
参数化
当对一个测试函数进行测试时,通常会给函数传递多组参数。比如测试账号登陆,我们需要模拟各种千奇百怪的账号密码。
在 pytest 中,我们有参数化测试,即每组参数都独立执行一次测试。使用的工具就是 pytest.mark.parametrize(argnames, argvalues)。argnames 是一个字符串或一组字符串,多个参数可以用 , 隔开;argvalues 是一个列表,列表中的每个元素都会参与一次测试。
1. 一个参数
这里是一个密码长度的测试函数,其中参数名为 passwd,其可选列表包含三个值:
# test_parametrize.py
import pytest

@pytest.mark.parametrize('passwd',    # 参数名,字符串格式
                      ['123456',      # 列表,针对列表中的每个元素,都会执行一次测试
                       'abcdefdfs',
                       'as52345fasdf4'])
def test_passwd_length(passwd):
    assert len(passwd) >= 8
运行可知执行了三次测试:
$ pytest tests/test-function/test_parametrize.py
============================= test session starts =============================
platform win32 -- Python 3.6.4, pytest-3.6.1, py-1.5.2, pluggy-0.6.0
rootdir: F:\self-repo\learning-pytest, inifile:
collected 3 items

tests\test-function\test_parametrize.py F..                              [100%]

================================== FAILURES ===================================
2. 多个参数
# test_parametrize.py
import pytest
import hashlib

@pytest.mark.parametrize('user, passwd',		# 多个参数,用逗号隔开;也可以写成元组的形式,如("user", "passwd")
                         [('jack', 'abcdefgh'), # 列表的每个元素用元组表示,元组的第一个值代表第一个参数, 第二个值代表第二个参数
                          ('tom', 'a123456a')])
def test_passwd_md5(user, passwd):
    db = {
        'jack': 'e8dc4081b13434b45189a720b77b6818',
        'tom': '1702a132e769a623c1adb78353fc9503'
    }
    assert hashlib.md5(passwd.encode()).hexdigest() == db[user]
使用 -v 执行测试
$ pytest -v tests/test-function/test_parametrize.py::test_passwd_md5
============================= test session starts =============================
platform win32 -- Python 3.6.4, pytest-3.6.1, py-1.5.2, pluggy-0.6.0 -- c:\anaconda3\python.exe
cachedir: .pytest_cache
rootdir: F:\self-repo\learning-pytest, inifile:
collected 2 items

tests/test-function/test_parametrize.py::test_passwd_md5[jack-abcdefgh] PASSED [ 50%]
tests/test-function/test_parametrize.py::test_passwd_md5[tom-a123456a] PASSED [100%]

========================== 2 passed in 0.04 seconds ===========================
如果觉得每组测试的默认参数显示不清晰,我们可以使用 pytest.param 的 id 参数进行自定义每组参数的唯一标识。
# test_parametrize.py
import pytest

@pytest.mark.parametrize('user, passwd',
                         [pytest.param('jack', 'abcdefgh', id='User<Jack>'),
                          pytest.param('tom', 'a123456a', id='User<Tom>')])
def test_passwd_md5_id(user, passwd):
    db = {
        'jack': 'e8dc4081b13434b45189a720b77b6818',
        'tom': '1702a132e769a623c1adb78353fc9503'
    }

    import hashlib

    assert hashlib.md5(passwd.encode()).hexdigest() == db[user]
现在的执行结果为:
$ pytest -v tests/test-function/test_parametrize.py::test_passwd_md5_id
============================= test session starts =============================
platform win32 -- Python 3.6.4, pytest-3.6.1, py-1.5.2, pluggy-0.6.0 -- c:\anaconda3\python.exe
cachedir: .pytest_cache
rootdir: F:\self-repo\learning-pytest, inifile:
collected 2 items

tests/test-function/test_parametrize.py::test_passwd_md5_id[User<Jack>] PASSED [ 50%]
tests/test-function/test_parametrize.py::test_passwd_md5_id[User<Tom>] PASSED [100%]

========================== 2 passed in 0.07 seconds ===========================
3. 参数的所有组合
多个参数可以堆叠,产生所有参数的组合
# test_parametrize.py
import pytest


@pytest.mark.parametrize('x',[0,1])
@pytest.mark.parametrize('y',[0,1])
@pytest.mark.parametrize('z',[0,1])
def test_passwd_length(x,y,z):
    print(x,y,z)


if __name__=="__main__":
    pytest.main(["-s","test_parametrize.py"])
-s参数可以输出打印信息,不加-s,print() 无法打印出来
执行结果:
$ pytest -s tests/test-function/test_parametrize.py
================================= test session starts =================================
platform win32 -- Python 3.7.1, pytest-6.2.2, py-1.9.0, pluggy-0.13.1
rootdir: C:\Users\wztshine\Desktop\pyt, configfile: pytest.ini
collected 8 itemss

test_parametrize.py 0 0 0
.1 0 0
.0 1 0
.1 1 0
.0 0 1
.1 0 1
.0 1 1
.1 1 1
.

================================== 8 passed in 0.04s ==================================
Fixture
1. 简介
Fixture 是一些函数,pytest 会在执行测试函数之前(或之后)加载运行它们,和 unittest 的fixture类似,都是做测试环境的前后梳理工作。譬如你想测试一个浏览器页面,那你肯定需要事先打开浏览器,测试完成后关闭浏览器,这些 事先 和 事后 处理的工作,可以给 fixutre 来做,因为 fixture 可以在多个测试用例中重复使用。不同的是,unittest 的fixture 如 setup,teardown 通常只在当前 py文件中供多个测试函数或使用,而 pytest 的 fixture 可以写在一个 conftest.py 文件中,任意多个 py 文件中的任意测试函数,都可以直接调用,实现多个文件重复使用。
Pytest 使用 pytest.fixture() 定义fixture,下面是最简单的fixture,只返回北京邮编:
# test_postcode.py
import pytest

@pytest.fixture()  # 这里定义了一个 fixture: postcode
def postcode():
    return '010'

def test_postcode(postcode):  # fixture 可以直接作为参数传递进来
    assert postcode == '010'
fixture可以直接定义在各测试脚本中,就像上面的例子。更多时候,我们希望一个 fixture 可以在更大程度上复用,这就需要对 fixture 进行集中管理。Pytest 使用文件 conftest.py 集中管理 fixture。
重要:
-
在复杂的项目中,可以在不同的目录层级定义
conftest.py,每一个conftest.py的作用域为其所在的目录和子目录。 -
不要自己导入 conftest.py 文件,pytest 会自动识别相应目录下的该文件
-
测试用例执行前,会自动加载当前目录,以及父级目录外的所有 conftest.py
2. 预处理和后处理
很多时候需要在测试前进行预处理(如新建数据库连接),并在测试完成进行清理(关闭数据库连接)。
当有大量重复的这类操作,最佳实践是使用 fixture 来自动化所有预处理和后处理。
Pytest 使用 yield 关键词将 fixture 分为两部分,yield 之前的代码属于预处理,会在测试前执行;yield 之后的代码属于后处理,将在测试完成后执行。
以下测试模拟数据库查询,使用fixture来模拟数据库的连接关闭:
# test_db.py
import pytest

@pytest.fixture()
def db():
    """模拟数据库连接和关闭的 fixture
    """
    print('Connection successful')

    yield

    print('Connection closed')


def search_user(user_id):
    """
    模拟连接数据库后,进行数据库查询
    """
    d = {
        '001': 'xiaoming'
    }
    return d[user_id]


def test_search(db):  # 将 db 这个 fixture 作为参数传入,它会自动执行
    assert search_user('001') == 'xiaoming'
执行时使用 -s 阻止消息被吞:不加 -s ,无法成功 print()
$ pytest -s tests/fixture/test_db.py
============================= test session starts =============================
platform win32 -- Python 3.6.4, pytest-3.6.1, py-1.5.2, pluggy-0.6.0
rootdir: F:\self-repo\learning-pytest, inifile:
collected 1 item

tests\fixture\test_db.py Connection successful
.Connection closed


========================== 1 passed in 0.02 seconds ===========================
可以看到在测试成功的 . 标识前后有数据库的连接和关闭操作。
如果想更细的跟踪 fixture 执行,可以使用 --setup-show 选项,它可以更详细的显示测试环境是如何搭建的:
$ pytest --setup-show tests/fixture/test_db.py
============================= test session starts =============================
platform win32 -- Python 3.6.4, pytest-3.6.1, py-1.5.2, pluggy-0.6.0
rootdir: F:\self-repo\learning-pytest, inifile:
collected 1 item

tests\fixture\test_db.py
      SETUP    F db
        tests/fixture/test_db.py::test_search (fixtures used: db).
      TEARDOWN F db

========================== 1 passed in 0.03 seconds ===========================
3. 作用域
fixture 的作用是为了抽离出重复的工作和方便复用,为了更精细化控制 fixture(比如只想对数据库访问测试脚本使用自动连接关闭的fixture),pytest 使用作用域来进行指定fixture的使用范围。
在定义 fixture 时,通过 scope 参数声明作用域,可选项有:
function: 函数级,每个测试函数都会执行一次fixture;class: 类级别,每个测试类执行一次,所有方法都可以使用;module: 模块级,每个模块执行一次,模块内函数和方法都可使用;session: 会话级,一次测试只执行一次,所有被找到的函数和方法都可用(也就是无论加载多少个模块,多少类,都只执行一次)。
默认的作用域为 function。
import pytest

@pytest.fixture(scope='function')
def func_scope():
    pass


@pytest.fixture(scope='module')
def mod_scope():
    pass


@pytest.fixture(scope='session')
def sess_scope():
    pass


@pytest.fixture(scope='class')
def class_scope():
    pass
最简单使用fixture方式是作为测试函数参数:
# test_scope.py

def test_multi_scope(sess_scope, mod_scope, func_scope):
    pass
执行结果如下,可以清楚看到各fixture的作用域和执行顺序:
$ pytest --setup-show tests/fixture/test_scope.py::test_multi_scope
============================= test session starts =============================
platform win32 -- Python 3.6.4, pytest-3.6.1, py-1.5.2, pluggy-0.6.0
rootdir: F:\self-repo\learning-pytest, inifile:
collected 1 item

tests\fixture\test_scope.py
SETUP    S sess_scope
  SETUP    M mod_scope
      SETUP    F func_scope
        tests/fixture/test_scope.py::test_multi_scope (fixtures used: func_scope, mod_scope, sess_scope).
      TEARDOWN F func_scope
  TEARDOWN M mod_scope
TEARDOWN S sess_scope

========================== 1 passed in 0.10 seconds ===========================
对于类使用 fixture,需要使用 pytest.mark.usefixtures (对函数和方法也适用):
# test_scope.py
import pytest

@pytest.mark.usefixtures('class_scope')
class TestClassScope:
    def test_1(self):
        pass

    def test_2(self):
        pass
执行结果如下,可见所有测试函数都在fixture作用范围内:
$ pytest --setup-show tests/fixture/test_scope.py::TestClassScope
============================= test session starts =============================
platform win32 -- Python 3.6.4, pytest-3.6.1, py-1.5.2, pluggy-0.6.0
rootdir: F:\self-repo\learning-pytest, inifile:
collected 2 items

tests\fixture\test_scope.py
    SETUP    C class_scope
        tests/fixture/test_scope.py::TestClassScope::()::test_1 (fixtures used: class_scope).
        tests/fixture/test_scope.py::TestClassScope::()::test_2 (fixtures used: class_scope).
    TEARDOWN C class_scope

========================== 2 passed in 0.03 seconds ===========================
对于类下的所有测试函数,可以在类上面添加 fixture 来实现对所有函数的处理:
下面的例子来源于 CSDN:
腾哥儿的测试之路:https://blog.csdn.net/weixin_45451320/article/details/113836073
# test_scope.py
# coding=utf-8
import pytest

@pytest.fixture()
def test_case_3():
    print('---3号用例完成---')

@pytest.fixture()
def test_case_4():
    print('---4号用例完成---')

@pytest.fixture()
def test_case_5():
    print('---5号用例完成---')

@pytest.fixture()
def test_case_6():
    print('---6号用例完成---')

@pytest.fixture()
def test_case_7():
    print('---7号用例完成---')

# (1)这里按照【从下到上的顺序】,执行优先级是3、4、5
@pytest.mark.usefixtures('test_case_5')
@pytest.mark.usefixtures('test_case_4')
@pytest.mark.usefixtures('test_case_3')
class Testlogin001:

    def test_case_1(self):
        print('---1号用例完成---')

    # (2)这里按照调用了前面的函数test_case_6,局部的调用,执行优先级是最高的。
    @pytest.mark.usefixtures('test_case_7')
    @pytest.mark.usefixtures('test_case_6')
    def test_case_2(self):
        print('---2号用例完成---')


if __name__ == "__main__":
    pytest.main(['-vs', 'test_scope.py'])
执行结果是这样的:
============================= test session starts =============================
collecting ... collected 2 items

test_01.py::Testlogin001::test_case_1
---3号用例完成---
---4号用例完成---
---5号用例完成---
PASSED                             [ 50%]
---1号用例完成---

test_01.py::Testlogin001::test_case_2
---6号用例完成---
---7号用例完成---
---3号用例完成---
---4号用例完成---
---5号用例完成---
PASSED                             [100%]
---2号用例完成---


============================== 2 passed in 0.02s ==============================
4. 自动执行 autouse
目前为止,所有 fixture 的使用都是手动指定:要么作为参数,要么使用 usefixtures。
如果我们想让 fixture 自动作用于测试用例,可以在定义时指定 autouse 参数。
下面是两个自动计时 fixture,一个用于统计每个函数运行时间(function 作用域),一个用于计算测试总耗时(session 作用域):
# test_autouse.py
import pytest

DATE_FORMAT = '%Y-%m-%d %H:%M:%S'


@pytest.fixture(scope='session', autouse=True)
def timer_session_scope():
    start = time.time()
    print('\nstart: {}'.format(time.strftime(DATE_FORMAT, time.localtime(start))))

    yield

    finished = time.time()
    print('finished: {}'.format(time.strftime(DATE_FORMAT, time.localtime(finished))))
    print('Total time cost: {:.3f}s'.format(finished - start))


@pytest.fixture(autouse=True)
def timer_function_scope():
    start = time.time()
    yield
    print(' Time cost: {:.3f}s'.format(time.time() - start))


# 注意下面的两个测试函数并都没有显式使用 fixture:
def test_1():
    time.sleep(1)


def test_2():
    time.sleep(2)
执行测试可看到,fixture自动执行并完成计时任务:
$ pytest -s tests/fixture/test_autouse.py
============================= test session starts =============================
platform win32 -- Python 3.6.4, pytest-3.6.1, py-1.5.2, pluggy-0.6.0
rootdir: F:\self-repo\learning-pytest, inifile:
collected 2 items

tests\fixture\test_autouse.py
start: 2018-06-12 10:16:27
. Time cost: 1.003s.
. Time cost: 2.003s.
finished: 2018-06-12 10:16:30
Total time cost: 3.016s.


========================== 2 passed in 3.11 seconds ===========================
5. 重命名
fixture的名称默认为定义时的函数名,如果不想使用默认,可以通过 name 选项指定名称:
# test_rename.py
import pytest

@pytest.fixture(name='age')
def calculate_average_age():
    return 28

def test_age(age):
    assert age == 28
6. 参数化
因为 fixture 也是函数,我们同样可以对 fixture 进行参数化。在什么情况下需要对 fixture 参数化?
假设现在有一批 API 需要测试对不同数据库的支持情况(对所有数据库进行相同操作),最简单的方法就是针对每个数据库编写一个测试用例,但这包含大量重复代码,如数据库的连接、关闭,查询等。
进一步,可以使用 fixture 抽离出数据库的通用操作,每个 API 都能复用这些数据库 fixture,同时可维护性也得到提升。
更进一步,可以继续将这些 fixture 合并为一个,而通过参数控制连接到不同的数据库。这就需要使用fixture参数化来实现。fixture 参数化需要使用 pytest 内置的 request,并通过 request.param 获取参数。
import pytest


@pytest.fixture(params=[('redis', '6379'),('elasticsearch', '9200')])
def param(request):				# 4. 执行此 fixture 的参数,request 是一个内置的 fixture,它可以获取上面装饰器中的参数
    return request.param


@pytest.fixture(autouse=True)   # 2. 自动调用此 fixture,因为 autouse=True
def db(param):					# 3. 调用了 param 这个 fixture
    print('\nSucceed to connect %s:%s' % param) 	# 5. 从 param 返回后,执行
    yield						# 6. yield 会回到测试函数: test_api
    print('\nSucceed to close %s:%s' % param)		# 8. 继续执行


def test_api():		# 1. 执行此测试
    assert 1 == 1	# 7. 执行断言
执行结果:
$ pytest -s tests/fixture/test_parametrize.py
============================= test session starts =============================
platform win32 -- Python 3.6.4, pytest-3.6.1, py-1.5.2, pluggy-0.6.0
rootdir: F:\self-repo\learning-pytest, inifile:
collected 2 items

tests\fixture\test_parametrize.py
Succeed to connect redis:6379
.
Succeed to close redis:6379

Succeed to connect elasticsearch:9200
.
Succeed to close elasticsearch:9200

========================== 2 passed in 0.10 seconds ===========================
与函数参数化使用 @pytest.mark.parametrize 不同,fixture在定义时使用 params 参数进行参数化。
fixture 参数化依赖于内置 fixture request 及其属性 param。
7. 内置的 fixture
tmpdir & tmpdir_factory
用于临时文件和目录管理,默认会在测试结束时删除。
tmpdir 只有 function 作用域,只能在函数内使用。
使用 tmpdir.mkdir(folder_name) 创建目临时录,tmpdir.join(file_name) 创建临时文件(或者使用创建的目录)。
def test_tmpdir(tmpdir):
    a_dir = tmpdir.mkdir('mytmpdir')
    a_file = a_dir.join('tmpfile.txt')

    a_file.write('hello, pytest!')

    assert a_file.read() == 'hello, pytest!'
注解
tmpdir_factory 可以在所有作用域使用,包括 function, class, module, session。
import pytest


@pytest.fixture(scope='module')
def my_tmpdir_factory(tmpdir_factory):
    a_dir = tmpdir_factory.mktemp('mytmpdir')
    a_file = a_dir.join('tmpfile.txt')

    a_file.write('hello, pytest!')

    return a_file
pytestconfig
使用 pytestconfig,可以很方便的读取命令行参数和配置文件。
下面示例演示命令行参数解析:首先在 conftest.py 中使用函数 pytest_addoption (特定的 hook function ):
conftest.py
def pytest_addoption(parser):
    parser.addoption('--host', action='store', help='host of db')
    parser.addoption('--port', action='store', default='8888', help='port of db')
然后就可以在测试函数中通过 pytestconfig 获取命令行参数:
test_config.py
def test_option1(pytestconfig):
    print('host: %s' % pytestconfig.getoption('host'))
    print('port: %s' % pytestconfig.getoption('port'))
conftest.py和test_config.py写在同一个目录下
pytestconfig 其实是 request.config 的快捷方式,所以也可以自定义fixture实现命令行参数读取。
# conftest.py

def pytest_addoption(parser):
    parser.addoption('--host', action='store', help='host of db')
    parser.addoption('--port', action='store', default='8888', help='port of db')


@pytest.fixture
def config(request):
    return request.config


# test_config.py

def test_option2(config):
    print('host: %s' % config.getoption('host'))
    print('port: %s' % config.getoption('port'))
执行结果:
$ pytest -s --host=localhost tests/fixture/test_config.py::test_option2
============================= test session starts =============================
platform win32 -- Python 3.6.4, pytest-3.6.1, py-1.5.2, pluggy-0.6.0
rootdir: F:\self-repo\learning-pytest, inifile:
collected 1 item

tests\fixture\test_config.py host: localhost
port: 8888
.

========================== 1 passed in 0.06 seconds ===========================
capsys
capsys 用于捕获 stdout 和 stderr 的内容,并临时关闭系统输出。
# test_capsys.py

def ping(output):
    print('Pong...', file=output)


def test_stdout(capsys):
    ping(sys.stdout)
    out, err = capsys.readouterr()
    assert out == 'Pong...\n'
    assert err == ''


def test_stderr(capsys):
    ping(sys.stderr)
    out, err = capsys.readouterr()
    assert out == ''
    assert err == 'Pong...\n'
monkeypatch
monkeypath 用于运行时动态修改类或模块。
Pytest 内置 monkeypatch 提供的函数有:
setattr(target, name, value, raising=True),设置属性;delattr(target, name, raising=True),删除属性;setitem(dic, name, value),字典添加元素;delitem(dic, name, raising=True),字典删除元素;setenv(name, value, prepend=None),设置环境变量;delenv(name, raising=True),删除环境变量;syspath_prepend(path),添加系统路径;chdir(path),切换目录。
其中 raising 用于通知 pytest 在元素不存在时是否抛出异常;prepend 如果设置,环境变量将变为 value+prepend+<old value> 。
这种在运行时控制程序的功能就需要 monkeypatch 来实现,下面在测试过程中修改了环境变量:
# test_monkeypatch.py

def test_config_monkeypatch(tmpdir, monkeypatch):
    monkeypatch.setenv('HOME', tmpdir.mkdir('home'))

    dump_config(config)
    path = os.path.expanduser('~/.conf.json')
    expected = json.load(open(path, 'r', encoding='utf-8'))
    assert expected == config
现在测试会来临时目录中执行,但环境变量可能对系统有依赖,所以更好的解决方法能自己控制路径中 ~ 的替换,这次通过改变 os.path.expanduser 的行为来实现:
recwarn
recwarn 用于捕获程序中 warnings 产生的警告。
# test_recwarn.py

def warn():
    warnings.warn('Deprecated function', DeprecationWarning)


def test_warn(recwarn):
    warn()
    assert len(recwarn) == 1
    w = recwarn.pop()
    assert w.category == DeprecationWarning
此外,pytest 可以使用 pytest.warns() 捕获警告:
import pytest


def test_warn2():
    with pytest.warns(None) as warnings:
        warn()

    assert len(warnings) == 1
    w = warnings.pop()
    assert w.category == DeprecationWarning
捕获 stdout/stderr 输出
在测试运行期间,所有的 stdout / stderr 都会被捕获(不会输出到屏幕)。如果测试失败,则通常会显示相应的捕获输出以及失败。(此行为可以通过 --show-capture 命令行选项)。此外, stdin 设置为“空”对象,该对象在尝试读取时将失败,因为在运行自动测试时很少需要等待交互式输入。(执行期间不会打印任何输出,只有停止后才能一次性打印出来)
设置捕获/禁用捕获
有三种方法可以获取捕获:
fd(文件描述符) 级别的捕获(默认):所有的文件描述符1和2的内容都被捕获sys级别:只捕获写入到python文件sys.stdout和sys.stderr的才会被捕获. 不会捕获文件描述符的写入。tee-sys捕获: Python写入sys.stdout和sys.stderr将被捕获,但是写入也将传递到sys.stdout和sys.stderr. 这允许输出被“实时打印”并捕获以供插件使用
您可以从命令行设置捕获:
pytest -s                  # disable all capturing
pytest --capture=sys       # replace sys.stdout/stderr with in-mem files
pytest --capture=fd        # also point filedescriptors 1 and 2 to temp file
pytest --capture=tee-sys   # combines 'sys' and '-s', capturing sys.stdout/stderr
                           # and passing it along to the actual sys.stdout/stderr
pytest --capture=no        # disable all capture,can show info in real time.
命令行参数
修改python回溯打印
修改回溯打印的示例:
pytest --showlocals  # show local variables in tracebacks
pytest -l            # show local variables (shortcut)

pytest --tb=auto     # (default) 'long' tracebacks for the first and last
                     # entry, but 'short' style for the other entries
pytest --tb=long     # exhaustive, informative traceback formatting
pytest --tb=short    # shorter traceback format
pytest --tb=line     # only one line per failure
pytest --tb=native   # Python standard library formatting
pytest --tb=no       # no traceback at all
详细总结报告
这个 -r 标记可以过滤 short test summary info 部分中展示的信息,
它默认为 fE 列出失败和错误。
以下是可用字符的完整列表:
f-失败E-误差s跳过x-失败X-XPASSp通过P-通过输出
用于(取消)选择组的特殊字符:
a- all exceptpPA-所有N-无,这不能用来显示任何内容(因为fE是默认设置)
========================= short test summary info ==================
SKIPPED [1] 222222.py:23: skipping this test    # 上面的选项作用于这一块,这里用了 -rs 参数,过滤出 skip 的测试
================ 1 failed, 1 passed, 1 skipped, 1 xfailed, 1 xpassed, 1 error in 0.27s =============
分析测试执行持续时间
要获取长度超过1.0秒的最慢10个测试持续时间的列表:
pytest --durations=10 --durations-min=1.0
默认情况下,pytest不会显示太小的测试持续时间(<0.005s),除非 -vv 在命令行上传递。
查看缓存
$ pytest --cache-show
清除缓存
pytest --cache-clear
缓存:交叉测试
只运行上次执行时失败的测试
这个插件提供了两个命令行参数来重新执行上次运行失败的测试:
--lf,--last-failed: 只执行上次失败的测试--ff,--failed-first:先执行上次失败的测试,然后执行其余的测试。
如果清理缓存,--cache-clear 选项可以在执行测试前清除缓存。
上次执行没有失败的测试
当上次执行时,没有测试失败,或者也没有 lastfailed 数据,pytest 可以配置:要么执行所有测试,要么一个也不执行。
pytest --last-failed --last-failed-no-failures all    # run all tests (default behavior)
pytest --last-failed --last-failed-no-failures none   # run no tests and exit
内置 fixture
capfd()
捕获文件描述符 1 和 2 到文件
通过 capfd.readouterr() 捕获输出,返回一个 (out, err) . out 和 err 都是 text 对象。
例如:
import pytest
import os

def test_system_echo(capfd):
    os.system('echo hello')
    captured = capfd.readouterr()
    assert captured.out == "hello\r\n"
capsys()
捕获写入到 sys.stdout 和 sys.stderr 的文本
通过 capsys.readouterr() 捕获, 返回一个 (out, err) 命名元组. out 和err 都是 text 对象.
例如:
def test_output(capsys):
    print("hello")
    captured = capsys.readouterr()
    assert captured.out == "hello\n"
插件
pytest-rerunfailures
此插件可以重新运行失败的测试用例。
安装:
pip install pytest-rerunfailures
使用:
pytest --reruns 2 --reruns-delay 5 test_sample.py # 对执行失败的用例重新运行最多2次,每次间隔5秒钟
或者只针对某个测试用例:
@pytest.mark.flaky(reruns=10, reruns_delay=1)
def test_foo1():
    x = random.randint(1,5)
    assert x==2
pytest-ordering
对测试用例进行排序,order序号越小,越先执行。
安装:
pip install pytest-ordering
使用:
import pytest


@pytest.mark.run(order=2)   # order序号小的先执行,也就是先执行 foo1,后 foo2
def test_foo2():
    assert 1==1

@pytest.mark.run(order=1)
def test_foo1():
    assert 2==2

pytest.main(['-sv','222222.py'])
pytest-timeout
设置测试超时时间,超过时间会 fail
安装:
pip install pytest-timeout
使用:
@pytest.mark.timeout(5)
def test_time():  # 当前用例限定5s超时
   ...
或者:
pytest --timeout=5 test_sample.py # 对所有用例都限定超时
pytest-assume
针对一个测试用例中多次断言,可以忽视断言的成败,执行完所有断言
安装:
pip install pytest-assume
不用assume:
def test_foo1():
    assert 1==2 # 执行到这里失败,下面的断言不会被执行
    assert 3==2
使用:
def test_foo1():
    pytest.assume(1==2)
    pytest.assume(3==2) # 尽管上面的断言失败了,但是这个也会继续执行
pytest-html
生成html报告
安装:
pip install pytest-html
使用:
pytest --html=./report.html test_sample.py  		# 生成一个叫 report.html 的报告(css文件单独放置)
pytest --html=./report.html --self-contained-html 	# 将css和html合并
pytest-sugar
显示执行进度
安装:
pip install pytest-sugar
pytest-xdist
使用多核cpu并行执行用例
安装:
pip install pytest-xdist
使用:
pytest -n 2 test_sample.py # 使用2个线程并行
pytest-cover
测试覆盖率
安装:
pip install pytest-cover
略
allure-pytest
allure插件,根据allure生成美观的报告
- 安装插件:
pip install allure-pytest
- 下载安装allure,解压后将 bin 文件夹路径添加到环境变量:
https://dl.bintray.com/qameta/generic/io/qameta/allure/allure/2.7.0/allure-2.7.0.zip
执行命令,查看是否配置成功(不行的话,可能需要java运行环境支持):
C:\Users\wztshine>allure --version
2.7.0
- 编写测试脚本:
import allure
import pytest


@allure.feature('test_module_01')
def test_case_01():
    """
    用例描述:Test case 01
    """
    assert 0

@allure.feature('test_module_02')
def test_case_02():
    """
    用例描述:Test case 02
    """
    assert 0 == 0
- 执行脚本:
pytest -s test_2.py --alluredir ./report # 执行 test_2.py中的测试,设置 alluredir 目录为:./report
- 生成 html 报告,并查看
allure generate ./report -o ./html --clean  # 针对上一步的 report 目录,生成一个 html 目录,里面存放了报告
allure open ./html                          # 打开报告,会自动调用开启一个web服务打开网页
allure report clean							# 清理报告数据
steps
Allure 报告首要并且可能最重要的是,它允许获得每个测试的非常详细的步骤。这是通过 @allure.step 装饰器来实现的,它将注释的方法或函数的调用与提供的参数都添加到报表中。
@step 可以存储在测试之外,并只在需要时导入。Step 方法可以有任意深嵌套的结构。
例如:
import allure
import pytest


@allure.step
def test_step1():
    """
    用例描述:Test step 1
    """
    test_step2()

@allure.step
def test_step2():
    """
    用例描述:Test step 2
    """
    assert 0 == 1

def test_step():
    test_step1()
    test_step2()

allure.step 可以有一个描述行,该描述行支持传递的位置参数和关键字参数的占位符,关键字参数的默认参数也将被捕获。
import allure

@allure.step('Step with placeholders in the title, positional: "{0}", keyword: "{key}"')
def step_with_title_placeholders(arg1, key=None):
    pass


def test_steps_with_placeholders():
    step_with_title_placeholders(1, key='something')
    step_with_title_placeholders(2)
    step_with_title_placeholders(3, 'anything')

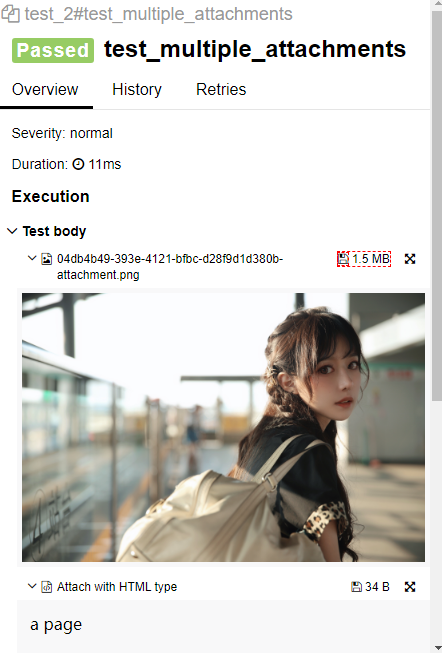
Attachments
报告可以显示许多不同类型的附件,这些附件可以作为测试、步骤或 fixture 结果的补充。附件可以通过 allure.attach 创建(body, name, attachment_type, extension):
body- 要写入文件的原始内容,可以是文字,图片等。name- 文件名的字符串attachment_type- 一个allure.attachment_type值,即附件的类型extension- 被用作文件的扩展,可以忽略
或者 allure.attach.file(source, name, attachment_type, extension):
source- 包含文件路径的字符串
(其他参数一样)
import allure
import pytest


def test_multiple_attachments():
    allure.attach.file(r'C:\Users\wztshine\Desktop\wallhaven-73dyxo.jpg', attachment_type=allure.attachment_type.PNG)
    allure.attach('<head></head><body> a page </body>', 'Attach with HTML type', allure.attachment_type.HTML)
附件显示在它们所属的测试实体的上下文中。HTML 类型的附件将呈现并显示在报告页面上,这是一种方便的方法,可以为您自己的测试结果表示提供一些定制化。
Descriptions
您可以添加测试的详细描述,以便为报表阅读提供所需的上下文。这可以通过几种方式实现:您可以添加一个 @allure.description 装饰器来提供一个描述字符串,或者您可以使用 @allure.description_html 来提供一些 HTML,以便在测试用例的 “description” 部分中呈现。
import allure
import pytest


@allure.description("this is description")  # 描述内容
def test_multiple_attachments():
    allure.attach.file(r'C:\Users\wztshine\Desktop\wallhaven-73dyxo.jpg', attachment_type=allure.attachment_type.PNG)
    allure.attach('<head></head><body> a page </body>', 'Attach with HTML type', allure.attachment_type.HTML)

也可以不写描述内容,直接使用函数的描述
import allure
import pytest


@allure.description     # 不写描述内容,直接使用函数的说明文档
def test_des():
    """ this is des"""   # 用这句话当描述
    assert 0==0
描述也可以使用 allure.dynamic.description 从测试体的内部动态更新。
import allure

@allure.description("""
This description will be replaced at the end of the test.
""")
def test_dynamic_description():
    assert 42 == int(6 * 7)
    allure.dynamic.description('A final description.')
Titles
特殊的 @allure.title 装饰器可以使测试标题更具可读性。标题支持参数占位符并支持动态替换。
import allure
import pytest


@allure.title("This test has a custom title")
def test_with_a_title():
    assert 2 + 2 == 4

Links
要想将报告与缺陷跟踪或测试管理集成,可以使用:@allure.link, @allure.issue 和 @allure.testcase
import allure

TEST_CASE_LINK = 'https://github.com/qameta/allure-integrations/issues/8#issuecomment-268313637'


@allure.link('https://www.youtube.com/watch?v=4YYzUTYZRMU') # 直接显示为网址
def test_with_link():
    pass


@allure.link('https://www.youtube.com/watch?v=Su5p2TqZxKU', name='Click me') # 链接文本
def test_with_named_link():
    pass


@allure.issue('140', 'Pytest-flaky test') # 会打开192.16.../140,也就是当前 web 服务的某个issueid的网址。
def test_with_issue_link():
    pass


@allure.testcase(TEST_CASE_LINK, 'Test case title') # 链接文本
def test_with_testcase_link():
    pass

BDD markers
BDD(Behavior-driven development)
类似于pytest 的mark标记,可以通过标记进行测试用例的过滤,只执行某些标记。
有两个装饰器可以根据项目的特性/故事分解来标记测试: @allure.feature 和 @allure.story (背景资料请参阅Wikipedia上的BDD文章)。为了表明某个特征或故事属于某个史诗,名字可以使用 epic_ 前缀开头。
您可以使用以下命令行选项来指定不同的测试集来执行传递一列逗号分隔的值:
--allure-epics--allure-features--allure-stories
例子:
import allure

def test_without_any_annotations_that_wont_be_executed():
    pass

@allure.story('epic_1')
def test_with_epic_1():
    pass

@allure.story('story_1')
def test_with_story_1():
    pass

@allure.story('story_2')
def test_with_story_2():
    pass

@allure.feature('feature_2')
@allure.story('story_2')
def test_with_story_2_and_feature_2():
    pass
$ pytest tests.py --allure-stories story_1,story_2

collected 5 items

tests.py ...                                                                    [100%]

============================== 3 passed in 0.01 seconds ==============================
$ pytest tests.py --allure-features feature2 --allure-stories story2

collected 5 items

tests.py ...                                                                     [100%]

=============================== 2 passed in 0.01 seconds ==============================
Severity markers
要根据测试的严重程度对测试进行评分,可以使用 @allure.severity 装饰器。它需要 allure.severity_level 枚举值作为参数。
tests.py
import allure


def test_with_no_severity_label():
    pass


@allure.severity(allure.severity_level.TRIVIAL)
def test_with_trivial_severity():
    pass


@allure.severity(allure.severity_level.NORMAL)
def test_with_normal_severity():
    pass


@allure.severity(allure.severity_level.NORMAL)
class TestClassWithNormalSeverity(object):
    def test_inside_the_normal_severity_test_class(self):
        pass

    @allure.severity(allure.severity_level.CRITICAL)
    def test_inside_the_normal_severity_test_class_with_overriding_critical_severity(self):
        pass
Severity 装饰器可以应用于函数、方法或整个类。
通过使用带有逗号分隔的严重性级别列表的 --allure-severities 命令行选项,只有具有相应严重性的测试才会运行。
$ pytest tests.py --allure-severities normal,critical

collected 5 items

bdd_annotations_demo/test_severity_labels.py ...                                [100%]

================================ 3 passed in 0.01 seconds ============================

 浙公网安备 33010602011771号