OpenVINO计算机视觉模型加速
OpenVINO计算机视觉模型加速
OpenVINO介绍
- 计算机视觉部署框架,支持多种边缘硬件平台
- Intel开发并开源使用的计算机视觉库
- 支持多个场景视觉任务场景的快速演示
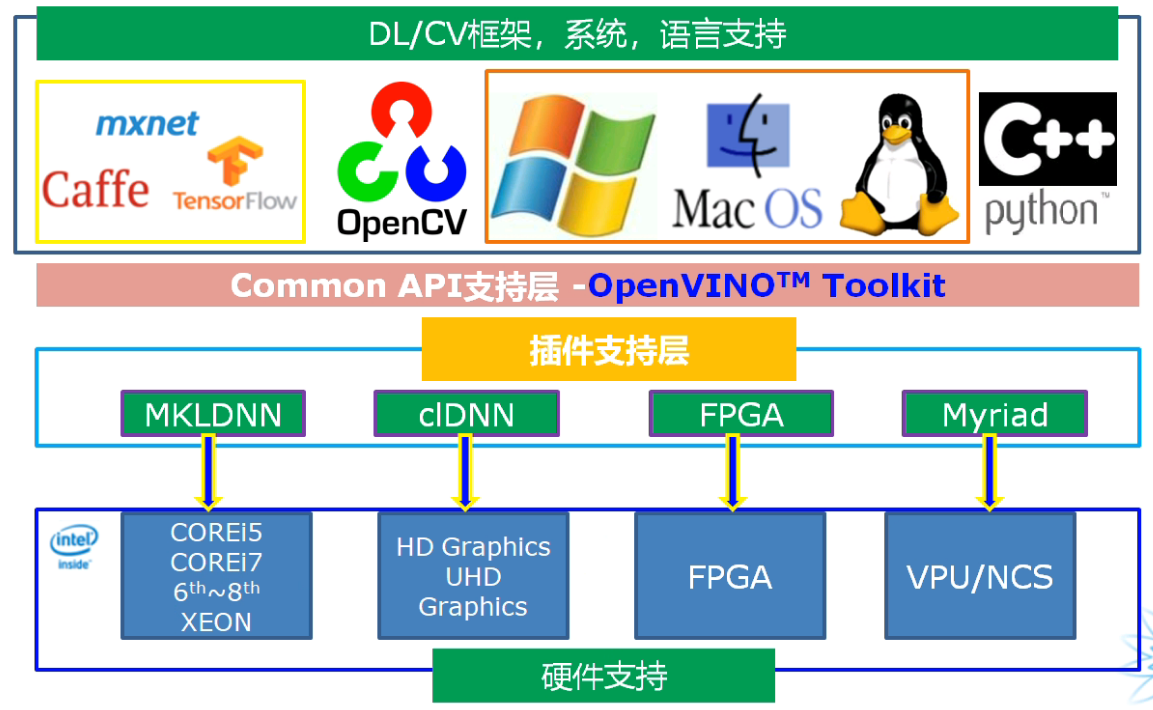
四个主要模块:

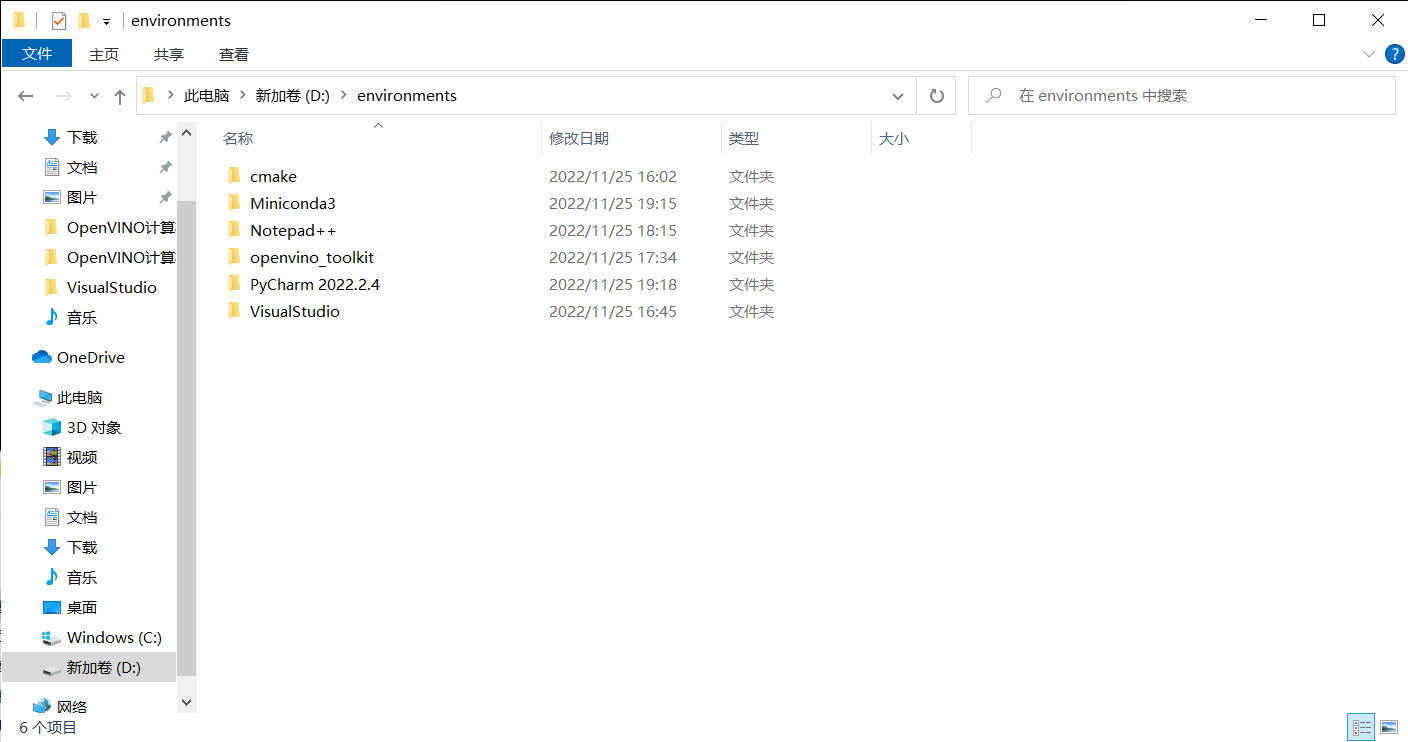
1、开发环境搭建
安装cmake、Miniconda3、Notepad++、PyCharm、VisualStudio 2019
注意:安装Miniconda3一定要设置其自动添加环境变量,需要添加5个环境变量,手动添加很可能会漏掉,排错困难

下载OpenVINO并安装:[Download Intel® Distribution of OpenVINO™ Toolkit](https://www.intel.com/content/www/us/en/developer/tools/openvino-toolkit/download-previous-versions.html?operatingsystem=window&distributions=webdownload&version=2021 4.2 LTS&options=offline)
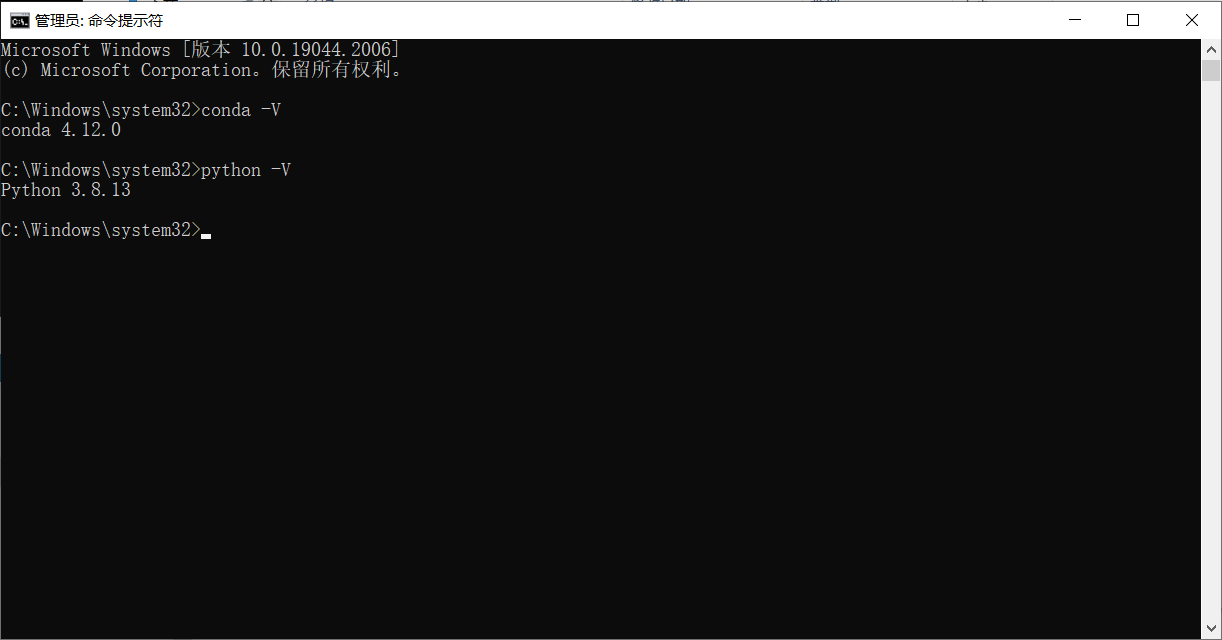
安装完毕后运行测试程序
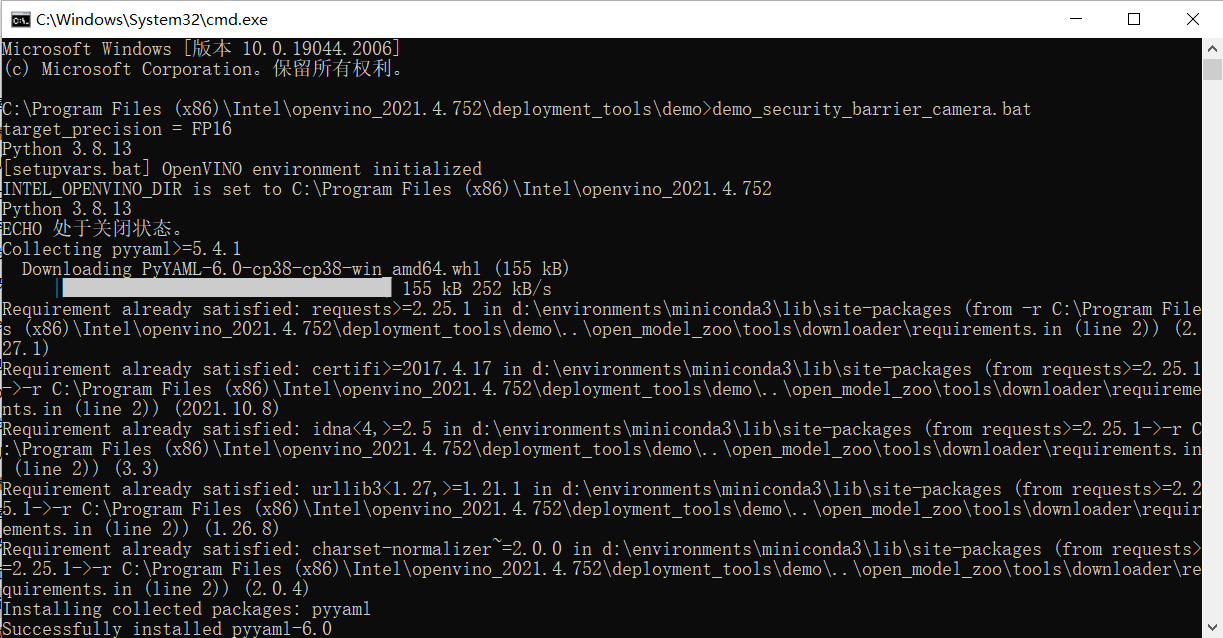
出现下面运行结果代表安装配置成功
添加OpenVINO环境变量

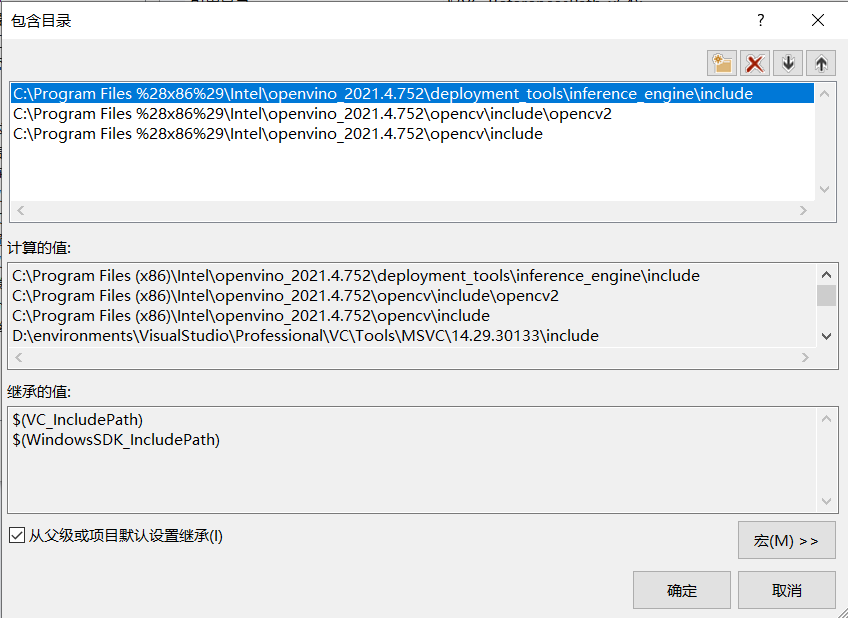
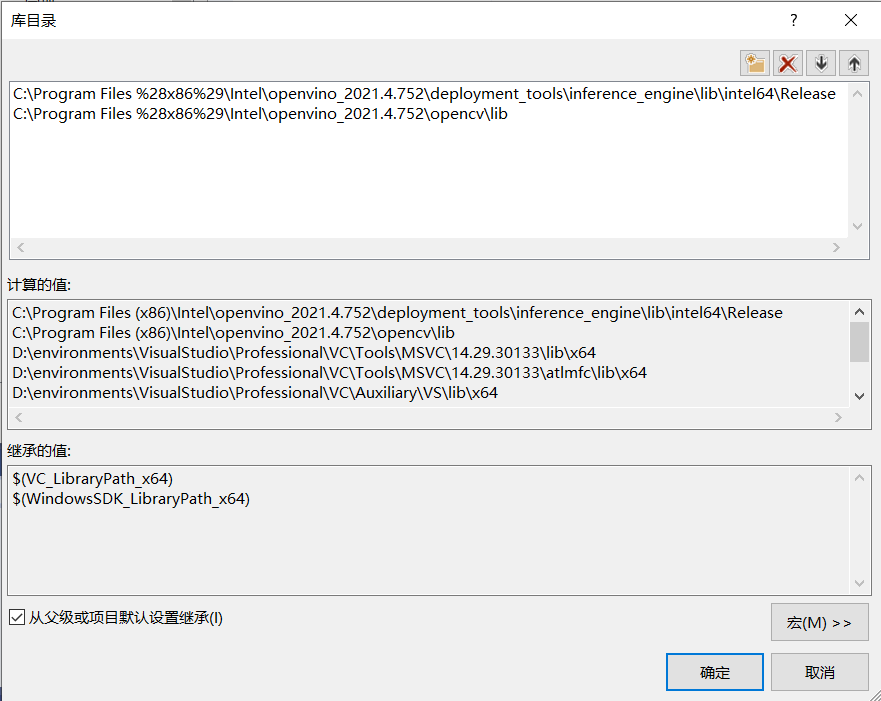
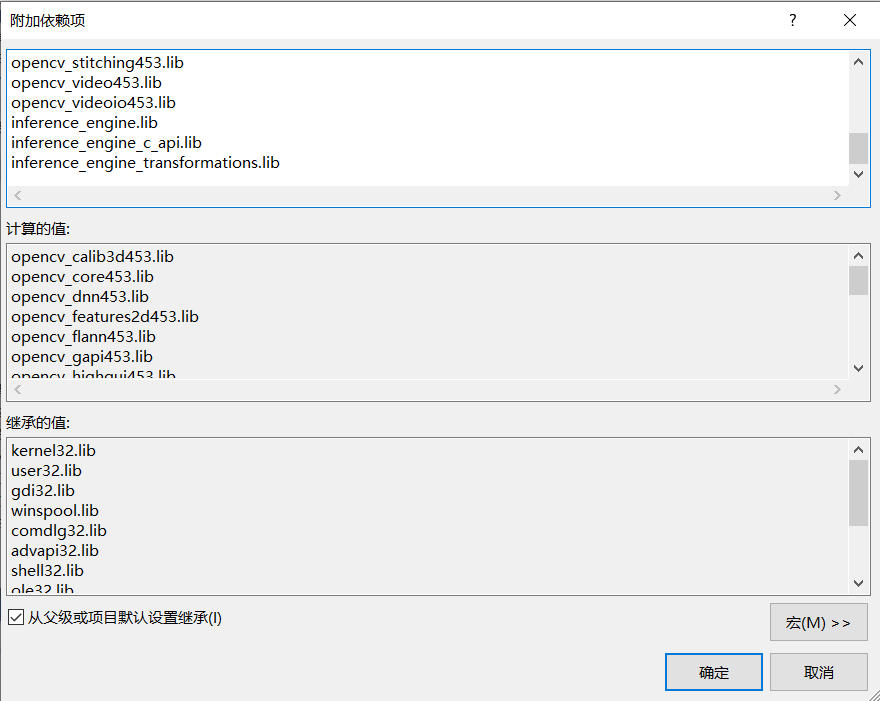
配置VisualStudio包含目录、库目录及附加依赖项
运行以下脚本自动获取附加依赖项

添加附加依赖项
至此,开发环境搭建完毕!
2、SDK介绍与开发流程

inference_engine.dll 推理引擎
依赖支持:inference_engine_transformations.dll, tbb.dll, tbbmalloc.dll, ngraph.dll
一定要把这些dll文件都添加到 C:/Windows/System32 中才可以正常运行OpenVINO程序
InferenceEngine相关API函数支持
- InferenceEngine::Core
- InferenceEngine::Blob, InferenceEngine::TBlob, InferenceEngine::NV12Blob
- InferenceEngine::BlobMap
- InferenceEngine::InputsDataMap, InferenceEngine::InputInfo
- InferenceEngine::OutputsDataMap
- InferenceEngine核心库的包装类
- InferenceEngine::CNNNetwork
- InferenceEngine::ExecutableNetwork
- InferenceEngine::InferRequest
代码实现
#include <inference_engine.hpp>
#include <iostream>

using namespace InferenceEngine;

int main(int argc, char** argv) {

	InferenceEngine::Core ie;  //使用推理引擎获取可用的设备及cpu全称
	std::vector<std::string> devices = ie.GetAvailableDevices();
	for (std::string name : devices) {
		std::cout << "device name: " << name << std::endl;
	}
	std::string cpuName = ie.GetMetric("CPU", METRIC_KEY(FULL_DEVICE_NAME)).as<std::string>();
	std::cout << "cpu full name: " << cpuName << std::endl;

	return 0;
}
效果:

3、ResNet18实现图像分类
预训练模型介绍 - ResNet18
- 预处理图像
- mean = [0.485, 0.456, 0.406], std = [0.229, 0.224, 0.225],图像归一化后再减去均值,除以方差
- 输入:NCHW = 1 * 3 * 224 * 224 (num,channels,height,width)
- 输出格式:1 * 1000
代码实现整体步骤
- 初始化Core ie
- ie.ReadNetwork
- 获取输入与输出格式并设置精度
- 获取可执行网络并链接硬件
- auto executable_network = ie.LoadNetwork(network, "CPU");
- 创建推理请求
- auto infer_request = executable_network.CreateInferRequest();
- 设置输入数据 - 图像数据预处理
- 推理并解析输出
代码实现
#include <inference_engine.hpp>
#include <opencv2/opencv.hpp>
#include <fstream> //fstream文件读写操作,iostream为控制台操作
using namespace InferenceEngine;
std::string labels_txt_file = "D:/projects/models/resnet18_ir/imagenet_classes.txt";
std::vector<std::string> readClassNames();
int main(int argc, char** argv) {
InferenceEngine::Core ie;
std::vector<std::string> devices = ie.GetAvailableDevices();
for (std::string name : devices) {
std::cout << "device name: " << name << std::endl;
}
std::string cpuName = ie.GetMetric("CPU", METRIC_KEY(FULL_DEVICE_NAME)).as<std::string>();
std::cout << "cpu name: " << cpuName << std::endl;
std::string xml = "D:/projects/models/resnet18_ir/resnet18.xml";
std::string bin = "D:/projects/models/resnet18_ir/resnet18.bin";
std::vector<std::string> labels = readClassNames(); //读取标签
cv::Mat src = cv::imread("D:/images/messi.jpg"); //读取图像
InferenceEngine::CNNNetwork network = ie.ReadNetwork(xml, bin); //读取resnet18网络
InferenceEngine::InputsDataMap inputs = network.getInputsInfo(); //DataMap是一个Mat数组
InferenceEngine::OutputsDataMap outputs = network.getOutputsInfo(); //DataMap是一个Mat数组
std::string input_name = "";
for (auto item : inputs) { //auto可以自动推断变量类型
input_name = item.first; //第一个参数是name,第二个参数是结构,第二个参数设置精度与结构
auto input_data = item.second;
input_data->setPrecision(Precision::FP32);
input_data->setLayout(Layout::NCHW);
input_data->getPreProcess().setColorFormat(ColorFormat::RGB);
std::cout << "input name: " << input_name << std::endl;
}
std::string output_name = "";
for (auto item : outputs) { //auto可以自动推断变量类型
output_name = item.first; //第一个参数是name,第二个参数是结构,第二个参数设置精度与结构
auto output_data = item.second;
output_data->setPrecision(Precision::FP32);
//注意:output_data不要设置结构
std::cout << "output name: " << output_name << std::endl;
}
auto executable_network = ie.LoadNetwork(network, "CPU"); //设置运行的设备
auto infer_request = executable_network.CreateInferRequest(); //设置推理请求
//图像预处理
auto input = infer_request.GetBlob(input_name); //获取网络输入图像信息
size_t num_channels = input->getTensorDesc().getDims()[1]; //size_t 类型表示C中任何对象所能达到的最大长度,它是无符号整数
size_t h = input->getTensorDesc().getDims()[2];
size_t w = input->getTensorDesc().getDims()[3];
size_t image_size = h * w;
cv::Mat blob_image;
cv::resize(src, blob_image, cv::Size(w, h)); //将输入图片大小转换为与网络输入大小一致
blob_image.convertTo(blob_image, CV_32F); //将输入图像转换为浮点数
blob_image = blob_image / 255.0;
cv::subtract(blob_image, cv::Scalar(0.485, 0.456, 0.406), blob_image);
cv::divide(blob_image, cv::Scalar(0.229, 0.224, 0.225), blob_image);
// HWC =》NCHW 将输入图像从HWC格式转换为NCHW格式
float* data = static_cast<float*>(input->buffer()); //将图像放到buffer中,放入input中
for (size_t row = 0; row < h; row++) {
for (size_t col = 0; col < w; col++) {
for (size_t ch = 0; ch < num_channels; ch++) {
//将每个通道变成一张图,按照通道顺序
data[image_size * ch + row * w + col] = blob_image.at<cv::Vec3f>(row, col)[ch];
}
}
}
infer_request.Infer();
auto output = infer_request.GetBlob(output_name);
//转换输出数据
const float* probs = static_cast<PrecisionTrait<Precision::FP32>::value_type*>(output->buffer());
const SizeVector outputDims = output->getTensorDesc().getDims(); //获取输出维度信息 1*1000
std::cout << outputDims[0] << "x" << outputDims[1] << std::endl;
float max = probs[0];
int max_index = 0;
for (int i = 1; i < outputDims[1]; i++) {
if (max < probs[i]) { //找到结果probs中的最大值,获取其下标
max = probs[i];
max_index = i;
}
}
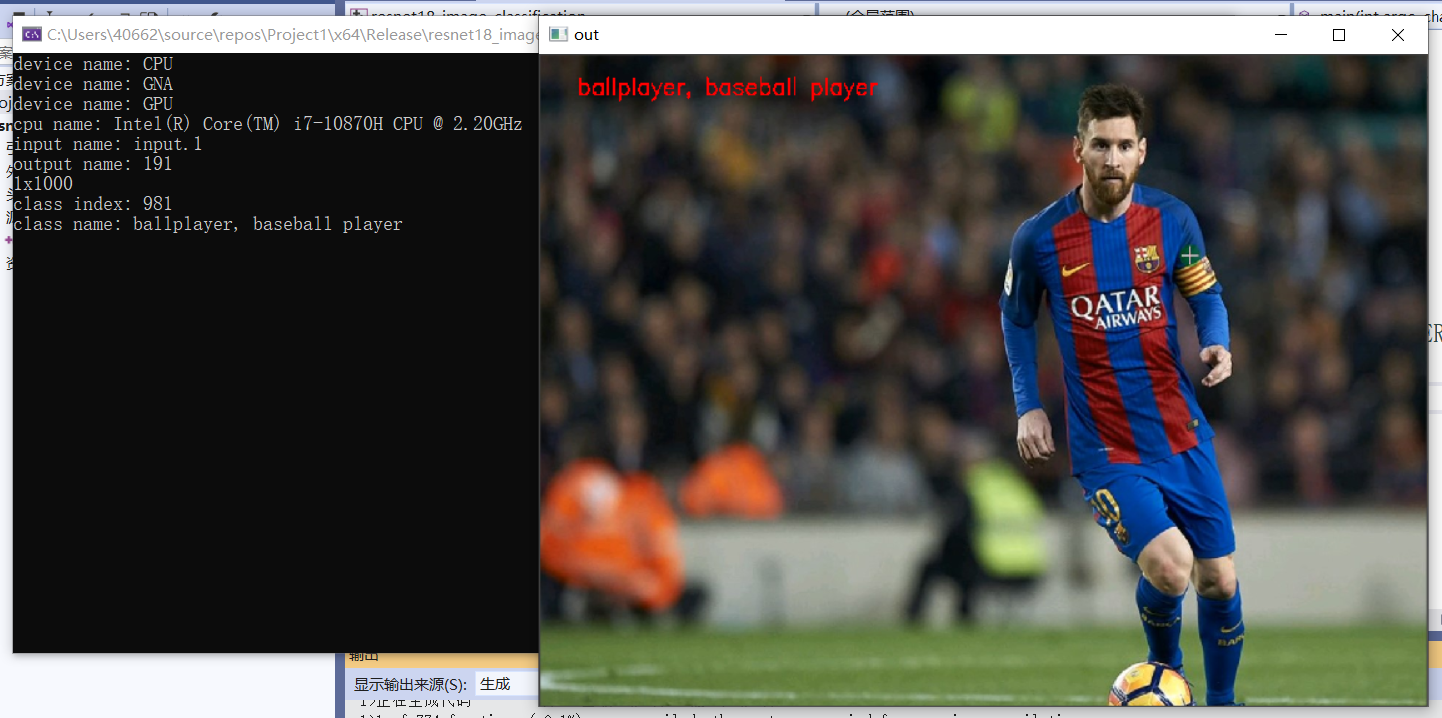
std::cout << "class index: " << max_index << std::endl;
std::cout << "class name: " << labels[max_index] << std::endl;
cv::putText(src, labels[max_index], cv::Point(50, 50), cv::FONT_HERSHEY_SIMPLEX, 1.0, cv::Scalar(0, 0, 255), 2, 8);
cv::namedWindow("out", cv::WINDOW_FREERATIO);
cv::imshow("out", src);
cv::waitKey(0);
return 0;
}
std::vector<std::string> readClassNames() { //读取文件
std::vector<std::string> classNames;
std::ifstream fp(labels_txt_file);
if (!fp.is_open()) {
printf("could not open file...\n");
exit(-1);
}
std::string name;
while (!fp.eof()) { //eof()函数判断是否读到文件末尾
std::getline(fp, name); //逐行读取文件并保存在变量中
if (name.length()) {
classNames.push_back(name);
}
}
fp.close();
return classNames;
}
效果:
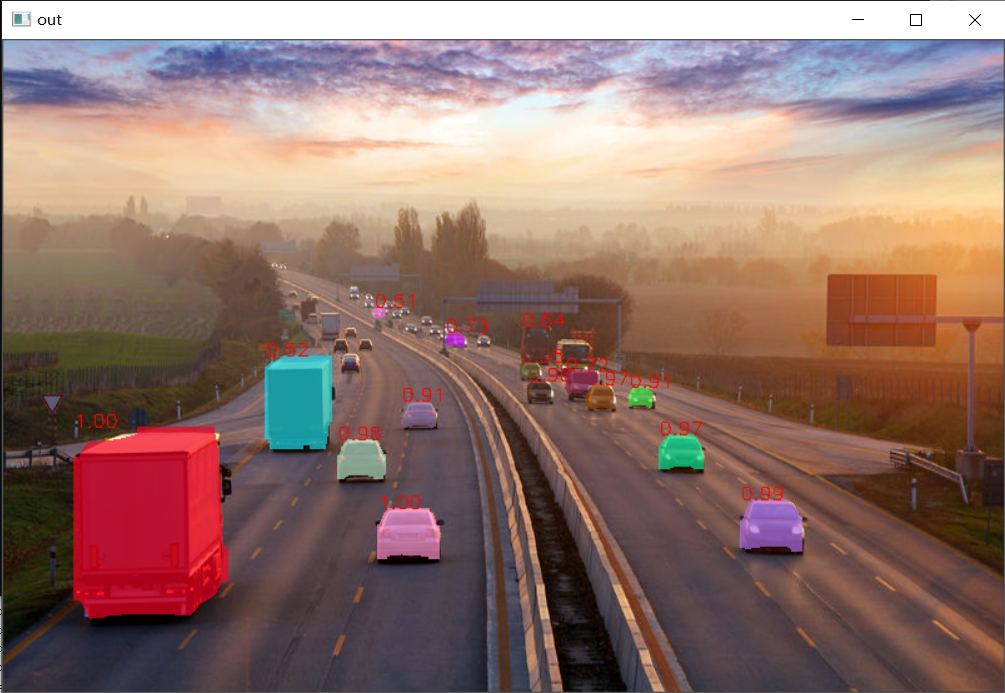
4、车辆检测与车牌识别
模型介绍
- vehicle - license - plate - detection - varrier - 0106
- 基于BIT-Vehicle数据集
- 输入 1 * 3 * 300 * 300 = NCHW
- 输出格式:[1, 1, N, 7]
- 七个值:[image_id, label, conf, x_min, y_min, x_max, y_max]
调用流程
- 加载模型
- 设置输入输出
- 构建输入
- 执行推断
- 解析输出
- 显示结果
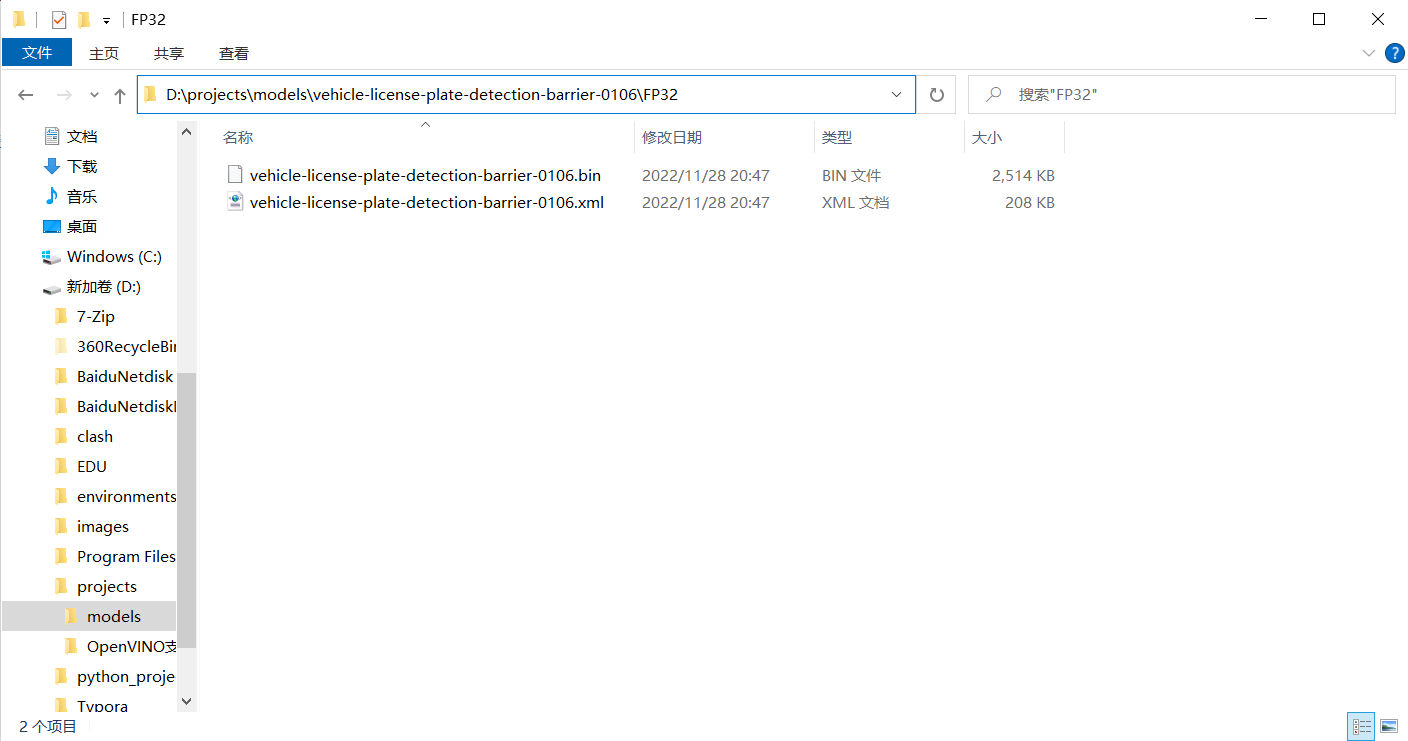
车辆及车牌检测模型下载
cd C:\Program Files (x86)\Intel\openvino_2021.2.185\deployment_tools\open_model_zoo\tools\downloader  #以管理员身份运行cmd,切换到downloader文件夹下

python downloader.py --name vehicle-license-plate-detection-barrier-0106  #在该文件夹下执行该脚本,下载模型
出现下图代表下载成功:

将下载的模型文件移动到模型文件夹中:
车辆及车牌检测代码实现
#include <inference_engine.hpp>
#include <opencv2/opencv.hpp>
#include <fstream>  //fstream文件读写操作,iostream为控制台操作

using namespace InferenceEngine;

int main(int argc, char** argv) {

	InferenceEngine::Core ie;
	std::vector<std::string> devices = ie.GetAvailableDevices();
	for (std::string name : devices) {
		std::cout << "device name: " << name << std::endl;
	}
	std::string cpuName = ie.GetMetric("CPU", METRIC_KEY(FULL_DEVICE_NAME)).as<std::string>();
	std::cout << "cpu name: " << cpuName << std::endl;

	std::string xml = "D:/projects/models/vehicle-license-plate-detection-barrier-0106/FP32/vehicle-license-plate-detection-barrier-0106.xml";
	std::string bin = "D:/projects/models/vehicle-license-plate-detection-barrier-0106/FP32/vehicle-license-plate-detection-barrier-0106.bin";
	cv::Mat src = cv::imread("D:/images/car_1.bmp");  //读取图像
	int im_h = src.rows;
	int im_w = src.cols;
	InferenceEngine::CNNNetwork network = ie.ReadNetwork(xml, bin);  //读取resnet18网络

	InferenceEngine::InputsDataMap inputs = network.getInputsInfo();  //DataMap是一个Mat数组
	InferenceEngine::OutputsDataMap outputs = network.getOutputsInfo();  //DataMap是一个Mat数组
	std::string input_name = "";
	for (auto item : inputs) {  //auto可以自动推断变量类型
		input_name = item.first;  //第一个参数是name,第二个参数是结构,第二个参数设置精度与结构
		auto input_data = item.second;
		input_data->setPrecision(Precision::U8);  //默认为unsigned char对应U8
		input_data->setLayout(Layout::NCHW);
		//input_data->getPreProcess().setColorFormat(ColorFormat::BGR);  默认就是BGR
		std::cout << "input name: " << input_name << std::endl;
	}
	std::string output_name = "";
	for (auto item : outputs) {  //auto可以自动推断变量类型
		output_name = item.first;  //第一个参数是name,第二个参数是结构,第二个参数设置精度与结构
		auto output_data = item.second;
		output_data->setPrecision(Precision::FP32);  //输出还是浮点数
		//注意:output_data不要设置结构
		std::cout << "output name: " << output_name << std::endl;
	}

	auto executable_network = ie.LoadNetwork(network, "CPU");  //设置运行的设备
	auto infer_request = executable_network.CreateInferRequest();  //设置推理请求

	//图像预处理
	auto input = infer_request.GetBlob(input_name);  //获取网络输入图像信息
	size_t num_channels = input->getTensorDesc().getDims()[1];  //size_t 类型表示C中任何对象所能达到的最大长度,它是无符号整数
	size_t h = input->getTensorDesc().getDims()[2];
	size_t w = input->getTensorDesc().getDims()[3];
	size_t image_size = h * w;
	cv::Mat blob_image;
	cv::resize(src, blob_image, cv::Size(w, h));  //将输入图片大小转换为与网络输入大小一致
	//cv::cvtColor(blob_image, blob_image, cv::COLOR_BGR2RGB);  //色彩空间转换

	// HWC =》NCHW  将输入图像从HWC格式转换为NCHW格式
	unsigned char* data = static_cast<unsigned char*>(input->buffer());  //将图像放到buffer中,放入input中
	for (size_t row = 0; row < h; row++) {
		for (size_t col = 0; col < w; col++) {
			for (size_t ch = 0; ch < num_channels; ch++) {
				//将每个通道变成一张图,按照通道顺序
				data[image_size * ch + row * w + col] = blob_image.at<cv::Vec3b>(row, col)[ch];
			}
		}
	}

	infer_request.Infer();
	auto output = infer_request.GetBlob(output_name);
	//转换输出数据
	const float* detection_out = static_cast<PrecisionTrait<Precision::FP32>::value_type*>(output->buffer());
	//output:[1, 1, N, 7]
	//七个参数为:[image_id, label, conf, x_min, y_min, x_max, y_max]
	const SizeVector outputDims = output->getTensorDesc().getDims();  //获取输出维度信息 1*1000
	std::cout << outputDims[2] << "x" << outputDims[3] << std::endl;
	const int max_count = outputDims[2];  //识别出的对象个数
	const int object_size = outputDims[3];  //获取对象信息的个数,此处为7个
	for (int n = 0; n < max_count; n++) {
		float label = detection_out[n * object_size + 1];
		float confidence = detection_out[n * object_size + 2];
		float xmin = detection_out[n * object_size + 3] * im_w;
		float ymin = detection_out[n * object_size + 4] * im_h;
		float xmax = detection_out[n * object_size + 5] * im_w;
		float ymax = detection_out[n * object_size + 6] * im_h;
		if (confidence > 0.5) {
			printf("label id: %d \n", static_cast<int>(label));
			cv::Rect box;
			box.x = static_cast<int>(xmin);
			box.y = static_cast<int>(ymin);
			box.width = static_cast<int>(xmax - xmin);
			box.height = static_cast<int>(ymax - ymin);
			cv::rectangle(src, box, cv::Scalar(0, 0, 255), 2, 8);
			//box.tl()返回矩形左上角坐标
			cv::putText(src, cv::format("%.2f", confidence), box.tl(), cv::FONT_HERSHEY_SIMPLEX, 1.0, cv::Scalar(0, 0, 255), 2, 8);
		}
	}

	//cv::putText(src, labels[max_index], cv::Point(50, 50), cv::FONT_HERSHEY_SIMPLEX, 1.0, cv::Scalar(0, 0, 255), 2, 8);
	cv::namedWindow("out", cv::WINDOW_FREERATIO);
	cv::imshow("out", src);
	cv::waitKey(0);
	return 0;
}
效果:

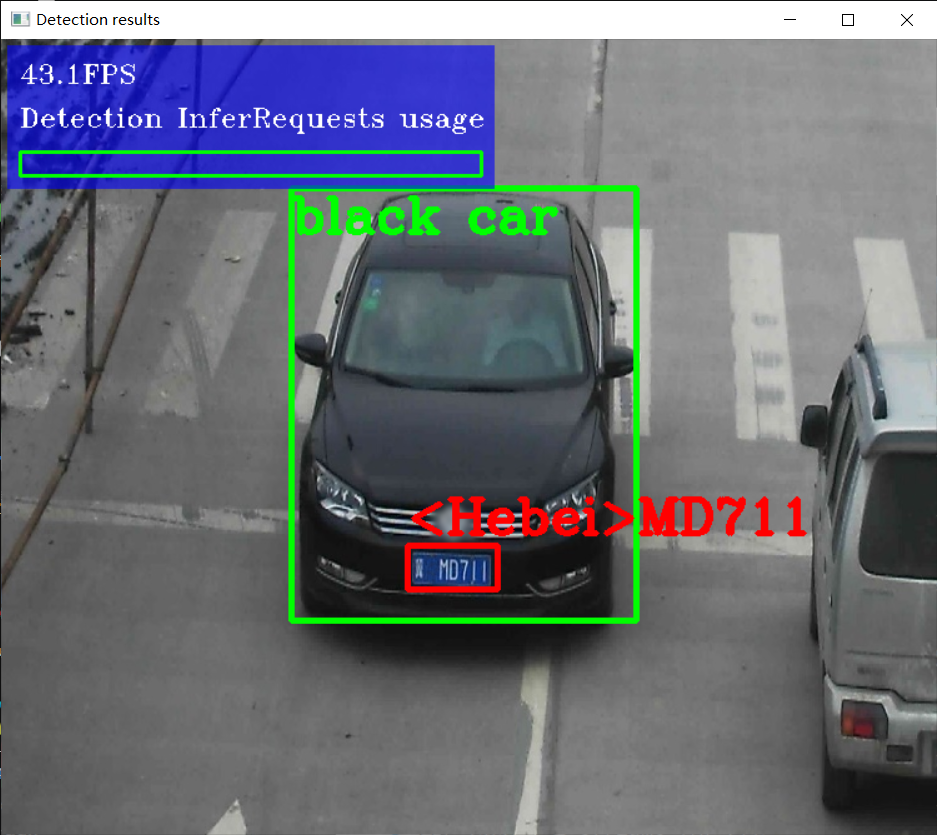
车牌识别
- 模型名称:license-plate-recognition-barrier-0001
- 输入格式:BGR
- 1 * 3 * 24 * 94,88 * 1 = [0, 1, 1, 1, 1, ...... , 1]
- 输出格式:1 * 88 * 1 * 1
下载模型(license-plate-recognition-barrier-0001),下载方法同上,实现思路:1初始化车牌识别网络,提升输入输出值的应用范围;2调用车辆及车牌检测模型进行车牌检测;3将车牌检测的数据输入车牌识别函数,使用车牌识别网络初始化的输入输出值在该函数中进行识别,输出识别到的车牌信息。
车牌识别代码实现
#include <opencv2/opencv.hpp>
#include <inference_engine.hpp>
#include <fstream>

using namespace InferenceEngine;
static std::vector<std::string> items = {
	"0","1","2","3","4","5","6","7","8","9",
	"< Anhui >","< Beijing >","< Chongqing >","< Fujian >",
	"< Gansu >","< Guangdong >","< Guangxi >","< Guizhou >",
	"< Hainan >","< Hebei >","< Heilongjiang >","< Henan >",
	"< HongKong >","< Hubei >","< Hunan >","< InnerMongolia >",
	"< Jiangsu >","< Jiangxi >","< Jilin >","< Liaoning >",
	"< Macau >","< Ningxia >","< Qinghai >","< Shaanxi >",
	"< Shandong >","< Shanghai >","< Shanxi >","< Sichuan >",
	"< Tianjin >","< Tibet >","< Xinjiang >","< Yunnan >",
	"< Zhejiang >","< police >",
	"A","B","C","D","E","F","G","H","I","J",
	"K","L","M","N","O","P","Q","R","S","T",
	"U","V","W","X","Y","Z"
};

InferenceEngine::InferRequest plate_request;
std::string plate_input_name1;
std::string plate_input_name2;
std::string plate_output_name;

void load_plate_recog_model();
void fetch_plate_text(cv::Mat &image, cv::Mat &plateROI);

int main(int argc, char** argv) {

	InferenceEngine::Core ie;
	load_plate_recog_model();  //调用车牌识别模型,模型信息保存到plate_input_name1/name2/output_name中

	std::string xml = "D:/projects/models/vehicle-license-plate-detection-barrier-0106/FP32/vehicle-license-plate-detection-barrier-0106.xml";
	std::string bin = "D:/projects/models/vehicle-license-plate-detection-barrier-0106/FP32/vehicle-license-plate-detection-barrier-0106.bin";
	cv::Mat src = cv::imread("D:/images/car_1.bmp");  //读取图像
	int im_h = src.rows;
	int im_w = src.cols;
	InferenceEngine::CNNNetwork network = ie.ReadNetwork(xml, bin);  //读取resnet18网络

	InferenceEngine::InputsDataMap inputs = network.getInputsInfo();  //DataMap是一个Mat数组
	InferenceEngine::OutputsDataMap outputs = network.getOutputsInfo();  //DataMap是一个Mat数组
	std::string input_name = "";
	for (auto item : inputs) {  //auto可以自动推断变量类型
		input_name = item.first;  //第一个参数是name,第二个参数是结构,第二个参数设置精度与结构
		auto input_data = item.second;
		input_data->setPrecision(Precision::U8);  //默认为unsigned char对应U8
		input_data->setLayout(Layout::NCHW);
		//input_data->getPreProcess().setColorFormat(ColorFormat::BGR);  默认就是BGR
		std::cout << "input name: " << input_name << std::endl;
	}
	std::string output_name = "";
	for (auto item : outputs) {  //auto可以自动推断变量类型
		output_name = item.first;  //第一个参数是name,第二个参数是结构,第二个参数设置精度与结构
		auto output_data = item.second;
		output_data->setPrecision(Precision::FP32);  //输出还是浮点数
		//注意:output_data不要设置结构
		std::cout << "output name: " << output_name << std::endl;
	}

	auto executable_network = ie.LoadNetwork(network, "CPU");  //设置运行的设备
	auto infer_request = executable_network.CreateInferRequest();  //设置推理请求

	//图像预处理
	auto input = infer_request.GetBlob(input_name);  //获取网络输入图像信息
	size_t num_channels = input->getTensorDesc().getDims()[1];  //size_t 类型表示C中任何对象所能达到的最大长度,它是无符号整数
	size_t h = input->getTensorDesc().getDims()[2];
	size_t w = input->getTensorDesc().getDims()[3];
	size_t image_size = h * w;
	cv::Mat blob_image;
	cv::resize(src, blob_image, cv::Size(w, h));  //将输入图片大小转换为与网络输入大小一致
	//cv::cvtColor(blob_image, blob_image, cv::COLOR_BGR2RGB);  //色彩空间转换

	// HWC =》NCHW  将输入图像从HWC格式转换为NCHW格式
	unsigned char* data = static_cast<unsigned char*>(input->buffer());  //将图像放到buffer中,放入input中
	for (size_t row = 0; row < h; row++) {
		for (size_t col = 0; col < w; col++) {
			for (size_t ch = 0; ch < num_channels; ch++) {
				//将每个通道变成一张图,按照通道顺序
				data[image_size * ch + row * w + col] = blob_image.at<cv::Vec3b>(row, col)[ch];
			}
		}
	}

	infer_request.Infer();
	auto output = infer_request.GetBlob(output_name);
	//转换输出数据
	const float* detection_out = static_cast<PrecisionTrait<Precision::FP32>::value_type*>(output->buffer());
	//output:[1, 1, N, 7]
	//七个参数为:[image_id, label, conf, x_min, y_min, x_max, y_max]
	const SizeVector outputDims = output->getTensorDesc().getDims();  //获取输出维度信息 1*1000
	std::cout << outputDims[2] << "x" << outputDims[3] << std::endl;
	const int max_count = outputDims[2];  //识别出的对象个数
	const int object_size = outputDims[3];  //获取对象信息的个数,此处为7个
	for (int n = 0; n < max_count; n++) {
		float label = detection_out[n * object_size + 1];
		float confidence = detection_out[n * object_size + 2];
		float xmin = detection_out[n * object_size + 3] * im_w;
		float ymin = detection_out[n * object_size + 4] * im_h;
		float xmax = detection_out[n * object_size + 5] * im_w;
		float ymax = detection_out[n * object_size + 6] * im_h;
		if (confidence > 0.5) {
			printf("label id: %d \n", static_cast<int>(label));
			cv::Rect box;
			box.x = static_cast<int>(xmin);
			box.y = static_cast<int>(ymin);
			box.width = static_cast<int>(xmax - xmin);
			box.height = static_cast<int>(ymax - ymin);

			if (label == 2) {  //将车牌用绿色表示
				cv::rectangle(src, box, cv::Scalar(0, 255, 0), 2, 8);
				//recognize plate
				cv::Rect plate_roi;
				plate_roi.x = box.x - 5;
				plate_roi.y = box.y - 5;
				plate_roi.width = box.width + 10;
				plate_roi.height = box.height + 10;
				cv::Mat roi = src(plate_roi);  //需要先初始化Mat&,才能使用
				//调用车牌识别方法
				fetch_plate_text(src, roi);
			}
			else {
				cv::rectangle(src, box, cv::Scalar(0, 0, 255), 2, 8);
			}

			//box.tl()返回矩形左上角坐标
			cv::putText(src, cv::format("%.2f", confidence), box.tl(), cv::FONT_HERSHEY_SIMPLEX, 1.0, cv::Scalar(0, 0, 255), 2, 8);
		}
	}

	//cv::putText(src, labels[max_index], cv::Point(50, 50), cv::FONT_HERSHEY_SIMPLEX, 1.0, cv::Scalar(0, 0, 255), 2, 8);
	cv::namedWindow("out", cv::WINDOW_FREERATIO);
	cv::imshow("out", src);
	cv::waitKey(0);
	return 0;
}

void load_plate_recog_model() {
	InferenceEngine::Core ie;

	std::string xml = "D:/projects/models/license-plate-recognition-barrier-0001/FP32/license-plate-recognition-barrier-0001.xml";
	std::string bin = "D:/projects/models/license-plate-recognition-barrier-0001/FP32/license-plate-recognition-barrier-0001.bin";

	InferenceEngine::CNNNetwork network = ie.ReadNetwork(xml, bin);  //读取网络
	InferenceEngine::InputsDataMap inputs = network.getInputsInfo();  //DataMap是一个Mat数组
	InferenceEngine::OutputsDataMap outputs = network.getOutputsInfo();  //DataMap是一个Mat数组

	int cnt = 0;
	for (auto item : inputs) {  //auto可以自动推断变量类型
		if (cnt == 0) {
			plate_input_name1 = item.first;  //第一个参数是name,第二个参数是结构,第二个参数设置精度与结构
			auto input_data = item.second;
			input_data->setPrecision(Precision::U8);  //默认为unsigned char对应U8
			input_data->setLayout(Layout::NCHW);
		}
		else if (cnt == 1) {
			plate_input_name2 = item.first;  //第一个参数是name,第二个参数是结构,第二个参数设置精度与结构
			auto input_data = item.second;
			input_data->setPrecision(Precision::FP32);  //默认为unsigned char对应U8
		}
		//input_data->getPreProcess().setColorFormat(ColorFormat::BGR);  默认就是BGR
		std::cout << "input name: " << (cnt + 1) << ":" << item.first << std::endl;
		cnt++;
	}
	std::string output_name = "";
	for (auto item : outputs) {  //auto可以自动推断变量类型
		plate_output_name = item.first;  //第一个参数是name,第二个参数是结构,第二个参数设置精度与结构
		auto output_data = item.second;
		output_data->setPrecision(Precision::FP32);  //输出还是浮点数
		//注意:output_data不要设置结构
		std::cout << "output name: " << plate_output_name << std::endl;
	}

	auto executable_network = ie.LoadNetwork(network, "CPU");  //设置运行的设备
	plate_request = executable_network.CreateInferRequest();  //设置推理请求
}

void fetch_plate_text(cv::Mat &image, cv::Mat &plateROI) {
	//图像预处理,使用车牌识别的方法中获取的输入输出信息,用于文本获取
	auto input1 = plate_request.GetBlob(plate_input_name1);  //获取网络输入图像信息
	size_t num_channels = input1->getTensorDesc().getDims()[1];  //size_t 类型表示C中任何对象所能达到的最大长度,它是无符号整数
	size_t h = input1->getTensorDesc().getDims()[2];
	size_t w = input1->getTensorDesc().getDims()[3];
	size_t image_size = h * w;
	cv::Mat blob_image;
	cv::resize(plateROI, blob_image, cv::Size(94, 24));  //将输入图片大小转换为与网络输入大小一致
	//cv::cvtColor(blob_image, blob_image, cv::COLOR_BGR2RGB);  //色彩空间转换

	// HWC =》NCHW  将输入图像从HWC格式转换为NCHW格式
	unsigned char* data = static_cast<unsigned char*>(input1->buffer());  //将图像放到buffer中,放入input中
	for (size_t row = 0; row < h; row++) {
		for (size_t col = 0; col < w; col++) {
			for (size_t ch = 0; ch < num_channels; ch++) {
				//将每个通道变成一张图,按照通道顺序
				data[image_size * ch + row * w + col] = blob_image.at<cv::Vec3b>(row, col)[ch];
			}
		}
	}

	//使用车牌识别的方法中获取的输入输出信息,用于文本获取
	auto input2 = plate_request.GetBlob(plate_input_name2);
	int max_sequence = input2->getTensorDesc().getDims()[0];  //输出字符长度
	float* blob2 = input2->buffer().as<float*>();
	blob2[0] = 0.0;
	std::fill(blob2 + 1, blob2 + max_sequence, 1.0f);  //填充起止范围与填充值

	plate_request.Infer();  //执行推理
	auto output = plate_request.GetBlob(plate_output_name);  //获取推理结果
	const float* plate_data = static_cast<PrecisionTrait<Precision::FP32>::value_type*>(output->buffer());  //获取浮点类型输出值plate_data
	std::string result;
	for (int i = 0; i < max_sequence; i++) {
		if (plate_data[i] == -1) {  //end
			break;
		}
		result += items[std::size_t(plate_data[i])];  //类型转换,字符串拼接
	}
	std::cout << result << std::endl;
	cv::putText(image, result.c_str(), cv::Point(50, 50), cv::FONT_HERSHEY_SIMPLEX, 1.0, cv::Scalar(0, 0, 255), 2, 8);
}
效果:

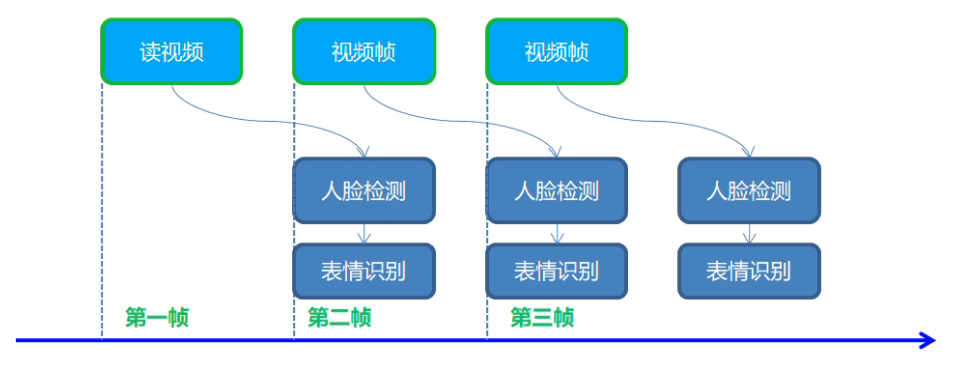
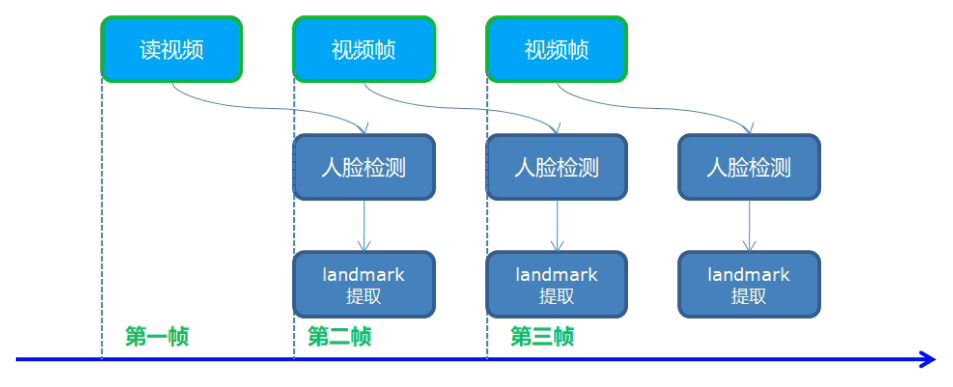
5、行人检测、人脸检测及表情识别
视频行人检测
模型介绍
- pedestrian-detection-adas-0002
- SSD MobileNetv1
- 输入格式:[1 * 3 * 384 * 672]
- 输出格式:[1, 1, N, 7]
代码实现
#include <inference_engine.hpp>
#include <opencv2/opencv.hpp>
#include <fstream> //fstream文件读写操作,iostream为控制台操作
using namespace InferenceEngine;
void infer_process(cv::Mat &frame, InferenceEngine::InferRequest &request, std::string &input_name, std::string &output_name);
int main(int argc, char** argv) {
InferenceEngine::Core ie;
std::string xml = "D:/projects/models/pedestrian-detection-adas-0002/FP32/pedestrian-detection-adas-0002.xml";
std::string bin = "D:/projects/models/pedestrian-detection-adas-0002/FP32/pedestrian-detection-adas-0002.bin";
cv::Mat src = cv::imread("D:/images/pedestrians_test.jpg"); //读取图像
int im_h = src.rows;
int im_w = src.cols;
InferenceEngine::CNNNetwork network = ie.ReadNetwork(xml, bin); //读取车辆检测网络
//获取网络输入输出信息
InferenceEngine::InputsDataMap inputs = network.getInputsInfo(); //DataMap是一个Mat数组
InferenceEngine::OutputsDataMap outputs = network.getOutputsInfo(); //DataMap是一个Mat数组
std::string input_name = "";
for (auto item : inputs) { //auto可以自动推断变量类型
input_name = item.first; //第一个参数是name,第二个参数是结构,第二个参数设置精度与结构
auto input_data = item.second;
// A->B 表示提取A中的成员B
input_data->setPrecision(Precision::U8); //默认为unsigned char对应U8
input_data->setLayout(Layout::NCHW);
//input_data->getPreProcess().setColorFormat(ColorFormat::BGR); 默认就是BGR
std::cout << "input name: " << input_name << std::endl;
}
std::string output_name = "";
for (auto item : outputs) { //auto可以自动推断变量类型
output_name = item.first; //第一个参数是name,第二个参数是结构,第二个参数设置精度与结构
auto output_data = item.second;
output_data->setPrecision(Precision::FP32); //输出还是浮点数
//注意:output_data不要设置结构
std::cout << "output name: " << output_name << std::endl;
}
auto executable_network = ie.LoadNetwork(network, "CPU"); //设置运行的设备
auto infer_request = executable_network.CreateInferRequest(); //设置推理请求
//创建视频流/加载视频文件
cv::VideoCapture capture("D:/images/video/pedestrians_test.mp4");
cv::Mat frame;
while (true) {
bool ret = capture.read(frame);
if (!ret) { //视频帧为空就跳出循环
break;
}
infer_process(frame, infer_request, input_name, output_name);
cv::imshow("frame", frame);
char c = cv::waitKey(1);
if (c == 27) { //ESC
break;
}
}
//cv::putText(src, labels[max_index], cv::Point(50, 50), cv::FONT_HERSHEY_SIMPLEX, 1.0, cv::Scalar(0, 0, 255), 2, 8);
cv::namedWindow("out", cv::WINDOW_FREERATIO);
cv::imshow("out", src);
cv::waitKey(0); //最后的视频画面静止
return 0;
}
void infer_process(cv::Mat& frame, InferenceEngine::InferRequest& request, std::string& input_name, std::string& output_name) {
//图像预处理
auto input = request.GetBlob(input_name); //获取网络输入图像信息
int im_w = frame.cols;
int im_h = frame.rows;
size_t num_channels = input->getTensorDesc().getDims()[1]; //size_t 类型表示C中任何对象所能达到的最大长度,它是无符号整数
size_t h = input->getTensorDesc().getDims()[2];
size_t w = input->getTensorDesc().getDims()[3];
size_t image_size = h * w;
cv::Mat blob_image;
cv::resize(frame, blob_image, cv::Size(w, h)); //将输入图片大小转换为与网络输入大小一致
//cv::cvtColor(blob_image, blob_image, cv::COLOR_BGR2RGB); //色彩空间转换
// HWC =》NCHW 将输入图像从HWC格式转换为NCHW格式
unsigned char* data = static_cast<unsigned char*>(input->buffer()); //将图像放到buffer中,放入input中
for (size_t row = 0; row < h; row++) {
for (size_t col = 0; col < w; col++) {
for (size_t ch = 0; ch < num_channels; ch++) {
//将每个通道变成一张图,按照通道顺序
data[image_size * ch + row * w + col] = blob_image.at<cv::Vec3b>(row, col)[ch];
}
}
}
request.Infer();
auto output = request.GetBlob(output_name);
//转换输出数据
const float* detection_out = static_cast<PrecisionTrait<Precision::FP32>::value_type*>(output->buffer());
//output:[1, 1, N, 7]
//七个参数为:[image_id, label, conf, x_min, y_min, x_max, y_max]
const SizeVector outputDims = output->getTensorDesc().getDims(); //获取输出维度信息 1*1000
std::cout << outputDims[2] << "x" << outputDims[3] << std::endl;
const int max_count = outputDims[2]; //识别出的对象个数
const int object_size = outputDims[3]; //获取对象信息的个数,此处为7个
for (int n = 0; n < max_count; n++) {
float label = detection_out[n * object_size + 1];
float confidence = detection_out[n * object_size + 2];
float xmin = detection_out[n * object_size + 3] * im_w;
float ymin = detection_out[n * object_size + 4] * im_h;
float xmax = detection_out[n * object_size + 5] * im_w;
float ymax = detection_out[n * object_size + 6] * im_h;
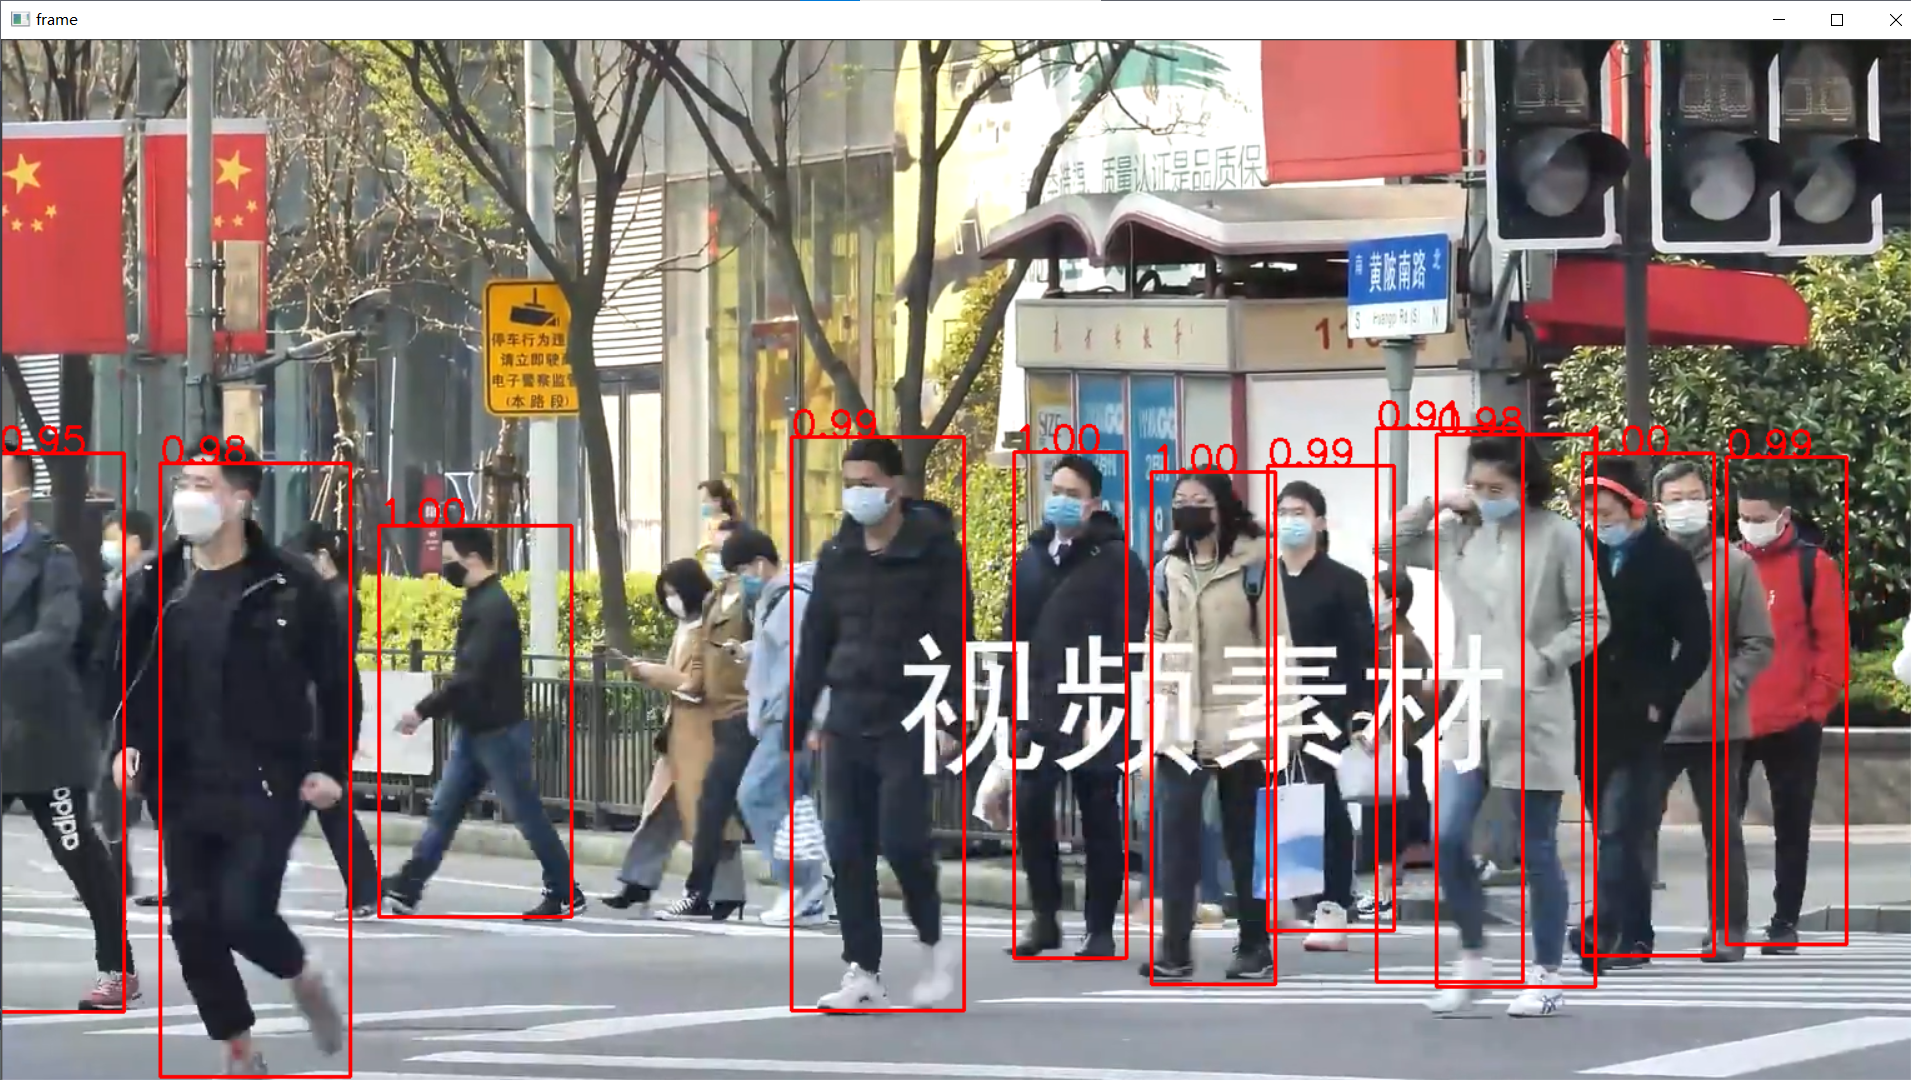
if (confidence > 0.9) {
printf("label id: %d \n", static_cast<int>(label));
cv::Rect box;
box.x = static_cast<int>(xmin);
box.y = static_cast<int>(ymin);
box.width = static_cast<int>(xmax - xmin);
box.height = static_cast<int>(ymax - ymin);
if (label == 2) { //将车牌与车辆用不同颜色表示
cv::rectangle(frame, box, cv::Scalar(0, 255, 0), 2, 8);
}
else {
cv::rectangle(frame, box, cv::Scalar(0, 0, 255), 2, 8);
}
//cv::rectangle(src, box, cv::Scalar(0, 0, 255), 2, 8);
//box.tl()返回矩形左上角坐标
cv::putText(frame, cv::format("%.2f", confidence), box.tl(), cv::FONT_HERSHEY_SIMPLEX, 1.0, cv::Scalar(0, 0, 255), 2, 8);
}
}
}
效果:
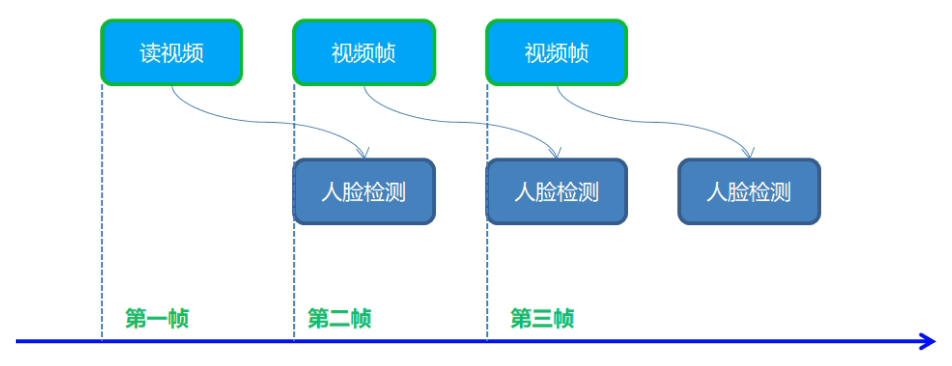
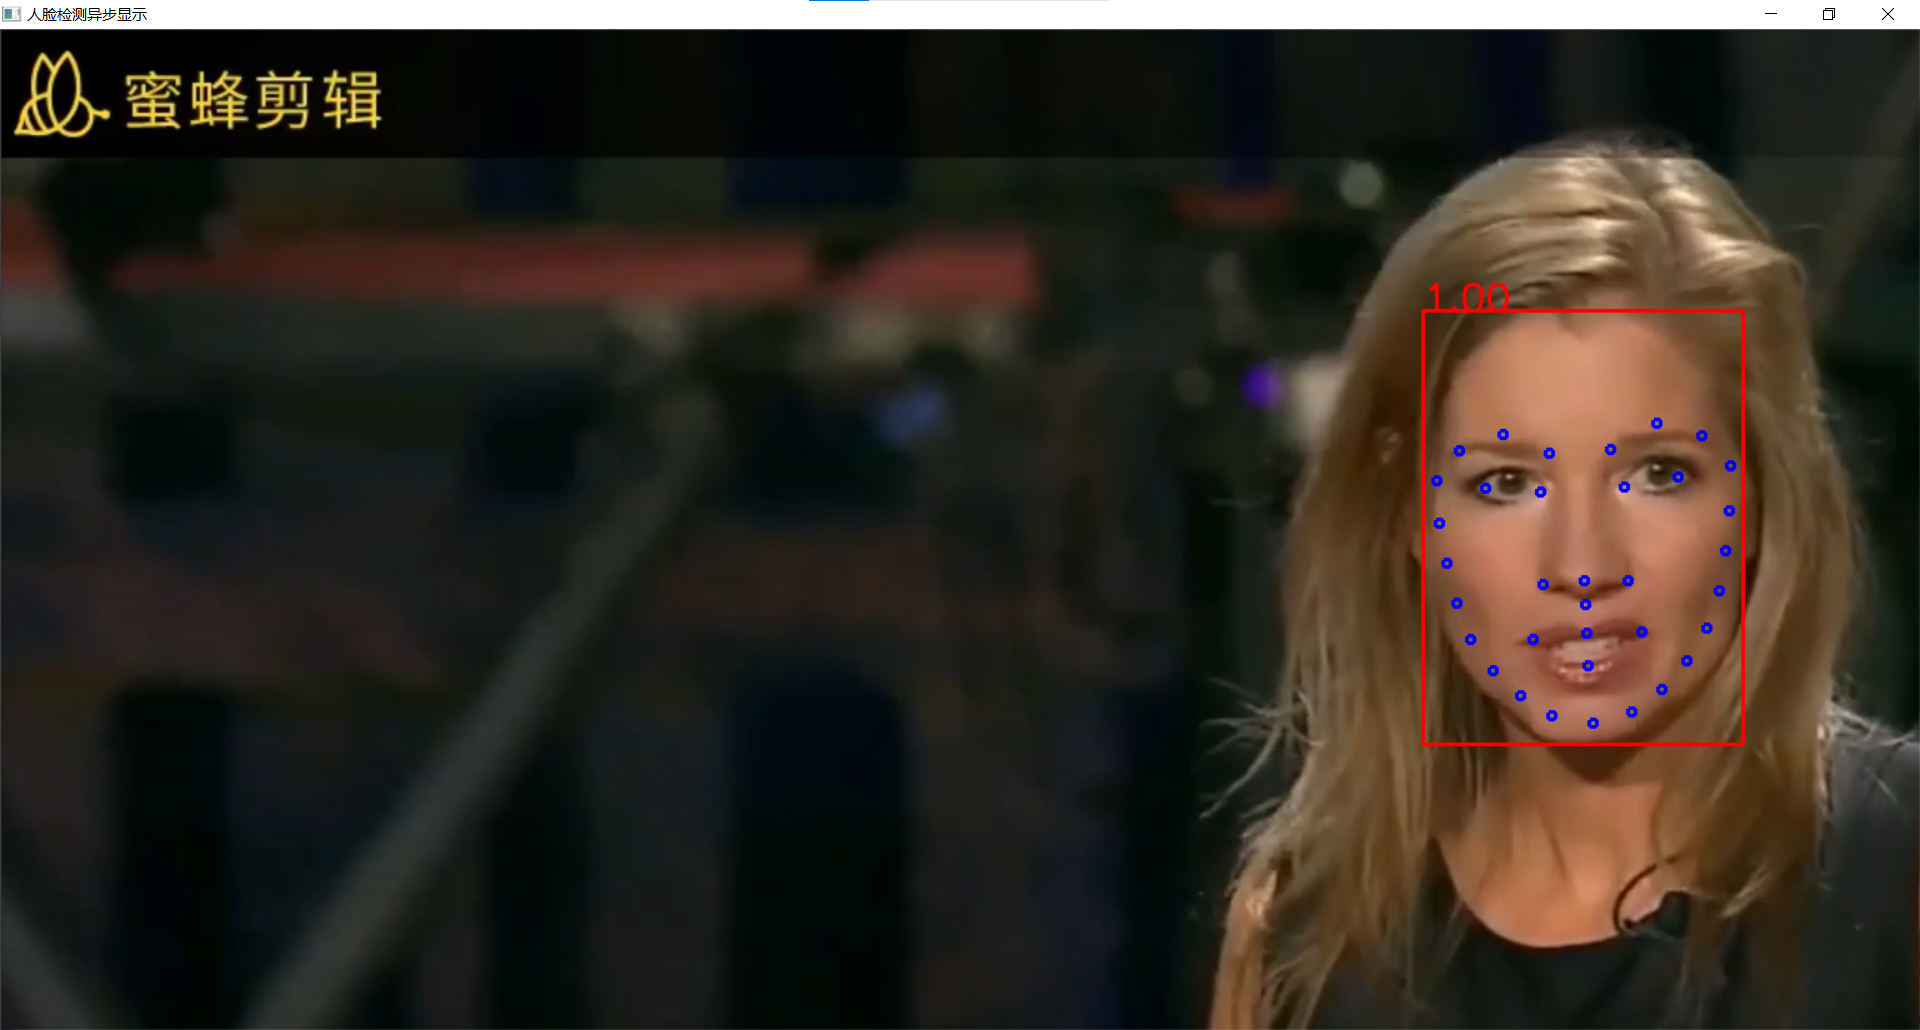
实时人脸检测之异步推理
模型介绍
- 人脸检测:face-detection-0202,SSD-MobileNetv2
- 输入格式:1 * 3 * 384 * 384
- 输出格式:[1, 1, N, 7]
- OpenVINO中人脸检测模型0202~0206
同步与异步执行
代码实现
#include <inference_engine.hpp>
#include <opencv2/opencv.hpp>
#include <fstream>  //fstream文件读写操作,iostream为控制台操作

using namespace InferenceEngine;

//图像预处理函数
template <typename T>
void matU8ToBlob(const cv::Mat& orig_image, InferenceEngine::Blob::Ptr& blob, int batchIndex = 0) {
	InferenceEngine::SizeVector blobSize = blob->getTensorDesc().getDims();
	const size_t width = blobSize[3];
	const size_t height = blobSize[2];
	const size_t channels = blobSize[1];
	InferenceEngine::MemoryBlob::Ptr mblob = InferenceEngine::as<InferenceEngine::MemoryBlob>(blob);
	if (!mblob) {
		THROW_IE_EXCEPTION << "We expect blob to be inherited from MemoryBlob in matU8ToBlob, "
			<< "but by fact we were not able to cast inputBlob to MemoryBlob";
	}
	// locked memory holder should be alive all time while access to its buffer happens
	auto mblobHolder = mblob->wmap();

	T* blob_data = mblobHolder.as<T*>();

	cv::Mat resized_image(orig_image);
	if (static_cast<int>(width) != orig_image.size().width ||
		static_cast<int>(height) != orig_image.size().height) {
		cv::resize(orig_image, resized_image, cv::Size(width, height));
	}

	int batchOffset = batchIndex * width * height * channels;

	for (size_t c = 0; c < channels; c++) {
		for (size_t h = 0; h < height; h++) {
			for (size_t w = 0; w < width; w++) {
				blob_data[batchOffset + c * width * height + h * width + w] =
					resized_image.at<cv::Vec3b>(h, w)[c];
			}
		}
	}
}

void frameToBlob(std::shared_ptr<InferenceEngine::InferRequest>& request, cv::Mat& frame, std::string& input_name) {
	//图像预处理,输入数据 ->指针获取成员方法
	InferenceEngine::Blob::Ptr input = request->GetBlob(input_name);  //获取网络输入图像信息
	//该函数template模板类型,需要指定具体类型
	matU8ToBlob<uchar>(frame, input);  //使用该函数处理输入数据
}

int main(int argc, char** argv) {

	InferenceEngine::Core ie;
	std::vector<std::string> devices = ie.GetAvailableDevices();
	for (std::string name : devices) {
		std::cout << "device name: " << name << std::endl;
	}
	std::string cpuName = ie.GetMetric("CPU", METRIC_KEY(FULL_DEVICE_NAME)).as<std::string>();
	std::cout << "cpu name: " << cpuName << std::endl;

	std::string xml = "D:/projects/models/face-detection-0202/FP32/face-detection-0202.xml";
	std::string bin = "D:/projects/models/face-detection-0202/FP32/face-detection-0202.bin";

	//cv::Mat src = cv::imread("D:/images/mmc2.jpg");  //读取图像
	//int im_h = src.rows;
	//int im_w = src.cols;

	InferenceEngine::CNNNetwork network = ie.ReadNetwork(xml, bin);  //读取车辆检测网络

	//获取网络输入输出信息并设置
	InferenceEngine::InputsDataMap inputs = network.getInputsInfo();  //DataMap是一个Mat数组
	InferenceEngine::OutputsDataMap outputs = network.getOutputsInfo();  //DataMap是一个Mat数组
	std::string input_name = "";
	for (auto item : inputs) {  //auto可以自动推断变量类型
		input_name = item.first;  //第一个参数是name,第二个参数是结构,第二个参数设置精度与结构
		auto input_data = item.second;
		// A->B 表示提取A中的成员B
		input_data->setPrecision(Precision::U8);  //默认为unsigned char对应U8
		input_data->setLayout(Layout::NCHW);
		//input_data->getPreProcess().setColorFormat(ColorFormat::BGR);  默认就是BGR
		std::cout << "input name: " << input_name << std::endl;
	}
	std::string output_name = "";
	for (auto item : outputs) {  //auto可以自动推断变量类型
		output_name = item.first;  //第一个参数是name,第二个参数是结构,第二个参数设置精度与结构
		auto output_data = item.second;
		output_data->setPrecision(Precision::FP32);  //输出还是浮点数
		//注意:output_data不要设置结构
		std::cout << "output name: " << output_name << std::endl;
	}

	auto executable_network = ie.LoadNetwork(network, "CPU");  //设置运行的设备
	//创建指针类型便于后续操作
	auto curr_infer_request = executable_network.CreateInferRequestPtr();  //设置推理请求
	auto next_infer_request = executable_network.CreateInferRequestPtr();  //设置推理请求

	cv::VideoCapture capture("D:/images/video/pedestrians_test.mp4");
	cv::Mat curr_frame;
	cv::Mat next_frame;
	capture.read(curr_frame);  //先读取一帧作为当前帧
	int im_h = curr_frame.rows;
	int im_w = curr_frame.cols;
	frameToBlob(curr_infer_request, curr_frame, input_name);
	bool first_frame = true;  //设置两个bool变量控制线程开启
	bool last_frame = false;
	//开启两个线程,curr转换显示结果,next预处理图像,预处理后交换给curr
	while (true) {
		int64 start = cv::getTickCount();  //计时
		bool ret = capture.read(next_frame);  //读取一帧作为下一帧
		if (!ret) {
			last_frame = true;  //如果下一帧为空,则last_frame为true
		}
		if (!last_frame) {  //如果last_frame为false则预处理下一帧图像
			frameToBlob(next_infer_request, next_frame, input_name);
		}
		if (first_frame) {  //如果first_frame为true则开启两个线程,同时修改first_frame为false,避免多次开启线程
			curr_infer_request->StartAsync();  //开启线程
			next_infer_request->StartAsync();
			first_frame = false;
		}
		else {  //如果first_frame与last_frame同为false表示只有下一帧不为空,则开启一个next线程
			if (!last_frame) {
				next_infer_request->StartAsync();
			}
		}
		//判断当前请求是否预处理完毕
		if (InferenceEngine::OK == curr_infer_request->Wait(InferenceEngine::IInferRequest::WaitMode::RESULT_READY)) {
			auto output = curr_infer_request->GetBlob(output_name);
			//转换输出数据
			const float* detection_out = static_cast<PrecisionTrait<Precision::FP32>::value_type*>(output->buffer());
			//output:[1, 1, N, 7]
			//七个参数为:[image_id, label, conf, x_min, y_min, x_max, y_max]
			const SizeVector outputDims = output->getTensorDesc().getDims();  //获取输出维度信息 1*1000
			std::cout << outputDims[2] << "x" << outputDims[3] << std::endl;
			const int max_count = outputDims[2];  //识别出的对象个数
			const int object_size = outputDims[3];  //获取对象信息的个数,此处为7个
			for (int n = 0; n < max_count; n++) {
				float label = detection_out[n * object_size + 1];
				float confidence = detection_out[n * object_size + 2];
				float xmin = detection_out[n * object_size + 3] * im_w;
				float ymin = detection_out[n * object_size + 4] * im_h;
				float xmax = detection_out[n * object_size + 5] * im_w;
				float ymax = detection_out[n * object_size + 6] * im_h;
				if (confidence > 0.5) {
					printf("label id: %d \n", static_cast<int>(label));
					cv::Rect box;
					box.x = static_cast<int>(xmin);
					box.y = static_cast<int>(ymin);
					box.width = static_cast<int>(xmax - xmin);
					box.height = static_cast<int>(ymax - ymin);

					cv::rectangle(curr_frame, box, cv::Scalar(0, 0, 255), 2, 8);
					//getTickCount()相减得到cpu走过的时钟周期数,getTickFrequency()得到cpu一秒走过的始终周期数
					float t = (cv::getTickCount() - start) / static_cast<float>(cv::getTickFrequency());
					std::cout << 1.0 / t << std::endl;
					//box.tl()返回矩形左上角坐标
					cv::putText(curr_frame, cv::format("%.2f", confidence), box.tl(), cv::FONT_HERSHEY_SIMPLEX, 1.0, cv::Scalar(0, 0, 255), 2, 8);
				}
			}
		}
		//显示结果
		cv::imshow("人脸检测异步显示", curr_frame);
		char c = cv::waitKey(1);
		if (c == 27) {  //ESC
			break;
		}
		if (last_frame) {  //如果last_frame为true表示下一帧为空,则跳出循环
			break;
		}

		//异步交换,下一帧复制到当前帧,当前帧请求与下一帧请求交换
		next_frame.copyTo(curr_frame);
		curr_infer_request.swap(next_infer_request);  //指针可以使用swap方法,否则不行
	}

	cv::waitKey(0);
	return 0;
}
效果:

实时人脸表情识别
模型介绍
- 人脸检测:face-detection-0202,SSD-MobileNetv2
- 输入格式:1 * 3 * 384 * 384
- 输出格式:[1, 1, N, 7]
- 表情识别:emotions-recognition-retail-0003
- 1 * 3 * 64 * 64
- [1, 5, 1, 1] - ('neutral', 'happy', 'sad', 'suprise', 'anger')
- 下载模型 emotions-recognition-retail-0003 同前
同步与异步执行
代码实现
#include <inference_engine.hpp>
#include <opencv2/opencv.hpp>
#include <fstream>  //fstream文件读写操作,iostream为控制台操作

using namespace InferenceEngine;

static const char *const items[] = {
	"neutral","happy","sad","surprise","anger"
};

//图像预处理函数
template <typename T>
void matU8ToBlob(const cv::Mat& orig_image, InferenceEngine::Blob::Ptr& blob, int batchIndex = 0) {
	InferenceEngine::SizeVector blobSize = blob->getTensorDesc().getDims();
	const size_t width = blobSize[3];
	const size_t height = blobSize[2];
	const size_t channels = blobSize[1];
	InferenceEngine::MemoryBlob::Ptr mblob = InferenceEngine::as<InferenceEngine::MemoryBlob>(blob);
	if (!mblob) {
		THROW_IE_EXCEPTION << "We expect blob to be inherited from MemoryBlob in matU8ToBlob, "
			<< "but by fact we were not able to cast inputBlob to MemoryBlob";
	}
	// locked memory holder should be alive all time while access to its buffer happens
	auto mblobHolder = mblob->wmap();

	T* blob_data = mblobHolder.as<T*>();

	cv::Mat resized_image(orig_image);
	if (static_cast<int>(width) != orig_image.size().width ||
		static_cast<int>(height) != orig_image.size().height) {
		cv::resize(orig_image, resized_image, cv::Size(width, height));
	}

	int batchOffset = batchIndex * width * height * channels;

	for (size_t c = 0; c < channels; c++) {
		for (size_t h = 0; h < height; h++) {
			for (size_t w = 0; w < width; w++) {
				blob_data[batchOffset + c * width * height + h * width + w] =
					resized_image.at<cv::Vec3b>(h, w)[c];
			}
		}
	}
}

void fetch_emotion(cv::Mat& image, InferenceEngine::InferRequest& request, cv::Rect& face_roi, std::string& e_input, std::string& e_output);
void frameToBlob(std::shared_ptr<InferenceEngine::InferRequest>& request, cv::Mat& frame, std::string& input_name) {
	//图像预处理,输入数据 ->指针获取成员方法
	InferenceEngine::Blob::Ptr input = request->GetBlob(input_name);  //获取网络输入图像信息
	//该函数template模板类型,需要指定具体类型
	matU8ToBlob<uchar>(frame, input);  //使用该函数处理输入数据
}

int main(int argc, char** argv) {

	InferenceEngine::Core ie;

	//load face model
	std::string xml = "D:/projects/models/face-detection-0202/FP32/face-detection-0202.xml";
	std::string bin = "D:/projects/models/face-detection-0202/FP32/face-detection-0202.bin";
	InferenceEngine::CNNNetwork network = ie.ReadNetwork(xml, bin);  //读取车辆检测网络
	//获取网络输入输出信息并设置
	InferenceEngine::InputsDataMap inputs = network.getInputsInfo();  //DataMap是一个Mat数组
	InferenceEngine::OutputsDataMap outputs = network.getOutputsInfo();  //DataMap是一个Mat数组

	std::string input_name = "";
	for (auto item : inputs) {  //auto可以自动推断变量类型
		input_name = item.first;  //第一个参数是name,第二个参数是结构,第二个参数设置精度与结构
		auto input_data = item.second;
		// A->B 表示提取A中的成员B
		input_data->setPrecision(Precision::U8);  //默认为unsigned char对应U8
		input_data->setLayout(Layout::NCHW);
		//input_data->getPreProcess().setColorFormat(ColorFormat::BGR);  默认就是BGR
		std::cout << "input name: " << input_name << std::endl;
	}
	std::string output_name = "";
	for (auto item : outputs) {  //auto可以自动推断变量类型
		output_name = item.first;  //第一个参数是name,第二个参数是结构,第二个参数设置精度与结构
		auto output_data = item.second;
		output_data->setPrecision(Precision::FP32);  //输出还是浮点数
		//注意:output_data不要设置结构
		std::cout << "output name: " << output_name << std::endl;
	}

	auto executable_network = ie.LoadNetwork(network, "CPU");  //设置运行的设备
	//创建指针类型便于后续操作
	auto curr_infer_request = executable_network.CreateInferRequestPtr();  //设置推理请求
	auto next_infer_request = executable_network.CreateInferRequestPtr();  //设置推理请求


	//load emotion model
	std::string em_xml = "D:/projects/models/emotions-recognition-retail-0003/FP32/emotions-recognition-retail-0003.xml";
	std::string em_bin = "D:/projects/models/emotions-recognition-retail-0003/FP32/emotions-recognition-retail-0003.bin";
	InferenceEngine::CNNNetwork em_network = ie.ReadNetwork(em_xml, em_bin);  //读取车辆检测网络
	//获取网络输入输出信息并设置
	InferenceEngine::InputsDataMap em_inputs = em_network.getInputsInfo();  //DataMap是一个Mat数组
	InferenceEngine::OutputsDataMap em_outputs = em_network.getOutputsInfo();  //DataMap是一个Mat数组

	std::string em_input_name = "";
	for (auto item : em_inputs) {
		em_input_name = item.first;
		//循环作用域内的变量可以不重命名,为查看更明确这里重命名
		auto em_input_data = item.second;
		em_input_data->setPrecision(Precision::U8);
		em_input_data->setLayout(Layout::NCHW);
	}
	std::string em_output_name = "";
	for (auto item : em_outputs) {  //auto可以自动推断变量类型
		em_output_name = item.first;  //第一个参数是name,第二个参数是结构,第二个参数设置精度与结构
		auto em_output_data = item.second;
		em_output_data->setPrecision(Precision::FP32);  //输出还是浮点数
	}
	auto executable_em_network = ie.LoadNetwork(em_network, "CPU");  //设置运行的设备
	//创建指针类型便于后续操作
	auto em_request = executable_em_network.CreateInferRequest();  //设置推理请求


	cv::VideoCapture capture("D:/images/video/face_detect.mp4");
	cv::Mat curr_frame;
	cv::Mat next_frame;
	capture.read(curr_frame);  //先读取一帧作为当前帧
	int im_h = curr_frame.rows;
	int im_w = curr_frame.cols;
	frameToBlob(curr_infer_request, curr_frame, input_name);
	bool first_frame = true;  //设置两个bool变量控制线程开启
	bool last_frame = false;
	//开启两个线程,curr转换显示结果,next预处理图像,预处理后交换给curr
	while (true) {
		int64 start = cv::getTickCount();  //计时
		bool ret = capture.read(next_frame);  //读取一帧作为下一帧
		if (!ret) {
			last_frame = true;  //如果下一帧为空,则last_frame为true
		}
		if (!last_frame) {  //如果last_frame为false则预处理下一帧图像
			frameToBlob(next_infer_request, next_frame, input_name);
		}
		if (first_frame) {  //如果first_frame为true则开启两个线程,同时修改first_frame为false,避免多次开启线程
			curr_infer_request->StartAsync();  //开启线程
			next_infer_request->StartAsync();
			first_frame = false;
		}
		else {  //如果first_frame与last_frame同为false表示只有下一帧不为空,则开启一个next线程
			if (!last_frame) {
				next_infer_request->StartAsync();
			}
		}
		//判断当前请求是否预处理完毕
		if (InferenceEngine::OK == curr_infer_request->Wait(InferenceEngine::IInferRequest::WaitMode::RESULT_READY)) {
			auto output = curr_infer_request->GetBlob(output_name);
			//转换输出数据
			const float* detection_out = static_cast<PrecisionTrait<Precision::FP32>::value_type*>(output->buffer());
			//output:[1, 1, N, 7]
			//七个参数为:[image_id, label, conf, x_min, y_min, x_max, y_max]
			const SizeVector outputDims = output->getTensorDesc().getDims();  //获取输出维度信息 1*1000
			std::cout << outputDims[2] << "x" << outputDims[3] << std::endl;
			const int max_count = outputDims[2];  //识别出的对象个数
			const int object_size = outputDims[3];  //获取对象信息的个数,此处为7个
			for (int n = 0; n < max_count; n++) {
				float label = detection_out[n * object_size + 1];
				float confidence = detection_out[n * object_size + 2];
				float xmin = detection_out[n * object_size + 3] * im_w;
				float ymin = detection_out[n * object_size + 4] * im_h;
				float xmax = detection_out[n * object_size + 5] * im_w;
				float ymax = detection_out[n * object_size + 6] * im_h;
				if (confidence > 0.5) {
					printf("label id: %d \n", static_cast<int>(label));
					cv::Rect box;
					box.x = static_cast<int>(xmin);
					box.y = static_cast<int>(ymin);
					xmax = xmax > im_w ? im_w : xmax;  //通过判断避免越界
					ymax = ymax > im_h ? im_h : ymax;
					box.width = static_cast<int>(xmax - xmin);
					box.height = static_cast<int>(ymax - ymin);

					box.x = box.x < 0 ? 0 : box.x;  //通过判断避免越界
					box.y = box.y < 0 ? 0 : box.y;
					box.width = box.x < 0 ? 0 : box.width;
					box.height = box.x < 0 ? 0 : box.height;

					cv::rectangle(curr_frame, box, cv::Scalar(0, 0, 255), 2, 8);

					fetch_emotion(curr_frame, em_request, box, em_input_name, em_output_name);  //获取表情

					//getTickCount()相减得到cpu走过的时钟周期数,getTickFrequency()得到cpu一秒走过的始终周期数
					float fps = static_cast<float>(cv::getTickFrequency()) / (cv::getTickCount() - start);

					cv::putText(curr_frame, cv::format("FPS:%.2f", fps), cv::Point(50, 50), cv::FONT_HERSHEY_SIMPLEX, 1.0, cv::Scalar(0, 0, 255), 2, 8);
				}
			}
		}
		//显示结果
		cv::imshow("人脸检测异步显示", curr_frame);
		char c = cv::waitKey(1);
		if (c == 27) {  //ESC
			break;
		}
		if (last_frame) {  //如果last_frame为true表示下一帧为空,则跳出循环
			break;
		}

		//异步交换,下一帧复制到当前帧,当前帧请求与下一帧请求交换
		next_frame.copyTo(curr_frame);
		curr_infer_request.swap(next_infer_request);  //指针可以使用swap方法,否则不行
	}

	cv::waitKey(0);
	return 0;
}

//获取表情
void fetch_emotion(cv::Mat& image, InferenceEngine::InferRequest& request, cv::Rect& face_roi, std::string& e_input, std::string& e_output) {

	cv::Mat faceROI = image(face_roi);  //获取面部区域
	//图像预处理,使用车牌识别的方法中获取的输入输出信息,用于文本获取
	auto blob = request.GetBlob(e_input);  //获取网络输入图像信息
	matU8ToBlob<uchar>(faceROI, blob);

	request.Infer();  //执行推理

	auto output = request.GetBlob(e_output);
	//转换输出数据
	const float* probs = static_cast<PrecisionTrait<Precision::FP32>::value_type*>(output->buffer());
	const SizeVector outputDims = output->getTensorDesc().getDims();  //获取输出维度信息 1*1000
	std::cout << outputDims[0] << "x" << outputDims[1] << std::endl;
	float max = probs[0];
	int max_index = 0;
	for (int i = 1; i < outputDims[1]; i++) {
		if (max < probs[i]) {  //找到结果probs中的最大值,获取其下标
			max = probs[i];
			max_index = i;
		}
	}
	std::cout << items[max_index] << std::endl;
	cv::putText(image, items[max_index], face_roi.tl(), cv::FONT_HERSHEY_SIMPLEX, 1.0, cv::Scalar(0, 0, 255), 2, 8);
}
效果:

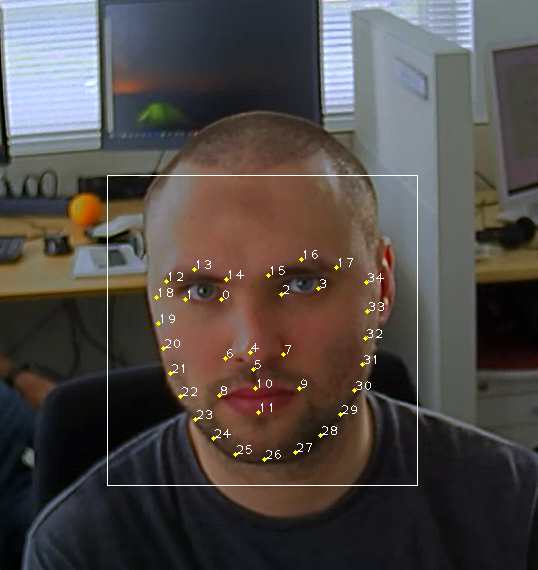
人脸关键点landmark检测
模型介绍
- face-detection-0202 - 人脸检测
- facial-landmarks-35-adas-0002 - landmark提取
- 输入格式:[1 * 3 * 60 * 60]
- 输出格式:[1, 70]
- 输出人脸35个特征点,浮点数坐标
程序流程
代码实现
#include <inference_engine.hpp>
#include <opencv2/opencv.hpp>
#include <fstream>  //fstream文件读写操作,iostream为控制台操作

using namespace InferenceEngine;

//图像预处理函数
template <typename T>
void matU8ToBlob(const cv::Mat& orig_image, InferenceEngine::Blob::Ptr& blob, int batchIndex = 0) {
	InferenceEngine::SizeVector blobSize = blob->getTensorDesc().getDims();
	const size_t width = blobSize[3];
	const size_t height = blobSize[2];
	const size_t channels = blobSize[1];
	InferenceEngine::MemoryBlob::Ptr mblob = InferenceEngine::as<InferenceEngine::MemoryBlob>(blob);
	if (!mblob) {
		THROW_IE_EXCEPTION << "We expect blob to be inherited from MemoryBlob in matU8ToBlob, "
			<< "but by fact we were not able to cast inputBlob to MemoryBlob";
	}
	// locked memory holder should be alive all time while access to its buffer happens
	auto mblobHolder = mblob->wmap();

	T* blob_data = mblobHolder.as<T*>();

	cv::Mat resized_image(orig_image);
	if (static_cast<int>(width) != orig_image.size().width ||
		static_cast<int>(height) != orig_image.size().height) {
		cv::resize(orig_image, resized_image, cv::Size(width, height));
	}

	int batchOffset = batchIndex * width * height * channels;

	for (size_t c = 0; c < channels; c++) {
		for (size_t h = 0; h < height; h++) {
			for (size_t w = 0; w < width; w++) {
				blob_data[batchOffset + c * width * height + h * width + w] =
					resized_image.at<cv::Vec3b>(h, w)[c];
			}
		}
	}
}

void frameToBlob(std::shared_ptr<InferenceEngine::InferRequest>& request, cv::Mat& frame, std::string& input_name) {
	//图像预处理,输入数据 ->指针获取成员方法
	InferenceEngine::Blob::Ptr input = request->GetBlob(input_name);  //获取网络输入图像信息
	//该函数template模板类型,需要指定具体类型
	matU8ToBlob<uchar>(frame, input);  //使用该函数处理输入数据
}

InferenceEngine::InferRequest landmark_request;  //提高推理请求作用域
void loadLandmarksRequest(Core& ie, std::string& land_input_name, std::string& land_output_name);
int main(int argc, char** argv) {

	InferenceEngine::Core ie;
	std::vector<std::string> devices = ie.GetAvailableDevices();
	for (std::string name : devices) {
		std::cout << "device name: " << name << std::endl;
	}
	std::string cpuName = ie.GetMetric("CPU", METRIC_KEY(FULL_DEVICE_NAME)).as<std::string>();
	std::cout << "cpu name: " << cpuName << std::endl;

	std::string xml = "D:/projects/models/face-detection-0202/FP32/face-detection-0202.xml";
	std::string bin = "D:/projects/models/face-detection-0202/FP32/face-detection-0202.bin";

	//cv::Mat src = cv::imread("D:/images/mmc2.jpg");  //读取图像
	//int im_h = src.rows;
	//int im_w = src.cols;

	InferenceEngine::CNNNetwork network = ie.ReadNetwork(xml, bin);  //读取车辆检测网络

	//获取网络输入输出信息并设置
	InferenceEngine::InputsDataMap inputs = network.getInputsInfo();  //DataMap是一个Mat数组
	InferenceEngine::OutputsDataMap outputs = network.getOutputsInfo();  //DataMap是一个Mat数组
	std::string input_name = "";
	for (auto item : inputs) {  //auto可以自动推断变量类型
		input_name = item.first;  //第一个参数是name,第二个参数是结构,第二个参数设置精度与结构
		auto input_data = item.second;
		// A->B 表示提取A中的成员B
		input_data->setPrecision(Precision::U8);  //默认为unsigned char对应U8
		input_data->setLayout(Layout::NCHW);
		//input_data->getPreProcess().setColorFormat(ColorFormat::BGR);  默认就是BGR
		std::cout << "input name: " << input_name << std::endl;
	}
	std::string output_name = "";
	for (auto item : outputs) {  //auto可以自动推断变量类型
		output_name = item.first;  //第一个参数是name,第二个参数是结构,第二个参数设置精度与结构
		auto output_data = item.second;
		output_data->setPrecision(Precision::FP32);  //输出还是浮点数
		//注意:output_data不要设置结构
		std::cout << "output name: " << output_name << std::endl;
	}

	auto executable_network = ie.LoadNetwork(network, "CPU");  //设置运行的设备
	//创建指针类型便于后续操作
	auto curr_infer_request = executable_network.CreateInferRequestPtr();  //设置推理请求
	auto next_infer_request = executable_network.CreateInferRequestPtr();  //设置推理请求

	//加载landmark模型
	std::string land_input_name = "";
	std::string land_output_name = "";
	loadLandmarksRequest(ie, land_input_name, land_output_name);

	cv::VideoCapture capture("D:/images/video/emotion_detect.mp4");
	cv::Mat curr_frame;
	cv::Mat next_frame;
	capture.read(curr_frame);  //先读取一帧作为当前帧
	int im_h = curr_frame.rows;
	int im_w = curr_frame.cols;
	frameToBlob(curr_infer_request, curr_frame, input_name);
	bool first_frame = true;  //设置两个bool变量控制线程开启
	bool last_frame = false;
	//开启两个线程,curr转换显示结果,next预处理图像,预处理后交换给curr
	while (true) {
		int64 start = cv::getTickCount();  //计时
		bool ret = capture.read(next_frame);  //读取一帧作为下一帧
		if (!ret) {
			last_frame = true;  //如果下一帧为空,则last_frame为true
		}
		if (!last_frame) {  //如果last_frame为false则预处理下一帧图像
			frameToBlob(next_infer_request, next_frame, input_name);
		}
		if (first_frame) {  //如果first_frame为true则开启两个线程,同时修改first_frame为false,避免多次开启线程
			curr_infer_request->StartAsync();  //开启线程
			next_infer_request->StartAsync();
			first_frame = false;
		}
		else {  //如果first_frame与last_frame同为false表示只有下一帧不为空,则开启一个next线程
			if (!last_frame) {
				next_infer_request->StartAsync();
			}
		}
		//判断当前请求是否预处理完毕
		if (InferenceEngine::OK == curr_infer_request->Wait(InferenceEngine::IInferRequest::WaitMode::RESULT_READY)) {
			auto output = curr_infer_request->GetBlob(output_name);
			//转换输出数据
			const float* detection_out = static_cast<PrecisionTrait<Precision::FP32>::value_type*>(output->buffer());
			//output:[1, 1, N, 7]
			//七个参数为:[image_id, label, conf, x_min, y_min, x_max, y_max]
			const SizeVector outputDims = output->getTensorDesc().getDims();  //获取输出维度信息 1*1000
			std::cout << outputDims[2] << "x" << outputDims[3] << std::endl;
			const int max_count = outputDims[2];  //识别出的对象个数
			const int object_size = outputDims[3];  //获取对象信息的个数,此处为7个
			for (int n = 0; n < max_count; n++) {
				float label = detection_out[n * object_size + 1];
				float confidence = detection_out[n * object_size + 2];
				float xmin = detection_out[n * object_size + 3] * im_w;
				float ymin = detection_out[n * object_size + 4] * im_h;
				float xmax = detection_out[n * object_size + 5] * im_w;
				float ymax = detection_out[n * object_size + 6] * im_h;
				if (confidence > 0.5) {
					printf("label id: %d \n", static_cast<int>(label));
					cv::Rect box;

					float x1 = std::min(std::max(0.0f, xmin), static_cast<float>(im_w));  //防止目标区域越界
					float y1 = std::min(std::max(0.0f, ymin), static_cast<float>(im_h));
					float x2 = std::min(std::max(0.0f, xmax), static_cast<float>(im_w));
					float y2 = std::min(std::max(0.0f, ymax), static_cast<float>(im_h));

					box.x = static_cast<int>(x1);
					box.y = static_cast<int>(y1);
					box.width = static_cast<int>(x2 - x1);
					box.height = static_cast<int>(y2 - y1);

					cv::Mat face_roi = curr_frame(box);
					auto face_input_blob = landmark_request.GetBlob(land_input_name);
					matU8ToBlob<uchar>(face_roi, face_input_blob);
					landmark_request.Infer();  //执行推理获取目标区域面部特征点

					auto land_output = landmark_request.GetBlob(land_output_name);
					const float* blob_out = static_cast<PrecisionTrait<Precision::FP32>::value_type*>(land_output->buffer());
					const SizeVector land_dims = land_output->getTensorDesc().getDims();
					const int b = land_dims[0];
					const int cc = land_dims[1];

					//共70个特征参数(x0, y0, x1, y1, ..., x34, y34),所以每次要 +2
					for (int i = 0; i < cc; i += 2) {
						float x = blob_out[i] * box.width + box.x;
						float y = blob_out[i + 1] * box.height + box.y;
						cv::circle(curr_frame, cv::Point(x, y), 3, cv::Scalar(255, 0, 0), 2, 8, 0);
					}

					cv::rectangle(curr_frame, box, cv::Scalar(0, 0, 255), 2, 8);
					//getTickCount()相减得到cpu走过的时钟周期数,getTickFrequency()得到cpu一秒走过的始终周期数
					float t = (cv::getTickCount() - start) / static_cast<float>(cv::getTickFrequency());
					std::cout << 1.0 / t << std::endl;
					//box.tl()返回矩形左上角坐标
					cv::putText(curr_frame, cv::format("%.2f", confidence), box.tl(), cv::FONT_HERSHEY_SIMPLEX, 1.0, cv::Scalar(0, 0, 255), 2, 8);
				}
			}
		}
		//显示结果
		cv::imshow("人脸检测异步显示", curr_frame);
		char c = cv::waitKey(1);
		if (c == 27) {  //ESC
			break;
		}
		if (last_frame) {  //如果last_frame为true表示下一帧为空,则跳出循环
			break;
		}

		//异步交换,下一帧复制到当前帧,当前帧请求与下一帧请求交换
		next_frame.copyTo(curr_frame);
		curr_infer_request.swap(next_infer_request);  //指针可以使用swap方法,否则不行
	}

	cv::waitKey(0);
	return 0;
}

void loadLandmarksRequest (Core& ie, std::string& land_input_name, std::string& land_output_name) {
    //下载模型同前
	std::string xml = "D:/projects/models/facial-landmarks-35-adas-0002/FP32/facial-landmarks-35-adas-0002.xml";
	std::string bin = "D:/projects/models/facial-landmarks-35-adas-0002/FP32/facial-landmarks-35-adas-0002.bin";

	InferenceEngine::CNNNetwork network = ie.ReadNetwork(xml, bin);  //读取网络
	InferenceEngine::InputsDataMap inputs = network.getInputsInfo();  //DataMap是一个Mat数组
	InferenceEngine::OutputsDataMap outputs = network.getOutputsInfo();  //DataMap是一个Mat数组

	int cnt = 0;
	for (auto item : inputs) {  //auto可以自动推断变量类型
		land_input_name = item.first;  //第一个参数是name,第二个参数是结构,第二个参数设置精度与结构
		auto input_data = item.second;
		input_data->setPrecision(Precision::U8);  //默认为unsigned char对应U8
		input_data->setLayout(Layout::NCHW);
	}
	for (auto item : outputs) {  //auto可以自动推断变量类型
		land_output_name = item.first;  //第一个参数是name,第二个参数是结构,第二个参数设置精度与结构
		auto output_data = item.second;
		output_data->setPrecision(Precision::FP32);  //输出还是浮点数
	}

	auto executable_network = ie.LoadNetwork(network, "CPU");  //设置运行的设备
	landmark_request = executable_network.CreateInferRequest();  //设置推理请求
}
效果:
6、图像语义分割与实例分割
实时道路语义分割
- 识别道路、背景、路边、标志线四个类别
道路分割模型介绍
- 模型:road-segmentation-adas-0001
- 输入格式:[B, C=3, H=512, W=896], BGR
- 输出格式:[B, C=4, H=512, W=896]
- 四个类别:BG, road, curb, mark
程序流程

代码实现
#include <inference_engine.hpp>
#include <opencv2/opencv.hpp>
#include <fstream>  //fstream文件读写操作,iostream为控制台操作

using namespace InferenceEngine;

//图像预处理函数
template <typename T>
void matU8ToBlob(const cv::Mat& orig_image, InferenceEngine::Blob::Ptr& blob, int batchIndex = 0) {
	InferenceEngine::SizeVector blobSize = blob->getTensorDesc().getDims();
	const size_t width = blobSize[3];
	const size_t height = blobSize[2];
	const size_t channels = blobSize[1];
	InferenceEngine::MemoryBlob::Ptr mblob = InferenceEngine::as<InferenceEngine::MemoryBlob>(blob);
	if (!mblob) {
		THROW_IE_EXCEPTION << "We expect blob to be inherited from MemoryBlob in matU8ToBlob, "
			<< "but by fact we were not able to cast inputBlob to MemoryBlob";
	}
	// locked memory holder should be alive all time while access to its buffer happens
	auto mblobHolder = mblob->wmap();

	T* blob_data = mblobHolder.as<T*>();

	cv::Mat resized_image(orig_image);
	if (static_cast<int>(width) != orig_image.size().width ||
		static_cast<int>(height) != orig_image.size().height) {
		cv::resize(orig_image, resized_image, cv::Size(width, height));
	}

	int batchOffset = batchIndex * width * height * channels;

	for (size_t c = 0; c < channels; c++) {
		for (size_t h = 0; h < height; h++) {
			for (size_t w = 0; w < width; w++) {
				blob_data[batchOffset + c * width * height + h * width + w] =
					resized_image.at<cv::Vec3b>(h, w)[c];
			}
		}
	}
}

void frameToBlob(std::shared_ptr<InferenceEngine::InferRequest>& request, cv::Mat& frame, std::string& input_name) {
	//图像预处理,输入数据 ->指针获取成员方法
	InferenceEngine::Blob::Ptr input = request->GetBlob(input_name);  //获取网络输入图像信息
	//该函数template模板类型,需要指定具体类型
	matU8ToBlob<uchar>(frame, input);  //使用该函数处理输入数据
}

int main(int argc, char** argv) {

	InferenceEngine::Core ie;

	std::string xml = "D:/projects/models/road-segmentation-adas-0001/FP32/road-segmentation-adas-0001.xml";
	std::string bin = "D:/projects/models/road-segmentation-adas-0001/FP32/road-segmentation-adas-0001.bin";

	InferenceEngine::CNNNetwork network = ie.ReadNetwork(xml, bin);  //读取车辆检测网络

	//获取网络输入输出信息并设置
	InferenceEngine::InputsDataMap inputs = network.getInputsInfo();  //DataMap是一个Mat数组
	InferenceEngine::OutputsDataMap outputs = network.getOutputsInfo();  //DataMap是一个Mat数组
	std::string input_name = "";
	for (auto item : inputs) {  //auto可以自动推断变量类型
		input_name = item.first;  //第一个参数是name,第二个参数是结构,第二个参数设置精度与结构
		auto input_data = item.second;
		// A->B 表示提取A中的成员B
		input_data->setPrecision(Precision::U8);  //默认为unsigned char对应U8
		input_data->setLayout(Layout::NCHW);
		//input_data->getPreProcess().setColorFormat(ColorFormat::BGR);  默认就是BGR
		std::cout << "input name: " << input_name << std::endl;
	}
	std::string output_name = "";
	for (auto item : outputs) {  //auto可以自动推断变量类型
		output_name = item.first;  //第一个参数是name,第二个参数是结构,第二个参数设置精度与结构
		auto output_data = item.second;
		output_data->setPrecision(Precision::FP32);  //输出还是浮点数
		//注意:output_data不要设置结构
		std::cout << "output name: " << output_name << std::endl;
	}

	auto executable_network = ie.LoadNetwork(network, "CPU");  //设置运行的设备
	//创建指针类型便于后续操作
	auto curr_infer_request = executable_network.CreateInferRequestPtr();  //设置推理请求
	auto next_infer_request = executable_network.CreateInferRequestPtr();  //设置推理请求

	cv::VideoCapture capture("D:/images/video/road_segmentation.mp4");
	cv::Mat curr_frame;
	cv::Mat next_frame;
	capture.read(curr_frame);  //先读取一帧作为当前帧
	int im_h = curr_frame.rows;
	int im_w = curr_frame.cols;
	frameToBlob(curr_infer_request, curr_frame, input_name);
	bool first_frame = true;  //设置两个bool变量控制线程开启
	bool last_frame = false;

	std::vector<cv::Vec3b> color_tab;  //设置分割输出图像中的不同颜色代表不同分类
	color_tab.push_back(cv::Vec3b(0, 0, 0));  //背景
	color_tab.push_back(cv::Vec3b(255, 0, 0));  //道路
	color_tab.push_back(cv::Vec3b(0, 0, 255));  //路边
	color_tab.push_back(cv::Vec3b(0, 255, 255));  //路标

	//开启两个线程,curr转换显示结果,next预处理图像,预处理后交换给curr
	while (true) {
		int64 start = cv::getTickCount();  //计时
		bool ret = capture.read(next_frame);  //读取一帧作为下一帧
		if (!ret) {
			last_frame = true;  //如果下一帧为空,则last_frame为true
		}
		if (!last_frame) {  //如果last_frame为false则预处理下一帧图像
			frameToBlob(next_infer_request, next_frame, input_name);
		}
		if (first_frame) {  //如果first_frame为true则开启两个线程,同时修改first_frame为false,避免多次开启线程
			curr_infer_request->StartAsync();  //开启线程
			next_infer_request->StartAsync();
			first_frame = false;
		}
		else {  //如果first_frame与last_frame同为false表示只有下一帧不为空,则开启一个next线程
			if (!last_frame) {
				next_infer_request->StartAsync();
			}
		}
		//判断当前请求是否预处理完毕
		if (InferenceEngine::OK == curr_infer_request->Wait(InferenceEngine::IInferRequest::WaitMode::RESULT_READY)) {
			auto output = curr_infer_request->GetBlob(output_name);
			//转换输出数据
			const float* detection_out = static_cast<PrecisionTrait<Precision::FP32>::value_type*>(output->buffer());

			//output:[B, C, H, W]
			const SizeVector outputDims = output->getTensorDesc().getDims();  //获取输出维度信息 1*1000

			//每个像素针对每种分类分别有一个识别结果数值,数值最大的为该像素的分类
			//结果矩阵格式为:每种分类各有一个输出图像大小的矩阵,每个像素位置对应其在该分类的可能性
			const int out_c = outputDims[1];  //分割识别的类型个数,此处为4
			const int out_h = outputDims[2];  //分割网络输出图像的高
			const int out_w = outputDims[3];  //分割网络输出图像的宽
			cv::Mat result = cv::Mat::zeros(cv::Size(out_w, out_h), CV_8UC3);
			int step = out_h * out_w;
			for (int row = 0; row < out_h; row++) {
				for (int col = 0; col < out_w; col++) {
					int max_index = 0;  //定义一个变量保存最大分类结果数值的下标
					float max_prob = detection_out[row * out_w + col];
					for (int cn = 1; cn < out_c; cn++) {
						//比较每个像素在四种不同分类矩阵中的可能性,找到最大可能性的分类
						float prob = detection_out[cn * step + row * out_w + col];
						if (prob > max_prob) {
							max_prob = prob;
							max_index = cn;
						}
					}
					//在结果矩阵中对应像素位置保存原图中该像素分类对应的颜色
					result.at<cv::Vec3b>(row, col) = color_tab[max_index];
				}
			}
			//先初始化一个网络输出结果大小的矩阵保存每个像素点对应的颜色,再将结果矩阵恢复到原图大小,以便最终结果显示
			cv::resize(result, result, cv::Size(im_w, im_h));
			//在输入图像中对应位置按比例增加结果矩阵中对应的颜色
			cv::addWeighted(curr_frame, 0.5, result, 0.5, 0, curr_frame);
		}
		//getTickCount()相减得到cpu走过的时钟周期数,getTickFrequency()得到cpu一秒走过的始终周期数
		float t = (cv::getTickCount() - start) / static_cast<float>(cv::getTickFrequency());
		cv::putText(curr_frame, cv::format("FPS: %.2f", 1.0 / t), cv::Point(50, 50), cv::FONT_HERSHEY_SIMPLEX, 1.0, cv::Scalar(0, 0, 255), 2, 8);
		//显示结果
		cv::imshow("道路分割异步显示", curr_frame);
		char c = cv::waitKey(1);
		if (c == 27) {  //ESC
			break;
		}
		if (last_frame) {  //如果last_frame为true表示下一帧为空,则跳出循环
			break;
		}

		//异步交换,下一帧复制到当前帧,当前帧请求与下一帧请求交换
		next_frame.copyTo(curr_frame);
		curr_infer_request.swap(next_infer_request);  //指针可以使用swap方法,否则不行
	}

	cv::waitKey(0);
	return 0;
}
效果:
黄色为路面标志,红色为路边,蓝色为道路,其余部分为背景

实例分割
实例分割模型介绍(Mask R-CNN)
- instance-segmentation-security-0050
- 有两个输入层:
- im_data: [1 * 3 * 480 * 480],图像数据 1 * C * H * C(num、channels、height、width)
- im_info: [1 * 3],图像信息,宽、高和scale
- 输出格式:
- classes: [100, ],最多100个实例,属于不超过80个分类
- scores: [100, ],每个检测到对象不是背景的概率
- Boxes: [100, 4],每个检测到的对象的位置(左上角及右下角坐标)
- raw_masks: [100, 81, 28, 28],实际是对每个实例都生成一个14*14的mask,对每个实例获取81个类别(80个类别+背景)的概率值,输出81个14 * 14大小的矩阵
- 实际内存中的结果矩阵是 14 * 14 * 81 * 100
代码实现
#include <inference_engine.hpp>
#include <opencv2/opencv.hpp>
#include <fstream>  //fstream文件读写操作,iostream为控制台操作

using namespace InferenceEngine;
/*
void read_coco_labels(std::vector<std::string>& labels) {
	std::string label_file = "D:/projects/models/coco_labels.txt";
	std::ifstream fp(label_file);
	if (!fp.is_open())
	{
		printf("could not open file...\n");
		exit(-1);
	}
	std::string name;
	while (!fp.eof())
	{
		std::getline(fp, name);
		if (name.length())
			labels.push_back(name);
	}
	fp.close();
}
*/

//图像预处理函数
template <typename T>
void matU8ToBlob(const cv::Mat& orig_image, InferenceEngine::Blob::Ptr& blob, int batchIndex = 0) {
	InferenceEngine::SizeVector blobSize = blob->getTensorDesc().getDims();
	const size_t width = blobSize[3];
	const size_t height = blobSize[2];
	const size_t channels = blobSize[1];
	InferenceEngine::MemoryBlob::Ptr mblob = InferenceEngine::as<InferenceEngine::MemoryBlob>(blob);
	if (!mblob) {
		THROW_IE_EXCEPTION << "We expect blob to be inherited from MemoryBlob in matU8ToBlob, "
			<< "but by fact we were not able to cast inputBlob to MemoryBlob";
	}
	// locked memory holder should be alive all time while access to its buffer happens
	auto mblobHolder = mblob->wmap();

	T* blob_data = mblobHolder.as<T*>();

	cv::Mat resized_image(orig_image);
	if (static_cast<int>(width) != orig_image.size().width ||
		static_cast<int>(height) != orig_image.size().height) {
		cv::resize(orig_image, resized_image, cv::Size(width, height));
	}

	int batchOffset = batchIndex * width * height * channels;

	for (size_t c = 0; c < channels; c++) {
		for (size_t h = 0; h < height; h++) {
			for (size_t w = 0; w < width; w++) {
				blob_data[batchOffset + c * width * height + h * width + w] =
					resized_image.at<cv::Vec3b>(h, w)[c];
			}
		}
	}
}

int main(int argc, char** argv) {

	InferenceEngine::Core ie;
	std::vector<std::string> coco_labels;
	//read_coco_labels(coco_labels);
	cv::RNG rng(12345);

	std::string xml = "D:/projects/models/instance-segmentation-security-0050/FP32/instance-segmentation-security-0050.xml";
	std::string bin = "D:/projects/models/instance-segmentation-security-0050/FP32/instance-segmentation-security-0050.bin";
	cv::Mat src = cv::imread("D:/images/instance_segmentation.jpg");  //读取图像
	int im_h = src.rows;
	int im_w = src.cols;
	InferenceEngine::CNNNetwork network = ie.ReadNetwork(xml, bin);  //读取车辆检测网络

	//获取网络输入输出信息
	InferenceEngine::InputsDataMap inputs = network.getInputsInfo();  //DataMap是一个Mat数组
	InferenceEngine::OutputsDataMap outputs = network.getOutputsInfo();  //DataMap是一个Mat数组
	std::string image_input_name = "";
	std::string image_info_name = "";
	int in_index = 0;

	//设置两个网络输入数据的参数
	for (auto item : inputs) {  //auto可以自动推断变量类型
		if (in_index == 0) {
			image_input_name = item.first;  //第一个参数是name,第二个参数是结构,第二个参数设置精度与结构
			auto input_data = item.second;
			// A->B 表示提取A中的成员B
			input_data->setPrecision(Precision::U8);  //默认为unsigned char对应U8,浮点类型则为FP32
			input_data->setLayout(Layout::NCHW);
		}
		else {
			image_info_name = item.first;  //第一个参数是name,第二个参数是结构,第二个参数设置精度与结构
			auto input_data = item.second;
			// A->B 表示提取A中的成员B
			input_data->setPrecision(Precision::FP32);  //默认为unsigned char对应U8,浮点类型则为FP32
		}
		in_index++;
	}

	for (auto item : outputs) {  //auto可以自动推断变量类型
		std::string output_name = item.first;  //第一个参数是name,第二个参数是结构,第二个参数设置精度与结构
		auto output_data = item.second;
		output_data->setPrecision(Precision::FP32);  //输出还是浮点数
		//注意:output_data不要设置结构
		std::cout << "output name: " << output_name << std::endl;
	}

	auto executable_network = ie.LoadNetwork(network, "CPU");  //设置运行的设备
	auto infer_request = executable_network.CreateInferRequest();  //设置推理请求

	//图像预处理
	auto input = infer_request.GetBlob(image_input_name);  //获取网络输入图像信息
	//将输入图像转换为网络的输入格式
	matU8ToBlob<uchar>(src, input);

	//设置网络的第二个输入
	auto input2 = infer_request.GetBlob(image_info_name);
	auto imInforDim = inputs.find(image_info_name)->second->getTensorDesc().getDims()[1];
	InferenceEngine::MemoryBlob::Ptr minput2 = InferenceEngine::as<InferenceEngine::MemoryBlob>(input2);
	auto minput2Holder = minput2->wmap();
	float* p = minput2Holder.as<InferenceEngine::PrecisionTrait<InferenceEngine::Precision::FP32>::value_type*>();
	p[0] = static_cast<float>(inputs[image_input_name]->getTensorDesc().getDims()[2]);  //输入图像的高
	p[1] = static_cast<float>(inputs[image_input_name]->getTensorDesc().getDims()[3]);  //输入图像的宽
	p[2] = 1.0f;  //scale,前面图像已经转换为480*480,这里保持为1.0就可以

	infer_request.Infer();

	float w_rate = static_cast<float>(im_w) / 480.0;  //用于通过网络输出中的坐标获取原图的坐标
	float h_rate = static_cast<float>(im_h) / 480.0;

	auto scores = infer_request.GetBlob("scores");  //获取网络输出中的信息
	auto boxes = infer_request.GetBlob("boxes");
	auto classes = infer_request.GetBlob("classes");
	auto raw_masks = infer_request.GetBlob("raw_masks");
	//转换输出数据
	const float* scores_data = static_cast<PrecisionTrait<Precision::FP32>::value_type*>(scores->buffer());  //强制转换数据类型为浮点型
	const float* boxes_data = static_cast<PrecisionTrait<Precision::FP32>::value_type*>(boxes->buffer());
	const float* classes_data = static_cast<PrecisionTrait<Precision::FP32>::value_type*>(classes->buffer());
	const auto raw_masks_data = static_cast<PrecisionTrait<Precision::FP32>::value_type*>(raw_masks->buffer());
	const SizeVector scores_outputDims = scores->getTensorDesc().getDims();  //获取输出维度信息 1*1000
	const SizeVector boxes_outputDims = boxes->getTensorDesc().getDims();  //获取输出维度信息 1*1000
	const SizeVector raw_masks_outputDims = raw_masks->getTensorDesc().getDims();  //[100, 81, 28, 28]
	const int max_count = scores_outputDims[0];  //识别出的对象个数
	const int object_size = boxes_outputDims[1];  //获取对象信息的个数,此处为4个
	printf("mask NCHW=[%d, %d, %d, %d]\n", raw_masks_outputDims[0], raw_masks_outputDims[1], raw_masks_outputDims[2], raw_masks_outputDims[3]);
	int mask_h = raw_masks_outputDims[2];
	int mask_w = raw_masks_outputDims[3];
	size_t box_stride = mask_h * mask_w * raw_masks_outputDims[1];  //两个mask之间的距离
	for (int n = 0; n < max_count; n++) {
		float confidence = scores_data[n];
		float xmin = boxes_data[n * object_size] * w_rate;  //转换为原图中的坐标
		float ymin = boxes_data[n * object_size + 1] * h_rate;
		float xmax = boxes_data[n * object_size + 2] * w_rate;
		float ymax = boxes_data[n * object_size + 3] * h_rate;
		if (confidence > 0.5) {
			cv::Scalar color(rng.uniform(0, 255), rng.uniform(0, 255), rng.uniform(0, 255));
			cv::Rect box;
			float x1 = std::min(std::max(0.0f, xmin), static_cast<float>(im_w));  //避免越界
			float y1 = std::min(std::max(0.0f, ymin), static_cast<float>(im_h));
			float x2 = std::min(std::max(0.0f, xmax), static_cast<float>(im_w));
			float y2 = std::min(std::max(0.0f, ymax), static_cast<float>(im_h));
			box.x = static_cast<int>(x1);
			box.y = static_cast<int>(y1);
			box.width = static_cast<int>(x2 - x1);
			box.height = static_cast<int>(y2 - y1);
			int label = static_cast<int>(classes_data[n]);  //第几个实例
			//std::cout << "confidence: " << confidence << "class name: " << coco_labels[label] << std::endl;
			//解析mask,raw_masks_data表示所有mask起始位置,box_stride*n表示跳过遍历的实例
			float* mask_arr = raw_masks_data + box_stride * n + mask_h * mask_w * label;  //找到当前实例当前分类mask的起始指针
			cv::Mat mask_mat(mask_h, mask_w, CV_32FC1, mask_arr);  //从mask_arr指针开始取值构建Mat
			cv::Mat roi_img = src(box);  //创建src大小的Mat并保留box区域
			cv::Mat resized_mask_mat(box.height, box.width, CV_32FC1);
			cv::resize(mask_mat, resized_mask_mat, cv::Size(box.width, box.height));
			cv::Mat uchar_resized_mask(box.height, box.width, CV_8UC3, color);
			roi_img.copyTo(uchar_resized_mask, resized_mask_mat <= 0.5);  //resized_mask_mat中像素值<=0.5的像素都不会复制到uchar_resized_mask上
			cv::addWeighted(uchar_resized_mask, 0.7, roi_img, 0.3, 0.0f, roi_img);

			//cv::rectangle(src, box, cv::Scalar(0, 0, 255), 2, 8);
			//box.tl()返回矩形左上角坐标
			cv::putText(src, cv::format("%.2f", confidence), box.tl(), cv::FONT_HERSHEY_SIMPLEX, 0.5, cv::Scalar(0, 0, 255), 1, 8);
		}
	}

	//cv::putText(src, labels[max_index], cv::Point(50, 50), cv::FONT_HERSHEY_SIMPLEX, 1.0, cv::Scalar(0, 0, 255), 2, 8);
	cv::namedWindow("out", cv::WINDOW_AUTOSIZE);
	cv::imshow("out", src);
	cv::waitKey(0);
	return 0;
}
效果:
7、场景文字检测与识别
场景文字检测
模型介绍
- text-detection-0003
- PixelLink模型库,BGR顺序
- 1个输入层:[B, C, H, W] [1 * 3 * 768 * 1280]
- 2个输出层:
- model/link_logits_/add:[1x16x192x320] - 像素与周围像素的联系
- model/segm_logits/add:[1x2x192x320] - 每个像素所属分类(文本/非文本),只要解析第二个输出就可以获取文本区域
代码实现
#include <inference_engine.hpp>
#include <opencv2/opencv.hpp>
#include <fstream>  //fstream文件读写操作,iostream为控制台操作

using namespace InferenceEngine;

//图像预处理函数
template <typename T>
void matU8ToBlob(const cv::Mat& orig_image, InferenceEngine::Blob::Ptr& blob, int batchIndex = 0) {
	InferenceEngine::SizeVector blobSize = blob->getTensorDesc().getDims();
	const size_t width = blobSize[3];
	const size_t height = blobSize[2];
	const size_t channels = blobSize[1];
	InferenceEngine::MemoryBlob::Ptr mblob = InferenceEngine::as<InferenceEngine::MemoryBlob>(blob);
	if (!mblob) {
		THROW_IE_EXCEPTION << "We expect blob to be inherited from MemoryBlob in matU8ToBlob, "
			<< "but by fact we were not able to cast inputBlob to MemoryBlob";
	}
	// locked memory holder should be alive all time while access to its buffer happens
	auto mblobHolder = mblob->wmap();

	T* blob_data = mblobHolder.as<T*>();

	cv::Mat resized_image(orig_image);
	if (static_cast<int>(width) != orig_image.size().width ||
		static_cast<int>(height) != orig_image.size().height) {
		cv::resize(orig_image, resized_image, cv::Size(width, height));
	}

	int batchOffset = batchIndex * width * height * channels;

	for (size_t c = 0; c < channels; c++) {
		for (size_t h = 0; h < height; h++) {
			for (size_t w = 0; w < width; w++) {
				blob_data[batchOffset + c * width * height + h * width + w] =
					resized_image.at<cv::Vec3b>(h, w)[c];
			}
		}
	}
}

int main(int argc, char** argv) {

	InferenceEngine::Core ie;

	std::string xml = "D:/projects/models/text-detection-0003/FP32/text-detection-0003.xml";
	std::string bin = "D:/projects/models/text-detection-0003/FP32/text-detection-0003.bin";
	cv::Mat src = cv::imread("D:/images/text_detection.png");  //读取图像
	cv::imshow("input", src);
	int im_h = src.rows;
	int im_w = src.cols;
	InferenceEngine::CNNNetwork network = ie.ReadNetwork(xml, bin);  //读取车辆检测网络

	//获取网络输入输出信息
	InferenceEngine::InputsDataMap inputs = network.getInputsInfo();  //DataMap是一个Mat数组
	InferenceEngine::OutputsDataMap outputs = network.getOutputsInfo();  //DataMap是一个Mat数组
	std::string image_input_name = "";

	//设置两个网络输入数据的参数
	for (auto item : inputs) {  //auto可以自动推断变量类型
		image_input_name = item.first;  //第一个参数是name,第二个参数是结构,第二个参数设置精度与结构
		auto input_data = item.second;
		// A->B 表示提取A中的成员B
		input_data->setPrecision(Precision::U8);  //默认为unsigned char对应U8,浮点类型则为FP32
		input_data->setLayout(Layout::NCHW);
	}
	std::string output_name1 = "";
	std::string output_name2 = "";
	int out_index = 0;
	for (auto item : outputs) {  //auto可以自动推断变量类型
		if (out_index == 1) {
			output_name2 = item.first;
		}
		else {
			output_name1 = item.first;
		}
		auto output_data = item.second;
		output_data->setPrecision(Precision::FP32);  //输出还是浮点数
		out_index++;
	}

	auto executable_network = ie.LoadNetwork(network, "CPU");  //设置运行的设备
	auto infer_request = executable_network.CreateInferRequest();  //设置推理请求

	//图像预处理
	auto input = infer_request.GetBlob(image_input_name);  //获取网络输入图像信息
	//将输入图像转换为网络的输入格式
	matU8ToBlob<uchar>(src, input);

	infer_request.Infer();

	auto output = infer_request.GetBlob(output_name2);  //只解析第二个输出即可
	//转换输出数据
	const float* detection_out = static_cast<PrecisionTrait<Precision::FP32>::value_type*>(output->buffer());

	//output:[B, C, H, W] [1, 2, 192, 320]
	const SizeVector outputDims = output->getTensorDesc().getDims();  //获取输出维度信息 1*1000

	//每个像素针对每种分类分别有一个识别结果数值,数值最大的为该像素的分类
	//结果矩阵格式为:每种分类各有一个输出图像大小的矩阵,每个像素位置对应其在该分类的可能性
	const int out_c = outputDims[1];  //分割识别的类型个数,此处为2
	const int out_h = outputDims[2];  //分割网络输出图像的高
	const int out_w = outputDims[3];  //分割网络输出图像的宽
	cv::Mat mask = cv::Mat::zeros(cv::Size(out_w, out_h), CV_32F);
	int step = out_h * out_w;
	for (int row = 0; row < out_h; row++) {
		for (int col = 0; col < out_w; col++) {
			float p1 = detection_out[row * out_w + col];  //获取每个像素最大可能的分类类别
			float p2 = detection_out[step + row * out_w + col];
			if (p1 < p2) {
				mask.at<float>(row, col) = p2;
			}
		}
	}
	//先初始化一个网络输出结果大小的矩阵保存每个像素点对应的颜色,再将结果矩阵恢复到原图大小,以便最终结果显示
	cv::resize(mask, mask, cv::Size(im_w, im_h));
	mask = mask * 255;
	mask.convertTo(mask, CV_8U);  //把mask从浮点数转换为整数,并将范围转换为0-255
	cv::threshold(mask, mask, 100, 255, cv::THRESH_BINARY);  //将mask按指定范围进行二值化分割
	std::vector<std::vector<cv::Point>> contours;
	cv::findContours(mask, contours, cv::RETR_EXTERNAL, cv::CHAIN_APPROX_SIMPLE);
	for (size_t t = 0; t < contours.size(); t++) {  //绘制每个前景区域外轮廓,遍历这些外轮廓并绘制到输入图像中
		cv::Rect box = cv::boundingRect(contours[t]);
		cv::rectangle(src, box, cv::Scalar(0, 0, 255), 2, 8, 0);
	}
	//cv::putText(src, labels[max_index], cv::Point(50, 50), cv::FONT_HERSHEY_SIMPLEX, 1.0, cv::Scalar(0, 0, 255), 2, 8);
	cv::namedWindow("mask", cv::WINDOW_AUTOSIZE);
	cv::imshow("mask", mask);
	cv::imshow("场景文字检测", src);
	cv::waitKey(0);
	return 0;
}
效果:

场景文字识别
模型介绍
- 模型名称:text-recognition-0012
- 输入格式 - BCHW = [1 * 1 * 32 * 120],输入的是单通道灰度图
- 输出层 - WBL = [30, 1, 37], W表示序列长度,每个字符占一行,共30行,每个字符有37种可能,所以占37列
- 其中L为:0123456789abcdefghijklmnopqrstuvwxyz#
-
表示CTC解析时候的空白字符,CTC的输出连续两个字符不能相同,相同字符间必有空格隔开,可参见以下博客:超详细讲解CTC理论和实战 - 简书 (jianshu.com)
代码实现
#include <inference_engine.hpp>
#include <opencv2/opencv.hpp>
#include <fstream>  //fstream文件读写操作,iostream为控制台操作

using namespace InferenceEngine;

//图像预处理函数
template <typename T>
void matU8ToBlob(const cv::Mat& orig_image, InferenceEngine::Blob::Ptr& blob, int batchIndex = 0) {
	InferenceEngine::SizeVector blobSize = blob->getTensorDesc().getDims();
	const size_t width = blobSize[3];
	const size_t height = blobSize[2];
	const size_t channels = blobSize[1];
	InferenceEngine::MemoryBlob::Ptr mblob = InferenceEngine::as<InferenceEngine::MemoryBlob>(blob);
	if (!mblob) {
		THROW_IE_EXCEPTION << "We expect blob to be inherited from MemoryBlob in matU8ToBlob, "
			<< "but by fact we were not able to cast inputBlob to MemoryBlob";
	}
	// locked memory holder should be alive all time while access to its buffer happens
	auto mblobHolder = mblob->wmap();

	T* blob_data = mblobHolder.as<T*>();

	cv::Mat resized_image(orig_image);
	if (static_cast<int>(width) != orig_image.size().width ||
		static_cast<int>(height) != orig_image.size().height) {
		cv::resize(orig_image, resized_image, cv::Size(width, height));
	}

	int batchOffset = batchIndex * width * height * channels;

	for (size_t c = 0; c < channels; c++) {
		for (size_t h = 0; h < height; h++) {
			for (size_t w = 0; w < width; w++) {
				blob_data[batchOffset + c * width * height + h * width + w] =
					resized_image.at<cv::Vec3b>(h, w)[c];
			}
		}
	}
}

//文本识别预处理
void loadTextRecogRequest(Core& ie, std::string& reco_input_name, std::string& reco_output_name);
std::string alphabet = "0123456789abcdefghijklmnopqrstuvwxyz#";  //用于匹配的字符表
std::string ctc_decode(const float* blob_out, int seq_w, int seq_l);  //CTC字符匹配函数
InferenceEngine::InferRequest reco_request;
int main(int argc, char** argv) {

	InferenceEngine::Core ie;

	std::string xml = "D:/projects/models/text-detection-0003/FP32/text-detection-0003.xml";
	std::string bin = "D:/projects/models/text-detection-0003/FP32/text-detection-0003.bin";
	cv::Mat src = cv::imread("D:/images/text_detection02.png");  //读取图像
	cv::imshow("input", src);
	int im_h = src.rows;
	int im_w = src.cols;
	InferenceEngine::CNNNetwork network = ie.ReadNetwork(xml, bin);  //读取车辆检测网络

	//获取网络输入输出信息
	InferenceEngine::InputsDataMap inputs = network.getInputsInfo();  //DataMap是一个Mat数组
	InferenceEngine::OutputsDataMap outputs = network.getOutputsInfo();  //DataMap是一个Mat数组
	std::string image_input_name = "";

	//设置两个网络输入数据的参数
	for (auto item : inputs) {  //auto可以自动推断变量类型
		image_input_name = item.first;  //第一个参数是name,第二个参数是结构,第二个参数设置精度与结构
		auto input_data = item.second;
		// A->B 表示提取A中的成员B
		input_data->setPrecision(Precision::U8);  //默认为unsigned char对应U8,浮点类型则为FP32
		input_data->setLayout(Layout::NCHW);
	}
	std::string output_name1 = "";
	std::string output_name2 = "";
	int out_index = 0;
	for (auto item : outputs) {  //auto可以自动推断变量类型
		if (out_index == 1) {
			output_name2 = item.first;
		}
		else {
			output_name1 = item.first;
		}
		auto output_data = item.second;
		output_data->setPrecision(Precision::FP32);  //输出还是浮点数
		out_index++;
	}

	auto executable_network = ie.LoadNetwork(network, "CPU");  //设置运行的设备
	auto infer_request = executable_network.CreateInferRequest();  //设置推理请求

	//图像预处理
	auto input = infer_request.GetBlob(image_input_name);  //获取网络输入图像信息
	//将输入图像转换为网络的输入格式
	matU8ToBlob<uchar>(src, input);

	infer_request.Infer();

	auto output = infer_request.GetBlob(output_name2);  //只解析第二个输出即可
	//转换输出数据
	const float* detection_out = static_cast<PrecisionTrait<Precision::FP32>::value_type*>(output->buffer());

	//output:[B, C, H, W] [1, 2, 192, 320]
	const SizeVector outputDims = output->getTensorDesc().getDims();  //获取输出维度信息 1*1000

	//每个像素针对每种分类分别有一个识别结果数值,数值最大的为该像素的分类
	//结果矩阵格式为:每种分类各有一个输出图像大小的矩阵,每个像素位置对应其在该分类的可能性
	const int out_c = outputDims[1];  //分割识别的类型个数,此处为2
	const int out_h = outputDims[2];  //分割网络输出图像的高
	const int out_w = outputDims[3];  //分割网络输出图像的宽
	cv::Mat mask = cv::Mat::zeros(cv::Size(out_w, out_h), CV_8U);
	int step = out_h * out_w;
	for (int row = 0; row < out_h; row++) {
		for (int col = 0; col < out_w; col++) {
			float p1 = detection_out[row * out_w + col];  //获取每个像素最大可能的分类类别
			float p2 = detection_out[step + row * out_w + col];
			if (p2 >= 1.0) {
				mask.at<uchar>(row, col) = 255;
			}
		}
	}
	//先初始化一个网络输出结果大小的矩阵保存每个像素点对应的颜色,再将结果矩阵恢复到原图大小,以便最终结果显示
	cv::resize(mask, mask, cv::Size(im_w, im_h));

	std::vector<std::vector<cv::Point>> contours;  //初始化一个容器保存轮廓点集
	cv::findContours(mask, contours, cv::RETR_EXTERNAL, cv::CHAIN_APPROX_SIMPLE);

	cv::Mat gray;
	cv::cvtColor(src, gray, cv::COLOR_BGR2GRAY);
	std::string reco_input_name = "";
	std::string reco_output_name = "";
	loadTextRecogRequest(ie, reco_input_name, reco_output_name);
	std::cout << "text input: " << reco_input_name << "text output: " << reco_output_name << std::endl;

	for (size_t t = 0; t < contours.size(); t++) {  //绘制每个前景区域外轮廓,遍历这些外轮廓并绘制到输入图像中
		cv::Rect box = cv::boundingRect(contours[t]);
		cv::rectangle(src, box, cv::Scalar(0, 0, 255), 2, 8, 0);
		box.x = box.x - 4;  //扩大文字检测区域减少漏检误检
		box.y = box.y - 4;
		box.width = box.width + 8;
		box.height = box.height + 8;

		cv::Mat roi = gray(box);

		auto reco_input_blob = reco_request.GetBlob(reco_input_name);
		size_t num_channels = reco_input_blob->getTensorDesc().getDims()[1];
		size_t h = reco_input_blob->getTensorDesc().getDims()[2];
		size_t w = reco_input_blob->getTensorDesc().getDims()[3];
		size_t image_size = h * w;
		cv::Mat blob_image;
		cv::resize(roi, blob_image, cv::Size(w, h));  //转换图像为网络输入大小

		//HWC =》NCHW
		unsigned char* data = static_cast<unsigned char*>(reco_input_blob->buffer());
		for (size_t row = 0; row < h; row++) {
			for (size_t col = 0; col < w; col++) {
				data[row * w + col] = blob_image.at<uchar>(row, col);  //uchar类型无符号 0-255
			}
		}
		reco_request.Infer();

		auto reco_output = reco_request.GetBlob(reco_output_name);
		//获取输出数据的指针
		const float* blob_out = static_cast<PrecisionTrait<Precision::FP32>::value_type*>(reco_output->buffer());
		const SizeVector reco_dims = reco_output->getTensorDesc().getDims();
		const int RW = reco_dims[0];  //30
		const int RB = reco_dims[1];  //1
		const int RL = reco_dims[2];  //37
		//通过CTC解码来处理网络输出的数据
		std::string ocr_txt = ctc_decode(blob_out, RW, RL);  //识别输出的数据为字符
		std::cout << ocr_txt << std::endl;
		cv::putText(src, ocr_txt, box.tl(), cv::FONT_HERSHEY_PLAIN, 1.0, cv::Scalar(255, 0, 0), 1);
	}
	//cv::putText(src, labels[max_index], cv::Point(50, 50), cv::FONT_HERSHEY_SIMPLEX, 1.0, cv::Scalar(0, 0, 255), 2, 8);
	cv::namedWindow("mask", cv::WINDOW_AUTOSIZE);
	cv::imshow("mask", mask);
	cv::imshow("场景文字检测", src);
	cv::waitKey(0);
	return 0;
}

void loadTextRecogRequest(Core& ie, std::string& reco_input_name, std::string& reco_output_name) {

	std::string xml = "D:/projects/models/text-recognition-0012/FP32/text-recognition-0012.xml";
	std::string bin = "D:/projects/models/text-recognition-0012/FP32/text-recognition-0012.bin";
	InferenceEngine::CNNNetwork network = ie.ReadNetwork(xml, bin);

	InferenceEngine::InputsDataMap inputs = network.getInputsInfo();
	InferenceEngine::OutputsDataMap outputs = network.getOutputsInfo();

	for (auto item : inputs) {
		reco_input_name = item.first;
		auto input_data = item.second;
		input_data->setPrecision(Precision::U8);
		input_data->setLayout(Layout::NCHW);
	}
	for (auto item : outputs) {
		reco_output_name = item.first;
		auto output_data = item.second;
		output_data->setPrecision(Precision::FP32);
	}

	auto exec_network = ie.LoadNetwork(network, "CPU");
	reco_request = exec_network.CreateInferRequest();
}

std::string ctc_decode(const float* blob_out, int seq_w, int seq_l) {
	printf("seq width:%d,seq length:%d\n", seq_w, seq_l);
	std::string res = "";
	bool prev_pad = false;
	const int num_classes = alphabet.length();
	int seq_len = seq_w * seq_l;
	for (int i = 0; i < seq_w; i++) {
		int argmax = 0;
		int max_prob = blob_out[i * seq_l];
		for (int j = 0; j < num_classes; j++) {
			if (blob_out[i * seq_l + j] > max_prob) {
				max_prob = blob_out[i * seq_l + j];
				argmax = j;
			}
		}
		auto symbol = alphabet[argmax];  //遍历查找每个字符的最大可能字符
		if (symbol == '#') {  //去除字符串中的空字符
			//通过prev_pad来控制空字符之后的字符一定会添加到结果字符串中,而两个连续相同字符的第二个不会被添加到结果字符串中
			prev_pad = true;
		}
		else {
			if (res.empty() || prev_pad || (!res.empty() && symbol != res.back())) {  //back()方法获取字符串最后一个字符;front()获取第一个字符
				prev_pad = false;
				res += symbol;  //字符串拼接
			}
		}
	}
	return res;
}
效果:

8、模型转换与部署
pytorch模型转换与部署
- ONNX转换与支持
- 首先需要保存pth文件,然后转化为内ONNX格式文件
- OpenVINO支持直接读取ONNX格式文件解析
- ONNX转换为IR文件
pytorch模型转换为onnx模型
从pytorch官网安装:Start Locally | PyTorch
import torch
import torchvision

def main():
    model = torchvision.models.resnet18(pretrained=True).eval()  #模型的推理模式
    dummy_input = torch.randn((1,3,224,224))  #tensor张量,多维数组,此处模型输入为3通道,224*224大小的图像
    torch.onnx.export(model,dummy_input,"resnet18.onnx")

if __name__ == '__main__':
    main()
运行后获取的onnx模型文件:
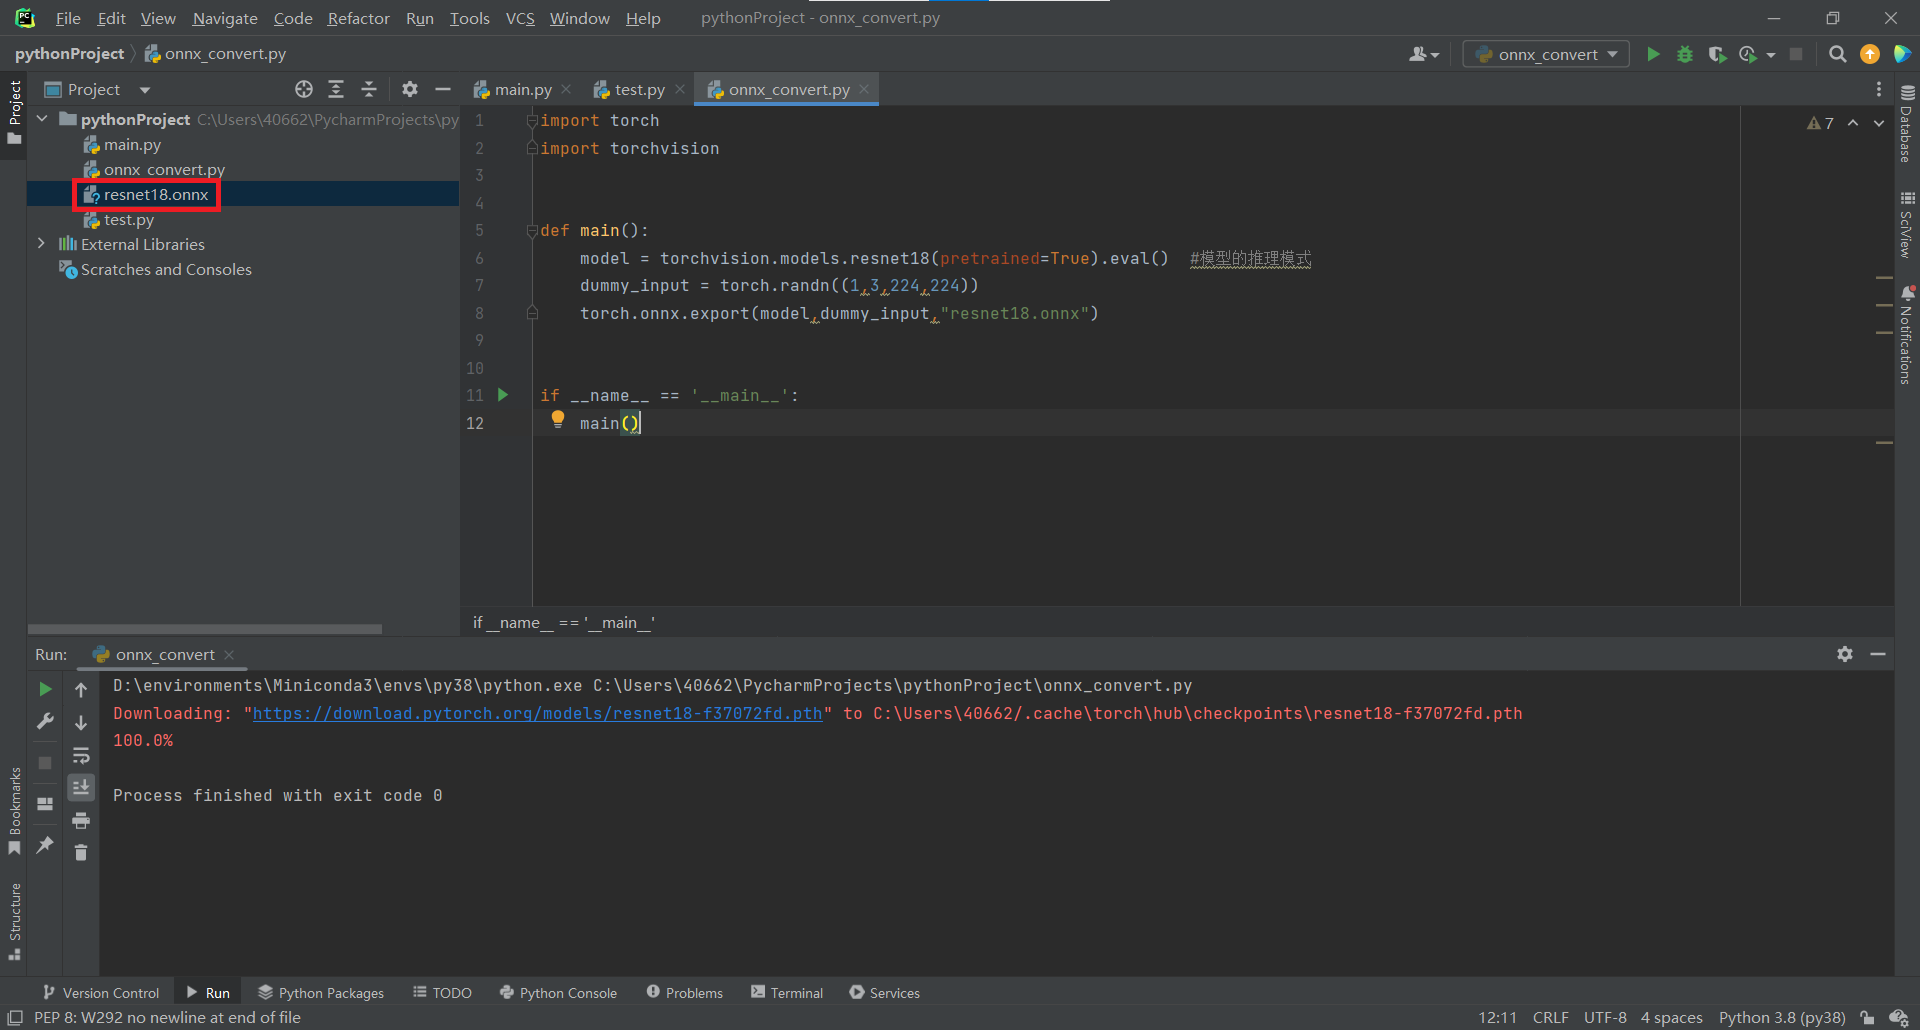
onnx模型转换为IR模型
-
进入OpenVINO安装路径下的model_optimizer文件夹,路径如下:C:\Program Files (x86)\Intel\openvino_2021.2.185\deployment_tools\model_optimizer
-
可以通过运行该文件夹中的install_prerequisites文件夹中的bat脚本来安装onnx及tensorflow环境,也可手动根据requirements_onnx.txt文件中的环境要求安装,安装完环境后,以管理员身份运行cmd命令提示符并进入到model_optimizer文件夹下

- 运行model_optimizer文件夹下mo_onnx.py脚本将onnx模型转换为IR模型,运行后该文件夹下会生成xml及bin两个文件
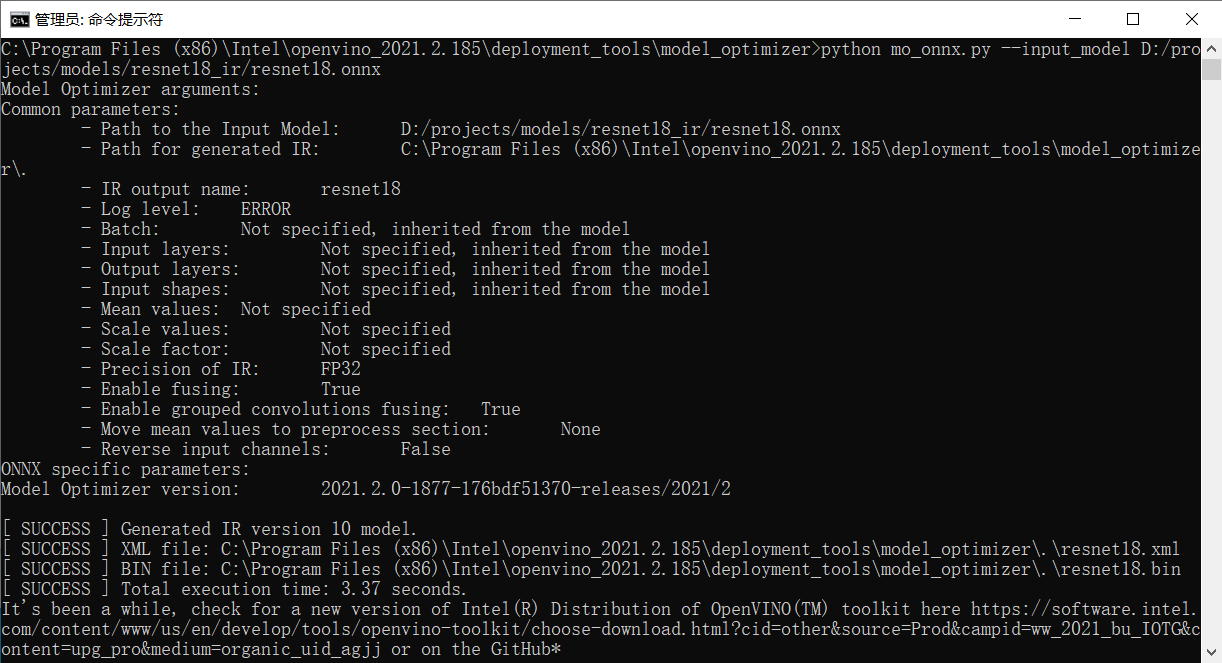
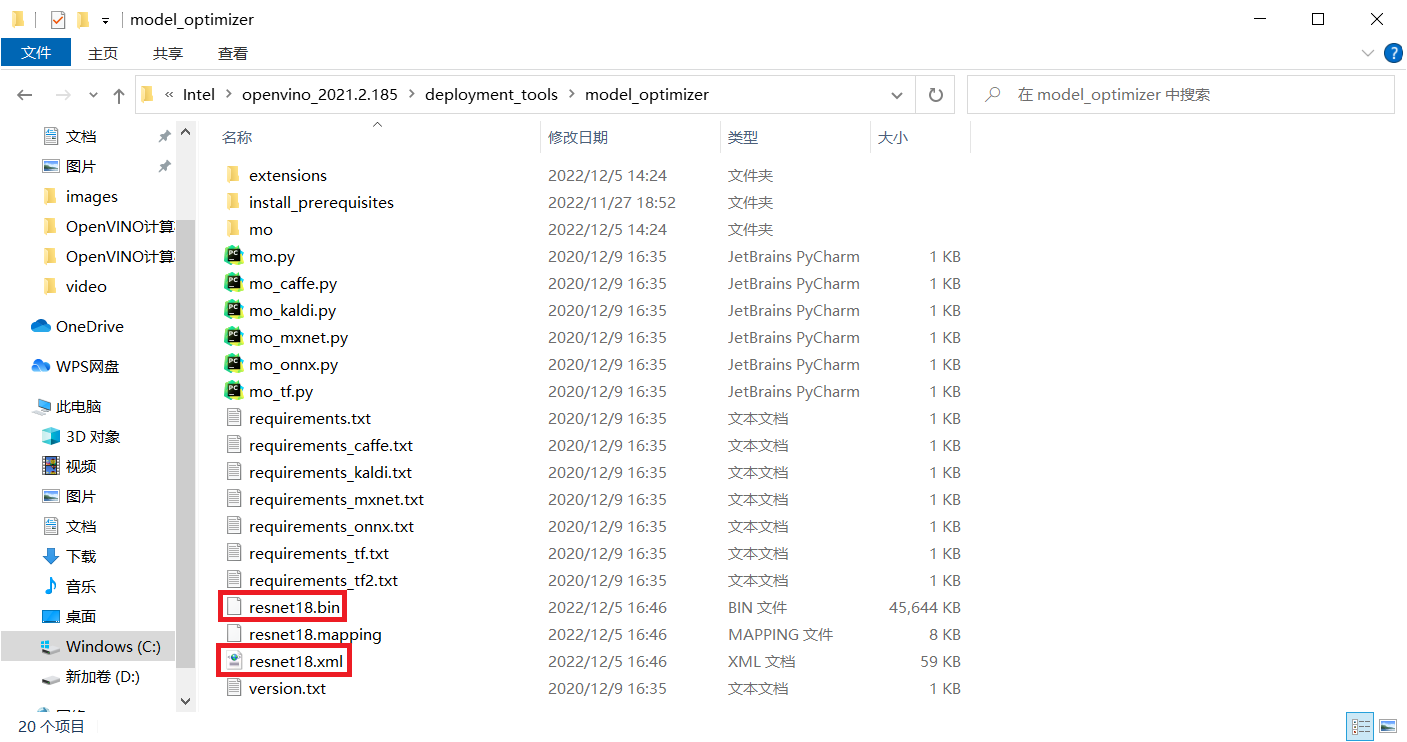
运行脚本如下:
python mo_onnx.py --input_model D:/projects/models/resnet18_ir/resnet18.onnx
转换获得的onnx模型及IR模型测试代码
#include <inference_engine.hpp>
#include <opencv2/opencv.hpp>
#include <fstream>

using namespace InferenceEngine;
std::string labels_txt_file = "D:/projects/models/resnet18_ir/imagenet_classes.txt";
std::vector<std::string> readClassNames();
int main(int argc, char** argv) {
	InferenceEngine::Core ie;
	std::vector<std::string> devices = ie.GetAvailableDevices();
	for (std::string name : devices) {
		std::cout << "device name: " << name << std::endl;
	}
	std::string cpuName = ie.GetMetric("CPU", METRIC_KEY(FULL_DEVICE_NAME)).as<std::string>();
	std::cout << "cpu full name: " << cpuName << std::endl;
	//std::string xml = "D:/projects/models/resnet18_ir/resnet18.xml";  //IR模型
	//std::string bin = "D:/projects/models/resnet18_ir/resnet18.bin";
	std::string onnx = "D:/projects/models/resnet18_ir/resnet18.onnx";  //ONNX模型
	std::vector<std::string> labels = readClassNames();
	cv::Mat src = cv::imread("D:/images/messi02.jpg");

	//IR和ONNX格式的模型都可以被InferenceEngine读取
	// InferenceEngine::CNNNetwork network = ie.ReadNetwork(xml, bin);
	InferenceEngine::CNNNetwork network = ie.ReadNetwork(onnx);
	InferenceEngine::InputsDataMap inputs = network.getInputsInfo();
	InferenceEngine::OutputsDataMap outputs = network.getOutputsInfo();

	std::string input_name = "";
	for (auto item : inputs) {
		input_name = item.first;
		auto input_data = item.second;
		input_data->setPrecision(Precision::FP32);
		input_data->setLayout(Layout::NCHW);
		input_data->getPreProcess().setColorFormat(ColorFormat::RGB);
		std::cout << "input name: " << input_name << std::endl;
	}

	std::string output_name = "";
	for (auto item : outputs) {
		output_name = item.first;
		auto output_data = item.second;
		output_data->setPrecision(Precision::FP32);
		std::cout << "output name: " << output_name << std::endl;
	}

	auto executable_network = ie.LoadNetwork(network, "CPU");
	auto infer_request = executable_network.CreateInferRequest();

	auto input = infer_request.GetBlob(input_name);
	size_t num_channels = input->getTensorDesc().getDims()[1];
	size_t h = input->getTensorDesc().getDims()[2];
	size_t w = input->getTensorDesc().getDims()[3];
	size_t image_size = h * w;
	cv::Mat blob_image;
	cv::resize(src, blob_image, cv::Size(w, h));
	cv::cvtColor(blob_image, blob_image, cv::COLOR_BGR2RGB);
	blob_image.convertTo(blob_image, CV_32F);
	blob_image = blob_image / 255.0;
	cv::subtract(blob_image, cv::Scalar(0.485, 0.456, 0.406), blob_image);
	cv::divide(blob_image, cv::Scalar(0.229, 0.224, 0.225), blob_image);

	// HWC =》NCHW
	float* data = static_cast<float*>(input->buffer());
	for (size_t row = 0; row < h; row++) {
		for (size_t col = 0; col < w; col++) {
			for (size_t ch = 0; ch < num_channels; ch++) {
				data[image_size * ch + row * w + col] = blob_image.at<cv::Vec3f>(row, col)[ch];
			}
		}
	}

	infer_request.Infer();

	auto output = infer_request.GetBlob(output_name);
	const float* probs = static_cast<PrecisionTrait<Precision::FP32>::value_type*>(output->buffer());
	const SizeVector outputDims = output->getTensorDesc().getDims();
	std::cout << outputDims[0] << "x" << outputDims[1] << std::endl;
	float max = probs[0];
	int max_index = 0;
	for (int i = 1; i < outputDims[1]; i++) {
		if (max < probs[i]) {
			max = probs[i];
			max_index = i;
		}
	}

	std::cout << "class index : " << max_index << std::endl;
	std::cout << "class name : " << labels[max_index] << std::endl;
	cv::putText(src, labels[max_index], cv::Point(50, 50), cv::FONT_HERSHEY_SIMPLEX, 1.0, cv::Scalar(0, 0, 255), 2, 8);
	cv::imshow("输入图像", src);
	cv::waitKey(0);
	return 0;
}


std::vector<std::string> readClassNames()
{
	std::vector<std::string> classNames;

	std::ifstream fp(labels_txt_file);
	if (!fp.is_open())
	{
		printf("could not open file...\n");
		exit(-1);
	}
	std::string name;
	while (!fp.eof())
	{
		std::getline(fp, name);
		if (name.length())
			classNames.push_back(name);
	}
	fp.close();
	return classNames;
}
效果:
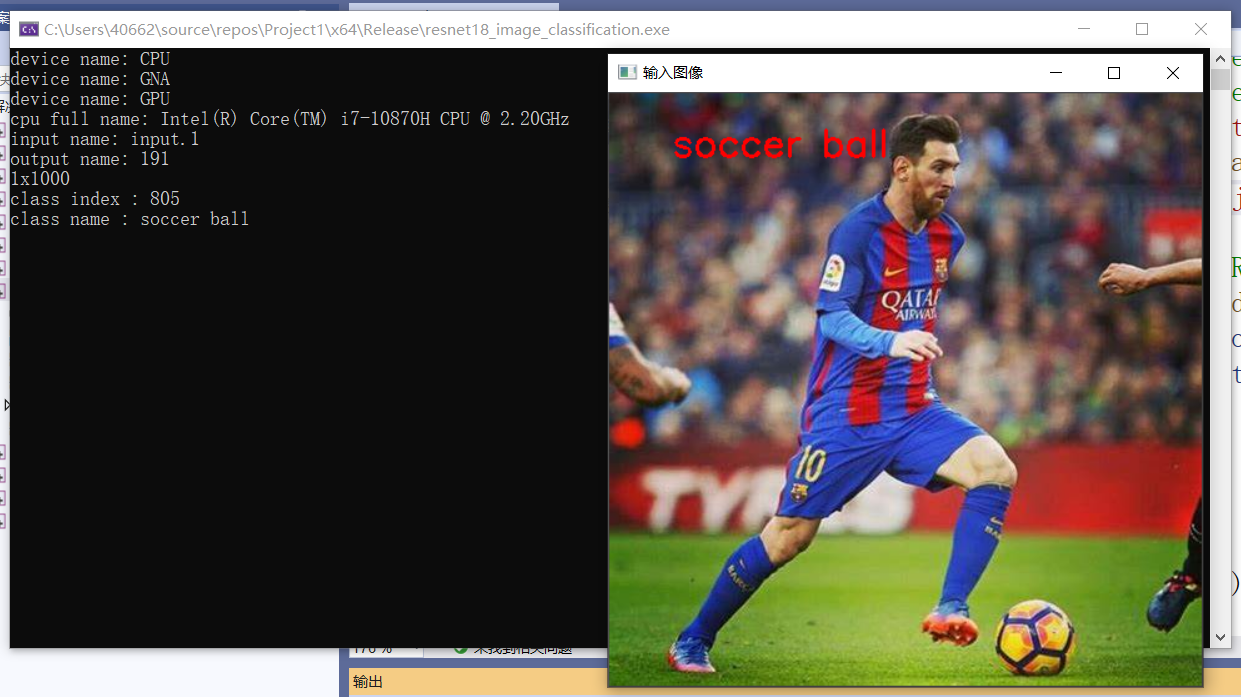
tensorflow模型转换与部署
- 通用参数设置
- --input_model <path_to_frozen.pb>
- --transformations_config <path_to_subgraph_replacement_configuration_file.json>
- --tensorflow_object_detection_api_pipeline_config <path_topipeline.config>
- --input_shape
- --reverse_input_channels(将rgb通道反序转换为bgr方便opencv后续操作)
- 版本信息要求
- tensorflow:required:>=1.15.2
- numpy:required:<1.19.0
- pip install tensorflow-gpu==1.15.2 -i https://pypi.tuna.tsinghua.edu.cn/simple
- pip install tensorflow-gpu==1.15.2 -i https://pypi.doubanio.com/simple/
- networkx>=1.11
- numpy>=1.14.0,<1.19.0
- test-generator==0.1.1
- defusedxml>=0.5.0
获取tensorflow预训练模型及查看OpenVINO模型转换文档
使用mobilenetv2版本pb转换为IR并调用推理
COCO-trained models链接:models/tf1_detection_zoo.md at master · tensorflow/models · GitHub
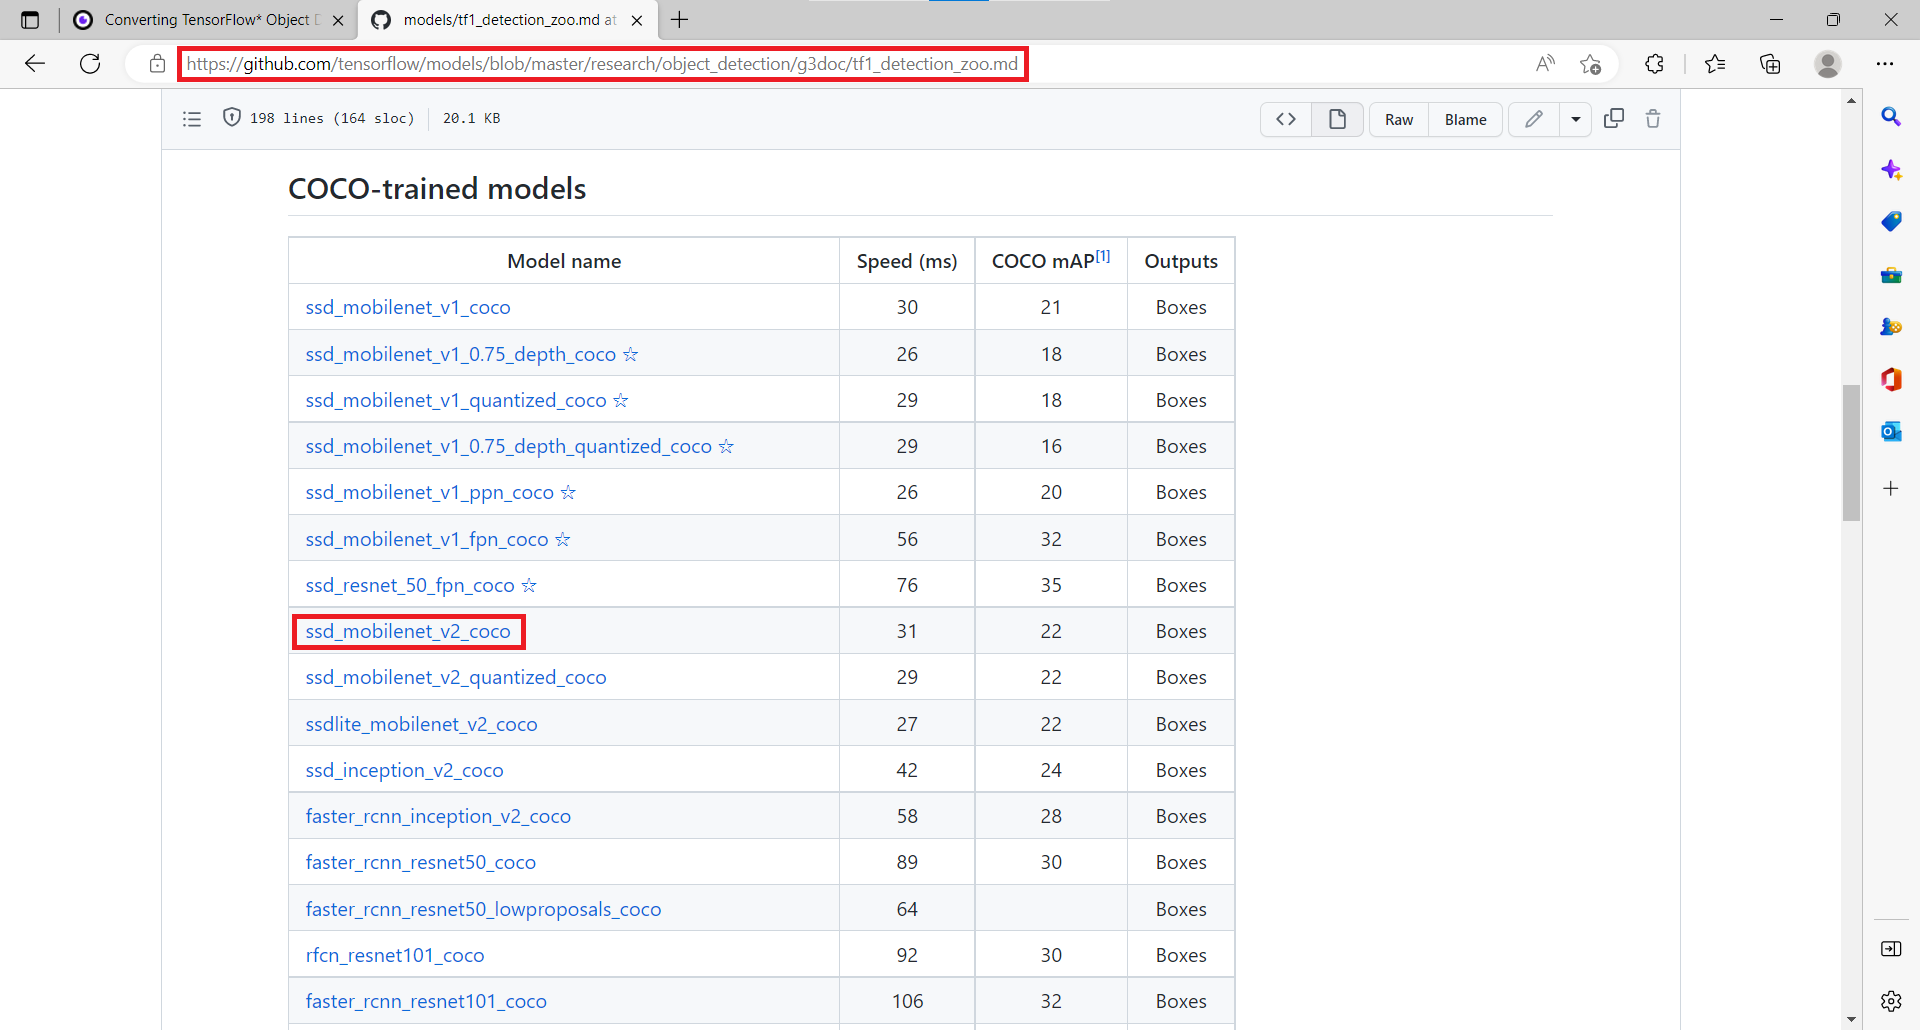
OpenVINO中的tesorflow模型转换链接:https://docs.openvino.ai/2021.2/openvino_docs_MO_DG_prepare_model_convert_model_tf_specific_Convert_Object_Detection_API_Models.html
获取的预训练模型文件夹中的pipeline.config文档可以对模型进行设置,比如参数image_resized可以保持原有固定输入图像大小300 * 300,也可以设置为保持原图像比例并设置图像大小缩放在一个范围内
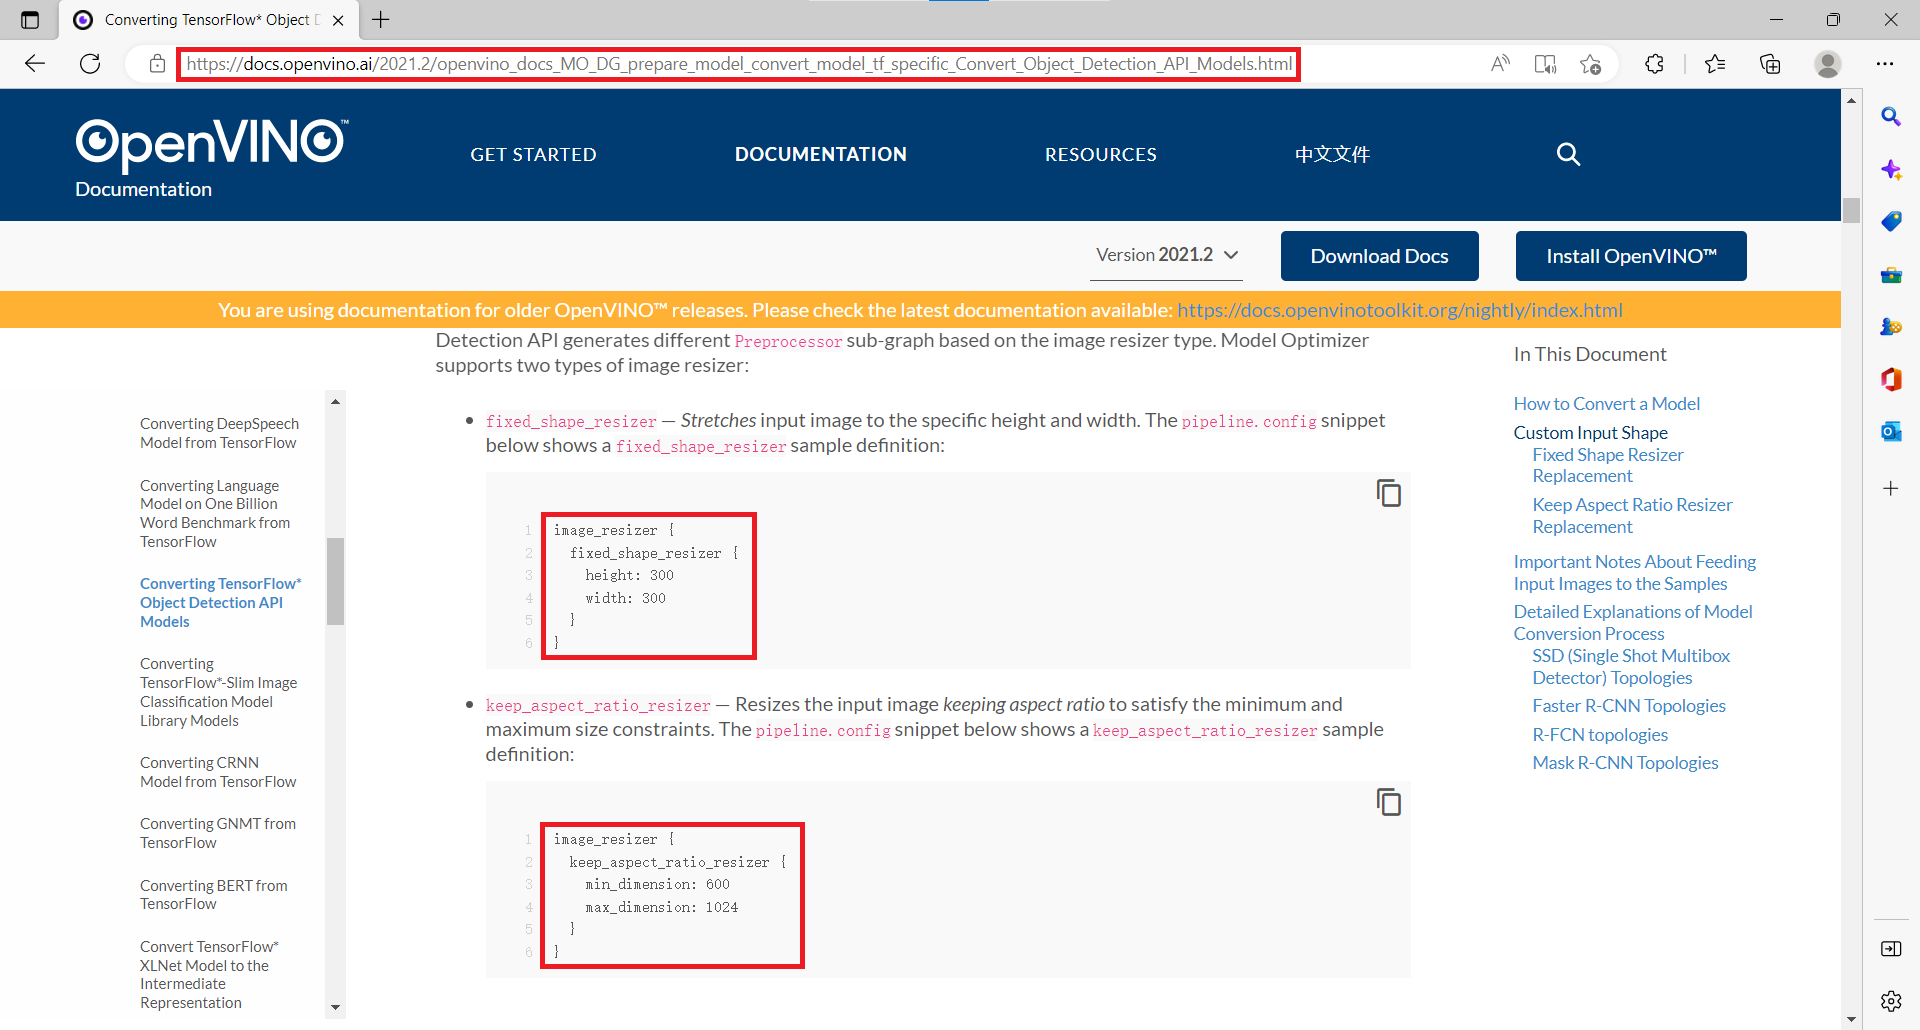
pb模型转换为IR模型代码:
python mo_tf.py --input_model=D:/tensorflow/ssd_mobilenet_v2_coco_2018_03_29/frozen_inference_graph.pb --transformations_config extensions/front/tf/ssd_v2_support.json --tensorflow_object_detection_api_pipeline_config D:/tensorflow/ssd_mobilenet_v2_coco_2018_03_29/pipeline.config --reverse_input_channels --input_shape [1,300,300,3]
tensorflow模型转换环境搭建及运行
python版本必须为3.8以下才能安装tensorflow 1.15.2,同时1.0版的tensorflow分cpu版与gpu版两种;
本机安装的python版本是3.8,所以使用conda创建python版本为3.6的虚拟环境用于模型转换:
conda create -n py36 python==3.6.5
conda activate py36
pip install tensorflow==1.15.2 -i https://pypi.doubanio.com/simple/
pip install tensorflow-gpu==1.15.2 -i https://pypi.doubanio.com/simple/
pip install networkx==1.11
pip install numpy==1.18.4
pip install test-generator==0.1.1
pip install defusedxml==0.5.0
cd C:\Program Files (x86)\Intel\openvino_2021.2.185\deployment_tools\model_optimizer
python mo_tf.py --input_model=D:/tensorflow/ssd_mobilenet_v2_coco_2018_03_29/frozen_inference_graph.pb --transformations_config extensions/front/tf/ssd_v2_support.json --tensorflow_object_detection_api_pipeline_config D:/tensorflow/ssd_mobilenet_v2_coco_2018_03_29/pipeline.config --reverse_input_channels --input_shape [1,300,300,3]
模型转换成功及转换得到的xml与bin文件
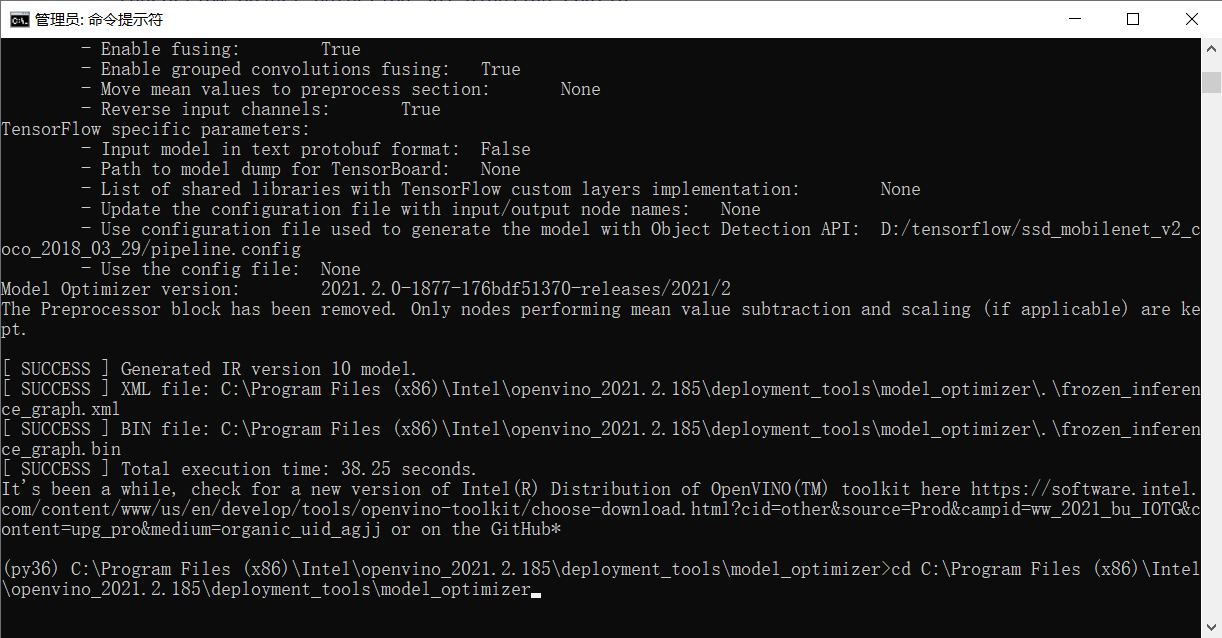

模型转换后的IR模型测试代码
#include <inference_engine.hpp>
#include <opencv2/opencv.hpp>
#include <fstream>  //fstream文件读写操作,iostream为控制台操作

void read_coco_labels(std::vector<std::string>& labels) {
	std::string label_file = "D:/projects/models/object_detection_classes_coco.txt";
	std::ifstream fp(label_file);
	if (!fp.is_open())
	{
		printf("could not open file...\n");
		exit(-1);
	}
	std::string name;
	while (!fp.eof())
	{
		std::getline(fp, name);
		if (name.length())
			labels.push_back(name);
	}
	fp.close();
}

using namespace InferenceEngine;

int main(int argc, char** argv) {

	InferenceEngine::Core ie;

	std::string xml = "D:/projects/models/tf_ssdv2_ir/frozen_inference_graph.xml";
	std::string bin = "D:/projects/models/tf_ssdv2_ir/frozen_inference_graph.bin";

	std::vector<std::string> coco_labels;
	read_coco_labels(coco_labels);

	cv::Mat src = cv::imread("D:/images/dog_bike_car.jpg");  //读取图像
	int im_h = src.rows;
	int im_w = src.cols;
	InferenceEngine::CNNNetwork network = ie.ReadNetwork(xml, bin);  //读取车辆检测网络

	//获取网络输入输出信息
	InferenceEngine::InputsDataMap inputs = network.getInputsInfo();  //DataMap是一个Mat数组
	InferenceEngine::OutputsDataMap outputs = network.getOutputsInfo();  //DataMap是一个Mat数组
	std::string input_name = "";
	for (auto item : inputs) {  //auto可以自动推断变量类型
		input_name = item.first;  //第一个参数是name,第二个参数是结构,第二个参数设置精度与结构
		auto input_data = item.second;
		// A->B 表示提取A中的成员B
		input_data->setPrecision(Precision::U8);  //默认为unsigned char对应U8
		input_data->setLayout(Layout::NCHW);
		//input_data->getPreProcess().setColorFormat(ColorFormat::BGR);  默认就是BGR
		std::cout << "input name: " << input_name << std::endl;
	}
	std::string output_name = "";
	for (auto item : outputs) {  //auto可以自动推断变量类型
		output_name = item.first;  //第一个参数是name,第二个参数是结构,第二个参数设置精度与结构
		auto output_data = item.second;
		output_data->setPrecision(Precision::FP32);  //输出还是浮点数
		//注意:output_data不要设置结构
		std::cout << "output name: " << output_name << std::endl;
	}

	auto executable_network = ie.LoadNetwork(network, "CPU");  //设置运行的设备
	auto infer_request = executable_network.CreateInferRequest();  //设置推理请求

	//图像预处理
	auto input = infer_request.GetBlob(input_name);  //获取网络输入图像信息
	size_t num_channels = input->getTensorDesc().getDims()[1];  //size_t 类型表示C中任何对象所能达到的最大长度,它是无符号整数
	size_t h = input->getTensorDesc().getDims()[2];
	size_t w = input->getTensorDesc().getDims()[3];
	size_t image_size = h * w;
	cv::Mat blob_image;
	cv::resize(src, blob_image, cv::Size(w, h));  //将输入图片大小转换为与网络输入大小一致
	//cv::cvtColor(blob_image, blob_image, cv::COLOR_BGR2RGB);  //色彩空间转换

	// HWC =》NCHW  将输入图像从HWC格式转换为NCHW格式
	unsigned char* data = static_cast<unsigned char*>(input->buffer());  //将图像放到buffer中,放入input中
	for (size_t row = 0; row < h; row++) {
		for (size_t col = 0; col < w; col++) {
			for (size_t ch = 0; ch < num_channels; ch++) {
				//将每个通道变成一张图,按照通道顺序
				data[image_size * ch + row * w + col] = blob_image.at<cv::Vec3b>(row, col)[ch];
			}
		}
	}

	infer_request.Infer();
	auto output = infer_request.GetBlob(output_name);
	//转换输出数据
	const float* detection_out = static_cast<PrecisionTrait<Precision::FP32>::value_type*>(output->buffer());
	//output:[1, 1, N, 7]
	//七个参数为:[image_id, label, conf, x_min, y_min, x_max, y_max]
	const SizeVector outputDims = output->getTensorDesc().getDims();  //获取输出维度信息 1*1000
	std::cout << outputDims[2] << "x" << outputDims[3] << std::endl;
	const int max_count = outputDims[2];  //识别出的对象个数
	const int object_size = outputDims[3];  //获取对象信息的个数,此处为7个
	for (int n = 0; n < max_count; n++) {
		float label = detection_out[n * object_size + 1];
		float confidence = detection_out[n * object_size + 2];
		float xmin = detection_out[n * object_size + 3] * im_w;
		float ymin = detection_out[n * object_size + 4] * im_h;
		float xmax = detection_out[n * object_size + 5] * im_w;
		float ymax = detection_out[n * object_size + 6] * im_h;
		if (confidence > 0.7) {
			printf("label id: %d,label name: %s \n", static_cast<int>(label), coco_labels[static_cast<int>(label)]);
			cv::Rect box;
			box.x = static_cast<int>(xmin);
			box.y = static_cast<int>(ymin);
			box.width = static_cast<int>(xmax - xmin);
			box.height = static_cast<int>(ymax - ymin);

			cv::rectangle(src, box, cv::Scalar(0, 0, 255), 2, 8);
			//box.tl()返回矩形左上角坐标
			cv::putText(src, coco_labels[static_cast<int>(label)], box.tl(), cv::FONT_HERSHEY_SIMPLEX, 1.0, cv::Scalar(0, 255, 0), 2, 8);
		}
	}

	//cv::putText(src, labels[max_index], cv::Point(50, 50), cv::FONT_HERSHEY_SIMPLEX, 1.0, cv::Scalar(0, 0, 255), 2, 8);
	cv::namedWindow("out", cv::WINDOW_FREERATIO);
	cv::imshow("out", src);
	cv::waitKey(0);
	return 0;
}
效果:

9、YOLOv5模型部署与推理
- Pytorch版本YOLOv5安装与配置
- YOLOv5转ONNX格式生成
- OpenVINO部署支持
YOLOv5安装与配置
强烈建议使用pycharm中的terminal命令行进行相关环境安装,速度快并且降低失败概率
- pytorch三件套安装(cuda版本11.6)
pip3 install torch torchvision torchaudio --extra-index-url https://download.pytorch.org/whl/cu116
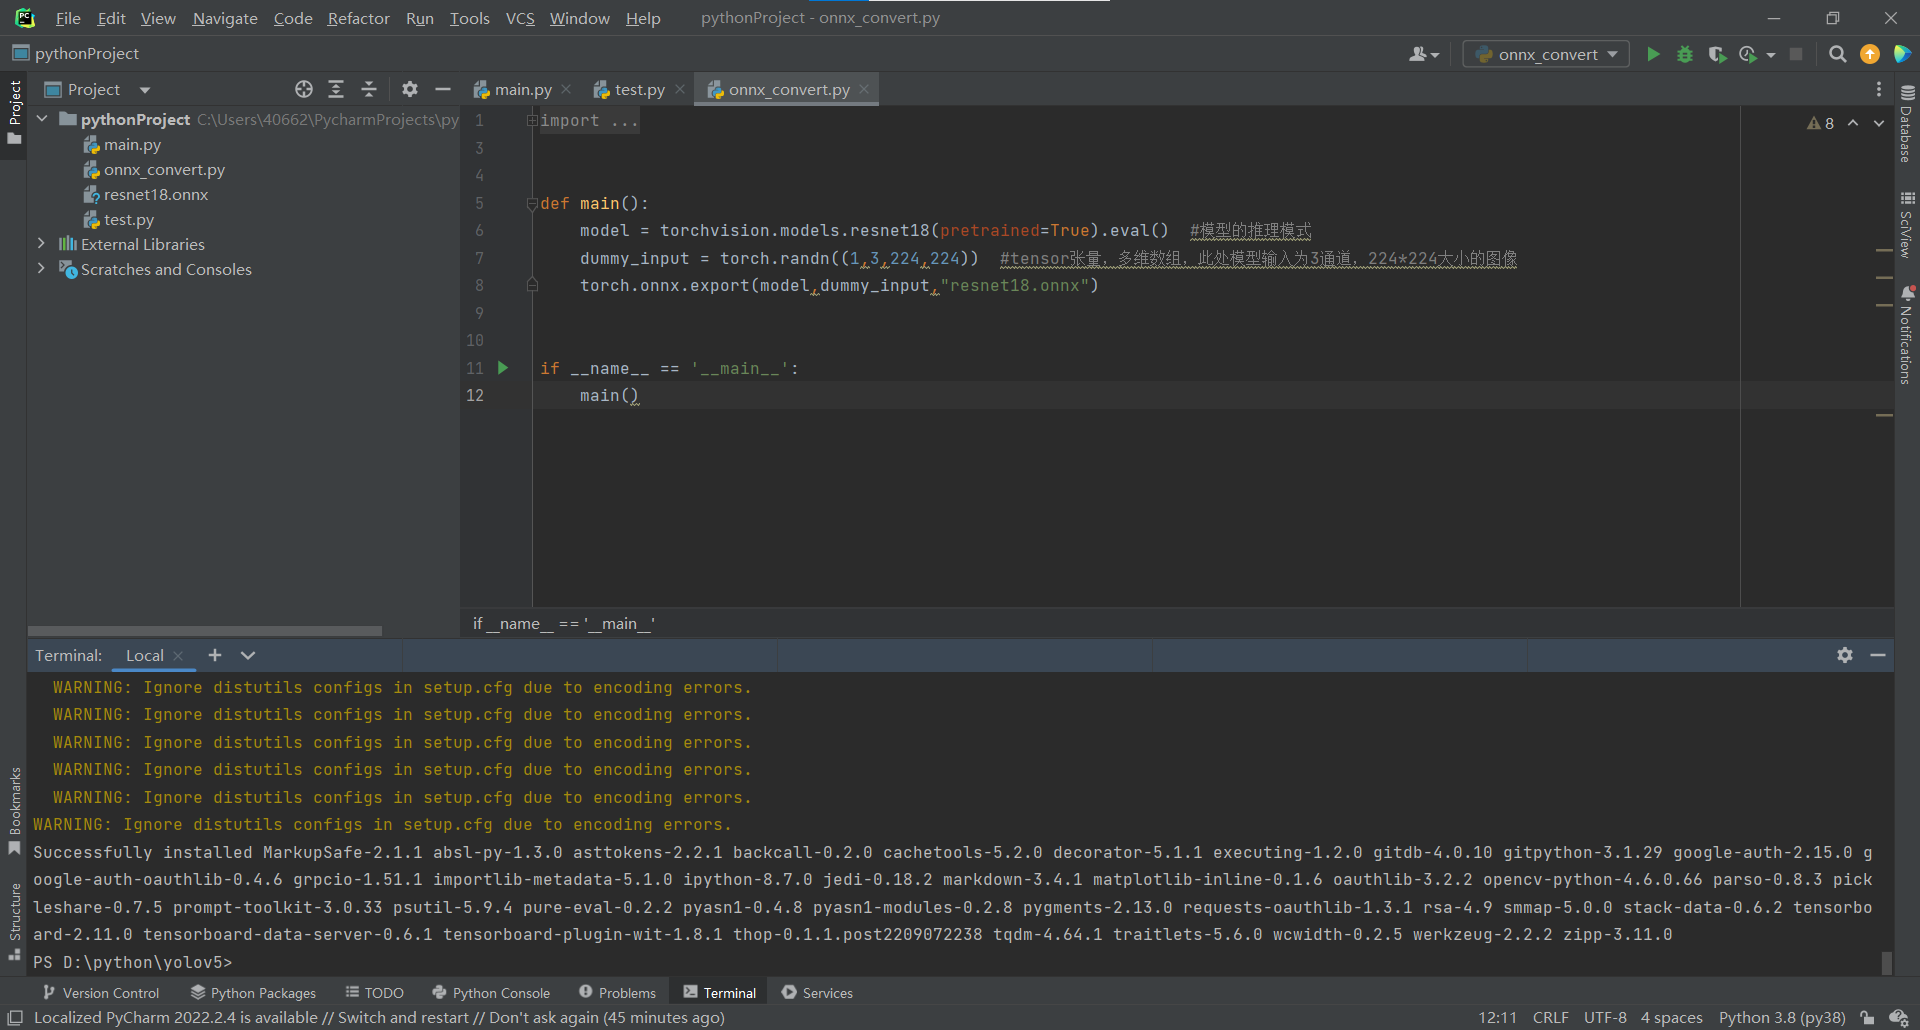
下载YOLOv5项目地址:GitHub - ultralytics/yolov5: YOLOv5 🚀 in PyTorch > ONNX > CoreML > TFLite
从命令行进入YOLOv5项目解压文件夹路径安装相关依赖环境并测试(下载模型需FQ):
pip install -r requirements.txt  #根据requirements文本文件的环境需求进行自动安装,失败时手动安装成功后重新该命令直到成功
python detect.py --source data/images --weights yolov5s.pt --conf 0.25  #使用yolov5最新模型进行图片识别
python detect.py --source D:/images/video/Boogie_Up.mp4 --weights yolov5s.pt --conf 0.25  #使用yolov5最新模型进行视频识别
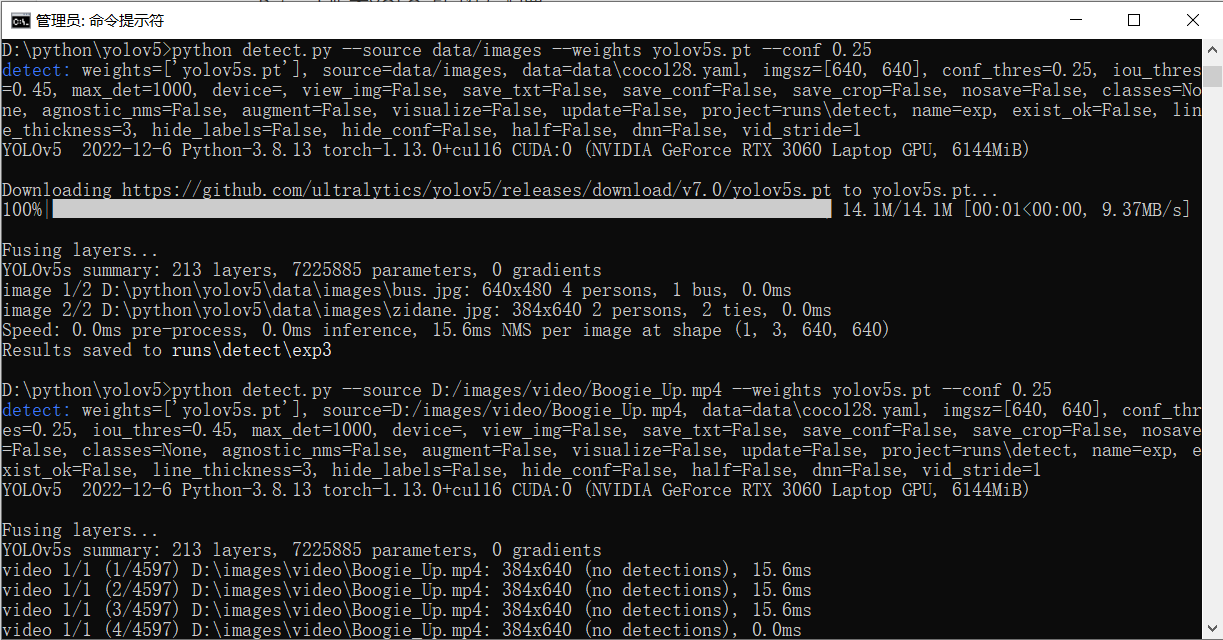
效果:
1、图片
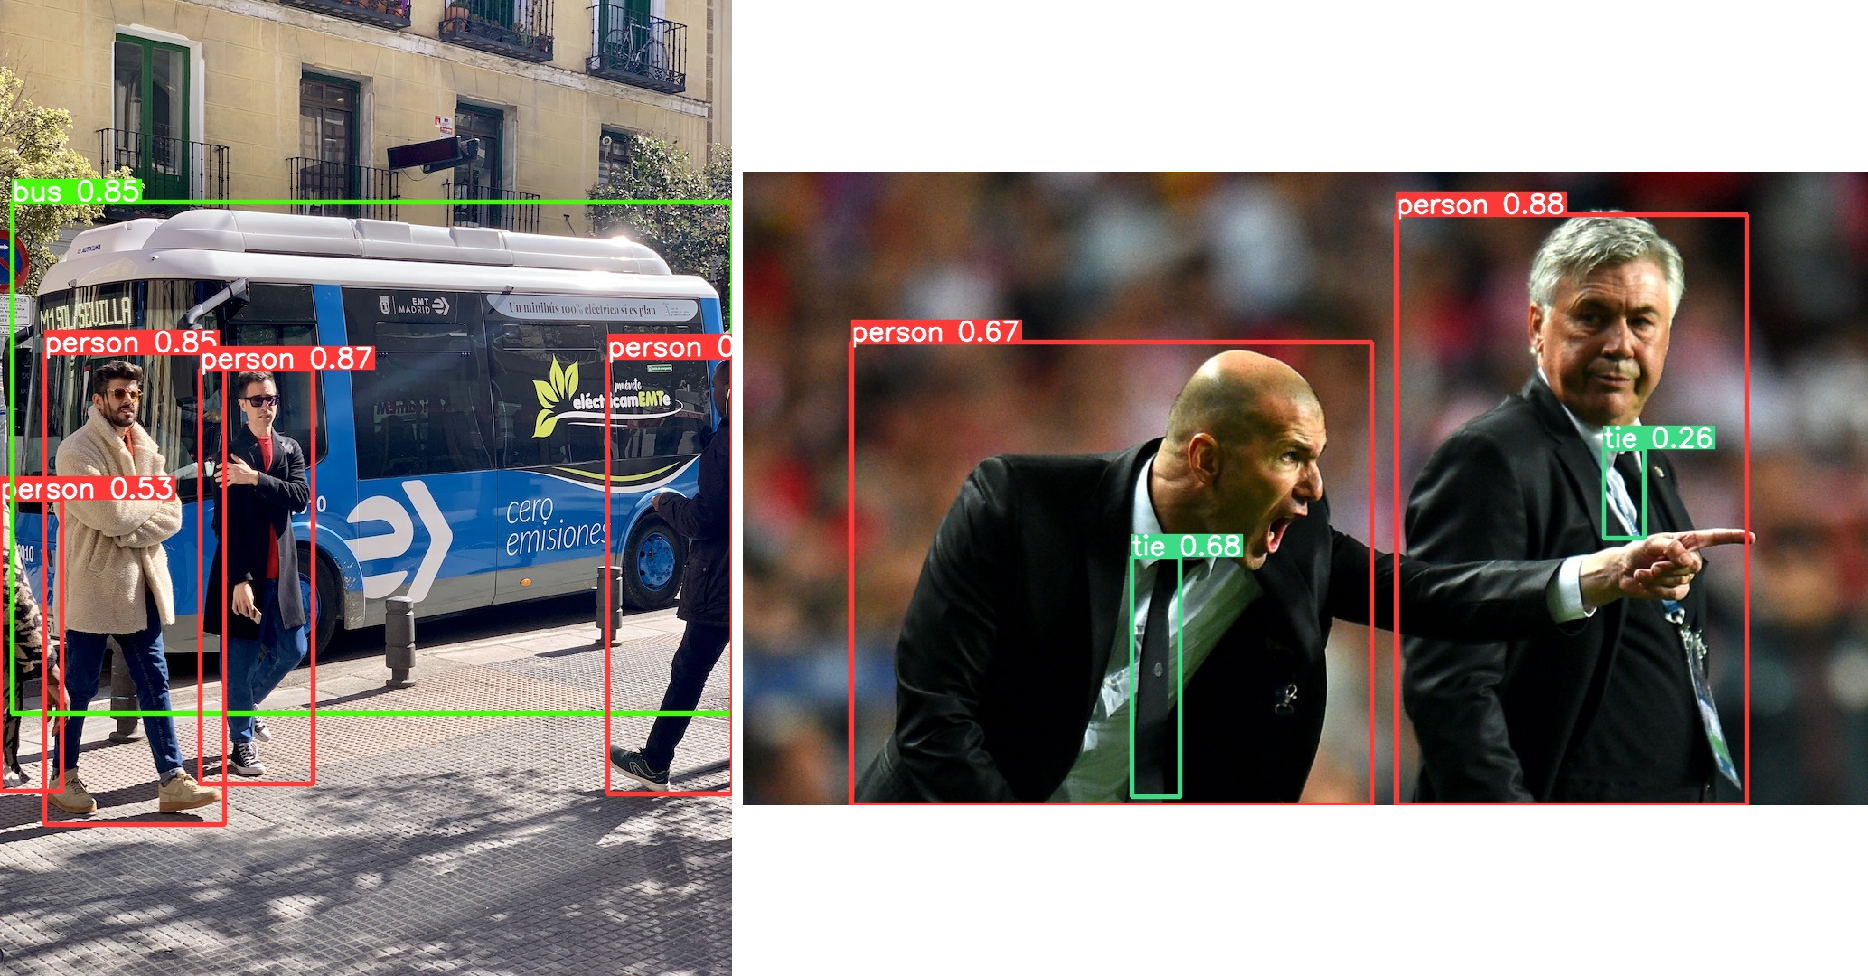
2、视频

YOLOv5转ONNX格式
- YOLOv5转换为ONNX代码
python export.py --weights yolov5s.pt --img 640 --batch 1 --include onnx #include参数为转换之后的模型类型
- 转IR格式文件,与pytorch模型转换中ONNX转IR一样
python mo_onnx.py --input_model D:/python/yolov5/yolov5s.onnx
OpenVINO+YOLOv5部署
YOLO识别原理概述:
1、YOLO识别原理
YOLO将图片分割成s2个网格。每个网格的大小相同,并且让s2个网格每个都可以预测出B个边界箱(预测框)。预测出来的每个边界箱都有5个信息量: 物体的中心位置(x,y),物体的高h,物体的宽w以及这次预测的置信度conf(预测这个网格里是否有目标的置信度)。每个网格不仅只预测B个边界箱,还预测这个网格是什么类别。假设我们要预测C类物体,则有C个置信度(预测是某一类目标的置信度)。那么这次预测的信息就有ss(5*B+C)个。
2、NMS非极大值抑制概念
方案一:选择预测类别的置信度(预测这个网格里是否有目标的置信度)高的里留下来,其余的预测都删除。方案二:把置信度(预测这个网格里是否有目标的置信度)最高的那个网格的边界箱作为极大边界箱,计算极大边界箱和其他几个网格的边界箱的IOU,如果超过一个阈值,例如0.5,就认为这两个网格实际上预测的是同一个物体,就把其中置信度比较小的删除。
YOLOv5s结构图:

- 加载IR/ONNX格式文件
- 设置输入格式 RGB - 640 * 640
- YOLOv5的输出层是三层,对应的降采样倍数是32,16,8
- 以输入 640 * 640大小的图像为例,得到三个输出层大小分别是20、40、80,每层上对应三个尺度的anchor(检测框)如下表
| 尺度 | anchor 尺度比率(x * y) |
|---|---|
| 80 | 10 * 13 16 * 30 33 * 23 |
| 40 | 30 * 61 62 * 45 59 * 119 |
| 20 | 116 * 90 156 * 198 373 * 326 |
模型的预测是在 20 * 20,40 * 40,80 * 80 每个输出层的每个特征点上预测三个anchor框,每个框预测分类,每个框的维度大小(不是输出维度)为:cx,cy,w,h,conf(置信度,表示框中对象不是背景的概率及框出对象的自信程度,当多个检测框检测到的对象重合时可根据大小值来判断选择哪一个检测框) + num of class(框中对象为COCO_labels中80类中每一类的概率),共5+80,图示如下(此处Hout和Wout可以看成是每层图像的高和宽):
输出结果解析时:先依次对每一个特征点遍历anchor0,再对每一个特征点遍历anchor1,即先保持anchor检测框不变,遍历特征点,遍历完所有特征点,再移动至下一个anchor检测框重新开始遍历特征点。
参考博客:目标检测之详解yolo的anchor、置信度和类别概率_专注于计算机视觉的AndyJiang的博客-CSDN博客_yolo置信度计算
output格式:[1, 3, 80, 80, 85]、[1, 3, 40, 40, 85]、[1, 3, 20, 20, 85],其中85是上面的(cx, cy, w, h, conf + number of class)。
每层每个特征点对应 85个参数个数 * 3个检测框,内存顺序按检测框顺序来保存,即先依次保存所有像素对应的第一个检测框再保存所有像素对应的第二个检测框。
代码实现
6.0版YOLOv5
#include <iostream>
#include <opencv2/opencv.hpp>
#include <opencv2/dnn.hpp>
#include <inference_engine.hpp>

using namespace std;
using namespace cv;
using namespace cv::dnn;
using namespace InferenceEngine;

class YOLOObjectDetection {
public:
	void detect(std::string xml, std::string bin, std::string filePath, int camera_index);
private:
	void inferAndOutput(cv::Mat &frame, InferenceEngine::InferRequest &request, InferenceEngine::InputsDataMap & input_info,
		InferenceEngine::OutputsDataMap &output_info, float sx, float sy);
};

/*====================================================================*/

#include <yolo_object_detection.h>

using namespace std;
using namespace cv;

int main(int argc, char** argv) {
	std::string xml = "D:/python/yolov5/yolov5s.xml";
	std::string bin = "D:/python/yolov5/yolov5s.bin";
	std::string onnx_yolov5s = "D:/python/yolov5/yolov5s.onnx";
	std::string image_file = "D:/python/yolov5/data/images/zidane.jpg";
	std::string video_file = "D:/images/video/Boogie_Up.mp4";
	YOLOObjectDetection yolo_detector;
	yolo_detector.detect(xml, bin, video_file, 1);
	return 0;
}

/*====================================================================*/

#include <yolo_object_detection.h>

using namespace std;
using namespace cv;
using namespace cv::dnn;
using namespace InferenceEngine;

std::vector<float> anchors = {
	10,13, 16,30, 33,23,
	30,61, 62,45, 59,119,
	116,90, 156,198, 373,326
};

int get_anchor_index(int scale_w, int scale_h) {
	if (scale_w == 20) {
		return 12;
	}
	if (scale_w == 40) {
		return 6;
	}
	if (scale_w == 80) {
		return 0;
	}
	return -1;
}

float get_stride(int scale_w, int scale_h) {
	if (scale_w == 20) {
		return 32.0;
	}
	if (scale_w == 40) {
		return 16.0;
	}
	if (scale_w == 80) {
		return 8.0;
	}
	return -1;
}

float sigmoid_function(float a)
{
	float b = 1. / (1. + exp(-a));
	return b;
}

void YOLOObjectDetection::detect(std::string xml, std::string bin, std::string filePath, int camera_index) {
	VideoCapture cap;
	Mat frame;
	if (camera_index == 0) {
		cap.open(0);
	}
	if (camera_index == 1) {
		cap.open(filePath);
	}
	if (camera_index == -1) {
		frame = imread(filePath);
	}
	if (frame.empty()) {
		cap.read(frame);
	}
	int image_height = frame.rows;
	int image_width = frame.cols;

	// 创建IE插件, 查询支持硬件设备
	Core ie;
	vector<string> availableDevices = ie.GetAvailableDevices();
	for (int i = 0; i < availableDevices.size(); i++) {
		printf("supported device name : %s \n", availableDevices[i].c_str());
	}

	//  加载检测模型
	auto network = ie.ReadNetwork(xml, bin);
	// auto network = ie.ReadNetwork(xml);

	// 请求网络输入与输出信息
	InferenceEngine::InputsDataMap input_info(network.getInputsInfo());
	InferenceEngine::OutputsDataMap output_info(network.getOutputsInfo());

	// 设置输入格式
	for (auto &item : input_info) {
		auto input_name = item.first;
		auto input_data = item.second;
		input_data->setPrecision(Precision::FP32);
		input_data->setLayout(Layout::NCHW);
		input_data->getPreProcess().setResizeAlgorithm(RESIZE_BILINEAR);
		input_data->getPreProcess().setColorFormat(ColorFormat::RGB);
	}

	// 设置输出格式
	for (auto &item : output_info) {
		auto input_name = item.first;
		auto output_data = item.second;
		output_data->setPrecision(Precision::FP32);
	}
	auto executable_network = ie.LoadNetwork(network, "CPU");

	// 请求推断图
	auto infer_request = executable_network.CreateInferRequest();  //生成推理请求
	float scale_x = image_width / 640.0;
	float scale_y = image_height / 640.0;

	if (camera_index == -1) {
		inferAndOutput(frame, infer_request, input_info, output_info, scale_x, scale_y);
		cv::imshow("OpenVINO2021R2+YOLOv5对象检测", frame);
	}
	else {
		while (true) {
			bool ret = cap.read(frame);
			if (frame.empty()) {
				break;
			}
			inferAndOutput(frame, infer_request, input_info, output_info, scale_x, scale_y);
			cv::imshow("YOLOv5s+OpenVINO2021R02+Demo", frame);
			char c = cv::waitKey(1);
			if (c == 27) {
				break;
			}
		}
	}
	waitKey(0);
	destroyAllWindows();
}

void YOLOObjectDetection::inferAndOutput(cv::Mat &frame, InferenceEngine::InferRequest &infer_request,
	InferenceEngine::InputsDataMap & input_info, InferenceEngine::OutputsDataMap &output_info, float sx, float sy) {
	int64 start = getTickCount();

	// 处理解析输出结果
	vector<Rect> boxes;  //创建三个容器用于保存检测框、分类id及置信度
	vector<int> classIds;
	vector<float> confidences;
	/** Iterating over all input blobs **/
	for (auto & item : input_info) {
		auto input_name = item.first;

		/** Getting input blob **/
		auto input = infer_request.GetBlob(input_name);
		size_t num_channels = input->getTensorDesc().getDims()[1];
		size_t h = input->getTensorDesc().getDims()[2];
		size_t w = input->getTensorDesc().getDims()[3];
		size_t image_size = h*w;
		Mat blob_image;
		resize(frame, blob_image, Size(w, h));
		cvtColor(blob_image, blob_image, COLOR_BGR2RGB);

		// NCHW
		float* data = static_cast<float*>(input->buffer());
		for (size_t row = 0; row < h; row++) {
			for (size_t col = 0; col < w; col++) {
				for (size_t ch = 0; ch < num_channels; ch++) {
					data[image_size*ch + row*w + col] = float(blob_image.at<Vec3b>(row, col)[ch]) / 255.0;
				}
			}
		}
	}

	// 执行预测
	infer_request.Infer();

	//循环遍历三个输出
	for (auto &item : output_info) {
		auto output_name = item.first;
		auto output = infer_request.GetBlob(output_name);

		const float* output_blob = static_cast<PrecisionTrait<Precision::FP32>::value_type*>(output->buffer());
		const SizeVector outputDims = output->getTensorDesc().getDims();
		const int out_n = outputDims[0];  //1张图
		const int out_c = outputDims[1];  //3个检测框
		const int side_h = outputDims[2];  //当前层的height
		const int side_w = outputDims[3];  //当前层的width
		const int side_data = outputDims[4];  //num of class + 5 = 85

		float stride = get_stride(side_h, side_h);  //获取该检测框的放缩倍数
		int anchor_index = get_anchor_index(side_h, side_h);
		int side_square = side_h*side_w;  //当前层的面积
		int side_data_square = side_square*side_data;  //每个检测框都有85个值(cx, cy, w, h, conf + number of class)
		int side_data_w = side_w*side_data;

		//每层每个特征点都有三个检测框,每个检测框都有85个值(cx, cy, w, h, conf + number of class)
		for (int i = 0; i < side_square; ++i) {  //遍历每个特征点
			for (int c = 0; c < out_c; c++) {  //遍历每层的三个检测框
				int row = i / side_h;  //当前输出层中每一个特征点的纵坐标
				int col = i % side_h;  //当前输出层中每一个特征点的横坐标
				//获取每一个anchor检测框的起始位置
				//先保持检测框不变,依次遍历完当前层特征点,再移动至下一个检测框遍历所有特征点
				int object_index = c*side_data_square + row*side_data_w + col*side_data;

				//获取每一个anchor的conf置信度并进行过滤
				float conf = sigmoid_function(output_blob[object_index + 4]);
				if (conf < 0.25) {
					continue;
				}

				// 置信度满足要求则解析cx, cy, width, height
				float x = (sigmoid_function(output_blob[object_index]) * 2 - 0.5 + col)*stride;  //stride为当前层放缩倍数,col是横坐标,-0.5可以获得左上角坐标
				float y = (sigmoid_function(output_blob[object_index + 1]) * 2 - 0.5 + row)*stride;
				float w = pow(sigmoid_function(output_blob[object_index + 2]) * 2, 2)*anchors[anchor_index + (c * 2)];
				float h = pow(sigmoid_function(output_blob[object_index + 3]) * 2, 2)*anchors[anchor_index + (c * 2) + 1];
				float max_prob = -1;
				int class_index = -1;

				// 解析类别
				for (int d = 5; d < 85; d++) {
					float prob = sigmoid_function(output_blob[object_index + d]);
					if (prob > max_prob) {
						max_prob = prob;
						class_index = d - 5;
					}
				}

				// 转换为top-left, bottom-right坐标
				int x1 = saturate_cast<int>((x - w / 2) * sx);  // top left x
				int y1 = saturate_cast<int>((y - h / 2) * sy);  // top left y
				int x2 = saturate_cast<int>((x + w / 2) * sx);  // bottom right x
				int y2 = saturate_cast<int>((y + h / 2) * sy); // bottom right y

				// 解析输出
				classIds.push_back(class_index);
				confidences.push_back((float)conf);
				boxes.push_back(Rect(x1, y1, x2 - x1, y2 - y1));
			}
		}
	}

	vector<int> indices;
	cv::dnn::NMSBoxes(boxes, confidences, 0.25, 0.5, indices);  //非最大抑制,去除同一个对象上的多个输出框
	for (size_t i = 0; i < indices.size(); ++i)
	{
		int idx = indices[i];
		Rect box = boxes[idx];
		rectangle(frame, box, Scalar(140, 199, 0), 4, 8, 0);
	}
	float fps = getTickFrequency() / (getTickCount() - start);
	float time = (getTickCount() - start) / getTickFrequency();

	ostringstream ss;
	ss << "FPS : " << fps << " detection time: " << time * 1000 << " ms";
	cv::putText(frame, ss.str(), Point(20, 50), 0, 1.0, Scalar(0, 0, 255), 2);
}
7.0版YOLOv5
#include <fstream>                   //C++ 文件操作
#include <iostream>                  //C++ input & output stream
#include <sstream>                   //C++ String stream, 读写内存中的string对象
#include <opencv2\opencv.hpp>        //OpenCV 头文件

#include <openvino\openvino.hpp>     //OpenVINO >=2022.1

using namespace std;
using namespace ov;
using namespace cv;
// COCO数据集的标签
vector<string> class_names = { "person", "bicycle", "car", "motorbike", "aeroplane", "bus", "train", "truck", "boat", "traffic light","fire hydrant",
"stop sign", "parking meter", "bench", "bird", "cat", "dog", "horse", "sheep", "cow", "elephant", "bear", "zebra", "giraffe","backpack", "umbrella",
"handbag", "tie", "suitcase", "frisbee", "skis", "snowboard", "sports ball", "kite", "baseball bat", "baseball glove","skateboard", "surfboard",
"tennis racket", "bottle", "wine glass", "cup", "fork", "knife", "spoon", "bowl", "banana", "apple", "sandwich", "orange","broccoli", "carrot",
"hot dog", "pizza", "donut", "cake", "chair", "sofa", "pottedplant", "bed", "diningtable", "toilet", "tvmonitor", "laptop", "mouse","remote",
"keyboard", "cell phone", "microwave", "oven", "toaster", "sink", "refrigerator", "book", "clock", "vase", "scissors", "teddy bear", "hair drier", "toothbrush" };
//OpenVINO IR模型文件路径
string ir_filename = "D:/yolov5/yolov5s.xml";

// @brief 对网络的输入为图片数据的节点进行赋值,实现图片数据输入网络
// @param input_tensor 输入节点的tensor
// @param inpt_image 输入图片数据
void fill_tensor_data_image(ov::Tensor& input_tensor, const cv::Mat& input_image) {
	// 获取输入节点要求的输入图片数据的大小
	ov::Shape tensor_shape = input_tensor.get_shape();
	const size_t width = tensor_shape[3]; // 要求输入图片数据的宽度
	const size_t height = tensor_shape[2]; // 要求输入图片数据的高度
	const size_t channels = tensor_shape[1]; // 要求输入图片数据的维度
	// 读取节点数据内存指针
	float* input_tensor_data = input_tensor.data<float>();
	// 将图片数据填充到网络中
	// 原有图片数据为 H、W、C 格式,输入要求的为 C、H、W 格式
	for (size_t c = 0; c < channels; c++) {
		for (size_t h = 0; h < height; h++) {
			for (size_t w = 0; w < width; w++) {
				input_tensor_data[c * width * height + h * width + w] = input_image.at<cv::Vec<float, 3>>(h, w)[c];
			}
		}
	}
}

int main(int argc, char** argv) {

	//创建OpenVINO Core
	Core core;
	CompiledModel compiled_model = core.compile_model(ir_filename, "AUTO");
	InferRequest infer_request = compiled_model.create_infer_request();

	// 预处理输入数据 - 格式化操作
	VideoCapture cap;
	cap.open(0);
	if (!cap.isOpened()) {
		cout << "Exit!webcam fails to open!" << endl;
		return -1;
	}

	// 获取输入节点tensor
	Tensor input_image_tensor = infer_request.get_tensor("images");
	int input_h = input_image_tensor.get_shape()[2]; //获得"images"节点的Height
	int input_w = input_image_tensor.get_shape()[3]; //获得"images"节点的Width
	cout << "input_h:" << input_h << "; input_w:" << input_w << endl;
	cout << "input_image_tensor's element type:" << input_image_tensor.get_element_type() << endl;
	cout << "input_image_tensor's shape:" << input_image_tensor.get_shape() << endl;
	// 获取输出节点tensor
	Tensor output_tensor = infer_request.get_tensor("output");
	int out_rows = output_tensor.get_shape()[1]; //获得"output"节点的out_rows
	int out_cols = output_tensor.get_shape()[2]; //获得"output"节点的Width
	cout << "out_cols:" << out_cols << "; out_rows:" << out_rows << endl;

	//连续采集处理循环
	while (true) {

		Mat frame;
		cap >> frame;

		int64 start = cv::getTickCount();
		int w = frame.cols;
		int h = frame.rows;
		int _max = std::max(h, w);
		cv::Mat image = cv::Mat::zeros(cv::Size(_max, _max), CV_8UC3);
		cv::Rect roi(0, 0, w, h);
		frame.copyTo(image(roi));

		float x_factor = image.cols / input_w;
		float y_factor = image.rows / input_h;

		cv::Mat blob_image;
		resize(image, blob_image, cv::Size(input_w, input_h));
		blob_image.convertTo(blob_image, CV_32F);
		blob_image = blob_image / 255.0;

		// 将图片数据填充到tensor数据内存中
		fill_tensor_data_image(input_image_tensor, blob_image);

		// 执行推理计算
		infer_request.infer();

		// 获得推理结果
		const ov::Tensor& output_tensor = infer_request.get_tensor("output");

		// 解析推理结果,YOLOv5 output format: cx,cy,w,h,score
		cv::Mat det_output(out_rows, out_cols, CV_32F, (float*)output_tensor.data());

		std::vector<cv::Rect> boxes;
		std::vector<int> classIds;
		std::vector<float> confidences;

		for (int i = 0; i < det_output.rows; i++) {
			float confidence = det_output.at<float>(i, 4);
			if (confidence < 0.4) {
				continue;
			}
			cv::Mat classes_scores = det_output.row(i).colRange(5, 85);
			cv::Point classIdPoint;
			double score;
			minMaxLoc(classes_scores, 0, &score, 0, &classIdPoint);

			// 置信度 0~1之间
			if (score > 0.5)
			{
				float cx = det_output.at<float>(i, 0);
				float cy = det_output.at<float>(i, 1);
				float ow = det_output.at<float>(i, 2);
				float oh = det_output.at<float>(i, 3);
				int x = static_cast<int>((cx - 0.5 * ow) * x_factor);
				int y = static_cast<int>((cy - 0.5 * oh) * y_factor);
				int width = static_cast<int>(ow * x_factor);
				int height = static_cast<int>(oh * y_factor);
				cv::Rect box;
				box.x = x;
				box.y = y;
				box.width = width;
				box.height = height;

				boxes.push_back(box);
				classIds.push_back(classIdPoint.x);
				confidences.push_back(score);
			}
		}
		// NMS
		std::vector<int> indexes;
		cv::dnn::NMSBoxes(boxes, confidences, 0.25, 0.45, indexes);
		for (size_t i = 0; i < indexes.size(); i++) {
			int index = indexes[i];
			int idx = classIds[index];
			cv::rectangle(frame, boxes[index], cv::Scalar(0, 0, 255), 2, 8);
			cv::rectangle(frame, cv::Point(boxes[index].tl().x, boxes[index].tl().y - 20),
				cv::Point(boxes[index].br().x, boxes[index].tl().y), cv::Scalar(0, 255, 255), -1);
			cv::putText(frame, class_names[idx], cv::Point(boxes[index].tl().x, boxes[index].tl().y - 10), cv::FONT_HERSHEY_SIMPLEX, .5, cv::Scalar(0, 0, 0));
		}

		// 计算FPS render it
		float t = (cv::getTickCount() - start) / static_cast<float>(cv::getTickFrequency());
		cout << "Infer time(ms): " << t * 1000 << "ms; Detections: " << indexes.size() << endl;
		putText(frame, cv::format("FPS: %.2f", 1.0 / t), cv::Point(20, 40), cv::FONT_HERSHEY_PLAIN, 2.0, cv::Scalar(255, 0, 0), 2, 8);
		cv::imshow("YOLOv5-6.1 + OpenVINO 2022.1 C++ Demo", frame);

		char c = cv::waitKey(1);
		if (c == 27) { // ESC
			break;
		}
	}

	cv::waitKey(0);
	cv::destroyAllWindows();

	return 0;
}
10、Python版本SDK配置与YOLOv5部署推理
Python版本环境配置
- 环境变量与DLL加载支持
- VS2019支持
- Python的PYTHONPATH支持与配置

- 测试安装与配置
- 控制台python环境下导入openvino测试:
from openvino.inference_engine import IECore

- Pycharm测试:
from openvino.inference_engine import IECore

ie = IECore()
devices = ie.available_devices

for device in devices:
    print(device)
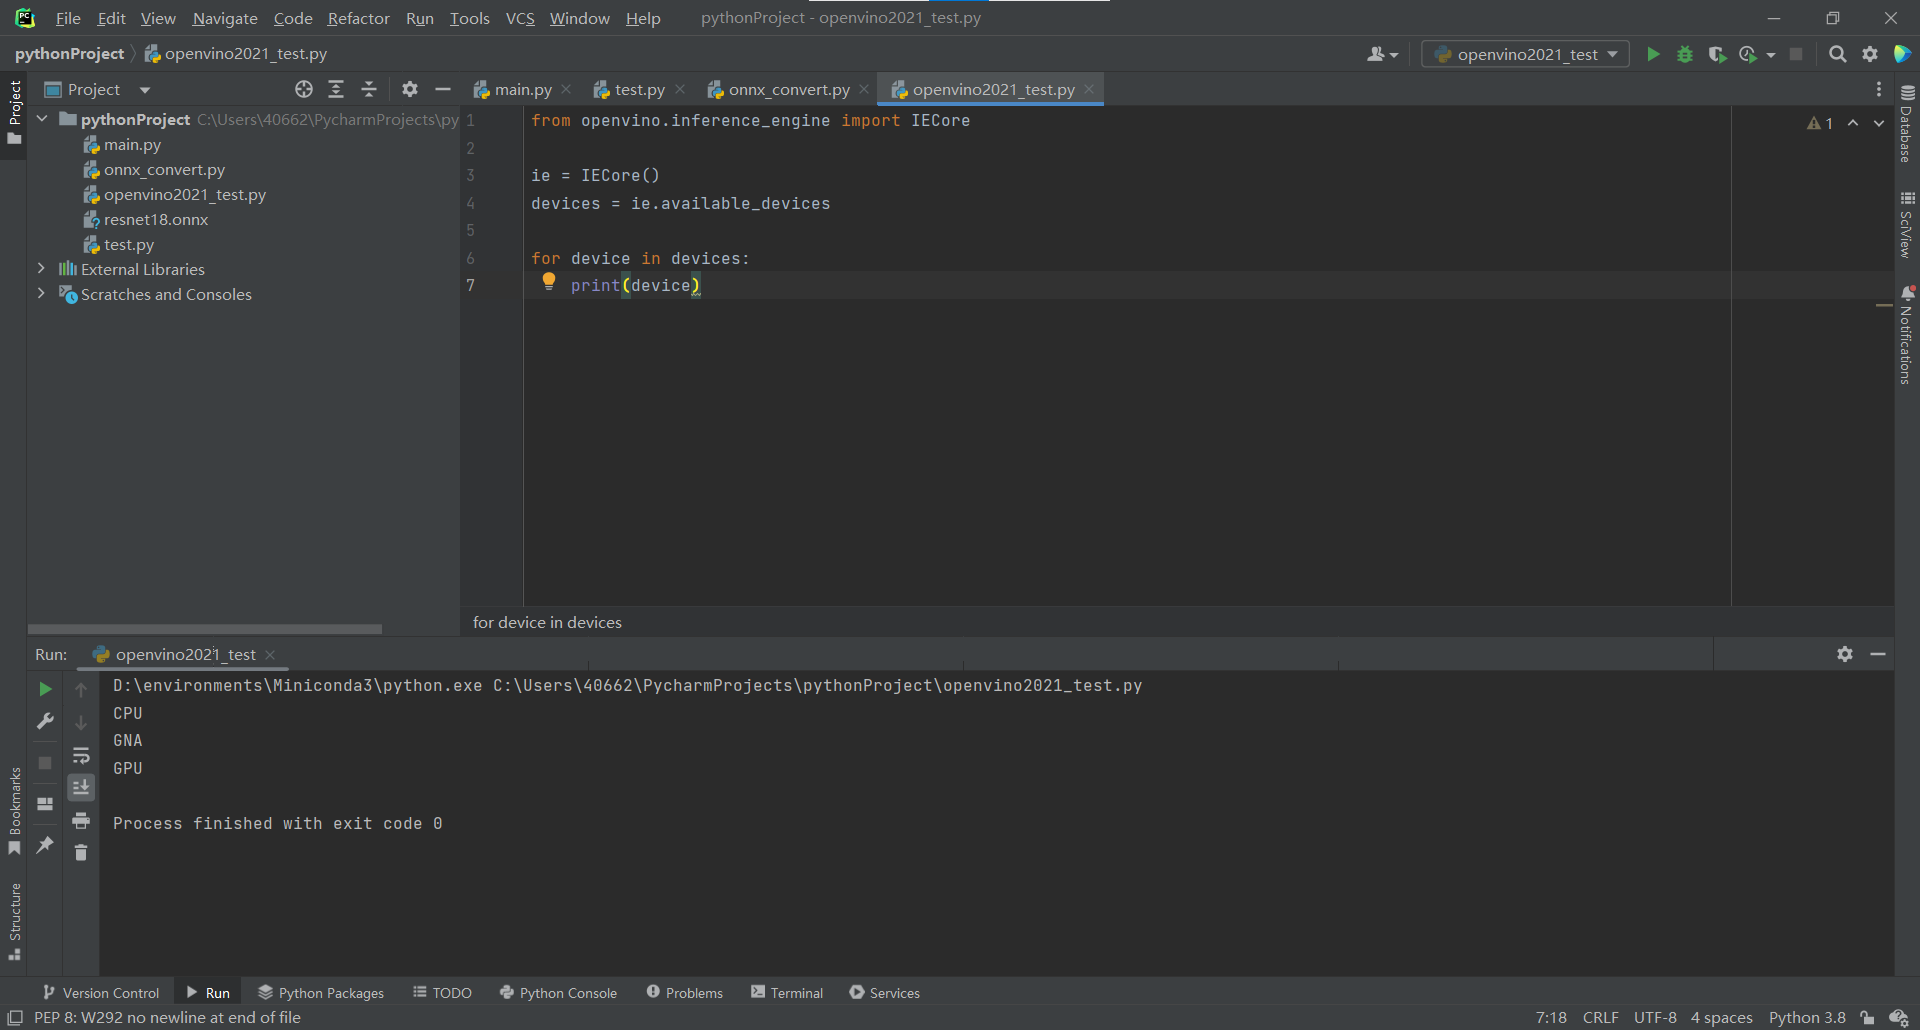
ResNet18图像分类部署推理
代码实现
from openvino.inference_engine import IECore
import numpy as np
import cv2 as cv

ie = IECore()
for device in ie.available_devices:
    print(device)

with open('imagenet_classes.txt') as f:
    labels = [line.strip() for line in f.readlines()]

model_xml = "resnet18.xml"
model_bin = "resnet18.bin"

net = ie.read_network(model=model_xml, weights= model_bin)
input_blob = next(iter(net.input_info))
out_blob = next(iter(net.outputs))

n, c, h, w = net.input_info[input_blob].input_data.shape
print(n, c, h, w)

src = cv.imread("D:/images/messi.jpg")
image = cv.resize(src, (w, h))
image = np.float32(image) / 255.0
image[:, :, ] -= (np.float32(0.485), np.float32(0.456), np.float32(0.406))
image[:, :, ] /= (np.float32(0.229), np.float32(0.224), np.float32(0.225))
image = image.transpose(2, 0, 1)

exec_net = ie.load_network(network=net, device_name="CPU")
res = exec_net.infer(inputs={input_blob:[image]})

res = res[out_blob]
print(res.shape)
label_index = np.argmax(res, 1)[0]
print(label_index, labels[label_index])
cv.putText(src, labels[label_index], (50, 50), cv.FONT_HERSHEY_SIMPLEX, 1.0, (0, 0, 255), 2, 8)
cv.namedWindow("image classification", cv.WINDOW_FREERATIO)
cv.imshow("image classification", src)
cv.waitKey(0)
效果:
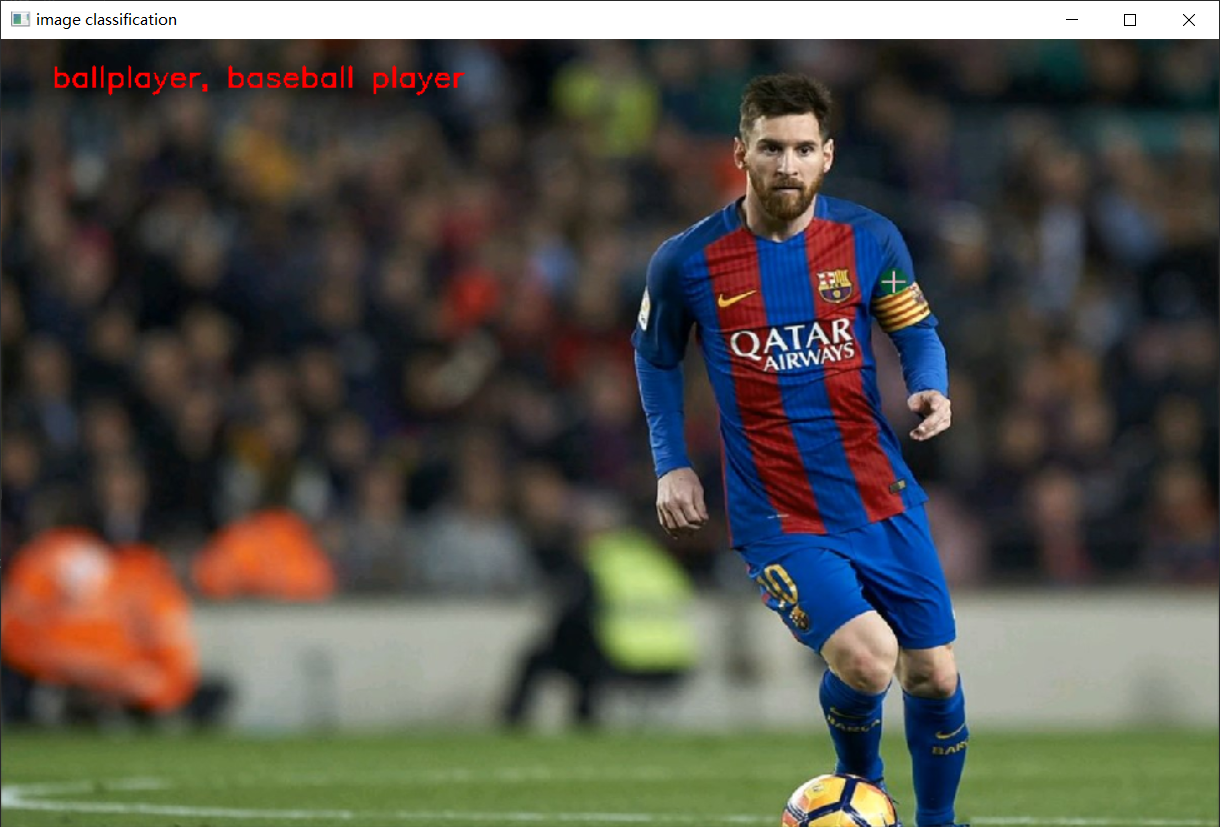
Python版本YOLOv5部署推理
代码实现:
# YOLOv5 🚀 by Ultralytics, GPL-3.0 license

import argparse
import os
import platform
import sys
from pathlib import Path

import torch

FILE = Path(__file__).resolve()
ROOT = FILE.parents[0]  # YOLOv5 root directory
if str(ROOT) not in sys.path:
    sys.path.append(str(ROOT))  # add ROOT to PATH
ROOT = Path(os.path.relpath(ROOT, Path.cwd()))  # relative

from models.common import DetectMultiBackend
from utils.dataloaders import IMG_FORMATS, VID_FORMATS, LoadImages, LoadScreenshots, LoadStreams
from utils.general import (LOGGER, Profile, check_file, check_img_size, check_imshow, check_requirements, colorstr, cv2,
                           increment_path, non_max_suppression, print_args, scale_boxes, strip_optimizer, xyxy2xywh)
from utils.plots import Annotator, colors, save_one_box
from utils.torch_utils import select_device, smart_inference_mode


@smart_inference_mode()
def run(
        weights=ROOT / 'yolov5s.onnx',  # model path or triton URL
        # weights=ROOT / 'yolov5s.pt',  # model path or triton URL
        source= 'D:/images/video/Boogie_Up.mp4',  # file/dir/URL/glob/screen/0(webcam)
        # source=ROOT / 'data/images',  # file/dir/URL/glob/screen/0(webcam)
        data=ROOT / 'data/coco128.yaml',  # dataset.yaml path
        imgsz=(640, 640),  # inference size (height, width)
        conf_thres=0.25,  # confidence threshold
        iou_thres=0.45,  # NMS IOU threshold
        max_det=1000,  # maximum detections per image
        device='',  # cuda device, i.e. 0 or 0,1,2,3 or cpu
        view_img=False,  # show results
        save_txt=False,  # save results to *.txt
        save_conf=False,  # save confidences in --save-txt labels
        save_crop=False,  # save cropped prediction boxes
        nosave=False,  # do not save images/videos
        classes=None,  # filter by class: --class 0, or --class 0 2 3
        agnostic_nms=False,  # class-agnostic NMS
        augment=False,  # augmented inference
        visualize=False,  # visualize features
        update=False,  # update all models
        project=ROOT / 'runs/detect',  # save results to project/name
        name='exp',  # save results to project/name
        exist_ok=False,  # existing project/name ok, do not increment
        line_thickness=3,  # bounding box thickness (pixels)
        hide_labels=False,  # hide labels
        hide_conf=False,  # hide confidences
        half=False,  # use FP16 half-precision inference
        dnn=False,  # use OpenCV DNN for ONNX inference
        vid_stride=1,  # video frame-rate stride
):
    source = str(source)
    save_img = not nosave and not source.endswith('.txt')  # save inference images
    is_file = Path(source).suffix[1:] in (IMG_FORMATS + VID_FORMATS)
    is_url = source.lower().startswith(('rtsp://', 'rtmp://', 'http://', 'https://'))
    webcam = source.isnumeric() or source.endswith('.streams') or (is_url and not is_file)
    screenshot = source.lower().startswith('screen')
    if is_url and is_file:
        source = check_file(source)  # download

    # Directories
    save_dir = increment_path(Path(project) / name, exist_ok=exist_ok)  # increment run
    (save_dir / 'labels' if save_txt else save_dir).mkdir(parents=True, exist_ok=True)  # make dir

    # Load model
    device = select_device(device)
    model = DetectMultiBackend(weights, device=device, dnn=dnn, data=data, fp16=half)
    stride, names, pt = model.stride, model.names, model.pt
    imgsz = check_img_size(imgsz, s=stride)  # check image size

    # Dataloader
    bs = 1  # batch_size
    if webcam:
        view_img = check_imshow(warn=True)
        dataset = LoadStreams(source, img_size=imgsz, stride=stride, auto=pt, vid_stride=vid_stride)
        bs = len(dataset)
    elif screenshot:
        dataset = LoadScreenshots(source, img_size=imgsz, stride=stride, auto=pt)
    else:
        dataset = LoadImages(source, img_size=imgsz, stride=stride, auto=pt, vid_stride=vid_stride)
    vid_path, vid_writer = [None] * bs, [None] * bs

    # Run inference
    model.warmup(imgsz=(1 if pt or model.triton else bs, 3, *imgsz))  # warmup
    seen, windows, dt = 0, [], (Profile(), Profile(), Profile())
    for path, im, im0s, vid_cap, s in dataset:
        with dt[0]:
            im = torch.from_numpy(im).to(model.device)
            im = im.half() if model.fp16 else im.float()  # uint8 to fp16/32
            im /= 255  # 0 - 255 to 0.0 - 1.0
            if len(im.shape) == 3:
                im = im[None]  # expand for batch dim

        # Inference
        with dt[1]:
            visualize = increment_path(save_dir / Path(path).stem, mkdir=True) if visualize else False
            pred = model(im, augment=augment, visualize=visualize)

        # NMS
        with dt[2]:
            pred = non_max_suppression(pred, conf_thres, iou_thres, classes, agnostic_nms, max_det=max_det)

        # Second-stage classifier (optional)
        # pred = utils.general.apply_classifier(pred, classifier_model, im, im0s)

        # Process predictions
        for i, det in enumerate(pred):  # per image
            seen += 1
            if webcam:  # batch_size >= 1
                p, im0, frame = path[i], im0s[i].copy(), dataset.count
                s += f'{i}: '
            else:
                p, im0, frame = path, im0s.copy(), getattr(dataset, 'frame', 0)

            p = Path(p)  # to Path
            save_path = str(save_dir / p.name)  # im.jpg
            txt_path = str(save_dir / 'labels' / p.stem) + ('' if dataset.mode == 'image' else f'_{frame}')  # im.txt
            s += '%gx%g ' % im.shape[2:]  # print string
            gn = torch.tensor(im0.shape)[[1, 0, 1, 0]]  # normalization gain whwh
            imc = im0.copy() if save_crop else im0  # for save_crop
            annotator = Annotator(im0, line_width=line_thickness, example=str(names))
            if len(det):
                # Rescale boxes from img_size to im0 size
                det[:, :4] = scale_boxes(im.shape[2:], det[:, :4], im0.shape).round()

                # Print results
                for c in det[:, 5].unique():
                    n = (det[:, 5] == c).sum()  # detections per class
                    s += f"{n} {names[int(c)]}{'s' * (n > 1)}, "  # add to string

                # Write results
                for *xyxy, conf, cls in reversed(det):
                    if save_txt:  # Write to file
                        xywh = (xyxy2xywh(torch.tensor(xyxy).view(1, 4)) / gn).view(-1).tolist()  # normalized xywh
                        line = (cls, *xywh, conf) if save_conf else (cls, *xywh)  # label format
                        with open(f'{txt_path}.txt', 'a') as f:
                            f.write(('%g ' * len(line)).rstrip() % line + '\n')

                    if save_img or save_crop or view_img:  # Add bbox to image
                        c = int(cls)  # integer class
                        label = None if hide_labels else (names[c] if hide_conf else f'{names[c]} {conf:.2f}')
                        annotator.box_label(xyxy, label, color=colors(c, True))
                    if save_crop:
                        save_one_box(xyxy, imc, file=save_dir / 'crops' / names[c] / f'{p.stem}.jpg', BGR=True)

            # Stream results
            im0 = annotator.result()
            if view_img:
                if platform.system() == 'Linux' and p not in windows:
                    windows.append(p)
                    cv2.namedWindow(str(p), cv2.WINDOW_NORMAL | cv2.WINDOW_KEEPRATIO)  # allow window resize (Linux)
                    cv2.resizeWindow(str(p), im0.shape[1], im0.shape[0])
                cv2.imshow(str(p), im0)
                cv2.waitKey(1)  # 1 millisecond

            # Save results (image with detections)
            if save_img:
                if dataset.mode == 'image':
                    cv2.imwrite(save_path, im0)
                else:  # 'video' or 'stream'
                    if vid_path[i] != save_path:  # new video
                        vid_path[i] = save_path
                        if isinstance(vid_writer[i], cv2.VideoWriter):
                            vid_writer[i].release()  # release previous video writer
                        if vid_cap:  # video
                            fps = vid_cap.get(cv2.CAP_PROP_FPS)
                            w = int(vid_cap.get(cv2.CAP_PROP_FRAME_WIDTH))
                            h = int(vid_cap.get(cv2.CAP_PROP_FRAME_HEIGHT))
                        else:  # stream
                            fps, w, h = 30, im0.shape[1], im0.shape[0]
                        save_path = str(Path(save_path).with_suffix('.mp4'))  # force *.mp4 suffix on results videos
                        vid_writer[i] = cv2.VideoWriter(save_path, cv2.VideoWriter_fourcc(*'mp4v'), fps, (w, h))
                    vid_writer[i].write(im0)

        # Print time (inference-only)
        LOGGER.info(f"{s}{'' if len(det) else '(no detections), '}{dt[1].dt * 1E3:.1f}ms")

    # Print results
    t = tuple(x.t / seen * 1E3 for x in dt)  # speeds per image
    LOGGER.info(f'Speed: %.1fms pre-process, %.1fms inference, %.1fms NMS per image at shape {(1, 3, *imgsz)}' % t)
    if save_txt or save_img:
        s = f"\n{len(list(save_dir.glob('labels/*.txt')))} labels saved to {save_dir / 'labels'}" if save_txt else ''
        LOGGER.info(f"Results saved to {colorstr('bold', save_dir)}{s}")
    if update:
        strip_optimizer(weights[0])  # update model (to fix SourceChangeWarning)


def parse_opt():  //要在这里进行相关设置
    parser = argparse.ArgumentParser()
    parser.add_argument('--weights', nargs='+', type=str, default=ROOT / 'yolov5s.onnx', help='model path or triton URL')
    # parser.add_argument('--weights', nargs='+', type=str, default=ROOT / 'yolov5s.pt', help='model path or triton URL')
    parser.add_argument('--source', type=str, default='D:/images/video/Boogie_Up.mp4', help='file/dir/URL/glob/screen/0(webcam)')
    # parser.add_argument('--source', type=str, default=ROOT / 'data/images', help='file/dir/URL/glob/screen/0(webcam)')
    parser.add_argument('--data', type=str, default=ROOT / 'data/coco128.yaml', help='(optional) dataset.yaml path')
    parser.add_argument('--imgsz', '--img', '--img-size', nargs='+', type=int, default=[640], help='inference size h,w')
    parser.add_argument('--conf-thres', type=float, default=0.25, help='confidence threshold')
    parser.add_argument('--iou-thres', type=float, default=0.45, help='NMS IoU threshold')
    parser.add_argument('--max-det', type=int, default=1000, help='maximum detections per image')
    parser.add_argument('--device', default='cpu', help='cuda device, i.e. 0 or 0,1,2,3 or cpu')
    # parser.add_argument('--device', default='', help='cuda device, i.e. 0 or 0,1,2,3 or cpu')
    parser.add_argument('--view-img', action='store_true', help='show results')
    parser.add_argument('--save-txt', action='store_true', help='save results to *.txt')
    parser.add_argument('--save-conf', action='store_true', help='save confidences in --save-txt labels')
    parser.add_argument('--save-crop', action='store_true', help='save cropped prediction boxes')
    parser.add_argument('--nosave', action='store_true', help='do not save images/videos')
    parser.add_argument('--classes', nargs='+', type=int, help='filter by class: --classes 0, or --classes 0 2 3')
    parser.add_argument('--agnostic-nms', action='store_true', help='class-agnostic NMS')
    parser.add_argument('--augment', action='store_true', help='augmented inference')
    parser.add_argument('--visualize', action='store_true', help='visualize features')
    parser.add_argument('--update', action='store_true', help='update all models')
    parser.add_argument('--project', default=ROOT / 'runs/detect', help='save results to project/name')
    parser.add_argument('--name', default='exp', help='save results to project/name')
    parser.add_argument('--exist-ok', action='store_true', help='existing project/name ok, do not increment')
    parser.add_argument('--line-thickness', default=3, type=int, help='bounding box thickness (pixels)')
    parser.add_argument('--hide-labels', default=False, action='store_true', help='hide labels')
    parser.add_argument('--hide-conf', default=False, action='store_true', help='hide confidences')
    parser.add_argument('--half', action='store_true', help='use FP16 half-precision inference')
    parser.add_argument('--dnn', action='store_true', help='use OpenCV DNN for ONNX inference')
    parser.add_argument('--vid-stride', type=int, default=1, help='video frame-rate stride')
    opt = parser.parse_args()
    opt.imgsz *= 2 if len(opt.imgsz) == 1 else 1  # expand
    print_args(vars(opt))
    return opt


def main(opt):
    check_requirements(exclude=('tensorboard', 'thop'))
    run(**vars(opt))


if __name__ == "__main__":
    opt = parse_opt()
    main(opt)
效果:
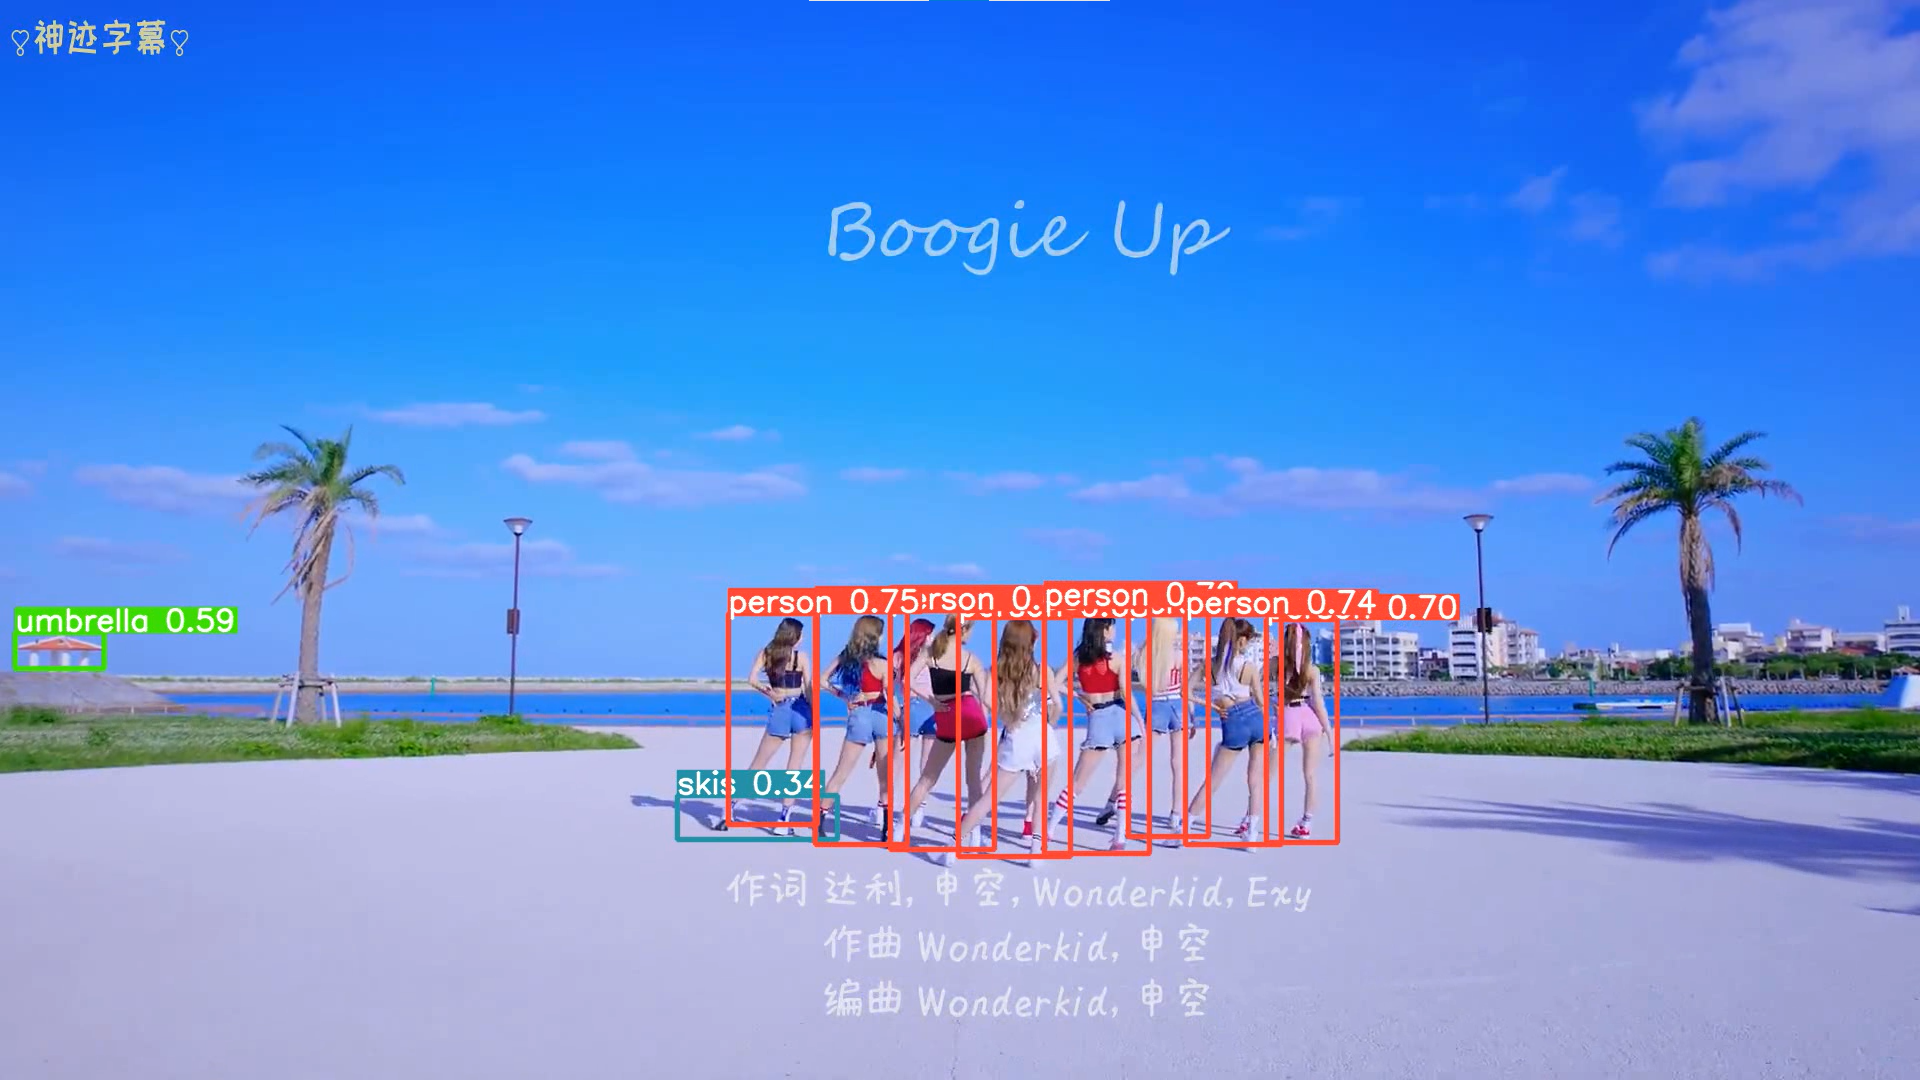
总结思维导图:
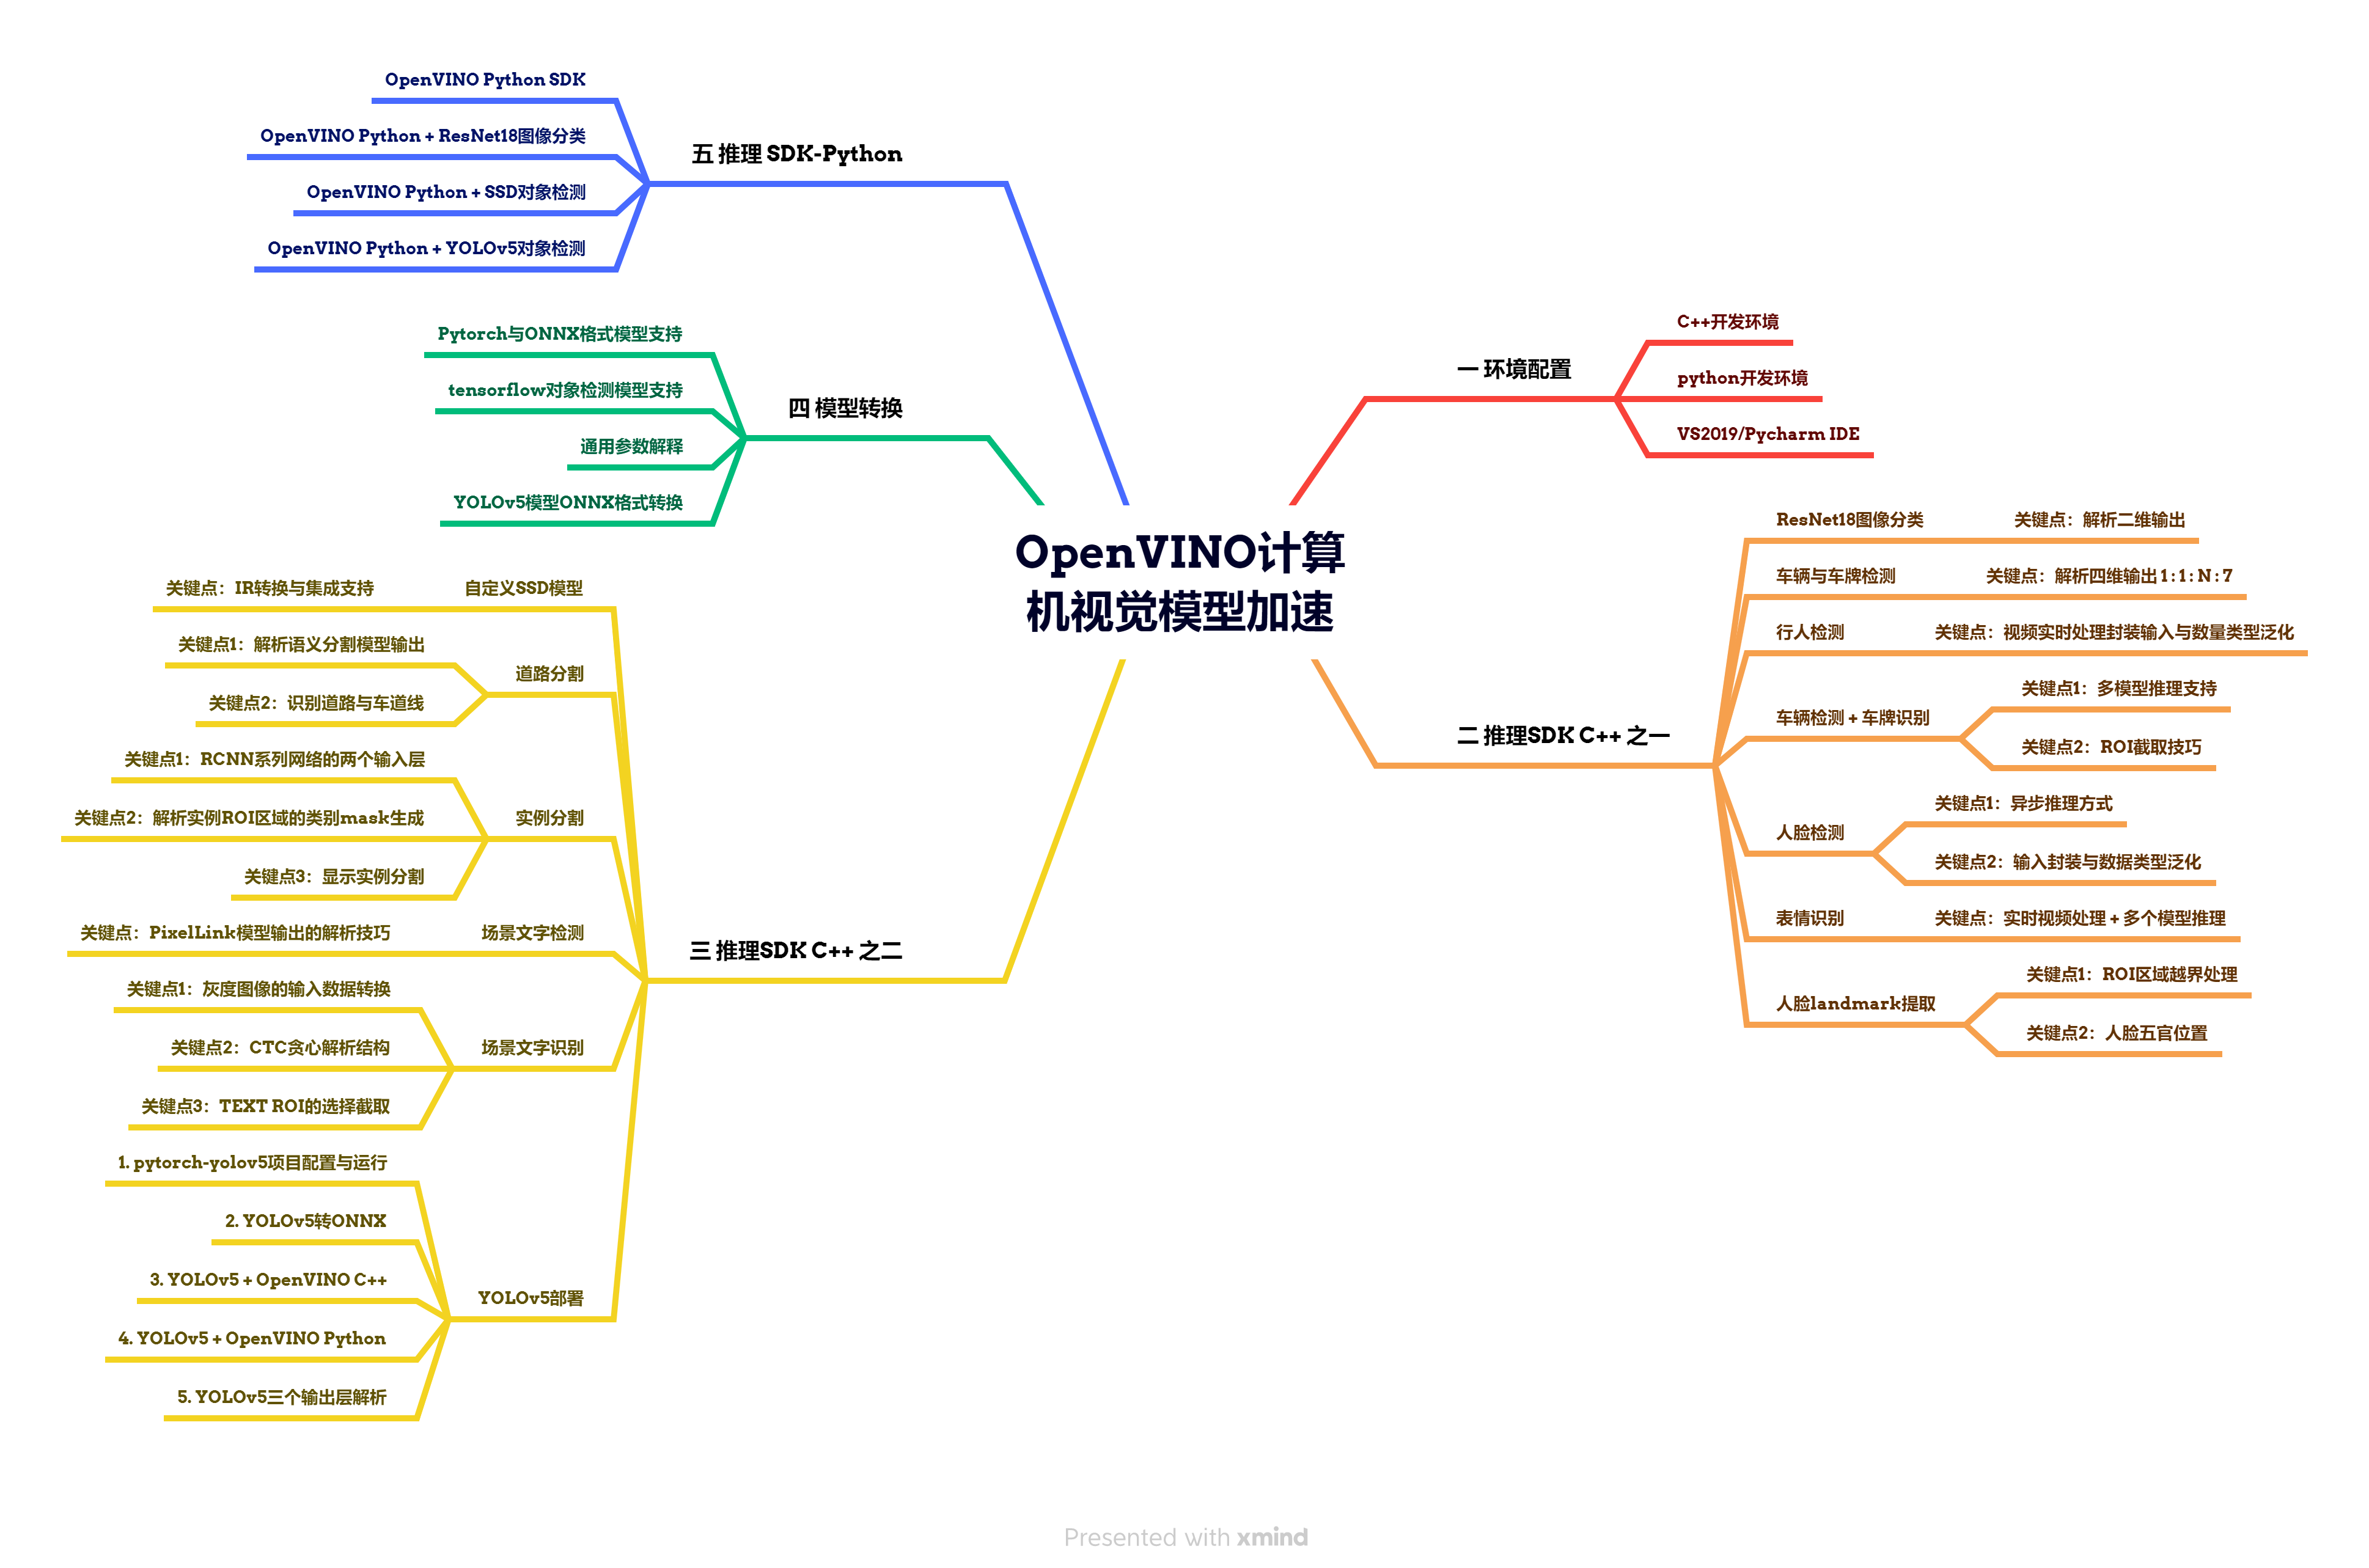

 浙公网安备 33010602011771号