

Nginx Rewrite相关功能
Nginx Rewrite相关功能
Nginx服务器利用ngx_http_rewrite_module 模块解析和处理rewrite请求,此功能依靠 PCRE(perl compatible regularex pression),因此编译之前要安装PCRE库,rewrite是nginx服务器的重要功能之一,用于实现URL的重写,URL的重写是非常有用的功能,比如它可以在我们改变网站结构之后,不需要客户端修改原来的书签,也无需其他网站修改我们的链接,就可以设置为访问,另外还可以在一定程度上提高网站的安全性。
ngx_http_rewrite_module模块指令:
if指令:
用于条件匹配判断,并根据条件判断结果选择不同的Nginx配置,可以配置在server或location块中进行配置,Nginx的if语法仅能使用if做单次判断,不支持使用if else或者if elif这样的多重判断。
- 用法如下:
    if (条件匹配) {
        action
    }
使用正则表达式对变量进行匹配,匹配成功时if指令认为条件为true,否则认为false,变量与表达式之间使用以下符号链接:
=: #比较变量和字符串是否相等,相等时if指令认为该条件为true,反之为false。
!=: #比较变量和字符串是否不相等,不相等时if指令认为条件为true,反之为false。
~: #表示在匹配过程中区分大小写字符,(可以通过正则表达式匹配),满足匹配条件为真,不满足为假。
!~:#为区分大小写字符且匹配结果不匹配,不满足为真,满足为假。
~*: #表示在匹配过程中不区分大小写字符,(可以通过正则表达式匹配),满足匹配条件为真,不满足为假。
!~*: #为不区分大小字符且匹配结果不匹配,满足为假,不满足为真。
-f 和 ! -f: #判断请求的文件是否存在和是否不存在
-d 和 ! -d: #判断请求的目录是否存在和是否不存在。
-x 和 ! -x: #判断文件是否可执行和是否不可执行。
-e 和 ! -e: #判断请求的文件或目录是否存在和是否不存在(包括文件,目录,软链接)。
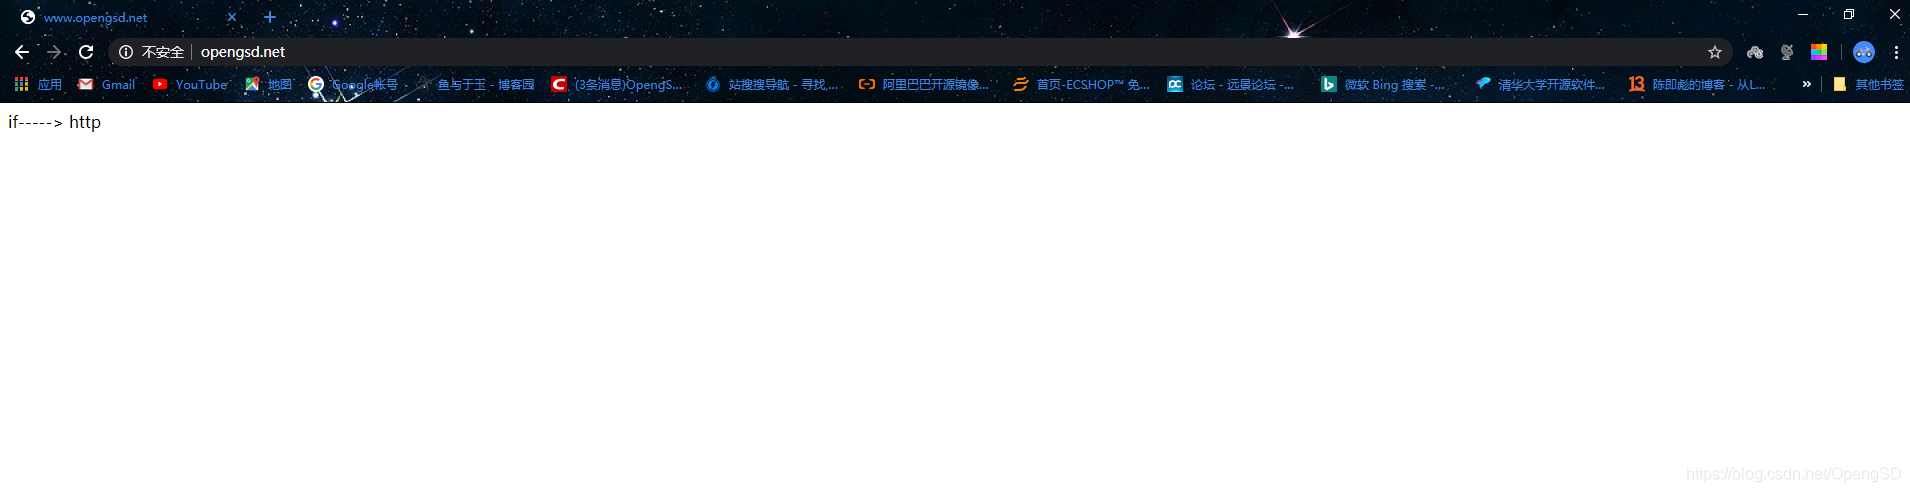
- nginx 的配置文件中支持 if 条件判断功能,当满足条件时实现特定的配置或者功能,下面我们使用 echo 演示一下下面我们修改一下 nginx 默认的主配置文件,location 中添加一个 if 判断语句块,如果请求协议为 http,则执行 echo 语句
[root@ubuntu ~]#vim /apps/nginx/conf/conf.d/pc.conf
server {
listen 80;
server_name www.OpengSD.net;
charset utf-8;
error_page 500 502 503 504 404 =1000 /error.html;
#access_log /data/nginx/logs/www-taotaobao-net_access.log;
error_log /data/nginx/logs/www-taotaobao-net_error.log;
location = /error.html {
root html;
}
# if配置段
location / {
root /data/nginx/html/pc;
index index.html;
default_type text/html;
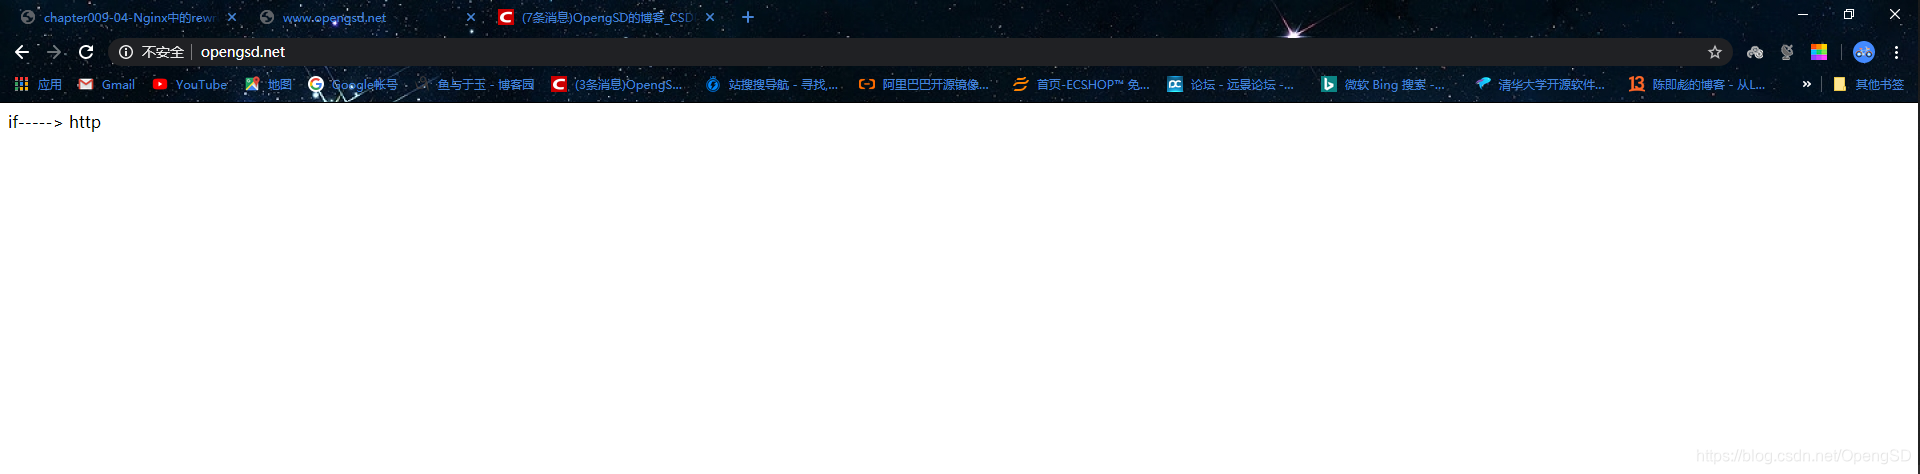
if ( $scheme = http ){
echo "if-----> $scheme";
}
}
}
[root@ubuntu ~]#systemctl reload nginx.service
- 测试访问
![在这里插入图片描述]()
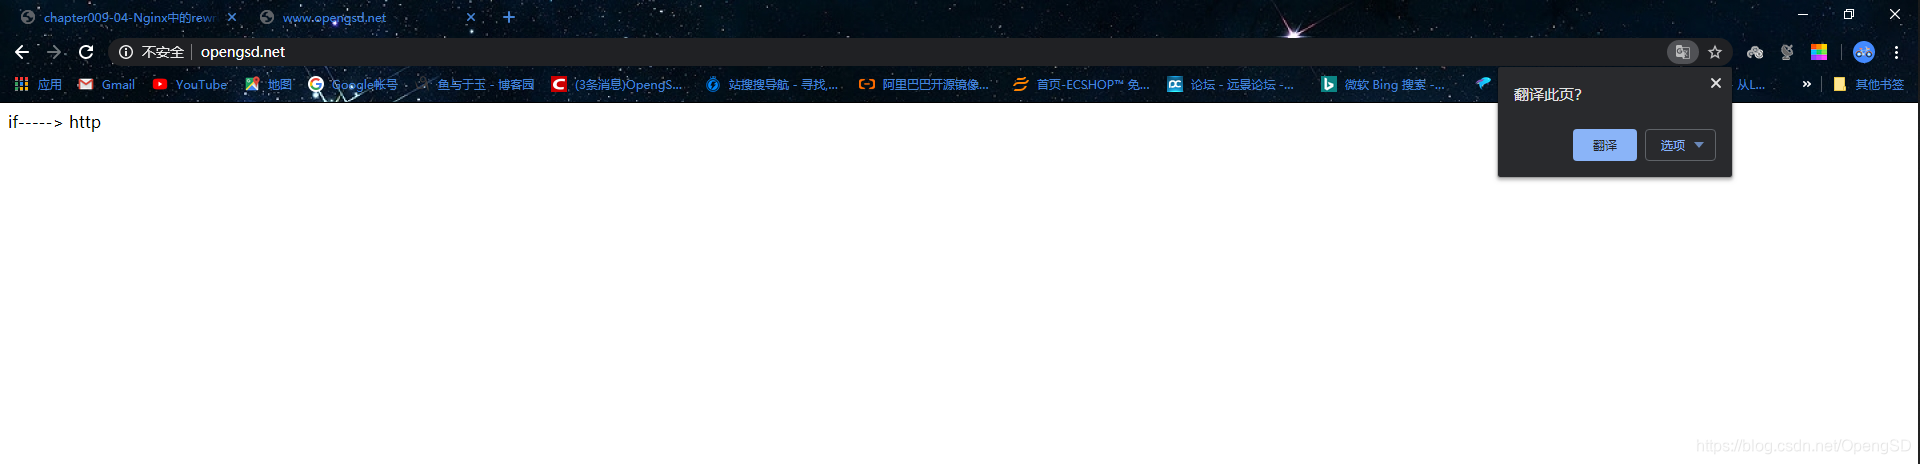
- 下面我将 if 语句中的等号 “=”, 改为 “!=” , 由于 nginx 的 scheme 为 http 所以判断不匹配,没有进行 echo 语句的执行,所以返回默认页面。
[root@ubuntu ~]#vim /apps/nginx/conf/conf.d/pc.conf
        location / {
                root /data/nginx/html/pc;
                index index.html;
                default_type text/html;
            if ( $scheme != http ){
                echo "if-----> $scheme";
                }
        }
[root@ubuntu ~]#systemctl reload nginx.service
- 测试访问
![在这里插入图片描述]()
- 演示使用正则表达式区分和不区分大小写进行匹配
# 区分大小写
[root@ubuntu ~]#vim /apps/nginx/conf/conf.d/pc.conf
        location / {
                root /data/nginx/html/pc;
                index index.html;
                default_type text/html;
            if ( $scheme ~ http ){
                echo "if-----> $scheme";
                }
        }
[root@ubuntu ~]#systemctl reload nginx.service

# 不区分大小写
[root@ubuntu ~]#vim /apps/nginx/conf/conf.d/pc.conf
        location / {
                root /data/nginx/html/pc;
                index index.html;
                default_type text/html;
            if ( $scheme ~* http ){
                echo "if-----> $scheme";
                }
        }
[root@ubuntu ~]#systemctl reload nginx.service
- 区分大小写测试
![在这里插入图片描述]()
- 不区分大小写测试
![在这里插入图片描述]()
- 同样使用正则表达式时,也可以使用叹号 "!" 取反。(不取反看,示例3的区分大小写)
[root@ubuntu ~]#vim /apps/nginx/conf/conf.d/pc.conf
        location / {
                root /data/nginx/html/pc;
                index index.html;
                default_type text/html;
            if ( $scheme !~ http ){
                echo "if-----> $scheme";
                }
        }
[root@ubuntu ~]#systemctl reload nginx.service
- 取反测试
![在这里插入图片描述]()
- 下面我们使用一下 -f 来判断指定文件是否存在。
[root@ubuntu ~]#vim /apps/nginx/conf/conf.d/pc.conf
        location / {
                root /data/nginx/html/pc;
                index index.html;
                default_type text/html;
            if ( -f /data/nginx/html/pc/index.html ){
                echo "index.html page is in the /apps/nginx/html/index.html";
                }
        }
[root@ubuntu ~]#systemctl reload nginx.service
- 判断文件存在打印echo字段
![在这里插入图片描述]()
- 取反判断文件存在则不打印

[root@ubuntu ~]#vim /apps/nginx/conf/conf.d/pc.conf
        location / {
                root /data/nginx/html/pc;
                index index.html;
                default_type text/html;
            if ( !-f /data/nginx/html/pc/index.html ){
                echo "index.html page is in the /apps/nginx/html/index.html";
                }
        }
[root@ubuntu ~]#systemctl reload nginx.service
- 取反测试
![在这里插入图片描述]()
- 使用 -d 选项判断指定的文件夹是否存在
[root@ubuntu ~]#vim /apps/nginx/conf/conf.d/pc.conf
location / {
root /data/nginx/html/pc;
index index.html;
default_type text/html;
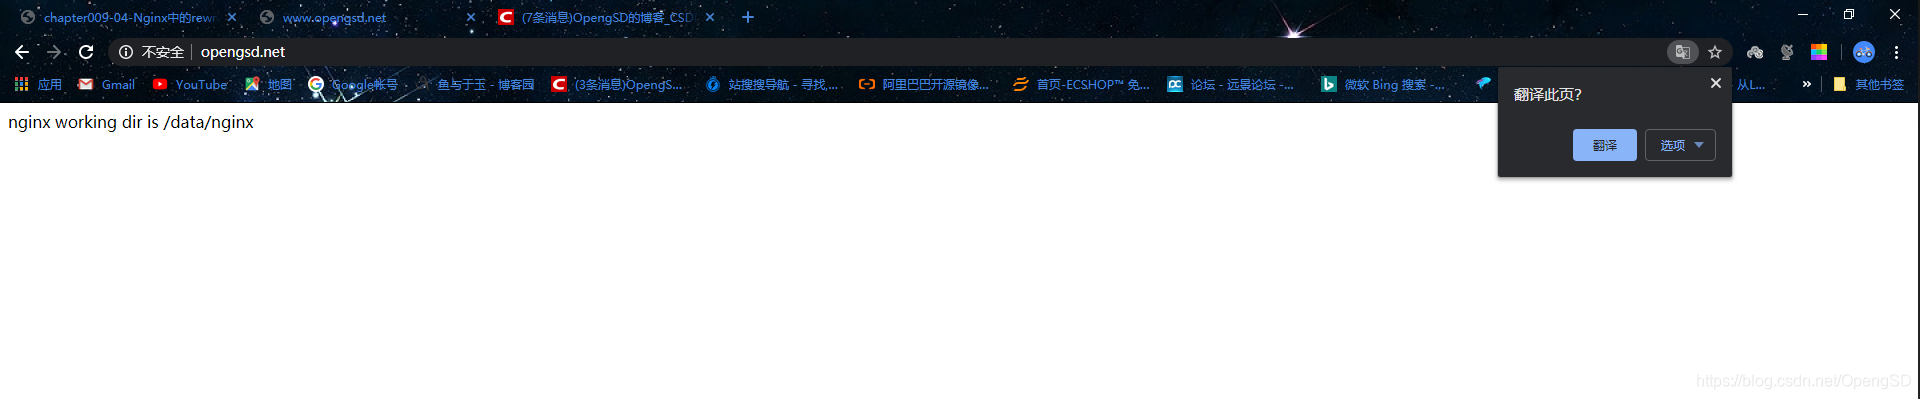
if ( -d /data/xxxx ){
echo "nginx working dir is /data/xxxx";
}
}
[root@ubuntu ~]#systemctl reload nginx.service
# /data下是没有xxxx目录的
[root@ubuntu ~]#ll /data/
total 1040
drwxr-xr-x 4 root root 4096 Jan 10 20:36 ./
drwxr-xr-x 25 root root 4096 Jan 5 17:17 ../
drwx------ 2 root root 16384 Jan 3 20:02 lost+found/
drwxr-xr-x 6 root root 4096 Jan 9 17:57 nginx/
-rw-r--r-- 1 root root 1032630 Dec 30 18:49 nginx-1.16.1.tar.gz
- 测试没有这个目录返回默认页面
![在这里插入图片描述]()
- 改为已经存在目录
[root@ubuntu ~]#vim /apps/nginx/conf/conf.d/pc.conf
        location / {
                root /data/nginx/html/pc;
                index index.html;
                default_type text/html;
            if ( -d /data/nginx ){
                echo "nginx working dir is /data/nginx";
                }
        }
[root@ubuntu ~]#systemctl reload nginx.service
# /data下是没有xxxx目录的
[root@ubuntu ~]#ll /data/
total 1040
drwxr-xr-x  4 root root    4096 Jan 10 20:36 ./
drwxr-xr-x 25 root root    4096 Jan  5 17:17 ../
drwx------  2 root root   16384 Jan  3 20:02 lost+found/
drwxr-xr-x  6 root root    4096 Jan  9 17:57 nginx/
-rw-r--r--  1 root root 1032630 Dec 30 18:49 nginx-1.16.1.tar.gz
- 测试
![在这里插入图片描述]()
- 判断指定文件是否具有可执行权限
[root@ubuntu ~]#vim /apps/nginx/conf/conf.d/pc.conf
        location / {
                root /data/nginx/html/pc;
                index index.html;
                default_type text/html;
            if ( -x /data/nginx/html/pc/index.html ){
                echo "index.html can not exec";
                }
        }
[root@ubuntu ~]#systemctl reload nginx.service
# 没有执行权限
[root@ubuntu ~]#ll /data/nginx/html/pc/index.html
-rw-r--r-- 1 root root 176 Jan  5 18:51 /data/nginx/html/pc/index.html
- 测试
![在这里插入图片描述]()
- 可以取反测试

[root@ubuntu ~]#vim /apps/nginx/conf/conf.d/pc.conf
        location / {
                root /data/nginx/html/pc;
                index index.html;
                default_type text/html;
            if ( !-x /data/nginx/html/pc/index.html ){
                echo "index.html can not exec";
                }
        }
[root@ubuntu ~]#systemctl reload nginx.service
- 测试
![在这里插入图片描述]()

- 使用 -e 选项判断指定文件、目录、软连接文件是否存在
# 判断存在的目录
[root@ubuntu ~]#vim /apps/nginx/conf/conf.d/pc.conf
        location / {
                root /data/nginx/html/pc;
                index index.html;
                default_type text/html;
            if ( -e /bin ){
                echo "/bin is a symbolic";
                }
        }
[root@ubuntu ~]#systemctl reload nginx.service
# 判断不存在的目录
[root@ubuntu ~]#vim /apps/nginx/conf/conf.d/pc.conf
        location / {
                root /data/nginx/html/pc;
                index index.html;
                default_type text/html;
            if ( -e /xiaobawang ){
                echo "/xiaobawang is a symbolic";
                }
        }
[root@ubuntu ~]#systemctl reload nginx.service
# 取反判断不存在的目录
[root@ubuntu ~]#vim /apps/nginx/conf/conf.d/pc.conf
        location / {
                root /data/nginx/html/pc;
                index index.html;
                default_type text/html;
            if ( !-e /xiaobawang ){
                echo "/xiaobawang is a symbolic";
                }
        }
[root@ubuntu ~]#systemctl reload nginx.service
- 判断存在的目录
![在这里插入图片描述]()
- 判断不存在的目录
![在这里插入图片描述]()
- 取反判断不存在的目录
![在这里插入图片描述]()


- if 中的判断条件为字符串时结果为 true,字符串为空时结果为 false
# 字符串非空
[root@ubuntu ~]#vim /apps/nginx/conf/conf.d/pc.conf
        location / {
                root /data/nginx/html/pc;
                index index.html;
                default_type text/html;
                set $xiaobawang "xiaobawang";
        if ( $xiaobawang ){
                echo "string is true";
                }
        }
[root@ubuntu ~]#systemctl reload nginx.service
# 字符串为空
[root@ubuntu ~]#vim /apps/nginx/conf/conf.d/pc.conf
        location / {
                root /data/nginx/html/pc;
                index index.html;
                default_type text/html;
                set $xiaobawang "";
        if ( $xiaobawang ){
                echo "string is true";
                }
        }
[root@ubuntu ~]#systemctl reload nginx.service
- 字符串不为空测试
![在这里插入图片描述]()
- 字符串为空测试
![在这里插入图片描述]()


set指令:
指定key并给其定义一个变量,变量可以调用Nginx内置变量赋值给key,另外set定义格式为set $key $value,及无论是key还是value都要加$符号。
[root@ubuntu ~]#vim /apps/nginx/conf/conf.d/pc.conf
        location /main {
                root /data/nginx/html/pc;
                index index.html;
                default_type text/html;
                set $name magedu;
                echo $name;
                set $my_port $server_port;   # $server_port 是当前端口。
                echo $my_port;
        }
[root@ubuntu ~]#/apps/nginx/sbin/nginx -t
nginx: the configuration file /apps/nginx//conf/nginx.conf syntax is ok
nginx: configuration file /apps/nginx//conf/nginx.conf test is successful
[root@ubuntu ~]#systemctl reload nginx.service
- 访问效果
![在这里插入图片描述]()

break指令:
用于中断当前相同作用域(location)中的其他Nginx配置,与该指令处于同一作用域的Nginx配置中,位于它前面的配置生效,位于后面的指令配置就不再生效了,Nginx服务器在根据配置处理请求的过程中遇到该指令的时候,回到上一层作用域继续向下读取配置,该指令可以在server块和location块以及if块中使用。
- 使用语法如下:
[root@ubuntu ~]#vim /apps/nginx/conf/conf.d/pc.conf
        location / {
                root /data/nginx/html/pc;
                index index.html;
                default_type text/html;
                set $name magedu;
                echo $name;
                break;  # 中断指令
                set $my_port $server_port;
                echo $my_port;
        }
[root@ubuntu ~]#/apps/nginx/sbin/nginx -t
nginx: the configuration file /apps/nginx//conf/nginx.conf syntax is ok
nginx: configuration file /apps/nginx//conf/nginx.conf test is successful
[root@ubuntu ~]#systemctl reload nginx.service
- 和上一个set指令对比访问效果(break后面的参数被中断,前面的照常打印。)
![在这里插入图片描述]()

return指令:
从nginx版本0.8.2开始支持,return用于完成对请求的处理,并直接向客户端返回响应状态码,比如其可以指定重定向URL(对于特殊重定向状态码,301/302等) 或者是指定提示文本内容(对于特殊状态码403/500等),处于此指令后的所有配置都将不被执行,return可以在server、if和location块进行配置。
- 用法如下:
        return code; #返回给客户端指定的HTTP状态码
        return code (text); #返回给客户端的状态码及响应体内容,可以调用变量
        return code URL; #返回给客户端的URL地址
- 示例:
[root@ubuntu ~]#vim /apps/nginx/conf/conf.d/pc.conf
location / {
root /data/nginx/html/pc;
default_type text/html;
index index.html;
if ( $scheme = http ){
#return 666;
#return 666 "not allow http"; # 指定提示文本内容
#return 301 http://www.baidu.com; # 指定重定向URL
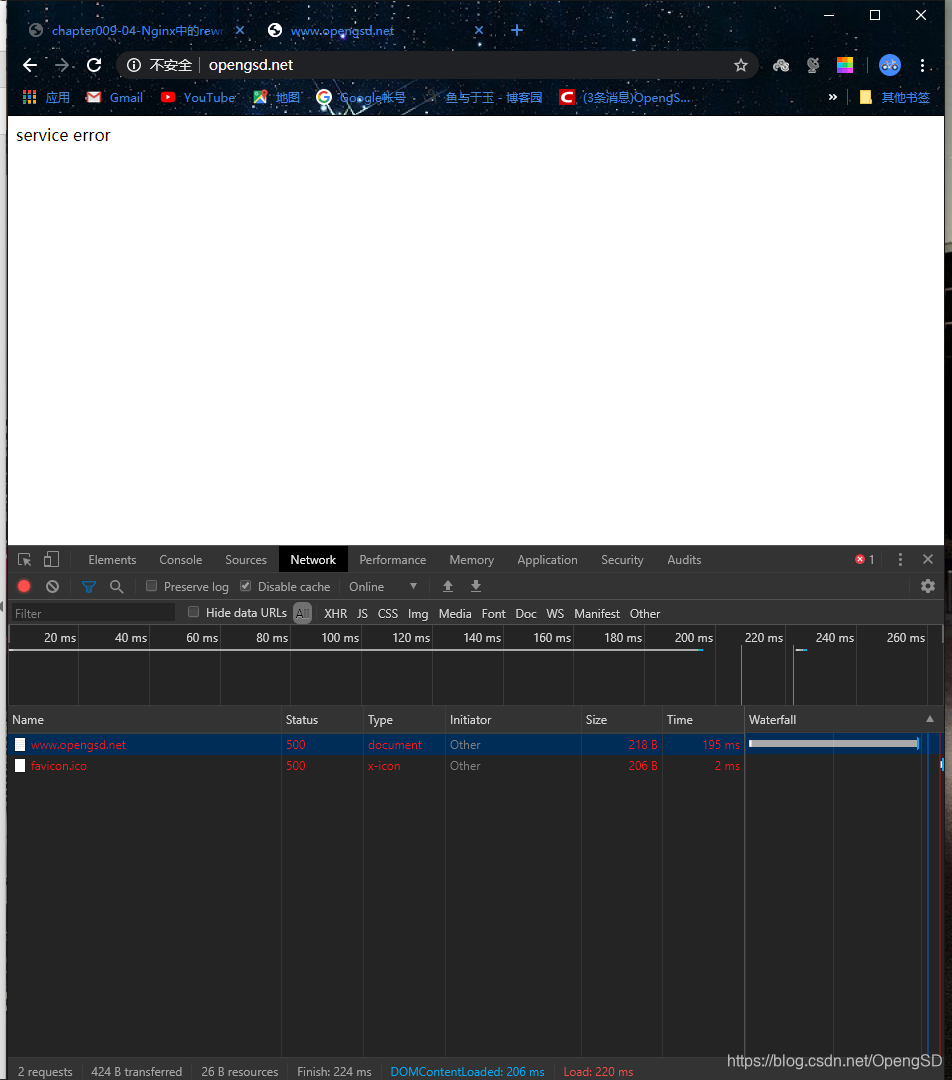
return 500 "service error";
echo "if-----> $scheme"; #return后面的将不再执行
}
if ( $scheme = https ){
echo "if ----> $scheme";
}
}
[root@ubuntu ~]#/apps/nginx/sbin/nginx -t
nginx: the configuration file /apps/nginx//conf/nginx.conf syntax is ok
nginx: configuration file /apps/nginx//conf/nginx.conf test is successful
[root@ubuntu ~]#systemctl reload nginx.service
- 测试(返回状态码为500,且return不再执行)
![在这里插入图片描述]()
rewrite_log指令:
设置是否开启记录ngx_http_rewrite_module模块日志记录到error_log日志文件当中,可以配置在http、server、location或if当中,需要日志级别为notice 。
- 用法示例:
# 修改主配置文件日志级别
[root@ubuntu ~]#vim /apps/nginx/conf/nginx.conf
error_log  logs/error.log  notice;  # 这条默认是禁用的打开就可以了。只能这个级别其他级别不行。
# 修改子配置文件
[root@ubuntu ~]#vim /apps/nginx/conf/conf.d/pc.conf
location /main {
index index.html;
default_type text/html;
set $name magedu;
echo $name;
rewrite_log on;
break;
set $my_port $server_port;
echo $my_port;
}
# 测试访问
[root@ubuntu data]#tail -f /apps/nginx/logs/error.log
2019/02/27 15:10:02 [warn] 5815#0: *3 using uninitialized "my_port" variable, client:
192.168.39.1, server: www.opengsd.net, request: "GET /main HTTP/1.1", host:
"www.magedu.net"
rewrite指令:
通过正则表达式的匹配来改变URI,可以同时存在一个或多个指令,按照顺序依次对URI进行匹配,rewrite主要是针对用户请求的URL或者是URI做具体处理,以下是URL和URI的具体介绍:
URI(universal resource identifier):通用资源标识符,标识一个资源的路径,可以不带协议。
URL(uniform resource location):统一资源定位符,是用于在Internet中描述资源的字符串,是URI的子集,主要包括传输协议(scheme)、主机(IP、端口号或者域名)和资源具体地址(目录和文件名)等三部分,一般格式为 scheme://主机名[:端口号][/资源路径],如:http://www.a.com:8080/path/file/index.html就是一个URL路径,URL必须带访问协议。
每个URL都是一个URI,但是URI不都是URL。

例如:
http://example.org:8080/path/to/resource.txt #URI/URL
ftp://example.org/resource.txt #URI/URL
/absolute/path/to/resource.txt #URI
rewrite的官方介绍地址:
rewrite可以配置在server、location、if,其具体使用方式为:
rewrite regex replacement [flag];
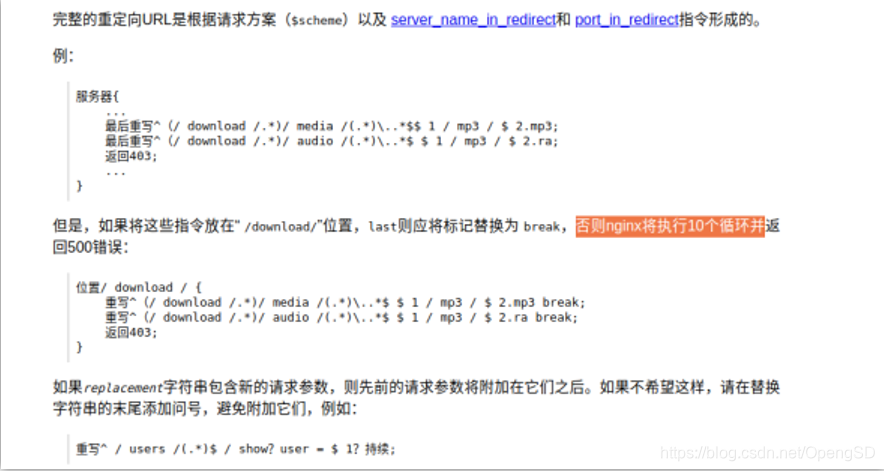
rewrite将用户请求的URI基于regex所描述的模式进行检查,匹配到时将其替换为表达式指定的新的URI。 注意:如果在同一级配置块中存在多个rewrite规则,那么会自下而下逐个检查;被某条件规则替换完成后,会重新一轮的替换检查,隐含有循环机制,但不超过10次;如果超过,提示500响应码,[flag]所表示的标志位用于控制此循环机制,如果替换后的URL是以http://或https://开头,则替换结果会直接以重向返回给客户端, 即永久重定向301。
rewrite flag使用介绍:
利用nginx的rewrite的指令,可以实现url的重新跳转,rewrtie有四种不同的flag,分别是redirect(临时重定向)、permanent(永久重定向)、break和last。其中前两种是跳转型的flag,后两种是代理型,跳转型是指有客户端浏览器重新对新地址进行请求,代理型是在WEB服务器内部实现跳转的。
Syntax: rewrite regex replacement [flag]; #通过正则表达式处理用户请求并返回替换后的数据包。 Default: —
Context: server, location, if
redirect;
#临时重定向,重写完成后以临时重定向方式直接返回重写后生成的新URL给客户端,由客户端重新发起请求;使用相
对路径,或者http://或https://开头,状态码:302

permanent;
#重写完成后以永久重定向方式直接返回重写后生成的新URL给客户端,由客户端重新发起请求,状态码:301
last;

#重写完成后停止对当前URI在当前location中后续的其它重写操作,而后对新的URL启动新一轮重写检查,不建议
在location中使用
break;

#重写完成后停止对当前URL在当前location中后续的其它重写操作,而后直接将匹配结果返还给客户端即结束循环
并返回数据给客户端,建议在location中使用
rewrite案例-域名永久与临时重定向:
要求:因业务需要,将访问源域名 www.opengsd.net 的请求永久重定向到www.opengsd.com
临时重定向不会缓存域名解析记录(A记录),但是永久重定向会缓存。
[root@ubuntu ~]#vim /apps/nginx/conf/conf.d/pc.conf
location / {
        root /data/nginx/html/pc;
        index index.html;
        rewrite / http://www.jd.com permanent; # 永久重定向 状态码301
        #rewrite / http://www.jd.com redirect; # 临时重定向 状态码302
        }
# 语法检查
[root@ubuntu ~]#/apps/nginx/sbin/nginx -t
nginx: the configuration file /apps/nginx//conf/nginx.conf syntax is ok
nginx: configuration file /apps/nginx//conf/nginx.conf test is successful
# 重新加载配置
[root@ubuntu ~]#/apps/nginx/sbin/nginx -s reload
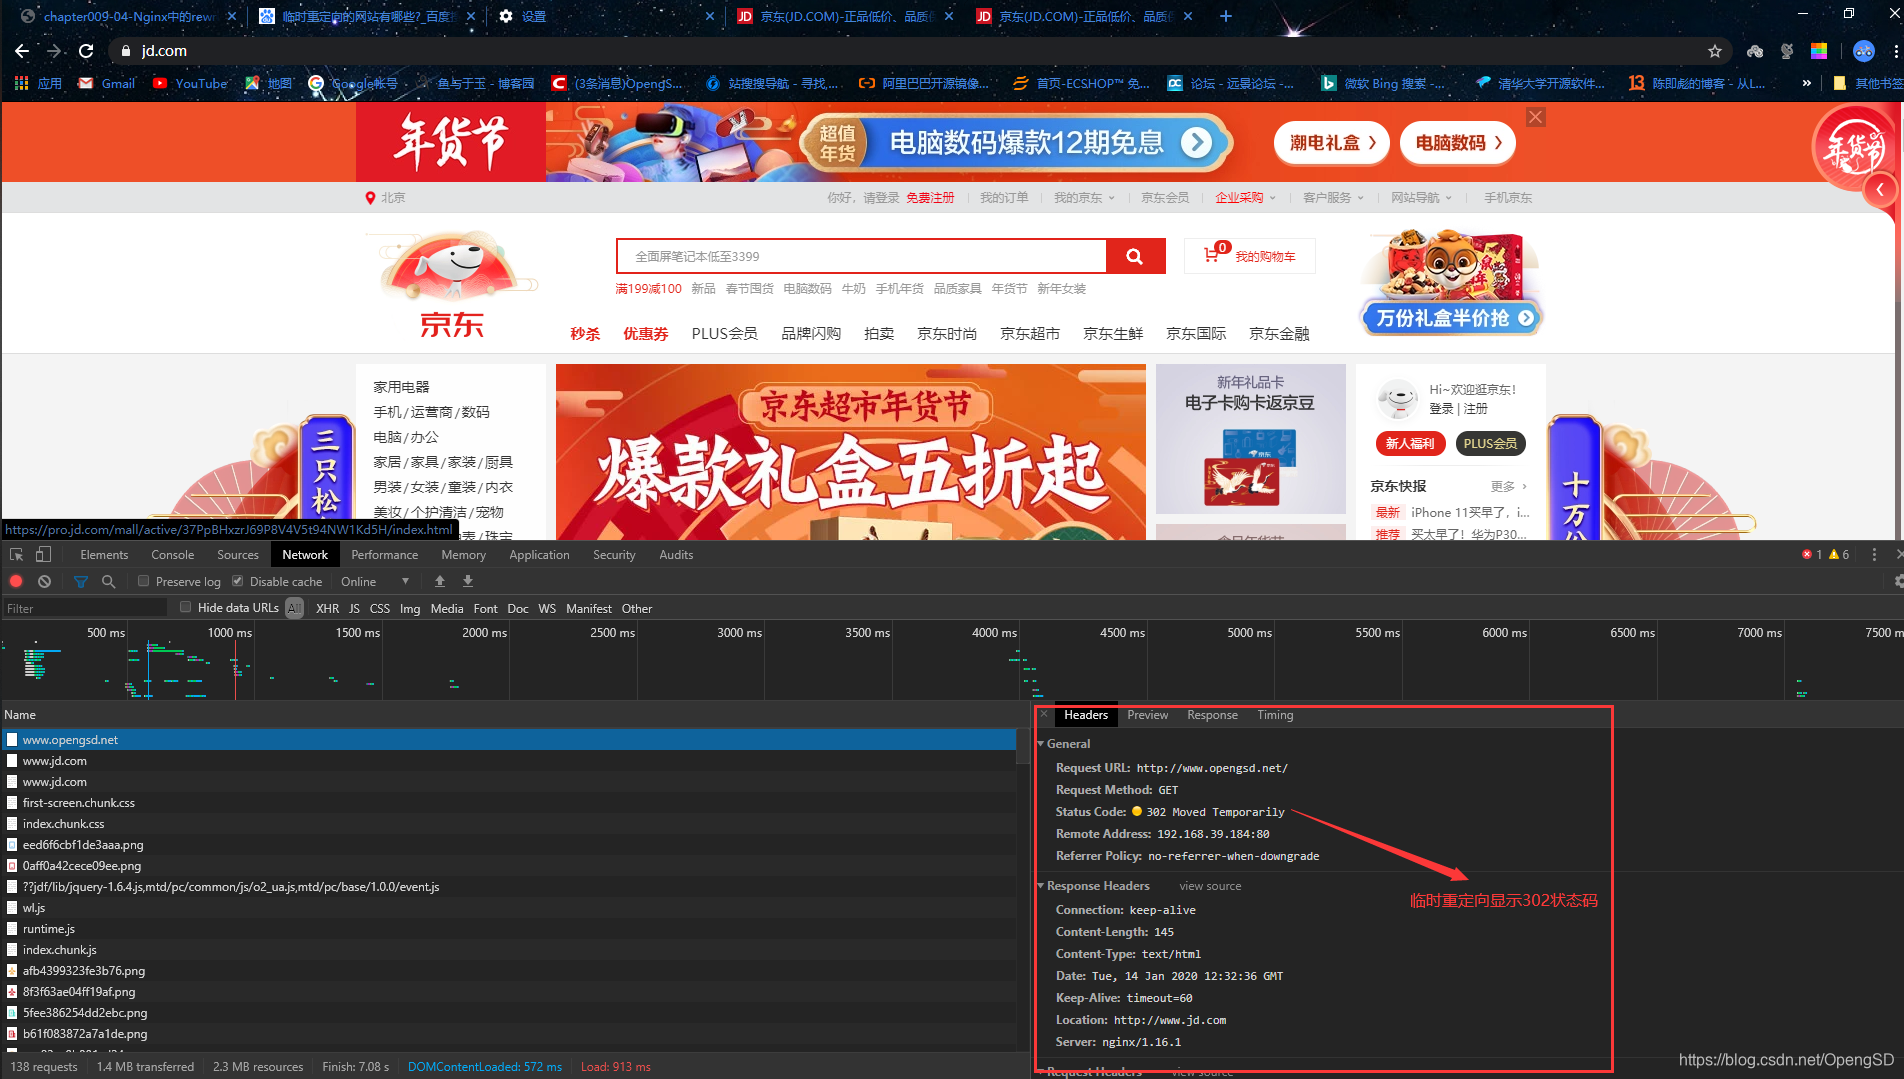
- 临时重定向测试
![在这里插入图片描述]()
- 永久重定向测试
![在这里插入图片描述]()
rewrite没经过判断直接使用时用可能在同一个协议的情况下会进行死循环,应注意直接写在server里会有问题最好写在if判断下面。(这个是官方的文档说明)
![在这里插入图片描述]()


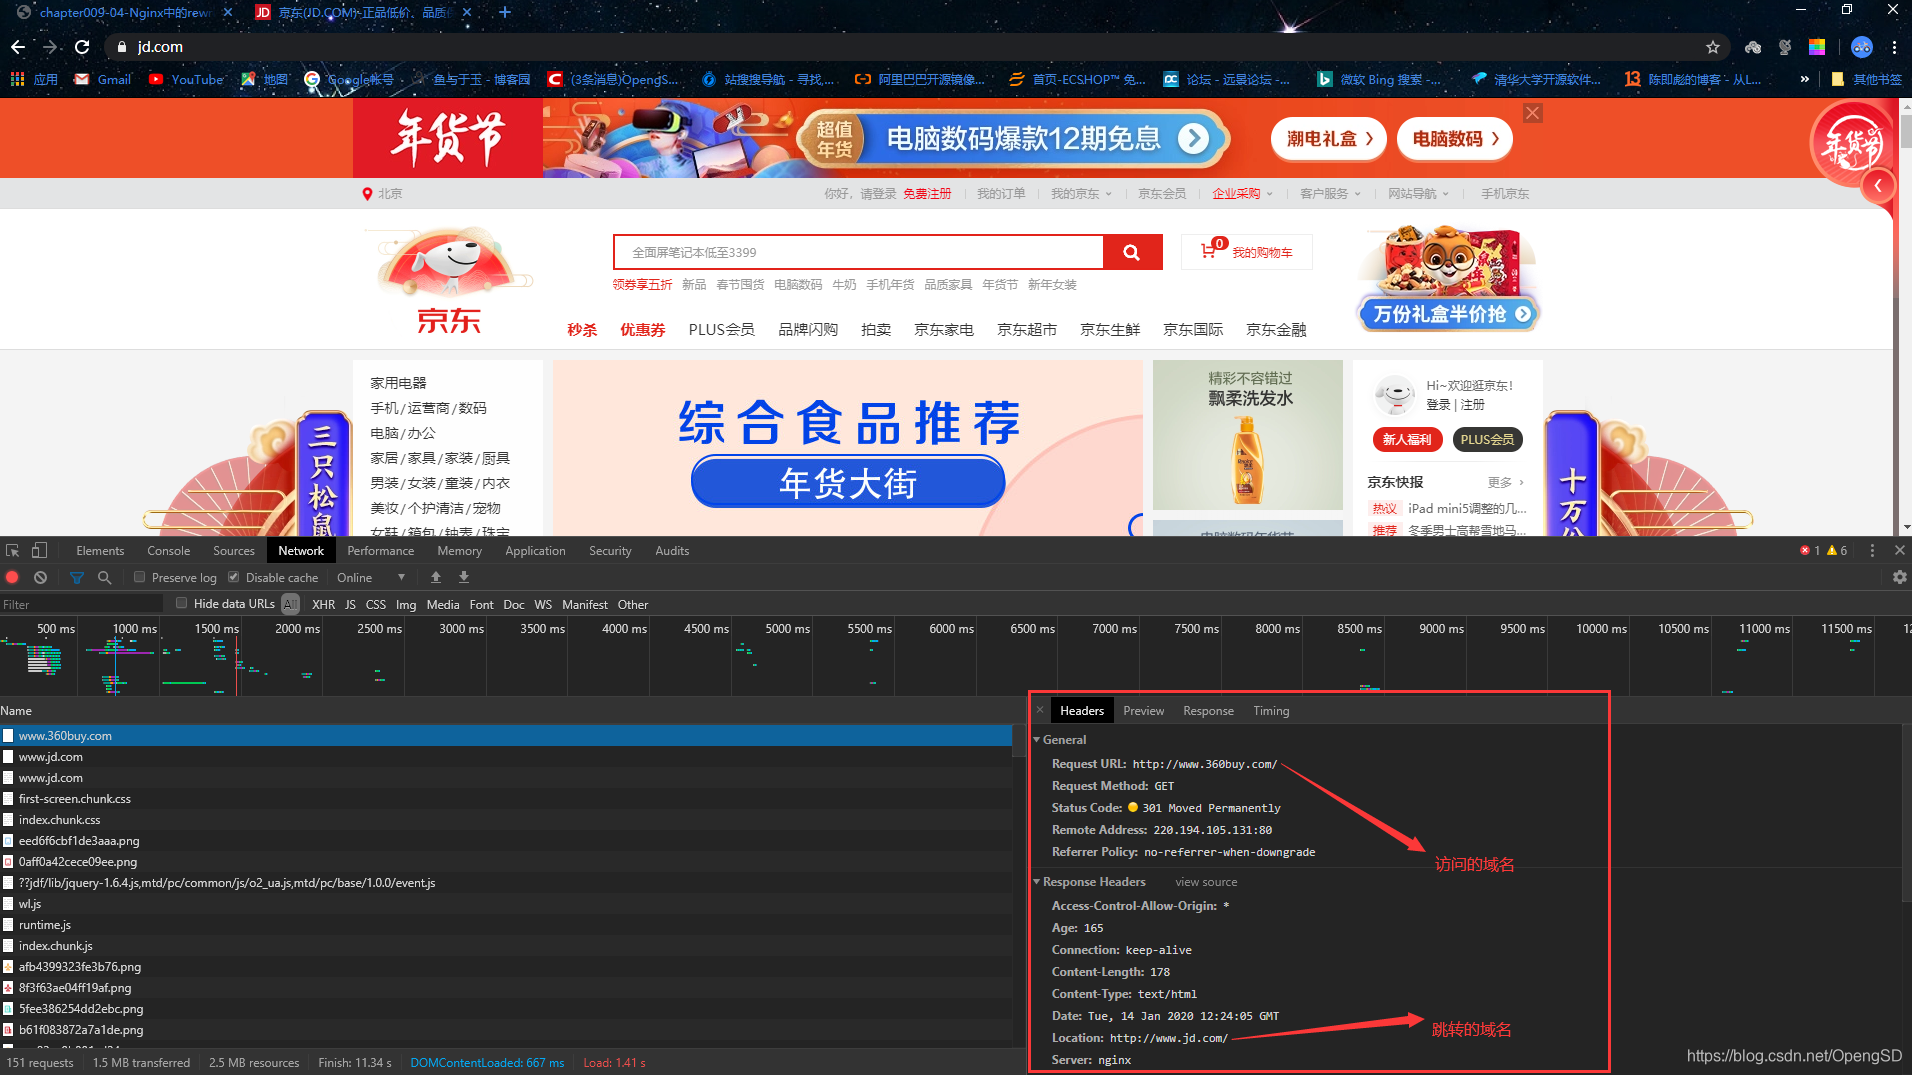
永久重定向:
域名永久重定向,京东早期的域名 www.360buy.com 由于与360公司类似,于是后期永久重定向到了 www.jd.com,永久重定向会缓存DNS解析记录。
临时重定向:
域名临时重定向,告诉浏览器域名不是固定重定向到当前目标域名,后期可能随时会更改,因此浏览器不会缓存当前域名的解析记录,而浏览器会缓存永久重定向的DNS解析记录,这也是临时重定向与永久重定向最大的本质区别。
rewrite案例--brak与last:
要求:访问about的请求被转发至images,而访问images传递请求再次被转发至images1,以此测试last和break分别有什么区别:
break案例:
break测试案例:当客户端访问break的时候,测试通过rewrite将URL重写为test1,然后再通过rewrite将test1重写为test2测试两条write规则最终哪一条生效,并且测试重写后的URL会不会到其他location重新匹配。
- 配好测试环境和规则(使用curl 命令测试 -L 跟随跳转 --head 显示头部报文信息)
[root@ubuntu ~]#vim /apps/nginx/conf/conf.d/pc.conf
location /break {
        #return 666 "break";
        root /data/nginx;
        index index.html;
        rewrite ^/break/(.*) /test1/$1 break;  # break匹配成功后不再向下匹配,也不会跳转到其他的location,即直接结束匹配并给客户端返回结果数据。
        rewrite ^/test1/(.*) /test2/$1 break;  # break不会匹配后面的rewrite规则也不匹配其他location
        }
        location = /test1 {
        return 999 "new test1";
        #index index.html;
        #root /data/nginx;
        }
        location = /test2 {
        return 666 "new test2";
        #root /opt/nginx;
        #index index.html;
        }
[root@ubuntu ~]#systemctl reload nginx.service
# 测试下面两个location的显示
[root@centos7 ~]#curl -L http://www.opengsd.net/test1
new test1[root@centos7 ~]#curl -L http://www.opengsd.net/test2
new test2[root@centos7 ~]#


# 创建break目录测试页面
[root@ubuntu ~]#mkdir /data/nginx/break
[root@ubuntu ~]#echo "break html" > /data/nginx/break/index.html

# 创建连个test资源目录并写入内容(测试方便)
[root@ubuntu ~]#mkdir /data/nginx/test1
[root@ubuntu ~]#mkdir /data/nginx/test2
[root@ubuntu ~]#echo "test1"  > /data/nginx/test1/index.html
[root@ubuntu ~]#echo "test2"  > /data/nginx/test2/index.html
- 测试不加rewrite重写
[root@ubuntu ~]#vim /apps/nginx/conf/conf.d/pc.conf
location /break {
        #return 666 "break";
        root /data/nginx;
        index index.html;
        #rewrite ^/break/(.*) /test1/$1 break;
        #rewrite ^/test1/(.*) /test2/$1 break;  # 这两行注释掉
        }
        location = /test1 {
        return 999 "new test1";
        #index index.html;
        #root /data/nginx;
        }
        location = /test2 {
        return 666 "new test2";
        #root /opt/nginx;
        #index index.html;
        }
[root@ubuntu ~]#systemctl reload nginx.service
# 测试
## 这是没创建目录之前找不到资源
[root@centos7 ~]#curl -L http://www.opengsd.net/break
<html>
<head><title>404 Not Found</title></head>
<body>
<center><h1>404 Not Found</h1></center>
<hr><center>nginx/1.16.1</center>
</body>
</html>

## 创建完目录和测试页面
[root@centos7 ~]#curl -L http://www.opengsd.net/break
break html
- 只加一条的rewrite重写
[root@ubuntu ~]#vim /apps/nginx/conf/conf.d/pc.conf
location /break {
        #return 666 "break";
        root /data/nginx;
        index index.html;
        rewrite ^/break/(.*) /test1/$1 break;
        #rewrite ^/test1/(.*) /test2/$1 break;
        }
        location = /test1 {
        return 999 "new test1";
        #index index.html;
        #root /data/nginx;
        }
        location = /test2 {
        return 666 "new test2";
        #root /opt/nginx;
        #index index.html;
        }
[root@ubuntu ~]#systemctl reload nginx.service

# 测试(访问的试break下的index.html但是显示的却是test1的index.html内容,说明rewrite重写成功)
[root@centos7 ~]#curl -L http://www.opengsd.net/break/index.html
test1
[root@centos7 ~]#curl --head http://www.opengsd.net/break/index.html
HTTP/1.1 200 OK
Server: nginx/1.16.1
Date: Wed, 15 Jan 2020 09:04:54 GMT
Content-Type: text/html; charset=utf-8
Content-Length: 6
Last-Modified: Wed, 15 Jan 2020 08:57:19 GMT
Connection: keep-alive
Keep-Alive: timeout=60
ETag: "5e1ed3ef-6"
Accept-Ranges: bytes
- 我们打开之前写好的另一条规则(两条规则都存在但是第一条后面加了break,本条location内的之后的操作都不进行)
[root@ubuntu ~]#vim /apps/nginx/conf/conf.d/pc.conf
location /break {
        #return 666 "break";
        root /data/nginx;
        index index.html;
        rewrite ^/break/(.*) /test1/$1 break;
        rewrite ^/test1/(.*) /test2/$1 break;
        }
        location = /test1 {
        return 999 "new test1";
        #index index.html;
        #root /data/nginx;
        }
        location = /test2 {
        return 666 "new test2";
        #root /opt/nginx;
        #index index.html;
        }
[root@ubuntu ~]#systemctl reload nginx.service

# 测试访问
[root@centos7 ~]$curl -L http://www.opengsd.net/break/index.html
test1
#最终的结果不会超出break的location而且不会继续匹配当前location后续的write规则,而且直接返回数据给客户端。
- break适用于不改变客户端访问方式,但是要将访问的目的URL做单次重写的场景,比如有V1/V2两个版本的网站前端页面并存,旧版本的网站数据已经保存到了statics不能丢失,但是要将访问新版本的资源重写到新的静态资源路径到新的目录static:
location /statics {
        root /data/nginx;
        index index.html;
        rewrite ^/statics/(.*) /static/$1 break;
}
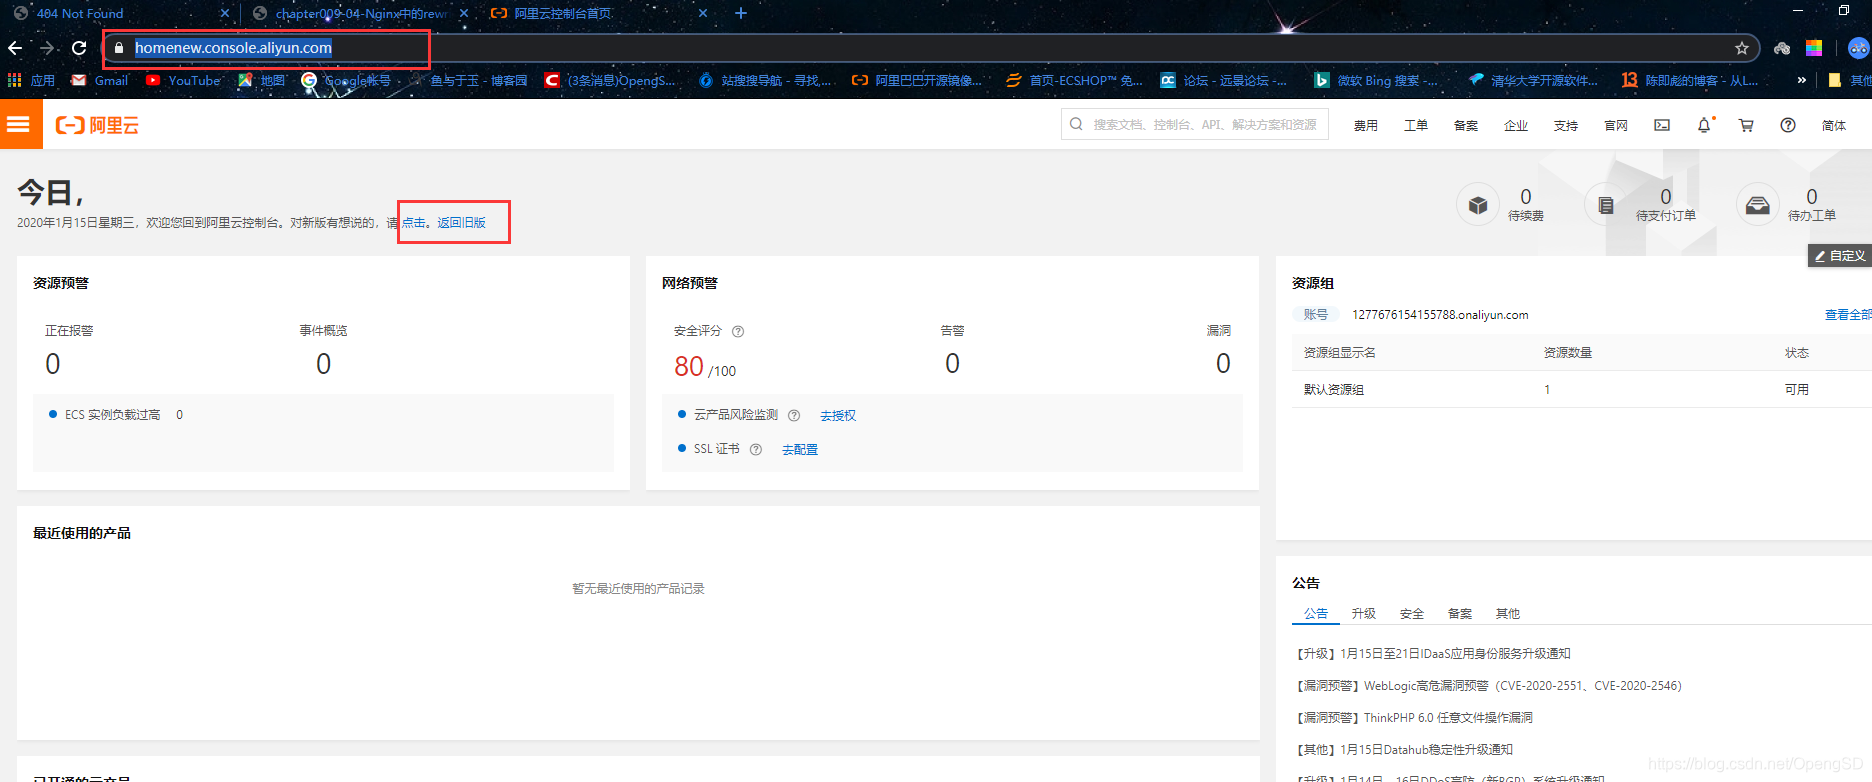
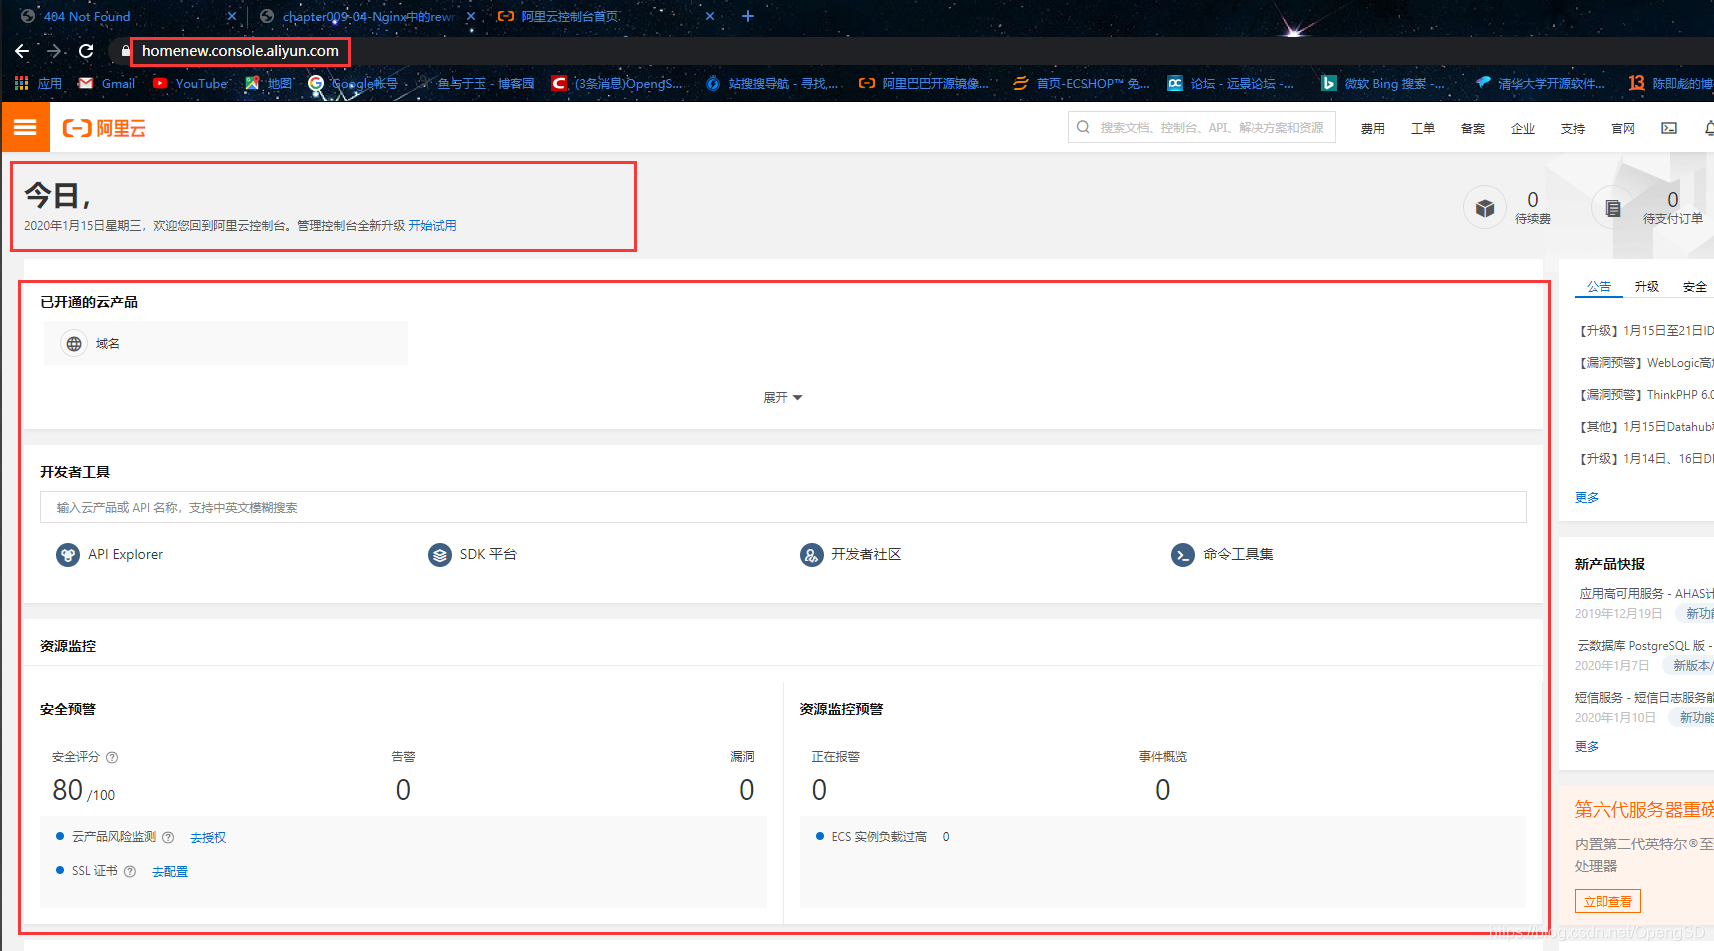
- 其实阿里云的控制台里面就可以区分这一点
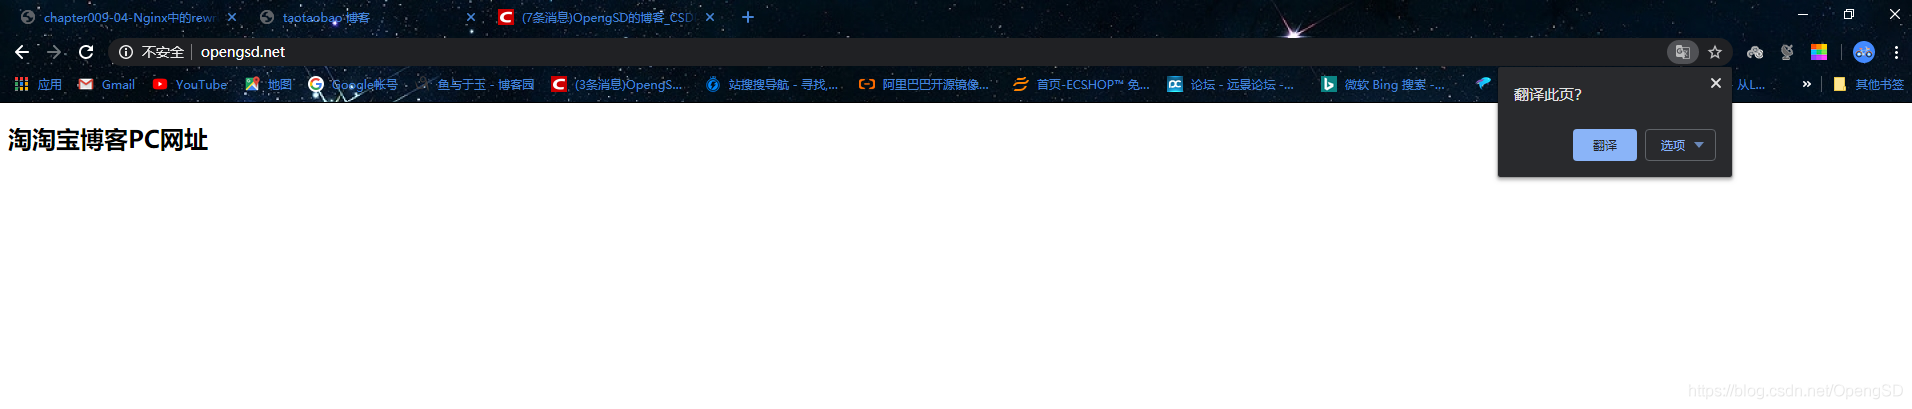
- 新版阿里云控制台
![在这里插入图片描述]()
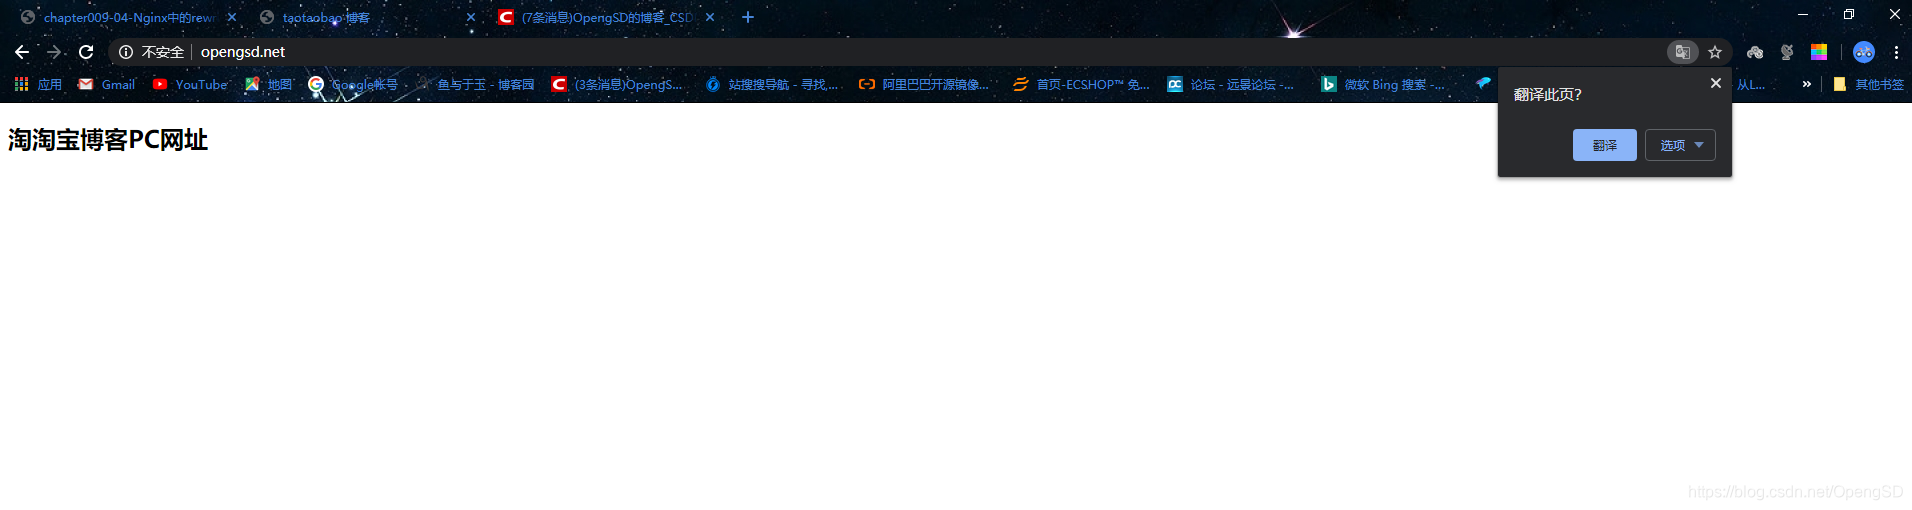
- 旧版阿里云控制台(URL路径没有改变过,但是访问的内容却不一样)
![在这里插入图片描述]()
last案例:
last:对某个location的URL匹配成功后会停止当前location的后续rewrite规则,并结束当前location,然后将匹配生成的新URL跳转至其他location继续匹配,直到没有location可匹配后将最后一次location的数据返回给客户端。
- 准备测试环境和规则
[root@ubuntu ~]#vim /apps/nginx/conf/conf.d/pc.conf
location /last {
                root /data/nginx;
                index index.html;
                #rewrite ^/last/(.*) /test1/$1 last;
                #rewrite ^/test1/(.*) /test2/$1 last;
        }
        location /test1 {
                #return 999 "new test1";
                root /data/nginx;
                index index.html;
                rewrite ^/test1/(.*) /test2/$1 last;
        }
        location /test2 {
                return 666 "new test2";
                #root /opt/nginx;
                #index index.html;
        }
[root@ubuntu ~]#systemctl reload nginx.service
# 创建资源页面
[root@ubuntu ~]#mkdir /data/nginx/last
[root@ubuntu ~]#echo "last" > /data/nginx/last/index.html


# 测试在访问last资源时打开test1的rewrite规则会匹配到哪里
[root@centos7 ~]$curl -L http://www.opengsd.net/last/index.html  # 因为上面规则没有打开所以访问last资源后面的这个rewrite不生效
last
# 访问test1测试(这里的规则会生效)
[root@centos7 ~]$curl -L http://www.opengsd.net/test1/index.html
new test2[root@centos7 ~]$
- 多个location来回匹配
[root@ubuntu ~]#vim /apps/nginx/conf/conf.d/pc.conf
location /last {
                root /data/nginx;
                index index.html;
                rewrite ^/last/(.*) /test1/$1 last;
                #rewrite ^/test1/(.*) /test2/$1 last;
        }
        location /test1 {
                #return 999 "new test1";
                root /data/nginx;
                index index.html;
                rewrite ^/test1/(.*) /test2/$1 last;
        }
        location /test2 {
                return 666 "new test2";
                #root /opt/nginx;
                #index index.html;
        }
[root@ubuntu ~]#systemctl reload nginx.service
# 测试结果上一个locatin 的rewrite生效重写到test1,test1的rewrite生效重写到test2。
[root@centos7 ~]$curl -L http://www.opengsd.net/last/index.html
new test2[root@centos7 ~]$
- 单条location里面多个rewrite除了第一条之后的都不会生效
[root@ubuntu ~]#vim /apps/nginx/conf/conf.d/pc.conf
location /last {
                root /data/nginx;
                index index.html;
                rewrite ^/last/(.*) /test1/$1 last;
                rewrite ^/test1/(.*) /test2/$1 last;
                # www.opengsd.net/last/index.html ---> www.opengsd.net/test1/index.html  # 这里是把访问的URL重写,然后到下面的location去匹配,如果下面的location还有rewrite规则,则再次去匹配直到没有可以匹配的。
        }
        location /test1 {
                #return 999 "new test1";
                root /data/nginx;
                index index.html;
                #rewrite ^/test1/(.*) /test2/$1 last;
        }
        location /test2 {
                return 666 "new test2";
                #root /opt/nginx;
                #index index.html;
                # 这里可以接着定义rewrite规则,但是要有对应的location。
        }
[root@ubuntu ~]#systemctl reload nginx.service

# 测试第二条的rewrite并没有生效
[root@centos7 ~]$curl -L http://www.opengsd.net/last/index.html
test1


# 单个location里面多个rewrite不会循环,但是会跳出当前location去匹配其他的location,直到没有可匹配,然后返回结果到用户。
- last+break配合使用
[root@ubuntu ~]#vim /apps/nginx/conf/conf.d/pc.conf
location /last {
                root /data/nginx;
                index index.html;
                rewrite ^/last/(.*) /test1/$1 last;
                #rewrite ^/test1/(.*) /test2/$1 last;
        }
        location /test1 {
                #return 999 "new test1";
                root /data/nginx;
                index index.html;
                rewrite ^/test1/(.*) /test2/$1 break;
        }
        location /test2 {
                return 666 "new test2";
                #root /opt/nginx;
                #index index.html;
        }
[root@ubuntu ~]#systemctl reload nginx.service

# 测试(这里显示test2 的内容的原因是test2下面有这个文件所以会显示,而且他的匹配规则并没有跳出当前的location)
[root@centos7 ~]$curl -L http://www.opengsd.net/last/index.html
test2
# 如果没有这个目录或文件则会报错(说明到上一个rewrite定义的break哪里就结束了匹配)
[root@ubuntu ~]#rm -f /data/nginx/test2/index.html
[root@centos7 ~]$curl -L http://www.opengsd.net/last/index.html
<html>
<head><title>404 Not Found</title></head>
<body>
<center><h1>404 Not Found</h1></center>
<hr><center>nginx/1.16.1</center>
</body>
</html>
last适用于要不改变客户端访问方式但是需做多次目的URL重写的场景,场景不是很多。
rewrite案例-自动跳转https:
要求:基于通信安全考虑公司网站要求全站https,因此要求将在不影响用户请求的情况下将http请求全部自动跳转至https,另外也可以实现部分location跳转。
- 生成证书
# 自签名CA证书
[root@ubuntu certs]#openssl req -newkey rsa:4096 -nodes -sha256 -keyout ca.key -x509 -days 3650 -out ca.crt
Can't load /root/.rnd into RNG
140148192780736:error:2406F079:random number generator:RAND_load_file:Cannot open file:../crypto/rand/randfile.c:88:Filename=/root/.rnd
Generating a RSA private key
.............................................++++
...........................++++
writing new private key to 'ca.key'
-----
You are about to be asked to enter information that will be incorporated
into your certificate request.
What you are about to enter is what is called a Distinguished Name or a DN.
There are quite a few fields but you can leave some blank
For some fields there will be a default value,
If you enter '.', the field will be left blank.
-----
Country Name (2 letter code) [AU]:CN
State or Province Name (full name) [Some-State]:BeiJing
Locality Name (eg, city) []:BeiJing
Organization Name (eg, company) [Internet Widgits Pty Ltd]:opengsd.net
Organizational Unit Name (eg, section) []:opengsd.net
Common Name (e.g. server FQDN or YOUR name) []:www.opengsd.net
Email Address []:1060351846@qq.com

# 生成证书申请文件
[root@ubuntu certs]#openssl req -newkey rsa:4096 -nodes -sha256 -keyout www.opengsd.net.key -out www.opengsd.net.csr
Can't load /root/.rnd into RNG
140607801209280:error:2406F079:random number generator:RAND_load_file:Cannot open file:../crypto/rand/randfile.c:88:Filename=/root/.rnd
Generating a RSA private key
...........++++
....................++++
writing new private key to 'www.opengsd.net.key'
-----
You are about to be asked to enter information that will be incorporated
into your certificate request.
What you are about to enter is what is called a Distinguished Name or a DN.
There are quite a few fields but you can leave some blank
For some fields there will be a default value,
If you enter '.', the field will be left blank.
-----
Country Name (2 letter code) [AU]:CN
State or Province Name (full name) [Some-State]:BeiJing
Locality Name (eg, city) []:BeiJing
Organization Name (eg, company) [Internet Widgits Pty Ltd]:opengsd.net
Organizational Unit Name (eg, section) []:opengsd.net
Common Name (e.g. server FQDN or YOUR name) []:www.opengsd.net
Email Address []:1060351846@qq.com

Please enter the following 'extra' attributes
to be sent with your certificate request
A challenge password []:  # 这个是要给私钥加密吗?(为了方便我没设置)
An optional company name []:

# 查看生成的证书申请文件
[root@ubuntu certs]#ll
total 24
drwxr-xr-x  2 root  root  4096 Jan 15 18:42 ./
drwxr-xr-x 12 nginx nginx 4096 Jan 15 18:33 ../
-rw-r--r--  1 root  root  2171 Jan 15 18:36 ca.crt
-rw-------  1 root  root  3272 Jan 15 18:35 ca.key
-rw-r--r--  1 root  root  1765 Jan 15 18:42 www.opengsd.net.csr
-rw-------  1 root  root  3272 Jan 15 18:40 www.opengsd.net.key

# 申请签发证书
[root@ubuntu certs]#openssl x509 -req -days 3650 -in www.opengsd.net.csr -CA ca.crt -CAkey ca.key -CAcreateserial -out www.opengsd.net.crt
Signature ok
subject=C = CN, ST = BeiJing, L = BeiJing, O = opengsd.net, OU = opengsd.net, CN = www.opengsd.net, emailAddress = 1060351846@qq.com
Getting CA Private Key

# 查看证书内容
[root@ubuntu certs]#openssl x509 -in www.opengsd.net.crt -noout -text
Certificate:
    Data:
        Version: 1 (0x0)
        Serial Number:
            78:e8:d1:d9:e5:6f:37:14:23:61:00:d8:cd:82:fa:b3:23:d8:33:1e
        Signature Algorithm: sha256WithRSAEncryption
        Issuer: C = CN, ST = BeiJing, L = BeiJing, O = opengsd.net, OU = opengsd.net, CN = www.opengsd.net, emailAddress = 1060351846@qq.com
        Validity
            Not Before: Jan 15 10:42:57 2020 GMT
            Not After : Jan 12 10:42:57 2030 GMT
        Subject: C = CN, ST = BeiJing, L = BeiJing, O = opengsd.net, OU = opengsd.net, CN = www.opengsd.net, emailAddress = 1060351846@qq.com
        Subject Public Key Info:
            Public Key Algorithm: rsaEncryption
                RSA Public-Key: (4096 bit)
以上的生成和配置证书可以参考上一篇博客。
- 实现https跳转
[root@ubuntu certs]#vim /apps/nginx/conf/conf.d/pc.conf
server {
        listen      443 ssl;
        listen      80;
        ssl_certificate /apps/nginx/certs/www.opengsd.net.crt;
        ssl_certificate_key /apps/nginx/certs/www.opengsd.net.key;
        ssl_session_cache shared:sslcache:20m;
        ssl_session_timeout 10m;
        server_name www.OpengSD.net;
        charset utf-8;
        location / {
                root /data/nginx/html/pc;
                index index.html;
        if ($scheme = http ){    #未加条件判断,会导致死循环
                rewrite / https://www.opengsd.net permanent;
                }
        }
}

[root@ubuntu certs]#/apps/nginx/sbin/nginx -t
nginx: the configuration file /apps/nginx//conf/nginx.conf syntax is ok
nginx: configuration file /apps/nginx//conf/nginx.conf test is successful
[root@ubuntu certs]#systemctl reload nginx.service

# 测试直接访问https
[root@centos7 ~]$curl -L -k -i https://www.opengsd.net/
HTTP/1.1 200 OK
Server: nginx/1.16.1
Date: Wed, 15 Jan 2020 10:53:33 GMT
Content-Type: text/html; charset=utf-8
Content-Length: 15
Last-Modified: Tue, 14 Jan 2020 11:39:27 GMT
Connection: keep-alive
Keep-Alive: timeout=60
ETag: "5e1da86f-f"
Accept-Ranges: bytes

192.168.39.184

# 访问http自动跳转为https
[root@centos7 ~]$curl -L -k -i http://www.opengsd.net/
HTTP/1.1 301 Moved Permanently
Server: nginx/1.16.1
Date: Wed, 15 Jan 2020 10:56:47 GMT
Content-Type: text/html
Content-Length: 169
Connection: keep-alive
Keep-Alive: timeout=60
Location: https://www.opengsd.net

HTTP/1.1 200 OK
Server: nginx/1.16.1
Date: Wed, 15 Jan 2020 10:56:48 GMT
Content-Type: text/html; charset=utf-8
Content-Length: 15
Last-Modified: Tue, 14 Jan 2020 11:39:27 GMT
Connection: keep-alive
Keep-Alive: timeout=60
ETag: "5e1da86f-f"
Accept-Ranges: bytes

192.168.39.184
- 如果是因为规则匹配问题导致的陷入死循环,则报错如下:
![在这里插入图片描述]()

rewrite案例-判断文件是否存在:
要求:当用户访问到公司网站的时输入了一个错误的URL,可以将用户重定向至官网首页。
[root@ubuntu certs]#vim /apps/nginx/conf/conf.d/pc.conf
        location / {
                root /data/nginx/html/pc;
                index index.html;
        if (!-f $request_filename ){
                rewrite (.*) http://www.opengsd.net/index.html;
                }
        }
[root@ubuntu certs]#/apps/nginx/sbin/nginx -t
nginx: the configuration file /apps/nginx//conf/nginx.conf syntax is ok
nginx: configuration file /apps/nginx//conf/nginx.conf test is successful
[root@ubuntu certs]#systemctl reload nginx.service
- 测试
![在这里插入图片描述]()

Nginx防盗链:
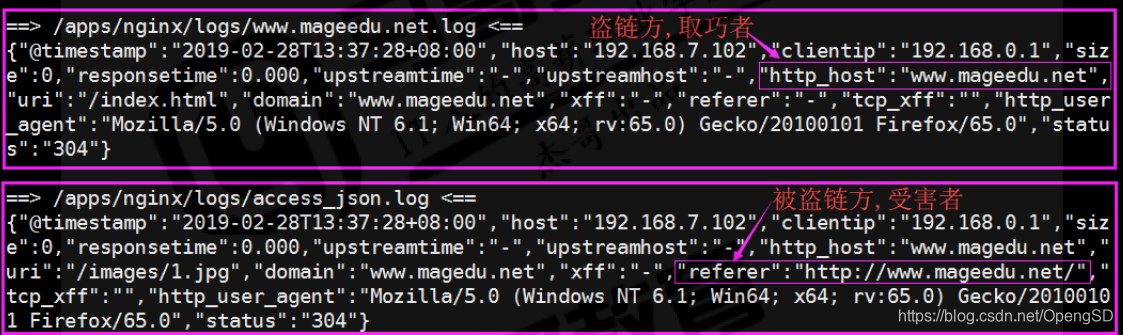
- 防盗链基于客户端携带的referer实现,referer是记录打开一个页面之前记录是从哪个页面跳转过来的标记信息,如果别人只链接了自己网站图片或某个单独的资源,而不是打开了网站的整个页面,这就是盗链,referer就是之前的那个网站域名,正常的referer信息有以下几种:
none:请求报文首部没有referer首部,比如用户直接在浏览器输入域名访问web网站,就没有referer信息。
blocked:请求报文有referer首部,但无有效值,比如为空。
server_names:referer首部中包含本主机名及即nginx 监听的server_name。
arbitrary_string:自定义指定字符串,但可使用*作通配符。
regular expression:被指定的正则表达式模式匹配到的字符串,要使用~开头,例如: ~.*\.opengsd\.com。
- 正常通过搜索引擎搜索web 网站并访问该网站的referer信息如下:
#通过搜索引擎访问web网站的referer信息:
==> /apps/nginx/logs/access_json.log <==
{"@timestamp":"2019-02-
28T13:58:46+08:00","host":"192.168.39.184","clientip":"192.168.39.1","siz
e":0,"responsetime":0.000,"upstreamtime":"-","upstreamhost":"-
","http_host":"www.opengsd.net","uri":"/index.html","domain":"www.opengsd.net","xff":"-
","referer":"https://www.baidu.com/s?ie=utf-
8&f=8&rsv_bp=1&rsv_idx=1&tn=baidu&wd=www.opengsd.net&oq=www.opengsd.net&rsv_pq=d630606800
02eb69&rsv_t=de01TWnmyTdcJqph7SfI1hXgXLJxSSfUPcQ3QkWdJk%2FLNrN95ih3XOhbRs4&rqlang=cn&rsv
_enter=1&inputT=321&rsv_sug3=41&rsv_sug2=0&rsv_sug4=1626","tcp_xff":"","http_user_agent"
:"Mozilla/5.0 (Windows NT 6.1; Win64; x64) AppleWebKit/537.36 (KHTML, like Gecko)
Chrome/72.0.3626.119 Safari/537.36","status":"304"}
实现web盗链:
在一个web 站点盗链另一个站点的资源信息,比如图片、视频等。
[root@s2 conf.d]# pwd
/apps/nginx/conf/conf.d
[root@s2 conf.d]# cat mageedu.net.conf
server {
        listen 80;
        server_name www.mageedu.net;

        location / {
        index index.html;
        root "/data/nginx/html/mageedu";
        access_log /apps/nginx/logs/www.mageedu.net.log access_json;
        }
}
#准备盗链web页面:
[root@s2 conf.d]# mkdir /data/nginx/html/mageedu
[root@s2 conf.d]# cat /data/nginx/html/mageedu/index.html
<!DOCTYPE html>
<html lang="en">
<head>
        <meta charset="UTF-8">
        <title>盗链页面</title>
</head>
<body>
<a href="http://www.magedu.net">测试盗链</a>
<img src="http://www.magedu.net/images/1.jpg">
</body>
</html>

#重启Nginx并访问http://www.mageedu.net/测试
#验证两个域名的日志,是否会在被盗连的web站点的日志中出现以下盗链日志信息:
==> /apps/nginx/logs/access_json.log <==
{"@timestamp":"2019-02-
28T13:27:37+08:00","host":"192.168.7.102","clientip":"192.168.0.1","size":0,"responsetime":0.000,"upstreamtime":"-","upstreamhost":"-","http_host":"www.magedu.net","uri":"/images/1.jpg","domain":"www.magedu.net","xff":"-","referer":"http://www.mageedu.net/","tcp_xff":"","http_user_agent":"Mozilla/5.0(Windows NT 6.1; Win64; x64; rv:65.0) Gecko/20100101 Firefox/65.0","status":"304"}
实现防盗链:
基于访问安全考虑,nginx支持通过ungx_http_referer_module模块 官网文档 检查访问请求的referer信息是否有效实现防盗链功能。
- 定义方式如下:
[root@s2 ~]# vim /apps/nginx/conf/conf.d/pc.conf
location /images {
root /data/nginx/html/pc;
index index.html;
valid_referers none blocked server_names
*.example.com example.* www.example.org/galleries/
~\.google\.;
if ($invalid_referer) {
return 403;
}
# 定义防盗链:
location ^~ /images {
root /data/nginx;
index index.html;
valid_referers none blocked server_names *.magedu.com www.magedu.*
api.online.test/v1/hostlist ~\.google\. ~\.baidu\.; #定义有效的referer
if ($invalid_referer) { #假如是使用其他的无效的referer访问:
return 403; #返回状态码403
}
}
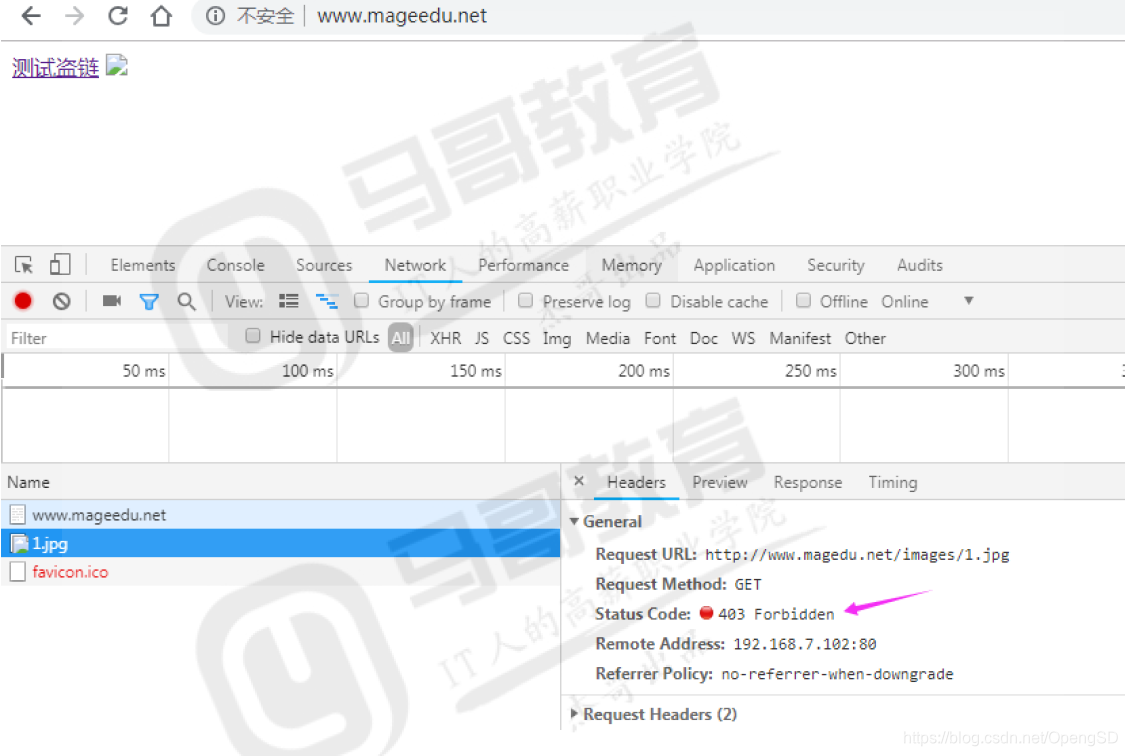
#重启Nginx并访问测试
- 使用浏览器访问盗链网站 www.mageedu.net, 验证是否提前状态码403:
![在这里插入图片描述]()
以上呢都是基于自己的理解,可能会有错误的地方大家参考即可。

 浙公网安备 33010602011771号