


spring boot 外部化配置
全局配置:
Spring Boot 的默 认 配 置 文 件位置为 src/main/resources/application.properties 。关于SpringBoot应用的配置内容都可以集中在该文件中, 根据我们引入的不同Starter模块,可以在这里定义容器端口号、 数据库连接信息、 日志级别等各种配置信息。比如,我们需要自定义Web模块的服务端口号,可以在application.properties中添加 server.port=8888 来 指 定 服 务 端口为 8888 , 也可 以通过spring.app让ca巨on.name= hello 来指定应用名。
Spring Boot的配置文件除了可以使用传统的 properties文件之外,还支持现在被广泛推荐使用的YAML文件。
application.properties :例:server.port=9998
application.yml(YAML) :例:server:
port:8080
properties文件相信大家接触得都很多了,这里介绍一下 yml 文件
yml:以数据为中心。
基本语法:
key:(这里一定要有个空格) value表示一对键值对
以空格的缩进来控制层级关系:只要是左对齐的一列数据,都是同一个层级的 。
值的写法:
字面量:普通的 值(数字,字符串,布尔):
key: value 字面量直接来写,字符串不用加单引号或者双引号
" " :双引号,不会转义字符串里面的特殊字符,写了什么就是什么,比如在双引号中写了\n (转移后为换行),但是这里就只是\n 并不会换行
‘ ‘ :会转义
对象(属性和值)(键值对):
key: value : (注意空格和缩进)
filed: value
例如:
people:
name: zhangs
age: 20
peopleName = people-name
行内写法:people: {name: zhangs,age: 20}
数组(list set):
例如:
animals:
- cat
- dog
- pig
行内写法:animals: [cat,dog,pig]
自定义参数:
配置文件占位符:${random.uuid} ${people.hello:hello}如果系统中没有定义people.hello,默认值为hello
@Component
@ConfigurationProperties(prefix="shelter")
//@PropertySource("classpath:shelter.properties")
public class ShelterConfig {

	//@Value("${shelter.upload.path}")
	private String uploadPath ;

	//@Value("${shelter.pageHelp.pageSize}")
	private Integer pageSize ;

}
如此便可以将配置文件中的配置读到配置类中。@ConfigurationProperties:告诉spring boot将本类中的属性和配置文件中的相关值进行绑定,通过其中有个prefix=“shelter”,表示将具有shelter前缀下面的属性进行 一 一 映射,以上类必须是容器中的组件才能使用此功能 所以还需要加个注解@Component。另一种获取值的方法
@Component
//@ConfigurationProperties(prefix="shelter")
@PropertySource("classpath:shelter.properties")
public class ShelterConfig {

	@Value("${shelter.upload.path}")
	private String uploadPath ;

	@Value("${shelter.pageHelp.pageSize}")
	private Integer pageSize ;

}
@PropertySource:加载指定的配置文件,如果不加这个注解,会去全局配置文件里面去查找。
@ImportResource:导入自己编写的spring的配置文件,让配置文件内容生效,比如可以自己编写一个xml通过此方法进行注入将@ImportResource(locations={"classpath:xxx.xml"})标注在配置类中,比如主程序类。
<!-- 配置文件处理器-->
<dependency>
	<groupId>org.springframework.boot</groupId>
	<artifactId>spring-boot-configuration-processor</artifactId>
	<optional>true</optional>
</dependency>
这个依赖就是在编写配置文件的 时候有提示。不引入此依赖便不会有提示
参数引用:
在 application.properties 中的各个参数之间可以直接通过使用 PlaceHolder 的方式来进行引用 , 就像下面的设置:
book.name = Test
book.author = wuzz
book.desc = ${book.author} is writing《${book.name}》
book.desc 参数引用了上文中定义的book.name和book.author 属性, 最后该属性的值就是wuzz is writing Test。
使用随机数:
在一 些特殊情况下, 我们希望有些参数每次被加载的时候不是 一 个固定的值, 比如密钥、 服务端口等。 在 Spr ingBoot的属性配置文件中, 可以 通过 使用${random}配置来产生随机的int值、long值或者string字符串,这样我们就可以容易地通过 配置随机生成属性,而不是在程序中通过编码来实现这些逻辑。
${random}的配置方式主要有以下几种, 读者可作为参考使用。
#随机字符串
com.didispace.blog.value=${random.value}
#随机int
com.didispace.blog.number=${random.int}
#随机long
com.didispace.blog.bignumber=${random.long}
# 10以内的随机数
com.didispace.blog.test1=${random.int(l0)}
# 10-20的随机数
com.didispace.blog.test2=${random.int[l0,20]}
该 配置方式可以 设置应用 端口等场景, 以避免在本地调试时出现端口冲突的麻烦。
多Profile文件:
配置文件编写的时候:创建配置文件application.properties / application-dev.properties / application-prod.properties,默认使用application.properties该配置。如果要使用生产和开发环境,可以在该文件中设置属性spring.profiles.active = dev 来激活
可以使用yml多文档块的方式去实现以上的需求,每个文档快以 --- 来分割。也可以在使用java -jar xxx.jar的时候增加一行命令 --spring.profiles.active = dev来实现
配置文件的加载顺序:下面4个文件目录是spring会自动识别的加载主配置文件,优先级由高到低,高优先级的在遇到相同的配置的时候会去覆盖低优先级的配置文件信息
- file:/config/
- file:/
- classpath:/config/
- classpath:/
基于 org.springframework.boot.env.EnvironmentPostProcessor 拓展配置:
1.在classpath 新建配置文件 custom.properties:
name=wuzhenzhao
2. 实现接口 :
public class CustomEnvironmentPostProcessor implements EnvironmentPostProcessor {
    private final Properties properties=new Properties();
    private String propertiesFile="custom.properties";

    @Override
    public void postProcessEnvironment(ConfigurableEnvironment environment, SpringApplication application) {
        Resource resource=new ClassPathResource(propertiesFile);
        environment.getPropertySources().addLast(loadProperties(resource));
    }

    private PropertySource<?> loadProperties(Resource resource){
        if(!resource.exists()){
            throw new RuntimeException("file not exist");
        }
        try {
            //custom.properties
            properties.load(resource.getInputStream());
            return new PropertiesPropertySource(resource.getFilename(),properties);
        } catch (IOException e) {
            throw new RuntimeException(e);
        }
    }
}
3. classpath 下新建 META-INF 文件夹,新建文件 spring.factories :
org.springframework.boot.env.EnvironmentPostProcessor=\
  com.wuzz.demo.config.CustomEnvironmentPostProcessor
4. 测试 :
@RestController
public class ConfigController {

    @Autowired
    Environment environment;

    @Value("${name}")
    private String name;


    @GetMapping("/env")
    public String env() {
        return environment.getProperty("name") + " Hello";
    }
}
如果要实现类似于 spring-cloud 里面得 org.springframework.cloud.bootstrap.config.PropertySourceLocator 的外部化配置的效果,也就是 spring-cloud-config 类似的功能的话,如下:
- 创建接口 PropertySourceLocator
- 分别实现两个实现类,一个基于本地配置、一个基于动态配置源 zookeeper。需要拓展就实现该接口
public interface PropertySourceLocator {

    PropertySource<?> locate(Environment environment, ConfigurableApplicationContext applicationContext);

    default Collection<PropertySource<?>> locateCollection(Environment environment, ConfigurableApplicationContext applicationContext){
        return locateCollections(this,environment,applicationContext);
    }

    //收集属性源列表
    static Collection<PropertySource<?>> locateCollections(PropertySourceLocator locator, Environment environment, ConfigurableApplicationContext applicationContext) {
        PropertySource<?> propertySource=locator.locate(environment,applicationContext);
        if(propertySource==null){
            return Collections.emptyList();
        }
        return Arrays.asList(propertySource);
    }
}
// 本地配置源
public class LocalCustomPropertySourceLocator implements PropertySourceLocator{
    private final Properties properties=new Properties();
    private String propertiesFile="custom.properties";

    @Override
    public PropertySource<?> locate(Environment environment, ConfigurableApplicationContext applicationContext) {
        Resource resource=new ClassPathResource(propertiesFile);
        return loadProperties(resource); //给到ApplicationContextInitializer加载
    }

    private PropertySource<?> loadProperties(Resource resource){
        if(!resource.exists()){
            throw new RuntimeException("file not exist");
        }
        try {
            //custom.properties
            properties.load(resource.getInputStream());
            return new PropertiesPropertySource(resource.getFilename(),properties);
        } catch (IOException e) {
            throw new RuntimeException(e);
        }
    }
}
// zookeeper 数据源 其中需要手动创建 /config/data 节点,并且添加 data 节点数据
public class ZookeeperPropertySourceLocator implements PropertySourceLocator{
    private final CuratorFramework curatorFramework;
    private final String DATA_NODE="/data";

    public ZookeeperPropertySourceLocator() {
        curatorFramework= CuratorFrameworkFactory.builder()
                .connectString("192.168.1.101:2181")
                .sessionTimeoutMs(20000)
                .connectionTimeoutMs(20000)
                .retryPolicy(new ExponentialBackoffRetry(1000,3))
                .namespace("config")
                .build();
        curatorFramework.start();
    }

    @Override
    public PropertySource<?> locate(Environment environment, ConfigurableApplicationContext applicationContext) {
        //加载远程Zookeeper的配置保存到一个PropertySource
        System.out.println("开始加载外部化配置");
        CompositePropertySource composite=new CompositePropertySource("configService");
        try {
            Map<String,Object> dataMap=getRemoteEnvironment();
            MapPropertySource mapPropertySource=new MapPropertySource("configService",dataMap);
            composite.addPropertySource(mapPropertySource);
        } catch (Exception e) {
            e.printStackTrace();
        }
        return composite;
    }

    private Map<String,Object> getRemoteEnvironment() throws Exception {
        String data=new String (curatorFramework.getData().forPath(DATA_NODE));
        //支持JSON格式
        ObjectMapper objectMapper=new ObjectMapper();
        Map<String,Object> map=objectMapper.readValue(data,Map.class);
        return map;
    }
}
基于 ApplicationContextInitializer 拓展点进行初始化:
public class ZookeeperApplicationContextInitializer implements ApplicationContextInitializer<ConfigurableApplicationContext> {

    private final List<PropertySourceLocator> propertySourceLocators;

    public ZookeeperApplicationContextInitializer() {
        ClassLoader classLoader= ClassUtils.getDefaultClassLoader();
        //加载所有的PropertySourceLocator的扩展实现(SPI)
        //ZookeeperPropertySourceLocator
        propertySourceLocators=new ArrayList<>(SpringFactoriesLoader
                .loadFactories(PropertySourceLocator.class,classLoader));
        System.out.println("====");
    }

    @Override
    public void initialize(ConfigurableApplicationContext applicationContext) {
        //去动态加载扩展的配置到Environment中
        ConfigurableEnvironment environment=applicationContext.getEnvironment();
        MutablePropertySources mutablePropertySources=environment.getPropertySources();
        for(PropertySourceLocator locator:this.propertySourceLocators){
           Collection<PropertySource<?>> sources=locator.locateCollection(environment,applicationContext);
           if(sources==null||sources.size()==0){
               continue;
           }
           for (PropertySource<?> p:sources){
               mutablePropertySources.addLast(p); //把属性源添加到Environment
           }
        }
    }
}
classpath 下新建 META-INF 文件夹,新建文件 spring.factories :
org.springframework.context.ApplicationContextInitializer=\
  com.wuzz.demo.configcenter.config.ZookeeperApplicationContextInitializer

com.wuzz.demo.configcenter.config.PropertySourceLocator=\
  com.wuzz.demo.configcenter.config.ZookeeperPropertySourceLocator,\
  com.wuzz.demo.configcenter.config.LocalCustomPropertySourceLocator
本地配置文件 custom.properties:
zookeeper=2.6.3
zookeeper 添加如下配置:
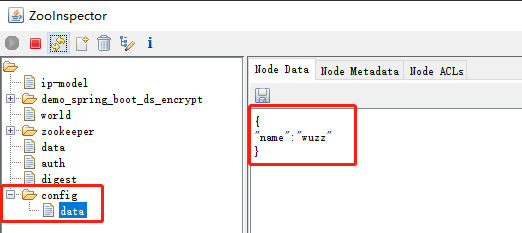
测试:
@RestController
public class ConfigController {

    @Autowired
    Environment environment;

    //把这些属性放到zookeeper
    @Value("${name}")
    private String name;

    @Value("${zookeeper}")
    private String command;

    @GetMapping("/env")
    public String env() {
        return environment.getProperty("name") + "\n" + command;
    }
}
测试访问接口 返回 wuzz 2.6.3。
加载顺序:
我们将SpringBoot应用需要的配置内容都放在了项目工程中, 已经能够通过spring.profiles.active或是通过Maven来实现多环境的支待。 但是, 当团队逐渐壮大, 分工越来越细致之后, 往往不需要让开发人员知道测试或是生产环境的细节, 而是希望由每个环境各自的负责人(QA或是运维)来集中维护这些信息。 那么如果还是以这样的方式存储配置内容, 对于不同环境配置的修改就不得不去获取工程内容来修改这些配置内容, 当应用非常多的时候就变得非常不方便。 同时, 配置内容对 开发人员都可见, 这本身也是 一 种安全隐患。 对此, 出现了很多将 配置内容外部化的框架和工具, 为了能够更合理地重写各属性的值,SpringBoot使用了下面这种较为特别的属性加载顺序:
- Devtools全局设置属性在你的主目录(~/.spring-boot-devtools.properties当devtools处于激活状态时)。
- 测试中的@TestPropertySource注解
- 测试中的@SpringBootTestproperties注解属性
- 命令行参数
- 来自SPRING_APPLICATION_JSON(嵌入在环境变量或系统属性中的内联JSON)的属性
- ServletConfig初始化参数
- ServletContext初始化参数
- java:comp/env中的JNDI属性
- Java系统属性(System.getProperties())
- 操作系统环境变量
- 一个只有random.*属性的RandomValuePropertySource
- 在你的jar包之外的 特殊配置文件的 应用程序属性(application-{profile}.properties和YAML 变体)
- 打包在jar中的 特殊配置文件的 应用程序属性(application-{profile}.properties和YAML 变体)
- 在你的jar包之外的应用程序属性(application.properties和YAML 变体)
- 打包在jar中的应用程序属性(application.properties和YAML 变体)
- @PropertySource注解在你的@Configuration类上
- 默认属性(通过设置SpringApplication.setDefaultProperties指定)
优先级按上面的顺序由高到低,数字越小优先级越高。可以看到,其中第12项和第14项 都是从应用jar包之外读取配置文件,所以,实现外部化配置的原理就是从此切入,为其指定外部配置文件的加载位置来取代jar包之内的配置内容。 通过这样的实现,我们的工程在配置中就变得非常干净,只需在本地放置开发需要的配置即可,而不用关心其他环境的配置,由其对应环境的负责人去维护即可。
监控与管理:
当我们决定用Spring Boot来作为微服务框架时,除了它强大的快速开发功能之外,还因为它在StarterPOMs中提供了 一 个特殊依赖模块spring-boot-starter-actuator 。引入该模块能够自动为 Spring Boot 构建的应用提供一 系列用于监控的端点。在现有的 Spring Boot 应用中引入该模块非常简单, 只需要在 pom.xml 的dependency 节点中,新增 spring-boot-starter-actuator 的依赖即可,具体如下:
<dependency>
    <groupId>org.springframework.boot</groupId>
    <artifactId>spring-boot-starter-actuator</artifactId>
</dependency>
增加该依赖之后,配置management.security.enabled=false 重新启动应用。此时,我们可以在控制台中看到如下图所示的输出:

上图显示了一批端点定义, 这些端点并非我们自己在程序中创建的, 而是由spring-boot-starter-actuator 模块根据应用依赖和配置自动创建出来的监控和管理端点。通过这些端点,我们可以实时获取应用的各项监控指标.
原生端点:
通过在快速入门示例中添加spring-boot-starter-actuator模块, 我们已经对它有了一 个初步的认识。接下来,我们详细介绍 一 下 spring-boot-starter-actuator模块中已经实现的 一 些原生端点。 根据端点的作用, 可以将原生端点分为以下三大类。
- 应用配置类:获取应用程序中加载的应用配置、 环境变量、 自动化配置报告等与Spring Boot应用密切相关的配置类信息。
- 度量指标类:获取应用程序运行过程中用于监控的度量指标, 比如内存信息、 线程池信息、 HTTP请求统计等。
- 操作控制类:提供了对应用的关闭等操作类功能。

 浙公网安备 33010602011771号