spring注解开发1
spring注解开发1

enter description here
需要进行包扫描,扫描每一个包中的bean
<?xml version="1.0" encoding="UTF-8"?>
<beans xmlns="http://www.springframework.org/schema/beans"
       xmlns:xsi="http://www.w3.org/2001/XMLSchema-instance"
       xsi:schemaLocation="
            http://www.springframework.org/schema/beans http://www.springframework.org/schema/beans/spring-beans.xsd">

    <context:component-scan base-package="com.itheima"/>

</beans>
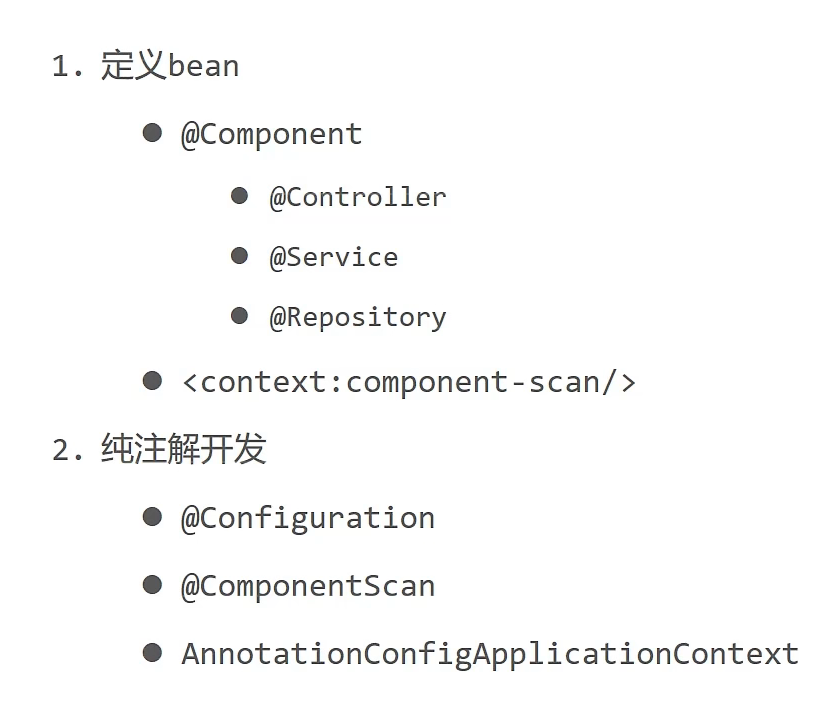
1. 知识点1:@Component等
| 名称 | @Component/@Controller/@Service/@Repository |
|---|---|
| 类型 | 类注解 |
| 位置 | 类定义上方 |
| 作用 | 设置该类为spring管理的bean |
| 属性 | value(默认):定义bean的id |
知识点2:@Configuration
| 名称 | @Configuration |
|---|---|
| 类型 | 类注解 |
| 位置 | 类定义上方 |
| 作用 | 设置该类为spring配置类 |
| 属性 | value(默认):定义bean的id |
知识点3:@ComponentScan
| 名称 | @ComponentScan |
|---|---|
| 类型 | 类注解 |
| 位置 | 类定义上方 |
| 作用 | 设置spring配置类扫描路径,用于加载使用注解格式定义的bean |
| 属性 | value(默认):扫描路径,此路径可以逐层向下扫描 |
小结:
这一节重点掌握的是使用注解完成Spring的bean管理,需要掌握的内容为:
- 记住@Component、@Controller、@Service、@Repository(用于数据层的定义)这四个注解
- applicationContext.xml中
<context:component-san/>的作用是指定扫描包路径,注解为@ComponentScan - @Configuration标识该类为配置类,使用类替换applicationContext.xml文件
- ClassPathXmlApplicationContext是加载XML配置文件
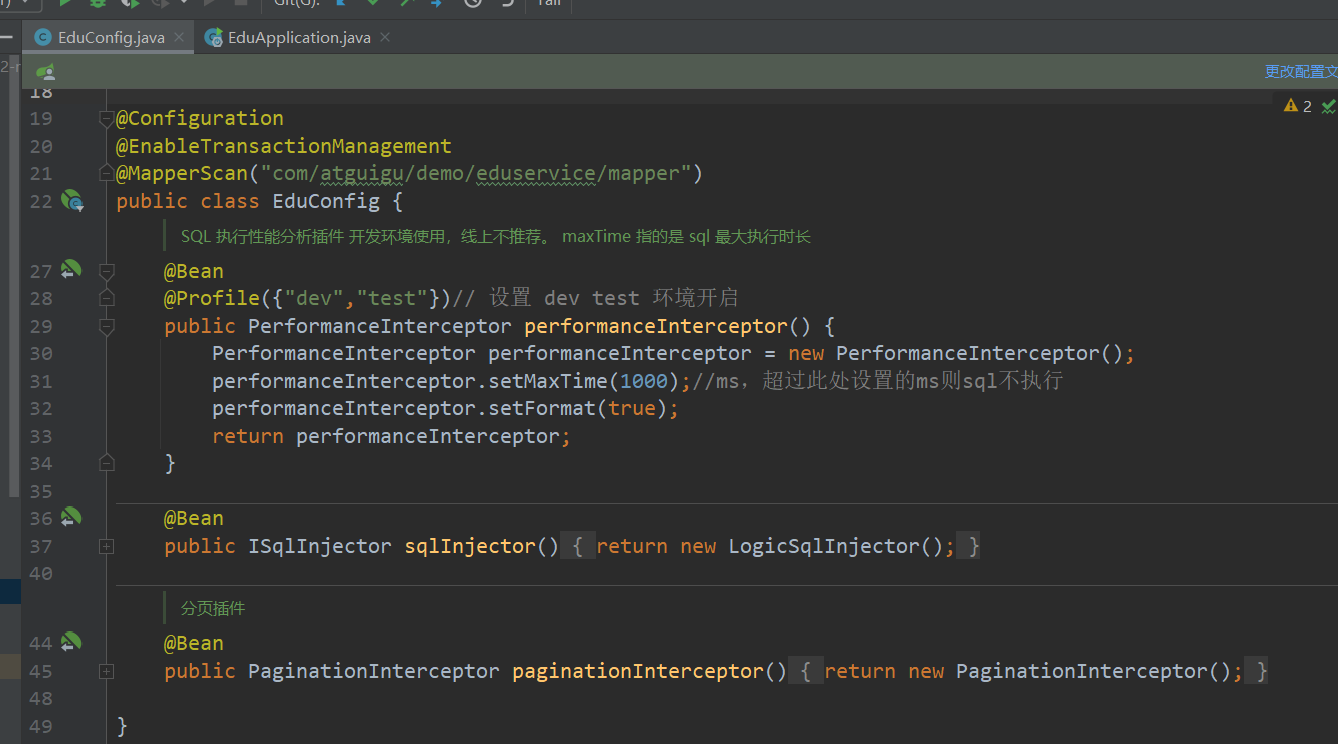
Configuration的使用

enter description here

交给bean管理后,我们也可以这样使用他,不过一般都不会使用


 浙公网安备 33010602011771号