
麒麟系统V10系统安全加固
一、安装clamav杀毒软件
1.在clamav官网下载:https://www.clamav.net/downloads
也可以在github上下载早一点的版本:https://github.com/Cisco-Talos/clamav/releases
我这里安装clamav-1.1.2
rpm -ivh clamav-1.1.2.linux.x86_64.rpm
2.下载病毒库:
https://database.clamav.net/main.cvd
https://database.clamav.net/daily.cvd
https://database.clamav.net/bytecode.cvd
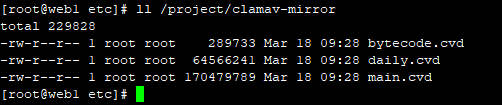
将三个病毒库放在目录中,然后使用nginx代理,
server {
        listen       80;
        server_name  localhost;
        root /project/clamav-mirror;
        index index.html;
        location / {
          autoindex on;
        }
        error_page   500 502 503 504  /50x.html;
        location = /50x.html {
            root   html;
        }
}

#/project/clamav-mirror/下就是三个病毒库文件
把/usr/local/etc/下的clamd.conf.sample和freshclam.conf.sample 复制为clamd.conf和freshclam.conf
修改以下内容:
egrep -v "^#|^$" /usr/local/etc/clamd.conf
DatabaseDirectory /var/lib/clamav                    #病毒库存放目录
TCPSocket 3310
TCPAddr 0.0.0.0
修改以下内容:
[root@web1 etc]# egrep -v "^#|^$" /usr/local/etc/freshclam.conf
DatabaseDirectory /var/lib/clamav
DatabaseOwner root
DatabaseMirror 10.110.55.11         #本地病毒库地址,就是上面配置的nginx地址
ScriptedUpdates yes
PrivateMirror 10.110.55.11           #本地病毒库地址,就是上面配置的nginx地址
 Checks 12
执行:/usr/local/bin/freshclam 加载病毒库
[root@web1 etc]# /usr/local/bin/freshclam
ClamAV update process started at Thu Mar 20 16:16:29 2025
WARNING: DNS Update Info disabled. Falling back to HTTP mode.
Trying to retrieve CVD header from http://10.110.55.11/daily.cld
Time:    0.0s, ETA:    0.0s [========================>]       146B/146B
WARNING: remote_cvdhead: file not found: http://10.110.55.11/daily.cld
Trying to retrieve CVD header from http://10.110.55.11/daily.cvd
Time:    0.0s, ETA:    0.0s [========================>]       512B/512B
OK
daily.cvd database is up-to-date (version: 27580, sigs: 2073246, f-level: 90, builder: raynman)
Trying to retrieve CVD header from http://10.110.55.11/main.cld
Time:    0.0s, ETA:    0.0s [========================>]       146B/146B
WARNING: remote_cvdhead: file not found: http://10.110.55.11/main.cld
Trying to retrieve CVD header from http://10.110.55.11/main.cvd
Time:    0.0s, ETA:    0.0s [========================>]       512B/512B
OK
main.cvd database is up-to-date (version: 62, sigs: 6647427, f-level: 90, builder: sigmgr)
Trying to retrieve CVD header from http://10.110.55.11/bytecode.cld
Time:    0.0s, ETA:    0.0s [========================>]       146B/146B
WARNING: remote_cvdhead: file not found: http://10.110.55.11/bytecode.cld
Trying to retrieve CVD header from http://10.110.55.11/bytecode.cvd
Time:    0.0s, ETA:    0.0s [========================>]       512B/512B
OK
bytecode.cvd database is up-to-date (version: 335, sigs: 86, f-level: 90, builder: raynman)
启动病毒库:clamd --config-file=/usr/local/etc/clamd.conf #服务端口为3310
扫描/project/nginx/conf/Virtaul/目录:
[root@web1 etc]# /usr/local/bin/clamscan -r -i /project/nginx/conf/Virtaul/

----------- SCAN SUMMARY -----------
Known viruses: 8705025
Engine version: 1.1.2
Scanned directories: 1
Scanned files: 3
Infected files: 0
Data scanned: 0.01 MB
Data read: 0.00 MB (ratio 2.00:1)
Time: 55.487 sec (0 m 55 s)
Start Date: 2025:03:20 16:17:06
End Date:   2025:03:20 16:18:02
二、配置rsyslog服务
1.在日志服务器开启监听514端口,且配置不同客户端主机日志存放路径
添加:
$ModLoad imudp
$UDPServerRun 514
$ModLoad imtcp
$InputTCPServerRun 514
if ($fromhost-ip == '10.110.55.106') then /project/client_logs/10.110.55.106.log              #指定10.110.55.106这台主机发过来额日志,存放路径,需要先创建日志所在的目录
/project/client_logs/
。 & stop if ($fromhost-ip == '10.110.55.105') then /project/client_logs/10.110.55.105.log #同上 & stop if ($fromhost-ip == '10.110.55.104') then /project/client_logs/10.110.55.104.log & stop
2.在客户端服务器上的/etc/rsyslog.conf中添加:
*.* @10.110.55.38:514
*.* @@10.110.55.38:514
3.然后重启systemctl restart rsyslog
三、修改用户登录策略。
1./etc/security/limits.conf
添加:最大登录两个用户
cat >>/etc/security/limits.conf <<EOF
* hard maxlogins 4
* hard maxsyslogins 2
root hard maxsyslogins 2
root hard maxlogins 2
EOF
2./etc/profile
添加: 不操作超时退出,以及umask改为077
cat >> /etc/profile << EOF
TMOUT=900
export TMOUT
umask 077
EOF
3./etc/pam.d/sshd.pam
添加:
cat >> /etc/pam.d/sshd.pam << EOF
auth required pam_limits.so
EOF
4./etc/ssh/sshd_config
sed -i "/^#UsePAM yes/s/#UsePAM yes/UsePAM yes/g" /etc/ssh/sshd_config
5./etc/pam.d/login
cat >> /etc/pam.d/login << EOF
account required pam_limits.so
EOF
6./etc/login.defs #密码过期时间为90天,最小密码长度为16位
修改为:
sed -i "/^PASS_MAX_DAYS/s/99999/90/g" /etc/login.defs
sed -i "/^PASS_MIN_DAYS/s/0/1/g" /etc/login.defs
sed -i "/^PASS_MIN_LEN/s/5/16/g" /etc/login.defs
7./etc/pam.d/sshd #如果系统/etc/pam.d/sshd中有以下配置,则不添加,如果没有,添加下面配置。
cat >> /etc/pam.d/sshd << EOF
#%PAM-1.0
auth substack password-auth
auth include postlogin
account required pam_sepermit.so
account required pam_nologin.so
account include password-auth
password include password-auth
# pam_selinux.so close should be the first session rule
session required pam_selinux.so close
session required pam_loginuid.so
# pam_selinux.so open should only be followed by sessions to be executed in the user context
session required pam_selinux.so open env_params
session required pam_namespace.so
session optional pam_keyinit.so force revoke
session optional pam_motd.so
session include password-auth
session include postlogin
EOF
10./etc/security/pwquality.conf #密码复杂度,必须包含大小写,数字,特殊字符,且最小长度为16位
修改密码策略:
sed -i "/^minlen =/s/minlen = 8/minlen = 16/g" /etc/security/pwquality.conf
sed -i "/^dcredit =/s/dcredit = 0/dcredit = -1/g" /etc/security/pwquality.conf
sed -i "/^ucredit =/s/ucredit = 0/ucredit = -1/g" /etc/security/pwquality.conf
sed -i "/^lcredit =/s/lcredit = 0/lcredit = -1/g" /etc/security/pwquality.conf
sed -i "/^ocredit =/s/ocredit = 0/ocredit = -1/g" /etc/security/pwquality.conf
修改:
sed -i "/^password requisite/s/password requisite pam_pwquality.so try_first_pass local_users_only/password requisite pam_pwquality.so try_first_pass local_users_only retry=3/g" /etc/pam.d/system-auth
sed -i "/^password requisite/s/password requisite pam_pwquality.so try_first_pass local_users_only/password requisite pam_pwquality.so try_first_pass local_users_only retry=3/g" /etc/pam.d/password-auth
11./etc/ssh/sshd_config
设置最大连接用户数为2个,且最大错误认证次数为3:
cat >>/etc/ssh/sshd_config << EOF
MaxSessions 2
MaxStartups 2:30:2
MaxAuthTries 3
UsePAM yes
EOF
四、三员分类
1.创建三权账号
#新建管理员
useradd sysadmin
echo Clouddeep@admin8890 |passwd --stdin sysadmin
#新建操作员
useradd sysoperator
echo Clouddeep@operator8890 |passwd --stdin sysoperator
#新建审计员
useradd sysaudit
echo Clouddeep@audit8890 |passwd --stdin sysaudit
2.修改visudo配置
visudo
#管理员
Cmnd_Alias SOFTWARE = /bin/rpm, /usr/bin/up2date, /usr/bin/yum
Cmnd_Alias SERVICES = /sbin/service, /sbin/chkconfig, /usr/bin/systemctl start, /usr/bin/systemctl stop, /usr/bin/systemctl reload, /usr/bin/systemctl restart, /usr/bin/systemctl status, /usr/bin/systemctl enable, /usr/bin/systemctl disable
Cmnd_Alias STORAGE = /sbin/fdisk, /sbin/sfdisk, /sbin/parted, /sbin/partprobe, /bin/mount, /bin/umount
sysadmin ALL=(root) SOFTWARE,SERVICES,STORAGE
#操作员
Cmnd_Alias DELEGATING = /usr/sbin/visudo, /bin/chown, /bin/chmod, /bin/chgrp
Cmnd_Alias PROCESSES = /bin/nice, /bin/kill, /usr/bin/kill, /usr/bin/killall
Cmnd_Alias NETWORKING = /sbin/route, /sbin/ifconfig, /bin/ping, /sbin/dhclient, /usr/bin/net, /sbin/iptables, /usr/bin/rfcomm, /usr/bin/wvdial, /sbin/iwconfig, /sbin/mii-tool
sysoperator ALL=(root) DELEGATING,PROCESSES,NETWORKING
#审计员 #可以根据具体情况添加审计员可以查看的目录
sysaudit ALL=(root) NOPASSWD:/usr/bin/cat,/usr/bin/less,/usr/bin/more,/usr/bin/tail ,/usr/bin/head,/usr/bin/ls /project/logs/*
3.测试配置是否正确
visudo -c
五、升级当前OpenSSH_9.7p1版本为OpenSSH_9.9p1
升级前一定要安装telnet服务,不然出现问题无法登录恢复:
安装telnet服务略......
下载最新的openssh版本:
下载地址:https://ftp.openbsd.org/pub/OpenBSD/OpenSSH/portable/openssh-9.9p1.tar.gz
解压:
执行:tar xf openssh-9.9p1.tar.gz
执行:cd openssh-9.9p1
执行:./configure --prefix=/usr/local/openssh --with-zlib --with-pam #编译时必须添加--with-pam,表示开启支持PAM认证,不然升级后的sshd不支持PAM密码策略。
注意:如果报这个错:
checking for openssl... /usr/bin/openssl
checking for openssl/opensslv.h... no
configure: error: *** OpenSSL headers missing - please install first or check config.log ***
需要安装:
执行:yum install -y openssl-devel (通过搭建本地yum源安装,搭建步骤看最后面)
注意:如果报这个错:
checking if getpgrp accepts zero args... yes
checking for openssl... /usr/bin/openssl
configure: error: *** working libcrypto not found, check config.log
需要执行:
执行:ln -s /usr/lib64/libcrypto.so.1.1.1f /usr/lib64/libcrypto.so
然后执行:
执行:make && make install
执行:mv /usr/sbin/sshd /usr/sbin/sshd.bak
执行:mv /usr/bin/ssh /usr/bin/ssh.bak
执行:mv /usr/bin/ssh-keygen /usr/bin/ssh-keygen.bak
执行:cp -rf /usr/local/openssh/sbin/sshd /usr/sbin/sshd
执行:cp -rf /usr/local/openssh/bin/ssh /usr/bin/ssh
执行:cp -rf /usr/local/openssh/bin/ssh-keygen /usr/bin/ssh-keygen
然后重启sshd,验证服务是否正常:
注意:升级后的sshd会默认加载使用/usr/local/openssh/etc/sshd_config配置文件,如果要指定配置文件为/etc/ssh/sshd_config,需要再编译时使用--sysconfdir=/etc/ssh,指定配置文件的默认位置为/etc/ssh,那么会把之前的配置文件覆盖。
执行:systemctl restart sshd
制作本地镜像源:
1.在/mnt下新建目录ios为本地挂载做准备(可根据自身规划调整存放位置),以下为命令:mkdir /mnt/ios/
2.修改配置文件
1)进入存放yum源配置文件夹:cd /etc/yum.repos.d/
2)将原配置文件备份(此步骤也可将原配置文件删除或将原配置文件enabled参数改为0):mv kylin_x86_64.repo kylin_x86_64.repo.bak
3)重写配置文件:vim local.repo(vim使用不了使用vi),写下以下内容(注意baseurl参数需与上面新建目录一致):
[local]
name = local
baseurl = file:///mnt/ios
gpgcheck = 0
enabled = 1
4)
挂载yum源镜像(注意此处镜像上传存放位置与新建目录位置要与上面一直):mount /home/Kylin-Server-10-SP2-x86-Release-Build09-20210524.iso /mnt/ios
5)清理yum缓存 yum clean all
然后就可以使用yum -y install xxxx 安装镜像源中的软件包了

 浙公网安备 33010602011771号