


物联网架构成长之路(33)-EMQ数据存储到influxDB
一、前言
时隔一年半,技术变化特别快,学习也要跟上才行。以前写过EMQ数据转存问题,当时用了比较笨的方法,通过写插件的方式,把MQTT里面的数据发送到数据库进行存储。当时也是为了学习erlang和emq。现在随着对物联网的深入,也结合实际需求,不停的学习。
下面将介绍我实验测试可行的物联网数据分析解决方案。采用的还是开源方案。通过订阅MQTT的根Topic,把所有物联网数据转存到InfluxDB时序数据库,然后通过Grafana进行图表显示。这应该是目前比较流行的方案。
二、安装InfluxDB
InfluxDB是时序数据库,特别适合做数据监控和物联网数据存储。【也可以说适合我现在参与架构的物联网平台的技术选型】
针对InfluxDB也没有什么可以多说的,详细可以查阅官方文档,或者网上的博客文章。我写的都是平时实践过程的操作记录,写博客,主要是为了以后忘记的时候,回看查阅用的。另一方面是加强跟同行读者交流的渠道。有一点要注意,一开始为了新,我用InfluxDB 2.0 版本,发现不行,那个太新的,很多对应的开发库没有完善好。所以还是采用InfluxDB 1.x版本。这样在spring boot 里面也有自带的starter库可以使用,操作起来特别方便。
InfluxDB官方文档: https://docs.influxdata.com/influxdb/v1.7/ 安装:
1 wget -qO- https://repos.influxdata.com/influxdb.key | sudo apt-key add -
2 echo "deb https://repos.influxdata.com/debian stretch stable" | sudo tee /etc/apt/sources.list.d/influxdb.list
3 apt-get update
4 apt-get install influxdb
三、InfluxDB基础命令使用
修改配置文件 /etc/influxdb/influxdb.conf
1 [http]
2     enabled = true
3     bind-address = ":8086"
4     auth-enabled = false
5     log-enabled = true
6     write-tracing = false
7     pprof-enabled = true
这里先设置不授权,等一下创建用户后,再修改为 auth-enabled=true,这个一般也是属于内部应用,不用ssl加密了。即使要也是通过Nginx进行反向代理。
用户管理
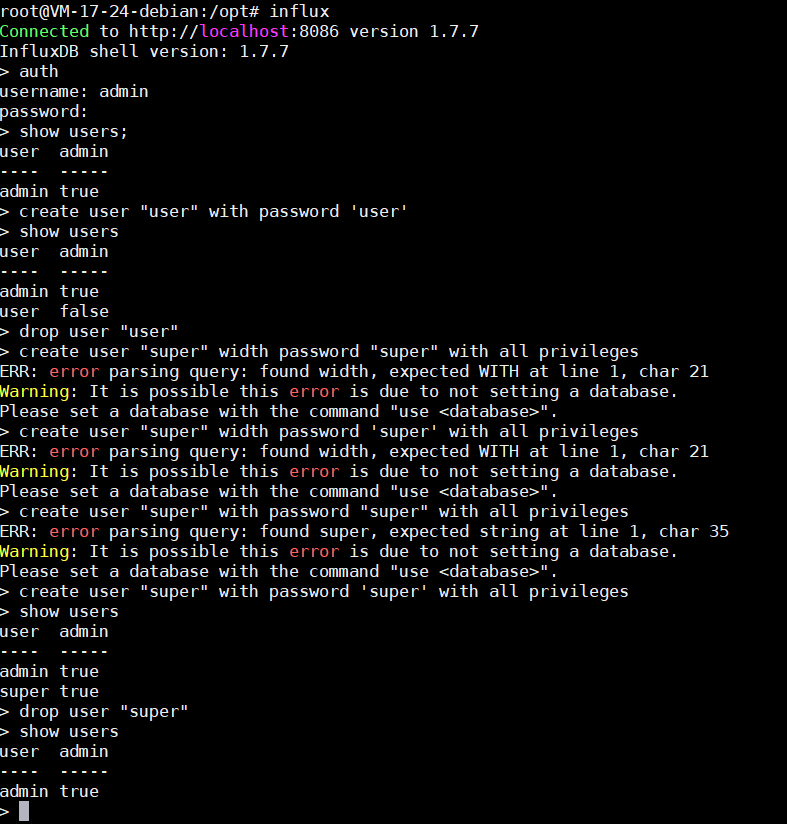
1 --显示所有用户:
2 show users
3 --新增用户:
4 --普通用户 (注意:用户名用双引号,密码用单引号)
5 create user "user" with password 'user'
6 --管理员用户
7 create user "admin" with password 'admin' with all privileges
8 --删除用户
9 drop user "user"
创建好后,注意修改influxdb.conf 中的 auth-enable=true, 然后重启服务 service influxdb restart
1 --创建数据库
2 create database wunaozai
3 --创建好后,就可以不用管了。一些简单的操作,可以参考其他博客资料。
4 --删除数据库
5 drop database wunaozai
6 --切换使用数据库
7 use wunaozai
1 --显示所有表
2 show measurements
3 --新建表(往表里面插入数据,就是新建表了)
4 --插入数据的语法有点特殊,采用的是InfluxDB特有的语法:
5 <measurement>[,<tag_key>=<tag_value>[,<tag_key>=<tag_value>]] <field_key>=<field_value>[,<field_key>=<field_value>] [<timestamp>]
6 insert wnztable,tag=mqtt value=33
7 --删除表
8 drop measurements wunaozai
其他的高级语法,不如查询还有策略就不展开,暂时不是重点,等以后深入研究后,在写博客介绍。
四、EMQ转存InfluxDB
EMQ如何把消息转存到InfluxDB呢,就是本章节的重点,利用上一篇博客中提到的,SpringBoot客户端监听EMQ的根Topic,然后把需要进行转存的Topic及其对应的Payload,构造成InfluxDB表数据,然后插入到InfluxDB中。
下面介绍一下用到的InfluxDB工具类
先在pom.xml中引入InfluxDB相关jar包
1 <!-- https://mvnrepository.com/artifact/org.influxdb/influxdb-java -->
2 <dependency>
3 <groupId>org.influxdb</groupId>
4 <artifactId>influxdb-java</artifactId>
5 <version>2.15</version>
6 </dependency>
相关工具类代码
 1 import org.influxdb.InfluxDB;
 2 import org.influxdb.InfluxDBFactory;
 3 import org.influxdb.dto.Point;
 4
 5 /**
 6  * 数据缓存至InfluxDB
 7  * @author wunaozai
 8  *
 9  */
10 public class InfluxDBService {
11
12     private static String INFLUXDB_URL = "http://127.0.0.1:8086";
13     private static String INFLUXDB_USERNAME = "admin";
14     private static String INFLUXDB_PASSWORD = "admin";
15     private static String INFLUXDB_DATABASE = "wunaozai"; //注意这里对应数据库,一般要先在命令行中创建数据库
16     private static InfluxDB influxDB = null;
17
18     private InfluxDBService(){
19
20     }
21
22     public static InfluxDB getInstance(){
23         if(influxDB == null){
24             influxDB = InfluxDBFactory.connect(INFLUXDB_URL, INFLUXDB_USERNAME, INFLUXDB_PASSWORD);
25             influxDB.setDatabase(INFLUXDB_DATABASE);
26             influxDB.setLogLevel(InfluxDB.LogLevel.BASIC);
27         }
28         return influxDB;
29     }
30     public static int writePoint(Point point){
31         getInstance().write(point);
32         return 0;
33     }
34 }
在上一篇博客中的MqttPushCallback.java中的
public void messageArrived(String topic, MqttMessage message);
这个函数来转存。
 1     @Override
 2     public void messageArrived(String topic, MqttMessage message) throws Exception {
 3         try{
 4             System.out.println(topic);
 5             String json = new String(message.getPayload());
 6             MQTTProtocolVoModel protocol = BaseModel.parseJSON(json, MQTTProtocolVoModel.class);
 7
 8             String cmd = protocol.getCmd();
 9             String customer_id = protocol.getProfile().getCustomer_id(); //厂商ID
10             String product_id = protocol.getProfile().getProduct_id(); //产品ID
11             String device_sn = protocol.getProfile().getDevice_sn(); //设备ID
12             Map<String, String> para = protocol.getDatapoint().getPara();
13             Map<String, Object> fields = new HashMap<>(); //这里是客户端传过来的数据点,就是需要被显示和监控的数据
14             for (Map.Entry<String, String> entry : para.entrySet()) {
15                 fields.put(entry.getKey(), entry.getValue());
16             }
17             Map<String, String> tag = new HashMap<>();
18             tag.put("customer_id", customer_id);
19             tag.put("product_id", product_id);
20             tag.put("device_sn", device_sn);
21             //这里可以添加很多Tag,为了简单演示,这里隐藏部分Tag
22             //构造数据点
23             Point point = Point.measurement("datapoint")
24                     .tag(tag).fields(fields).build();
25             InfluxDBService.writePoint(point);
26         }catch (Exception e) {
27             e.printStackTrace();
28         }
29     }
这里可以通过EMQ Dashboard自带的Websocket进行发送,也可以通过前面小节用到的PC工具,网上Web端MQTT客户也很多,可以通过任意MQTT工具进行测试。
下面这个是查询InfluxDB得到的表数据。

参考资料:
https://www.cnblogs.com/jason1990/p/11076310.html
https://blog.csdn.net/caodanwang/article/details/51967393
https://docs.influxdata.com/influxdb/v1.7/
https://www.cnblogs.com/shhnwangjian/p/6897216.html
本文地址: https://www.cnblogs.com/wunaozai/p/11160730.html
|
作者:无脑仔的小明 出处:http://www.cnblogs.com/wunaozai/ 本文版权归作者和博客园共有,欢迎转载,但未经作者同意必须保留此段声明,且在文章页面明显位置给出原文连接,否则保留追究法律责任的权利。 如果文中有什么错误,欢迎指出。以免更多的人被误导。有需要沟通的,可以站内私信,文章留言,或者关注“无脑仔的小明”公众号私信我。一定尽力回答。 |

 浙公网安备 33010602011771号