


加速 PyTorch 模型介绍
加速 PyTorch 模型介绍
PyTorch 2.0 引入了一个名为*torch.compile()*的工具,可以极大地加速 PyTorch 代码和模型。通过将 PyTorch 代码转换为高度优化的内核,torch.compile 在现有代码库上进行最小化修改即可提供显著的性能提升。此功能允许精确优化单个函数、整个模块以及复杂的训练循环,提供了一个多功能且强大的工具来提高计算效率。
将演示如何在 AMD GPU 上使用 ROCm 和 torch.compile 加速各种实际模型。
torch.compile 的工作原理
torch.compile 的执行涉及几个关键步骤:
1)图获取:模型被分解并重写为子图。可以编译或优化的子图被扁平化。不能编译的子图会回退到eager mode(即时模式)。
2)图降低:所有的 PyTorch 操作都会被分解成其选定的特定后端的内核。
3)图编译:所有后端内核调用其对应的低级设备操作。torch.compile 的四项关键技术是:TorchDynamo、AOTAutograd、PrimTorch 和 TorchInductor。这些组件各自承担着使 torch.compile 功能得以实现的重要角色。
①- TorchDynamo:可靠且快速地获取图。它通过符号解释 Python 字节码,将其转化为张量操作图。如果遇到无法解释的代码段,它会默认为常规的 Python 解释器。该方法确保可以处理多种程序,同时大幅提升性能。
②- AOT Autograd:重新使用 Autograd 进行提前(AoT)计算图。AOT Autograd 是 PyTorch 2.0 的自动微分引擎。其功能是提前生成反向传递的跟踪,提升微分过程的效率。AOT Autograd 使用 PyTorch 的 torch_dispatch 机制来遍历现有的 PyTorch autograd 引擎,提前捕获反向传递。这使得前向传递和反向传递都能加速。
③- PrimTorch:提供稳定的基础操作符。它将复杂的 PyTorch 操作分解为更简单的操作。
④- TorchInductor:为加速器和后端生成高速代码。TorchInductor 是一个深度学习编译器,将中间表示转化为可执行代码。它获取 TorchDynamo 生成的计算图并将其转化为优化的低级内核。对于 NVIDIA 和 AMD GPU,它使用OpenAI Triton 作为基础组件。
torch.compile 函数具有多种编译模式,例如 default、reduce-overhead和最大自动调谐,它们在编译时间和推理开销上有所不同。通常,最大自动调谐模式相对于 reduce-overhead 模式编译时间更长,但推理速度更快。default模式编译最快,但相对于 reduce-overhead 模式推理效率较低。torch.compile函数在第一次执行期间将模型编译为优化内核。因此,初次运行可能会因为编译时间而稍长,但随后的执行由于减少了 Python 开销和 GPU 读写操作展示了加速效果。最终的加速效果可能因模型架构和批处理大小而异。可以在PyTorch 2.0中了解更多关于 PyTorch 编译过程的内容。
通过评估以下模型在Eager-mode和不同torch.compile模式下的性能,展示了使用 torch.compile 可以在 AMD GPU 上加速实际模型:
①- 使用卷积神经网络(ResNet-152)模型进行图像分类
②- 使用视觉Transformer模型进行图像分类
③- 使用 Llama 2 7B 模型进行文本生成
使用的完整代码可以在 [ROCm blogs repository](rocm-blogs/blogs/artificial-intelligence/torch_compile at release · ROCm/rocm-blogs · GitHub) 中找到。
1. 前提条件
在以下环境中测试。硬件和操作系统:
- [AMD Instinct GPU](AMD Instinct™加速器)
- Ubuntu 22.04.3 LTS- 软件:
- [ROCm 6.0+](快速开始安装指南 — ROCm安装 (Linux))
- [ROCm 2.0+ 版的 PyTorch]( 为ROCm安装PyTorch — ROCm安装 (Linux))- 库:
- transformers, sentencepiece, numpy, tabulate, scipy, matplotlib使用 Linux 设备上安装了 MI210 加速器的 [rocm/pytorch-nightly](https://hub.docker.com/r/rocm/pytorch-nightly/tags) Docker 镜像。建议使用 PyTorch 的 nightly 版本以实现更优化的加速效果。
2. 安装依赖项
!pip install -q transformers==4.31 sentencepiece numpy tabulate scipy matplotlib sentencepiece huggingface_hub
检查 AMD GPU 和 PyTorch 版本(>2.0)。
import torch
print(f" GPUs数量: {torch.cuda.device_count()}")
print([torch.cuda.get_device_name(i) for i in range(torch.cuda.device_count())])
torch_ver = [int(x) for x in torch.__version__.split(".")[:2]]
断言torch_ver >= [2, 0], "要求PyTorch >= 2.0"
print("PyTorch版本:", torch.__version__)
输出:
GPUs数量: 1
['AMD Instinct MI210']
PyTorch版本: 2.4.0a0+git1f8177d
接下来,将定义一个辅助函数来测量给定函数的执行时间。
import time
def timed(fn, n_test: int, dtype: torch.dtype) -> tuple:
"""
测量给定函数的执行时间。
Args:
- fn (function): 要计时的函数。
- n_test (int): 执行函数以获取平均时间的次数。
- dtype (torch.dtype): PyTorch张量的数据类型。
Returns:
- tuple: 一个包含平均执行时间(以毫秒为单位)和函数输出的元组。
"""
with torch.no_grad(), torch.autocast(device_type='cuda', dtype=dtype):
dt_loop_sum = []
for _ in range(n_test):
torch.cuda.synchronize()
start = time.time()
output = fn()
torch.cuda.synchronize()
end = time.time()
dt_loop_sum.append(end-start)
dt_test = sum(dt_loop_sum) / len(dt_loop_sum)
return dt_test * 1000, output
通过 TorchDynamo 使用 torch.compile 需要一个将捕获的图转换为快速机器代码的后端。不同的后端可以带来不同的优化增益。可以通过运行 torch.compiler.list_backends() 查看 TorchDynamo 支持的后端列表。
3. torch.compiler.list_backends()
1)输出:
['cudagraphs', 'inductor', 'onnxrt', 'openxla', 'openxla_eval', 'tvm']
选择 inductor 作为后端,这是默认设置。这个后端将允许从原生 PyTorch 应用程序的操作中动态生成 Triton 内核。
2)使用 torch.compile 加速 ResNet-152
ResNet 是一种卷积神经网络,使用 ResNet-152 作为图像分类模型的骨干网络。在不同模式下测试并比较推理时间,包括 Eager 模式、default、reduce-overhead 和 最大自动调谐 模式。
4. 验证模型和环境设置
首先,下载并显示用作分类模型输入的测试图像,如图5-1所示。
# 从pytorch网站下载示例图像
import urllib
import matplotlib.pyplot as plt
url, filename = ("https://github.com/pytorch/hub/raw/master/images/dog.jpg", "dog.jpg")
try: urllib.URLopener().retrieve(url, filename)
except: urllib.request.urlretrieve(url, filename)
from PIL import Image
input_image = Image.open(filename)
plt.imshow(input_image)
plt.axis('off')
plt.show()
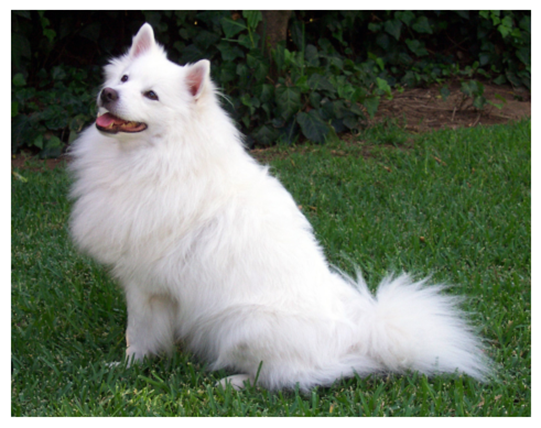
图5-1 下载并显示用作分类模型输入的测试图像
导入图像预处理器和模型来处理上述图像。
import torch
import torchvision.transforms as transforms
# 创建图像预处理器
preprocess = transforms.Compose([
transforms.Resize(256),
transforms.CenterCrop(224),
transforms.ToTensor(),
transforms.Normalize(mean=[0.485, 0.456, 0.406], std=[0.229, 0.224, 0.225]),
])
input_tensor = preprocess(input_image)
input_batch = input_tensor.unsqueeze(0) # 按照模型的预期创建小批量
# 加载resnet152模型
model = torch.hub.load('pytorch/vision:v0.17.2', 'resnet152', pretrained=True)
model.eval()
# 如果可用,将输入和模型移动到GPU以获得速度
if torch.cuda.is_available():
input_batch = input_batch.to('cuda')
model.to('cuda')
with torch.no_grad():
output = model(input_batch)
# 形状为1000的张量,其置信度得分超过ImageNet的1000个类
print(output.shape)
输出:
torch.Size([1, 1000])
打印基于概率的 topk 标签的辅助函数。
def print_topk_labels(output, k):
# 输出有非标准化的分数。要获得概率,可以在其上运行softmax。
probabilities = torch.nn.functional.softmax(output[0], dim=0)
# 阅读分类
with open("imagenet_classes.txt", "r") as f:
categories = [s.strip() for s in f.readlines()]
# 显示每张图片的顶级类别
topk_prob, topk_catid = torch.topk(probabilities, k)
for i in range(topk_prob.size(0)):
print(categories[topk_catid[i]], topk_prob[i].item())
# 下载ImageNet标签
显示前 5 个标签及其概率。
print_topk_labels(output, 5)
输出:
Samoyed 0.7907489538192749
Pomeranian 0.08977615833282471
white wolf 0.03610273823142052
keeshond 0.02681431733071804
Arctic fox 0.022788070142269135
可以发现,模型效果很好。表明环境是正确的,已经准备好使用 torch.compile 测试基于 ResNet-152 的模型。
人工智能芯片与自动驾驶


 浙公网安备 33010602011771号