
在DirectX11使用imGui
在DirectX11使用imGui
生成imGui静态库
在GitHub上克隆imGui项目后,在文件夹中单独挑出imGui的核心代码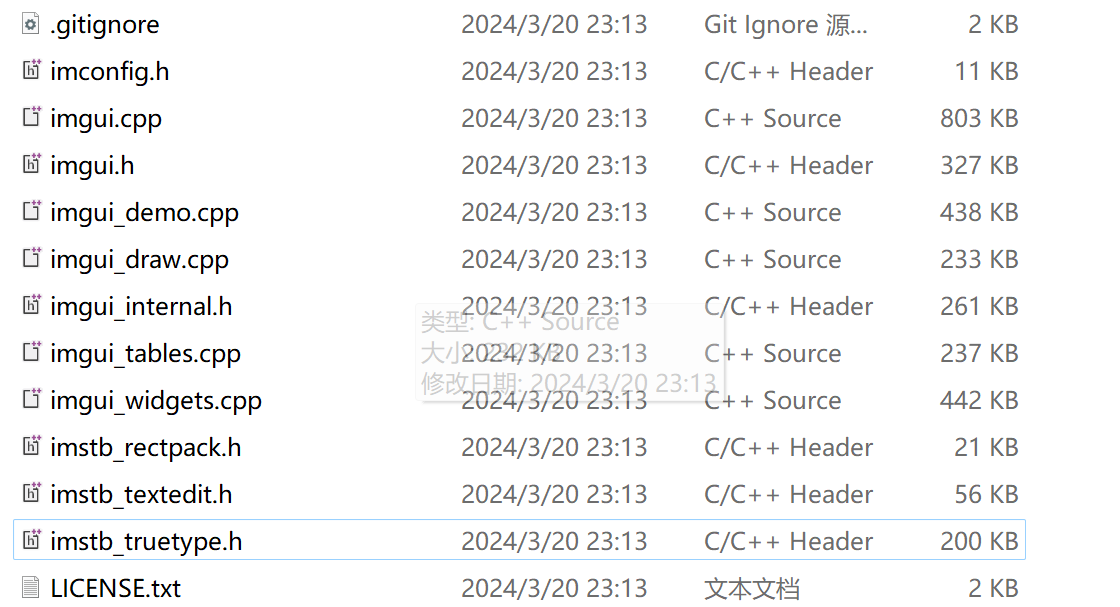
随后根据自己所使用的图形API和平台在backends文件夹中挑出需要的文件,这里选择这四个。
在自己需要使用imGui的项目内再创建一个项目,放入以上文件,再打开项目属性,再常规中更改输出目录和配置类型,输出目录更改为$(ProjectDir)$(Platform)\$(Configuration)\,配置类型更改为静态库(.lib),随后右键项目点击生成来生成静态库。
生成的静态库别位于:
- ImGui/x64/Debug/ImGui.lib
- ImGui/x64/Release/ImGui.lib
打开自己的项目后打开项目属性,在C/C++的附加包含目录中输入imGui项目的地址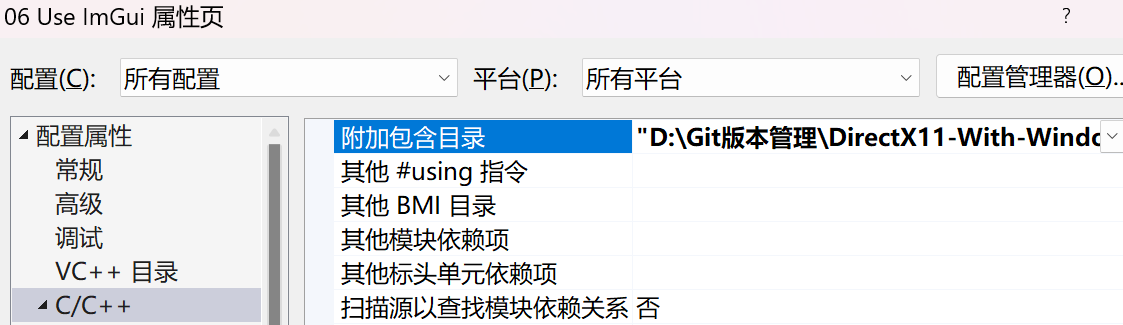
在链接器中输入中的``附加依赖项`输入生成静态库的地址
初始化imGui
添加需要的头文件:
#include "imgui.h"
#include "imgui_impl_win32.h"
#include "imgui_impl_dx11.h"
设置imGui上下文:
bool D3DApp::InitImGui()
{
    IMGUI_CHECKVERSION();
    ImGui::CreateContext();
    ImGuiIO& io = ImGui::GetIO(); (void)io;
    io.ConfigFlags |= ImGuiConfigFlags_NavEnableKeyboard;     // 允许键盘控制
    io.ConfigFlags |= ImGuiConfigFlags_NavEnableGamepad;      // 仅允许标题拖动

    //设置ImGui风格
    ImGui::StyleColorsDark();
    //ImGui::StyleColorsLight();

    //设置平台/渲染器后端
    ImGui_ImplWin32_Init(hwnd);
    ImGui_ImplDX11_Init(g_pd3dDevice, g_pd3dDeviceContext);

    return true;

}
在D3DApp::Init中调用InitImGui:
bool D3DApp::Init()
{
    if (!InitMainWindow())
    return false;

	if (!InitDirect3D())
    return false;

	if (!InitImGui())
    return false;

	return true;
}
向前声明消息处理函数:
extern IMGUI_IMPL_API LRESULT ImGui_ImplWin32_WndProcHandler(HWND hWnd, UINT msg, WPARAM wParam, LPARAM lParam);
在消息处理函数D3DApp::MsgProc的开头添加ImGui的处理:
LRESULT D3DApp::MsgProc(HWND hwnd, UINT msg, WPARAM wParam, LPARAM lParam)
{
    if (ImGui_ImplWin32_WndProcHandler(m_hMainWnd, msg, wParam, lParam))
        return true;
}
在Run()函数中启动imGui框架:
ImGui_ImplDX11_NewFrame();
ImGui_ImplWin32_NewFrame();
ImGui::NewFrame();
最后在GameApp::DrawScene()中渲染imGui:
ImGui::Render();
// 下面这句话会触发ImGui在Direct3D的绘制
// 因此需要在此之前将后备缓冲区绑定到渲染管线上
ImGui_ImplDX11_RenderDrawData(ImGui::GetDrawData());
imGui的使用
基本使用
-
调用
ImGui::Begin("ImGui")会创建一个以传入字符串为名的窗口,同时还要调用ImGui::End()来终止窗口,在他们之间可以加入自己需要的功能:ImGui::Begin("ImGui") //Function ImGui::End() -
通过调用
ImGui::Text("Use of ImGui")来在界面中加入文字,效果:
-
调用
ImGui::Checkbox("Demo Window", &showDemoWindow)添加勾选框,函数原型:bool Checkbox(const char* label, bool* v);其中第一个参数
label为勾选框显示的文本,第二个参数v为要控制的布尔变量,点击勾选框会改变其值。效果:

-
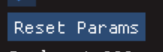
调用
ImGui::Button("Reset Params")以创建一个按钮,函数原型:bool Button(const char* label, const ImVec2& size = ImVec2(0, 0));其中第一个参数
label为按钮显示的文本,第二个参数size为按钮的大小。效果:
-
调用
ImGui::SliderFloat("Scale", &scale, 0.2f, 2.0f)会产生一个滑块,可修改传入的变量,函数原型:bool SliderFloat(const char* label, float* v, float v_min, float v_max, const char* format = "%.3f", ImGuiSliderFlags flags = 0);其中第一个参数
label为按钮显示的文本,第二个参数v为要修改的值,第三个参数v_min为v可修改到的最小值,第四个参数v_max为v可修改到的最大值,第五个参数format为滑块中显示数字的格式。效果:

-
调用
ImGui::ColorEdit3("Color", reinterpret_cast<float*>(&m_CBuffer.color))可自行编辑颜色函数原型:bool ColorEdit3(const char* label, float col[3], ImGuiColorEditFlags flags = 0);其中第一个参数
label为按钮显示的文本,第二个参数col[3]为要改变的颜色。
效果: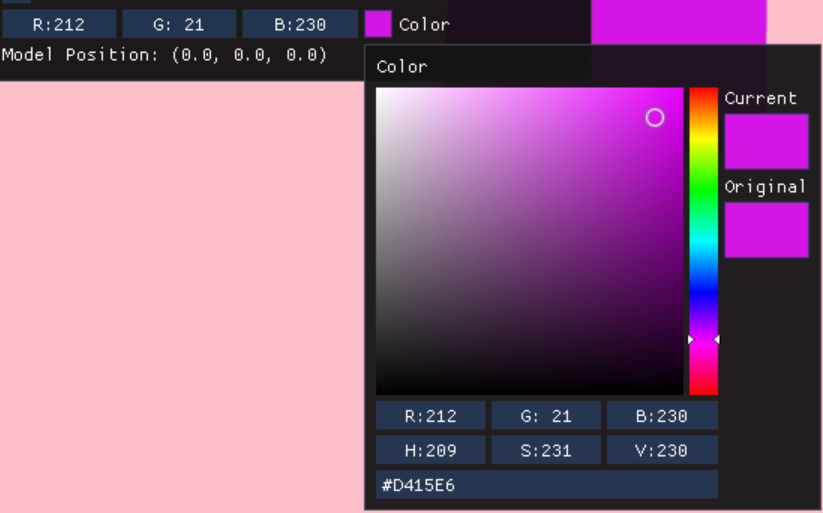
键鼠操作
通过键鼠操作移动物体
先是定义需要的变量:
static int dx = 0, dy = 0, dc = 0, dphi = 0;

static float phi1 = 0.0f, theta1 = 0.0f;
static float phi2 = 0.0f, theta2 = 0.0f;
static float scale1 = 1.0f;
static float scale2 = 1.0f;
static float x1 = 0.0f, y1 = 0.0f;
static float x2 = 0.0f, y2 = 0.0f;
static float fov = XM_PIDIV2;
-
ImGui::IsAnyItemActive()函数可判断是否对UI进行操作:if (!ImGui::IsAnyItemActive()) {} //操作UI时不对物体进行影响 -
ImGui::IsMouseDragging()函数可判断鼠标是否拖动,例如传入ImGuiMouseButton_Left可判断左键,ImGuiMouseButton_Right可判断右键,拖动时返回true,否则返回false。
可以应用他来达到拖动时移动物体的效果,如:if (ImGui::IsMouseDragging(ImGuiMouseButton_Left)) { x1 += io.MouseDelta.x * 0.01f; y1 -= io.MouseDelta.y * 0.01f; }其中
io.MouseDelta是光标的增量。 -
ImGui::IsKeyPressed()函数可判断键盘按键是否按下,按下返回true,否则返回false,可接收ImGuiKey_类型的枚举。
可以应用它来达到键盘移动的效果,如:if (ImGui::IsKeyPressed(ImGuiKey_W)) { //W键向上移动 dy = 1; } if (ImGui::IsKeyPressed(ImGuiKey_S)) { //S键向下移动 dy = -1; }当摁下W键时y的增量就会变成正的,使其向上移动;摁下S键时y的增量就会变成负的,使其向下移动,其他方向或角度同理。
-
ImGui::IsKeyReleased()函数可判断键盘按键是否松开,松开返回true,否则返回false,可接收ImGuiKey_类型的枚举。
可以使用它来停止物体的移动,如:if (ImGui::IsKeyReleased(ImGuiKey_W) || ImGui::IsKeyReleased(ImGuiKey_S)) { //松开停止 dy = 0; }当松开W或S键时y轴的增量就会置零,停止移动,其他变化同理。
-
还可以使用
ImGuiIO来获取鼠标的一些信息:ImGuiIO& io = ImGuiIO::GetIO(); auto& delta = io.MouseDelta; // 当前帧鼠标位移量 io.MouseWheel; // 鼠标滚轮其中可以利用鼠标滚轮的增量来达到缩放的效果如:
else if (io.MouseWheel != 0.0f){
    scale1 += 0.02f * io.MouseWheel;
    if (scale1 > 2.0f)
        scale1 = 2.0f;
    else if (scale1 < 0.2f)
        scale1 = 0.2f;
}
最后加上如下语句就可以较为丝滑的使用键鼠控制两个物体:
    x2 += dx * 0.0002f;  //更新位置
    y2 += dy * 0.0002f;  //更新位置

    scale2 += dc * 0.0002f;
    if (scale2 > 2.0f) {
        scale2 = 2.0f;
    }
    else if (scale2 < 0.2f) {
        scale2 = 0.2f;
    }

    phi2 -= dphi * 0.0002f;
    theta2 -= dphi * 0.0002f;
    phi2 = XMScalarModAngle(phi2);
    theta2 = XMScalarModAngle(theta2);
不过还需要为另一个物体创建新的顶点缓冲区,先创建新的缓冲区描述:
D3D11_BUFFER_DESC vbd2;
ZeroMemory(&vbd2, sizeof(vbd2));
vbd2.ByteWidth = sizeof(vertices1);
vbd2.Usage = D3D11_USAGE_IMMUTABLE;
vbd2.BindFlags = D3D11_BIND_VERTEX_BUFFER;
vbd2.CPUAccessFlags = 0;
再更改顶点子资源:
InitData.pSysMem = vertices1;
最后创建:
HR(m_pd3dDevice->CreateBuffer(&vbd2, &InitData, m_pVertexBuffer2.GetAddressOf()));
索引缓冲区也与之类似:
D3D11_BUFFER_DESC ibd2;
ZeroMemory(&ibd2, sizeof(ibd2));
ibd2.Usage = D3D11_USAGE_IMMUTABLE;
ibd2.ByteWidth = sizeof(indices1);
ibd2.BindFlags = D3D11_BIND_INDEX_BUFFER;
ibd2.CPUAccessFlags = 0;

InitData.pSysMem = indices1;
HR(m_pd3dDevice->CreateBuffer(&ibd2, &InitData, m_pIndicesBuffer2.GetAddressOf()));
然后在GameApp::UpdateScene(float dt)方法的最后先使用第一个物体的数据更改并更新常量缓冲区:
//更改常量缓冲区
//XMVECTOR XM_CALLCONV XMVectorReplicate(float Value);  返回向量(Value, Value, Value, Value)
m_CBuffer.world = XMMatrixTranspose(
    XMMatrixScalingFromVector(XMVectorReplicate(scale1)) *
    XMMatrixRotationX(phi1) * XMMatrixRotationY(theta1) *
    XMMatrixTranslation(x1, y1, 0.0f)
);
//XMMatrixPerspectiveFovLH(float FovAngleY, float AspectRatio, float NearZ, float FarZ)   透视投影矩阵
//FovAngleY:视场角 AspectRatio:宽高比
m_CBuffer.proj = XMMatrixTranspose((XMMatrixPerspectiveFovLH(fov, AspectRatio(), 1.0f, 1000.0f)));

//更新常量缓冲区
D3D11_MAPPED_SUBRESOURCE mappedData1;
m_pd3dImmediateContext->Map(m_pConstantBuffer.Get(), 0, D3D11_MAP_WRITE_DISCARD, 0, &mappedData1);
memcpy_s(mappedData1.pData, sizeof(m_CBuffer), &m_CBuffer, sizeof(m_CBuffer));
m_pd3dImmediateContext->Unmap(m_pConstantBuffer.Get(), 0);
这时再绑定存储第一个物体数据的常量缓冲区、顶点缓冲区、索引缓冲区:
//在输入装配阶段绑定顶点缓冲区
UINT strides = sizeof(VertexPosColor);  //跨越字节数
UINT offset = 0;    //起始偏移量
m_pd3dImmediateContext->IASetVertexBuffers(0, 1, m_pVertexBuffer1.GetAddressOf(), &strides, &offset);

//绑定索引缓冲区
m_pd3dImmediateContext->IASetIndexBuffer(m_pIndicesBuffer1.Get(), DXGI_FORMAT_R32_UINT, 0);

//绑定常量缓冲区
m_pd3dImmediateContext->VSSetConstantBuffers(0, 1, m_pConstantBuffer.GetAddressOf());
//这次需绑定到像素缓冲区,不然自定义的颜色无法使用
m_pd3dImmediateContext->PSSetConstantBuffers(0, 1, m_pConstantBuffer.GetAddressOf());
最后绘制第一个物体:
m_pd3dImmediateContext->DrawIndexed(18, 0, 0);
这时在使用与上述一样的方法更改常量缓冲区并使用第二个物体的数据绑定相关缓冲区:
m_CBuffer.world = XMMatrixTranspose(
    XMMatrixScalingFromVector(XMVectorReplicate(scale2)) *
    XMMatrixRotationX(phi2) * XMMatrixRotationY(theta2) *
    XMMatrixTranslation(x2, y2, 0.0f)
);
//XMMatrixPerspectiveFovLH(float FovAngleY, float AspectRatio, float NearZ, float FarZ)   透视投影矩阵
//FovAngleY:视场角 AspectRatio:宽高比
m_CBuffer.proj = XMMatrixTranspose((XMMatrixPerspectiveFovLH(fov, AspectRatio(), 1.0f, 1000.0f)));

//更新常量缓冲区
D3D11_MAPPED_SUBRESOURCE mappedData2;
m_pd3dImmediateContext->Map(m_pConstantBuffer.Get(), 0, D3D11_MAP_WRITE_DISCARD, 0, &mappedData2);
memcpy_s(mappedData2.pData, sizeof(m_CBuffer), &m_CBuffer, sizeof(m_CBuffer));
m_pd3dImmediateContext->Unmap(m_pConstantBuffer.Get(), 0);

m_pd3dImmediateContext->IASetVertexBuffers(0, 1, m_pVertexBuffer2.GetAddressOf(), &strides, &offset);

m_pd3dImmediateContext->IASetIndexBuffer(m_pIndicesBuffer2.Get(), DXGI_FORMAT_R32_UINT, 0);
最后绘制:
m_pd3dImmediateContext->DrawIndexed(36, 0, 0);
就可以对第二个物体进行操作,实现对两个物体完成不同的操作。
组件ID
ImGui 需要靠唯一的ID来追踪组件,而 ImGui 默认将组件的Label参数,也就是组件的名字,当作是唯一ID,所以当有相同的Label时就会产生产生冲突。
解决名字相同的方法:
-
用
##来标记唯一ID##后面的字符串不会显示在组件上,这样就保证了栈里的ID是唯一的。 -
使用 PushID/PopID 方法
ImGui::PushID(0); if (ImGui::Button("Test1")) { ::OutputDebugStringA("Btn1 clicked"); } ImGui::PopID(); ImGui::PushID(1); if (ImGui::Button("Test1")) { ::OutputDebugStringA("Btn2 clicked"); } ImGui::PopID();PushID和PopID成对使用,参数可以是数字,也可以是字符串,要保证唯一性。
注意事项:
-
只有可交互式的组件才需要ID,比如
Button、Input等等。 -
不同窗口之间的相同ID不会冲突。
-
如果需要一个空
Label就必须设置一个ID。ImGui::Button("##id") -
使用
###来禁止将Label部分纳入为ID。sprintf(buf, "My game (%f FPS)###MyGame", fps); Begin(buf);这样在栈里的实际ID是”MyGame”,而不是整个字符串。

 浙公网安备 33010602011771号