spring boot(书籍摘录和部分纯洁的微笑博客)
1,Spring Boot 集成 Memcached
Memcached 介绍
因为 Spring Boot 没有针对 Memcached 提供对应的组建包,因此需要我们自己来集成。官方推出的 Java 客户端 Spymemcached 是一个比较好的选择之一。
Spymemcached 介绍
Spymemcached 最早由 Dustin Sallings 开发,Dustin 后来和别人一起创办了 Couchbase (原NorthScale),职位为首席架构师。2014 加入 Google。
Spymemcached 是一个采用 Java 开发的异步、单线程的 Memcached 客户端, 使用 NIO 实现。Spymemcached 是 Memcached 的一个流行的 Java client 库,性能表现出色,广泛应用于 Java + Memcached 项目中。
依赖配置
** 添加依赖**
pomx 包中添加 spymemcached 的引用
<dependency>
  <groupId>net.spy</groupId>
  <artifactId>spymemcached</artifactId>
  <version>2.12.2</version>
</dependency>
添加配置
memcache.ip=192.168.0.161
memcache.port=11211
分别配置 memcache 的 Ip 地址和 端口。
设置配置对象
创建 MemcacheSource 接收配置信息
@Component
@ConfigurationProperties(prefix = "memcache")
public class MemcacheSource {

    private String ip;

    private int port;

    public String getIp() {
        return ip;
    }

    public void setIp(String ip) {
        this.ip = ip;
    }

    public int getPort() {
        return port;
    }

    public void setPort(int port) {
        this.port = port;
    }
}
@ConfigurationProperties(prefix = "memcache") 的意思会以 memcache.* 为开通将对应的配置文件加载到属性中。
启动初始化 MemcachedClient
我们使用上一节的内容
@Component
public class MemcachedRunner implements CommandLineRunner {
    protected Logger logger =  LoggerFactory.getLogger(this.getClass());

    @Resource
    private  MemcacheSource memcacheSource;

    private MemcachedClient client = null;

    @Override
    public void run(String... args) throws Exception {
        try {
            client = new MemcachedClient(new InetSocketAddress(memcacheSource.getIp(),memcacheSource.getPort()));
        } catch (IOException e) {
            logger.error("inint MemcachedClient failed ",e);
        }
    }

    public MemcachedClient getClient() {
        return client;
    }

}
测试使用
@RunWith(SpringRunner.class)
@SpringBootTest
public class RepositoryTests {

  @Resource
    private MemcachedRunner memcachedRunner;

  @Test
  public void testSetGet()  {
    MemcachedClient memcachedClient = memcachedRunner.getClient();
    memcachedClient.set("testkey",1000,"666666");
    System.out.println("***********  "+memcachedClient.get("testkey").toString());
  }

}
使用中先测试插入一个 key 为 testkey ,1000 为过期时间单位为 毫秒,最后的 “666666” 为 key 对应的值。
执行测试用例 testSetGet ,控制台输出内容:
*********** 666666
表明测试成功。
2,Spring Boot、微服务架构和大数据治理三者之间的故事
微服务架构
微服务的诞生并非偶然,它是在互联网高速发展,技术日新月异的变化以及传统架构无法适应快速变化等多重因素的推动下诞生的产物。互联网时代的产品通常有两类特点:需求变化快和用户群体庞大,在这种情况下,如何从系统架构的角度出发,构建灵活、易扩展的系统,快速应对需求的变化;同时,随着用户的增加,如何保证系统的可伸缩性、高可用性,成为系统架构面临的挑战。
如果还按照以前传统开发模式,开发一个大型而全的系统已经很难满足市场对技术的需求,这时候分而治之的思想被提了出来,于是我们从单独架构发展到分布式架构,又从分布式架构发展到 SOA 架构,服务不断的被拆分和分解,粒度也越来越小,直到微服务架构的诞生。
微服务架构是 SOA 架构的传承,但一个最本质的区别就在于微服务是真正的分布式的、去中心化的。把所有的“思考”逻辑包括路由、消息解析等放在服务内部,去掉一个大一统的 ESB,服务间轻通信,是比 SOA 更彻底的拆分。微服务架构强调的重点是业务系统需要彻底的组件化和服务化,原有的单个业务系统会拆分为多个可以独立开发,设计,运行和运维的小应用,这些小应用之间通过服务完成交互和集成。
大约 2009 年开始,Netflix 完全重新定义了它的应用程序开发和操作模型,拉开了微服务探索的第一步,直到2014年3月 Martin Fowler 写的一篇文章
每个服务运行在其独立的进程中,服务和服务间采用轻量级的通信机制互相沟通(通常是基于 HTTP 的 RESTful API)。每个服务都围绕着具体业务进行构建,并且能够被独立地部署到生产环境、类生产环境等。另外,应尽量避免统一的、集中式的服务管理机制,对具体的一个服务而言,应根据业务上下文,选择合适的语言、工具对其进行构建。
微服务架构和数据治理
随着微服务架构的落地,人们发现微服务架构虽然改进了开发模式,但同时也引入了一些问题,在这所有的问题中,最重要的也是马上要面临的一个问题就是数据的问题。在微服务架构中我们强调彻底的组件化和服务化,每个微服务都可以独立的部署和投产,其实也就意味着很多的微服务有自己独立的数据库。
整个业务数据被分散在各个子服务之后会带来两个最明显的问题:1、业务管理系统对数据完整的查询,比如分页查询、多条件查询等,数据被割裂后如何来整合?2、如何对数据进一步的分析挖掘?这些需求可能需要分析全量的数据,并且在分析时不能影响到当前业务。
从技术方案来讲,我们一般有两种选择来处理这些问题,第一种是在线处理数据,第二种是离线处理数据。
在线处理数据的方案就是按照微服务的标准接口来进行,后端需要哪个系统的数据就去调用某个微服务提供的接口来获取。后端管理平台根据前端的需求去不同的微服务系统去获取数据,然后将返回的数据进行处理后将数据返回。这种方案有两个弊端:1)一方面微服务数据方需要提供数据接口,一方面数据的使用者需要去写调用方法,并且调用者需要编写大量的代码进行数据处理;2)在对各个微服务进行调取数据时会影响微服务的正常业务处理性能。
离线处理数据方案,就是将业务数据准实时的同步到另外一个数据库中,在同步的过程中进行数据整合处理,以满足业务方对数据的需求,数据同步过来后,再提供另外一个服务接口专业负责对外输出数据信息。这种方案有两个特点:1)数据同步方案是关键,技术选型有很多,如何选择切合公司业务的技术方案;2)离线数据处理对微服务正常业务处理没有影响。
在我以往的工作中两种方案都实施过,个人更倾向于使用第二种方案。
MongDB 和数据分析
MongoDB 称之为对开发人员最友好的数据库,不再强调传统关系数据库中的行和列,整个表可以看作一个 Json 文档,MongoDB 也被认为在 Nosql 中最像关系数据库的 Nosql 数据库,保留了类似关系数据库的数据库(DataBase)、集合(Collection)、文档对象(Document)。
MongoDB 是目前最热门非关系数据库的之一,在最新的数据库排行榜中 MongoDB 排名第五,在所有的非关系数据库中排名第一,非常广泛的应用于国内外的互联网公司。
MongoDB 最大的特点是支持的查询语言非常强大,其语法有点类似于面向对象的查询语言,几乎可以实现类似关系数据库单表查询的绝大部分功能,而且还支持对数据建立索引。MongoDB 在高可用和读写负载均衡上的实现非常简洁和友好,MongoDB 自带了副本集的概念,通过设计恰当的副本集和驱动程序,可以非常便地实现高可用、读写负载均衡。
MongoDB 的这些特性非常方便对数据进行高性能查询,MongoDB 支持 Aggregate 和 Mapreduce 利用分而治之的理念来处理大规模数据分析。Spring Boot 对 MongoDB 的支持非常友好,使用 Spring Boot 非常便利的处理对 MongoDB 查询和操作,Spring Boot 也提供了组件包来支持对 MongoDB的使用。
MongoDB 4.0 宣布将正式支持 ACID 事务,未来 MongoDB 的想象空间更加巨大!因此 MongDB + Spring Boot 是微服务架构中数据分析的理想选择之一。
再来聊聊 Spring Boot
Spring Boot 是由 Pivotal 团队提供的全新框架,其设计目的是用来简化新 Spring 应用的初始搭建以及开发过程。该框架使用了特定的方式来进行配置,从而使开发人员不再需要定义样板化的配置。采用 Spring Boot 可以大大的简化开发模式,所有你想集成的常用框架,它都有对应的组件支持。
Spring Boot 基于 Spring 开发,Spring Boot 本身并不提供 Spring 框架的核心特性以及扩展功能,只是用于快速、敏捷地开发新一代基于 Spring 框架的应用程序。也就是说,它并不是用来替代 Spring 的解决方案,而是和 Spring 框架紧密结合用于提升 Spring 开发者体验的工具。同时它集成了大量常用的第三方库配置(例如 Redis、MongoDB、Jpa、RabbitMQ、Quartz 等等),Spring Boot 应用中这些第三方库几乎可以零配置的开箱即用,大部分的 Spring Boot 应用都只需要非常少量的配置代码,开发者能够更加专注于业务逻辑。
Spring Boot 一经推出就受到开源社区的追捧,Spring Boot 官方提供了很多 Starters 方便集成第三方产品,很多主流的框架也纷纷进行了主动的集成,比如 Mybatis。Spring 官方非常重视 Spring Boot 的发展,在 Spring 官网首页进行重点推荐介绍,是目前 Spring 官方重点发展的项目之一
Spring Boot 本身发展特别快,自从 2014 年 4 月发布 Spring Boot 1.0 之后,版本更新非常频繁,我在 2016 年使用的时候是 1.3.X,到现在 Spring Boot 已经发布了 Spring Boot 2.0,Spring Boot 2.0 集成了很多最新优秀的技术和新特性,并且对 Spring Boot 1.0 的 API 进行了大幅优化。Spring Boot 一经推出就迅速的成为一门热门的技术,从下图也可以看出这个结论,
Spring Boot 和 微服务架构
随着 Spring 不断的发展,涉及的领域越来越多,项目整合开发需要配合各种各样的文件,慢慢变得不那么易用简单,违背了最初的理念,甚至人称配置地狱。Spring Boot 正是在这样的一个背景下被抽象出来的开发框架,目的为了让大家更容易的使用 Spring 、更容易的集成各种常用的中间件、开源软件;另一方面,Spring Boot 诞生时,正处于微服务概念在慢慢酝酿中,Spring Boot 的研发融合了微服务架构的理念,实现了在 Java 领域内微服务架构落地的技术支撑。
Spring Boot 作为一套全新的框架,来源于 Spring 大家族,因此 Spring 所有具备的功能它都有,而且更容易使用;Spring Boot 以约定大于配置的核心思想,默认帮我们进行了很多设置,多数 Spring Boot 应用只需要很少的 Spring 配置。Spring Boot 开发了很多的应用集成包,支持绝大多数开源软件,让我们以很低的成本去集成其他主流开源软件。
Spring Boot 特性:
-
使用 Spring 项目引导页面可以在几秒构建一个项目
-
方便对外输出各种形式的服务,如 REST API、WebSocket、Web、Streaming、Tasks
-
非常简洁的安全策略集成
-
支持关系数据库和非关系数据库
-
支持运行期内嵌容器,如 Tomcat、Jetty
-
强大的开发包,支持热启动
-
自动管理依赖
-
自带应用监控
-
支持各种 IED,如 IntelliJ IDEA 、NetBeans
Spring Boot 的这些特性非常方便、快速构建独立的微服务。所以我们使用 Spring Boot 开发项目,会给我们传统开发带来非常大的便利度,可以说如果你使用过 Spring Boot 开发过项目,就不会再愿意以以前的方式去开发项目了。
总结一下,使用 Spring Boot 至少可以给我们带来以下几方面的改进:
-
Spring Boot 使编码变简单,Spring Boot 提供了丰富的解决方案,快速集成各种解决方案提升开发效率。
-
Spring Boot 使配置变简单,Spring Boot 提供了丰富的 Starters,集成主流开源产品往往只需要简单的配置即可。
-
Spring Boot 使部署变简单,Spring Boot 本身内嵌启动容器,仅仅需要一个命令即可启动项目,结合 Jenkins 、Docker 自动化运维非常容易实现。
-
Spring Boot 使监控变简单,Spring Boot 自带监控组件,使用 Actuator 轻松监控服务各项状态。
总结,Spring Boot 是 Java 领域最优秀的微服务架构落地技术,没有之一。
三者之间的纠葛
了解完微服务架构、Spring Boot、大数据治理之后,我们就发现这样一个有趣的事情:微服务架构是一种架构思想,是架构不断发展的必然结果,具有构建灵活、易扩展、快速应用、可伸缩性、高可用等特点;微服务架构思想的推出对技术有了更高的要求,在这样的背景下 Spring Boot 孕育而生,Spring Boot 出生名门,从一开始就站在一个比较高的起点,又经过这几年的发展,生态足够完善,Spring Boot 已经当之无愧成为 Java 领域最热门的技术。
微服务架构下,数据被分隔到 N 个独立的微服务中,如何应对市场、业务对大量数据的查询、分析就变的非常急迫,利用 Spring Boot 和 MongoDB 可以轻松的解决这个问题,通过技术手段将分裂到 N 个微服务的数据同步到 MongoDB 集群中,在同步的过程中进行数据清洗,来满足公司的各项业务需求。Spring Boot 对 MongoDB 的支持非常友好,一方面 Spring Data 技术预生成很多常用方法便于使用,另一方面 Spring Boot 封装了分布式计算的相关函数,可以让我们以较简洁的方式来实现统计查询。
Spring Boot 是 Java 领域微服务架构最优落地技术,Spring Boot+MongoDB 方案是在微服务架构下数据治理的最佳方案之一。
当然如果我们对微服务架构、Spring Boot 、MongoDB 不熟悉的话,可能需要走很多的弯路。错误的技术方案会对后期的微服务落地带来非常大的困扰,增加额外的开发工作量,我自己深有体会,合适的技术方案可以节省60%以上的工作量。
为此我特意写了一个专栏《微服务技术架构和大数据治理实战》,讲解微服务架构和大数据治理的技术落地。将工作中实践过最具实战代表性的一些内容整理出来,以 51CTO 专栏的形式来展现。课程内容将站在全局的角度去看待微服务实践和数据分析,讲解微服务架构、Spring Boot、MongoDB、同步方案、数据分析等内容,帮助广大的技术朋友们少走弯路,掌握微服务和数据分析的技术。
本专栏共18节课程,围绕四大块内容:
-
一、微服务架构和 Spring Boot;
-
二、Spring Boot 和 MongoDB 实战详解,介绍实战中遇到的典型问题;
-
三、微服务架构下的数据治理,数据同步、实时变更;
-
四、微服务架构实践的经验和教训。
认真学完此专栏之后,会对微服务架构实践、Spring Boot 和 MongoDB 使用、微服务架构下数据处理有进一步的了解,具备使用 Spring Boot 开发微服务项目、利用相关技术解决微服务架构中数据治理的疼点。
3,Spring Boot 如何解决项目启动时初始化资源
在我们实际工作中,总会遇到这样需求,在项目启动的时候需要做一些初始化的操作,比如初始化线程池,提前加载好加密证书等。今天就给大家介绍一个 Spring Boot 神器,专门帮助大家解决项目启动初始化资源操作。
这个神器就是 CommandLineRunner,CommandLineRunner 接口的 Component 会在所有 Spring Beans都初始化之后,SpringApplication.run()之前执行,非常适合在应用程序启动之初进行一些数据初始化的工作。
接下来我们就运用案例测试它如何使用,在测试之前在启动类加两行打印提示,方便我们识别 CommandLineRunner 的执行时机。
@SpringBootApplication
public class CommandLineRunnerApplication {
	public static void main(String[] args) {
		System.out.println("The service to start.");
		SpringApplication.run(CommandLineRunnerApplication.class, args);
		System.out.println("The service has started.");
	}
}
接下来我们直接创建一个类继承 CommandLineRunner ,并实现它的 run() 方法。
@Component
public class Runner implements CommandLineRunner {
    @Override
    public void run(String... args) throws Exception {
        System.out.println("The Runner start to initialize ...");
    }
}
我们在 run() 方法中打印了一些参数来看出它的执行时机。完成之后启动项目进行测试:
...
The service to start.

  .   ____          _            __ _ _
 /\\ / ___'_ __ _ _(_)_ __  __ _ \ \ \ \
( ( )\___ | '_ | '_| | '_ \/ _` | \ \ \ \
 \\/  ___)| |_)| | | | | || (_| |  ) ) ) )
  '  |____| .__|_| |_|_| |_\__, | / / / /
 =========|_|==============|___/=/_/_/_/
 :: Spring Boot ::        (v2.0.0.RELEASE)
...
2018-04-21 22:21:34.706  INFO 27016 --- [           main] o.s.b.w.embedded.tomcat.TomcatWebServer  : Tomcat started on port(s): 8080 (http) with context path ''
2018-04-21 22:21:34.710  INFO 27016 --- [           main] com.neo.CommandLineRunnerApplication     : Started CommandLineRunnerApplication in 3.796 seconds (JVM running for 5.128)
The Runner start to initialize ...
The service has started.
根据控制台的打印信息我们可以看出 CommandLineRunner 中的方法会在 Spring Boot 容器加载之后执行,执行完成后项目启动完成。
如果我们在启动容器的时候需要初始化很多资源,并且初始化资源相互之间有序,那如何保证不同的 CommandLineRunner 的执行顺序呢?Spring Boot 也给出了解决方案。那就是使用 @Order 注解。
我们创建两个 CommandLineRunner 的实现类来进行测试:
第一个实现类:
@Component
@Order(1)
public class OrderRunner1 implements CommandLineRunner {
    @Override
    public void run(String... args) throws Exception {
        System.out.println("The OrderRunner1 start to initialize ...");
    }
}
第二个实现类:
@Component
@Order(2)
public class OrderRunner2 implements CommandLineRunner {
    @Override
    public void run(String... args) throws Exception {
        System.out.println("The OrderRunner2 start to initialize ...");
    }
}
添加完成之后重新启动,观察执行顺序:
...
The service to start.

  .   ____          _            __ _ _
 /\\ / ___'_ __ _ _(_)_ __  __ _ \ \ \ \
( ( )\___ | '_ | '_| | '_ \/ _` | \ \ \ \
 \\/  ___)| |_)| | | | | || (_| |  ) ) ) )
  '  |____| .__|_| |_|_| |_\__, | / / / /
 =========|_|==============|___/=/_/_/_/
 :: Spring Boot ::        (v2.0.0.RELEASE)
...
2018-04-21 22:21:34.706  INFO 27016 --- [           main] o.s.b.w.embedded.tomcat.TomcatWebServer  : Tomcat started on port(s): 8080 (http) with context path ''
2018-04-21 22:21:34.710  INFO 27016 --- [           main] com.neo.CommandLineRunnerApplication     : Started CommandLineRunnerApplication in 3.796 seconds (JVM running for 5.128)
The OrderRunner1 start to initialize ...
The OrderRunner2 start to initialize ...
The Runner start to initialize ...
The service has started.
通过控制台的输出我们发现,添加 @Order 注解的实现类最先执行,并且@Order()里面的值越小启动越早。
在实践中,使用ApplicationRunner也可以达到相同的目的,两着差别不大。看来使用 Spring Boot 解决初始化资源的问题非常简单
4, Rest Client——插件
可以查看请求信息,Cookies信息,响应信息请求头信息,
5,SpringBoot事务支持
1.1声明式事务
是指将事务管理代码从业务中方法中分离出来,以声明的方式来实现事务管理,Spring通过Spring AOP框架支持声明式事务管理。
数据访问的技术很多,例如:JDBC JPA Hibernate 分布式事务等,Sping 再不同的事务管理API上定义了一个抽象层,PlatfromTransaction-Manage
Spring 并不 直接管理事务, 是提供了 置事务管理器实现,常用的有 DataSourceTransactionManager ,JdoTransactionManager ,JpaTransactionManager Hibemat TransactionManager 等。
1.2 Sp ing 声名式事务
Spring 置文 件中 关于事务配置 总是由 部分组成,分别是 DataSource TransactionManager 和代理机制 。无论哪种配置 式, 一般变化的只是代理机制部分,
Spring 声明式事务配 置提供五种方式
这里需要注意 是,@Transactional 注解来自 org springframework.transaction. annotation Spring 提供了@ EnableTransactionManagement 注解在配置类 来开启声明式事务 支持。使用@EnableTransactionManag ment Spring 容器会自动扫描注解@ Transactional 方法和类。
Spring 定义了7 种传播行为,
Spr ng 提供了 5种事务 的隔离级别
@Transactional 可以通过 propagation 属性定义事务行为,属性值分别为阻RQUIRED ,SUPPORTS ,MANDATORY ,REQUIRES_ NEW ,NOT SUPPORTED, NEVER 以及NESTED 份别对应5—1 中的内容。可 以通过 isolation 属性定义隔离级别, 属性值 分别为 DEFAULT, READ_UNCOMMITTED, READ_COMMITTED REPEATABLE_READ 以及 SERIALIZABL,
1.3 类级别事务
JpaRepositorγ 接口是不开启 事务的,而 SimpleJapRepository 默认是开启事务的,需要手动添加,而事务一般都是加在服务层,添加@Transactional
1.4方法级别事务
如果类识别器也注解了事务,以方法上的注解的事务为准。
6,spring使用过滤器Filter和监听器Lister
1,过滤器
Filter 接口源代码如下
public nterface Filter {
	roid init(FilterConfig varl) throws ServletException ;
	roid doFilter (ServletReques rarl ServletResponse var2 ,
	FilterChain var3) throws IOException, ServletException;
void destroy() ;
}
• @WebFilter :用于将一个类声明为过滤器,该注解将会在应用部署时被容器处
理,容器根据具体的属性配直将相应的类部署为过滤器 这样我们在 Web
用中使用 监听器时,不需要在 web.xml 文件中配直监听器的相关描述信息
该注解的常用属性有 filterName urlPatterns value filterName 属性用于指
定过滤器的 name ,等价于 XML 配直文件中的 <filter-name>标签 urlPattems
属性用于指定一组过滤器的URL匹配模式,等价与XML配直文件 的<url-pattern>标签。
value 属性等价 urlPatterns属性,但是两者不可以同时使用
使用该功能需要在启动类上添加 @ServletComponentScan :使用该注解后, Servlet ,Filter, Listener 可以直接通 过@WebServlet WebFilter、@WebListener 自动注册,无须其他代码
事实上,在 Spring Boot 中添加自 己的 Servlet Filter Listener 有两种方法,即代 码注册和注解自动注册。上面属于注解自动注册, 而代码注册可以通 Servle egistrationBean FilterRegistrationBean ServlListenerRegis ationBean 注册 Bean
2,监听器
根据监昕对象可以把监听器分为 类: ServletContext (对应aplication )、HttpSession (对应 session )、 ServletRequest (对应 request )。 Application 在整个 Web 服务中只有一个,在 Web 务关闭时销毁 Session 对应每个会话,在会话起始时创 建,一端关闭会话时销毁 Request 对象是客户发送请求时创建的 (一 同创建的还有 Response ,用于封装请求数据,在一次请求处理完毕时销毁。
(1 )监听对象创建与销毁,如 ServletContextListener
(2)监听对象域属性的增加和删除,如HttpSessionListener和ServletRequestListener
(3)监听绑定到Session上某个对象的状态,如:ServletContextAttributeListener,HttpSessionAttributeListener,ServletRequestAttributeListener等
我们可以 contextlnitialized 方法中查询 用户 ,利用 缓存技术把用户数据 放到缓存中,
7,集成Redis缓存
1.介绍
Redis 概述 Redis 是一个基于内存的单线程高性能 key-value 型数据库,读写性能优异 。与Memcached 缓存相 比, Redis 支持丰富的数据类型,包括 string (字符串) list (链表 )、 set (集合)、 zset (sorted set 有序集合)和 hash (哈希类型),因 此 Redis 在企业中被广泛应用。
2.安装和测试
启动redis的步骤,set lesson redis get lesson
启动cmd 输入:redis-cli
3.Spring Boot中的Redis
Spring Boot 持许多类型 的缓存,比如 EhCache ,JCache ,Redis 等。在不添 加任何额外 配置的情况下, Spring Boot 默认使用 SimpleCacheConfiguration ,考虑到 Redis 缓存在企业中被广泛使用,故选择用 Redis 缓存来进行讲解
1,引入依赖
spring- boot-starter- data- redis
2.添加缓存配置
### redis 缓存配置
###默认 redis 数据库为 dbO
spring.redis.database=O
###服务器地址,默认为 localhost
spring.redis.host=localhost
###链接端口,默认为 6379
spring.redis.port=6379
### redis 密码默认为空
spring.redis.password=
@Resource
pri vate RedisTemplate redisTemplate ;
@Resource
private StringRedisTemplate stringRedisTemplate
@Test
public void testRedis () {
//增 key name, value : ay
redisTemplate.opsForValue().set ("name","ay") ;
String name = (String) redisTemplate.opsForValue().get ("name");
System.out.println("name");
//删除
redisTemplate.delete ("name");
//更新
redisTemplate.opsForValue().set ("name","al");
//查询
name = StringRedisTemplate.opsForValue().get("name");
System.out.print("name");
RedisTemplat和 StringRedisTempl te 都是 Spring Data Redis 为我 供的模板类,用来对数据进行操作 其中 StringRedisTemplate 只针对键值是字符串的数据进行操作
4 .Redis 缓存在 Spring Boot 中使用
1 监昕器 Listener 的开发
本节在上下文初始化的方法中加载数据库中的所有用户数据,并存放到 Redis缓存中 ,之所以要把用户数据存放到缓存中,是因为用户的数据属于变动不大 的数据,适合存放到缓存中.
在监听器类中添加
需要实体类实现序列化接口,才能以键值对得方式放入缓存中,Serializable
项目启动并加载所有用户数据到缓存之后,我们需要修改 AyUserServicelmpl 的接口,比如 findByld ,save, delete 等方法。如果在 Redis 缓存中查询不到数据,就需要到数据库查询,如果能够在数据库中查询到数据,除了返回数据之外,还需 要把数据更新到缓存中。这样再次查询数据 ,就不需要到数据库中查询数据了。这 里主要对方法 findByld 进行修改, AyUserServicelmpl 具体需要修改的代码如下:
@Service
public class AyUserServiceimpl implements AyUserService {

	//集成 Redis 缓存
@Resource(name = ” ayUserRepository ")
private AyUserRepository ayUserRepository ;
@Resource
private RedisTemplate redisTemplate;
private stat final String ALL_USER = "ALL_USER_LIST ” J
@Override
public AyUser findByid(String id) {
	//step . 1 查询 Red 缓存中的所有数据
	List<AyUser> ayUserList = redisTemplate.opsForList().
		range(ALL_USER, 0 , - 1);
if(ayUserList ! = null && ayUserList size()> 0){
	for (AyUser user : ayUserList) {
		if (user.getid().equals(id)) {
		return user;
			}
		}
}
	//step.2 查询数据库中的数据
AyUser ayUser = ayUserRepository.findOne(id) ;
if(ayUser 1 = null) {
	//step 将数据插入 Redis 缓存中
redisTemplate.opsForList().leftPush(ALL_USER, ayUser);
return ayUser; }
//省略
}
虽然引入 Redis缓存用户数据可以提高访问性能,但是带来的代码复 杂度 是可想而知的。所以在以后的工作中,在性能和代码复杂度的权衡下,要根据具体的业务场景加以选择,不可滥用缓存
在Test类中进行测试
8, Quartz 定时器
1,概述
Quartz 一个完全 Java 编写的开源任务调度框架,通过触发器设置作业定时 运行规则、控制作业的运行时间 Quartz 定时器作用很多,比如定时发送信息、定时生成报表
Quartz 架主要核心组件包括调度器、触发器、作业。调度器作为作业的总指挥, 触发器作为作业的操作者,作业为应用的功能模块。如图:
Job是 一个接口,该接口只有一个方法 execute ,被调度的作业 (类)需实现该接 口中的 execute()方法, JobExecutionContext 类提供了调度上下文的各种信息。每次 执行该 Job 均重新创建 Job 实例 Job 的源代码 下:
public interface Job {
void execute(JobExecutionContext varl) throws JobExecutionException;
}
Quartz 在每次执行 Job 时,都重新创建一个 Job 实例,所以它不直接接收一个 Job 实例,相反它接收一个 Job 实现 ,以便运行时通过 newInstance()的反射机制实 例化 Job 。因 此需要通过一个类来描述 Job 的实现类及其他相 的静态信息,如 Job 名字、描述、关联监昕器等信息, JobDetail 承担了这一角色 JobDetail 用来保存作 业的详细信息。一个 JobDetail 可以有多个 Trigger ,但是一个 Trigger 只能对应一个 Job Detail
Trigger 触发器描述触发 Job 的执行规则,主要有 SimpleTrigger 和 CronTrigger 个子类。当仅需触发一次或者以固定时间间隔周期执行时, SimpleTrigger 是最适合的 选择;而 CronTrigger 则可以通过 Cron 表达式定义出各种复杂时间规则的调度方案, 如每早晨 9:00 执行,周一、周三、周五下午 5:00 执行等。 Cron 表达式定义如下:
Scheduler 责管理 Quartz 的运行环境, Quartz 是基于多线程架构的,启动的 时候 会初始化一套线程,这套线程用来执行一些预置 的作业 Trigger和 JobDetail 可以 注册到 Scheduler 中,Scheduler 可以将 Trigger 绑定 某一 JobDetail 中,这样 当Trigger 触发时,对应的 Job 就会被执行。 Scheduler 拥有一个 chedulerContext 类似于 ServletContext ,保存 着Scheduler 上下文 信息 Job 和Trigger 都可以访问 SchedulerContext 内的信息。 Scheduler 使用 一个线程池作为任务运行的基础设施,任 务通过共享线程池中的线程提高运行效率。
2,具体使用
首先引入依赖
创建定时器的方法有两种
①使用 XML 置文件的方式;百度使用 ,注意在启动类上加• @ImportResource :导入资源配置文件,让 Spring Boot 可 以 读取到, 类似 XML 直文件 中的 import> 标签
②使用注解的方式 注解的方式不需要任何配置文件且简单高效
• @Configurable声明此类为一个配置类,相当于XML文件,可以被Spring Boot扫面初始化,
• @EnableScheduling 通过在配直类注解@ EnableScheduling 来开启对计划任务 的支持,然后在要执行计划任务的方法上注解@Scheduled ,声明这是一个计 划任务
• @Schedul 注解为定时任务,在 cron 表达式里写执行的时机
示例
创建定时任务实现类
cron()表达式可以在百度上查出具体使用方法
定时任务1:
@Component
public class SchedulerTask {

    private int count=0;

    @Scheduled(cron="*/6 * * * * ?")
    private void process(){
        System.out.println("this is scheduler task runing  "+(count++));
    }

}
定时任务2:
@Component
public class Scheduler2Task {

    private static final SimpleDateFormat dateFormat = new SimpleDateFormat("HH:mm:ss");

    @Scheduled(fixedRate = 6000)
    public void reportCurrentTime() {
        System.out.println("现在时间:" + dateFormat.format(new Date()));
    }

}
结果如下:
this is scheduler task runing  0
现在时间:09:44:17
this is scheduler task runing  1
现在时间:09:44:23
this is scheduler task runing  2
现在时间:09:44:29
this is scheduler task runing  3
现在时间:09:44:35
参数说明
@Scheduled 参数可以接受两种定时的设置,一种是我们常用的cron="*/6 * * * * ?",一种是 fixedRate = 6000,两种都表示每隔六秒打印一下内容。
fixedRate 说明
-
@Scheduled(fixedRate = 6000):上一次开始执行时间点之后6秒再执行 -
@Scheduled(fixedDelay = 6000):上一次执行完毕时间点之后6秒再执行 -
@Scheduled(initialDelay=1000, fixedRate=6000):第一次延迟1秒后执行,之后按 fixedRate 的规则每6秒执行一次
9异步消息于异步调用
1,异步消息
异步:两个通信应用之间可以不用同时在线等待,任何一方只需各自处理自己的业务,比如发送方发送消息以后不用登录接收方的响应,可以接着处理其他的任务。也就是说发送方和接收方都是相互独立存在的,发送方只管方,接收方只能接收,无须去等待对方的响应。 同步:两个通信应用服务之间必须要进行同步,两个服务之间必须都是正常运行的。发送程序和接收程序都必须一直处于运行状态,并且随时做好相互通信的准备。发送程序首先向接收程序发起一个请求,称之为发送消息,发送程序紧接着就会堵塞当前自身的进程,不与其他应用进行任何的通信以及交互,等待接收程序的响应,待发送消息得到接收程序的返回消息之后会继续向下运行,进行下一步的业务处理。
jms是异步通信,发送方发送消息后就可以继续其它业务,而不用阻塞等等接收方响应。但接收方在接收消息上有两种模式:一种是同步接收消息,一种是异步接收消息。下面的示例中也会分别演示
同步接收消息:接收者主动接收消息,若消息队列中没有消息则阻塞等待,当然也有其它方法可以规定等待时间或是不等待。 异步接收消息:当消息队列有消息时会调用接收者的onMessage方法,接收者不用阻塞等待,可执行其它业务。 二、消息模型 jms支持两类消息传输模型:点对点模型(p2p)和发布/订阅模型(pub/sub)
1、p2p模型
点对点消息传送模型允许JMS客户端通过队列(queue)和这个虚拟通道来同步和异步发送、接收消息。消息生产者称为发送者(sender),消息消费者称为接收者(receiver)。传统上,点对点模型是一个基于拉取(pull)或轮询(polling)的消息传送模型,这种模型从队列中请求消息,而不是自动地将消息推送到客户端。 特点: (1)发送到队列的消息被一个而且仅仅一个接收者所接收; (2)队列保留信息,只到被消费或超时,接收者可用离线,上线时可消费消息。 (3)一旦消息被消费,就不会在队列中;
2、Pub/Sub模型
在发布/订阅模型中,消息会被发布到一个名为主题(topic)的虚拟通道中。消息生产者称为发布者(Publisher),而消息消费者称为订阅者(subscriber)。与点对点模型不同,使用发布/订阅模型发布到一个主题的消息,能够由多个订阅者所接收。有时候,也称这项技术为广播(broadcasting)消息。每个订阅者会接收到每条消息的一个副本。总的来说,发布/订阅消息传送模型基本上是一个基于推送(push)的模型,其中消息自动地向消费者广播,无需请求或轮询主题来获得新消息。 特点: (1) 每个消息可以有多个消费者 (2)发布者和订阅者之间有时间上的依赖性。针对某个主题(Topic)的订阅者,它必须创建一个订阅者之后,才能消费发布者的消息,而且为了消费消息,订阅者必须保持运行的状态。 (3)为了缓和这样严格的时间相关性,JMS允许订阅者创建一个可持久化的订阅。这样,即使订阅者没有被激活(运行),它也能接收到发布者的消息。 ———————————————— -----------------------------------------------------------------------------------
为了同时演示同步消息接收和异步消息接收,我们新建两个类(ActivemqQueueConsumer.java和ActivemqQueueConsumerAsyn.java),同步和异步的区别在于: 同步:使用Message message = consumer.receive()接收消息 异步:实现接口MessageListener,注册监听器 consumer.setMessageListener(this); //(异步接收) ,实现 onMessage方法 例子:
生产者类
package com.css.sword.service;

import javax.jms.*;


import org.apache.activemq.ActiveMQConnectionFactory;

public class ActivemqQueueProducer {
    private  Session session;
    private  MessageProducer producer ;
    private Connection connection;


    public  void initialize() throws JMSException
    {
        ConnectionFactory connectFactory = new ActiveMQConnectionFactory(
        "tcp://localhost:61616");
        connection = connectFactory.createConnection();
        //session = connection.createSession(true, Session.AUTO_ACKNOWLEDGE);//支持事务
        session = connection.createSession(false, Session.AUTO_ACKNOWLEDGE);//不支持事务

        Destination destination =  session.createQueue("queue1");
        producer = session.createProducer(destination);
        connection.start();

    }

    public void sendText(String Message)
    {
        try {
            TextMessage text = session.createTextMessage(Message);
            producer.send(text);
            System.out.println("Sending message:"+text.getText());


        } catch (JMSException e) {
            // TODO Auto-generated catch block
            e.printStackTrace();
        }

    }

    public void submit() throws JMSException
    {
        session.commit();
    }
    // 关闭连接
    public void close() throws JMSException {
        System.out.println("Producer:->Closing connection");
        if (producer != null)
            producer.close();
        if (session != null)
            session.close();
        if (connection != null)
            connection.close();
    }

}
同步接收
package com.css.sword.service;

import javax.jms.*;

import org.apache.activemq.ActiveMQConnectionFactory;

/**
 * <p>Title:ActivemqQueueConsumer</p>
 * <p>Description: 模拟同步接收消息</p>
 * @author yuanxj
 * @date 2016-1-20
 */
public class ActivemqQueueConsumer {

    private String name = "";


    private String subject = "TOOL.DEFAULT";

    private Destination destination = null;

    private Connection connection = null;

    private Session session = null;

    private MessageConsumer consumer = null;
    ActivemqQueueConsumer(String name){
        this.name=name;
    }

    public  void initialize() throws JMSException
    {
    ConnectionFactory connectFactory = new ActiveMQConnectionFactory(
"tcp://localhost:61616");
        Connection connection = connectFactory.createConnection();
        session = connection.createSession(false, Session.AUTO_ACKNOWLEDGE);
        Destination destination =  session.createQueue("queue1");
        consumer = session.createConsumer(destination);
        connection.start();

    }

    public void recive()
    {
        try {
            initialize();
            System.out.println("Consumer("+name+"):->Begin listening...");
            int count=0;
            while(count<10)
            {
                Message message = consumer.receive(); //主动接收消息(同步)
                System.out.println("consumer recive:"+((TextMessage)message).getText());
                count++;
                System.out.println(count);

            }
            } catch (JMSException e) {
            // TODO Auto-generated catch block
            e.printStackTrace();
        }
    }

    public void submit() throws JMSException
    {
        session.commit();
    }
     // 关闭连接
    public void close() throws JMSException {
        System.out.println("Consumer:->Closing connection");
        if (consumer != null)
            consumer.close();
        if (session != null)
            session.close();
        if (connection != null)
            connection.close();
    }

}
异步接收
package com.css.sword.service;

import javax.jms.Connection;
import javax.jms.ConnectionFactory;
import javax.jms.Destination;
import javax.jms.JMSException;
import javax.jms.Message;
import javax.jms.MessageConsumer;
import javax.jms.MessageListener;
import javax.jms.Session;
import javax.jms.TextMessage;

import org.apache.activemq.ActiveMQConnectionFactory;

/**
 * <p>Title:ActivemqQueueConsumerAsyn</p>
 * <p>Description: 异步接收信息</p>
 * @author yuanxj
 * @date 2016-1-20
 */
public class ActivemqQueueConsumerAsyn implements MessageListener{
    private String name = "";
    private Connection connection = null;
    private Session session = null;
    private MessageConsumer consumer = null;
    ActivemqQueueConsumerAsyn(String name){
        this.name=name;
    }

    public  void initialize() throws JMSException
    {ConnectionFactory connectFactory = new ActiveMQConnectionFactory(
"tcp://localhost:61616");
        Connection connection = connectFactory.createConnection();
        session = connection.createSession(false, Session.AUTO_ACKNOWLEDGE);
        Destination destination =  session.createQueue("queue1");
        consumer = session.createConsumer(destination);
        connection.start();

    }

    public void recive()
    {
        try {
            initialize();
            System.out.println("Consumer("+name+"):->Begin listening...");
            // 开始监听
            consumer.setMessageListener(this);  //(异步接收)

            } catch (JMSException e) {
            // TODO Auto-generated catch block
            e.printStackTrace();
        }
    }

    @Override
    public void onMessage(Message arg0) {
        // TODO Auto-generated method stub
        try{
            if(arg0 instanceof TextMessage)
            {
                TextMessage txtMsg = (TextMessage) arg0;
                System.out.println("consumer("+name+")异步 recive:"+txtMsg.getText());
                Thread.sleep(500);
            }
        }catch(Exception e)
        {
            e.printStackTrace();
        }

    }
    public void submit() throws JMSException
    {
        session.commit();
    }
     // 关闭连接
    public void close() throws JMSException {
        System.out.println("Consumer:->Closing connection");
        if (consumer != null)
            consumer.close();
        if (session != null)
            session.close();
        if (connection != null)
            connection.close();
    }

}
事务的控制语句为: session = connection.createSession(false, Session.AUTO_ACKNOWLEDGE);如果是false表示不支持事务,如果是true表示支持事务。如果支持事务则需submit提交,否则不入队列
JmsMessagingTemplate 消息的工具 类, 也可以注入 JmsTemplate, JmsMessagingTemp 对JmsTemplate 进行了封装。参数 destination 是发送到 队列的 message 待发送的消息
2,异步调用
Spring Boot 提供的异 处理方式@Async 处理。在 Spring Boot 架中,只要提过@ sync 注解就能将普通的同步任务改为异步调用任务, 使用@Async 注解之前,我 需要在入口类添 注解@ EnableAsync 开启异步调用。
例子:
服务层
@Slf4j
@Service
public class AsyncService {

	@Async
	public void asyncEvent() {
		log.info("async event invoked -> thread: " + Thread.currentThread().getName());
		try {
			Thread.sleep(3000);
		} catch (InterruptedException e) {
			e.printStackTrace();
		}
	}

	public void syncEvent() {
		log.info("sync event invoked -> thread: " + Thread.currentThread().getName());
		try {
			Thread.sleep(3000);
		} catch (InterruptedException e) {
			e.printStackTrace();
		}
	}
}
控制层
@Slf4j
@RestController
@RequestMapping("/async")
public class AsyncController {

	@Resource
	private AsyncService asyncService;

	@GetMapping("/doTask")
	public String doTask(){
		long start = System.currentTimeMillis();
		log.info("start the task:{}", start);
		// 调用同步方法
		asyncService.syncEvent();
		long syncTime = System.currentTimeMillis();
		log.info("sync event time cost:{}", syncTime - start);
		// 调用异步方法
		asyncService.asyncEvent();
		long asyncTime = System.currentTimeMillis();
		log.info("async event time cost:{}", asyncTime - syncTime);
		log.info("finish the task:{}",asyncTime);
		return "done";
	}
}
启动应用并访问http://localhost:8080/async/doTask,可看到控制台输出:
2019-01-09 11:34:04.002  INFO 8136 --- [nio-8080-exec-1] c.b.s.controller.AsyncController         : start the task:1547004844002
2019-01-09 11:34:04.005  INFO 8136 --- [nio-8080-exec-1] com.bo.springboot.service.AsyncService   : sync event invoked -> thread: http-nio-8080-exec-1
2019-01-09 11:34:07.005  INFO 8136 --- [nio-8080-exec-1] c.b.s.controller.AsyncController         : sync event time cost:3003
2019-01-09 11:34:07.013  INFO 8136 --- [nio-8080-exec-1] c.b.s.controller.AsyncController         : async event time cost:8
2019-01-09 11:34:07.014  INFO 8136 --- [nio-8080-exec-1] c.b.s.controller.AsyncController         : finish the task:1547004847013
2019-01-09 11:34:07.014  INFO 8136 --- [         task-1] com.bo.springboot.service.AsyncService   : async event invoked -> thread: task-1
可以看出,调用异步方法时,是立即返回的,基本没有耗时。这里有几点需要注意下:
-
@Async既可以注解在类上也可以注解在方法上,当声明在类级别上时,调用类中的所有方法都将异步执行。就目标方法签名而言,支持任何参数类型。但是,返回类型被约束为void或java.util.concurrent.Future。
-
在默认情况下,未设置
TaskExecutor时,默认是使用SimpleAsyncTaskExecutor这个线程池,但此线程不是真正意义上的线程池,因为线程不重用,每次调用都会创建一个新的线程。可通过控制台日志输出可以看出,每次输出线程名都是递增的。 -
调用的异步方法,不能为
同一个类的方法,简单来说,因为Spring在启动扫描时会为其创建一个代理类,而同类调用时,还是调用本身的代理类的,所以和平常调用是一样的。其他的注解如@Cache等也是一样的道理,说白了,就是Spring的代理机制造成的。
自定义线程池
前面有提到,在默认情况下,系统使用的是默认的SimpleAsyncTaskExecutor进行线程创建。所以一般上我们会自定义线程池来进行线程的复用。在配置类中创建一个自定义的ThreadPoolTaskExecutor线程池:
@Configuration
@EnableAsync
public class AsyncConfig {

	@Bean
	public ThreadPoolTaskExecutor AsyncTaskExecutor() {
		ThreadPoolTaskExecutor taskExecutor = new ThreadPoolTaskExecutor();
		taskExecutor.setCorePoolSize(10);
		taskExecutor.setMaxPoolSize(20);
		taskExecutor.setQueueCapacity(200);
		taskExecutor.setKeepAliveSeconds(60);
		taskExecutor.setThreadNamePrefix("async-task-");
		taskExecutor.setRejectedExecutionHandler(new ThreadPoolExecutor.CallerRunsPolicy());
		taskExecutor.initialize();
		return taskExecutor;
	}
}
再次启动应用访问http://localhost:8080/async/doTask,就可以看到已经是使用自定义的线程了
2019-01-09 16:55:20.091  INFO 2904 --- [nio-8080-exec-1] c.b.s.controller.AsyncController         : start the task:1547024120091
2019-01-09 16:55:20.094  INFO 2904 --- [nio-8080-exec-1] com.bo.springboot.service.AsyncService   : sync event invoked -> thread: http-nio-8080-exec-1
2019-01-09 16:55:23.095  INFO 2904 --- [nio-8080-exec-1] c.b.s.controller.AsyncController         : sync event time cost:3004
2019-01-09 16:55:23.106  INFO 2904 --- [nio-8080-exec-1] c.b.s.controller.AsyncController         : async event time cost:11
2019-01-09 16:55:23.107  INFO 2904 --- [nio-8080-exec-1] c.b.s.controller.AsyncController         : finish the task:1547024123106
2019-01-09 16:55:23.107  INFO 2904 --- [   async-task-1] com.bo.springboot.service.AsyncService   : async event invoked -> thread: async-task-1
如果在配置类中定义多个线程池,异步调用的时候使用的是哪个线程池?下面在配置类中定义2个线程池进行测试:
@Configuration
@EnableAsync
public class AsyncConfig {

	@Bean
	public ThreadPoolTaskExecutor asyncTaskExecutor1() {
		ThreadPoolTaskExecutor taskExecutor = new ThreadPoolTaskExecutor();
		taskExecutor.setCorePoolSize(10);
		taskExecutor.setMaxPoolSize(20);
		taskExecutor.setQueueCapacity(200);
		taskExecutor.setKeepAliveSeconds(60);
		taskExecutor.setThreadNamePrefix("async-task-1-");
		taskExecutor.setRejectedExecutionHandler(new ThreadPoolExecutor.CallerRunsPolicy());
		return taskExecutor;
	}

	@Bean
	public ThreadPoolTaskExecutor asyncTaskExecutor2() {
		ThreadPoolTaskExecutor taskExecutor = new ThreadPoolTaskExecutor();
		taskExecutor.setCorePoolSize(10);
		taskExecutor.setMaxPoolSize(20);
		taskExecutor.setQueueCapacity(200);
		taskExecutor.setKeepAliveSeconds(60);
		taskExecutor.setThreadNamePrefix("async-task-2-");
		taskExecutor.setRejectedExecutionHandler(new ThreadPoolExecutor.CallerRunsPolicy());
		return taskExecutor;
	}
}
启动应用访问http://localhost:8080/async/doTask,控制台输出如下:
2019-01-09 17:04:18.116  INFO 10744 --- [nio-8080-exec-1] c.b.s.controller.AsyncController         : start the task:1547024658116
2019-01-09 17:04:18.118  INFO 10744 --- [nio-8080-exec-1] com.bo.springboot.service.AsyncService   : sync event invoked -> thread: http-nio-8080-exec-1
2019-01-09 17:04:21.118  INFO 10744 --- [nio-8080-exec-1] c.b.s.controller.AsyncController         : sync event time cost:3002
2019-01-09 17:04:21.127  INFO 10744 --- [nio-8080-exec-1] .s.a.AnnotationAsyncExecutionInterceptor : More than one TaskExecutor bean found within the context, and none is named 'taskExecutor'. Mark one of them as primary or name it 'taskExecutor' (possibly as an alias) in order to use it for async processing: [asyncTaskExecutor1, asyncTaskExecutor2]
2019-01-09 17:04:21.130  INFO 10744 --- [nio-8080-exec-1] c.b.s.controller.AsyncController         : async event time cost:12
2019-01-09 17:04:21.130  INFO 10744 --- [nio-8080-exec-1] c.b.s.controller.AsyncController         : finish the task:1547024661130
2019-01-09 17:04:21.130  INFO 10744 --- [cTaskExecutor-1] com.bo.springboot.service.AsyncService   : async event invoked -> thread: SimpleAsyncTaskExecutor-1
发现异步调用使用的不是配置类中自定义的线程池线程,而是SimpleAsyncTaskExecutor的线程,其中有一行日志说明了原因:
More than one TaskExecutor bean found within the context, and none is named 'taskExecutor'. Mark one of them as primary or name it 'taskExecutor' (possibly as an alias) in order to use it for async processing: [asyncTaskExecutor1, asyncTaskExecutor2]
由于没有指定异步调用使用的哪一个线程池,所以最后使用了spring的默认线程池:SimpleAsyncTaskExecutor,怎么指定?
1、在其中一个自定义线程池bean添加注解@Primary或设置bean的name属性为"taskExecutor"
	@Bean
	@Primary
	public ThreadPoolTaskExecutor AsyncTaskExecutor1() ...
2、在@Async注解的value属性指定异步调度的线程池(bean name)
 	@Bean(name = "taskExecutor")
	public ThreadPoolTaskExecutor AsyncTaskExecutor1() ...
注意:当在类级别的@Async注解指定时,表示指定的线程池用于类中的所有方法,而方法级别的@Async注解指定的线程池始终覆盖在类级别设置的任何值。
关于ThreadPoolTaskExecutor参数说明
-
corePoolSize:线程池维护线程的最少数量
-
maxPoolSize:线程池维护线程的最大数量,只有在缓冲队列满了之后才会申请超过核心线程数的线程
-
queueCapacity:任务缓存队列
-
keepAliveSeconds:允许线程的空闲时间,当超过了核心线程数之外的线程在空闲时间到达之后会被销毁
-
threadNamePrefix:线程池中线程的名称前缀
-
rejectedExecutionHandler:线程池对拒绝任务(无线程可用)的处理策略。这里采用了CallerRunsPolicy策略,当线程池没有处理能力的时候,该策略会直接在 execute 方法的调用线程中运行被拒绝的任务;如果执行程序已关闭,则会丢弃该任务。还有一个是AbortPolicy策略:处理程序遭到拒绝将抛出运行时RejectedExecutionException。
另外在一些场景下,若需要在关闭线程池时等待当前调度任务完成后才开始关闭,可以通过简单的配置,进行优雅的停机策略配置。关键就是通过setWaitForTasksToCompleteOnShutdown(true)和setAwaitTerminationSeconds方法。
-
setWaitForTasksToCompleteOnShutdown:表明是否等待所有线程执行完任务,默认为false
-
setAwaitTerminationSeconds:等待的时间,超过这个时间就强制销毁,因为不能无限的等待下去以确保应用最后能够被关闭
所以,完整线程池配置为:
	@Bean
	public ThreadPoolTaskExecutor asyncTaskExecutor1() {
		ThreadPoolTaskExecutor taskExecutor = new ThreadPoolTaskExecutor();
		taskExecutor.setCorePoolSize(10);
		taskExecutor.setMaxPoolSize(20);
		taskExecutor.setQueueCapacity(200);
		taskExecutor.setKeepAliveSeconds(60);
		taskExecutor.setThreadNamePrefix("async-task-1-");
		taskExecutor.setRejectedExecutionHandler(new ThreadPoolExecutor.CallerRunsPolicy());
		taskExecutor.setWaitForTasksToCompleteOnShutdown(true);
		taskExecutor.setAwaitTerminationSeconds(60);
		taskExecutor.initialize();
		return taskExecutor;
	}
异步回调及超时处理
对于一些业务场景下,需要异步回调的返回值时,就需要使用异步回调来完成了。主要就是通过Future进行异步回调。
Tips:什么是Future类型?
Future是对于具体的Runnable或者Callable任务的执行结果进行取消、查询是否完成、获取结果的接口。必要时可以通过get方法获取执行结果,该方法会阻塞直到任务返回结果。
它的接口定义如下:
public interface Future<V> {
    boolean cancel(boolean mayInterruptIfRunning);
    boolean isCancelled();
    boolean isDone();
    V get() throws InterruptedException, ExecutionException;
    V get(long timeout, TimeUnit unit)
        throws InterruptedException, ExecutionException, TimeoutException;
}
它声明这样的五个方法:
-
cancel方法用来取消任务,如果取消任务成功则返回true,如果取消任务失败则返回false。参数mayInterruptIfRunning表示是否允许取消正在执行却没有执行完毕的任务,如果设置true,则表示可以取消正在执行过程中的任务。如果任务已经完成,则无论mayInterruptIfRunning为true还是false,此方法肯定返回false,即如果取消已经完成的任务会返回false;如果任务正在执行,若mayInterruptIfRunning设置为true,则返回true,若mayInterruptIfRunning设置为false,则返回false;如果任务还没有执行,则无论mayInterruptIfRunning为true还是false,肯定返回true。
-
isCancelled方法表示任务是否被取消成功,如果在任务正常完成前被取消成功,则返回true
-
isDone方法表示任务是否已经完成,若任务完成,则返回true
-
get()方法用来获取执行结果,这个方法会产生阻塞,会一直等到任务执行完毕才返回
-
get(long timeout, TimeUnit unit)用来获取执行结果,如果在指定时间内,还没获取到结果,则抛出TimeoutException,结果返回null
也就是说Future提供了三种功能:
-
判断任务是否完成;
-
能够中断任务;
-
能够获取任务执行结果。
异步回调
新增具有Future类型返回值的异步方法和接口:
	@Async
	public Future<String> asyncRet(){
		log.info("async task invoked -> thread: {}", Thread.currentThread().getName());
		try {
			Thread.sleep(3000);
		}catch (InterruptedException e){
			e.printStackTrace();
		}
		return new AsyncResult<>("Async Result");
	}
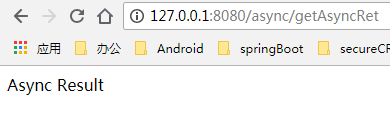
@GetMapping("/getAsyncRet")
	public String doAsync() throws ExecutionException, InterruptedException {
		long begin = Clock.systemUTC().millis();
		log.info("start the async task: {}", begin);
		Future<String> future = asyncService.asyncRet();
		while (true){
			if(future.isDone()){
				break;
			}
		}
		long end = Clock.systemUTC().millis();
		log.info("async task time cost: {}", end - begin);
		log.info("finish the async task: {}", end);
		return future.get();
	}
其中AsyncResult是Spring提供的一个Future接口的子类,然后通过isDone方法,判断是否已经执行完毕。此时,控制台输出:
 2019-01-10 11:37:59.468  INFO 6672 --- [nio-8080-exec-1] c.b.s.controller.AsyncController         : start the async task: 1547091479468
2019-01-10 11:37:59.473  INFO 6672 --- [ async-task-1-1] com.bo.springboot.service.AsyncService   : async task invoked -> thread: async-task-1-1
2019-01-10 11:38:02.474  INFO 6672 --- [nio-8080-exec-1] c.b.s.controller.AsyncController         : async task time cost: 3006
2019-01-10 11:38:02.474  INFO 6672 --- [nio-8080-exec-1] c.b.s.controller.AsyncController         : finish the async task: 1547091482474
等待3秒后页面显示:
所以,当某个业务功能可以同时拆开一起执行时,可利用异步回调机制有效的减少程序执行时间,提高效率。
超时处理
对于一些需要异步回调的函数,不能无期限的等待下去,所以一般上需要设置超时时间,超时后可将线程释放,而不至于一直堵塞而占用资源。对于Future配置超时,很简单,通过get方法指定超时即可。
	@GetMapping("/getAsyncRetWithTimeout")
	public String getAsyncRetWithTimeout() throws InterruptedException, ExecutionException, TimeoutException {
		Future<String> future = asyncService.asyncRet();
		// 2秒后超时
		return future.get(2000, TimeUnit.MILLISECONDS);
	}
超时后,会抛出异常TimeoutException类,此时可进行统一异常捕获即可。
2019-01-10 11:51:50.598  INFO 9036 --- [ async-task-1-1] com.bo.springboot.service.AsyncService   : async task invoked -> thread: async-task-1-1
2019-01-10 11:51:52.642 ERROR 9036 --- [nio-8080-exec-1] o.a.c.c.C.[.[.[/].[dispatcherServlet]    : Servlet.service() for servlet [dispatcherServlet] in context with path [] threw exception [Request processing failed; nested exception is java.util.concurrent.TimeoutException] with root cause

java.util.concurrent.TimeoutException: null
	at java.util.concurrent.FutureTask.get(FutureTask.java:205) ~[na:1.8.0_181]
	at com.bo.springboot.controller.AsyncController.getAsyncRetWithTimeout(AsyncController.java:65) ~[classes/:na]
	at sun.reflect.NativeMethodAccessorImpl.invoke0(Native Method) ~[na:1.8.0_181]
	at sun.reflect.NativeMethodAccessorImpl.invoke(NativeMethodAccessorImpl.java:62) ~[na:1.8.0_181]
小结
本节主要是讲解了异步调用的使用及相关配置,如超时,异常等处理。在剥离一些和业务无关的操作时,就可以考虑使用异步调用进行其他无关业务操作,以此提供业务的处理效率。或者一些业务场景下可拆分出多个方法进行同步执行又互不影响时,也可以考虑使用异步调用方式提高执行效率。
10,全局异常处理与Retry重试
1,全局异常处理
首先定义 异常处理类BusinessException
publ class BusinessException extends RuntimeException{
    public BusinessException() {}
    public BusinessException(String message) {
    super(message) ;
}
在com.example.demo下创建错误的实体类ErrorInfo<T>
public class Errorinfo<T> {
        public static final Integer SUCCESS = 200;
        public static final Integer ERROR = 100;
        //错误信息
        private Integer code;
        //错误码
        private String message ;
        private String url;
        private T data;
        //省略 set get 方法
}
在ErrorInfo同包下新建统 一异常处理类 GlobalDefaultExceptionHandler
	@ControllerAdvice(basePackages ={"com.example.demo",})
public class GlobalDefaultExceptionHandler {
	@ExceptionHandler({BusinessException.class})
//如果返回的为 jso口数据或其他对象,就添加该注解
@ResponseBody
	public Errorinfo defaultErrorHandler(HttpServletRequest req,
Exception e)
	throws Exception {
        Errorinfo errorinfo =new Errorinfo();
        errorinfo.setMessage(e.getMessage());
        errorinfo.setUrl(req.getRequestURI());
        errorinfo.setCode(Errorinfo.SUCCESS) ;
	return errorinfo
	}
}
•@ControllerAdvice :定义统一的异常处理类, basePackages 属性用 定义扫描 哪些包,默认可不设直。
• @ExceptionHandler :用来定义函数针对的异常类型,可以传入多个需要捕获 的异常类。
• @ResponseBody :如果返回的为 json 数据或其他对象,就添加该注解
在需要时抛出异常即可
11,Spring Boot原理解析
1,@SpringBootApplication
@SpringBootApplication 启了 Spring 的组件扫描和 Spring Boot 自动配 置功 。实际上它是 复合注解,包含 重要的注解: SpringBootConfiguration 、@ EnableAutoConfiguration Compon ntScan
@SpringBootConfiguration 注解:标明该类使用 Spring 基于 Java 的注解, Sp1ing Boot 推荐我们使用基于 Java 而不是 XML 的配直,所以本书的实 战例子都是基于 Java 而不是 XML 的配直 本书使用的 Spring Boot 版本为 2.0.0.RCl 查看 @SpringBootConfiguration 源代码,可以看到它对 @Configuration 进行 简单的“包装”,然后取名为 @SpringBootConfiguration 我们对@Configuration 注解并不陌生,它就是 JavaCon句形式的 Spring IoC 容器 的配置类使用的@Configuration
• @EnableAutoConfiguration 注解 :该注解可以 开启自动配置的功 能。从@EnableAutoConfiguration 的源代码可以看出,其包含@Import 注解。而 我们知道, Import 注解 的主 作用就是借助 EnableAutoConfigurationlmportSele ct or Spring Boot 应用所有 符合条件 Configuration 配置都加载到 Spring Boot 创建并使用的 Ioc 容器 中, Ioc 容器就是我们所说的 Spring 应用程序上下 ApplicationContext 。学习 Spring 框架就知道, Spring 框架提供了很多 Enable 开头 的注解定义,比如@EnableScheduling 、@EnableCaching 等。而这些@Enable 开头的 注解都有一 同的功能,就是借助@Import 的支持收 和注册特定场 相关的 bean 定义,
• @ComponentScan 注解:启动组件扫描,开发的组件或 bean 定义能被自动友 现并注入 Sprin g应用程序上下文 ,比如我们在控制层添加 Controller 注解、 在服务层添加@ Service 注解和@Component 主解等,这些注解都可以被@ ComponentScan 注解扫描到。
2,SpringApplication run 方法
读源码知从源代码可以看出, Spring Boot 首先开启了一个 SpringApplicationRunListeners 监听器,然后通过 createApplicationContext prepareContext refreshContext 方法创建、 准备、刷新应用上下文 ConfigurableApplicationContext ,通过上下文加载应用所需的 类和各种环境配置等,最后启动一个应用实例。
3,SpringApplicationRunlisteners 监昕器
SpringApplicationRunListener 接口规 定了 SpringBoot 的生命周期,在各个生命 周期广播相应的事件(ApplicationEvent ),实 际调用的是 applicationListener 类。 SpringApplicationRunListener具体源代码 在同名接口中查看
而ApplicationListener Spring 框架到 Java 实现的监听器模式的一种框架实现。 具体源代码在同名接口中查看
ApplicationListener 接口只有一个方法 onApplicationEvent ,所以自己 的类在实现该接口的时候要实现该方法 如果在上下 ApplicationContext 中部 署一 个实现了 ApplicationListener 接口的监 昕器, 每当 ApplicationEvent 件发布到 ApplicationContext 时, 该监 器就会得 到通知 如果我们要为 Spring Boot 应用添 加自定义的 App li cationListener ,那么可以通过 SpringAppllication.addListeners()或者 SpringApplication.setListeners () 方法添加一个或者多个自定义的 ApplicationListener
4,ApplicationContextlnitializer 接口
在Spring Boot 准备上下文 prepareContext 时, 会对 ConfigurableApplicationContext 实例做进一步的设置或者处理 prepareContext 的源代码
在准备上下文 prepareContext 的方法中,通过applyinitializers方法对context上下文进行设置和处理,具体看源码
在applyInitializers方法中,主要调用ApplicationContextInitializer 类的initialize方法对应用上下文进行设置和处理。ApplicationContextInitializer 本质上是一个回调接口,用于在ConfigurableApplicationContext执行refresh操作之前对它进行一些初始化操作。一般情况下,我们基本不需要自定义一个ApplicationContextInitializer,如果真需要自定义一个ApplicationContextInitializer,那么可以通过SpringApplication.addInitializers()设置。
5, ApplicationRunner与CommandLineRunner
ApplicationRunner与CommandLineRunner接口执行点是在容器启动成功后的最后一步回调,我们可以在回调方法run中执行相关逻辑。ApplicationRunner具体源代码
在ApplicationRunner或CommandLineRunner类中只有-一个run方法,但是它们的入参不一样,分别是ApplicationArguments和可变String数组。如果有多个ApplicationRunner或CommandLineRunner实现类,而我们需要按一定顺序执行它们,那么可以在实现类上加上@Order (value= 整数值)注解,SpringBoot会按照@Order中的value值从小到大依次执行。
12 ,Spring Boot的执行流程
(1)项目启动时,调用入口类MySpringBootApplication的main方法。
(2)入口类MySpringBootApplication的main方法会调用SpringApplication的静态方法run。
(3)在run方法中首先创建一个SpringApplication对象实例,然后调用SpringApplication对象实例的run方法。
(4)查询和加载所有的SpringApplicationListener监听器。
(5) Spring ApplicationListener监听器调用其starting方法,Spring Boot通知这些 SpringApplicationListener监听器,马上 要开始执行了。
(6)创建和准备SpringBoot应用将要使用的Environment环境,包括配置要使用的PropertySource以及Profile。
(7)创建和初始化应用上下文ApplicationContext。这一步只是准备 工作,并未开始正式创建。
(8)这一-步是最重要的,Spring Boot会通过@EnableAutoConfiguration获取所有配置以及其他形式的Ioc容器配置,并加 载到已经准备完毕的ApplicationContext。
(9)主要是调用ApplicationContextInitializer类的initialize 方法对应用上下文进行设置和处理。
(10)调用ApplicationContext上下文的refresh方法,使Ioc容器达到可用状态。
(11) 查找当前ApplicationContext 上下文是否注册ApplicationRunner与CommandL ineRunner,如果有,循环遍历执行ApplicationRunner和CommandL ineRunner的run方法。
(12)执行SpringApplicationListener的finished方法,Spring Boot应用启动完毕。
常用的Spring-boot-starter起步依赖
13,Spring Security
Spring Security 安全框架除了包含基本的认证和授权功能外,还提供了加密解密、 统一登录等一系列支持。 Spring Security 安全框架简单的实现原理如图
在图中, Accessor 是资源的访问者,在访问过程中,需要经过一系 列拦 截器 Interceptor 的拦截,比如 FilterSecuritylnterceptor ,MethodSecuritylnterceptor,AspectJSecurityinterceptor 等。这些拦截器是统一 的抽象类 AbstractSecurity Interceptor 的具体实现。
“控制机构” AccessDecisionManager 决定谁可以访问资源,而“身份认 证机构” AuthenticationManager 就是定义那个“谁”,解决的是访问者身份认证问题, 只有确定注册类,才可以给予授权访问。 “控制机构” AccessDecisionManager 和“身 份认证机构” AuthenticationManager 责制 订规则, abstractSecurityInterceptor 负责 执行
首先我们看下它的官网介绍:Spring Security官网地址
Spring Security is a powerful and highly customizable authentication and access-control framework. It is the de-facto standard for securing Spring-based applications.
Spring Security is a framework that focuses on providing both authentication and authorization to Java applications. Like all Spring projects, the real power of Spring Security is found in how easily it can be extended to meet custom requirements
Spring Security是一个功能强大且高度可定制的身份验证和访问控制框架。它实际上是保护基于spring的应用程序的标准。
Spring Security是一个框架,侧重于为Java应用程序提供身份验证和授权。与所有Spring项目一样,Spring安全性的真正强大之处在于它可以轻松地扩展以满足定制需求
从官网的介绍中可以知道这是一个权限框架。想我们之前做项目是没有使用框架是怎么控制权限的?对于权限 一般会细分为功能权限,访问权限,和菜单权限。代码会写的非常的繁琐,冗余。
怎么解决之前写权限代码繁琐,冗余的问题,一些主流框架就应运而生而Spring Scecurity就是其中的一种。
Spring 是一个非常流行和成功的 Java 应用开发框架。Spring Security 基于 Spring 框架,提供了一套 Web 应用安全性的完整解决方案。一般来说,Web 应用的安全性包括用户认证(Authentication)和用户授权(Authorization)两个部分。用户认证指的是验证某个用户是否为系统中的合法主体,也就是说用户能否访问该系统。用户认证一般要求用户提供用户名和密码。系统通过校验用户名和密码来完成认证过程。用户授权指的是验证某个用户是否有权限执行某个操作。在一个系统中,不同用户所具有的权限是不同的。比如对一个文件来说,有的用户只能进行读取,而有的用户可以进行修改。一般来说,系统会为不同的用户分配不同的角色,而每个角色则对应一系列的权限。
对于上面提到的两种应用情景,Spring Security 框架都有很好的支持。在用户认证方面,Spring Security 框架支持主流的认证方式,包括 HTTP 基本认证、HTTP 表单验证、HTTP 摘要认证、OpenID 和 LDAP 等。在用户授权方面,Spring Security 提供了基于角色的访问控制和访问控制列表(Access Control List,ACL),可以对应用中的领域对象进行细粒度的控制。
实战测试
实验环境搭建
1、新建一个初始的springboot项目web模块,thymeleaf模块
2、导入静态资源
welcome.html
|views
|level1
1.html
2.html
3.html
|level2
1.html
2.html
3.html
|level3
1.html
2.html
3.html
Login.html
3、controller跳转!
package com.kuang.controller;

import org.springframework.stereotype.Controller;
import org.springframework.web.bind.annotation.PathVariable;
import org.springframework.web.bind.annotation.RequestMapping;

@Controller
public class RouterController {

   @RequestMapping({"/","/index"})
   public String index(){
       return "index";
  }

   @RequestMapping("/toLogin")
   public String toLogin(){
       return "views/login";
  }

   @RequestMapping("/level1/{id}")
   public String level1(@PathVariable("id") int id){
       return "views/level1/"+id;
  }

   @RequestMapping("/level2/{id}")
   public String level2(@PathVariable("id") int id){
       return "views/level2/"+id;
  }

   @RequestMapping("/level3/{id}")
   public String level3(@PathVariable("id") int id){
       return "views/level3/"+id;
  }

}
4、测试实验环境是否OK!
认识SpringSecurity
Spring Security 是针对Spring项目的安全框架,也是Spring Boot底层安全模块默认的技术选型,他可以实现强大的Web安全控制,对于安全控制,我们仅需要引入 spring-boot-starter-security 模块,进行少量的配置,即可实现强大的安全管理!
记住几个类:
-
WebSecurityConfigurerAdapter:自定义Security策略
-
AuthenticationManagerBuilder:自定义认证策略
-
@EnableWebSecurity:开启WebSecurity模式
Spring Security的两个主要目标是 “认证” 和 “授权”(访问控制)。
“认证”(Authentication)
身份验证是关于验证您的凭据,如用户名/用户ID和密码,以验证您的身份。
身份验证通常通过用户名和密码完成,有时与身份验证因素结合使用。
“授权” (Authorization)
授权发生在系统成功验证您的身份后,最终会授予您访问资源(如信息,文件,数据库,资金,位置,几乎任何内容)的完全权限。
这个概念是通用的,而不是只在Spring Security 中存在。
认证和授权
目前,我们的测试环境,是谁都可以访问的,我们使用 Spring Security 增加上认证和授权的功能
1、引入 Spring Security 模块
<dependency>
   <groupId>org.springframework.boot</groupId>
   <artifactId>spring-boot-starter-security</artifactId>
</dependency>
2、编写 Spring Security 配置类
参考官网:https://spring.io/projects/spring-security
查看我们自己项目中的版本,找到对应的帮助文档:
https://docs.spring.io/spring-security/site/docs/5.3.0.RELEASE/reference/html5 #servlet-applications 8.16.4
3、编写基础配置类
package com.kuang.config;

import org.springframework.security.config.annotation.web.builders.HttpSecurity;
import org.springframework.security.config.annotation.web.configuration.EnableWebSecurity;
import org.springframework.security.config.annotation.web.configuration.WebSecurityConfigurerAdapter;

@EnableWebSecurity // 开启WebSecurity模式
public class SecurityConfig extends WebSecurityConfigurerAdapter {

   @Override
   protected void configure(HttpSecurity http) throws Exception {

  }
}
4、定制请求的授权规则
@Override
protected void configure(HttpSecurity http) throws Exception {
   // 定制请求的授权规则
   // 首页所有人可以访问
   http.authorizeRequests().antMatchers("/").permitAll()
  .antMatchers("/level1/**").hasRole("vip1")
  .antMatchers("/level2/**").hasRole("vip2")
  .antMatchers("/level3/**").hasRole("vip3");
}
5、测试一下:发现除了首页都进不去了!因为我们目前没有登录的角色,因为请求需要登录的角色拥有对应的权限才可以!
6、在configure()方法中加入以下配置,开启自动配置的登录功能!
// 开启自动配置的登录功能
// /login 请求来到登录页
// /login?error 重定向到这里表示登录失败
http.formLogin();
7、测试一下:发现,没有权限的时候,会跳转到登录的页面!
8、查看刚才登录页的注释信息;
我们可以定义认证规则,重写configure(AuthenticationManagerBuilder auth)方法
//定义认证规则
@Override
protected void configure(AuthenticationManagerBuilder auth) throws Exception {

   //在内存中定义,也可以在jdbc中去拿....
   auth.inMemoryAuthentication()
          .withUser("kuangshen").password("123456").roles("vip2","vip3")
          .and()
          .withUser("root").password("123456").roles("vip1","vip2","vip3")
          .and()
          .withUser("guest").password("123456").roles("vip1","vip2");
}
9、测试,我们可以使用这些账号登录进行测试!发现会报错!
There is no PasswordEncoder mapped for the id “null”
10、原因,我们要将前端传过来的密码进行某种方式加密,否则就无法登录,修改代码
//定义认证规则
@Override
protected void configure(AuthenticationManagerBuilder auth) throws Exception {
   //在内存中定义,也可以在jdbc中去拿....
   //Spring security 5.0中新增了多种加密方式,也改变了密码的格式。
   //要想我们的项目还能够正常登陆,需要修改一下configure中的代码。我们要将前端传过来的密码进行某种方式加密
   //spring security 官方推荐的是使用bcrypt加密方式。

   auth.inMemoryAuthentication().passwordEncoder(new BCryptPasswordEncoder())
          .withUser("kuangshen").password(new BCryptPasswordEncoder().encode("123456")).roles("vip2","vip3")
          .and()
          .withUser("root").password(new BCryptPasswordEncoder().encode("123456")).roles("vip1","vip2","vip3")
          .and()
          .withUser("guest").password(new BCryptPasswordEncoder().encode("123456")).roles("vip1","vip2");
}
11、测试,发现,登录成功,并且每个角色只能访问自己认证下的规则!搞定
权限控制和注销
1、开启自动配置的注销的功能
//定制请求的授权规则
@Override
protected void configure(HttpSecurity http) throws Exception {
   //....
   //开启自动配置的注销的功能
      // /logout 注销请求
   http.logout();
}
2、我们在前端,增加一个注销的按钮,index.html 导航栏中
<a class="item" th:href="@{/logout}">
   <i class="address card icon"></i> 注销
</a>
3、我们可以去测试一下,登录成功后点击注销,发现注销完毕会跳转到登录页面!
4、但是,我们想让他注销成功后,依旧可以跳转到首页,该怎么处理呢?
// .logoutSuccessUrl("/"); 注销成功来到首页
http.logout().logoutSuccessUrl("/");
5、测试,注销完毕后,发现跳转到首页OK
6、我们现在又来一个需求:用户没有登录的时候,导航栏上只显示登录按钮,用户登录之后,导航栏可以显示登录的用户信息及注销按钮!还有就是,比如kuangshen这个用户,它只有 vip2,vip3功能,那么登录则只显示这两个功能,而vip1的功能菜单不显示!这个就是真实的网站情况了!该如何做呢?
我们需要结合thymeleaf中的一些功能
sec:authorize="isAuthenticated()":是否认证登录!来显示不同的页面
Maven依赖:
<!-- https://mvnrepository.com/artifact/org.thymeleaf.extras/thymeleaf-extras-springsecurity4 -->
<dependency>
   <groupId>org.thymeleaf.extras</groupId>
   <artifactId>thymeleaf-extras-springsecurity5</artifactId>
   <version>3.0.4.RELEASE</version>
</dependency>
7、修改我们的 前端页面
-
导入命名空间
-
xmlns:sec="http://www.thymeleaf.org/thymeleaf-extras-springsecurity5"
-
修改导航栏,增加认证判断
-
<!--登录注销-->
<div class="right menu">

   <!--如果未登录-->
   <div sec:authorize="!isAuthenticated()">
       <a class="item" th:href="@{/login}">
           <i class="address card icon"></i> 登录
       </a>
   </div>

   <!--如果已登录-->
   <div sec:authorize="isAuthenticated()">
       <a class="item">
           <i class="address card icon"></i>
          用户名:<span sec:authentication="principal.username"></span>
          角色:<span sec:authentication="principal.authorities"></span>
       </a>
   </div>

   <div sec:authorize="isAuthenticated()">
       <a class="item" th:href="@{/logout}">
           <i class="address card icon"></i> 注销
       </a>
   </div>
</div>
8、重启测试,我们可以登录试试看,登录成功后确实,显示了我们想要的页面;
9、如果注销404了,就是因为它默认防止csrf跨站请求伪造,因为会产生安全问题,我们可以将请求改为post表单提交,或者在spring security中关闭csrf功能;我们试试:在 配置中增加 http.csrf().disable();
http.csrf().disable();//关闭csrf功能:跨站请求伪造,默认只能通过post方式提交logout请求
http.logout().logoutSuccessUrl("/");
10、我们继续将下面的角色功能块认证完成!
<!-- sec:authorize="hasRole('vip1')" -->
<div class="column" sec:authorize="hasRole('vip1')">
   <div class="ui raised segment">
       <div class="ui">
           <div class="content">
               <h5 class="content">Level 1</h5>
               <hr>
               <div><a th:href="@{/level1/1}"><i class="bullhorn icon"></i> Level-1-1</a></div>
               <div><a th:href="@{/level1/2}"><i class="bullhorn icon"></i> Level-1-2</a></div>
               <div><a th:href="@{/level1/3}"><i class="bullhorn icon"></i> Level-1-3</a></div>
           </div>
       </div>
   </div>
</div>

<div class="column" sec:authorize="hasRole('vip2')">
   <div class="ui raised segment">
       <div class="ui">
           <div class="content">
               <h5 class="content">Level 2</h5>
               <hr>
               <div><a th:href="@{/level2/1}"><i class="bullhorn icon"></i> Level-2-1</a></div>
               <div><a th:href="@{/level2/2}"><i class="bullhorn icon"></i> Level-2-2</a></div>
               <div><a th:href="@{/level2/3}"><i class="bullhorn icon"></i> Level-2-3</a></div>
           </div>
       </div>
   </div>
</div>

<div class="column" sec:authorize="hasRole('vip3')">
   <div class="ui raised segment">
       <div class="ui">
           <div class="content">
               <h5 class="content">Level 3</h5>
               <hr>
               <div><a th:href="@{/level3/1}"><i class="bullhorn icon"></i> Level-3-1</a></div>
               <div><a th:href="@{/level3/2}"><i class="bullhorn icon"></i> Level-3-2</a></div>
               <div><a th:href="@{/level3/3}"><i class="bullhorn icon"></i> Level-3-3</a></div>
           </div>
       </div>
   </div>
</div>
11、测试一下!
12、权限控制和注销搞定!
记住我
现在的情况,我们只要登录之后,关闭浏览器,再登录,就会让我们重新登录,但是很多网站的情况,就是有一个记住密码的功能,这个该如何实现呢?很简单
1、开启记住我功能
//定制请求的授权规则
@Override
protected void configure(HttpSecurity http) throws Exception {
//。。。。。。。。。。。
   //记住我
   http.rememberMe();
}
2、我们再次启动项目测试一下,发现登录页多了一个记住我功能,我们登录之后关闭 浏览器,然后重新打开浏览器访问,发现用户依旧存在!
思考:如何实现的呢?其实非常简单
我们可以查看浏览器的cookie
3、我们点击注销的时候,可以发现,spring security 帮我们自动删除了这个 cookie
4、结论:登录成功后,将cookie发送给浏览器保存,以后登录带上这个cookie,只要通过检查就可以免登录了。如果点击注销,则会删除这个cookie,具体的原理我们在JavaWeb阶段都讲过了,这里就不在多说了!
定制登录页
现在这个登录页面都是spring security 默认的,怎么样可以使用我们自己写的Login界面呢?
1、在刚才的登录页配置后面指定 loginpage
http.formLogin().loginPage("/toLogin");
2、然后前端也需要指向我们自己定义的 login请求
<a class="item" th:href="@{/toLogin}">
   <i class="address card icon"></i> 登录
</a>
3、我们登录,需要将这些信息发送到哪里,我们也需要配置,login.html 配置提交请求及方式,方式必须为post:
在 loginPage()源码中的注释上有写明:
<form th:action="@{/login}" method="post">
   <div class="field">
       <label>Username</label>
       <div class="ui left icon input">
           <input type="text" placeholder="Username" name="username">
           <i class="user icon"></i>
       </div>
   </div>
   <div class="field">
       <label>Password</label>
       <div class="ui left icon input">
           <input type="password" name="password">
           <i class="lock icon"></i>
       </div>
   </div>
   <input type="submit" class="ui blue submit button"/>
</form>
4、这个请求提交上来,我们还需要验证处理,怎么做呢?我们可以查看formLogin()方法的源码!我们配置接收登录的用户名和密码的参数!
http.formLogin()
  .usernameParameter("username")
  .passwordParameter("password")
  .loginPage("/toLogin")
  .loginProcessingUrl("/login"); // 登陆表单提交请求
5、在登录页增加记住我的多选框
<input type="checkbox" name="remember"> 记住我
6、后端验证处理!
//定制记住我的参数!
http.rememberMe().rememberMeParameter("remember");
7、测试,OK
完整配置代码
package com.kuang.config;

import org.springframework.security.config.annotation.authentication.builders.AuthenticationManagerBuilder;
import org.springframework.security.config.annotation.web.builders.HttpSecurity;
import org.springframework.security.config.annotation.web.configuration.EnableWebSecurity;
import org.springframework.security.config.annotation.web.configuration.WebSecurityConfigurerAdapter;
import org.springframework.security.crypto.bcrypt.BCryptPasswordEncoder;

@EnableWebSecurity
public class SecurityConfig extends WebSecurityConfigurerAdapter {

   //定制请求的授权规则
   @Override
   protected void configure(HttpSecurity http) throws Exception {

       http.authorizeRequests().antMatchers("/").permitAll()
      .antMatchers("/level1/**").hasRole("vip1")
      .antMatchers("/level2/**").hasRole("vip2")
      .antMatchers("/level3/**").hasRole("vip3");


       //开启自动配置的登录功能:如果没有权限,就会跳转到登录页面!
           // /login 请求来到登录页
           // /login?error 重定向到这里表示登录失败
       http.formLogin()
          .usernameParameter("username")
          .passwordParameter("password")
          .loginPage("/toLogin")
          .loginProcessingUrl("/login"); // 登陆表单提交请求

       //开启自动配置的注销的功能
           // /logout 注销请求
           // .logoutSuccessUrl("/"); 注销成功来到首页

       http.csrf().disable();//关闭csrf功能:跨站请求伪造,默认只能通过post方式提交logout请求
       http.logout().logoutSuccessUrl("/");

       //记住我
       http.rememberMe().rememberMeParameter("remember");
  }

   //定义认证规则
   @Override
   protected void configure(AuthenticationManagerBuilder auth) throws Exception {
       //在内存中定义,也可以在jdbc中去拿....
       //Spring security 5.0中新增了多种加密方式,也改变了密码的格式。
       //要想我们的项目还能够正常登陆,需要修改一下configure中的代码。我们要将前端传过来的密码进行某种方式加密
       //spring security 官方推荐的是使用bcrypt加密方式。

       auth.inMemoryAuthentication().passwordEncoder(new BCryptPasswordEncoder())
              .withUser("kuangshen").password(new BCryptPasswordEncoder().encode("123456")).roles("vip2","vip3")
              .and()
              .withUser("root").password(new BCryptPasswordEncoder().encode("123456")).roles("vip1","vip2","vip3")
              .and()
              .withUser("guest").password(new BCryptPasswordEncoder().encode("123456")).roles("vip1","vip2");
  }
}
14, Apache Shiro
Apache Shiro Features 特性
Apache Shiro 是一个全面的、蕴含丰富功能的安全框架。下图为描述 Shiro 功能的框架图:
Authentication(认证), Authorization(授权), Session Management(会话管理), Cryptography(加密)被 Shiro 框架的开发团队称之为应用安全的四大基石。那么就让我们来看看它们吧:
-
Authentication(认证):用户身份识别,通常被称为用户“登录”
-
Authorization(授权):访问控制。比如某个用户是否具有某个操作的使用权限。
-
Session Management(会话管理):特定于用户的会话管理,甚至在非web 或 EJB 应用程序。
-
Cryptography(加密):在对数据源使用加密算法加密的同时,保证易于使用。
还有其他的功能来支持和加强这些不同应用环境下安全领域的关注点。特别是对以下的功能支持:
-
Web支持:Shiro 提供的 Web 支持 api ,可以很轻松的保护 Web 应用程序的安全。
-
缓存:缓存是 Apache Shiro 保证安全操作快速、高效的重要手段。
-
并发:Apache Shiro 支持多线程应用程序的并发特性。
-
测试:支持单元测试和集成测试,确保代码和预想的一样安全。
-
“Run As”:这个功能允许用户假设另一个用户的身份(在许可的前提下)。
-
“Remember Me”:跨 session 记录用户的身份,只有在强制需要时才需要登录。
注意: Shiro 不会去维护用户、维护权限,这些需要我们自己去设计/提供,然后通过相应的接口注入给 Shiro
High-Level Overview 高级概述
在概念层,Shiro 架构包含三个主要的理念:Subject,SecurityManager和 Realm。下面的图展示了这些组件如何相互作用,我们将在下面依次对其进行描述。
-
Subject:当前用户,Subject 可以是一个人,但也可以是第三方服务、守护进程帐户、时钟守护任务或者其它–当前和软件交互的任何事件。
-
SecurityManager:管理所有Subject,SecurityManager 是 Shiro 架构的核心,配合内部安全组件共同组成安全伞。
-
Realms:用于进行权限信息的验证,我们自己实现。Realm 本质上是一个特定的安全 DAO:它封装与数据源连接的细节,得到Shiro 所需的相关的数据。在配置 Shiro 的时候,你必须指定至少一个Realm 来实现认证(authentication)和/或授权(authorization)。
我们需要实现Realms的Authentication 和 Authorization。其中 Authentication 是用来验证用户身份,Authorization 是授权访问控制,用于对用户进行的操作授权,证明该用户是否允许进行当前操作,如访问某个链接,某个资源文件等。
Shiro 配置
首先要配置的是 ShiroConfig 类,Apache Shiro 核心通过 Filter 来实现,就好像 SpringMvc 通过 DispachServlet 来主控制一样。 既然是使用 Filter 一般也就能猜到,是通过 URL 规则来进行过滤和权限校验,所以我们需要定义一系列关于 URL 的规则和访问权限。
ShiroConfig
@Configuration
public class ShiroConfig {
	@Bean
	public ShiroFilterFactoryBean shirFilter(SecurityManager securityManager) {
		System.out.println("ShiroConfiguration.shirFilter()");
		ShiroFilterFactoryBean shiroFilterFactoryBean = new ShiroFilterFactoryBean();
		shiroFilterFactoryBean.setSecurityManager(securityManager);
		//拦截器.
		Map<String,String> filterChainDefinitionMap = new LinkedHashMap<String,String>();
		// 配置不会被拦截的链接 顺序判断
		filterChainDefinitionMap.put("/static/**", "anon");
		//配置退出 过滤器,其中的具体的退出代码Shiro已经替我们实现了
		filterChainDefinitionMap.put("/logout", "logout");
		//<!-- 过滤链定义,从上向下顺序执行,一般将/**放在最为下边 -->:这是一个坑呢,一不小心代码就不好使了;
		//<!-- authc:所有url都必须认证通过才可以访问; anon:所有url都都可以匿名访问-->
		filterChainDefinitionMap.put("/**", "authc");
		// 如果不设置默认会自动寻找Web工程根目录下的"/login.jsp"页面
		shiroFilterFactoryBean.setLoginUrl("/login");
		// 登录成功后要跳转的链接
		shiroFilterFactoryBean.setSuccessUrl("/index");

		//未授权界面;
		shiroFilterFactoryBean.setUnauthorizedUrl("/403");
		shiroFilterFactoryBean.setFilterChainDefinitionMap(filterChainDefinitionMap);
		return shiroFilterFactoryBean;
	}

	@Bean
	public MyShiroRealm myShiroRealm(){
		MyShiroRealm myShiroRealm = new MyShiroRealm();
		return myShiroRealm;
	}


	@Bean
	public SecurityManager securityManager(){
		DefaultWebSecurityManager securityManager =  new DefaultWebSecurityManager();
		securityManager.setRealm(myShiroRealm());
		return securityManager;
    }

}
Filter Chain 定义说明:
-
1、一个URL可以配置多个 Filter,使用逗号分隔
-
2、当设置多个过滤器时,全部验证通过,才视为通过
-
3、部分过滤器可指定参数,如 perms,roles
Shiro 内置的 FilterChain
FILTER NAME CLASS anon org.apache.shiro.web.filter.authc.AnonymousFilter authc org.apache.shiro.web.filter.authc.FormAuthenticationFilter authcBasic org.apache.shiro.web.filter.authc.BasicHttpAuthenticationFilter perms org.apache.shiro.web.filter.authz.PermissionsAuthorizationFilter port org.apache.shiro.web.filter.authz.PortFilter rest org.apache.shiro.web.filter.authz.HttpMethodPermissionFilter roles org.apache.shiro.web.filter.authz.RolesAuthorizationFilter ssl org.apache.shiro.web.filter.authz.SslFilter user org.apache.shiro.web.filter.authc.UserFilter
-
-
anon:所有 url 都都可以匿名访问
-
authc: 需要认证才能进行访问
-
user:配置记住我或认证通过可以访问
登录认证实现
在认证、授权内部实现机制中都有提到,最终处理都将交给Real进行处理。因为在 Shiro 中,最终是通过 Realm 来获取应用程序中的用户、角色及权限信息的。通常情况下,在 Realm 中会直接从我们的数据源中获取 Shiro 需要的验证信息。可以说,Realm 是专用于安全框架的 DAO. Shiro 的认证过程最终会交由 Realm 执行,这时会调用 Realm 的getAuthenticationInfo(token)方法。
该方法主要执行以下操作:
-
1、检查提交的进行认证的令牌信息
-
2、根据令牌信息从数据源(通常为数据库)中获取用户信息
-
3、对用户信息进行匹配验证。
-
4、验证通过将返回一个封装了用户信息的
AuthenticationInfo实例。 -
5、验证失败则抛出
AuthenticationException异常信息。
而在我们的应用程序中要做的就是自定义一个 Realm 类,继承AuthorizingRealm 抽象类,重载 doGetAuthenticationInfo(),重写获取用户信息的方法。
doGetAuthenticationInfo 的重写
@Override
protected AuthenticationInfo doGetAuthenticationInfo(AuthenticationToken token)
        throws AuthenticationException {
    System.out.println("MyShiroRealm.doGetAuthenticationInfo()");
    //获取用户的输入的账号.
    String username = (String)token.getPrincipal();
    System.out.println(token.getCredentials());
    //通过username从数据库中查找 User对象,如果找到,没找到.
    //实际项目中,这里可以根据实际情况做缓存,如果不做,Shiro自己也是有时间间隔机制,2分钟内不会重复执行该方法
    UserInfo userInfo = userInfoService.findByUsername(username);
    System.out.println("----->>userInfo="+userInfo);
    if(userInfo == null){
        return null;
    }
    SimpleAuthenticationInfo authenticationInfo = new SimpleAuthenticationInfo(
            userInfo, //用户名
            userInfo.getPassword(), //密码
            ByteSource.Util.bytes(userInfo.getCredentialsSalt()),//salt=username+salt
            getName()  //realm name
    );
    return authenticationInfo;
}
链接权限的实现
Shiro 的权限授权是通过继承AuthorizingRealm抽象类,重载doGetAuthorizationInfo();当访问到页面的时候,链接配置了相应的权限或者 Shiro 标签才会执行此方法否则不会执行,所以如果只是简单的身份认证没有权限的控制的话,那么这个方法可以不进行实现,直接返回 null 即可。在这个方法中主要是使用类:
SimpleAuthorizationInfo进行角色的添加和权限的添加。
@Override
protected AuthorizationInfo doGetAuthorizationInfo(PrincipalCollection principals) {
    System.out.println("权限配置-->MyShiroRealm.doGetAuthorizationInfo()");
    //SimpleAuthorizationInfo类里有getrole()和getPermission方法
    SimpleAuthorizationInfo authorizationInfo = new SimpleAuthorizationInfo();
  	 // getPrimaryPrincipal是获取一个自定义的principals集合用来分配权限信息,
    //必须 implements Serializable
    UserInfo userInfo  = (UserInfo)principals.getPrimaryPrincipal();
    for(SysRole role:userInfo.getRoleList()){
        authorizationInfo.addRole(role.getRole());
        for(SysPermission p:role.getPermissions()){
            authorizationInfo.addStringPermission(p.getPermission());
        }
    }
    return authorizationInfo;
}
当然也可以添加 set 集合:roles 是从数据库查询的当前用户的角色,stringPermissions 是从数据库查询的当前用户对应的权限
authorizationInfo.setRoles(roles);
authorizationInfo.setStringPermissions(stringPermissions);
就是说如果在shiro配置文件中添加了filterChainDefinitionMap.put(“/add”, “perms[权限添加]”);就说明访问/add这个链接必须要有“权限添加”这个权限才可以访问,如果在shiro配置文件中添加了filterChainDefinitionMap.put(“/add”, “roles[100002],perms[权限添加]”);就说明访问/add这个链接必须要有“权限添加”这个权限和具有“100002”这个角色才可以访问。
登录实现
登录过程其实只是处理异常的相关信息,具体的登录验证交给 Shiro 来处理
@RequestMapping("/login")
public String login(HttpServletRequest request, Map<String, Object> map) throws Exception{
    System.out.println("HomeController.login()");
    // 登录失败从request中获取shiro处理的异常信息。
    // shiroLoginFailure:就是shiro异常类的全类名.
    String exception = (String) request.getAttribute("shiroLoginFailure");
    System.out.println("exception=" + exception);
    String msg = "";
    if (exception != null) {
        if (UnknownAccountException.class.getName().equals(exception)) {
            System.out.println("UnknownAccountException -- > 账号不存在:");
            msg = "UnknownAccountException -- > 账号不存在:";
        } else if (IncorrectCredentialsException.class.getName().equals(exception)) {
            System.out.println("IncorrectCredentialsException -- > 密码不正确:");
            msg = "IncorrectCredentialsException -- > 密码不正确:";
        } else if ("kaptchaValidateFailed".equals(exception)) {
            System.out.println("kaptchaValidateFailed -- > 验证码错误");
            msg = "kaptchaValidateFailed -- > 验证码错误";
        } else {
            msg = "else >> "+exception;
            System.out.println("else -- >" + exception);
        }
    }
    map.put("msg", msg);
    // 此方法不处理登录成功,由shiro进行处理
    return "/login";
}
其它 Dao 层和 Service 的代码直接看示例代码。
测试
1、编写好后就可以启动程序,访问http://localhost:8080/userInfo/userList页面,由于没有登录就会跳转到http://localhost:8080/login页面。登录之后就会跳转到 index 页面,登录后,直接在浏览器中输入http://localhost:8080/userInfo/userList访问就会看到用户信息。上面这些操作时候触发MyShiroRealm.doGetAuthenticationInfo()这个方法,也就是登录认证的方法。
2、登录admin账户,访问:http://127.0.0.1:8080/userInfo/userAdd显示用户添加界面,访问http://127.0.0.1:8080/userInfo/userDel显示403没有权限。上面这些操作时候触发MyShiroRealm.doGetAuthorizationInfo()这个方面,也就是权限校验的方法。
3、修改 admin不 同的权限进行测试
@Manytomany (多表连接时注解使用)
@JoinTable(name = “User_role”, joinColumns = {@JoinColumn(name = “uid”)}, inverseJoinColumns = {@JoinColumn(name = “role_id”)}) 其中 joinColumns 写的是本表在中间表的外键名称,inverseJoinColumns写的是另一个表在中间表的外键名称。
privert List<Role> RoleList;
15,邮件服务
例子
1、pom 包配置
pom 包里面添加 spring-boot-starter-mail 包引用
2、在 application.properties 中添加邮箱配置
spring.mail.host=smtp.qiye.163.com //邮箱服务器地址
spring.mail.username=xxx@oo.com //用户名
spring.mail.password=xxyyooo    //密码
spring.mail.default-encoding=UTF-8

mail.fromMail.addr=xxx@oo.com  //以谁来发送邮件
3、编写 mailService,这里只提出实现类
@Component
public class MailServiceImpl implements MailService{

    private final Logger logger = LoggerFactory.getLogger(this.getClass());

    @Autowired
    private JavaMailSender mailSender;

    @Value("${mail.fromMail.addr}")
    private String from;

    @Override
    public void sendSimpleMail(String to, String subject, String content) {
        SimpleMailMessage message = new SimpleMailMessage();
        message.setFrom(from);
        message.setTo(to);
        message.setSubject(subject);
        message.setText(content);

        try {
            mailSender.send(message);
            logger.info("简单邮件已经发送。");
        } catch (Exception e) {
            logger.error("发送简单邮件时发生异常!", e);
        }
   }

}
4、编写 test 类进行测试
@RunWith(SpringRunner.class)
@SpringBootTest
public class MailServiceTest {

    @Autowired
    private MailService MailService;

    @Test
    public void testSimpleMail() throws Exception {
        MailService.sendSimpleMail("ityouknow@126.com","test simple mail"," hello this is simple mail");
    }
}
但是在正常使用的过程中,我们通常在邮件中加入图片或者附件来丰富邮件的内容,下面讲介绍如何使用 Spring Boot 来发送丰富的邮件。
发送 html 格式邮件
其它都不变在 MailService 添加 sendHtmlMail 方法
public void sendHtmlMail(String to, String subject, String content) {
    MimeMessage message = mailSender.createMimeMessage();

    try {
        //true表示需要创建一个multipart message
        MimeMessageHelper helper = new MimeMessageHelper(message, true);
        helper.setFrom(from);
        helper.setTo(to);
        helper.setSubject(subject);
        helper.setText(content, true);

        mailSender.send(message);
        logger.info("html邮件发送成功");
    } catch (MessagingException e) {
        logger.error("发送html邮件时发生异常!", e);
    }
}
在测试类中构建 html 内容,测试发送
@Test
public void testHtmlMail() throws Exception {
    String content="<html>\n" +
            "<body>\n" +
            "    <h3>hello world ! 这是一封Html邮件!</h3>\n" +
            "</body>\n" +
            "</html>";
    MailService.sendHtmlMail("ityouknow@126.com","test simple mail",content);
}
发送带附件的邮件
在 MailService 添加 sendAttachmentsMail 方法.
public void sendAttachmentsMail(String to, String subject, String content, String filePath){
    MimeMessage message = mailSender.createMimeMessage();

    try {
        MimeMessageHelper helper = new MimeMessageHelper(message, true);
        helper.setFrom(from);
        helper.setTo(to);
        helper.setSubject(subject);
        helper.setText(content, true);

        FileSystemResource file = new FileSystemResource(new File(filePath));
        String fileName = filePath.substring(filePath.lastIndexOf(File.separator));
        helper.addAttachment(fileName, file);

        mailSender.send(message);
        logger.info("带附件的邮件已经发送。");
    } catch (MessagingException e) {
        logger.error("发送带附件的邮件时发生异常!", e);
    }
}
添加多个附件可以使用多条
helper.addAttachment(fileName, file)
在测试类中添加测试方法
@Test
public void sendAttachmentsMail() {
    String filePath="e:\\tmp\\application.log";
    mailService.sendAttachmentsMail("ityouknow@126.com", "主题:带附件的邮件", "有附件,请查收!", filePath);
}
发送带静态资源的邮件
邮件中的静态资源一般就是指图片,在 MailService 添加 sendAttachmentsMail 方法
public void sendInlineResourceMail(String to, String subject, String content, String rscPath, String rscId){
    MimeMessage message = mailSender.createMimeMessage();

    try {
        MimeMessageHelper helper = new MimeMessageHelper(message, true);
        helper.setFrom(from);
        helper.setTo(to);
        helper.setSubject(subject);
        helper.setText(content, true);

        FileSystemResource res = new FileSystemResource(new File(rscPath));
        helper.addInline(rscId, res);

        mailSender.send(message);
        logger.info("嵌入静态资源的邮件已经发送。");
    } catch (MessagingException e) {
        logger.error("发送嵌入静态资源的邮件时发生异常!", e);
    }
}
在测试类中添加测试方法
@Test
public void sendInlineResourceMail() {
    String rscId = "neo006";
    String content="<html><body>这是有图片的邮件:<img src=\'cid:" + rscId + "\' ></body></html>";
    String imgPath = "C:\\Users\\summer\\Pictures\\favicon.png";

    mailService.sendInlineResourceMail("ityouknow@126.com", "主题:这是有图片的邮件", content, imgPath, rscId);
}
添加多个图片可以使用多条
<img src='cid:" + rscId + "' >和helper.addInline(rscId, res)来实现
到此所有的邮件发送服务已经完成了。
邮件系统
上面发送邮件的基础服务就这些了,但是如果我们要做成一个邮件系统的话还需要考虑以下几个问题:
邮件模板
我们会经常收到这样的邮件:
尊敬的neo用户:

          恭喜您注册成为xxx网的用户,,同时感谢您对xxx的关注与支持并欢迎您使用xx的产品与服务。
          ...
其中只有 neo 这个用户名在变化,其它邮件内容均不变,如果每次发送邮件都需要手动拼接的话会不够优雅,并且每次模板的修改都需要改动代码的话也很不方便,因此对于这类邮件需求,都建议做成邮件模板来处理。模板的本质很简单,就是在模板中替换变化的参数,转换为 html 字符串即可,这里以thymeleaf为例来演示。
1、pom 中导入 thymeleaf 的包
<dependency>
	<groupId>org.springframework.boot</groupId>
	<artifactId>spring-boot-starter-thymeleaf</artifactId>
</dependency>
2、在 resorces/templates 下创建 emailTemplate.html
<!DOCTYPE html>
<html lang="zh" xmlns:th="http://www.thymeleaf.org">
    <head>
        <meta charset="UTF-8"/>
        <title>Title</title>
    </head>
    <body>
        您好,这是验证邮件,请点击下面的链接完成验证,<br/>
        <a href="#" th:href="@{ http://www.ityouknow.com/neo/{id}(id=${id}) }">激活账号</a>
    </body>
</html>
3、解析模板并发送
@Test
public void sendTemplateMail() {
    //创建邮件正文
    Context context = new Context();
    context.setVariable("id", "006");
    String emailContent = templateEngine.process("emailTemplate", context);

    mailService.sendHtmlMail("ityouknow@126.com","主题:这是模板邮件",emailContent);
}
发送失败
因为各种原因,总会有邮件发送失败的情况,比如:邮件发送过于频繁、网络异常等。在出现这种情况的时候,我们一般会考虑重新重试发送邮件,会分为以下几个步骤来实现:
-
1、接收到发送邮件请求,首先记录请求并且入库。
-
2、调用邮件发送接口发送邮件,并且将发送结果记录入库。
-
3、启动定时系统扫描时间段内,未发送成功并且重试次数小于3次的邮件,进行再次发送
异步发送
很多时候邮件发送并不是我们主业务必须关注的结果,比如通知类、提醒类的业务可以允许延时或者失败。这个时候可以采用异步的方式来发送邮件,加快主交易执行速度,在实际项目中可以采用MQ发送邮件相关参数,监听到消息队列之后启动发送邮件。
16 文件上传
一,
1、pom 包配置
我们使用 Spring Boot 版本 2.1.0、jdk 1.8、tomcat 8.0。
<parent>
    <groupId>org.springframework.boot</groupId>
    <artifactId>spring-boot-starter-parent</artifactId>
    <version>2.1.0.RELEASE</version>
</parent>

<properties>
    <java.version>1.8</java.version>
</properties>

<dependencies>
    <dependency>
        <groupId>org.springframework.boot</groupId>
        <artifactId>spring-boot-starter-web</artifactId>
    </dependency>
    <dependency>
        <groupId>org.springframework.boot</groupId>
        <artifactId>spring-boot-starter-thymeleaf</artifactId>
    </dependency>
    <dependency>
        <groupId>org.springframework.boot</groupId>
        <artifactId>spring-boot-devtools</artifactId>
        <optional>true</optional>
    </dependency>
</dependencies>
引入了spring-boot-starter-thymeleaf做页面模板引擎,写一些简单的上传示例。
2、启动类设置
@SpringBootApplication
public class FileUploadWebApplication {

    public static void main(String[] args) throws Exception {
        SpringApplication.run(FileUploadWebApplication.class, args);
    }

    @Bean
    public TomcatServletWebServerFactory tomcatEmbedded() {
        TomcatServletWebServerFactory tomcat = new TomcatServletWebServerFactory();
        tomcat.addConnectorCustomizers((TomcatConnectorCustomizer) connector -> {
            if ((connector.getProtocolHandler() instanceof AbstractHttp11Protocol<?>)) {
                //-1 means unlimited
                ((AbstractHttp11Protocol<?>) connector.getProtocolHandler()).setMaxSwallowSize(-1);
            }
        });
        return tomcat;
    }

}
tomcatEmbedded 这段代码是为了解决,上传文件大于10M出现连接重置的问题。此异常内容 GlobalException 也捕获不到。
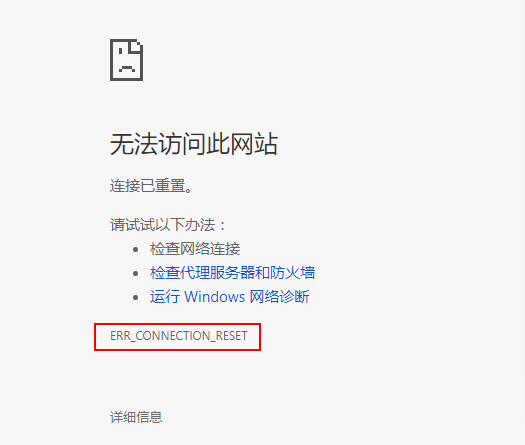
详细内容参考:
3、编写前端页面
上传页面
<!DOCTYPE html>
<html xmlns:th="http://www.thymeleaf.org">
<body>
<h1>Spring Boot file upload example</h1>
<form method="POST" action="/upload" enctype="multipart/form-data">
    <input type="file" name="file" /><br/><br/>
    <input type="submit" value="Submit" />
</form>
</body>
</html>
非常简单的一个 Post 请求,一个选择框选择文件,一个提交按钮,效果如下:
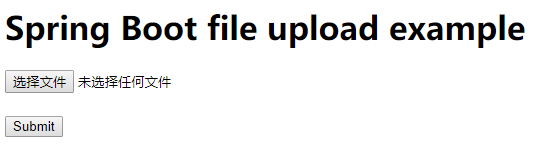
上传结果展示页面:
<!DOCTYPE html>
<html lang="en" xmlns:th="http://www.thymeleaf.org">
<body>
<h1>Spring Boot - Upload Status</h1>
<div th:if="${message}">
    <h2 th:text="${message}"/>
</div>
</body>
</html>
效果图如下:
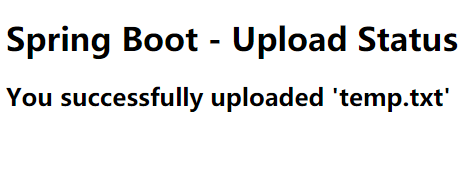
4、编写上传控制类
访问 localhost 自动跳转到上传页面:
@GetMapping("/")
public String index() {
    return "upload";
}
上传业务处理
@PostMapping("/upload")
public String singleFileUpload(@RequestParam("file") MultipartFile file,
                               RedirectAttributes redirectAttributes) {
    if (file.isEmpty()) {
        redirectAttributes.addFlashAttribute("message", "Please select a file to upload");
        return "redirect:uploadStatus";
    }

    try {
        // Get the file and save it somewhere
        byte[] bytes = file.getBytes();
        Path path = Paths.get(UPLOADED_FOLDER + file.getOriginalFilename());
        Files.write(path, bytes);

        redirectAttributes.addFlashAttribute("message",
                "You successfully uploaded '" + file.getOriginalFilename() + "'");

    } catch (IOException e) {
        e.printStackTrace();
    }

    return "redirect:/uploadStatus";
}
上面代码的意思就是,通过MultipartFile读取文件信息,如果文件为空跳转到结果页并给出提示;如果不为空读取文件流并写入到指定目录,最后将结果展示到页面。
MultipartFile是Spring上传文件的封装类,包含了文件的二进制流和文件属性等信息,在配置文件中也可对相关属性进行配置,基本的配置信息如下:
-
spring.http.multipart.enabled=true#默认支持文件上传. -
spring.http.multipart.file-size-threshold=0#支持文件写入磁盘. -
spring.http.multipart.location=# 上传文件的临时目录 -
spring.http.multipart.max-file-size=1Mb# 最大支持文件大小 -
spring.http.multipart.max-request-size=10Mb# 最大支持请求大小
最常用的是最后两个配置内容,限制文件上传大小,上传时超过大小会抛出异常:

更多配置信息参考这里:
5、异常处理
@ControllerAdvice
public class GlobalExceptionHandler {

    @ExceptionHandler(MultipartException.class)
    public String handleError1(MultipartException e, RedirectAttributes redirectAttributes) {
        redirectAttributes.addFlashAttribute("message", e.getCause().getMessage());
        return "redirect:/uploadStatus";
    }
}
设置一个@ControllerAdvice用来监控Multipart上传的文件大小是否受限,当出现此异常时在前端页面给出提示。利用@ControllerAdvice可以做很多东西,比如全局的统一异常处理等,感兴趣的同学可以下来了解。
二, 分布式文件系统 FastDFS
这个项目会在上一个项目的基础上进行构建。
1、pom 包配置
<dependency>
    <groupId>org.csource</groupId>
    <artifactId>fastdfs-client-java</artifactId>
    <version>1.27-SNAPSHOT</version>
</dependency>
加入了fastdfs-client-java包,用来调用 FastDFS 相关的 API。
2、配置文件
resources 目录下添加fdfs_client.conf文件
connect_timeout = 60
network_timeout = 60
charset = UTF-8
http.tracker_http_port = 8080
http.anti_steal_token = no
http.secret_key = 123456

tracker_server = 192.168.53.85:22122
tracker_server = 192.168.53.86:22122
配置文件设置了连接的超时时间,编码格式以及 tracker_server 地址等信息
详细内容参考:
3、封装 FastDFS 上传工具类
封装FastDFSFile,文件基础信息包括文件名、内容、文件类型、作者等。
public class FastDFSFile {
    private String name;
    private byte[] content;
    private String ext;
    private String md5;
    private String author;
    //省略getter、setter
}
封装 FastDFSClient 类,包含常用的上传、下载、删除等方法。
首先在类加载的时候读取相应的配置信息,并进行初始化。
static {
    try {
        String filePath = new ClassPathResource("fdfs_client.conf").getFile().getAbsolutePath();;
        ClientGlobal.init(filePath);
        trackerClient = new TrackerClient();
        trackerServer = trackerClient.getConnection();
        storageServer = trackerClient.getStoreStorage(trackerServer);
    } catch (Exception e) {
        logger.error("FastDFS Client Init Fail!",e);
    }
}
文件上传
public static String[] upload(FastDFSFile file) {
    logger.info("File Name: " + file.getName() + "File Length:" + file.getContent().length);

    NameValuePair[] meta_list = new NameValuePair[1];
    meta_list[0] = new NameValuePair("author", file.getAuthor());

    long startTime = System.currentTimeMillis();
    String[] uploadResults = null;
    try {
        storageClient = new StorageClient(trackerServer, storageServer);
        uploadResults = storageClient.upload_file(file.getContent(), file.getExt(), meta_list);
    } catch (IOException e) {
        logger.error("IO Exception when uploadind the file:" + file.getName(), e);
    } catch (Exception e) {
        logger.error("Non IO Exception when uploadind the file:" + file.getName(), e);
    }
    logger.info("upload_file time used:" + (System.currentTimeMillis() - startTime) + " ms");

    if (uploadResults == null) {
        logger.error("upload file fail, error code:" + storageClient.getErrorCode());
    }
    String groupName = uploadResults[0];
    String remoteFileName = uploadResults[1];

    logger.info("upload file successfully!!!" + "group_name:" + groupName + ", remoteFileName:" + " " + remoteFileName);
    return uploadResults;
}
使用 FastDFS 提供的客户端 storageClient 来进行文件上传,最后将上传结果返回。
根据 groupName 和文件名获取文件信息。
public static FileInfo getFile(String groupName, String remoteFileName) {
    try {
        storageClient = new StorageClient(trackerServer, storageServer);
        return storageClient.get_file_info(groupName, remoteFileName);
    } catch (IOException e) {
        logger.error("IO Exception: Get File from Fast DFS failed", e);
    } catch (Exception e) {
        logger.error("Non IO Exception: Get File from Fast DFS failed", e);
    }
    return null;
}
下载文件
public static InputStream downFile(String groupName, String remoteFileName) {
    try {
        storageClient = new StorageClient(trackerServer, storageServer);
        byte[] fileByte = storageClient.download_file(groupName, remoteFileName);
        InputStream ins = new ByteArrayInputStream(fileByte);
        return ins;
    } catch (IOException e) {
        logger.error("IO Exception: Get File from Fast DFS failed", e);
    } catch (Exception e) {
        logger.error("Non IO Exception: Get File from Fast DFS failed", e);
    }
    return null;
}
删除文件
public static void deleteFile(String groupName, String remoteFileName)
        throws Exception {
    storageClient = new StorageClient(trackerServer, storageServer);
    int i = storageClient.delete_file(groupName, remoteFileName);
    logger.info("delete file successfully!!!" + i);
}
使用 FastDFS 时,直接调用 FastDFSClient 对应的方法即可。
4、编写上传控制类
从 MultipartFile 中读取文件信息,然后使用 FastDFSClient 将文件上传到 FastDFS 集群中。
public String saveFile(MultipartFile multipartFile) throws IOException {
    String[] fileAbsolutePath={};
    String fileName=multipartFile.getOriginalFilename();
    String ext = fileName.substring(fileName.lastIndexOf(".") + 1);
    byte[] file_buff = null;
    InputStream inputStream=multipartFile.getInputStream();
    if(inputStream!=null){
        int len1 = inputStream.available();
        file_buff = new byte[len1];
        inputStream.read(file_buff);
    }
    inputStream.close();
    FastDFSFile file = new FastDFSFile(fileName, file_buff, ext);
    try {
        fileAbsolutePath = FastDFSClient.upload(file);  //upload to fastdfs
    } catch (Exception e) {
        logger.error("upload file Exception!",e);
    }
    if (fileAbsolutePath==null) {
        logger.error("upload file failed,please upload again!");
    }
    String path=FastDFSClient.getTrackerUrl()+fileAbsolutePath[0]+ "/"+fileAbsolutePath[1];
    return path;
}
请求控制,调用上面方法saveFile()。
@PostMapping("/upload") //new annotation since 4.3
public String singleFileUpload(@RequestParam("file") MultipartFile file,
                               RedirectAttributes redirectAttributes) {
    if (file.isEmpty()) {
        redirectAttributes.addFlashAttribute("message", "Please select a file to upload");
        return "redirect:uploadStatus";
    }
    try {
        // Get the file and save it somewhere
        String path=saveFile(file);
        redirectAttributes.addFlashAttribute("message",
                "You successfully uploaded '" + file.getOriginalFilename() + "'");
        redirectAttributes.addFlashAttribute("path",
                "file path url '" + path + "'");
    } catch (Exception e) {
        logger.error("upload file failed",e);
    }
    return "redirect:/uploadStatus";
}
上传成功之后,将文件的路径展示到页面,效果图如下:

在浏览器中访问此Url,可以看到成功通过FastDFS展示:
17,Actuator 监控应用
1,Actuator 的 REST 接口
Actuator 监控分成两类:原生端点和用户自定义端点;自定义端点主要是指扩展性,用户可以根据自己的实际应用,定义一些比较关心的指标,在运行期进行监控。
原生端点是在应用程序里提供众多 Web 接口,通过它们了解应用程序运行时的内部状况。原生端点又可以分成三类:
-
应用配置类:可以查看应用在运行期的静态信息:例如自动配置信息、加载的 springbean 信息、yml 文件配置信息、环境信息、请求映射信息;
-
度量指标类:主要是运行期的动态信息,例如堆栈、请求连、一些健康指标、metrics 信息等;
-
操作控制类:主要是指 shutdown,用户可以发送一个请求将应用的监控功能关闭。
Actuator 提供了 13 个接口,具体如下表所示。
| HTTP 方法 | 路径 | 描述 |
|---|---|---|
| GET | /auditevents | 显示应用暴露的审计事件 (比如认证进入、订单失败) |
| GET | /beans | 描述应用程序上下文里全部的 Bean,以及它们的关系 |
| GET | /conditions | 就是 1.0 的 /autoconfig ,提供一份自动配置生效的条件情况,记录哪些自动配置条件通过了,哪些没通过 |
| GET | /configprops | 描述配置属性(包含默认值)如何注入Bean |
| GET | /env | 获取全部环境属性 |
| GET | /env/{name} | 根据名称获取特定的环境属性值 |
| GET | /flyway | 提供一份 Flyway 数据库迁移信息 |
| GET | /liquidbase | 显示Liquibase 数据库迁移的纤细信息 |
| GET | /health | 报告应用程序的健康指标,这些值由 HealthIndicator 的实现类提供 |
| GET | /heapdump | dump 一份应用的 JVM 堆信息 |
| GET | /httptrace | 显示HTTP足迹,最近100个HTTP request/repsponse |
| GET | /info | 获取应用程序的定制信息,这些信息由info打头的属性提供 |
| GET | /logfile | 返回log file中的内容(如果 logging.file 或者 logging.path 被设置) |
| GET | /loggers | 显示和修改配置的loggers |
| GET | /metrics | 报告各种应用程序度量信息,比如内存用量和HTTP请求计数 |
| GET | /metrics/{name} | 报告指定名称的应用程序度量值 |
| GET | /scheduledtasks | 展示应用中的定时任务信息 |
| GET | /sessions | 如果我们使用了 Spring Session 展示应用中的 HTTP sessions 信息 |
| POST | /shutdown | 关闭应用程序,要求endpoints.shutdown.enabled设置为true |
| GET | /mappings | 描述全部的 URI路径,以及它们和控制器(包含Actuator端点)的映射关系 |
| GET | /threaddump | 获取线程活动的快照 |
2,快速上手
相关配置
项目依赖
<dependencies>
  <dependency>
    <groupId>org.springframework.boot</groupId>
    <artifactId>spring-boot-starter-web</artifactId>
  </dependency>
  <dependency>
      <groupId>org.springframework.boot</groupId>
      <artifactId>spring-boot-starter-actuator</artifactId>
  </dependency>
</dependencies>
配置文件
info.app.name=spring-boot-actuator
info.app.version= 1.0.0
info.app.test=test

management.endpoints.web.exposure.include=*
management.endpoint.health.show-details=always
#management.endpoints.web.base-path=/monitor

management.endpoint.shutdown.enabled=true
-
management.endpoints.web.base-path=/monitor代表启用单独的url地址来监控 Spring Boot 应用,为了安全一般都启用独立的端口来访问后端的监控信息 -
management.endpoint.shutdown.enabled=true启用接口关闭 Spring Boot
配置完成之后,启动项目就可以继续验证各个监控功能了。
命令详解
在 Spring Boot 2.x 中为了安全期间,Actuator 只开放了两个端点 /actuator/health 和 /actuator/info。可以在配置文件中设置打开。
可以打开所有的监控点
management.endpoints.web.exposure.include=*
也可以选择打开部分
management.endpoints.web.exposure.exclude=beans,trace
Actuator 默认所有的监控点路径都在/actuator/*,当然如果有需要这个路径也支持定制。
management.endpoints.web.base-path=/manage
设置完重启后,再次访问地址就会变成/manage/*
Actuator 几乎监控了应用涉及的方方面面,我们重点讲述一些经常在项目中常用的命令。
health
health 主要用来检查应用的运行状态,这是我们使用最高频的一个监控点。通常使用此接口提醒我们应用实例的运行状态,以及应用不”健康“的原因,比如数据库连接、磁盘空间不够等。
默认情况下 health 的状态是开放的,添加依赖后启动项目,访问:http://localhost:8080/actuator/health即可看到应用的状态。
{
    "status" : "UP"
}
默认情况下,最终的 Spring Boot 应用的状态是由 HealthAggregator 汇总而成的,汇总的算法是:
-
1 设置状态码顺序:
setStatusOrder(Status.DOWN, Status.OUT_OF_SERVICE, Status.UP, Status.UNKNOWN);。 -
2 过滤掉不能识别的状态码。
-
3 如果无任何状态码,整个 Spring Boot 应用的状态是 UNKNOWN。
-
4 将所有收集到的状态码按照 1 中的顺序排序。
-
5 返回有序状态码序列中的第一个状态码,作为整个 Spring Boot 应用的状态。
health 通过合并几个健康指数检查应用的健康情况。Spring Boot Actuator 有几个预定义的健康指标比如DataSourceHealthIndicator, DiskSpaceHealthIndicator, MongoHealthIndicator, RedisHealthIndicator等,它使用这些健康指标作为健康检查的一部分。
举个例子,如果你的应用使用 Redis,RedisHealthindicator 将被当作检查的一部分;如果使用 MongoDB,那么MongoHealthIndicator 将被当作检查的一部分。
可以在配置文件中关闭特定的健康检查指标,比如关闭 redis 的健康检查:
management.health.redise.enabled=false
默认,所有的这些健康指标被当作健康检查的一部分。
info
info 就是我们自己配置在配置文件中以 info 开头的配置信息,比如我们在示例项目中的配置是:
info.app.name=spring-boot-actuator
info.app.version= 1.0.0
info.app.test= test
启动示例项目,访问:http://localhost:8080/actuator/info返回部分信息如下:
{
  "app": {
    "name": "spring-boot-actuator",
    "version": "1.0.0",
    "test":"test"
  }
}
beans
根据示例就可以看出,展示了 bean 的别名、类型、是否单例、类的地址、依赖等信息。
启动示例项目,访问:http://localhost:8080/actuator/beans返回部分信息如下:
[
  {
    "context": "application:8080:management",
    "parent": "application:8080",
    "beans": [
      {
        "bean": "embeddedServletContainerFactory",
        "aliases": [

        ],
        "scope": "singleton",
        "type": "org.springframework.boot.context.embedded.tomcat.TomcatEmbeddedServletContainerFactory",
        "resource": "null",
        "dependencies": [

        ]
      },
      {
        "bean": "endpointWebMvcChildContextConfiguration",
        "aliases": [

        ],
        "scope": "singleton",
        "type": "org.springframework.boot.actuate.autoconfigure.EndpointWebMvcChildContextConfiguration$$EnhancerBySpringCGLIB$$a4a10f9d",
        "resource": "null",
        "dependencies": [

        ]
      }
  }
]
conditions
Spring Boot 的自动配置功能非常便利,但有时候也意味着出问题比较难找出具体的原因。使用 conditions 可以在应用运行时查看代码了某个配置在什么条件下生效,或者某个自动配置为什么没有生效。
启动示例项目,访问:http://localhost:8080/actuator/conditions返回部分信息如下:
{
    "positiveMatches": {
     "DevToolsDataSourceAutoConfiguration": {
            "notMatched": [
                {
                    "condition": "DevToolsDataSourceAutoConfiguration.DevToolsDataSourceCondition",
                    "message": "DevTools DataSource Condition did not find a single DataSource bean"
                }
            ],
            "matched": [ ]
        },
        "RemoteDevToolsAutoConfiguration": {
            "notMatched": [
                {
                    "condition": "OnPropertyCondition",
                    "message": "@ConditionalOnProperty (spring.devtools.remote.secret) did not find property 'secret'"
                }
            ],
            "matched": [
                {
                    "condition": "OnClassCondition",
                    "message": "@ConditionalOnClass found required classes 'javax.servlet.Filter', 'org.springframework.http.server.ServerHttpRequest'; @ConditionalOnMissingClass did not find unwanted class"
                }
            ]
        }
    }
}
heapdump
返回一个 GZip 压缩的 JVM 堆 dump
启动示例项目,访问:http://localhost:8080/actuator/heapdump会自动生成一个 Jvm 的堆文件 heapdump,我们可以使用 JDK 自带的 Jvm 监控工具 VisualVM 打开此文件查看内存快照。类似如下图:
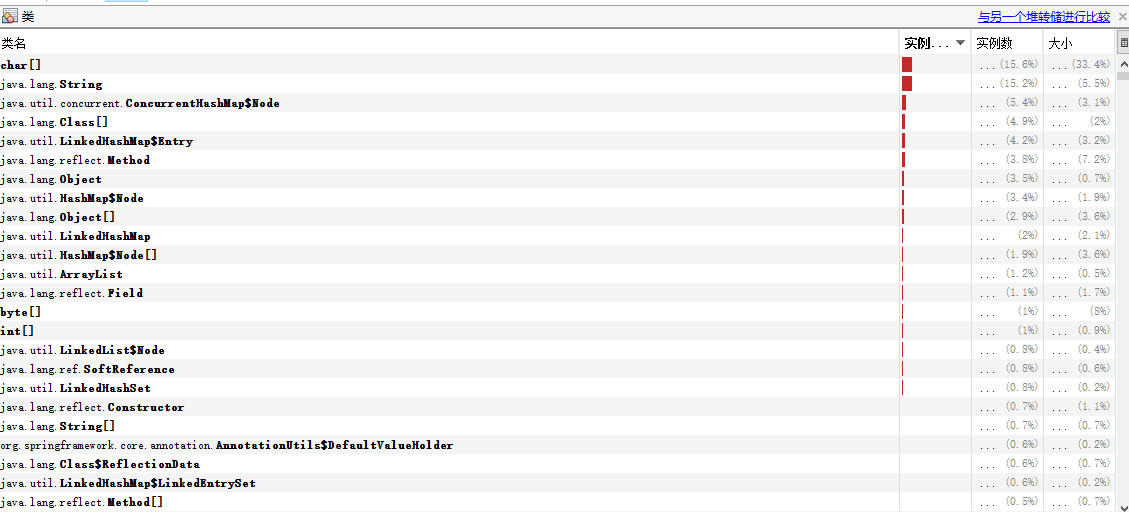
shutdown
开启接口优雅关闭 Spring Boot 应用,要使用这个功能首先需要在配置文件中开启:
management.endpoint.shutdown.enabled=true
配置完成之后,启动示例项目,使用 curl 模拟 post 请求访问 shutdown 接口。
shutdown 接口默认只支持 post 请求。
curl -X POST "http://localhost:8080/actuator/shutdown"
{
    "message": "Shutting down, bye..."
}
此时你会发现应用已经被关闭。
mappings
描述全部的 URI 路径,以及它们和控制器的映射关系
启动示例项目,访问:http://localhost:8080/actuator/mappings返回部分信息如下:
{
  "/**/favicon.ico": {
    "bean": "faviconHandlerMapping"
  },
  "{[/hello]}": {
    "bean": "requestMappingHandlerMapping",
    "method": "public java.lang.String com.neo.controller.HelloController.index()"
  },
  "{[/error]}": {
    "bean": "requestMappingHandlerMapping",
    "method": "public org.springframework.http.ResponseEntity<java.util.Map<java.lang.String, java.lang.Object>> org.springframework.boot.autoconfigure.web.BasicErrorController.error(javax.servlet.http.HttpServletRequest)"
  }
}
threaddump
/threaddump 接口会生成当前线程活动的快照。这个功能非常好,方便我们在日常定位问题的时候查看线程的情况。 主要展示了线程名、线程ID、线程的状态、是否等待锁资源等信息。
启动示例项目,访问:http://localhost:8080/actuator/threaddump返回部分信息如下:
[
  {
    "threadName": "http-nio-8088-exec-6",
    "threadId": 49,
    "blockedTime": -1,
    "blockedCount": 0,
    "waitedTime": -1,
    "waitedCount": 2,
    "lockName": "java.util.concurrent.locks.AbstractQueuedSynchronizer$ConditionObject@1630a501",
    "lockOwnerId": -1,
    "lockOwnerName": null,
    "inNative": false,
    "suspended": false,
    "threadState": "WAITING",
    "stackTrace": [
      {
        "methodName": "park",
        "fileName": "Unsafe.java",
        "lineNumber": -2,
        "className": "sun.misc.Unsafe",
        "nativeMethod": true
      },
      ...
      {
        "methodName": "run",
        "fileName": "TaskThread.java",
        "lineNumber": 61,
        "className": "org.apache.tomcat.util.threads.TaskThread$WrappingRunnable",
        "nativeMethod": false
      }
      ...
    ],
    "lockInfo": {
      "className": "java.util.concurrent.locks.AbstractQueuedSynchronizer$ConditionObject",
      "identityHashCode": 372286721
    }
  }
  ...
]
生产出现问题的时候,可以通过应用的线程快照来检测应用正在执行的任务。
18,Spring Boot Admin
Spring Boot Admin 是一个管理和监控 Spring Boot 应用程序的开源软件。每个应用都认为是一个客户端,通过 HTTP 或者使用 Eureka 注册到 admin server 中进行展示,Spring Boot Admin UI 部分使用 VueJs 将数据展示在前端。
1,监控单体应用
这节给大家展示如何使用 Spring Boot Admin 监控单个 Spring Boot 应用。
Admin Server 端
项目依赖
<dependencies>
  <dependency>
    <groupId>de.codecentric</groupId>
    <artifactId>spring-boot-admin-starter-server</artifactId>
    <version>2.1.0</version>
  </dependency>
  <dependency>
    <groupId>org.springframework.boot</groupId>
    <artifactId>spring-boot-starter-web</artifactId>
  </dependency>
</dependencies>
** 配置文件**
server.port=8000
服务端设置端口为:8000。
启动类
@Configuration
@EnableAutoConfiguration
@EnableAdminServer
public class AdminServerApplication {

  public static void main(String[] args) {
    SpringApplication.run(AdminServerApplication.class, args);
  }
}
完成上面三步之后,启动服务端,浏览器访问http://localhost:8000可以看到以下界面:

Admin Client 端
项目依赖
<dependencies>
    <dependency>
      <groupId>de.codecentric</groupId>
      <artifactId>spring-boot-admin-starter-client</artifactId>
      <version>2.1.0</version>
    </dependency>
    <dependency>
      <groupId>org.springframework.boot</groupId>
      <artifactId>spring-boot-starter-web</artifactId>
    </dependency>
</dependencies>
** 配置文件**
server.port=8001
spring.application.name=Admin Client
spring.boot.admin.client.url=http://localhost:8000
management.endpoints.web.exposure.include=*
-
spring.boot.admin.client.url配置 Admin Server 的地址 -
management.endpoints.web.exposure.include=*打开客户端 Actuator 的监控。
启动类
@SpringBootApplication
public class AdminClientApplication {
  public static void main(String[] args) {
    SpringApplication.run(AdminClientApplication.class, args);
  }
}
`配置完成之后,启动 Client 端,Admin 服务端会自动检查到客户端的变化,并展示其应用

页面会展示被监控的服务列表,点击详项目名称会进入此应用的详细监控信息。
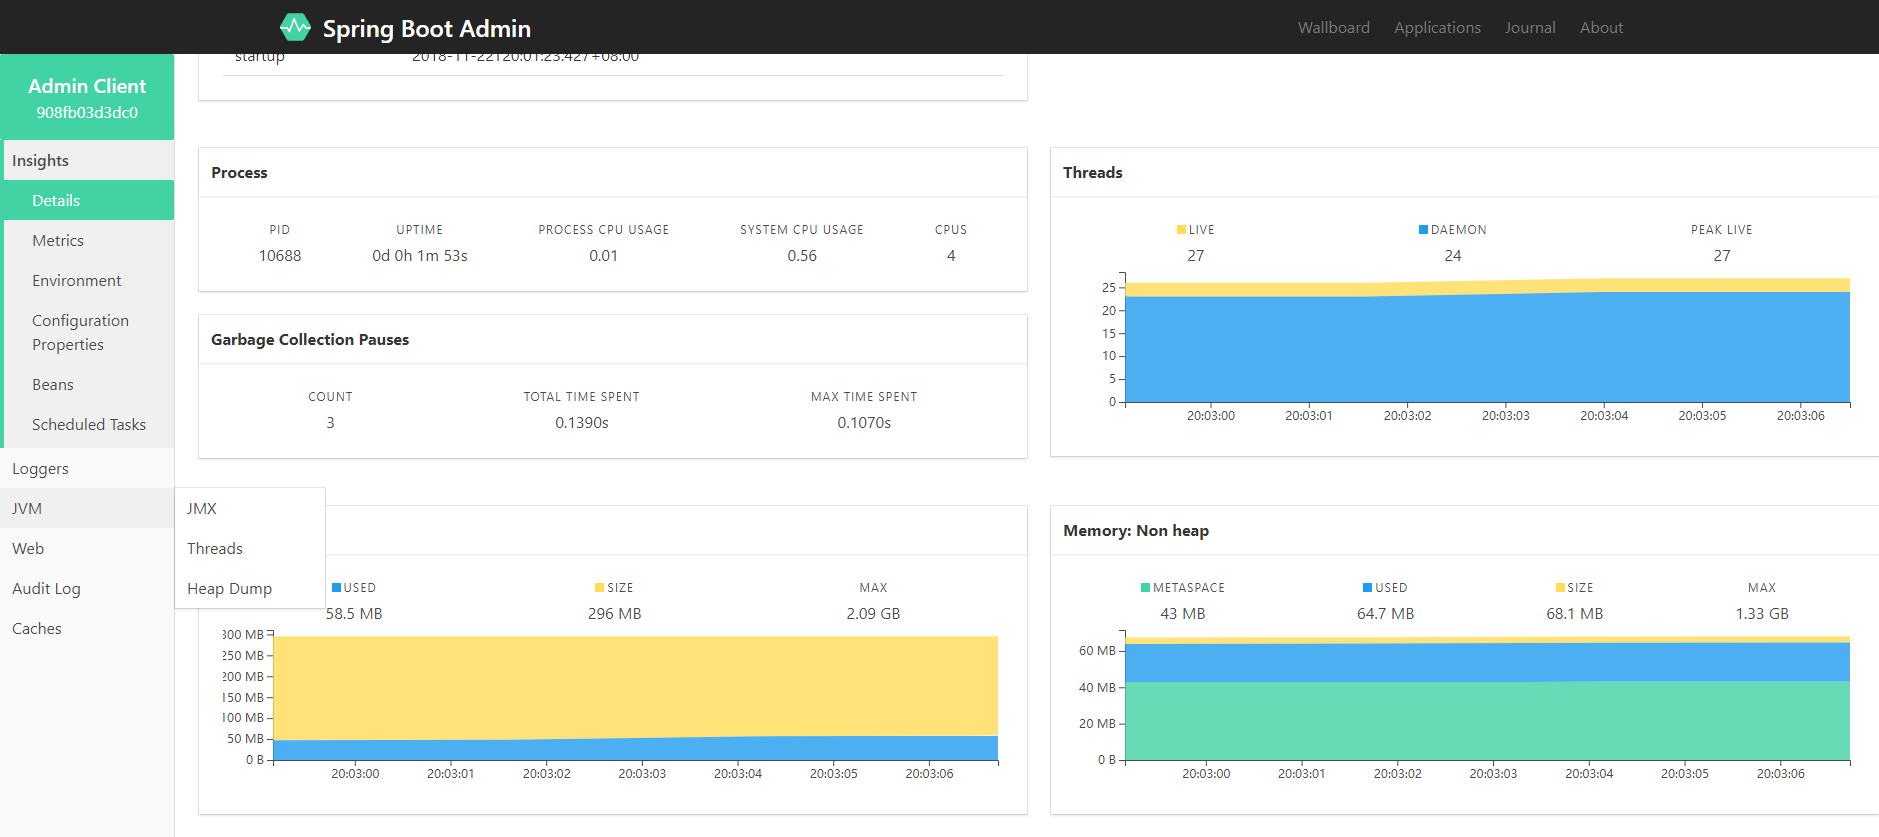
通过上图可以看出,Spring Boot Admin 以图形化的形式展示了应用的各项信息,这些信息大多都来自于 Spring Boot Actuator 提供的接口。
2,监控微服务
如果我们使用的是单个 Spring Boot 应用,就需要在每一个被监控的应用中配置 Admin Server 的地址信息;如果应用都注册在 Eureka 中就不需要再对每个应用进行配置,Spring Boot Admin 会自动从注册中心抓取应用的相关信息。
如果我们使用了 Spring Cloud 的服务发现功能,就不需要在单独添加 Admin Client 客户端,仅仅需要 Spring Boot Server ,其它内容会自动进行配置。
接下来我们以 Eureka 作为服务发现的示例来进行演示,实际上也可以使用 Consul 或者 Zookeeper。
1、服务端和客户端添加 spring-cloud-starter-eureka 到包依赖中
<dependency>
    <groupId>org.springframework.cloud</groupId>
    <artifactId>spring-cloud-starter-netflix-eureka-client</artifactId>
</dependency>
2、启动类添加注解
@Configuration
@EnableAutoConfiguration
@EnableDiscoveryClient
@EnableAdminServer
public class SpringBootAdminApplication {
    public static void main(String[] args) {
        SpringApplication.run(SpringBootAdminApplication.class, args);
    }

    @Configuration
    public static class SecurityPermitAllConfig extends WebSecurityConfigurerAdapter {
        @Override
        protected void configure(HttpSecurity http) throws Exception {
            http.authorizeRequests().anyRequest().permitAll()
                .and().csrf().disable();
        }
    }
}
使用类 SecurityPermitAllConfig 关闭了安全验证。
3、在客户端中配置服务发现的地址
eureka:
  instance:
    leaseRenewalIntervalInSeconds: 10
    health-check-url-path: /actuator/health
    metadata-map:
      startup: ${random.int}    #needed to trigger info and endpoint update after restart
  client:
    registryFetchIntervalSeconds: 5
    serviceUrl:
      defaultZone: ${EUREKA_SERVICE_URL:http://localhost:8761}/eureka/

management:
  endpoints:
    web:
      exposure:
        include: "*"
  endpoint:
    health:
      show-details: ALWAYS
Spring Cloud 提供了示例代码可以参考这里:

 浙公网安备 33010602011771号