
SpringBoot02
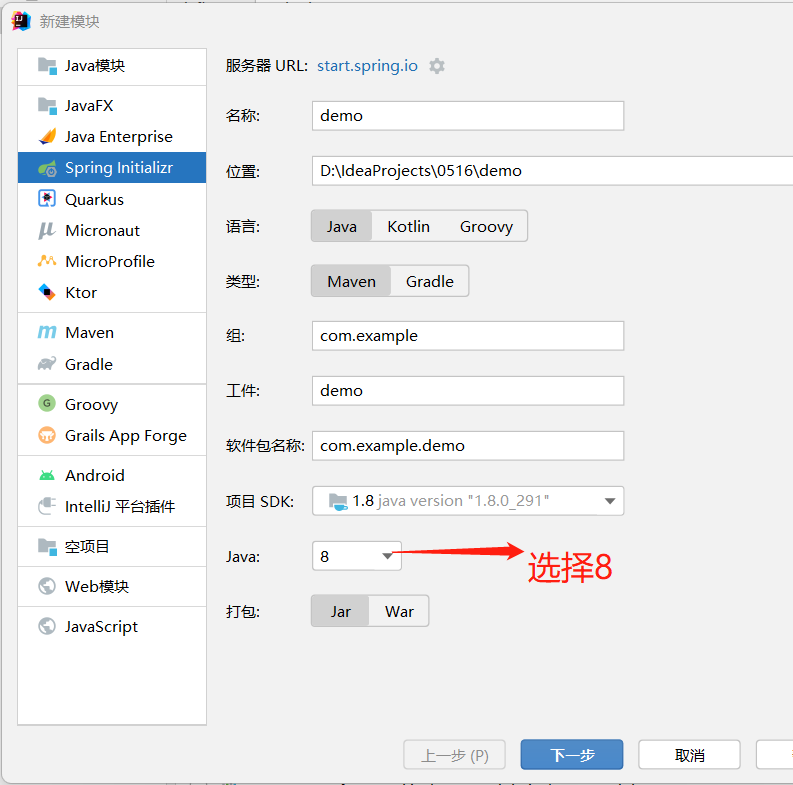
创建SpringBoot项目
1.创建空项目
2.在项目结构中添加模块
3.选择添加SPring Initializr模块
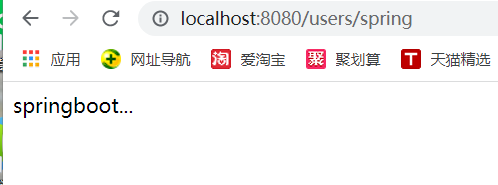
4.新建Controller类,测试springboot
@RestController
@RequestMapping("/users")
public class UserController {
    @GetMapping("/spring")
    public String getUser(){
        System.out.println("springboot...");
        return "springboot...";
    }
}
5.测试结果,成功连接服务器

6.在浏览器上查看localhost:8080/users/spring,结果
基于SpringBoot的SSMP整合案例
一:模块创建
1.创建SPring Initializr项目,选择spring web、MySql Driver、Lombok依赖项
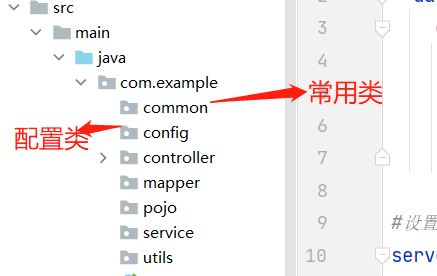
2.创建软件包
二:实体类开发
1.创建实体类
@Data
@NoArgsConstructor
@AllArgsConstructor
@TableName("students")
public class Student {
    @TableId
    private Integer stuNum;
    private String stuName;
    private String stuGender;
    private Integer stuAge;
}
三:数据层开发
1.配置application.yml文件
spring:
  datasource:
    druid:
      driver-class-name: com.mysql.cj.jdbc.Driver
      url: jdbc:mysql://locahost:3306/test?serverTimezone = GMT
      username: root
      password: 297999

#设置默认的端口号80,即localhost后无需加:8080
server:
  port: 80

mybatis-plus:
  global-config:
    db-config:
      id-type: auto
#      为方便调试可以开启MyBatisPlus的日志
  configuration:
    log-impl: org.apache.ibatis.logging.stdout.StdOutImpl
2.创建StudentMapper
@Mapper
public interface StudentMapper extends BaseMapper<Student> {

}
3.创建测试类
@SpringBootTest
class SpringbootApplicationTests {
    @Autowired
    StudentMapper mapper;

    @Test
    public void selectStudent(){
        System.out.println(mapper.selectList(null));

    }

}
四:业务层开发
1.创建StudentService接口
public interface StudentService extends IService<Student> {
}
2.创建StudentServiceImpl实现类
@Service
public class StudentServiceImpl extends ServiceImpl<StudentMapper, Student>implements StudentService {
}
3.测试类定义
@Autowired
    StudentServiceImpl servie;

    @Test
    public void selectStudent2(){
        System.out.println(servie.list());

    }
五:表现层开发
1.创建StudenntController,实现曾删改查
@RestController
@RequestMapping("/stu")
public class StudentController {
@Autowired
StudentServiceImpl service;
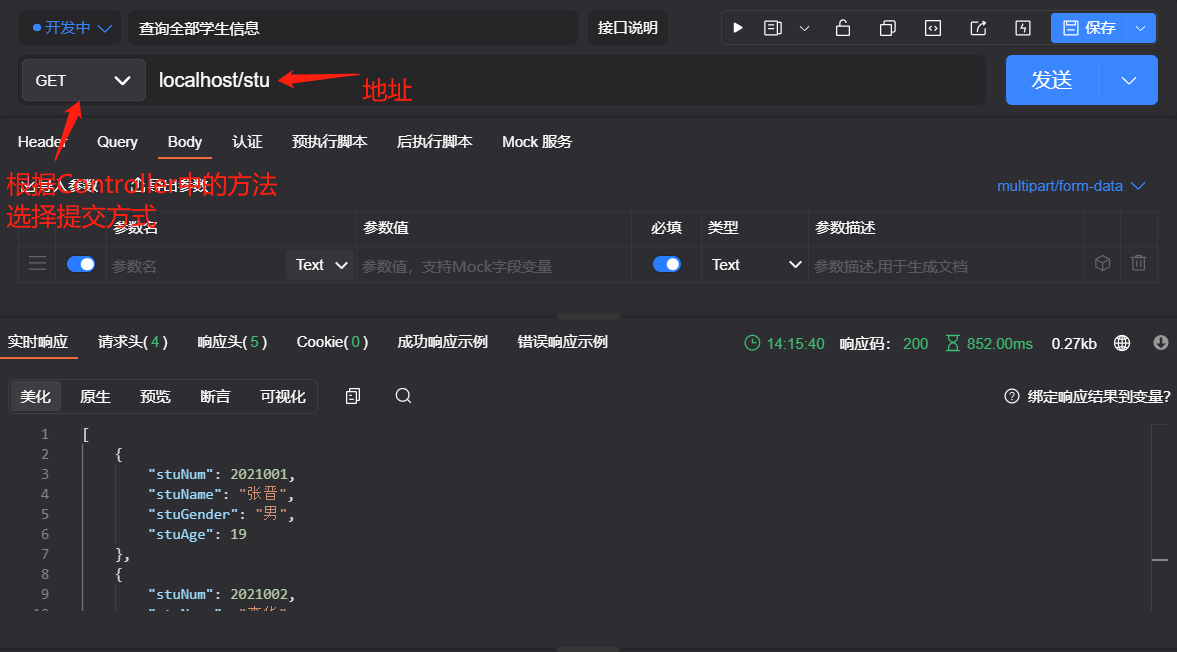
// 查询全部学生信息,GetMapping无值默认访问
@GetMapping
public List<Student> getAll() {
return service.list();
}
// 查询单个信息
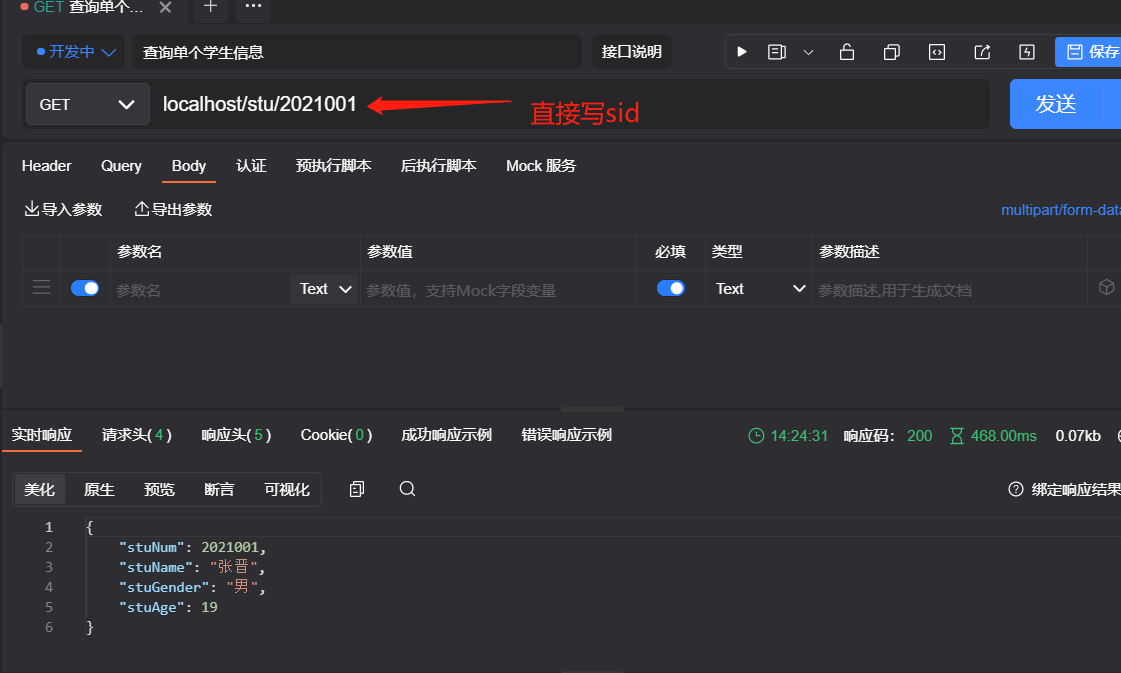
// 若设为@GetMapping("/one"),则访问路径为localhost/stu/one?sid=1
// 若设为@GetMapping("/{sid}"),则访问路径为localhost/stu/1,@PathVariable指路径变量
@GetMapping("/{sid}")
public Student getOne(@PathVariable Integer sid) {
return service.getById(sid);
}
// 添加学生信息
@PutMapping
public Boolean insert(Student student) {//Put必须加@RequestBody注解
boolean save = service.save(student);
return save;
}
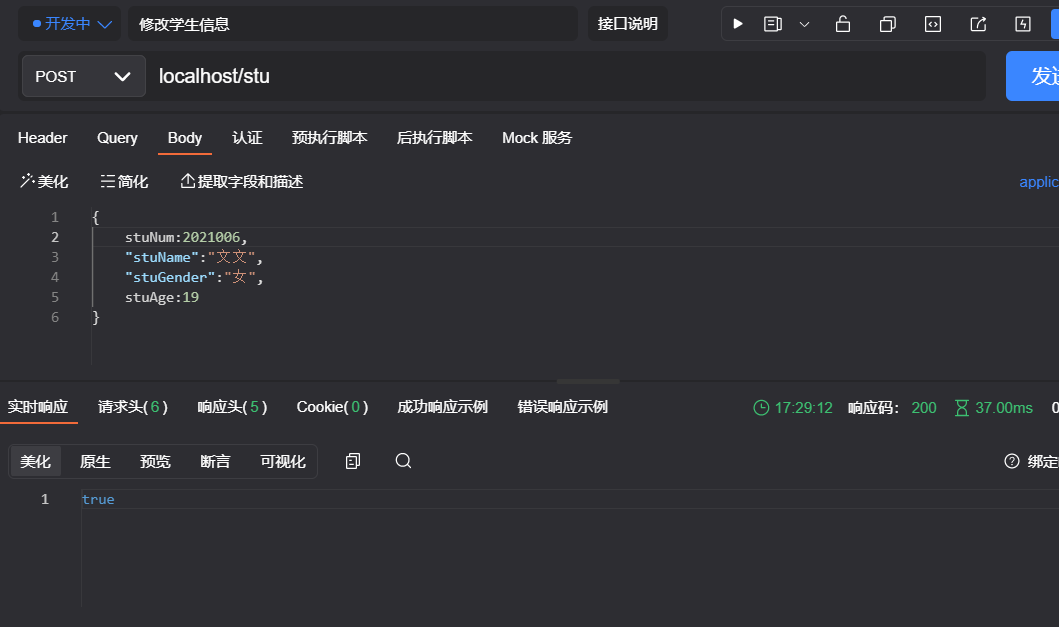
// 修改学生信息
@PostMapping
public Boolean update(Student student){
boolean update = service.update(student, null);
return update;
}
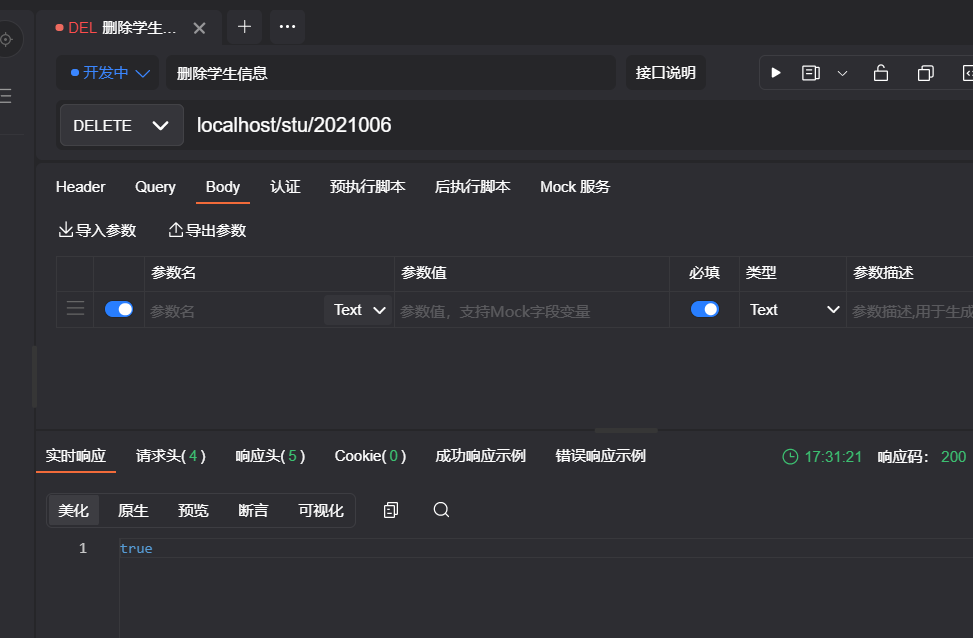
// 删除学生信息
@DeleteMapping("/${sid}")
public Boolean delect(@PathVariable Integer sid){
boolean b = service.removeById(sid);
return b;
}
}
2.通过ApiPost调试接口
ApiPost是一款类似Postman可以对网页调试,模拟发送网页HTTP/HTTPS请求的工具。通常我们可以用来很方便的模拟get、post或者其他方式的请求来调试接口。
2.1查询全部学生信息
2.2查询单个学生信息
2.3添加学生信息

2.4修改学生信息
2.5删除学生信息

 浙公网安备 33010602011771号