linux-加密隧道服务
加密隧道服务
一、加密隧道服务概述
两点如何传输数据最安全
方案1: 专线(成本高)
方案2: 硬件设备3层路由器 , 硬件vpn设备 vpn virtual private network 虚拟专有网络 深信服VPN
方案3: 公有云产品
方案4: 商业产品
方案5: 开源软件
- pptp (不推荐) 使用最简单,不是很稳定,依赖于网络设备的支持.
- OpenVPN 实现用户/运维/开发,访问网站内网.
- IpSEC
- OpenSwan 用于实现两个局域网内网互通.
二、应用场景
运营:通过OpenVPN实现网站安全登录:(后台管理地址,设置为只能能通过vpn访问.)
开发:通过OpenVPN让开发与测试人员连接网站,进行开发测试(在家的时候)
运维:通过OpenVPN让各种用户(运维)连接网站内网服务器,或者是连接JMS
三、OpenVPN服务端配置
1.环境准备
| 主机 | ip | 说明 |
|---|---|---|
| m01 | 10.0.0.61/172.16.1.61 | openvpn server服务端 |
| web01 | 10.0.0.7/172.16.1.7 | 客户连接的内网服务器 非openvpn client客户端 |
| windows 笔记本 | openvpn 客户端 |
2.证书准备流程
- 创建CA证书
- server密钥
- client密钥
- OpenVPN服务端配置文件
2.1安装证书创建工具
[root@m01 ~]# yum install -y openvpn easy-rsa
[root@m01 ~]# rpm -ql easy-rsa
/usr/share/easy-rsa/3.0.8/easyrsa
2.2创建ca证书
#充当权威机构 修改vars文件
[root@m01 ~]# mkdir -p   /opt/easy-rsa
[root@m01 ~]# cp -a /usr/share/easy-rsa/3.0.8/*   /opt/easy-rsa/
[root@m01 ~]# cp /usr/share/doc/easy-rsa-3.0.8/vars.example  /opt/easy-rsa/vars
[root@m01 ~]# cat > /opt/easy-rsa/vars <<'EOF'
if [ -z "$EASYRSA_CALLER" ]; then
 echo "You appear to be sourcing an Easy-RSA 'vars' file." >&2
 echo "This is no longer necessary and is disallowed. See the section called" >&2
 echo "'How to use this file' near the top comments for more details." >&2
 return 1
fi
set_var EASYRSA_DN "cn_only"
set_var EASYRSA_REQ_COUNTRY "CN"
set_var EASYRSA_REQ_PROVINCE "Beijing"
set_var EASYRSA_REQ_CITY "Beijing"
set_var EASYRSA_REQ_ORG "yuanlinux"
set_var EASYRSA_REQ_EMAIL "yuanlinux@qq.com"
set_var EASYRSA_NS_SUPPORT "yes"
EOF

#创建var后 检查 权威机构信息
[root@m01 /opt/easy-rsa]# tree
.
├── easyrsa
├── openssl-easyrsa.cnf
├── vars
└── x509-types
    ├── ca
    ├── client
    ├── code-signing
    ├── COMMON
    ├── email
    ├── kdc
    ├── server
    └── serverClient

1 directory, 11 files

#充当权威机构 创建ca证书
#1.初始化,在当前目录创建PKI目录,用于存储证书
[root@m01 /opt/easy-rsa]# ll
total 88
-rwxr-xr-x 1 root root 76946 Sep 10  2020 easyrsa
-rw-r--r-- 1 root root  4616 Sep 10  2020 openssl-easyrsa.cnf
-rw-r--r-- 1 root root   517 Apr  1 16:07 vars
drwxr-xr-x 2 root root   122 Apr  1 16:02 x509-types
[root@m01 /opt/easy-rsa]# ./easyrsa init-pki
#正在使用来自于vars
Note: using Easy-RSA configuration from: /opt/easy-rsa/vars
#初始化完成 显示你可以尝试创建 CA证书
init-pki complete; you may now create a CA or requests.
Your newly created PKI dir is: /opt/easy-rsa/pki
#初始化后的目录在 pki下面

#2.创建根证书,会提示设置密码,用于ca对之后生成的server和client证书签名时使用,其他可默认
#温馨提示: 加上密码
[root@m01 /opt/easy-rsa]# ./easyrsa build-ca

Note: using Easy-RSA configuration from: /opt/easy-rsa/vars
Using SSL: openssl OpenSSL 1.0.2k-fips  26 Jan 2017

Enter New CA Key Passphrase: 		#输入密码
Re-Enter New CA Key Passphrase:
Generating RSA private key, 2048 bit long modulus
..............+++
.........................................+++
e is 65537 (0x10001)
You are about to be asked to enter information that will be incorporated
into your certificate request.
What you are about to enter is what is called a Distinguished Name or a DN.
There are quite a few fields but you can leave some blank
For some fields there will be a default value,
If you enter '.', the field will be left blank.
-----
Common Name (eg: your user, host, or server name) [Easy-RSA CA]:yuanlinux.cn  #输入域名

CA creation complete and you may now import and sign cert requests.
Your new CA certificate file for publishing is at:
/opt/easy-rsa/pki/ca.crt

#创建后生成 ca证书和私钥
[root@m01 /opt/easy-rsa]# tree
.
├── easyrsa
├── openssl-easyrsa.cnf
├── pki
│   ├── ca.crt				  #ca证书
│   ├── certs_by_serial
│   ├── index.txt
│   ├── index.txt.attr
│   ├── issued
│   ├── openssl-easyrsa.cnf
│   ├── private
│   │   └── ca.key			 #ca私钥
│   ├── renewed
│   │   ├── certs_by_serial
│   │   ├── private_by_serial
│   │   └── reqs_by_serial
│   ├── reqs
│   ├── revoked
│   │   ├── certs_by_serial
│   │   ├── private_by_serial
│   │   └── reqs_by_serial
│   ├── safessl-easyrsa.cnf
│   └── serial
├── vars
└── x509-types
    ├── ca
    ├── client
    ├── code-signing
    ├── COMMON
    ├── email
    ├── kdc
    ├── server
    └── serverClient
2.3创建server证书
创建server端证书和私钥文件
#1.创建请求文件及服务端私钥,nopass表示不加密私钥文件,其他可默认
[root@m01 /opt/easy-rsa]# ./easyrsa gen-req server nopass

Note: using Easy-RSA configuration from: /opt/easy-rsa/vars
Using SSL: openssl OpenSSL 1.0.2k-fips  26 Jan 2017
Generating a 2048 bit RSA private key
....................................................................+++
.....................................................................................................+++
writing new private key to '/opt/easy-rsa/pki/easy-rsa-85727.HIbZRd/tmp.Wlxf8a'
-----
You are about to be asked to enter information that will be incorporated
into your certificate request.
What you are about to enter is what is called a Distinguished Name or a DN.
There are quite a few fields but you can leave some blank
For some fields there will be a default value,
If you enter '.', the field will be left blank.
-----
Common Name (eg: your user, host, or server name) [server]:yuanlinux.cn

Keypair and certificate request completed. Your files are:
req: /opt/easy-rsa/pki/reqs/server.req
#server.req 用于 创建证书(证书资料)
key: /opt/easy-rsa/pki/private/server.key
#server私钥文件

#2.给server端证书签名,首先是对一些信息的确认,可以输入yes,然后创建ca根证书时设置的密码
[root@m01 /opt/easy-rsa]# ./easyrsa sign server server

Note: using Easy-RSA configuration from: /opt/easy-rsa/vars
Using SSL: openssl OpenSSL 1.0.2k-fips  26 Jan 2017


You are about to sign the following certificate.
Please check over the details shown below for accuracy. Note that this request
has not been cryptographically verified. Please be sure it came from a trusted
source or that you have verified the request checksum with the sender.

Request subject, to be signed as a server certificate for 825 days:

subject=
    commonName                = yuanlinux.cn


Type the word 'yes' to continue, or any other input to abort.
  Confirm request details: yes   #输入yes
Using configuration from /opt/easy-rsa/pki/easy-rsa-85787.LjOey4/tmp.Pg2d7M
Enter pass phrase for /opt/easy-rsa/pki/private/ca.key:
Check that the request matches the signature
Signature ok
The Subject's Distinguished Name is as follows
commonName            :ASN.1 12:'yuanlinux.cn'
Certificate is to be certified until Jul  4 08:13:57 2025 GMT (825 days)

Write out database with 1 new entries
Data Base Updated

Certificate created at: /opt/easy-rsa/pki/issued/server.crt

[root@m01 /opt/easy-rsa]# tree pki/
pki/
├── ca.crt								#ca证书
├── certs_by_serial
│   └── 196D16DC1E7D3D8CFE9EBA2D844B2235.pem
├── index.txt
├── index.txt.attr
├── index.txt.attr.old
├── index.txt.old
├── issued
│   └── server.crt					#server证书
├── openssl-easyrsa.cnf
├── private
│   ├── ca.key
│   └── server.key					#server私钥
├── renewed
│   ├── certs_by_serial
│   ├── private_by_serial
│   └── reqs_by_serial
├── reqs
│   └── server.req
├── revoked
│   ├── certs_by_serial
│   ├── private_by_serial
│   └── reqs_by_serial
├── safessl-easyrsa.cnf
├── serial
└── serial.old
2.4创建client证书
创建client端证书和私钥文件
#1.创建client端证书和私钥文件,nopass表示不加密私钥文件,其他可默认
[root@m01 /opt/easy-rsa]# ./easyrsa gen-req client nopass

Note: using Easy-RSA configuration from: /opt/easy-rsa/vars
Using SSL: openssl OpenSSL 1.0.2k-fips  26 Jan 2017
Generating a 2048 bit RSA private key
..........+++
............+++
writing new private key to '/opt/easy-rsa/pki/easy-rsa-85866.pzRS7J/tmp.Qo9IPX'
-----
You are about to be asked to enter information that will be incorporated
into your certificate request.
What you are about to enter is what is called a Distinguished Name or a DN.
There are quite a few fields but you can leave some blank
For some fields there will be a default value,
If you enter '.', the field will be left blank.
-----
Common Name (eg: your user, host, or server name) [client]:yuanlinux.cn

Keypair and certificate request completed. Your files are:
req: /opt/easy-rsa/pki/reqs/client.req
key: /opt/easy-rsa/pki/private/client.key
#2.给client端证书签名,首先是对一些信息的确认,可以输入yes,然后创建ca根证书时设置的密码
[root@m01 /opt/easy-rsa]# ./easyrsa sign client client

Note: using Easy-RSA configuration from: /opt/easy-rsa/vars
Using SSL: openssl OpenSSL 1.0.2k-fips  26 Jan 2017


You are about to sign the following certificate.
Please check over the details shown below for accuracy. Note that this request
has not been cryptographically verified. Please be sure it came from a trusted
source or that you have verified the request checksum with the sender.

Request subject, to be signed as a client certificate for 825 days:

subject=
    commonName                = yuanlinux.cn


Type the word 'yes' to continue, or any other input to abort.
  Confirm request details: yes
Using configuration from /opt/easy-rsa/pki/easy-rsa-85897.q7UPbB/tmp.R10NzZ
Enter pass phrase for /opt/easy-rsa/pki/private/ca.key:
Check that the request matches the signature
Signature ok
The Subject's Distinguished Name is as follows
commonName            :ASN.1 12:'yuanlinux.cn'
Certificate is to be certified until Jul  4 08:16:21 2025 GMT (825 days)

Write out database with 1 new entries
Data Base Updated

Certificate created at: /opt/easy-rsa/pki/issued/client.crt
2.5创建dh-pem算法文件和目录汇总
#.创建Diffie-Hellman文件,秘钥交换时的Diffie-Hellman算法
[root@m01 /opt/easy-rsa]# ./easyrsa gen-dh
DH parameters of size 2048 created at /opt/easy-rsa/pki/dh.pem
总结
创建vars文件(伪装ca机构),创建ca证书 build-ca
创建server证书和私钥
- gen-req server nopass
- sign server server
创建client证书和私钥
- gen-req client nopass
- sign client client
dh.pem 文件
3.服务端配置文件
#服务端配置文件
#配置文件中 各种路径默认相对于 /etc/openvpn
[root@m01 ~]# tree -F /etc/openvpn/
/etc/openvpn/
├── client/
└── server/

#注释篇
vim /etc/openvpn/server/server.conf
port 1194                               #端口
proto udp                               #协议
dev tun                                 #采用路由隧道模式tun
ca server/ca.crt                        #ca证书文件位置   /etc/openvpn   /etc/opnevpn/server

server/ca.crt
cert server/server.crt                  #服务端公钥名称 /etc/openvpn
key server/server.key                   #服务端私钥名称 /etc/openvpn
dh server/dh.pem                               #加密算法文件, 交换证书 校验算法 /etc/openvpn
server 10.8.0.0 255.255.255.0           #给客户端分配地址池(ip地址范围),注意:不能和VPN服务器内网网段有相同
push "route 172.16.1.0 255.255.255.0"   #客户端连接后,推送给客户端的路由规则
                                        #客户端想访问172.16.1.0/24 网段联系openvpn服务端
#ifconfig-pool-persist ipp.txt          #地址池记录文件位置 未来让openvpn 客户端固定ip地址使用的.
keepalive 10 120                        #存活时间,10秒ping一次,120 如未收到响应则视为断线
max-clients 100                         #最多允许100个客户端连接
status /var/log/openvpn-status.log      #日志记录位置openvpn状态
log /var/log/openvpn.log                #openvpn日志记录位置
verb 3                                  #verbose日志输出级别   数字越大越详细 最多11(debug)
client-to-client                        #客户端与客户端之间支持通信
persist-key     #通过keepalive检测超时后,重新启动VPN,不重新读取keys,保留第一次使用的keys 对私钥进行缓存.
persist-tun     #检测超时后,重新启动VPN,一直保持tun是linkup的。否则网络会先linkdown然后再linkup
duplicate-cn    #客户端密钥(证书和私钥)是否可以重复

[root@m01 ~]# cat /etc/openvpn/server/server.conf
port 1194
proto udp
dev tun
#/etc/openvpn目录
ca   ca.crt
dh server/dh.pem
cert server/server.crt
key server/server.key

server 10.8.0.0 255.255.255.0
push "route 172.16.1.0 255.255.255.0"
#ifconfig-pool-persist ipp.txt
keepalive 10 120
max-clients 100
status /var/log/openvpn-status.log
log /var/log/openvpn.log
verb 3
client-to-client
persist-key
persist-tun
duplicate-cn

#复制证书及密钥
[root@m01 ~]# cd /opt/easy-rsa/pki/
[root@m01 /opt/easy-rsa/pki]# cp ca.crt /etc/openvpn/
[root@m01 /opt/easy-rsa/pki]# cp dh.pem   /etc/openvpn/server/
[root@m01 /opt/easy-rsa/pki]# cp   issued/server.crt   private/server.key  /etc/openvpn/server/

#修改systemctl 配置
[root@m01 ~]# cat /usr/lib/systemd/system/openvpn@.service
[Unit]
Description=OpenVPN Robust And Highly Flexible Tunneling Application On %I
After=network.target

[Service]
Type=notify
PrivateTmp=true
ExecStart=/usr/sbin/openvpn --cd /etc/openvpn/ --config %i/%i.conf
##增加%i/即可   修改这一行
#%i表示 server或 client
#ll /etc/openvpn/server/server.conf

[Install]
WantedBy=multi-user.target
[root@m01 ~]# systemctl daemon-reload

#启动
[root@m01 ~]# systemctl enable openvpn@server
[root@m01 ~]# systemctl start openvpn@server

[root@m01 /etc/openvpn]# ss -lntup |grep 1194
udp    UNCONN     0      0         *:1194      *:*      users:(("openvpn",pid=86237,fd=5))


[root@m01 /etc/openvpn]#  ip a s tun0
4: tun0: <POINTOPOINT,MULTICAST,NOARP,UP,LOWER_UP> mtu 1500 qdisc pfifo_fast state UNKNOWN group default qlen 100
    link/none
    inet 10.8.0.1 peer 10.8.0.2/32 scope global tun0
       valid_lft forever preferred_lft forever
    inet6 fe80::d0a1:8c5f:f48e:b103/64 scope link flags 800
       valid_lft forever preferred_lft forever
[root@m01 /etc/openvpn]# route -n
Kernel IP routing table
Destination     Gateway         Genmask         Flags Metric Ref    Use Iface
0.0.0.0         10.0.0.2        0.0.0.0         UG    0      0        0 eth0
10.0.0.0        0.0.0.0         255.255.255.0   U     0      0        0 eth0
10.8.0.0        10.8.0.2        255.255.255.0   UG    0      0        0 tun0
10.8.0.2        0.0.0.0         255.255.255.255 UH    0      0        0 tun0
169.254.0.0     0.0.0.0         255.255.0.0     U     1002   0        0 eth0
169.254.0.0     0.0.0.0         255.255.0.0     U     1003   0        0 eth1
172.16.1.0      0.0.0.0         255.255.255.0   U     0      0        0 eth1


#配置内核转发
[root@m01 /opt/easy-rsa/pki]# cat /etc/sysctl.conf
# sysctl settings are defined through files in
# /usr/lib/sysctl.d/, /run/sysctl.d/, and /etc/sysctl.d/.
#
# Vendors settings live in /usr/lib/sysctl.d/.
# To override a whole file, create a new file with the same in
# /etc/sysctl.d/ and put new settings there. To override
# only specific settings, add a file with a lexically later
# name in /etc/sysctl.d/ and put new settings there.
#
# For more information, see sysctl.conf(5) and sysctl.d(5).
net.ipv4.ip_forward = 1
[root@m01 /opt/easy-rsa/pki]# sysctl -p
net.ipv4.ip_forward = 1
故障:openvpn启动报错
[root@m01 /etc/openvpn/server]# systemctl status openvpn@server
● openvpn@server.service - OpenVPN Robust And Highly Flexible Tunneling Application On server
Loaded: loaded (/usr/lib/systemd/system/openvpn@.service; enabled; vendor preset: disabled)
Active: failed (Result: exit-code) since Sat 2023-04-01 16:31:48 CST; 3s ago
Process: 86121 ExecStart=/usr/sbin/openvpn --cd /etc/openvpn/ --config %i/%i.conf (code=exited, status=1/FAILURE)
Main PID: 86121 (code=exited, status=1/FAILURE)

Apr 01 16:31:48 m01 systemd[1]: Starting OpenVPN Robust And Highly Flexible Tunneling Application On server...
Apr 01 16:31:48 m01 systemd[1]: openvpn@server.service: main process exited, code=exited, status=1/FAILURE
Apr 01 16:31:48 m01 systemd[1]: Failed to start OpenVPN Robust And Highly Flexible Tunneling Application On server.
Apr 01 16:31:48 m01 systemd[1]: Unit openvpn@server.service entered failed state.
Apr 01 16:31:48 m01 systemd[1]: openvpn@server.service failed.

[root@m01 /etc/openvpn/server]# cat /var/log/openvpn.log
Options error: --dh fails with 'dh.pem': No such file or directory (errno=2)
Options error: --cert fails with 'server.crt': No such file or directory (errno=2)
Sat Apr  1 16:31:48 2023 WARNING: cannot stat file 'server.key': No such file or directory (errno=2)
Options error: --key fails with 'server.key': No such file or directory (errno=2)
Options error: Please correct these errors.
Use --help for more information.

#原因:
这三个文件没有
#解决:
修改配置文件
[root@m01 /etc/openvpn]# tree
.
├── ca.crt
├── client
└── server
 ├── dh.pem
 ├── server.conf
 ├── server.crt
 └── server.key
[root@m01 /etc/openvpn]# cat /etc/openvpn/server/server.conf
port 1194
proto udp
dev tun
#/etc/openvpn目录
ca   ca.crt
dh server/dh.pem    #这三行没有加server
cert server/server.crt
key server/server.key
4.客户端配置文件
4.1 windows
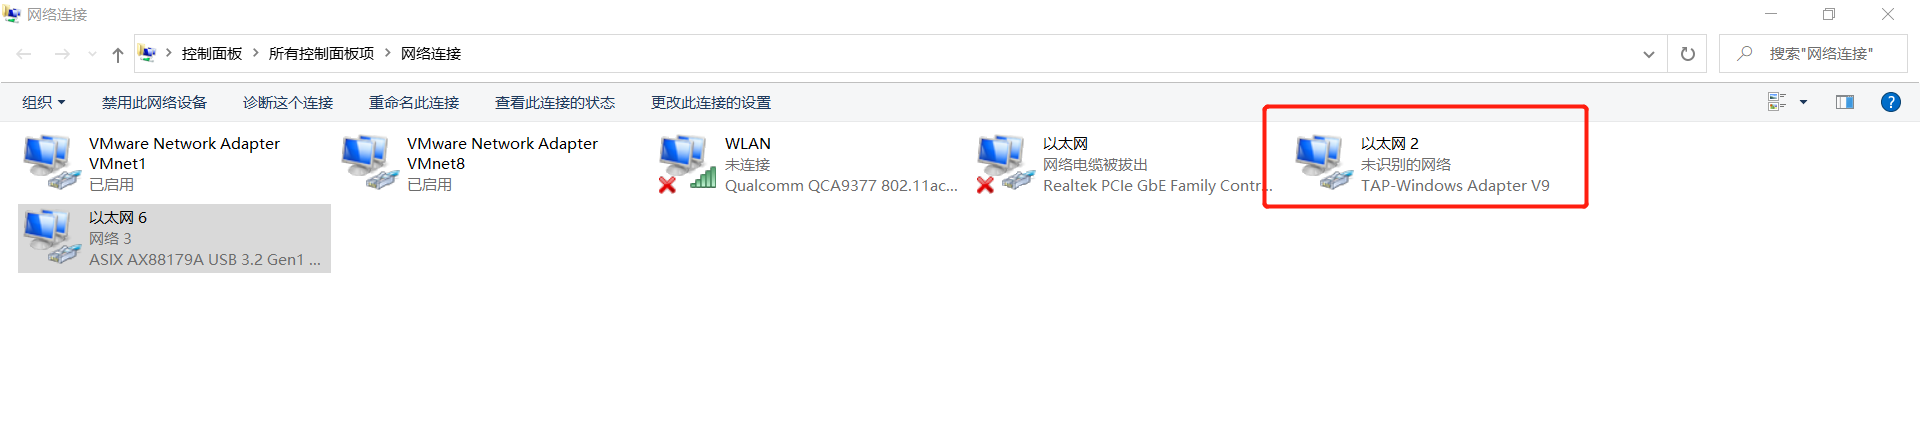
openvpn-install-2.4.6-I602-windows客户端.exe
[root@m01 /opt/easy-rsa/pki]# sz ca.crt
[root@m01 /opt/easy-rsa/pki]# sz issued/client.crt
[root@m01 /opt/easy-rsa/pki]# sz private/client.key
client.ovpn
client #指定当前VPN是客户端
dev tun #使用tun隧道传输协议
proto udp #使用udp协议传输数据
remote 10.0.0.61 1194 #openvpn服务器IP地址端口号
resolv-retry infinite #断线自动重新连接,在网络不稳定的情况下非常有用
nobind #不绑定本地特定的端口号
ca ca.crt #指定CA证书的文件路径
cert client.crt #指定当前客户端的证书文件路径
key client.key #指定当前客户端的私钥文件路径
verb 3 #指定日志文件的记录详细级别,可选0-9,等级越高日志内容越详细
persist-key #通过keepalive检测超时后,重新启动VPN,不重新读取keys,保留第一次使用的keys
client
dev tun
proto udp
remote 10.0.0.61 1194
resolv-retry infinite
nobind
ca ca.crt
cert client.crt
key client.key
verb 3
persist-key
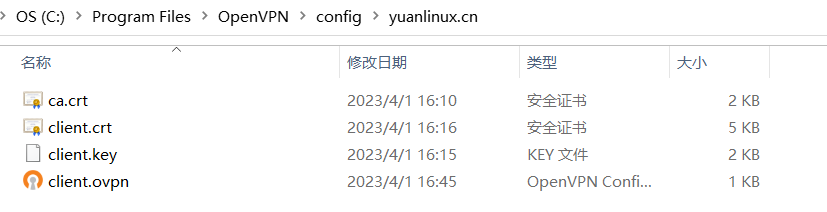
C:\Program Files\OpenVPN\config\yuanlinux.cn
ca.crt #ca证书
client.crt #客户端证书
client.key #客户端私钥
client.ovpn #客户端配置文件 类似于client.conf .ovpn open vpn
#测试,电脑就能访问到172网段了
[C:\~]$ ping 172.16.1.61
正在 Ping 172.16.1.61 具有 32 字节的数据:
来自 172.16.1.61 的回复: 字节=32 时间<1ms TTL=64
来自 172.16.1.61 的回复: 字节=32 时间=1ms TTL=64
172.16.1.61 的 Ping 统计信息:
数据包: 已发送 = 2,已接收 = 2,丢失 = 0 (0% 丢失),
往返行程的估计时间(以毫秒为单位):
最短 = 0ms,最长 = 1ms,平均 = 0ms
^C
[C:\~]$ ssh root@172.16.1.61
Connecting to 172.16.1.61:22...
Connection established.
To escape to local shell, press 'Ctrl+Alt+]'.
WARNING! The remote SSH server rejected X11 forwarding request.
Last login: Sat Apr 1 16:00:03 2023 from 10.0.0.1
主机名: m01
ip地址: 10.0.0.61 172.16.1.61 10.8.0.1
总计内存: 972
可用内存: 586
系统负载: 0.03 0.04 0.05
[root@m01 ~]#
#管理员运行
# #客户端想要访问 172.16.1.0/24网段请走 10.8.0.5
C:\WINDOWS\system32\route.exe ADD 10.8.0.0 MASK 255.255.255.0 10.8.0.5
[root@jumpserver ~]# route add -net 10.8.0.0/24 gw 172.16.1.61
[C:\~]$ ping 172.16.1.64
正在 Ping 172.16.1.64 具有 32 字节的数据:
来自 172.16.1.64 的回复: 字节=32 时间<1ms TTL=63
172.16.1.64 的 Ping 统计信息:
数据包: 已发送 = 1,已接收 = 1,丢失 = 0 (0% 丢失),
往返行程的估计时间(以毫秒为单位):
最短 = 0ms,最长 = 0ms,平均 = 0ms


4.2 Linux
yum install -y openvpn

cat /etc/openvpn/client/clinet.conf
client                  #指定当前VPN是客户端
dev tun                 #使用tun隧道传输协议
proto udp               #使用udp协议传输数据
remote 10.0.0.61 1194   #openvpn服务器IP地址端口号
resolv-retry infinite   #断线自动重新连接,在网络不稳定的情况下非常有用
nobind                  #不绑定本地特定的端口号
ca ca.crt               #指定CA证书的文件路径
cert client/client.crt         #指定当前客户端的证书文件路径
key client/client.key          #指定当前客户端的私钥文件路径
verb 3                  #指定日志文件的记录详细级别,可选0-9,等级越高日志内容越详细

/usr/lib/systemd/system/openvpn@.service
[Unit]
Description=OpenVPN Robust And Highly Flexible Tunneling Application On %I
After=network.target

[Service]
Type=notify
PrivateTmp=true
ExecStart=/usr/sbin/openvpn --cd /etc/openvpn/ --config %i/%i.conf

[Install]
WantedBy=multi-user.target


#启动
systemctl enable openvpn@client
systemctl start openvpn@client


route add  -net   10.8.0.0/24   gw 172.16.1.61
4.3 总结
opnevpn连接服务器局域网:
开启openvpn 服务端内核转发功能
在内网服务器上面配置路由规则(永久生效命令写入 /etc/rc.local )
四、OpenVPN加密/认证
#openvpn server
1.先配置服务端支持密码认证:
[root@m01 ~]# vim /etc/openvpn/server.conf
#服务端配置文件增加 3行
script-security 3
#允许使用自定义脚本
auth-user-pass-verify /etc/openvpn/check.sh via-env
#指定认证脚本
username-as-common-name
#用户密码登陆方式验证


2.编写/etc/openvpn/check.sh 脚本文件
[root@m01 ~]# cat /etc/openvpn/check.sh
/bin/sh
#desc: openvpn uesr check   scripts
#author: wh
PASSFILE="/etc/openvpn/openvpnfile"             #密码文件 用户名 密码明文
LOG_FILE="/var/log/openvpn-password.log"        #用户登录情况的日志
TIME_STAMP=`date "+%Y-%m-%d %T"`
 if [ ! -r "${PASSFILE}" ]; then
  echo "${TIME_STAMP}: Could not open password file \"${PASSFILE}\" for reading." >> ${LOG_FILE}
  exit 1
 fi
 CORRECT_PASSWORD=`awk '!/^;/&&!/^#/$1"=='${username}'"{print $2;exit}'${PASSFILE}`
 if [ "${CORRECT_PASSWORD}" = "" ]; then
  echo "${TIME_STAMP}: User does not exist:username=\"${username}\", password=\"${password}\"."
>> ${LOG_FILE}
  exit 1
 fi
 if [ "${password}" = "${CORRECT_PASSWORD}" ];
then
  echo "${TIME_STAMP}: Successful authentication: username=\"${username}\"." >>${LOG_FILE}
  exit 0
  fi

 echo "${TIME_STAMP}: Incorrect password:username=\"${username}\", password=\"${password}\"."
 >>${LOG_FILE}
  exit 1


3. 设置权限
chmod 700 /etc/openvpn/check.sh
4. 创建用户
cat > /etc/openvpn/openvpnfile <<EOF
wh 1
EOF
5. 重启服务端


#openvpn 客户端
auth-user-pass

 浙公网安备 33010602011771号