综合架构环境
综合架构环境准备
一、安装系统
- 安装英文
- 添加常用的软件包
- 添加额外网卡
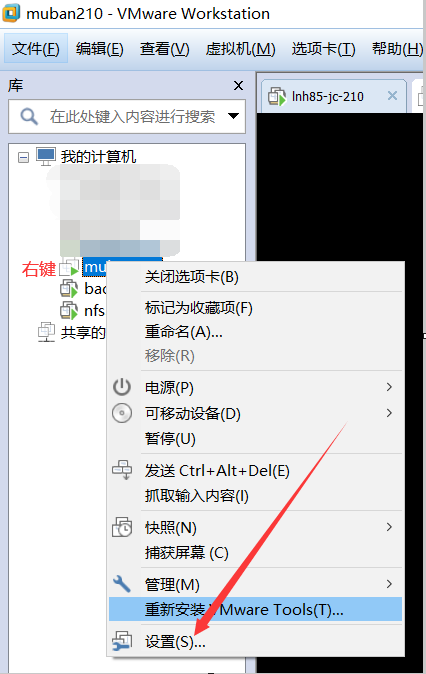
二、添加网卡
第1块网卡:net 模式 eth0 10.0.0.210 公网
第2块网卡:LAN区段 eth1 172.16.1.210 局域网
1.添加网卡步骤:

2.添加eth1网卡配置文件
[root@muban ~]# cat /etc/sysconfig/network-scripts/ifcfg-eth1
NAME=eth1
DEVICE=eth1
IPADDR=172.16.1.210
PREFIX=24
ONBOOT=yes
BOOTPROTO=static

[root@muban ~]# systemctl restart network
三、系统优化
1.关闭防火墙
#firewalld
[root@muban ~]# systemctl stop firewalld
[root@muban ~]# systemctl disable firewalld
Removed symlink /etc/systemd/system/multi-user.target.wants/firewalld.service.
Removed symlink /etc/systemd/system/dbus-org.fedoraproject.FirewallD1.service.
[root@muban ~]# systemctl status firewalld
● firewalld.service - firewalld - dynamic firewall daemon
   Loaded: loaded (/usr/lib/systemd/system/firewalld.service; disabled; vendor preset: enabled)
   Active: inactive (dead)
     Docs: man:firewalld(1)

Jan 09 19:23:29 muban systemd[1]: Starting firewalld - dynamic firewall daemon...
Jan 09 19:23:30 muban systemd[1]: Started firewalld - dynamic firewall daemon.
Jan 09 19:23:30 muban firewalld[1010]: WARNING: AllowZoneDrifting is enabled. This is considere...now.
Jan 09 19:55:59 muban systemd[1]: Stopping firewalld - dynamic firewall daemon...
Jan 09 19:55:59 muban systemd[1]: Stopped firewalld - dynamic firewall daemon.
Hint: Some lines were ellipsized, use -l to show in full.
#selinux  替换完需要重启linux生效
[root@muban ~]# sed -i 's#SELINUX=enforcing#SELINUX=disabled#g' /etc/selinux/config
[root@muban ~]# cat /etc/selinux/config

# This file controls the state of SELinux on the system.
# SELINUX= can take one of these three values:
#     enforcing - SELinux security policy is enforced.
#     permissive - SELinux prints warnings instead of enforcing.
#     disabled - No SELinux policy is loaded.
SELINUX=disabled

[root@muban ~]# getenforce
Disabled
2.配置源
#备份
[root@muban ~]# mv /etc/yum.repos.d/CentOS-Base.repo /etc/yum.repos.d/CentOS-Base.repo.backup
#修改base源 为阿里云
[root@muban ~]# curl -o /etc/yum.repos.d/CentOS-Base.repo https://mirrors.aliyun.com/repo/Centos-7.repo
  % Total    % Received % Xferd  Average Speed   Time    Time     Time  Current
                                 Dload  Upload   Total   Spent    Left  Speed
100  2523  100  2523    0     0   5529      0 --:--:-- --:--:-- --:--:--  5532
#增加epel源
[root@muban ~]# curl -o /etc/yum.repos.d/epel.repo http://mirrors.aliyun.com/repo/epel-7.repo
  % Total    % Received % Xferd  Average Speed   Time    Time     Time  Current
                                 Dload  Upload   Total   Spent    Left  Speed
100   664  100   664    0     0   5361      0 --:--:-- --:--:-- --:--:--  5398
#查看yum源
[root@muban ~]# yum repolist
Loaded plugins: fastestmirror
Determining fastest mirrors
 * base: mirrors.aliyun.com
 * extras: mirrors.aliyun.com
 * updates: mirrors.aliyun.com
3.安装常用工具
[root@muban ~]# yum install -y vim tree wget bash-completion bash-completion-extras lrzsz net-tools sysstat iotop iftop htop unzip nc nmap telnet bc psmisc httpd-tools bind-utils nethogs expect
[root@muban ~]# yum install -y cowsay  sl
4.优化ssh连接速度
[root@muban ~]# sed -i '/^GSSAPIAuthentication/s@^@#@g'  /etc/ssh/sshd_config   #注释掉现在的行
[root@muban ~]# cat >>/etc/ssh/sshd_config<<EOF
> UseDNS no #相当于网络命令的-n选项.
> GSSAPIAuthentication no #关闭GSS认证.
> EOF
[root@muban ~]# systemctl restart sshd
#检查
[root@muban ~]# egrep '^(GSSAPIAuthentication|UseDNS)'  /etc/ssh/sshd_config
UseDNS no #相当于网络命令的-n选项.
GSSAPIAuthentication no #关闭GSS认证.
5.时间同步
#如果时区不对,要修改时区
#查看时区
[root@muban ~]# timedatectl status
      Local time: Mon 2023-01-09 20:09:10 GMT
  Universal time: Mon 2023-01-09 20:09:10 UTC
        RTC time: Mon 2023-01-09 20:09:09
       Time zone: Atlantic/Reykjavik (GMT, +0000)  #表示时区
     NTP enabled: n/a
NTP synchronized: no
 RTC in local TZ: no
      DST active: n/a
#修改时区
[root@muban ~]# timedatectl set-timezone Asia/Shanghai

#配置定时时间同步.
[root@muban ~]# yum -y install ntpdate
[root@muban ~]# crontab -e
no crontab for root - using an empty one
#1. 同步时间
*/2 * * * * /sbin/ntpdate ntp1.aliyun.com  &>/dev/null
[root@muban ~]# crontab -l
#1. 同步时间
*/2 * * * * /sbin/ntpdate ntp1.aliyun.com  &>/dev/null
6.命令行颜色
#把内容写入/etc/profile
[root@muban ~]# vim /etc/profile
export PS1='[\[\e[34;1m\]\u@\[\e[0m\]\[\e[32;1m\]\H\[\e[0m\]\[\e[31;1m\] \w\[\e[0m\]]\$ '
#使文件生效
[root@muban ~]# source /etc/profile

#如果只想对自己生效修改
~/.bash_profile 或~/.bashrc
7.主机名与hosts文件
[root@muban ~]# hostnamectl set-hostname muban
[root@muban ~]# hostname
muban
#修改hosts文件
[root@muban ~]# cat >>/etc/hosts <<EOF
> 172.16.1.5 lb01
> 172.16.1.6 lb02
> 172.16.1.7 web01
> 172.16.1.8 web02
> 172.16.1.9 web03
> 172.16.1.10 web04
> 172.16.1.31 nfs01
> 172.16.1.41 backup
> 172.16.1.51 db01
> 172.16.1.61 m01
> EOF
[root@muban ~]# cat /etc/hosts
127.0.0.1   localhost localhost.localdomain localhost4 localhost4.localdomain4
::1         localhost localhost.localdomain localhost6 localhost6.localdomain6
172.16.1.5 lb01
172.16.1.6 lb02
172.16.1.7 web01
172.16.1.8 web02
172.16.1.9 web03
172.16.1.10 web04
172.16.1.31 nfs01
172.16.1.41 backup
172.16.1.51 db01
172.16.1.61 m01
8.一键修改主机名和ip地址的脚本
#如何使用
sh   /server/scripts/change.sh 主机名  IP地址(10.0.0.7)

[root@muban ~]# mkdir -p /server/scripts
#author: wh
#desc:   change ip and  hostname
#version: v7.0
#升级一些判断

#判断参数格式是否为2
[ $# -ne 2 ] && {
  echo "脚本使用姿势不对"
  echo "正确姿势:$0 主机名 ip地址"
  exit 1
}
#获取当前主机ip地址
ip=`hostname -I |awk '{print $1}'|sed 's#.*\.##g'`
#新的ip
ip_new=`echo $2 |sed 's#^.*\.##g'`
#新的主机名
hostname=$1

#修改ip
sed -i "s#10.0.0.$ip#10.0.0.$ip_new#g"   /etc/sysconfig/network-scripts/ifcfg-eth0
sed -i "s#172.16.1.$ip#172.16.1.$ip_new#g"   /etc/sysconfig/network-scripts/ifcfg-eth1
#重启网卡
systemctl restart network
#修改主机名
hostnamectl set-hostname $hostname
9.拍摄快照
四、综合架构
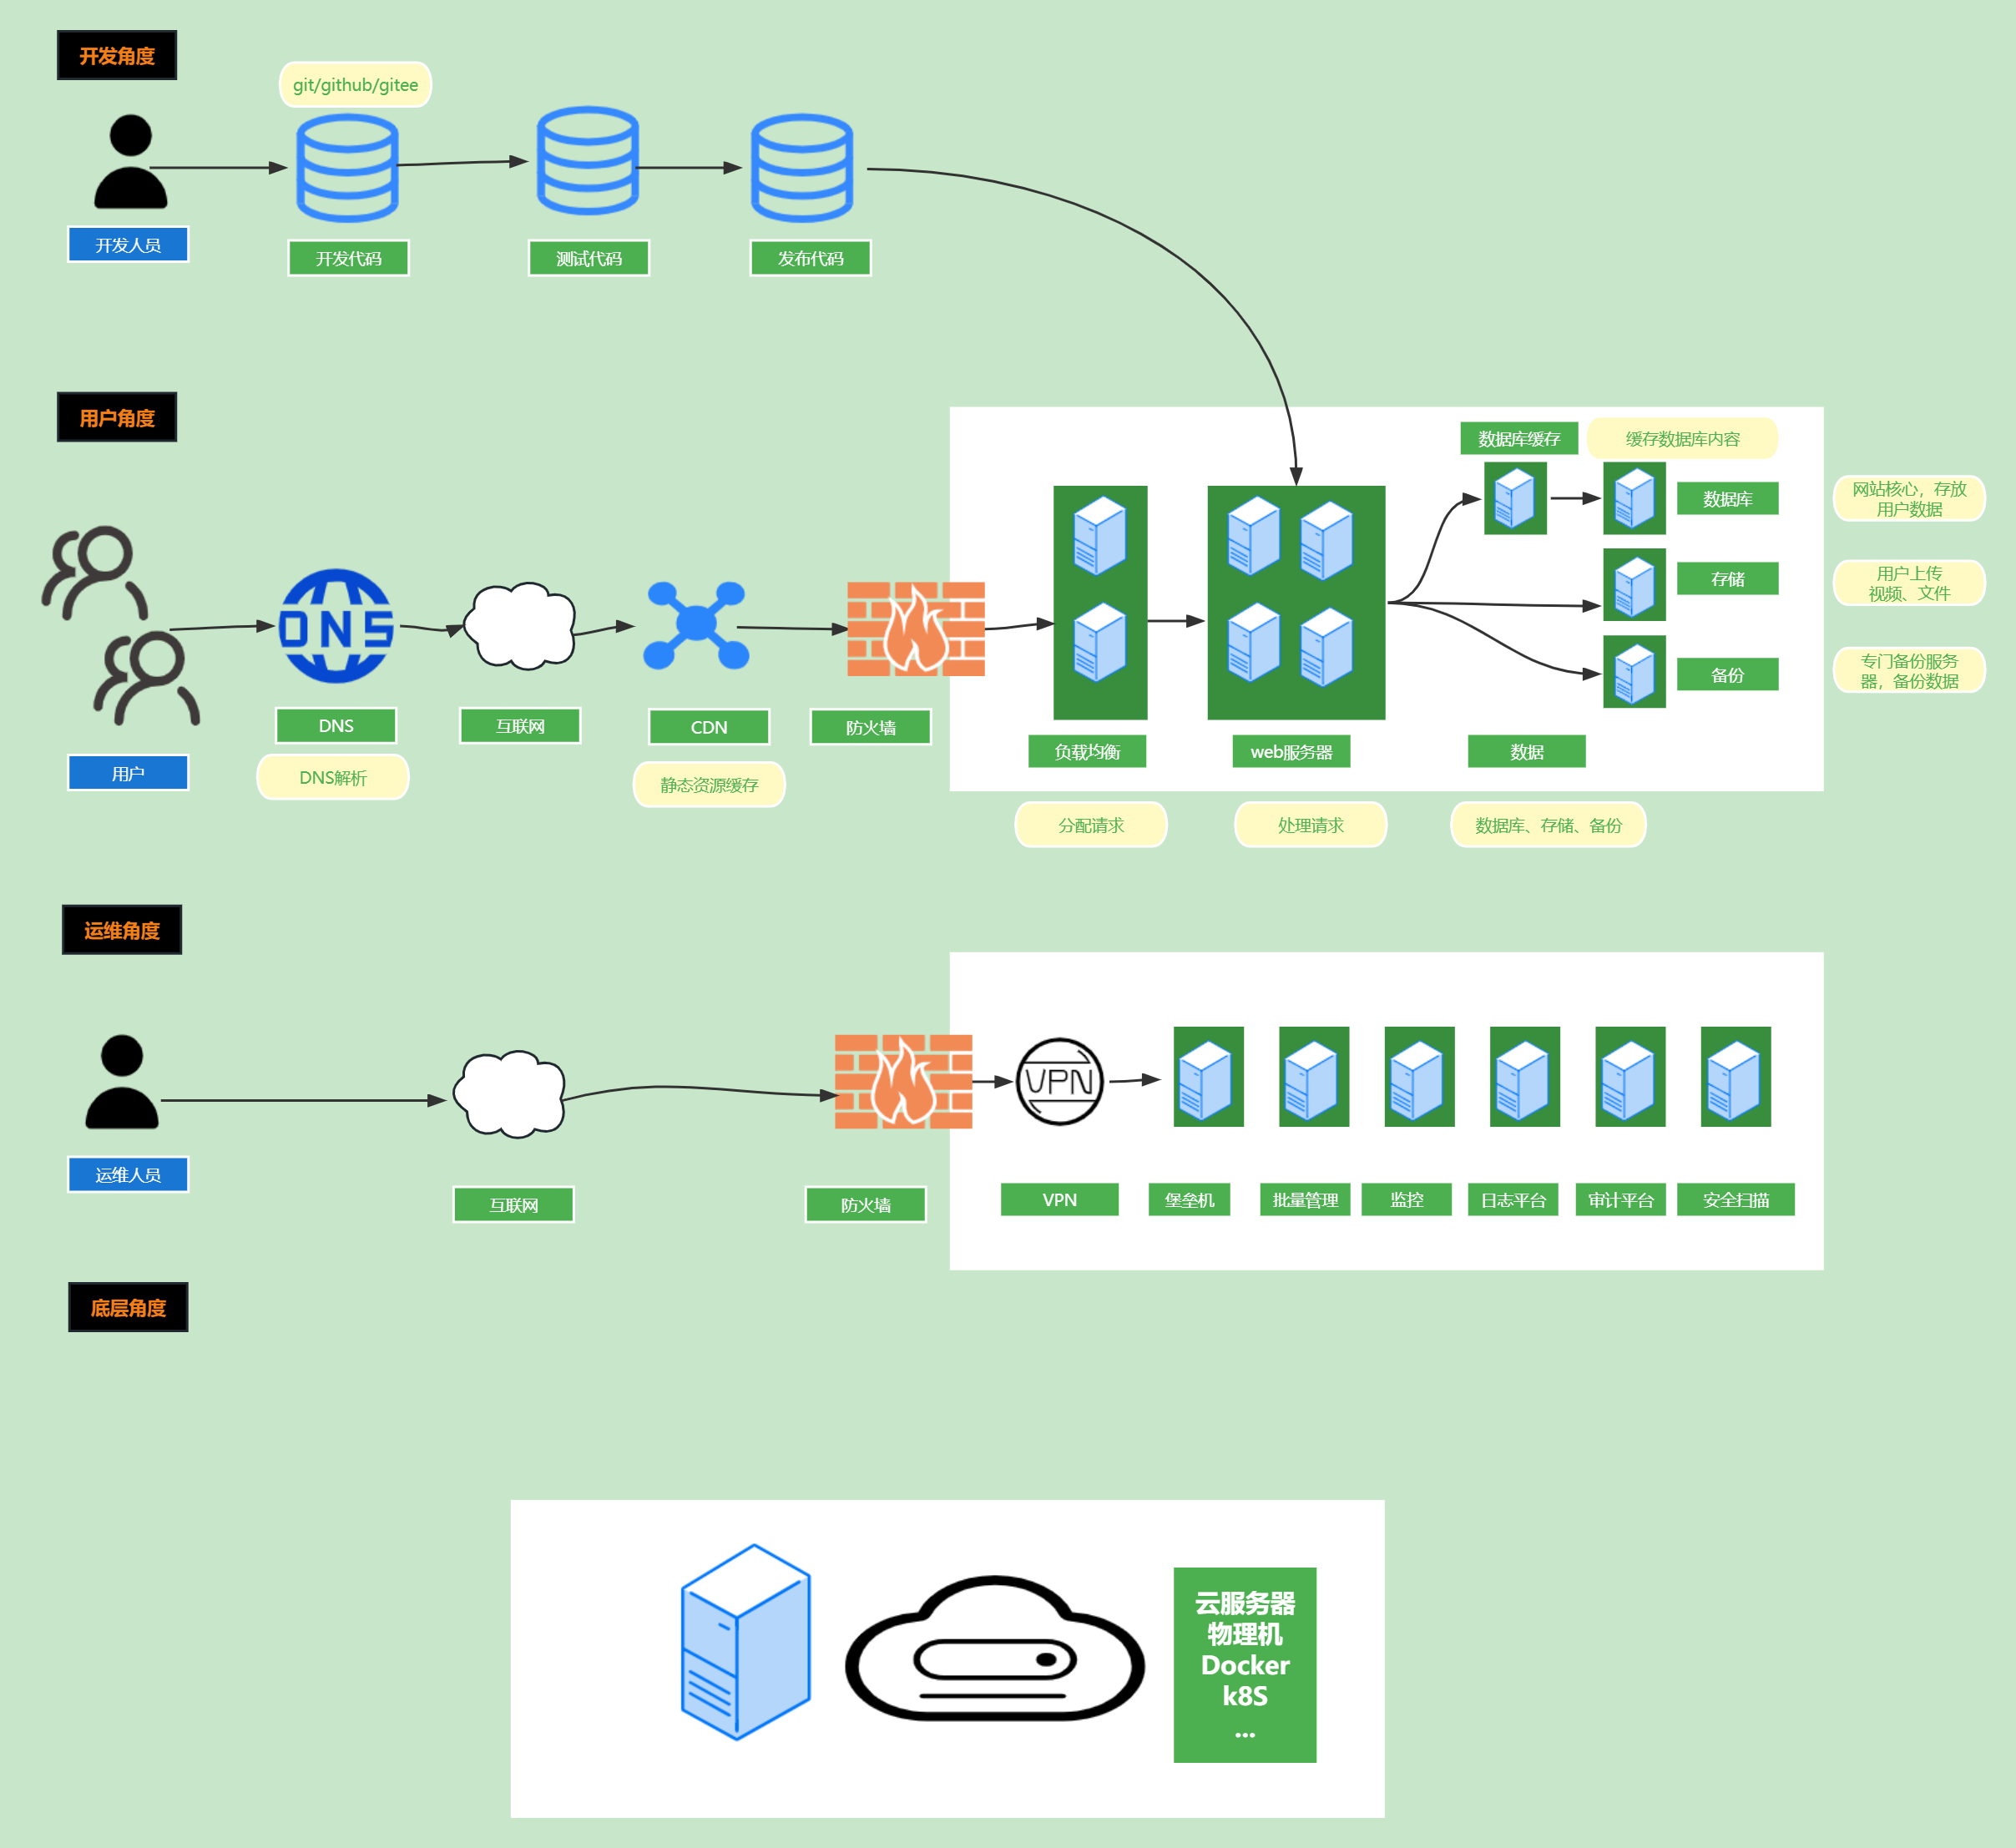
1.什么是综合架构
一般网站通用的结构,就是综合架构
2.综合架构详解
| 角度 | 说明 | 相关操作 |
|---|---|---|
| 开发角度 | 主要关注的书写代码,这些代码需要服务器运行 | 代码存放、开发如何提交运维,运维如何部署代码,如何测试代码 |
| 用户角度 | app或浏览器访问网站,整个访问流程中涉及到的服务、功能 | 整个网站架构的核心 |
| 运维角度 | 如何快速部署环境,自动化部署,自动化监控,堡垒机 | 如何自动化维护,监控,故障修复 |
3.技术栈
去IOE运动:(IBM服务器,Oracle数据库,EMC存储(dell))
| 角度 | 功能 | 服务 |
|---|---|---|
| 开发角度 | 存放代码 | gitlab,gogs,github,gitee(码云) |
| 集成,发布 | Jenkins | |
| 代码检查 | Sonarqube | |
| 私服,软件包仓库(Java) | Nexus | |
| 用户角度 | DNS解析 | DNS云解析(阿里云),Bind9,DNSmasq,CoreDNS |
| CDN缓存 | CDN(阿里云),蓝汛(专做CDN),七牛CND | |
| 防火墙 | 硬件防火墙:深信服,奇安信,华为 软件:firewalld ,iptables 公有云:安全组,态势感知,云安全中心 |
|
| 负载均衡 | 硬件:F5 软件:nginx,tengine,openResty,haproxy,lvs |
|
| wb网站服务器 | 基本:nginx,tengine,openResty 架构: LNMP:Linux,Nginx,Mysql,PHP LNMT:Linux,Nginx,Mysql,Tomcat LNMP:Linux,Nginx,Mysql,Python LNMG:Linux,Nginx,Mysql,Golang |
|
| 缓存服务器 | Redis,Kafka,RabbitMQ,RocketMQ | |
| 数据库服务器 | Mysql,Oracle,Mariadb 国产:TiDB,OpenGauss,OceanBase |
|
| 存储 | 硬件存储 软件存储:NFS,分布式存储 对象存储:阿里云OSS,七牛云对象存储,腾讯COS |
|
| 实时同步 | SerSync,Lsyncd | |
| 备份 | 定时任务,脚本,打包压缩 Rsync |
|
| 运维角度 | VPN | 硬件 OpenVPN |
| 堡垒机 | 硬件 开源软件:Teleport,Jumpserver |
|
| 批量管理 | Ansible,SaltStack,Puppet,Chef,Farbic | |
| 日志收集平台 | ELastic Stack(ELK,EFK,EBLK,ElasticSearch,Filebeat,Logstash,Kibana) | |
| 审计 | SQL升级,Yearning,Archery 操作/行为审计(堡垒机) |
|
| 安全 | 商业:AppScan,Nessus,OWASP 开源:ClamAV |

 浙公网安备 33010602011771号