二、WPF入门教程——Bingding学习
Bingding学习
一、简介
WPF的核心理念是变传统的UI驱动数据变成数据驱动UI,支撑这个理念的基础就是本章讲的Data Binding和与之相关的数据校验和数据转换。在使用Binding的时候,最重要的就是设置它的源和路径。
Bingding的源:
有三个属性用来设置源:ElementName(string)、Source(Object) 和 RelativeSource(RelativeSource)。注:这三个只能指定一个,否则异常。
ElementName:源为一个元素(Element),这里用的是此元素中设置的Name属性。
Source:以object作为源。<TextBlock Text="{Binding Source={StaticResource myDataSource}, Path=PersonName}"/>
RelativeSource:源相对于绑定目标的位置。
源是元素本身:{Binding RelativeSource={RelativeSource Self}};
源是Tempalte中元素的Parent:{Binding RelativeSource={RelativeSource TemplatedParent}};
源是绑定以collection形式的前一个数据:{Binding RelativeSource={RelativeSource PreviousData}},MSDN上关于PreviousData的说明并不多。
以上三项为RelativeSource中的Static值,使用这些值可以减少内存开销。
源是Ancestor(可能比parent还高):{Binding RelativeSource={RelativeSource FindAncestor,AncestorLevel=n, AncestorType={x:Type desiredType}}}
Bingding的Path:
Binding中的Path是 PropertyPath对象。
在最简单的情况下,Path 属性值是要用于绑定的源对象的属性名称,如 Path=PropertyName。
通过类似于C#中使用的语法,可以指定属性的子属性。例如,子句 Path=ShoppingCart.Order 将绑定设置为对象的子属性 Order 或属性 ShoppingCart。
若要绑定到附加属性,请将附加属性用括号括起。例如,若要绑定到附加属性 DockPanel.Dock,则语法为 Path=(DockPanel.Dock)。
在应用了索引器的属性名称之后的方括号内,可以指定属性的索引器。例如,子句 Path=ShoppingCart[0] 将绑定设置为与属性的内部索引处理文本字符串“0”的方式对应的索引。此外,还支持多个索引器。
在 Path 子句中可以同时使用索引器和子属性,例如,Path=ShoppingCart.ShippingInfo[MailingAddress,Street]。
在索引器内部,可以有多个由逗号(,) 分隔的索引器参数。可以使用圆括号指定每个参数的类型。例如,可以使用 Path="[(sys:Int32)42,(sys:Int32)24]",其中 sys 映射到 System 命名空间。
如果源为集合视图,则可以用斜杠(/) 指定当前项。例如,子句 Path=/ 设置到视图中当前项的绑定。如果源为集合,则此语法指定默认集合视图的当前项。
可以结合使用属性名和斜杠来遍历作为集合的属性。例如,Path=/Offices/ManagerName 指定源集合的当前项,该源集合包含同样是集合的 Offices 属性。其当前项是包含 ManagerName 属性的对象。
也可以使用句点(.)路径绑定到当前源。例如,Text=”{Binding}” 等效于 Text=”{Binding Path=.}”。
二、案例
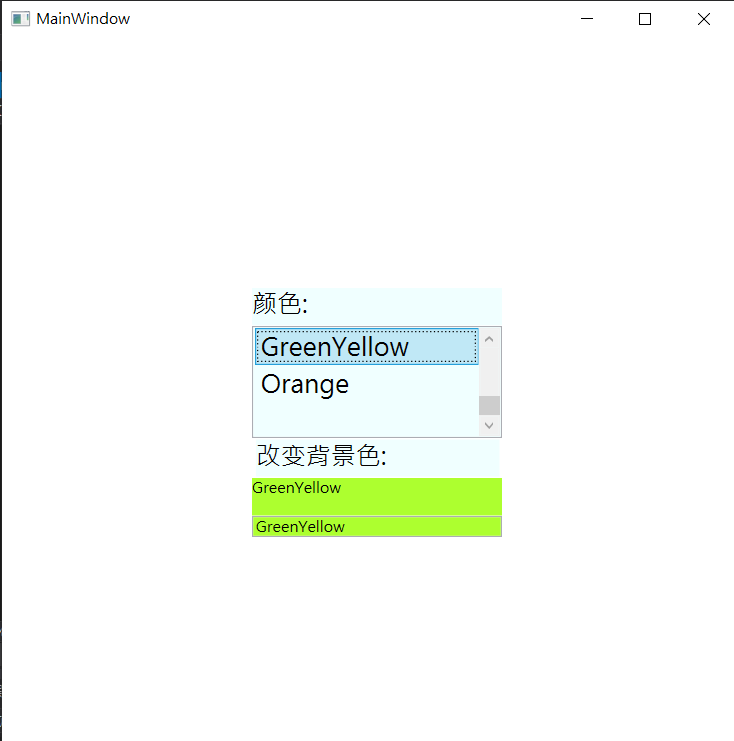
案例一:
Grid代码:
   <Grid>
        <!--行-->
        <Grid.RowDefinitions>
            <RowDefinition Height="200" />
            <RowDefinition Height="200"/>
            <RowDefinition Height="*"/>
        </Grid.RowDefinitions>

        <!--列-->
        <Grid.ColumnDefinitions>
            <ColumnDefinition Width="200" />
            <ColumnDefinition Width="200" />
            <ColumnDefinition Width="*" />
        </Grid.ColumnDefinitions>

        <!--设置在Grid中布局位置-->
        <!--将MainWindow分为3x3的布局,则位于中间(1,1)位置,个人理解相当于坐标。-->
        <StackPanel  Grid.Row="1" Grid.Column="1">
            <TextBlock Width="250" Height="30" Text="颜色:" TextWrapping="Wrap"  Background="Azure" FontSize="20"/>
            <ListBox x:Name="listColor" Width="200" Height="90"  Background="Azure"  FontSize="20">
                <ListBoxItem Content="Blue"/>
                <ListBoxItem Content="Red"/>
                <ListBoxItem Content="Green"/>
                <ListBoxItem Content="Gray"/>
                <ListBoxItem Content="Cyan"/>
                <ListBoxItem Content="GreenYellow"/>
                <ListBoxItem Content="Orange"/>
            </ListBox>
            <TextBlock Width="200" Height="30" TextWrapping="Wrap"  FontSize="20" Margin="3,1,2,1"   Background="Azure" Text="改变背景色:" />
            <!--绑定选择值-->
            <TextBlock Width="200" Height="30" Text="{Binding ElementName=listColor, Path=SelectedItem.Content, Mode=OneWay}"  Background="{Binding ElementName=listColor, Path=SelectedItem.Content, Mode=OneWay}">
            </TextBlock>
            <TextBox Name="txtTwoWay" Text="{Binding ElementName=listColor,Path=SelectedItem.Content,Mode=TwoWay}"  Background="{Binding ElementName=listColor,  Path=SelectedItem.Content,Mode=TwoWay}" >
            </TextBox>
        </StackPanel>
    </Grid>
执行效果:
案例二:
Grid代码:
<Grid>
        <StackPanel>
            <TextBlock Text="{Binding ElementName=slider,Path=Value}"/>
            <Slider x:Name="slider" Maximum="100" Minimum="1"/>
        </StackPanel>
 </Grid>
执行效果:

三、总结
在上例子中绑定数据源时候用到了Mode属性,通过查阅资料得知有以下区别:
oneTime:一次性绑定,将数据给控件,绑定就结束。
oneWay:数据源改变会影响绑定该数据源的控件。
twoWay:数据源改变会影响绑定该数据源的控件,并且控件中数据改变时也会影响到数据源。
本文来自博客园,作者:码农阿亮,转载请注明原文链接:https://www.cnblogs.com/wml-it/p/14871144.html
技术的发展日新月异,随着时间推移,无法保证本博客所有内容的正确性。如有误导,请大家见谅,欢迎评论区指正!
开源库地址,欢迎点亮:
GitHub:https://github.com/ITMingliang
Gitee: https://gitee.com/mingliang_it
GitLab: https://gitlab.com/ITMingliang
建群声明: 本着技术在于分享,方便大家交流学习的初心,特此建立【编程内功修炼交流群】,为大家答疑解惑。热烈欢迎各位爱交流学习的程序员进群,也希望进群的大佬能不吝分享自己遇到的技术问题和学习心得!进群方式:扫码关注公众号,后台回复【进群】。


 浙公网安备 33010602011771号