
OpenAuth.net入门【6】——添加数据校验功能
接前5篇
OpenAuth.net入门【1】——代码生成过程记录 - 星星c# - 博客园 (cnblogs.com)
OpenAuth.net入门【2】——代码生成后补全编辑功能 - 星星c# - 博客园 (cnblogs.com)
OpenAuth.net入门【3】——代码生成后补全查询功能 - 星星c# - 博客园 (cnblogs.com)
OpenAuth.net入门【4】——自定义数据列表和编辑界面 - 星星c# - 博客园 (cnblogs.com)
OpenAuth.net入门【5】——解决添加完数据,在未刷新列表时执行删除,数据未被真正删除的问题 - 星星c# - 博客园 (cnblogs.com)
本篇介绍如何添加数据的校验功能
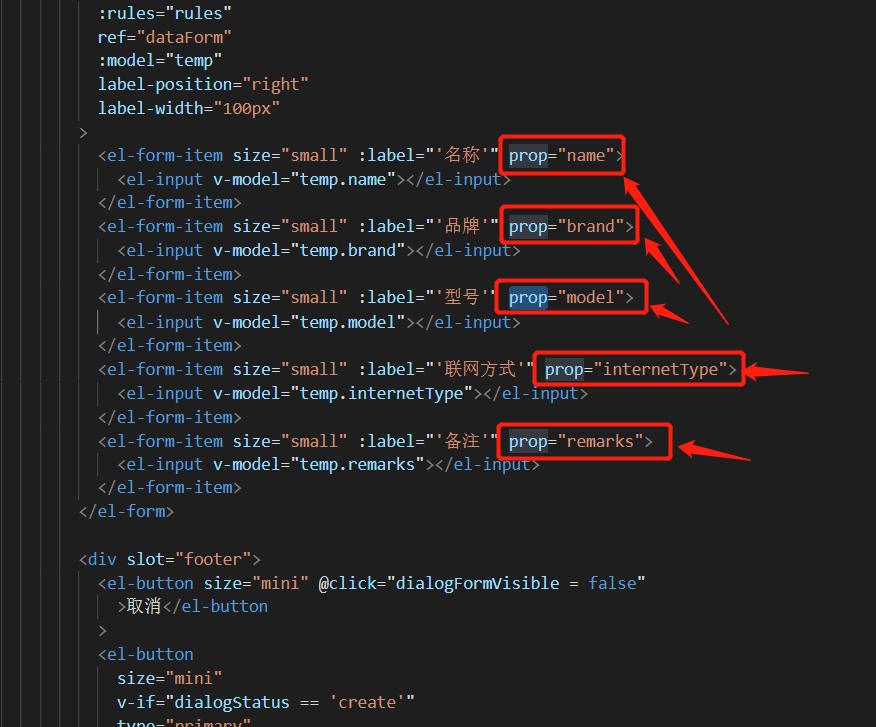
1、在编辑表单上配置正确对应的校验属性
在表单上加上正确的“prop”属性,如下图:
2、添加校验规则
找到data下的rules属性,并添加相应的规则,如下图:
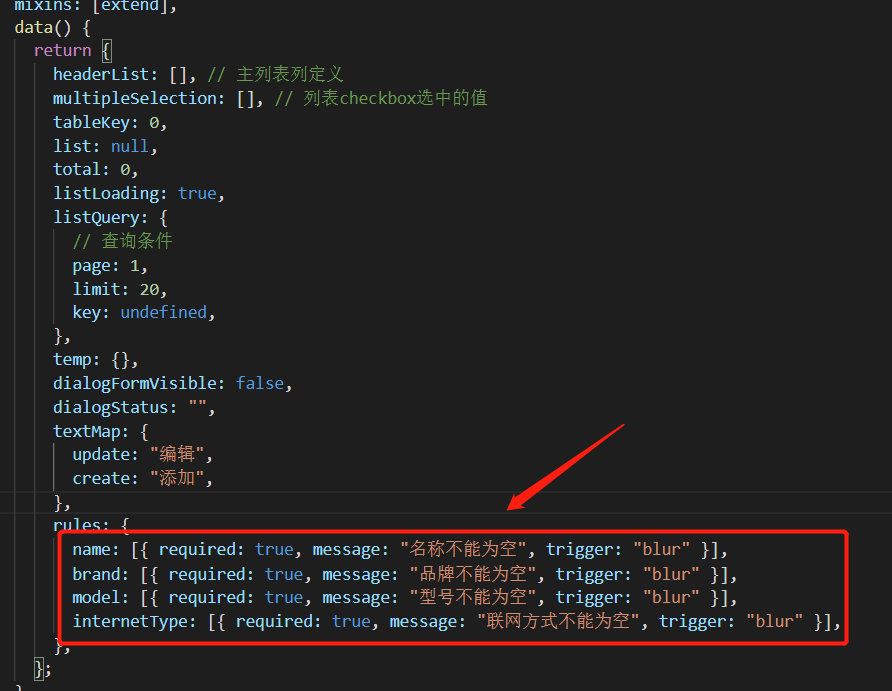
代码如下:
  data() {
    return {
      headerList: [], // 主列表列定义
      multipleSelection: [], // 列表checkbox选中的值
      tableKey: 0,
      list: null,
      total: 0,
      listLoading: true,
      listQuery: {
        // 查询条件
        page: 1,
        limit: 20,
        key: undefined,
      },
      temp: {},
      dialogFormVisible: false,
      dialogStatus: "",
      textMap: {
        update: "编辑",
        create: "添加",
      },
      rules: {
        name: [{ required: true, message: "名称不能为空", trigger: "blur" }],
        brand: [{ required: true, message: "品牌不能为空", trigger: "blur" }],
        model: [{ required: true, message: "型号不能为空", trigger: "blur" }],
        internetType: [{ required: true, message: "联网方式不能为空", trigger: "blur" }],
      },
    };
  },
3、保存按钮事件上加判断
如下图:
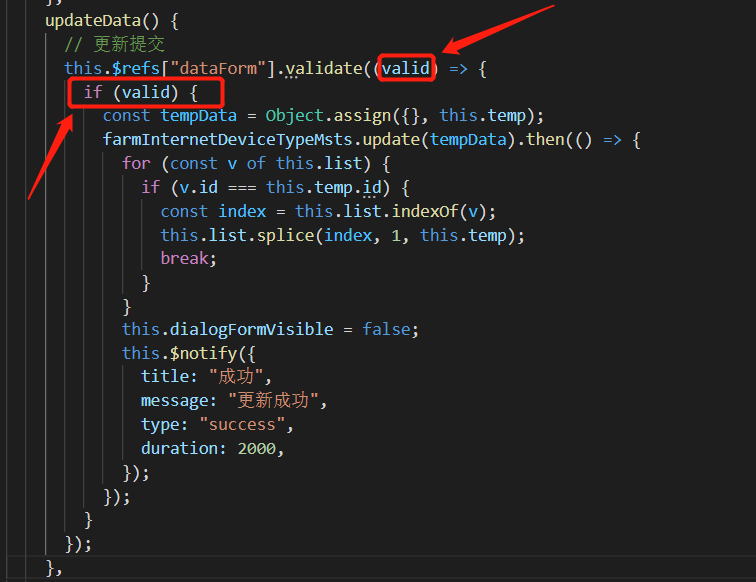
代码如下:
    updateData() {
      // 更新提交
      this.$refs["dataForm"].validate((valid) => {
        if (valid) {
          const tempData = Object.assign({}, this.temp);
          farmInternetDeviceTypeMsts.update(tempData).then(() => {
            for (const v of this.list) {
              if (v.id === this.temp.id) {
                const index = this.list.indexOf(v);
                this.list.splice(index, 1, this.temp);
                break;
              }
            }
            this.dialogFormVisible = false;
            this.$notify({
              title: "成功",
              message: "更新成功",
              type: "success",
              duration: 2000,
            });
          });
        }
      });
    },
如下图:
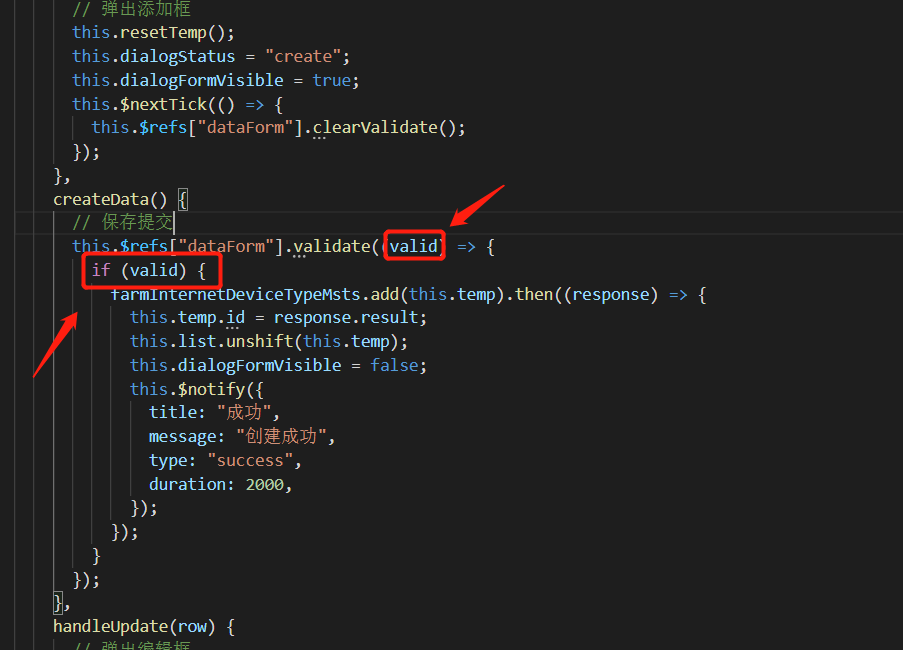
代码如下:
    createData() {
      // 保存提交
      this.$refs["dataForm"].validate((valid) => {
        if (valid) {
          farmInternetDeviceTypeMsts.add(this.temp).then((response) => {
            this.temp.id = response.result;
            this.list.unshift(this.temp);
            this.dialogFormVisible = false;
            this.$notify({
              title: "成功",
              message: "创建成功",
              type: "success",
              duration: 2000,
            });
          });
        }
      });
    },
4、效果图


 浙公网安备 33010602011771号