
tensorflow学习笔记——高效读取数据的方法(TFRecord)
关于TensorFlow读取数据,官网给出了三种方法:
- 供给数据(Feeding):在TensorFlow程序运行的每一步,让python代码来供给数据。
- 从文件读取数据:在TensorFlow图的起始,让一个输入管线从文件中读取数据。
- 预加载数据:在TensorFlow图中定义常量或变量来保存所有数据(仅适用于数据量比较小的情况)。
对于数据量较小而言,可能一般选择直接将数据加载进内存,然后再分batch输入网络进行训练(tip:使用这种方法时,结合yeild 使用更为简洁)。但是如果数据量较大,这样的方法就不适用了。因为太耗内存,所以这时最好使用TensorFlow提供的队列queue,也就是第二种方法:从文件读取数据。对于一些特定的读取,比如csv文件格式,官网有相关的描述,在这里我们学习一种比较通用的,高效的读取方法,即使用TensorFlow内定标准格式——TFRecords。
1,什么是TFRecords?
TensorFlow提供了一种统一的格式来存储数据,这个格式就是TFRecords。
为了高效的读取数据,可以将数据进行序列化存储,这样也便于网络流式读取数据,TFRecord就是一种保存记录的方法可以允许你讲任意的数据转换为TensorFlow所支持的格式,这种方法可以使TensorFlow的数据集更容易与网络应用架构相匹配。
TFRecord是谷歌推荐的一种常用的存储二进制序列数据的文件格式,理论上它可以保存任何格式的信息。下面是Tensorflow的官网给出的文档结构,整个文件由文件长度信息,长度校验码,数据,数据校验码组成。
uint64 length
uint32 masked_crc32_of_length
byte   data[length]
uint32 masked_crc32_of_data
但是对于我们普通开发者而言,我们并不需要关心这些,TensorFlow提供了丰富的API可以帮助我们轻松地读写TFRecord文件。
而 tf.Example 类就是一种将数据表示为{‘string’: value}形式的 message类型,TensorFlow经常使用 tf.Example 来写入,读取 TFRecord数据。
1.1 tf.Example 可以使用的数据格式
通常情况下,tf.Example中可以使用以下几种格式:
- tf.train.BytesList: 可以使用的类型包括 string和byte
- tf.train.FloatList: 可以使用的类型包括 float和double
- tf.train.Int64List: 可以使用的类型包括 enum,bool, int32, uint32, int64
TFRecord支持写入三种格式的数据:string,int64,float32,以列表的形式分别通过tf.train.BytesList,tf.train.Int64List,tf.train.FloatList 写入 tf.train.Feature,如下所示:
#feature一般是多维数组,要先转为list
tf.train.Feature(bytes_list=tf.train.BytesList(value=[feature.tostring()]))

#tostring函数后feature的形状信息会丢失,把shape也写入
tf.train.Feature(int64_list=tf.train.Int64List(value=list(feature.shape)))

tf.train.Feature(float_list=tf.train.FloatList(value=[label]))
如果写成这样,可能大家更熟悉一点:
def _bytes_feature(value):
    """Returns a bytes_list from a string/byte."""
    if isinstance(value, type(tf.constant(0))):
        value = value.numpy() # BytesList won't unpack a string from an EagerTensor.
    return tf.train.Feature(bytes_list=tf.train.BytesList(value=[value]))

def _float_feature(value):
    """Return a float_list form a float/double."""
    return tf.train.Feature(float_list=tf.train.FloatList(value=[value]))

def _int64_feature(value):
    """Return a int64_list from a bool/enum/int/uint."""
    return tf.train.Feature(int64_list=tf.train.Int64List(value=[value]))
通过上述操作,我们以dict的形式把要写入的数据汇总,并构建 tf.train.Features,然后构建 tf.train.Example。如下:
def get_tfrecords_example(feature, label):
	tfrecords_features = {}
	feat_shape = feature.shape
	tfrecords_features['feature'] = tf.train.Feature(bytes_list=
                                              tf.train.BytesList(value=[feature.tostring()]))
	tfrecords_features['shape'] = tf.train.Feature(int64_list=
                                              tf.train.Int64List(value=list(feat_shape)))
	tfrecords_features['label'] = tf.train.Feature(float_list=
                                              tf.train.FloatList(value=label))

	return tf.train.Example(features=tf.train.Features(feature=tfrecords_features))
我们测试一下,来验证不同的数据格式需要使用不同的函数:
# tf.train.BytesList
print(_bytes_feature(b'test_string'))
print(_bytes_feature('test_string'.encode('utf8')))

# tf.train.FloatList
print(_float_feature(np.exp(1)))

# tf.train.Int64List
print(_int64_feature(True))
print(_int64_feature(1))

结果:

bytes_list {
  value: "test_string"
}

bytes_list {
  value: "test_string"
}

float_list {
  value: 2.7182817459106445
}

int64_list {
  value: 1
}

int64_list {
  value: 1
}
把创建的tf.train.Example序列化下,便可以通过 tf.python_io.TFRecordWriter 写入 tfrecord文件中,如下:
#创建tfrecord的writer,文件名为xxx
tfrecord_wrt = tf.python_io.TFRecordWriter('xxx.tfrecord')
#把数据写入Example
exmp = get_tfrecords_example(feats[inx], labels[inx])
#Example序列化
exmp_serial = exmp.SerializeToString()
#写入tfrecord文件
tfrecord_wrt.write(exmp_serial)
#写完后关闭tfrecord的writer
tfrecord_wrt.close()
TFRecord 的核心内容在于内部有一系列的Example,Example 是protocolbuf 协议(protocolbuf 是通用的协议格式,对主流的编程语言都适用。所以这些 List对应到Python语言当中是列表。而对于Java 或者 C/C++来说他们就是数组)下的消息体。
一个Example消息体包含了一系列的feature属性。每一个feature是一个map,也就是 key-value 的键值对。key 取值是String类型。而value是Feature类型的消息体。下面代码给出了 tf.train.Example的定义:
message Example {
    Features features = 1;
};

message Features{
    map<string,Feature> featrue = 1;
};

message Feature{
    oneof kind{
        BytesList bytes_list = 1;
        FloatList float_list = 2;
        Int64List int64_list = 3;
  }
};
从上面的代码可以看出 tf.train.example 的数据结构是比较简洁的。tf.train.example中包含了一个从属性名称到取值的字典。其中属性名称为一个字符串,属性的取值为字符串(ByteList),实数列表(FloatList)或者整数列表(Int64List),举个例子,比如将一张解码前的图像存为一个字符串,图像所对应的类别编码存为整数列表,所以可以说TFRecord 可以存储几乎任何格式的信息。
2,为什么要用TFRecord?
TFRerecord也不是非用不可,但确实是谷歌官网推荐的文件格式。
- 1,它特别适合于TensorFlow,或者说就是为TensorFlow量身打造的。
- 2,因为TensorFlow开发者众多,统一训练的数据文件格式是一件很有意义的事情,也有助于降低学习成本和迁移成本。
TFRecords 其实是一种二进制文件,虽然它不如其他格式好理解,但是它能更好的利用内存,更方便赋值和移动,并且不需要单独的标签文件,理论上,它能保存所有的信息。总而言之,这样的文件格式好处多多,所以让我们利用起来。
3,为什么要生成自己的图片数据集TFrecords?
使用TensorFlow进行网格训练时,为了提高读取数据的效率,一般建议将训练数据转化为TFrecords格式。
使用tensorflow官网例子练习,我们会发现基本都是MNIST,CIFAR_10这种做好的数据集说事。所以对于我们这些初学者,完全不知道图片该如何输入。这时候学习自己制作数据集就非常有必要了。
4,如何将一张图片和一个TFRecord 文件相互转化
我们可以使用TFWriter轻松的完成这个任务。但是制作之前,我们要明确自己的目的。我们必须要想清楚,需要把什么信息存储到TFRecord 文件当中,这其实是最重要的。
下面我们将一张图片转化为TFRecord,然后读取一张TFRecord文件,并展示为图片。
4.1 将一张图片转化成TFRecord 文件
下面举例说明尝试把图片转化成TFRecord 文件。
首先定义Example 消息体。
Example Message {
    Features{
        feature{
            key:"name"
            value:{
                bytes_list:{
                    value:"cat"
                }
            }
        }
        feature{
            key:"shape"
            value:{
                int64_list:{
                    value:689
                    value:720
                    value:3
                }
            }
        }
        feature{
            key:"data"
            value:{
                bytes_list:{
                    value:0xbe
                    value:0xb2
                    ...
                    value:0x3
                }
            }
        }
    }
}
上面的Example表示,要将一张 cat 图片信息写进了 TFRecord 当中。而图片信息包含了图片的名字,图片的维度信息还有图片的数据,分别对应了 name,shape,content 3个feature。
下面我们尝试使用代码实现:
# _*_coding:utf-8_*_
import tensorflow as tf

def write_test(input, output):
    # 借助于TFRecordWriter 才能将信息写入TFRecord 文件
    writer = tf.python_io.TFRecordWriter(output)

    # 读取图片并进行解码
    image = tf.read_file(input)
    image = tf.image.decode_jpeg(image)

    with tf.Session() as sess:
        image = sess.run(image)
        shape = image.shape
        # 将图片转换成string
        image_data = image.tostring()
        print(type(image))
        print(len(image_data))
        name = bytes('cat', encoding='utf-8')
        print(type(name))
        # 创建Example对象,并将Feature一一对应填充进去
        example = tf.train.Example(features=tf.train.Features(feature={
             'name': tf.train.Feature(bytes_list=tf.train.BytesList(value=[name])),
             'shape': tf.train.Feature(int64_list=tf.train.Int64List(value=[shape[0], shape[1], shape[2]])),
             'data': tf.train.Feature(bytes_list=tf.train.BytesList(value=[image_data]))
        }
        ))
        # 将example序列化成string 类型,然后写入。
        writer.write(example.SerializeToString())
    writer.close()


if __name__ == '__main__':
    input_photo = 'cat.jpg'
    output_file = 'cat.tfrecord'
    write_test(input_photo, output_file)
上述代码注释比较详细,所以我们就重点说一下下面三点:
- 1,将图片解码,然后转化成string数据,然后填充进去。
- 2,Feature 的value 是列表,所以记得加上 []
- 3,example需要调用 SerializetoString() 进行序列化后才行
4.2 TFRecord 文件读取为图片
我们将图片的信息写入到一个tfrecord文件当中。现在我们需要检验它是否正确。这就需要用到如何读取TFRecord 文件的知识点了。
代码如下:
# _*_coding:utf-8_*_
import tensorflow as tf
import numpy as np
import matplotlib.pyplot as plt

def _parse_record(example_photo):
    features = {
        'name': tf.FixedLenFeature((), tf.string),
        'shape': tf.FixedLenFeature([3], tf.int64),
        'data': tf.FixedLenFeature((), tf.string)
    }
    parsed_features = tf.parse_single_example(example_photo,features=features)
    return parsed_features

def read_test(input_file):
    # 用dataset读取TFRecords文件
    dataset = tf.data.TFRecordDataset(input_file)
    dataset = dataset.map(_parse_record)
    iterator = dataset.make_one_shot_iterator()

    with tf.Session() as sess:
        features = sess.run(iterator.get_next())
        name = features['name']
        name = name.decode()
        img_data = features['data']
        shape = features['shape']
        print("==============")
        print(type(shape))
        print(len(img_data))

        # 从bytes数组中加载图片原始数据,并重新reshape,它的结果是 ndarray 数组
        img_data = np.fromstring(img_data, dtype=np.uint8)
        image_data = np.reshape(img_data, shape)

        plt.figure()
        # 显示图片
        plt.imshow(image_data)
        plt.show()

        # 将数据重新编码成jpg图片并保存
        img = tf.image.encode_jpeg(image_data)
        tf.gfile.GFile('cat_encode.jpg', 'wb').write(img.eval())

if __name__ == '__main__':
    read_test("cat.tfrecord")
下面解释一下代码:
1,首先使用dataset去读取tfrecord文件
2,在解析example 的时候,用现成的API:tf.parse_single_example
3,用 np.fromstring() 方法就可以获取解析后的string数据,记得把数据还原成 np.uint8
4,用 tf.image.encode_jepg() 方法可以将图片数据编码成 jpeg 格式
5,用 tf.gfile.GFile 对象可以把图片数据保存到本地
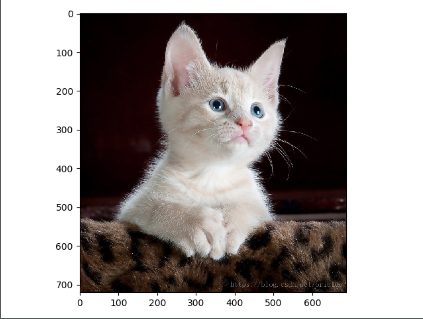
6,因为将图片 shape 写入了example 中,所以解析的时候必须指定维度,在这里 [3],不然程序会报错。
运行程序后,可以看到图片显示如下:
5,如何将一个文件夹下多张图片和一个TFRecord 文件相互转化
下面我们将一个文件夹的图片转化为TFRecord,然后再将TFRecord读取为图片。
5.1 将一个文件夹下多张图片转化为一个TFRecord文件
下面举例说明尝试把图片转化成TFRecord 文件。
# _*_coding:utf-8_*_
# 将图片保存成TFRecords
import os
import tensorflow as tf
from PIL import Image
import random
import cv2
import numpy as np


def _int64_feature(value):
    return tf.train.Feature(int64_list=tf.train.Int64List(value=[value]))


# 生成字符串型的属性
def _bytes_feature(value):
    return tf.train.Feature(bytes_list=tf.train.BytesList(value=[value]))


# 生成实数型的属性
def float_list_feature(value):
    return tf.train.Feature(float_list=tf.train.FloatList(value=value))


def read_image(filename, resize_height, resize_width, normalization=False):
    '''
        读取图片数据,默认返回的是uint8, [0, 255]
        :param filename:
        :param resize_height:
        :param resize_width:
        :param normalization:  是否归一化到 [0.0, 1.0]
        :return:  返回的图片数据
        '''
    bgr_image = cv2.imread(filename)
    # print(type(bgr_image))
    # 若是灰度图则转化为三通道
    if len(bgr_image.shape) == 2:
        print("Warning:gray image", filename)
        bgr_image = cv2.cvtColor(bgr_image, cv2.COLOR_GRAY2BGR)
    # 将BGR转化为RGB
    rgb_image = cv2.cvtColor(bgr_image, cv2.COLOR_BGR2RGB)
    # show_image(filename, rgb_image)
    # rgb_image=Image.open(filename)
    if resize_width > 0 and resize_height > 0:
        rgb_image = cv2.resize(rgb_image, (resize_width, resize_height))
    rgb_image = np.asanyarray(rgb_image)
    if normalization:
        rgb_image = rgb_image / 255.0
    return rgb_image


def load_labels_file(filename, labels_num=1, shuffle=False):
    '''
        载图txt文件,文件中每行为一个图片信息,且以空格隔开,图像路径 标签1  标签2
        如  test_image/1.jpg 0 2
        :param filename:
        :param labels_num:  labels个数
        :param shuffle: 是否打乱顺序
        :return:  images type-> list
        :return:labels type->lis\t
        '''
    images = []
    labels = []
    with open(filename) as f:
        lines_list = f.readlines()
        # print(lines_list)  # ['plane\\0499.jpg 4\n', 'plane\\0500.jpg 4\n']
        if shuffle:
            random.shuffle(lines_list)
        for lines in lines_list:
            line = lines.rstrip().split(" ")  # rstrip 删除 string 字符串末尾的空格.  ['plane\\0006.jpg', '4']
            label = []
            for i in range(labels_num):  # labels_num 1      0 1所以i只能取1
                label.append(int(line[i + 1]))  # 确保读取的是列表的第二个元素
            # print(label)
            images.append(line[0])
            # labels.append(line[1])  # ['0', '4']
            labels.append(label)
    # print(images)
    # print(labels)
    return images, labels


def create_records(image_dir, file, output_record_dir, resize_height, resize_width, shuffle, log=5):
    '''
    实现将图像原始数据,label,长,宽等信息保存为record文件
    注意:读取的图像数据默认是uint8,再转为tf的字符串型BytesList保存,解析请需要根据需要转换类型
    :param image_dir:原始图像的目录
    :param file:输入保存图片信息的txt文件(image_dir+file构成图片的路径)
    :param output_record_dir:保存record文件的路径
    :param resize_height:
    :param resize_width:
    PS:当resize_height或者resize_width=0是,不执行resize
    :param shuffle:是否打乱顺序
    :param log:log信息打印间隔
    '''
    # 加载文件,仅获取一个label
    images_list, labels_list = load_labels_file(file, 1, shuffle)

    writer = tf.python_io.TFRecordWriter(output_record_dir)
    for i, [image_name, labels] in enumerate(zip(images_list, labels_list)):
        image_path = os.path.join(image_dir, images_list[i])
        if not os.path.exists(image_path):
            print("Error:no image", image_path)
            continue
        image = read_image(image_path, resize_height, resize_width)
        image_raw = image.tostring()
        if i % log == 0 or i == len(images_list) - 1:
            print("-----------processing:%d--th------------" % (i))
            print('current image_path=%s' % (image_path), 'shape:{}'.format(image.shape),
                  'labels:{}'.format(labels))
        # 这里仅保存一个label,多label适当增加"'label': _int64_feature(label)"项
        label = labels[0]
        example = tf.train.Example(features=tf.train.Features(feature={
            'image_raw': _bytes_feature(image_raw),
            'height': _int64_feature(image.shape[0]),
            'width': _int64_feature(image.shape[1]),
            'depth': _int64_feature(image.shape[2]),
            'label': _int64_feature(label)
        }))
        writer.write(example.SerializeToString())
    writer.close()

def get_example_nums(tf_records_filenames):
    '''
    统计tf_records图像的个数(example)个数
    :param tf_records_filenames: tf_records文件路径
    :return:
    '''
    nums = 0
    for record in tf.python_io.tf_record_iterator(tf_records_filenames):
        nums += 1
    return nums

if __name__ == '__main__':
    resize_height = 224  # 指定存储图片高度
    resize_width = 224  # 指定存储图片宽度
    shuffle = True
    log = 5

    image_dir = 'dataset/train'
    train_labels = 'dataset/train.txt'
    train_record_output = 'train.tfrecord'
    create_records(image_dir, train_labels, train_record_output, resize_height, resize_width, shuffle, log)
    train_nums = get_example_nums(train_record_output)
    print("save train example nums={}".format(train_nums))
5.2 将一个TFRecord文件转化为图片显示
因为图片太多,所以我们这里只展示每个文件夹中第一张图片即可。
代码如下:
# _*_coding:utf-8_*_
# 将图片保存成TFRecords
import os
import tensorflow as tf
from PIL import Image
import random
import cv2
import numpy as np
import matplotlib.pyplot as plt

def read_records(filename,resize_height, resize_width,type=None):
    '''
    解析record文件:源文件的图像数据是RGB,uint8,[0,255],一般作为训练数据时,需要归一化到[0,1]
    :param filename:
    :param resize_height:
    :param resize_width:
    :param type:选择图像数据的返回类型
         None:默认将uint8-[0,255]转为float32-[0,255]
         normalization:归一化float32-[0,1]
         centralization:归一化float32-[0,1],再减均值中心化
    :return:
    '''
    # 创建文件队列,不限读取的数量
    filename_queue = tf.train.string_input_producer([filename])
    # 为文件队列创建一个阅读区
    reader = tf.TFRecordReader()
    # reader从文件队列中读入一个序列化的样本
    _, serialized_example = reader.read(filename_queue)

    # 解析符号化的样本
    features = tf.parse_single_example(
        serialized_example,
        features={
            'image_raw': tf.FixedLenFeature([], tf.string),
            'height': tf.FixedLenFeature([], tf.int64),
            'width': tf.FixedLenFeature([], tf.int64),
            'depth': tf.FixedLenFeature([], tf.int64),
            'label': tf.FixedLenFeature([], tf.int64)
        }
    )
    # 获得图像原始的数据
    tf_image = tf.decode_raw(features["image_raw"], tf.uint8)

    tf_height = features['height']
    tf_width = features['width']
    tf_depth = features['depth']
    tf_label = tf.cast(features['label'], tf.int32)

    #PS 回复原始图像 reshpe的大小必须与保存之前的图像shape一致,否则报错
    # 设置图像的维度
    tf_image = tf.reshape(tf_image, [resize_height, resize_width, 3])

    # 恢复数据后,才可以对图像进行resize_images:输入 uint 输出 float32
    # tf_image = tf.image.resize_images(tf_image, [224, 224])

    # 存储的图像类型为 uint8 tensorflow训练数据必须是tf.float32
    if type is None:
        tf_image = tf.cast(tf_image, tf.float32)
    # 【1】 若需要归一化的话请使用
    elif type == 'normalization':
        # 仅当输入数据是 uint8,才会归一化 [0 , 255]
        tf_image = tf.cast(tf_image, tf.float32) * (1. / 255.0)
    elif type=='centralization':
        # 若需要归一化,且中心化,假设均值为0.5 请使用
        tf_image = tf.cast(tf_image, tf.float32) * (1. / 255.0) - 0.5

    # 这里仅仅返回图像和标签
    return tf_image, tf_label


def show_image(title, image):
    '''
    显示图片
    :param title:  图像标题
    :param image:  图像的数据
    :return:
    '''
    plt.imshow(image)
    plt.axis('on')   # 关掉坐标轴 为  off
    plt.title(title)  # 图像题目
    plt.show()


def disp_records(record_file,resize_height, resize_width,show_nums=4):
    '''
    解析record文件,并显示show_nums张图片,主要用于验证生成record文件是否成功
    :param tfrecord_file: record文件路径
    :return:
    '''
    # 读取record 函数
    tf_image, tf_label = read_records(record_file, resize_height, resize_width, type='normalization')
    # 显示前4个图片
    init_op = tf.global_variables_initializer()
    # init_op = tf.initialize_all_variables()
    with tf.Session() as sess:
        sess.run(init_op)
        coord = tf.train.Coordinator()
        threads = tf.train.start_queue_runners(sess=sess, coord=coord)
        for i in range(show_nums):  # 在会话中取出image和label
            image, label = sess.run([tf_image, tf_label])
            # image = tf_image.eval()
            # 直接从record解析的image是一个向量,需要reshape显示
            # image = image.reshape([height,width,depth])
            print('shape:{},tpye:{},labels:{}'.format(image.shape, image.dtype, label))
            # pilimg = Image.fromarray(np.asarray(image_eval_reshape))
            # pilimg.show()
            show_image("image:%d"%(label), image)
        coord.request_stop()
        coord.join(threads)


if __name__ == '__main__':
    resize_height = 224  # 指定存储图片高度
    resize_width = 224  # 指定存储图片宽度
    shuffle = True
    log = 5

    image_dir = 'dataset/train'
    train_labels = 'dataset/train.txt'
    train_record_output = 'train.tfrecord'


    # 测试显示函数
    disp_records(train_record_output, resize_height, resize_width)
部分代码解析:
5.3,加入队列
with tf.Session() as sess:
    sess.run(init_op)
    coord = tf.train.Coordinator()
    # 启动队列
    threads = tf.train.start_queue_runners(sess=sess, coord=coord)
    for i in range(show_nums):  # 在会话中取出image和label
        image, label = sess.run([tf_image, tf_label])
注意,启动队列那条code不能忘记,不然会卡死,这样加入后,就可以做到和tensorflow官网一样的二进制数据集了。
6,生成分割多个record文件
当图片数据很多时候,会导致单个record文件超级巨大的情况,解决方法就是,将数据分成多个record文件保存,读取时,只需要将多个record文件的路径列表交给“tf.train.string_input_producer”,
完整代码如下:(此处来自 此博客)
# -*-coding: utf-8 -*-
import tensorflow as tf
import numpy as np
import os
import cv2
import math
import matplotlib.pyplot as plt
import random
from PIL import Image


##########################################################################
def _int64_feature(value):
    return tf.train.Feature(int64_list=tf.train.Int64List(value=[value]))
# 生成字符串型的属性
def _bytes_feature(value):
    return tf.train.Feature(bytes_list=tf.train.BytesList(value=[value]))
# 生成实数型的属性
def float_list_feature(value):
  return tf.train.Feature(float_list=tf.train.FloatList(value=value))

def show_image(title,image):
    '''
    显示图片
    :param title: 图像标题
    :param image: 图像的数据
    :return:
    '''
    # plt.figure("show_image")
    # print(image.dtype)
    plt.imshow(image)
    plt.axis('on')    # 关掉坐标轴为 off
    plt.title(title)  # 图像题目
    plt.show()

def load_labels_file(filename,labels_num=1):
    '''
    载图txt文件,文件中每行为一个图片信息,且以空格隔开:图像路径 标签1 标签2,如:test_image/1.jpg 0 2
    :param filename:
    :param labels_num :labels个数
    :return:images type->list
    :return:labels type->list
    '''
    images=[]
    labels=[]
    with open(filename) as f:
        for lines in f.readlines():
            line=lines.rstrip().split(' ')
            label=[]
            for i in range(labels_num):
                label.append(int(line[i+1]))
            images.append(line[0])
            labels.append(label)
    return images,labels

def read_image(filename, resize_height, resize_width):
    '''
    读取图片数据,默认返回的是uint8,[0,255]
    :param filename:
    :param resize_height:
    :param resize_width:
    :return: 返回的图片数据是uint8,[0,255]
    '''

    bgr_image = cv2.imread(filename)
    if len(bgr_image.shape)==2:#若是灰度图则转为三通道
        print("Warning:gray image",filename)
        bgr_image = cv2.cvtColor(bgr_image, cv2.COLOR_GRAY2BGR)

    rgb_image = cv2.cvtColor(bgr_image, cv2.COLOR_BGR2RGB)#将BGR转为RGB
    # show_image(filename,rgb_image)
    # rgb_image=Image.open(filename)
    if resize_height>0 and resize_width>0:
        rgb_image=cv2.resize(rgb_image,(resize_width,resize_height))
    rgb_image=np.asanyarray(rgb_image)
    # show_image("src resize image",image)

    return rgb_image


def create_records(image_dir,file, record_txt_path, batchSize,resize_height, resize_width):
    '''
    实现将图像原始数据,label,长,宽等信息保存为record文件
    注意:读取的图像数据默认是uint8,再转为tf的字符串型BytesList保存,解析请需要根据需要转换类型
    :param image_dir:原始图像的目录
    :param file:输入保存图片信息的txt文件(image_dir+file构成图片的路径)
    :param output_record_txt_dir:保存record文件的路径
    :param batchSize: 每batchSize个图片保存一个*.tfrecords,避免单个文件过大
    :param resize_height:
    :param resize_width:
    PS:当resize_height或者resize_width=0是,不执行resize
    '''
    if os.path.exists(record_txt_path):
        os.remove(record_txt_path)

    setname, ext = record_txt_path.split('.')

    # 加载文件,仅获取一个label
    images_list, labels_list=load_labels_file(file,1)
    sample_num = len(images_list)
    # 打乱样本的数据
    # random.shuffle(labels_list)
    batchNum = int(math.ceil(1.0 * sample_num / batchSize))

    for i in range(batchNum):
        start = i * batchSize
        end = min((i + 1) * batchSize, sample_num)
        batch_images = images_list[start:end]
        batch_labels = labels_list[start:end]
        # 逐个保存*.tfrecords文件
        filename = setname + '{0}.tfrecords'.format(i)
        print('save:%s' % (filename))

        writer = tf.python_io.TFRecordWriter(filename)
        for i, [image_name, labels] in enumerate(zip(batch_images, batch_labels)):
            image_path=os.path.join(image_dir,batch_images[i])
            if not os.path.exists(image_path):
                print('Err:no image',image_path)
                continue
            image = read_image(image_path, resize_height, resize_width)
            image_raw = image.tostring()
            print('image_path=%s,shape:( %d, %d, %d)' % (image_path,image.shape[0], image.shape[1], image.shape[2]),'labels:',labels)
            # 这里仅保存一个label,多label适当增加"'label': _int64_feature(label)"项
            label=labels[0]
            example = tf.train.Example(features=tf.train.Features(feature={
                'image_raw': _bytes_feature(image_raw),
                'height': _int64_feature(image.shape[0]),
                'width': _int64_feature(image.shape[1]),
                'depth': _int64_feature(image.shape[2]),
                'label': _int64_feature(label)
            }))
            writer.write(example.SerializeToString())
        writer.close()

        # 用txt保存*.tfrecords文件列表
        # record_list='{}.txt'.format(setname)
        with open(record_txt_path, 'a') as f:
            f.write(filename + '\n')

def read_records(filename,resize_height, resize_width):
    '''
    解析record文件
    :param filename:保存*.tfrecords文件的txt文件路径
    :return:
    '''
    # 读取txt中所有*.tfrecords文件
    with open(filename, 'r') as f:
        lines = f.readlines()
        files_list=[]
        for line in lines:
            files_list.append(line.rstrip())

    # 创建文件队列,不限读取的数量
    filename_queue = tf.train.string_input_producer(files_list,shuffle=False)
    # create a reader from file queue
    reader = tf.TFRecordReader()
    # reader从文件队列中读入一个序列化的样本
    _, serialized_example = reader.read(filename_queue)
    # get feature from serialized example
    # 解析符号化的样本
    features = tf.parse_single_example(
        serialized_example,
        features={
            'image_raw': tf.FixedLenFeature([], tf.string),
            'height': tf.FixedLenFeature([], tf.int64),
            'width': tf.FixedLenFeature([], tf.int64),
            'depth': tf.FixedLenFeature([], tf.int64),
            'label': tf.FixedLenFeature([], tf.int64)
        }
    )
    tf_image = tf.decode_raw(features['image_raw'], tf.uint8)#获得图像原始的数据

    tf_height = features['height']
    tf_width = features['width']
    tf_depth = features['depth']
    tf_label = tf.cast(features['label'], tf.int32)
    # tf_image=tf.reshape(tf_image, [-1])    # 转换为行向量
    tf_image=tf.reshape(tf_image, [resize_height, resize_width, 3]) # 设置图像的维度
    # 存储的图像类型为uint8,这里需要将类型转为tf.float32
    # tf_image = tf.cast(tf_image, tf.float32)
    # [1]若需要归一化请使用:
    tf_image = tf.image.convert_image_dtype(tf_image, tf.float32)# 归一化
    # tf_image = tf.cast(tf_image, tf.float32) * (1. / 255)  # 归一化
    # [2]若需要归一化,且中心化,假设均值为0.5,请使用:
    # tf_image = tf.cast(tf_image, tf.float32) * (1. / 255) - 0.5 #中心化
    return tf_image, tf_height,tf_width,tf_depth,tf_label

def disp_records(record_file,resize_height, resize_width,show_nums=4):
    '''
    解析record文件,并显示show_nums张图片,主要用于验证生成record文件是否成功
    :param tfrecord_file: record文件路径
    :param resize_height:
    :param resize_width:
    :param show_nums: 默认显示前四张照片
    :return:
    '''
    tf_image, tf_height, tf_width, tf_depth, tf_label = read_records(record_file,resize_height, resize_width)  # 读取函数
    # 显示前show_nums个图片
    init_op = tf.initialize_all_variables()
    with tf.Session() as sess:
        sess.run(init_op)
        coord = tf.train.Coordinator()
        threads = tf.train.start_queue_runners(sess=sess, coord=coord)
        for i in range(show_nums):
            image,height,width,depth,label = sess.run([tf_image,tf_height,tf_width,tf_depth,tf_label])  # 在会话中取出image和label
            # image = tf_image.eval()
            # 直接从record解析的image是一个向量,需要reshape显示
            # image = image.reshape([height,width,depth])
            print('shape:',image.shape,'label:',label)
            # pilimg = Image.fromarray(np.asarray(image_eval_reshape))
            # pilimg.show()
            show_image("image:%d"%(label),image)
        coord.request_stop()
        coord.join(threads)


def batch_test(record_file,resize_height, resize_width):
    '''
    :param record_file: record文件路径
    :param resize_height:
    :param resize_width:
    :return:
    :PS:image_batch, label_batch一般作为网络的输入
    '''

    tf_image,tf_height,tf_width,tf_depth,tf_label = read_records(record_file,resize_height, resize_width) # 读取函数

    # 使用shuffle_batch可以随机打乱输入:
    # shuffle_batch用法:https://blog.csdn.net/u013555719/article/details/77679964
    min_after_dequeue = 100#该值越大,数据越乱,必须小于capacity
    batch_size = 4
    # capacity = (min_after_dequeue + (num_threads + a small safety margin∗batchsize)
    capacity = min_after_dequeue + 3 * batch_size#容量:一个整数,队列中的最大的元素数

    image_batch, label_batch = tf.train.shuffle_batch([tf_image, tf_label],
                                                      batch_size=batch_size,
                                                      capacity=capacity,
                                                      min_after_dequeue=min_after_dequeue)

    init = tf.global_variables_initializer()
    with tf.Session() as sess:  # 开始一个会话
        sess.run(init)
        coord = tf.train.Coordinator()
        threads = tf.train.start_queue_runners(coord=coord)
        for i in range(4):
            # 在会话中取出images和labels
            images, labels = sess.run([image_batch, label_batch])
            # 这里仅显示每个batch里第一张图片
            show_image("image", images[0, :, :, :])
            print(images.shape, labels)
        # 停止所有线程
        coord.request_stop()
        coord.join(threads)


if __name__ == '__main__':
    # 参数设置
    image_dir='dataset/train'
    train_file = 'dataset/train.txt'  # 图片路径
    output_record_txt = 'dataset/record/record.txt'#指定保存record的文件列表
    resize_height = 224  # 指定存储图片高度
    resize_width = 224  # 指定存储图片宽度
    batchSize=8000     #batchSize一般设置为8000,即每batchSize张照片保存为一个record文件
    # 产生record文件
    create_records(image_dir=image_dir,
                   file=train_file,
                   record_txt_path=output_record_txt,
                   batchSize=batchSize,
                   resize_height=resize_height,
                   resize_width=resize_width)

    # 测试显示函数
    disp_records(output_record_txt,resize_height, resize_width)

    # batch_test(output_record_txt,resize_height, resize_width)
7,直接读取文件的方式
之前,我们都是将数据转存为tfrecord文件,训练时候再去读取,如果不想转为record文件,想直接读取图像文件进行训练,可以使用下面的方法:
filename.txt
0.jpg 0
1.jpg 0
2.jpg 0
3.jpg 0
4.jpg 0
5.jpg 1
6.jpg 1
7.jpg 1
8.jpg 1
9.jpg 1
代码如下:
# -*-coding: utf-8 -*-

import tensorflow as tf
import glob
import numpy as np
import os
import matplotlib.pyplot as plt

import cv2
def show_image(title, image):
    '''
    显示图片
    :param title: 图像标题
    :param image: 图像的数据
    :return:
    '''
    # plt.imshow(image, cmap='gray')
    plt.imshow(image)
    plt.axis('on')  # 关掉坐标轴为 off
    plt.title(title)  # 图像题目
    plt.show()


def tf_read_image(filename, resize_height, resize_width):
    '''
    读取图片
    :param filename:
    :param resize_height:
    :param resize_width:
    :return:
    '''
    image_string = tf.read_file(filename)
    image_decoded = tf.image.decode_jpeg(image_string, channels=3)
    # tf_image = tf.cast(image_decoded, tf.float32)
    tf_image = tf.cast(image_decoded, tf.float32) * (1. / 255.0)  # 归一化
    if resize_width>0 and resize_height>0:
        tf_image = tf.image.resize_images(tf_image, [resize_height, resize_width])
    # tf_image = tf.image.per_image_standardization(tf_image)  # 标准化[0,1](减均值除方差)
    return tf_image


def get_batch_images(image_list, label_list, batch_size, labels_nums, resize_height, resize_width, one_hot=False, shuffle=False):
    '''
    :param image_list:图像
    :param label_list:标签
    :param batch_size:
    :param labels_nums:标签个数
    :param one_hot:是否将labels转为one_hot的形式
    :param shuffle:是否打乱顺序,一般train时shuffle=True,验证时shuffle=False
    :return:返回batch的images和labels
    '''
    # 生成队列
    image_que, tf_label = tf.train.slice_input_producer([image_list, label_list], shuffle=shuffle)
    tf_image = tf_read_image(image_que, resize_height, resize_width)
    min_after_dequeue = 200
    capacity = min_after_dequeue + 3 * batch_size  # 保证capacity必须大于min_after_dequeue参数值
    if shuffle:
        images_batch, labels_batch = tf.train.shuffle_batch([tf_image, tf_label],
                                                            batch_size=batch_size,
                                                            capacity=capacity,
                                                            min_after_dequeue=min_after_dequeue)
    else:
        images_batch, labels_batch = tf.train.batch([tf_image, tf_label],
                                                    batch_size=batch_size,
                                                    capacity=capacity)
    if one_hot:
        labels_batch = tf.one_hot(labels_batch, labels_nums, 1, 0)
    return images_batch, labels_batch


def load_image_labels(filename):
    '''
    载图txt文件,文件中每行为一个图片信息,且以空格隔开:图像路径 标签1,如:test_image/1.jpg 0
    :param filename:
    :return:
    '''
    images_list = []
    labels_list = []
    with open(filename) as f:
        lines = f.readlines()
        for line in lines:
            # rstrip:用来去除结尾字符、空白符(包括\n、\r、\t、' ',即:换行、回车、制表符、空格)
            content = line.rstrip().split(' ')
            name = content[0]
            labels = []
            for value in content[1:]:
                labels.append(int(value))
            images_list.append(name)
            labels_list.append(labels)
    return images_list, labels_list


def batch_test(filename, image_dir):
    labels_nums = 2
    batch_size = 4
    resize_height = 200
    resize_width = 200
    image_list, label_list = load_image_labels(filename)
    image_list=[os.path.join(image_dir,image_name) for image_name in image_list]

    image_batch, labels_batch = get_batch_images(image_list=image_list,
                                                 label_list=label_list,
                                                 batch_size=batch_size,
                                                 labels_nums=labels_nums,
                                                 resize_height=resize_height, resize_width=resize_width,
                                                 one_hot=False, shuffle=True)
    with tf.Session() as sess:  # 开始一个会话
        sess.run(tf.global_variables_initializer())
        coord = tf.train.Coordinator()
        threads = tf.train.start_queue_runners(coord=coord)
        for i in range(4):
            # 在会话中取出images和labels
            images, labels = sess.run([image_batch, labels_batch])
            # 这里仅显示每个batch里第一张图片
            show_image("image", images[0, :, :, :])
            print('shape:{},tpye:{},labels:{}'.format(images.shape, images.dtype, labels))

        # 停止所有线程
        coord.request_stop()
        coord.join(threads)


if __name__ == "__main__":
    image_dir = "./dataset/train"
    filename = "./dataset/train.txt"
    batch_test(filename, image_dir)
8,数据输入管道:pipeline机制解释如下:
TensorFlow引入了tf.data.Dataset模块,使其数据读入的操作变得更为方便,而支持多线程(进程)的操作,也在效率上获得了一定程度的提高。使用tf.data.Dataset模块的pipline机制,可实现CPU多线程处理输入的数据,如读取图片和图片的一些的预处理,这样GPU可以专注于训练过程,而CPU去准备数据。
参考资料:
https://blog.csdn.net/u014061630/article/details/80776975

(五星推荐)TensorFlow全新的数据读取方式:Dataset API入门教程:http://baijiahao.baidu.com/s?id=1583657817436843385&wfr=spider&for=pc
从tfrecord文件创建TFRecordDataset方式如下:
# 用dataset读取TFRecords文件
dataset = tf.contrib.data.TFRecordDataset(input_file)
解析tfrecord 文件的每条记录,即序列化后的 tf.train.Example;使用 tf.parse_single_example 来解析:
feats = tf.parse_single_example(serial_exmp, features=data_dict)
其中,data_dict 是一个dict,包含的key 是写入tfrecord文件时用的key ,相应的value是对应不同的数据类型,我们直接使用代码看,如下:
def _parse_record(example_photo):
    features = {
        'name': tf.FixedLenFeature((), tf.string),
        'shape': tf.FixedLenFeature([3], tf.int64),
        'data': tf.FixedLenFeature((), tf.string)
    }
    parsed_features = tf.parse_single_example(example_photo,features=features)
    return parsed_features
解析tfrecord文件中的所有记录,我们需要使用dataset 的map 方法,如下:
dataset = dataset.map(_parse_record)
Dataset支持一类特殊的操作:Transformation。一个Dataset通过Transformation变成一个新的Dataset。通常我们可以通过Transformation完成数据变换,打乱,组成batch,生成epoch等一系列操作。常用的Transformation有:map、batch、shuffle和repeat。
map方法可以接受任意函数对dataset中的数据进行处理;另外可以使用repeat,shuffle,batch方法对dataset进行重复,混洗,分批;用repeat赋值dataset以进行多个epoch;如下:
dataset = dataset.repeat(epochs).shuffle(buffer_size).batch(batch_size)
解析完数据后,便可以取出数据进行使用,通过创建iterator来进行,如下:
iterator = dataset.make_one_shot_iterator()

features = sess.run(iterator.get_next())
下面分别介绍
8.1,map
使用 tf.data.Dataset.map,我们可以很方便地对数据集中的各个元素进行预处理。因为输入元素之间时独立的,所以可以在多个 CPU 核心上并行地进行预处理。map 变换提供了一个 num_parallel_calls参数去指定并行的级别。
dataset = dataset.map(map_func=parse_fn, num_parallel_calls=FLAGS.num_parallel_calls)
8.2,prefetch
tf.data.Dataset.prefetch 提供了 software pipelining 机制。该函数解耦了 数据产生的时间 和 数据消耗的时间。具体来说,该函数有一个后台线程和一个内部缓存区,在数据被请求前,就从 dataset 中预加载一些数据(进一步提高性能)。prefech(n) 一般作为最后一个 transformation,其中 n 为 batch_size。 prefetch 的使用方法如下:
dataset = dataset.batch(batch_size=FLAGS.batch_size)
dataset = dataset.prefetch(buffer_size=FLAGS.prefetch_buffer_size) # last transformation
return dataset
8.3,repeat
repeat的功能就是将整个序列重复多次,主要用来处理机器学习中的epoch,假设原先的数据是一个epoch,使用repeat(5)就可以将之变成5个epoch:
如果直接调用repeat()的话,生成的序列就会无限重复下去,没有结束,因此也不会抛出tf.errors.OutOfRangeError异常
8.4,完整代码如下:
# -*-coding: utf-8 -*-
import tensorflow as tf
import numpy as np
import glob
import matplotlib.pyplot as plt

width=0
height=0
def show_image(title, image):
    '''
    显示图片
    :param title: 图像标题
    :param image: 图像的数据
    :return:
    '''
    # plt.figure("show_image")
    # print(image.dtype)
    plt.imshow(image)
    plt.axis('on')  # 关掉坐标轴为 off
    plt.title(title)  # 图像题目
    plt.show()


def tf_read_image(filename, label):
    image_string = tf.read_file(filename)
    image_decoded = tf.image.decode_jpeg(image_string, channels=3)
    image = tf.cast(image_decoded, tf.float32)
    if width>0 and height>0:
        image = tf.image.resize_images(image, [height, width])
    image = tf.cast(image, tf.float32) * (1. / 255.0)  # 归一化
    return image, label


def input_fun(files_list, labels_list, batch_size, shuffle=True):
    '''
    :param files_list:
    :param labels_list:
    :param batch_size:
    :param shuffle:
    :return:
    '''
    # 构建数据集
    dataset = tf.data.Dataset.from_tensor_slices((files_list, labels_list))
    if shuffle:
        dataset = dataset.shuffle(100)
    dataset = dataset.repeat()  # 空为无限循环
    dataset = dataset.map(tf_read_image, num_parallel_calls=4)  # num_parallel_calls一般设置为cpu内核数量
    dataset = dataset.batch(batch_size)
    dataset = dataset.prefetch(2)  # software pipelining 机制
    return dataset


if __name__ == '__main__':
    data_dir = 'dataset/image/*.jpg'
    # labels_list = tf.constant([0,1,2,3,4])
    # labels_list = [1, 2, 3, 4, 5]
    files_list = glob.glob(data_dir)
    labels_list = np.arange(len(files_list))
    num_sample = len(files_list)
    batch_size = 1
    dataset = input_fun(files_list, labels_list, batch_size=batch_size, shuffle=False)

    # 需满足:max_iterate*batch_size <=num_sample*num_epoch,否则越界
    max_iterate = 3
    with tf.Session() as sess:
        iterator = dataset.make_initializable_iterator()
        init_op = iterator.make_initializer(dataset)
        sess.run(init_op)
        iterator = iterator.get_next()
        for i in range(max_iterate):
            images, labels = sess.run(iterator)
            show_image("image", images[0, :, :, :])
            print('shape:{},tpye:{},labels:{}'.format(images.shape, images.dtype, labels))
9,AttributeError: module 'tensorflow' has no attribute 'data' 解决方法
当我们使用tf 中的 dataset时,可能会出现如下错误:

原因是tf 版本不同导致的错误。
在编写代码的时候,使用的tf版本不同,可能导致其Dataset API 放置的位置不同。当使用TensorFlow1.3的时候,Dataset API是放在 contrib 包里面,而当使用TensorFlow1.4以后的版本,Dataset API已经从contrib 包中移除了,而变成了核心API的一员。故会产生报错。
解决方法:
将下面代码:
# 用dataset读取TFRecords文件
dataset = tf.data.TFRecordDataset(input_file)
改为此代码:
# 用dataset读取TFRecords文件
dataset = tf.contrib.data.TFRecordDataset(input_file)
问题解决。
10,tf.gfile.FastGfile()函数学习
函数如下:
tf.gfile.FastGFile(path,decodestyle)
函数功能:实现对图片的读取
函数参数:path:图片所在路径
decodestyle:图片的解码方式(‘r’:UTF-8编码; ‘rb’:非UTF-8编码)
例子如下:
img_raw = tf.gfile.FastGFile(IMAGE_PATH, 'rb').read()
11,Python zip()函数学习
zip() 函数用于将可迭代的对象作为参数,将对象中对应的元素打包成一个个元组,然后返回由这些元组组成的列表。如果各个迭代器的元素个数不一致,则返回列表长度与最短的对象相同,利用*号操作符,可以将元组解压为列表。
在 Python 3.x 中为了减少内存,zip() 返回的是一个对象。如需展示列表,需手动 list() 转换。
zip([iterable, ...])

参数说明: iterabl——一个或多个迭代器

返回值:返回元组列表
实例:
>>>a = [1,2,3]
>>> b = [4,5,6]
>>> c = [4,5,6,7,8]

>>> zipped = zip(a,b)     # 打包为元组的列表
[(1, 4), (2, 5), (3, 6)]

>>> zip(a,c)              # 元素个数与最短的列表一致
[(1, 4), (2, 5), (3, 6)]

>>> zip(*zipped)          # 与 zip 相反,*zipped 可理解为解压,返回二维矩阵式
[(1, 2, 3), (4, 5, 6)]
12,下一步计划
1,为什么前面使用Dataset,而用大多数博文中的 QueueRunner 呢?
A:这是因为 Dataset 比 QueueRunner 新,而且是官方推荐的,Dataset 比较简单。
2,学习了 TFRecord 相关知识,下一步学习什么?
A:可以尝试将常见的数据集如 MNIST 和 CIFAR-10 转换成 TFRecord 格式。
参考文献:https://blog.csdn.net/u012759136/article/details/52232266
https://blog.csdn.net/tengxing007/article/details/56847828/
https://blog.csdn.net/briblue/article/details/80789608 (五星推荐)
https://blog.csdn.net/happyhorizion/article/details/77894055 (五星推荐)

 浙公网安备 33010602011771号