

OpenCV向JNI层的参数转换
九层之台,起于累土;千里之堤毁于蚁穴;成者半于九十。最近工程项目完全可以调试,却最后在 OpenCV向JNI层的参数转换 这个节点上遇到麻烦,看来得好好的思考一番,仔细寻找其中的纰漏。
一、实例
根据可运行的openCv sample,可以用与人脸检测的函数是这样的:
//貌似 必须要特殊编写,便可以默认调用!wishchin!
public Mat onCameraFrame(CvCameraViewFrame inputFrame) {

        mRgba = inputFrame.rgba();
        mGray = inputFrame.gray();

        if (mAbsoluteFaceSize == 0) {
            int height = mGray.rows();
            if (Math.round(height * mRelativeFaceSize) > 0) {
                mAbsoluteFaceSize = Math.round(height * mRelativeFaceSize);
            }
            mNativeDetector.setMinFaceSize(mAbsoluteFaceSize);
        }

        MatOfRect faces = new MatOfRect();

        if (mDetectorType == JAVA_DETECTOR) {
            if (mJavaDetector != null)
                mJavaDetector.detectMultiScale(mGray, faces, 1.1, 2, 2, // TODO: objdetect.CV_HAAR_SCALE_IMAGE
                        new Size(mAbsoluteFaceSize, mAbsoluteFaceSize), new Size());
        }
        else if (mDetectorType == NATIVE_DETECTOR) {
            if (mNativeDetector != null)
                mNativeDetector.detect(mGray, faces);//Detect 面部的代码,使用C++!wishchin!
        }
        else {
            Log.e(TAG, "Detection method is not selected!");
        }

        //0.2.把检测到的框画在图片上!wishchin!
        Rect[] facesArray = faces.toArray();
        for (int i = 0; i < facesArray.length; i++){
           Core.rectangle(mRgba, facesArray[i].tl(), facesArray[i].br(), FACE_RECT_COLOR, 3);
        }
        if (mNativeDetector != null){
        	//Detect 使用C++!wishchin!
        	//mCamParam.dof6CamRecog(mGray,mCamParam);//具体函数已经转移!
        }
        return mRgba;
}
函数分析:
主要处理过程:
mNativeDetector.detect(mGray, faces);//Detect 面部的代码,使用C++!wishchin!所使用的函数:
public void detect(Mat imageGray, MatOfRect faces) {
		nativeDetect( mNativeObj,  imageGray.getNativeObjAddr(),  faces.getNativeObjAddr()  );
	}
所调用的Native函数:
private static native void nativeDetect(long thiz, long inputImage, long faces);
对应CPP内的JNI接口:
JNIEXPORT void JNICALL
Java_com_example_feeljulygpsmap_FeelJulyGpsMap_nativeDetect
(JNIEnv * jenv, jclass,
		jlong thiz,
		jlong imageGray, jlong faces)
{
    LOGD("Java_org_opencv_samples_facedetect_DetectionBasedTracker_nativeDetect enter");
    try
    {
        vector<Rect>  RectFaces;
        ((DetectionBasedTracker*)thiz)->process(*((Mat*)imageGray));
        ((DetectionBasedTracker*)thiz)->getObjects(RectFaces);
        vector_Rect_to_Mat(RectFaces, *((Mat*)faces));
    }
    catch(cv::Exception& e)
    {
        LOGD("nativeCreateObject caught cv::Exception: %s", e.what());
        jclass je = jenv->FindClass("org/opencv/core/CvException");
        if(!je)
            je = jenv->FindClass("java/lang/Exception");
        jenv->ThrowNew(je, e.what());
    }
    catch (...)
    {
        LOGD("nativeDetect caught unknown exception");
        jclass je = jenv->FindClass("java/lang/Exception");
        jenv->ThrowNew(je, "Unknown exception in JNI code DetectionBasedTracker.nativeDetect()");
    }

    LOGD("Java_org_opencv_samples_facedetect_DetectionBasedTracker_nativeDetect exit");
}
二、参数解析
1.java到C++
第一层参数转换:由Java到C++,通过jlong类型
转换语法:
nativeDetect( mNativeObj,
              imageGray.getNativeObjAddr(),  faces.getNativeObjAddr()  );
通过Mat型 .getNativeObjAddr()成员函数获取矩阵地址,通过jlong型进行JNI参数代入
对应形式:
JNIEXPORT void JNICALL
Java_com_example_feeljulygpsmap_FeelJulyGpsMap_nativeDetect
(JNIEnv * jenv, jclass,
		jlong thiz,
		jlong imageGray, jlong faces)
函数进行运算的过程:
((DetectionBasedTracker*)thiz)->process(*((Mat*) imageGray) );
涉及到的第二次参数转化:
*((Mat*) imageGray)把jlong型在C++层强制转化为Mat类型的指针,供其他C++函数使用,由此完成Java层到C++层的全部语法转换!
其中前两个参数的作为JNI本地参数默认调用;
第三个参数jlong thiz顾名思义即是所使用参数类的载入地址,通过获取C++类的地址载入,由此可以使用在底层使用C++的类,并获取C++类的类函数和成员变量。
第四个和第五个参数分别对应了java层载入的两个mat型参数的地址,由此完成java向JNI层的陷入。
自此检测,我的代码和sample在语法层面完全一致,并且代入变元的语义一致,在此过程的移植方法上,理所应当是没有错误的。
注意事项:不管有没有声明const,载入的Mat型是不能被改变的,已经初始化的mat型不能再被修改,比如
<del>*((Mat*) imageGray)</del>
2.由C++到java层
参数变元,经过一系列运算,得到函数结果,或者以参数或者以返回值的方式向java层返回。
由C++到java层返回的语法是这样的:
mNativeDetector.detect(mGray, faces);//Detect 面部的代码,使用C++!wishchin!
所调用的java函数:
 mNativeDetector.detect(mGray, faces);//Detect 面部的代码,使用C++!wishchin!
<pre name="code" class="java"> public void detect(Mat imageGray, MatOfRect faces) {
		nativeDetect( mNativeObj,  imageGray.getNativeObjAddr(),  faces.getNativeObjAddr()  );
	}
所使用的Native函数:
private static native void nativeDetect(long thiz, long inputImage, long faces);
对应CPP内的JNI接口:
JNIEXPORT void JNICALL
Java_com_example_feeljulygpsmap_FeelJulyGpsMap_nativeDetect
(JNIEnv * jenv, jclass,
		jlong thiz,
		jlong imageGray, jlong faces);
JNI函数处理过程:
        ((DetectionBasedTracker*)thiz)->getObjects(RectFaces);
        vector_Rect_to_Mat(RectFaces, *((Mat*)faces));
参数转变的函数调用:
vector_Rect_to_Mat(RectFaces, *((Mat*)faces));参数转变函数:
inline void vector_Rect_to_Mat(vector<Rect>& v_rect,  Mat& mat)
{
    mat = Mat(v_rect, true);
}
完成效果:
返回脸部检测的识别框,压入Vector,并通过函数强制转换成 Mat型指针,
java顶层调用:
//0.2.把检测到的框画在图片上!wishchin!
        Rect[] facesArray = faces.toArray();
这样可以通过数组转化为java层的 CvArray 类型,
以便
for (int i = 0; i < facesArray.length; i++){
           Core.rectangle(mRgba, facesArray[i].tl(), facesArray[i].br(), FACE_RECT_COLOR, 3);
        }
此代码段使用。
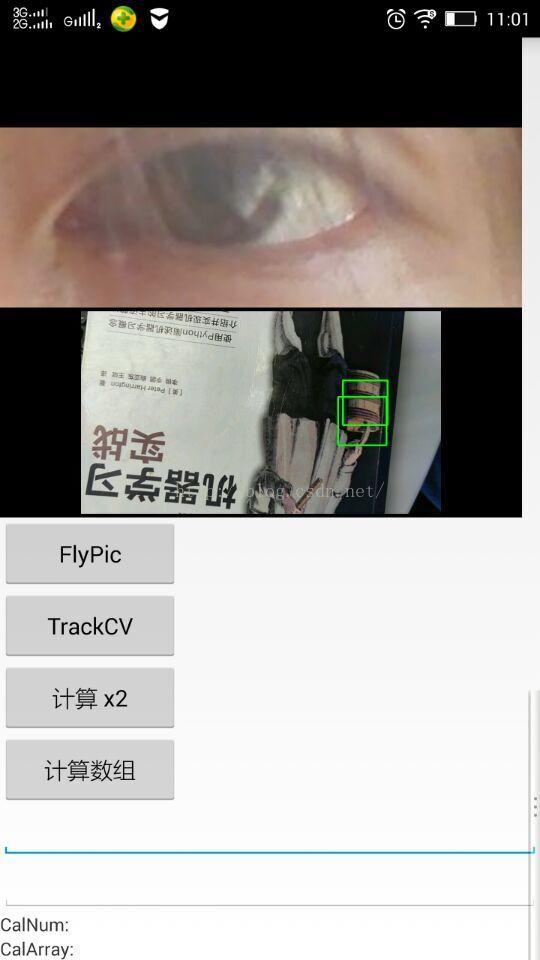
显示效果为:

 浙公网安备 33010602011771号