
opencv:图像的基本变换
0.概述
图像变换的基本原理都是找到原图和目标图的像素位置的映射关系,这个可以用坐标系来思考,在opencv中,
图像的坐标系是从左上角开始(0,0),向右是x增加方向(cols),向下时y增加方向(rows)。
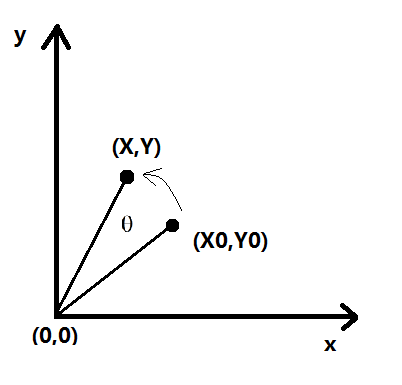
普通坐标关系:
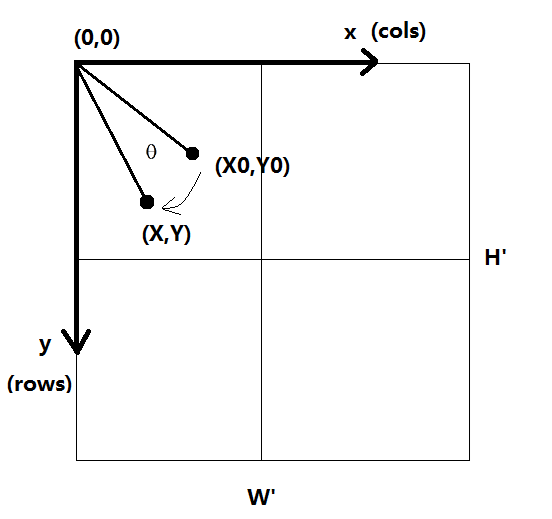
图像坐标关系:
1.图像的平移
图像的平移是比较简单的映射关系,对于原图像的某个像素点位置(X0,Y0),向右平移100个像素的话,变换之后的目标像素点位置(X = X0+100,Y),然后用原图像的像素值填充目标位置就可,因此我们需要将这种映射关系转换一下,方便获得原图像素值,也就是X0 = X-100,这里X是已知的。
具体代码如下:
void translation(cv::Mat & src, cv::Mat & dst, int dx, int dy)
{
	const int rows = src.rows; // 获得原图的高度(y)
	const int cols = src.cols; // 获得原图的宽度(x)

	dst.create(rows, cols, src.type()); // 按照原图大小和格式创建一个空白图

	Vec3b *p;
	for (int Y = 0; Y < rows; ++Y) // 按行扫描
	{
		p = dst.ptr<Vec3b>(Y);

		for (int X = 0; X < cols; ++X)
		{
			int X0 = X - dx; // 逆映射关系,求得原图的位置
			int Y0 = Y - dy;
			if (X0 >= 0 && Y0 >= 0 && X0 < cols && Y0 < rows) // 防止越界
			{
				p[X] = src.ptr<Vec3b>(Y0)[X0]; // 将原图的像素值赋给目标位置
			}
		}
	}

}
2.图像的缩放
这里暂时只贴出opencv的缩放接口:
void resize(InputArray src,  //输入图像
OutputArray dst, // 输出图像
Size dsize,  // 指定的输出图像的大小
double fx=0,  // 横向缩放比例
double fy=0, // 纵向缩放比例
int interpolation=INTER_LINEAR // 指定插值方式
 );
3.图像的旋转
图像旋转矩阵的原理可以参考这里
基本映射关系:
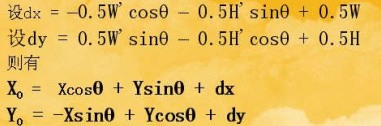
我们只需要根据这个映射关系写就好,其中的dx和dy主要用来计算旋转中心的,如果都是0的话图像就是围绕
图像坐标(0,0)来旋转,该公式中的W'和H'指的是目标图像的宽度和高度。
代码:
void rotation(cv::Mat & src, cv::Mat & dst, int angle, cv::Point center = cv::Point(0, 0))
{
        // 计算角度的正余弦
	float sint = sin(angle*3.141592653 / 180);
	float cost = cos(angle*3.141592653 / 180);

	const int rows = src.rows; // rows == H (Y--->)
	const int cols = src.cols; // cols == W (X--->)

	// 计算旋转中心的偏移
	float centerxScale = (float)center.x / cols;
	float centeryScale = (float)center.y / rows;
	float dx =  -centerxScale * cols*cost - centeryScale * rows*sint + centerxScale * cols; // 根据映射公式
	float dy =  centerxScale * cols*sint - centeryScale * rows*cost + centeryScale * rows;

	dst.create(rows, cols, src.type());

	Vec3b *p;
	for (int Y = 0; Y < rows; ++Y)
	{
		p = dst.ptr<Vec3b>(Y);

		for (int X = 0; X < cols; ++X)
		{
			int X0 = X*cost + Y*sint + dx; // 根据映射公式
			int Y0 = -X*sint + Y*cost + dy;
			if (X0 >= 0 && Y0 >= 0 && X0 < cols && Y0 < rows)
			{
				p[X] = src.ptr<Vec3b>(Y0)[X0];
			}
		}
	}

}
4.图像的翻转
这里也只贴opencv的接口:
void flip(InputArray src, // 原图像
 OutputArray dst, //目标图像
int flipCode // 翻转方式,1:水平,0:垂直,-1:水平垂直
);
5.图像的错切
图像的错切效果可以想象伸缩门中的菱形的变化:
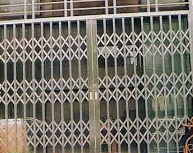
不过对于x方向的错切,y方向的高度并不会变化。
贴代码:
void shear(cv::Mat & src, cv::Mat & dst, float dx = 0,float dy = 0) // dx,dy为错切率
{

	const int rows = src.rows; // rows == H (Y--->)
	const int cols = src.cols; // cols == W (X--->)

	dst.create(rows, cols, src.type());

	Vec3b *p;
	for (int Y = 0; Y < rows; ++Y)
	{
		p = dst.ptr<Vec3b>(Y);

		for (int X = 0; X < cols; ++X)
		{
			int X0 = X + dx*Y;
			int Y0 = Y + dy*X;
			if (X0 >= 0 && Y0 >= 0 && X0 < cols && Y0 < rows)
			{
				p[X] = src.ptr<Vec3b>(Y0)[X0];
			}
		}
	}

}
效果图(dx = 0.1,dy=0.1):

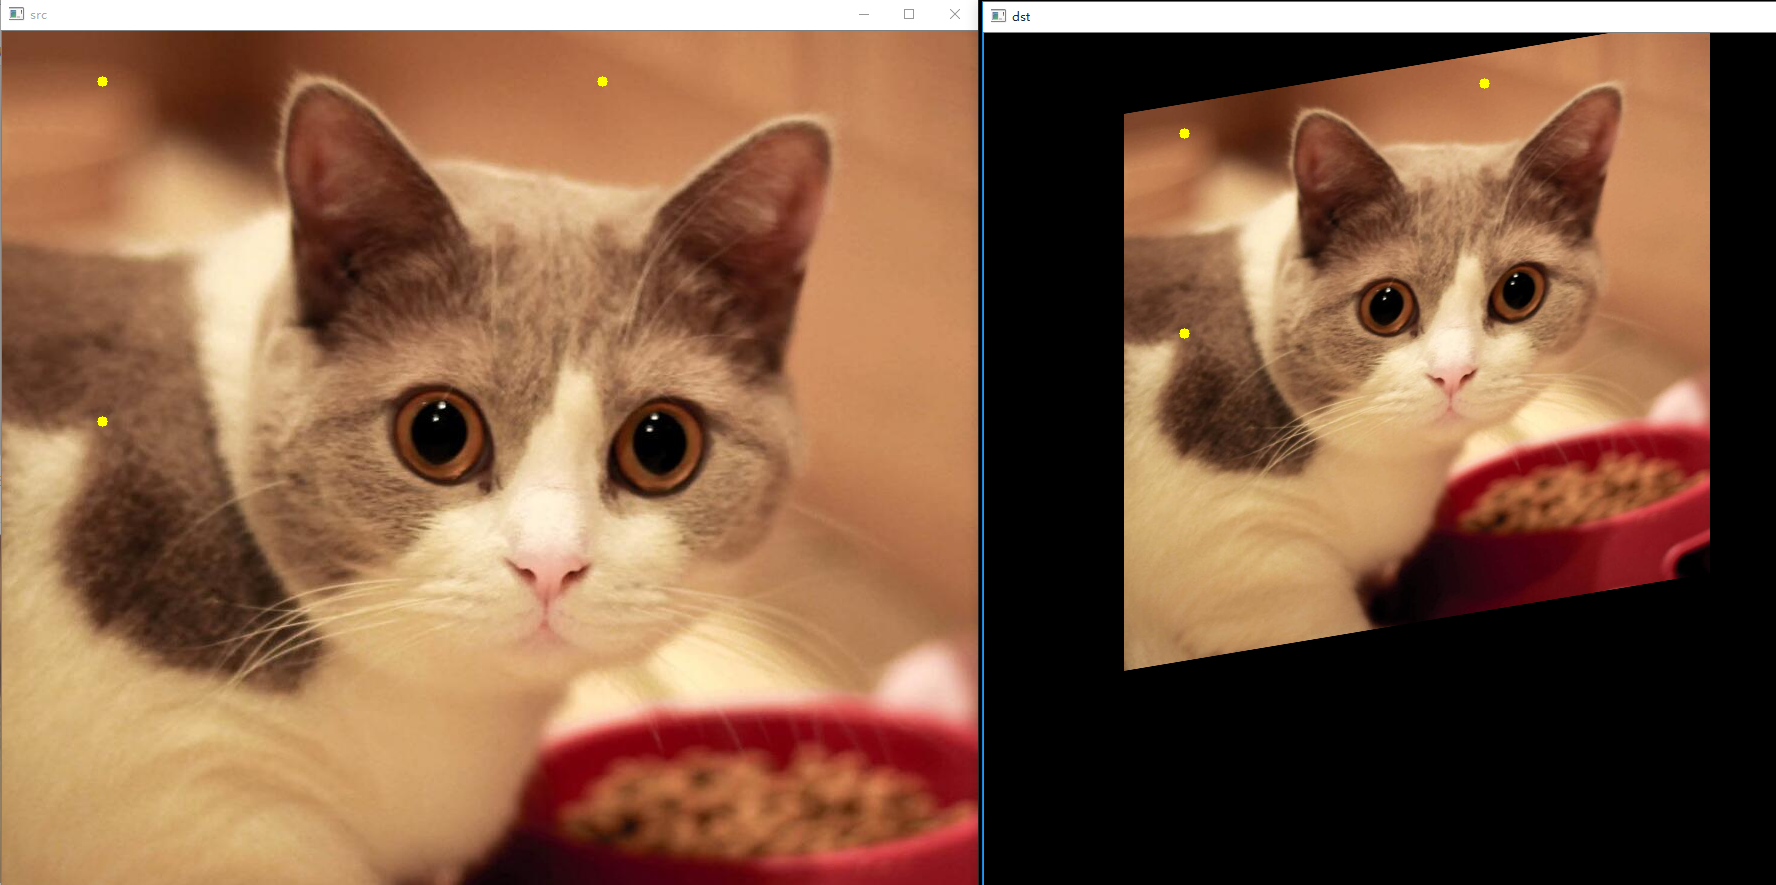
6.图像的仿射变换
图像的仿射变换其实就是以上基本变换的组合,仿射变换可以维持原图的点线关系,例如平行和比例等。
示例代码:
#include <opencv.hpp>
#include <iostream>
#include <imgproc.hpp>

using namespace std;
using namespace cv;

int main()
{
	Mat img = imread("img.jpg");
	Mat dst;

	Point2f affinePoints0[3] = { Point2f(100, 50), Point2f(100, 390), Point2f(600, 50) }; // 选取原图像的映射点
	Point2f affinePoints1[3] = { Point2f(200, 100), Point2f(200, 300), Point2f(500, 50) }; // 选取目标图像的映射点

	Mat trans = getAffineTransform(affinePoints0, affinePoints1); // 获得变换矩阵

	warpAffine(img, dst, trans, Size(img.cols, img.rows)); // 仿射变换

	for (int i = 0; i < 3; ++i) // 描点
	{
		circle(img, affinePoints0[i], 5, Scalar(0, 255, 255), -1);
		circle(dst, affinePoints1[i], 5, Scalar(0, 255, 255), -1);
	}

	imshow("src", img);
	imshow("dst", dst);
	waitKey(0);
	return 0;
}
效果图:
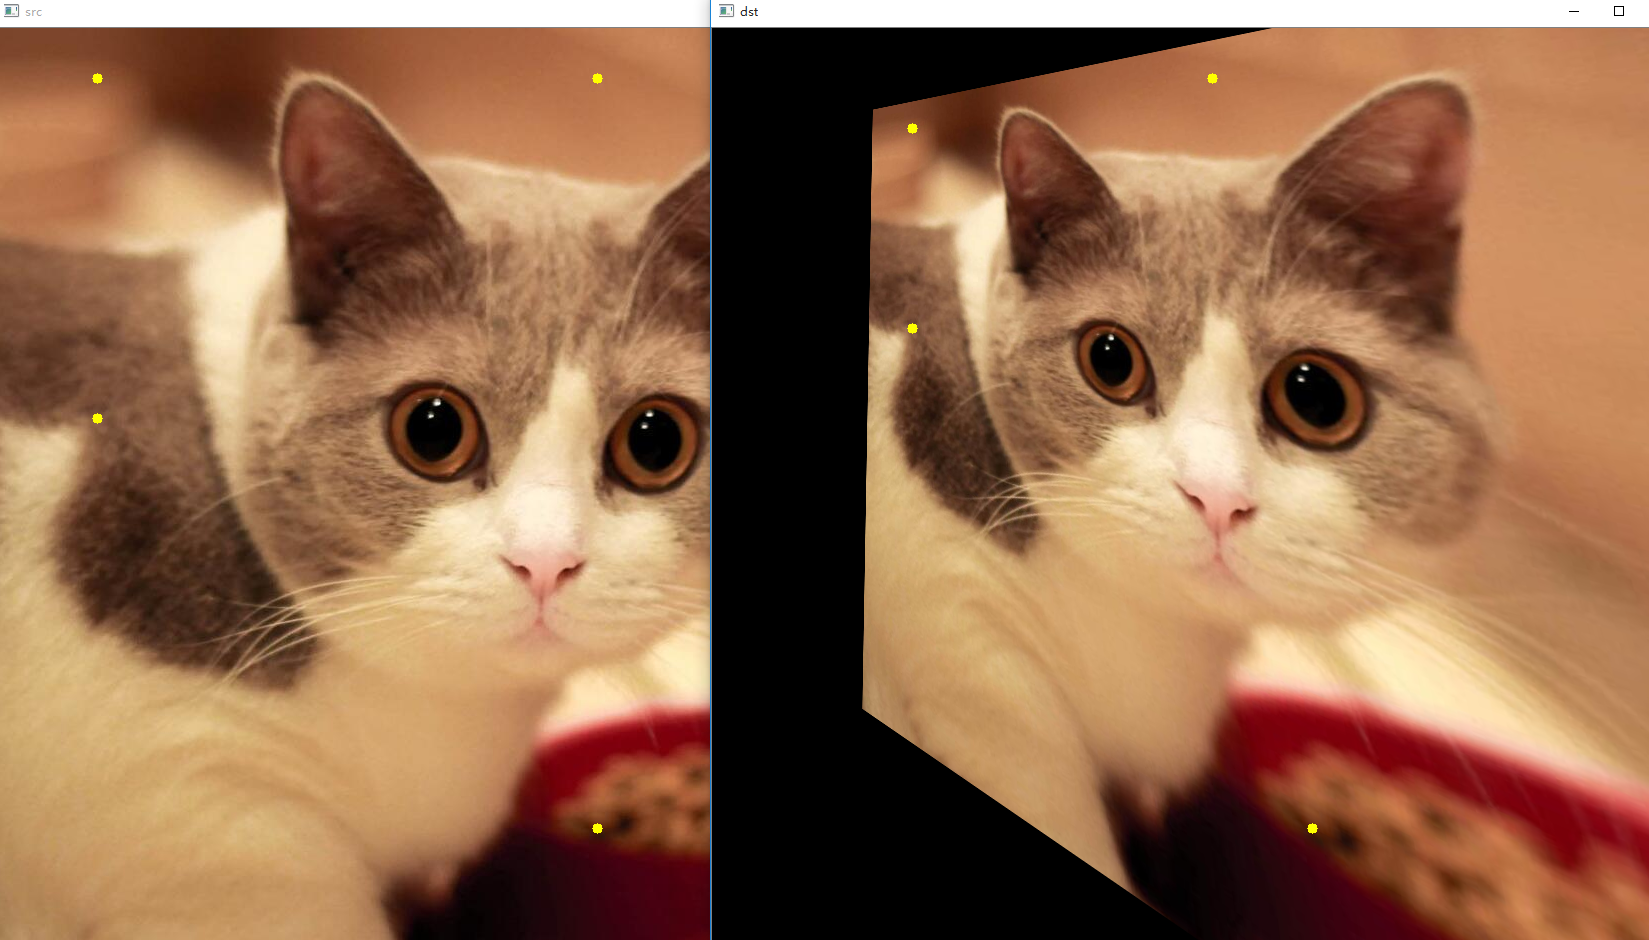
7.图像的透视变换
图像的透视变换和放射变换类似,不过选取的映射点为四个。
示例代码:
#include <opencv.hpp>
#include <iostream>
#include <imgproc.hpp>

using namespace std;
using namespace cv;

int main()
{
	Mat img = imread("img.jpg");
	Mat dst;

	Point2f perspectivePoints0[4] = { Point2f(100, 50), Point2f(100, 390), Point2f(600, 50),Point2f(600, 800) }; // 选取原图像的映射点
	Point2f perspectivePoints1[4] = { Point2f(200, 100), Point2f(200, 300), Point2f(500, 50), Point2f(600, 800) }; // 选取目标图像的映射点

	Mat trans = getPerspectiveTransform(perspectivePoints0, perspectivePoints1); // 获得变换矩阵

	warpPerspective(img, dst, trans, Size(img.cols, img.rows)); // 透视变换

	for (int i = 0; i < 4; ++i) // 描点
	{
		circle(img, perspectivePoints0[i], 5, Scalar(0, 255, 255), -1);
		circle(dst, perspectivePoints1[i], 5, Scalar(0, 255, 255), -1);
	}

	imshow("src", img);
	imshow("dst", dst);
	waitKey(0);
	return 0;
}
效果图(额。):
------------ 转载请注明出处 ------------

 浙公网安备 33010602011771号