Vue的使用总结(2)
1、Vue 中 class 和 style 的绑定
在 Vue 中,可以通过数据绑定来操作元素的 class 列表和内联样式,操作 class 和 style 是用 v-bind 来绑定的。在将 v-bind 用于 class 和 style 时,Vue.js 做了专门的增强,表达式结果的类型除了字符串之外,还可以是对象或数组。
v-bind: class 指令可以与普通的 class 属性共存,并不会冲突或者覆盖。
当在一个自定义组件上使用 class 属性时,这些 class 将被添加到该组件的根元素上面,这个元素上已经存在的 class 不会被覆盖。
1.1、绑定 class
1.1.1、字符串语法
字符串语法也就是直接在 v-bind:class 后面直接写表达式。
<div v-bind:class="'red_class'">
      div3
</div>

.red_class {
    background: red;
}
1.1.2、对象语法
对象语法就是在 v-bind:class 的表达式语法里写入一个对象。该对象的属性名是类名,属性值的 true 或者 false 决定该属性名是否添加进类名中。
<div v-bind:class="{ red_class : false" >
    div1
</div>
<div v-bind:class="{ 'red_class' : classBol, 'green_class': true >  <!--属性名可以写成字符串-->
    div2
</div>
<div v-bind:class="classObj">  <!--也可以直接写对象变量-->
    div3
</div>

data: {
  classBol: true,
  classObj: {
     red_class: true
  }
}
判断该对象的属性值是 true 或者 false 的依据跟 JS 一般情况下判断数据的布尔值一样,比如:0为false,1为true,null 为false。
1.1.3、数组语法
可以把一个数组传给 v-bind:class,以应用一个 class 列表。数组语法和对象语法不同,在数组语法中,数组项是变量名,类名取决于该变量名的值,值是什么,类名就是什么。
<div v-bind:class="[redClass, greenClass]"></div>

data: {
  redClass: 'red_class',
  greenClass: 'green_class'
}

<!-- 最终渲染 -->
<div class="red_class green_class"></div>
在数组中也可以使用三元表达式,并且数组项也可以是对象
<div v-bind:class="[true? redClass : '', greenClass]"></div> <!-- 三元表达式,不过数组项仍是变量 -->

<div v-bind:class="[{ red_class: false }, greenClass]"></div> <!-- 数组项中使用对象 -->

data: {
  redClass: 'red_class',
  greenClass: 'green_class'
}
1.2、绑定 style
当 v-bind:style 使用需要添加浏览器引擎前缀的 CSS 属性时,如 transform,Vue会自动侦测并添加相应的前缀。
1.2.1、对象语法
<div v-bind:style="{ color: colorVal, fontSize: sizeVal + 'px' }"></div>

<div v-bind:style="styleObject"></div>  <!--直接绑定一个对象变量-->

data: {
  colorVal: 'red',
  sizeVal: 30,
  styleObject: {
     color: 'red',
     fontSize: '13px'
  }
}
1.2.2、数组语法
绑定 style 的数组语法的数组项是对象,其实就是可以将多个样式对象绑定到元素上。
<div v-bind:style="[baseObj, otherObj]"></div>

data: {
  baseObj: {
    color: 'red'
  },
  otherObj: {
     fontSize: '13px'
  }
}
2、组件
2.1、全局注册组件
全局注册组件:
// 定义一个名为 button-counter 的新组件
Vue.component('button-counter', {
  data: function () {
    return {
      count: 0
    }
  },
  template: '<button v-on:click="count++">You clicked me {{ count }} times.</button>'
})
组件是可复用的 Vue 实例,且带有一个名字,上面的例子中是 <button-counter>。
我们可以在一个通过 new Vue 创建的 Vue 根实例中,把这个组件作为自定义元素来使用:
<div id="components-demo">
  <button-counter></button-counter>
</div>
组件是可复用的 Vue 实例,它们与 new Vue 接收相同的选项,例如 data、computed、watch、methods 以及生命周期钩子等。仅有的例外是像 el 这样根实例特有的选项。每用一次组件,就会有一个它的新实例被创建。
组件的 data 必须是一个函数。每个组件只能有一个根元素。组件中的data写成一个函数,数据以函数返回值形式定义,这样每复用一次组件,就会返回一份新的data。如果data值为对象,将导致多个实例共享一个对象,其中一个组件改变data属性值,其它实例也会受到影响。
上面的组件是通过全局注册的,全局注册的组件可以用在其被注册之后的任何 (通过 new Vue) 新创建的 Vue 根实例,也包括其组件树中的所有子组件的模板中。注意:全局注册的行为必须在根 Vue 实例 (通过 new Vue) 创建之前发生。
2.2、局部注册组件
全局注册往往是不够理想的。比如,如果你使用一个像 webpack 这样的构建系统,全局注册所有的组件意味着即便你已经不再使用一个组件了,它仍然会被包含在你最终的构建结果中。这造成了用户下载的 JavaScript 的无谓的增加。
局部注册组件:
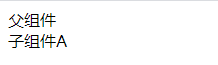
<body>
    <div id="app">
        {{parentMsg}}
        <component-a></component-a>
    </div>

    <script src="https://cdn.jsdelivr.net/npm/vue@2/dist/vue.js"></script>
    <script>
        //组件
        var componentA = {
            name: "componentA",
            data: function() {
                return {
                    msg: '子组件A'
                }

            },
            template: `
                <div>{{msg}}</div>
            `
        }

        //根实例使用组件
        var app = new Vue({
            el: '#app',
            components: {
                'component-a': componentA
            },
            data: {
                parentMsg: '父组件'
            }
        })
    </script>
</body>
页面渲染效果:
2.3、父子组件通过prop传值
Prop 是你可以在组件上注册的一些自定义 attribute。当一个值传递给一个 prop attribute 的时候,它就变成了那个组件实例的一个 property。
定义组件的 prop:
Vue.component('blog-post', {
  props: ['title'],
  template: '<h3>{{ title }}</h3>'
})
给组件传值:
<blog-post title="My journey with Vue"></blog-post>
<blog-post title="Blogging with Vue"></blog-post>
<blog-post title="Why Vue is so fun"></blog-post>
一个组件默认可以拥有任意数量的 prop,任何值都可以传递给任何 prop。在组件内可以访问 prop 的值,就像访问 data 中的值一样。
prop 可以传递静态值,也可以使用 v-bind 来传递动态的值:
<!-- 动态赋予一个变量的值 -->
<blog-post v-bind:title="post.title"></blog-post>
2.3.1、prop的类型
在定义组件时,我们可以指定组件的每个 prop 希望接收到的值类型:
Vue.component('my-component', {
  ...
  props: {
    title: String,
    likes: Number,
    isPublished: Boolean,
    commentIds: Array,
    author: Object,
    callback: Function,
    contactsPromise: Promise // or any other constructor
  }
})
指定 prop 的类型之后,如果给组件传递的 prop 不是指定的类型将会报错。
prop 可以接收任何类型的值:
<!-- 传递数字 -->
<!-- 即便 `42` 是静态的,我们仍然需要 `v-bind` 来告诉 Vue 是一个 JavaScript 表达式而不是一个字符串。 -->
<blog-post v-bind:likes="42"></blog-post>

<!-- 布尔值 -->
<!-- 包含该 prop 没有值的情况在内,都意味着 `true`。-->
<blog-post is-published></blog-post>
<blog-post v-bind:is-published="false"></blog-post>

<!-- 数组 -->
<blog-post v-bind:comment-ids="[234, 266, 273]"></blog-post>

<!-- 对象 -->
<blog-post
  v-bind:author="{
    name: 'Veronica',
    company: 'Veridian Dynamics'
  }"
></blog-post>

<!-- 一次性传入对象的所有属性 -->
post: {
  id: 1,
  title: 'My Journey with Vue'
}
<blog-post v-bind="post"></blog-post>
<!-- 等价于 -->
<blog-post
  v-bind:id="post.id"
  v-bind:title="post.title"
></blog-post>
注意,在 JavaScript 中对象和数组是通过引用传入的,所以对于一个数组或对象类型的 prop 来说,在子组件中改变变更这个对象或数组本身将会影响到父组件的状态。
2.3.2、prop的校验
我们可以为组件的 prop 指定校验规则,比如是否必填、默认值、自定义的校验规则等。
Vue.component('my-component', {
  props: {
    // 基础的类型检查 (`null` 和 `undefined` 会通过任何类型验证)
    propA: Number,

    // 多个可能的类型
    propB: [String, Number],

    // 必填的字符串
    propC: {
      type: String,
      required: true
    },

    // 带有默认值的数字
    propD: {
      type: Number,
      default: 100
    },

    // 带有默认值的对象
    propE: {
      type: Object,
      // 对象或数组默认值必须从一个工厂函数获取
      default: function () {
        return { message: 'hello' }
      }
    },

    // 自定义验证函数
    propF: {
      validator: function (value) {
        // 这个值必须匹配下列字符串中的一个
        return ['success', 'warning', 'danger'].indexOf(value) !== -1
      }
    }
  }
})
当 prop 验证失败的时候,(开发环境构建版本的) Vue 将会产生一个控制台的警告。
组件的 prop 会在该组件的实例创建之前进行验证,所以实例的 property (如 data、computed 等) 在 default 或 validator 函数中是不可用的。
2.3.3、非prop的属性
一个非 prop 的 attribute 是指传向一个组件,但是该组件并没有相应 prop 定义的 attribute。组件可以接受任意的 attribute,而这些非 prop 的属性会直接被添加到这个组件的根元素上。
<body>
    <div id="app">
        {{parentMsg}}
        <component-a notProp="aabb"></component-a>
    </div>

    <script src="https://cdn.jsdelivr.net/npm/vue@2/dist/vue.js"></script>
    <script>
        //组件
        var componentA = {
            name: "componentA",
            data: function() {
                return {
                    msg: '子组件A'
                }

            },
            template: `
                <div id="comA">{{msg}}</div>
            `
        }

        //根实例使用组件
        var app = new Vue({
            el: '#app',
            components: {
                'component-a': componentA
            },
            data: {
                parentMsg: '父组件'
            }
        })
    </script>
</body>
上面可以看到,notProp属性在子组件中并未定义,所以是非 prop 属性,此时这些属性会直接被添加到组件的根元素上。
最终效果:
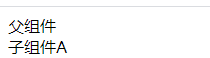

如果该属性在子组件的根元素中也有并且有值,此时该属性会自动合并,也就是该属性的值是父元素中传入的值也子组件中的值的并集。
2.4、父子组件通过事件传值
父组件在使用子组件时,可以监听子组件的某个自定义事件,子组件可以通过 $emit() 方法来触发自定义事件。
//父组件使用子组件时,监听一个自定义事件
<blog-post
  ...
  v-on:enlarge-text="onEnlargeText"
></blog-post>

onEnlargeText: function (enlargeAmount) {
    this.postFontSize += enlargeAmount
}


//子组件触发自定义事件
<button v-on:click="$emit('enlarge-text', 0.1)">
  Enlarge text
</button>
2.5、父子组件通过 v-model 通信
官方文档:https://cn.vuejs.org/v2/guide/components.html#在组件上使用-v-model
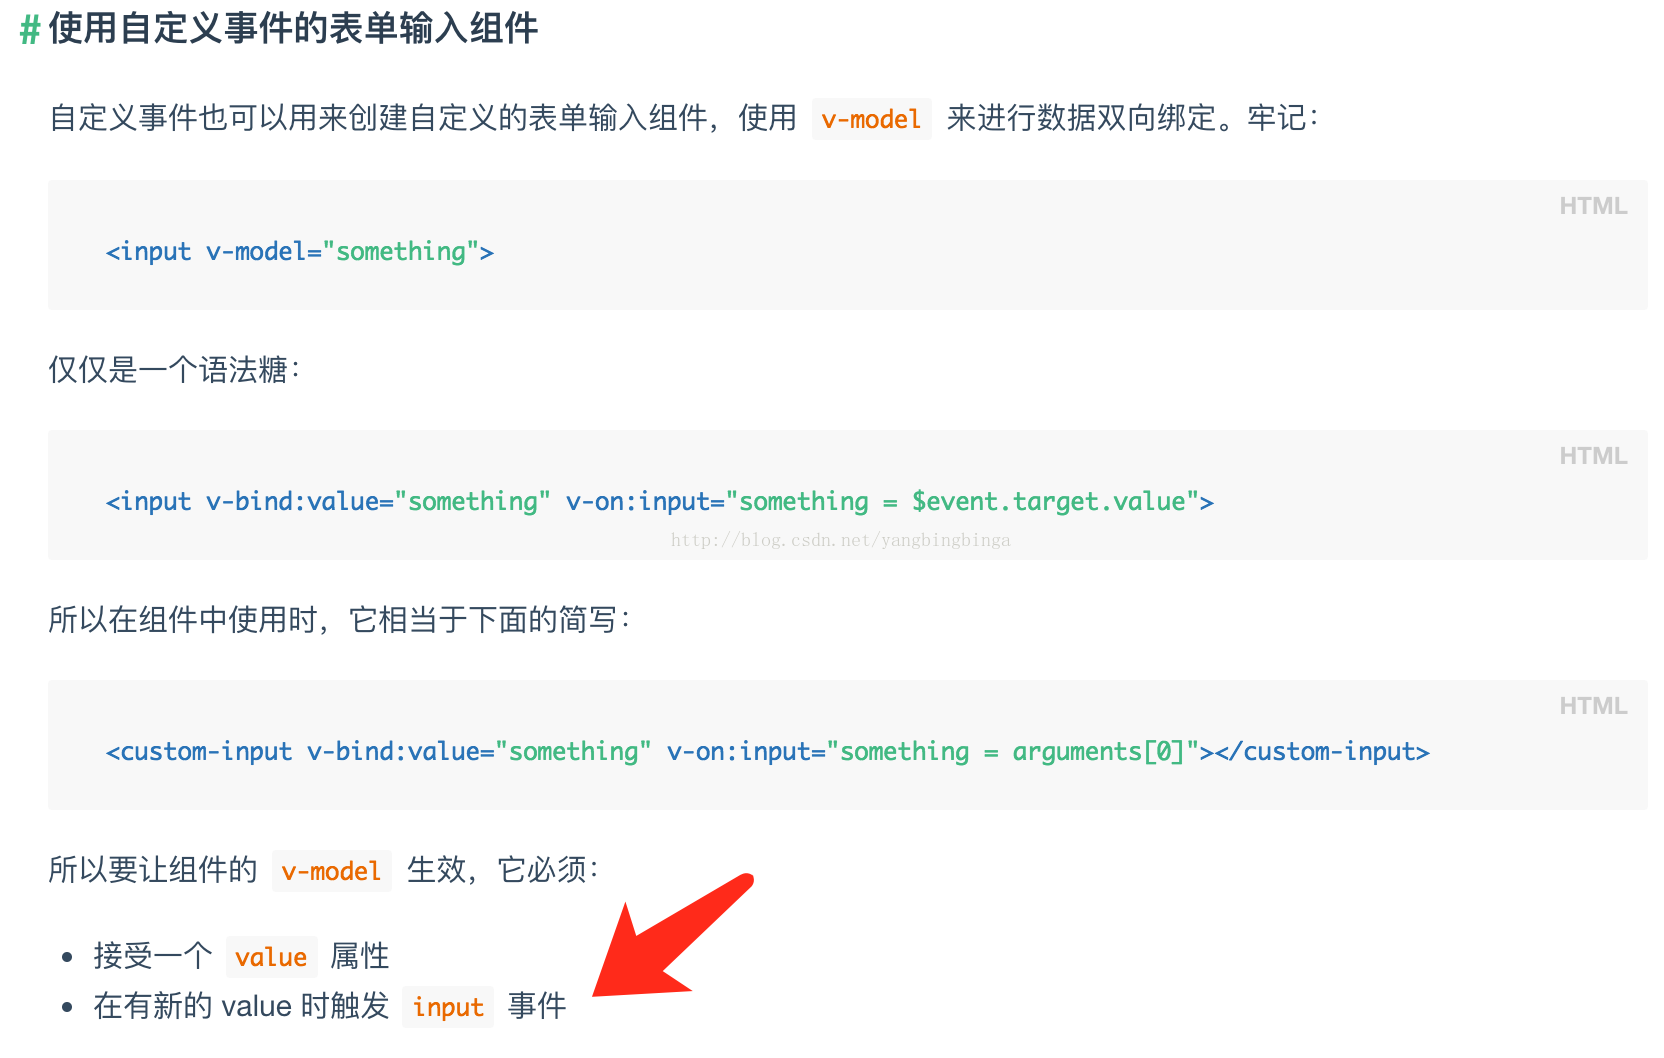
即 v-model 只是一个语法糖,v-model 真正的靠的还是 v-bind 绑定数据,触发 input 传递数据,这不管是在组件还是表单元素中都是一样的。
组件之间通过 v-model 进行通信的代码示例:
//父组件代码
import TodoItem from './components/TodoItem.vue'

data(){
    return {
      modelMsg: 'v-model信息'
    }
}

<todo-item v-model="modelMsg"></todo-item>
//上面的代码相当于:
<todo-item v-bind:value="modelMsg" v-on:input="modelMsg = arguments[0]"></todo-item>
上面其实就是给子组件传递了一个 key 为 'value' 的属性值,并且监听了子组件的 input 方法, input 的回调方法的方法体为 变量名=arguments[0],也就是会自动将子组件传递回来的方法的第一个参数设为属性的新值。
子组件代码:
//子组件中使用父组件绑定的值
<input type="text" v-model="modelMsg2" @input="changeMsg($event)">

//上面其实不一定要绑定在表单元素上,传过来的value其实就是一个普通的 props 属性值,可以任意使用
<div class="hello">
    <h1>父组件的值:{{ value }}</h1>
    <button @click="changeMsg">点击</button>
</div>

data () {
    return {
     //这里将value赋值给modelMsg,不然直接修改value时会报错
      modelMsg2: this.value
    }
 }
props: {
  //接受父组件传递过来的值。注意,这里的key一定是叫做 'value'
    value: {
       type: String
    }
}

methods: {
  //需要修改父组件绑定的值时,通过input事件触发
    handleInput(e) {
      this.$emit('input',e.target.value)
    },

    //需要修改父组件绑定的值时,通过input事件触发
    changeMsg() {
      this.$emit('input', 'new value值')
    }
}
可以看到,实际上就是给子组件传递了一个 'value' 作为 prop,并且给子组件绑定了 input 事件。子组件可以接收到 'value' 的值,并且在 value 发生改变时可以以 input 事件传递给父组件,父组件会自动接收到最新的 ‘value’ 的值。
由上面代码可以得知,需要手动设置一个函数,当子组件的props属性 value 值发生改变时,通过 $emit 传递给父组件,父组件中的 v-model 已经自动监听了 input 事件,并且会自动同步父组件的数据,由此父子组件之间的数据双向绑定得以实现。
参考:https://www.cnblogs.com/rachelch/p/8944367.html
2.6、组件的template通过script定义
组件定义时使用的 template 模板可以通过 script 来定义:
<script type="text/x-template" id="anchored-heading-template">
    <h1 v-if="level === 1">
        <slot></slot>
    </h1>
</script>

//注册组件
Vue.component('anchored-heading', {
    template: '#anchored-heading-template',   //引用script来定义template
    props: {
        level: {
            type: Number,
            required: true
        }
    }
})

//使用组件
<anchored-heading :level="1">
        Hello world!
</anchored-heading>
3、vue 中的函数参数
3、原生事件的传递
3.1、没有括号时默认会传原生事件
vue 中调用事件,如果不传参,默认会将原生 DOM 事件作为参数传过去
<button @click="a">事件尝试</button>

methods: {
  a (e) {
     console.log(e);    //输出原生事件  MouseEvent {isTrusted: true, screenX: 427, screenY: 491, clientX: 388, clientY: 362, …}
  }
}
3.1.2、加上括号默认不会传原生事件
如果加上了括号以后,不管你是否在后面添加参数,都不会自动将原生事件传过去
<button @click="a()">事件尝试</button>

methods: {
  a (e) {
     console.log(e);    //输出  undefined
  }
}

<button @click="a('aaa')">事件尝试</button>

methods: {
  a (e) {
     console.log(e);    //输出  aaa
  }
}
3.1.3、如何手动传原生事件
有时候可能我们也需要访问原始的 DOM 事件,这时可以用特殊变量 $event 把它传入方法。($event 参数不一定要在最后传递)
<button @click="a('aaa','bbb',$event)">事件尝试</button>

methods: {
  a (a,b,event) {
     console.log(a,b,event);    //输出  aaa  bbb  MouseEvent {isTrusted: true, screenX: 425, screenY: 507, clientX: 386, clientY: 376, …}
  }
}
3.2、父组件如何接收子组件的参数
3.2.1、父组件只接收子组件的参数,不传递额外的参数
如果在父组件中只接收子组件的参数,并不传递额外的参数,此时父组件的接收函数可以不写参数,组件默认会将子组件传过来的参数作为参数传递。
/*** 子组件只传递一个参数的情况: ***/
//子组件  触发父组件的事件
this.$emit('childBtnClick','hahahaha')

//父组件
<child @childBtnClick="childClick"></child>

childClick (msg) {
    console.log(msg);  //输出 'hahahaha'
}

/*** 子组件传递多个参数的情况: ***/
//子组件  触发父组件的事件
this.$emit('childBtnClick', 'hahahaha', '2222')

//父组件
<child @childBtnClick="childClick"></child>

childClick (msg, msg2) {
    console.log(msg, msg2);  //输出 'hahahaha'  '2222'
}
3.2.2、父组件接收子组件参数并且传递额外的参数
当父组件接收子组件参数,并且自身也往函数中传递额外的参数时,可以在函数中使用一些关键字来接收子组件传递的参数。
当子组件只传递一个参数时,可以使用 $event 来接收子组件传递的参数。当子组件传递多个参数时,可以使用 arguments 来接收多个参数,该关键字接收到的是一个数组,子组件传递的参数都在里面。
/*** 子组件只传递一个参数的情况: ***/
//子组件  触发父组件的事件
this.$emit('childBtnClick', 'hahahaha')

//父组件
<child @childBtnClick="childClick($event, 'aaa')"></child>

childClick (e, msg) {
    console.log(e, msg);  //输出 'hahahaha'  'aaa'
}

/*** 子组件传递多个参数的情况: ***/
//子组件  触发父组件的事件
this.$emit('childBtnClick', 'hahahaha', 'haha2222')

//父组件
<child @childBtnClick="childClick(arguments, 'aaa')"></child>

childClick (arr, msg) {
    console.log(arr, arr[0], arr[1], msg);  //输出  Arguments(2)["hahahaha", "haha222", callee: (...), Symbol(Symbol.iterator): ƒ]  "hahahaha"  "haha222"  "aaa"
}
可参考:https://www.cnblogs.com/lalalagq/p/9901139.html、https://github.com/vuejs/vue/issues/5735
4、插槽
子组件可以通过 <slot></slot> 来定义插槽,通过插槽可以让父组件往子组件指定的内容区里面插入想要的元素。
//子组件定义插槽
<a
  v-bind:href="url"
  class="nav-link"
>
    <slot></slot>
</a>

//父组件直接往子组件里面插入内容,该内容将会自动添加至插槽处
<navigation-link url="/profile">
    <span class="fa fa-user"></span>
    Your Profile
</navigation-link>
如果子组件中没有定义插槽元素 <slot>,则父组件往子组件里面插入的内容将会全部被抛弃。
父组件在往子组件里面插入内容时,可以使用父组件的数据,但不能访问子组件作用域的内容。
//假设myurl在父组件中有定义,而userObj没有定义。则myurl可以正常显示,但userObj将报错
<navigation-link :url="myurl">
    Logged in as {{ userObj.name }}
    {{myurl}}
</navigation-link>
父级模板里的所有内容都是在父级作用域中编译的;子模板里的所有内容都是在子作用域中编译的。上面实例中,父组件中插槽跟模板的其它地方一样可以访问相同的实例 property (也就是相同的“作用域”),而不能访问 <navigation-link> 的作用域
4.1、默认插槽内容
有时我们可能希望给插槽一些默认内容,当父组件没有传入插槽内容时,插槽的默认内容将起作用。
<button type="submit">
  <slot>Submit</slot>
</button>
如果父组件提供了插槽内容,则默认插槽里面的内容将被取代。
4.2、具名插槽
有时我们需要定义多个插槽,这时可以通过定义插槽的 name 属性来区别各个插槽。
<div class="container">
  <header>
    <slot name="header"></slot>
  </header>

  <main>
    <slot></slot>
  </main>

  <footer>
    <slot name="footer"></slot>
  </footer>
</div>
不带 name 属性的插槽即是默认插槽,该插槽会带有隐含的名字“default”。
在向具名插槽插入内容的时候,我们可以在一个 <template> 元素上使用 v-slot 指令,并以 v-slot 的参数的形式提供其名称:
<base-layout>
  <template v-slot:header>
    <h1>Here might be a page title</h1>
  </template>

  <p>A paragraph for the main content.</p>
  <p>And another one.</p>

  <template v-slot:footer>
    <p>Here's some contact info</p>
  </template>
</base-layout>
现在 <template> 元素中的所有内容都将会被传入相应的插槽。任何没有被包裹在带有 v-slot 的 <template> 中的内容都会被视为默认插槽的内容。
在往默认插槽插入内容时,也可以通过 default 来指定插入默认插槽:
<base-layout>
  <template v-slot:header>
    <h1>Here might be a page title</h1>
  </template>

  <template v-slot:default>
    <p>A paragraph for the main content.</p>
    <p>And another one.</p>
  </template>

  <template v-slot:footer>
    <p>Here's some contact info</p>
  </template>
</base-layout>
注意,v-slot 只能添加在 <template> 上 ,除非当被提供的内容只有默认插槽时,组件的标签才可以被当作插槽的模板来使用,此时 v-slot 可以直接用在组件标签上。
4.3、作用域插槽
默认情况下,父组件在往子组件里面插入内容时,只可以使用父组件的数据,不能访问子组件作用域的内容。比如:
//假设myurl在父组件中有定义,而userObj没有定义。则myurl可以正常显示,但userObj将报错
<navigation-link :url="myurl">
    Logged in as {{ userObj.name }}
    {{myurl}}
</navigation-link>
要想在父组件中也能访问子组件的一些数据,此时我们可以使用作用域插槽。
在子组件里定义插槽时,可以将希望传递的值作为 slot 元素的属性传递给父组件,父组件就能通过 v-slot 来拿到子组件传递的值。我们将子组件绑定在 <slot> 元素上的属性称为插槽 prop。
//子组件代码
<span>
  <slot v-bind:user="user">
    {{ user.lastName }}
  </slot>
</span>

//父组件代码。下面父组件将包含所有插槽 prop 的对象命名为 slotProps,通过该变量就能拿到所有子组件传递的值
<current-user>
  <template v-slot:default="slotProps">
    {{ slotProps.user.firstName }}
  </template>
</current-user>
当子组件的插槽只有默认插槽时,父组件在使用子组件时,可以将子组件的标签作为插槽的模板来使用,可以把 v-slot 直接用在组件标签上:
<current-user v-slot:default="slotProps">
  {{ slotProps.user.firstName }}
</current-user>

//可以省略 default
<current-user v-slot="slotProps">
  {{ slotProps.user.firstName }}
</current-user>
注意默认插槽的缩写语法不能和具名插槽混用,因为它会导致作用域不明确:
<!-- 无效,会导致警告 -->
<current-user v-slot="slotProps">
  {{ slotProps.user.firstName }}
  <template v-slot:other="otherSlotProps">
    slotProps is NOT available here
  </template>
</current-user>


<!-- 只要出现多个插槽,请始终为所有的插槽使用完整的基于 <template> 的语法 -->
<current-user>
  <template v-slot:default="slotProps">
    {{ slotProps.user.firstName }}
  </template>

  <template v-slot:other="otherSlotProps">
    ...
  </template>
</current-user>
4.4、废弃的语法
关于插槽的一些旧语法:slot 和 slot-scope,这些语法在 vue2.6 起被 v-slot 取代,虽然在 vue2.x 版本仍被支持,但 vue3 版本将会废弃掉不再支持。
具名插槽 slot:
<base-layout>
  <template slot="header">
    <h1>Here might be a page title</h1>
  </template>

  <p>A paragraph for the main content.</p>
  <p>And another one.</p>

  <template slot="footer">
    <p>Here's some contact info</p>
  </template>
</base-layout>
作用域插槽:
<slot-example>
  <template slot="default" slot-scope="slotProps">
    {{ slotProps.msg }}
  </template>
</slot-example>
5、过滤器(filter)
Vue.js 允许你自定义过滤器,可被用于一些常见的文本格式化。
你可以在一个组件的选项中定义本地的局部过滤器,也可以在创建 Vue 实例之前全局定义过滤器:
//在vue选项中局部定义过滤器
filters: {
  capitalize: function (value) {
    if (!value) return ''
    value = value.toString()
    return value.charAt(0).toUpperCase() + value.slice(1)
  }
}

//全局定义过滤
Vue.filter('capitalize', function (value) {
  if (!value) return ''
  value = value.toString()
  return value.charAt(0).toUpperCase() + value.slice(1)
})
当全局过滤器和局部过滤器重名时,会采用局部过滤器。
过滤器可以用在两个地方:双花括号插值和 v-bind 表达式 (后者从 2.1.0+ 开始支持)。过滤器应该被添加在 JavaScript 表达式的尾部,由“管道”符号指示:
<!-- 在双花括号中 -->
{{ message | capitalize }}

<!-- 在 `v-bind` 中 -->
<div v-bind:id="rawId | formatId"></div>
过滤器函数总接收表达式的值 (之前的操作链的结果) 作为第一个参数。在上述例子中,capitalize 过滤器函数将会收到 message 的值作为第一个参数。
过滤器可以串联:
{{ message | filterA | filterB }}
上面例子中,filterA 被定义为接收单个参数的过滤器函数,表达式 message 的值将作为参数传入到函数中。然后继续调用同样被定义为接收单个参数的过滤器函数 filterB,将 filterA 的结果传递到 filterB 中。
过滤器是 JavaScript 函数,因此可以接收参数:
{{ message | filterA('arg1', arg2) }}
这里,filterA 被定义为接收三个参数的过滤器函数。其中 message 的值作为第一个参数,普通字符串 'arg1' 作为第二个参数,表达式 arg2 的值作为第三个参数。
6、命名问题
6.1、自定义事件命名(使用分隔符命名)
vue 中的自定义事件在被触发时(子组件触发父组件的自定义事件),驼峰法和横线法不会进行自动转换即不会自动匹配,所以事件名需要完全一致。并且在DOM中的事件名都会被转换为小写,所以如果你在 JS 代码中如果使用了驼峰法,而 DOM 中也使用了驼峰法,则会匹配不上而报错。
所以事件命名建议使用分隔符命名(kebab-case)。不要使用驼峰法命名,否则可能有问题。
//使用驼峰法命名的问题:
//子组件触发自定义事件
this.$emit('myEvent')

<!-- 父组件监听自定义事件,此时不管使用分隔符还是驼峰法都无法监听到子组件触发的事件 -->
<my-component v-on:myEvent="doSomething"></my-component>
<my-component v-on:my-event="doSomething"></my-component>
6.2、prop的命名(推荐分隔符命名)
在 DOM 中即父组件使用横线连接符(kebab-case)命名,在子组件中可以使用横线或者驼峰法,都能匹配上。所以我们推荐使用分隔符命名。
但是当我们使用 DOM 模板(而不是在字符串模板 template: `` 或单文件组件)时,camelCase (驼峰命名法) 的 prop 名需要使用其等价的 kebab-case (短横线分隔命名) 来匹配:
//在JS中,使用驼峰法和分隔符都能匹配上
Vue.component('blog-post', {
  props: ['postTitle'],
  template: '<h3>{{ postTitle }}</h3>'
})

//在DOM中只能使用分隔符,使用驼峰法会因大小写问题导致无法匹配
<blog-post post-title="hello!"></blog-post>
6.3、组件的命名(推荐分隔符命名)
定义组件时,我们需要给组件命名:
Vue.component('my-component-name', { /* ... */ })
组件的命名可以使用分隔线或者首字母大写的驼峰法。但是我们推荐使用分隔线命名。
当使用分隔线命名时(比如:my-component-name),使用组件的时候也得使用分隔线;
当使用首字母大写的驼峰法时(比如:MyComponentName),在使用组件时可以使用分隔线也可以使用首字母大写驼峰法。但是如果是在 DOM 中使用(而不是在字符串模板 template: `` 或单文件组件)时,此时只能通过分隔线来使用组件(即使组件是使用驼峰法的命名),因为在 HTML 中不区分大小写,浏览器会把所有大写字符解释为小写字符,所以在HTML中使用驼峰法可能会因为匹配不上而报错。

 浙公网安备 33010602011771号