ubuntu 安装 ES 以及集群的搭建
安装java jdk
#更新软件包列表
sudo apt-get update
#安装openjdk-8-jdk
sudo apt-get install openjdk-8-jdk
#查看版本
java -version
1.下载安装包(我的是elasticsearch-6.4.0)
#下载压缩包
wget https://artifacts.elastic.co/downloads/elasticsearch/elasticsearch-6.4.0.tar.gz
#解压
tar -zxvf elasticsearch-6.4.0.tar.gz -C /usr/local/
2.修改elasticsearch.yml
vi /usr/local/elasticsearch-6.4.0/config/elasticsearch.yml
#修改network.host为 0.0.0.0
network.host: 0.0.0.0
#修改http.port为 9200
http.port: 9200
3.新建用户并赋予权限
#新建用户
adduser xxx

#赋予权限
chown -R xxx 文件夹

chown -R xjf:xjf /opt/tools/elasticsearch-5.4.0
4.root用户下更改内存权限
sysctl -w vm.max_map_count=262144
5.修改jvm.option
vi /usr/local/elasticsearch-6.4.0/config/jvm.option
#把1g改成512m
6.启动(切换到新建的用户)
/usr/local/elasticsearch-6.4.0/bin/elasticsearch
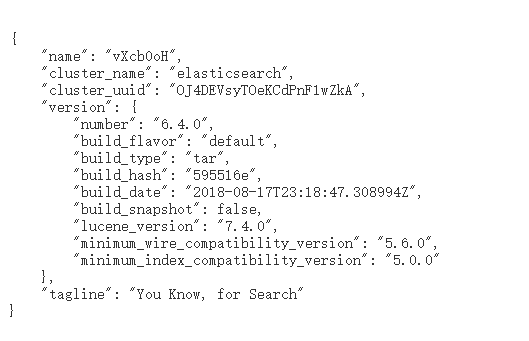
7.浏览器访问9200端口
參考:https://cloud.tencent.com/developer/article/1700609
https://blog.csdn.net/weixin_44596128/article/details/103970665?utm_term=ubuntu安装es&utm_medium=distribute.pc_aggpage_search_result.none-task-blog-2allsobaiduweb~default-0-103970665&spm=3001.4430
ES集群搭建
cluster.name: escluster
node.name: es1
node.master: true
node.data: true
#path.data: /data/elasticsearch/data
#path.logs: /data/elasticsearch/logs
bootstrap.memory_lock: false
bootstrap.system_call_filter: false
http.port: 9200
network.host: 192.168.0.120
network.publish_host: 192.168.0.120
discovery.zen.minimum_master_nodes: 2
discovery.zen.ping_timeout: 3s
#discovery.zen.ping.unicast.hosts: ["8.8.8.8:9300","8.8.8.9:9300"]
discovery.zen.ping.unicast.hosts: ["192.168.0.120:9300","192.168.0.121:9300","192.168.0.81:9300"]
三台机器不一样的配置点如下
node.name: es1      ===》172.16.0.8
node.name: es2      ===》172.16.0.6
node.name: es3      ===》172.16.0.22
参考:
https://blog.csdn.net/xiaoge335/article/details/100575925
https://www.cnblogs.com/soft2018/p/10213266.html
https://elasticsearch.cn/question/4586
I can feel you forgetting me。。 有一种默契叫做我不理你,你就不理我

 浙公网安备 33010602011771号