

Spring Boot + Vue3 前后端分离 实战 wiki 知识库系统<四>--前后端交互整合
接着上一次https://www.cnblogs.com/webor2006/p/17158238.html的继续往下学习,这次的目标就是前后端进行功能的联调了。
集成HTTP库Axios:
简述:
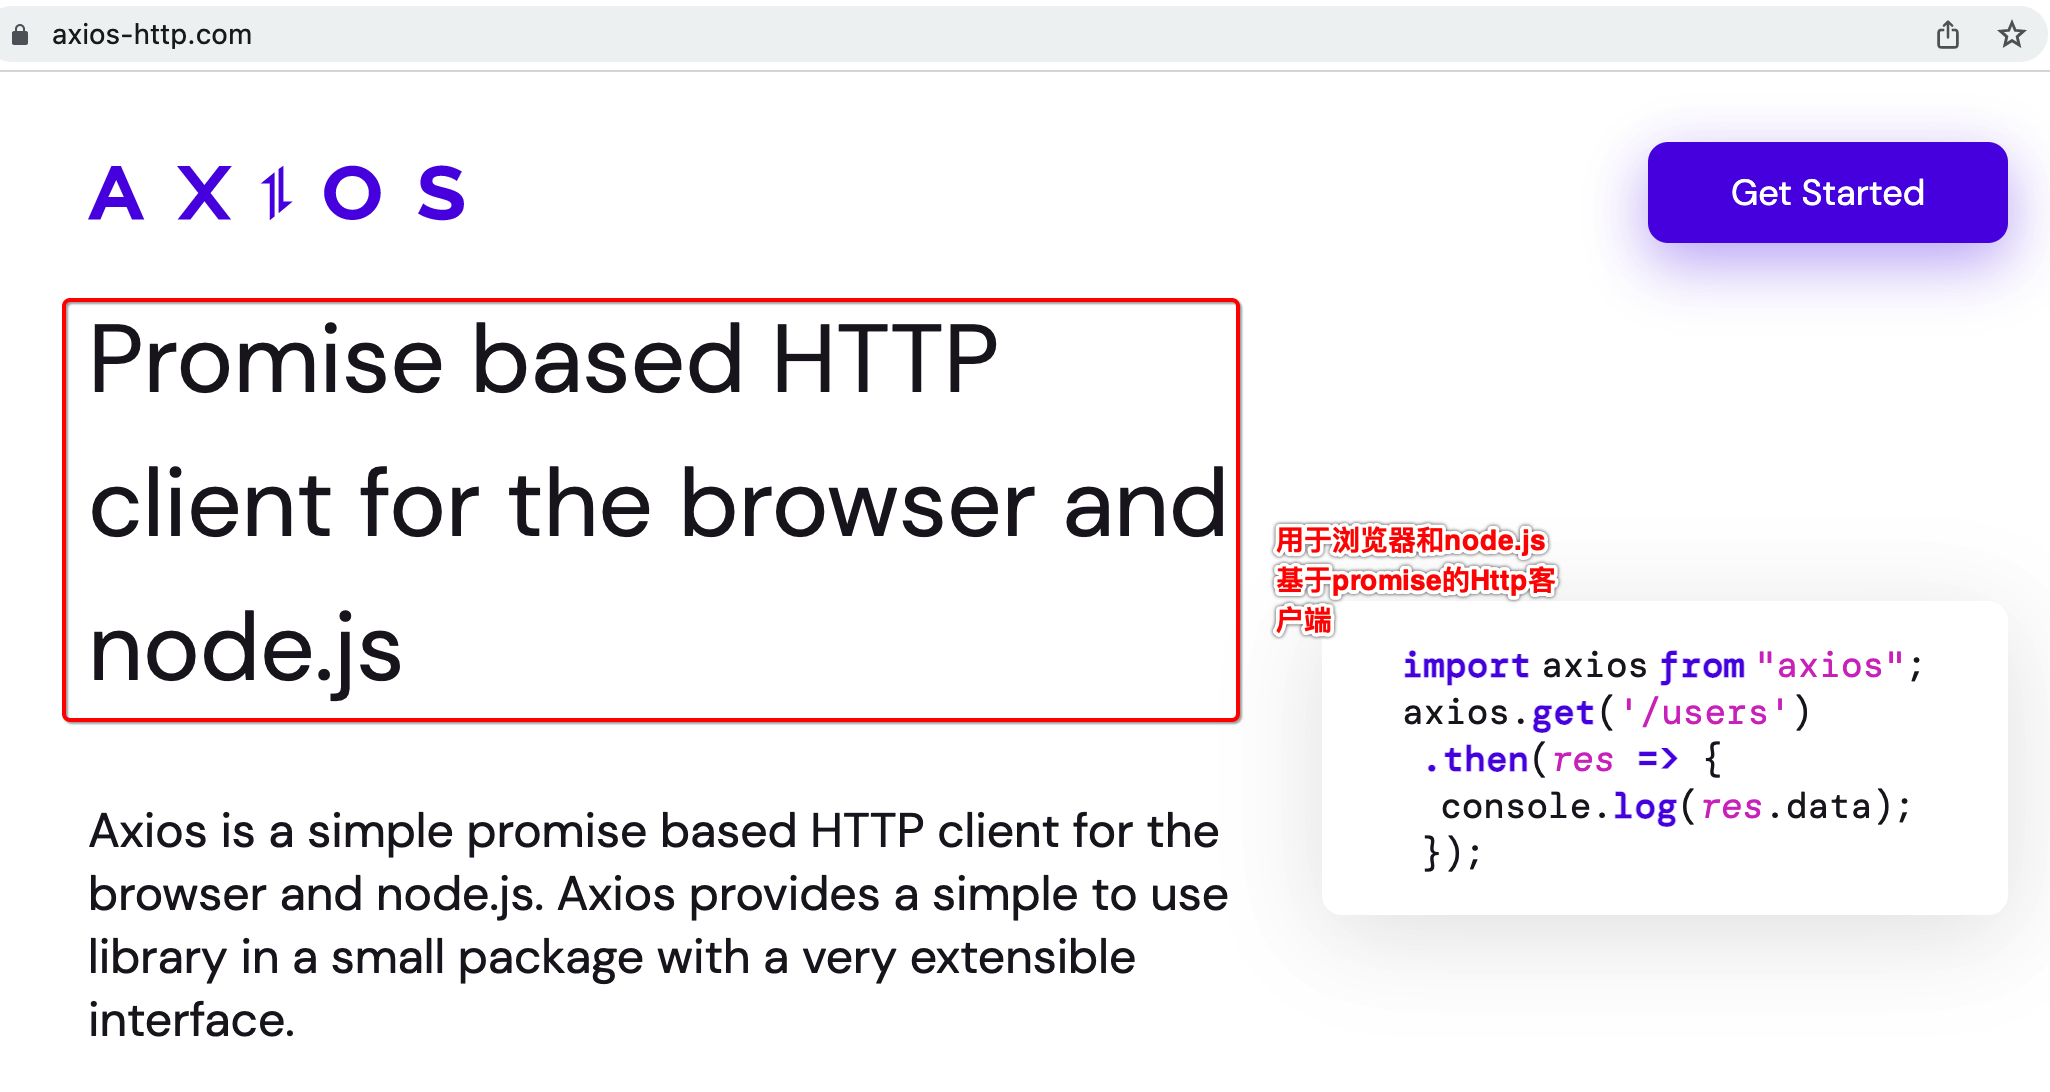
对于Vue前端来说,需要发起后台的请求来拿到相关的数据进行前后端的联调,通常都会借用三方的库来进行网络请求,这里也不例会,会用Axios这个HTTP库,先上官网了解一下它https://axios-http.com/:
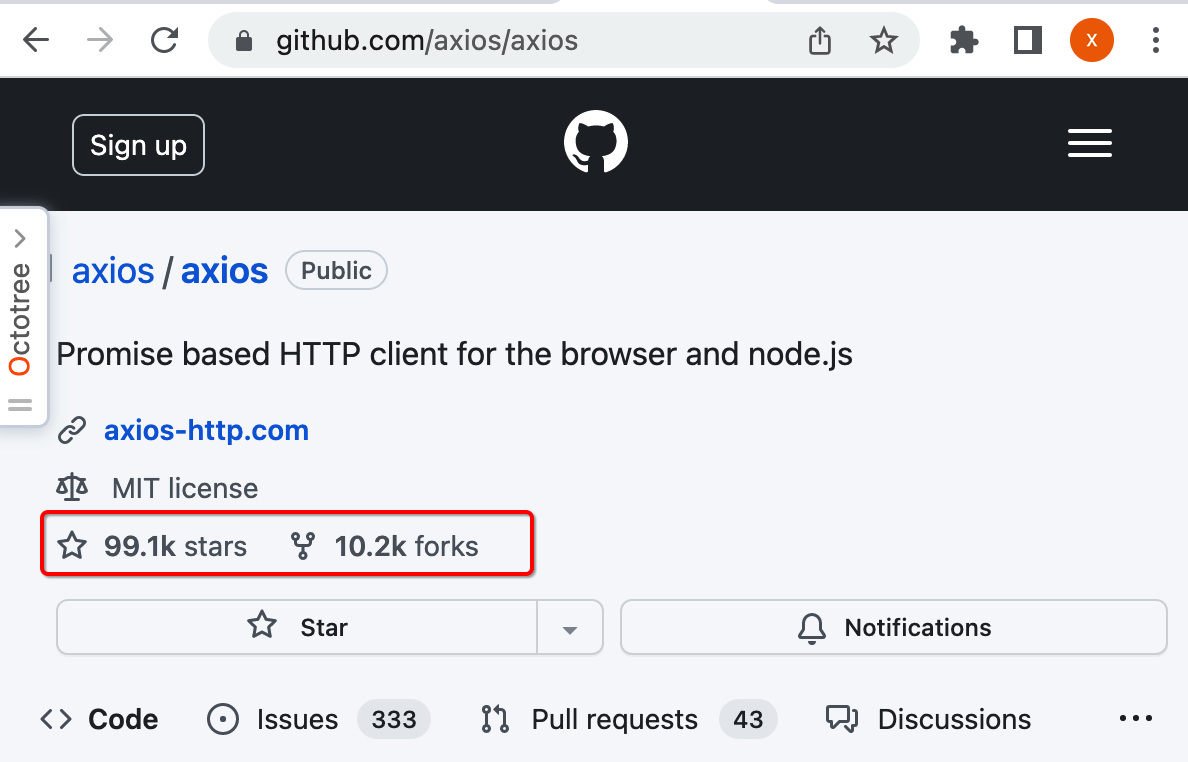
看一下它的github的star,就知道有多有名:
安装:
所以接下来咱们将它安装到咱们的工程中:
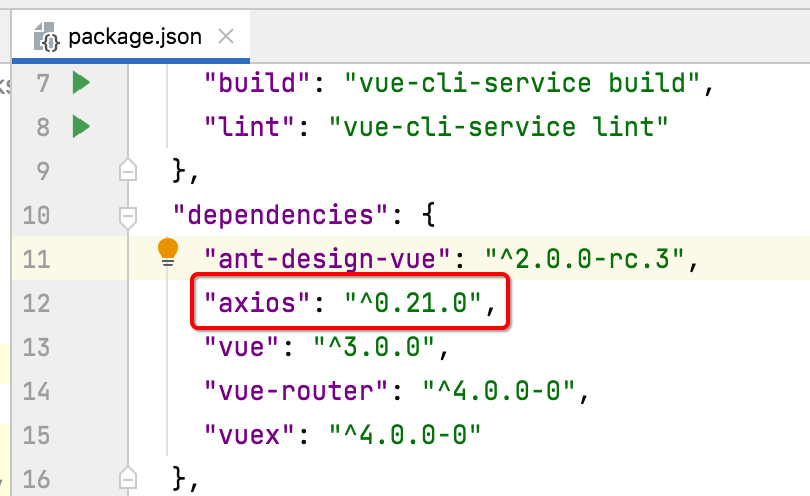
npm install axios@0.21.0 --save
其中指定的0.21.0不是如今最新的版本,是为了跟课程的版本保持一致,这样可以保证学习的节奏不会受版本的影响,执行一下:
(base) localhost:web xiongwei$ npm install axios@0.21.0 --save
npm WARN deprecated axios@0.21.0: Critical security vulnerability fixed in v0.21.1. For more information, see https://github.com/axios/axios/pull/3410
+ axios@0.21.0
added 1 package from 1 contributor in 13.41s

127 packages are looking for funding
  run `npm fund` for details
此时则可以看到添加了相关的依赖了:
体验请求:
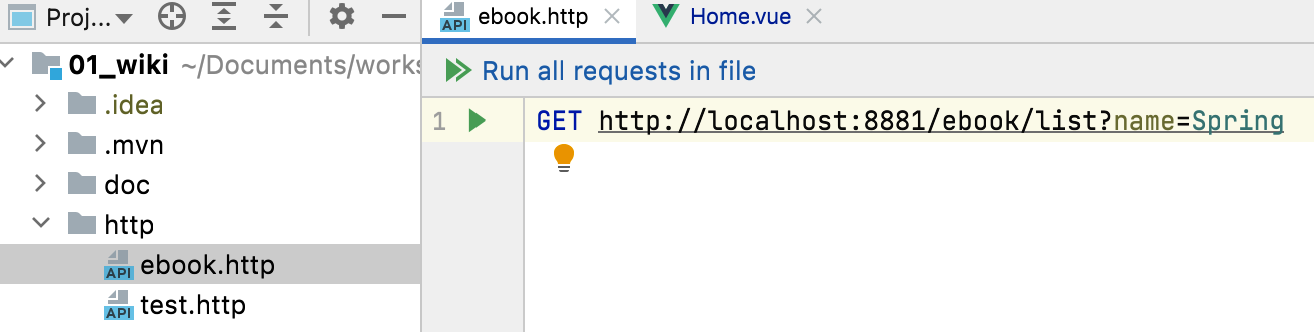
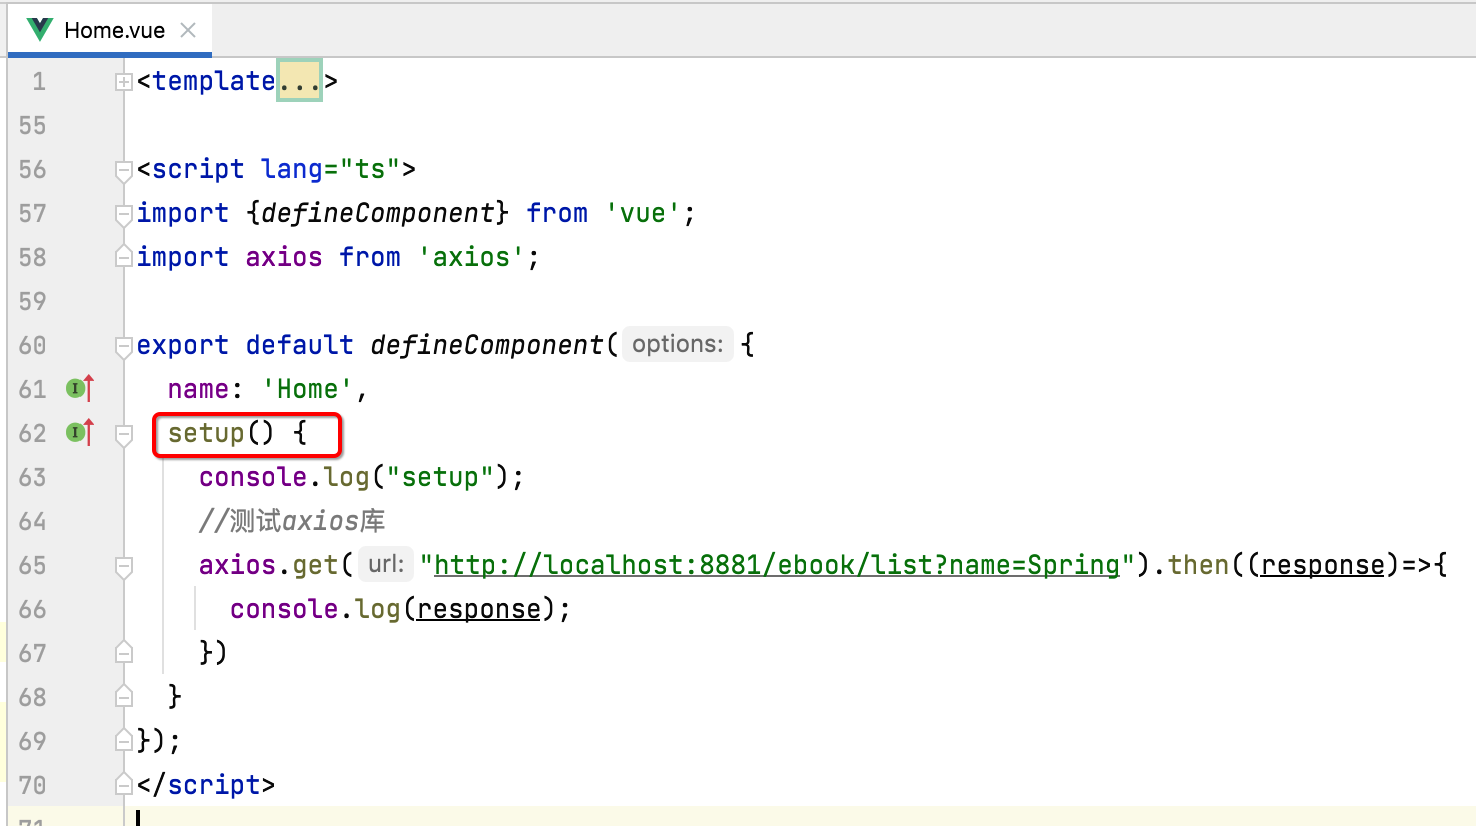
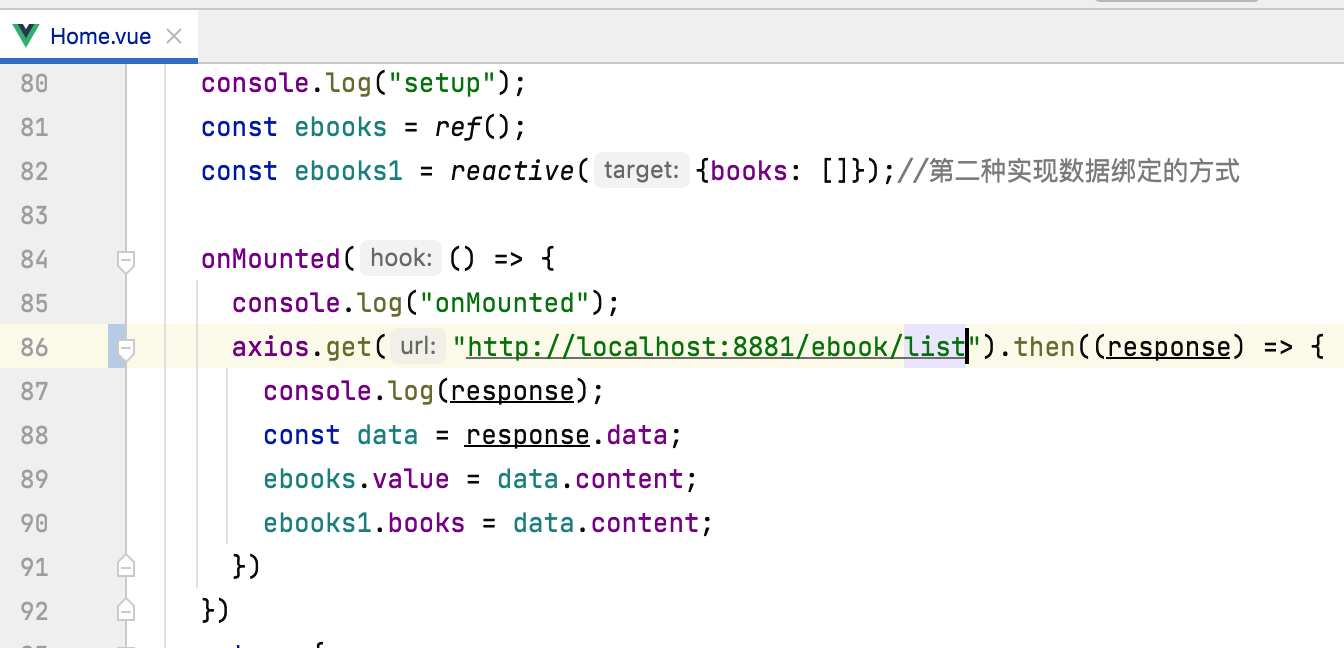
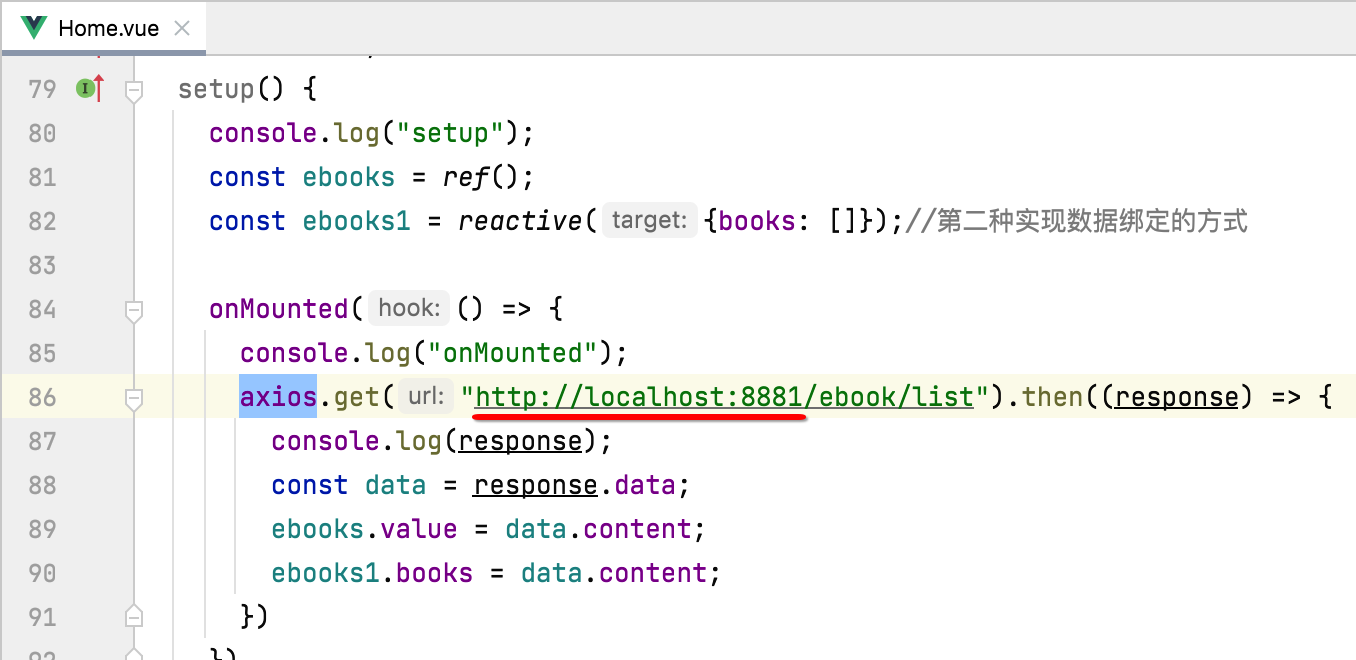
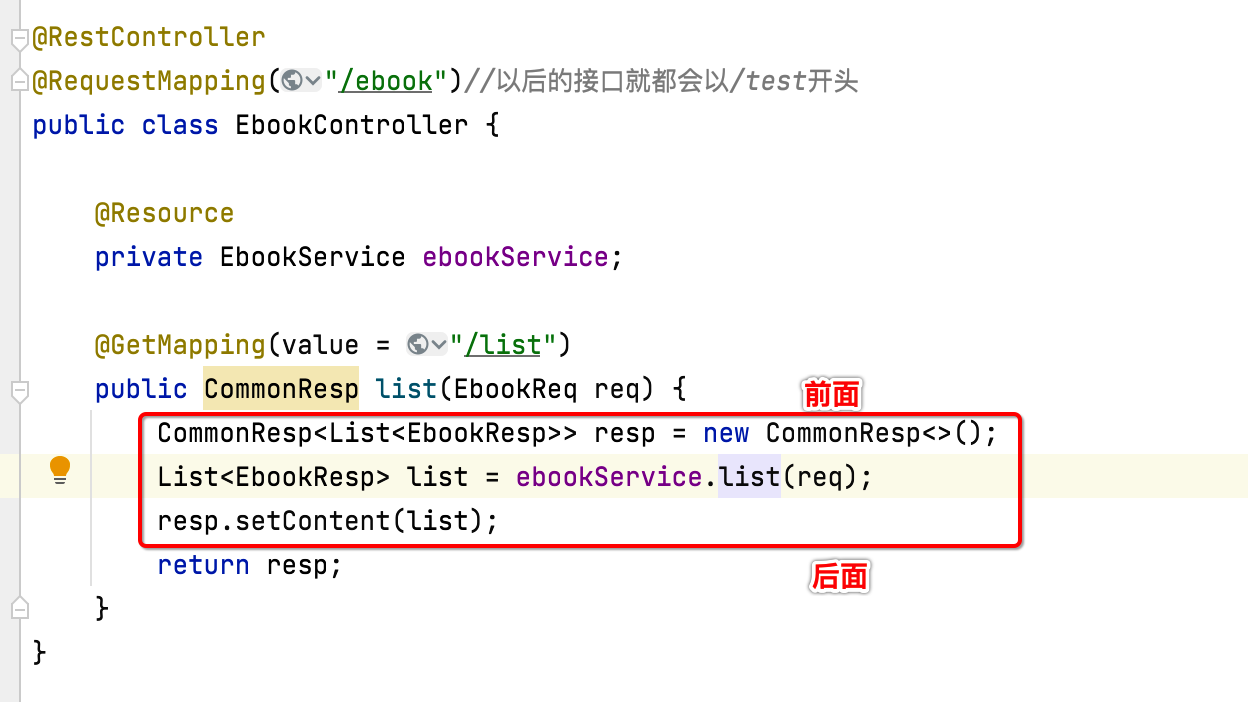
接下来则来使用一下这个库,来将咱们后台电子书的列表数据给拉取下来:
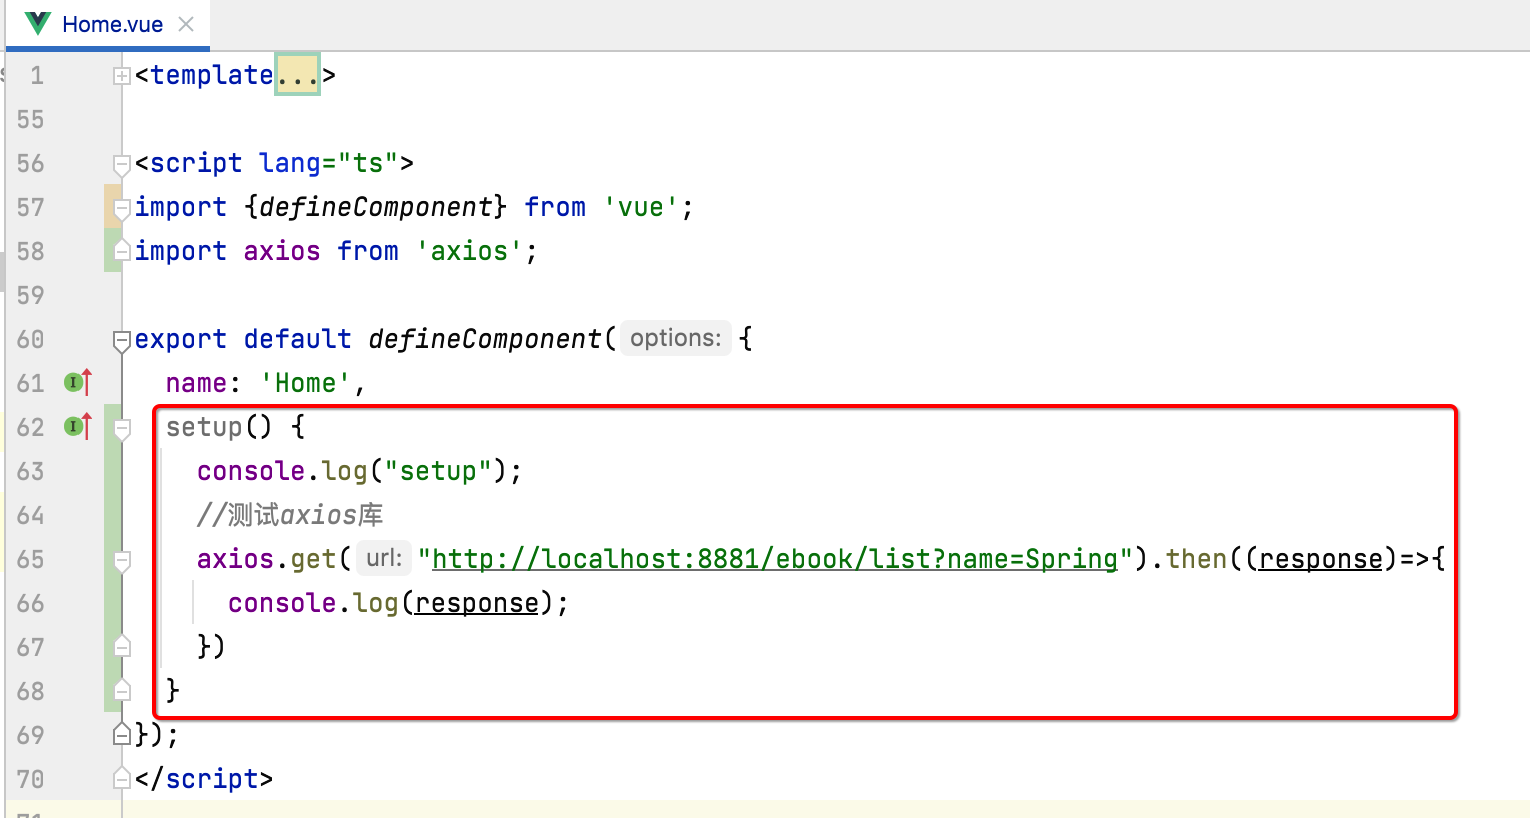
其中setup是Vue3新增的初始化的方法,当组件加载完之后,初始执行的地方,而测试的地址刚好就是我们之前写后端测试用例时用到的:
好,接下来咱们启动一下咱们的服务端,然后执行看一下是否能正常请求到后端的数据:
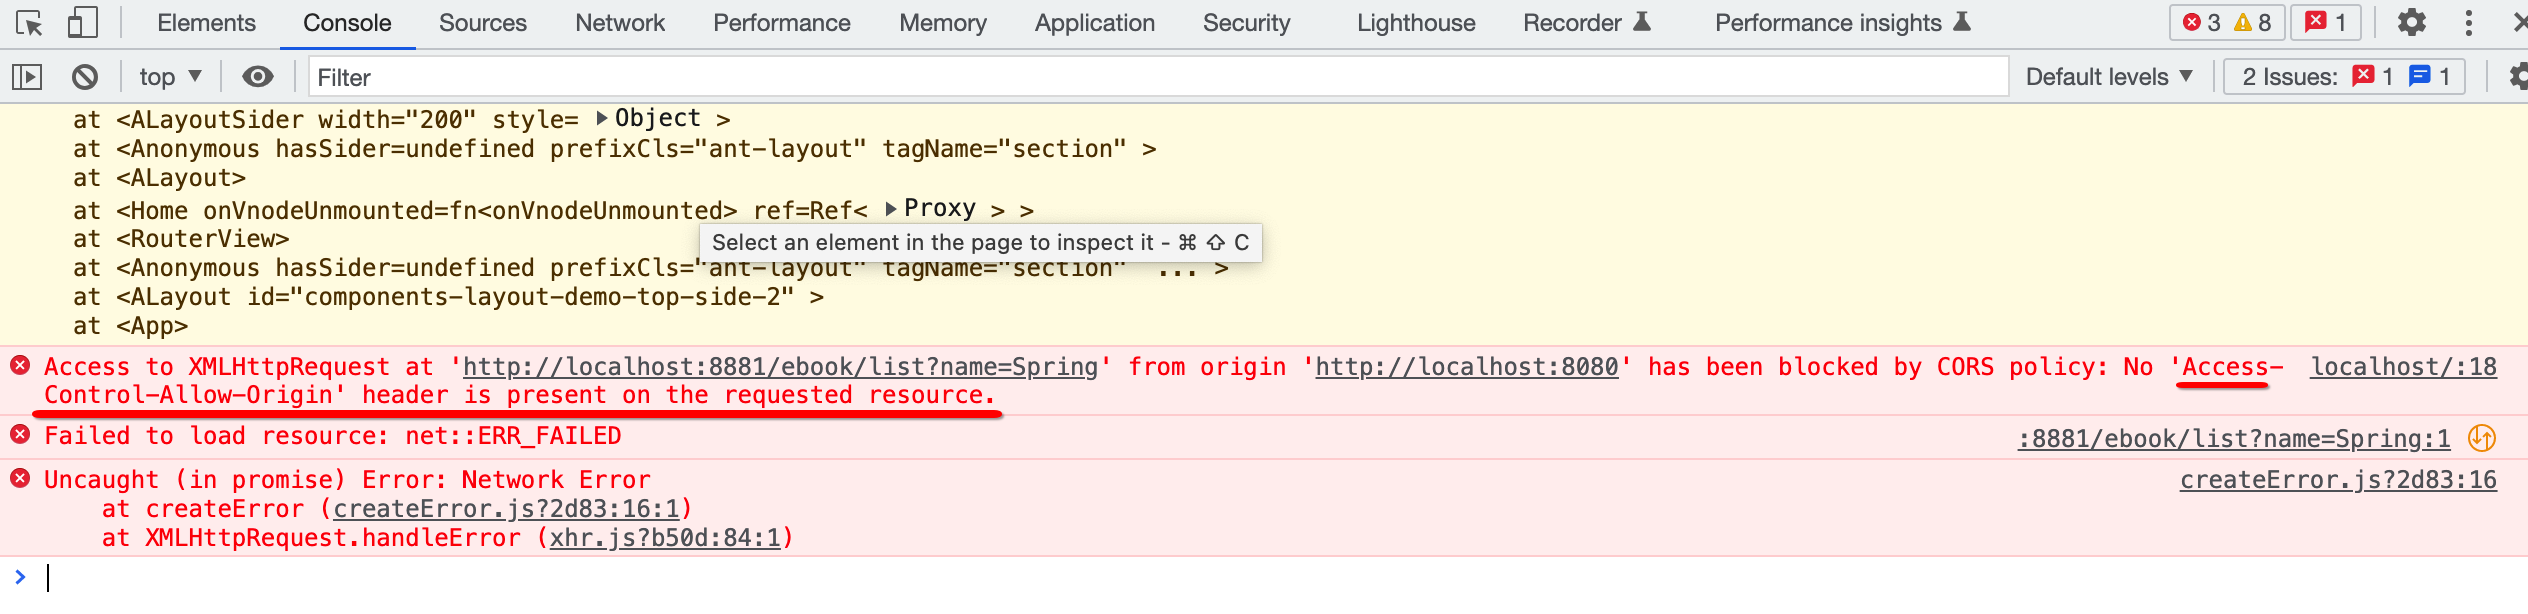
报错了。。“Access-Control-Allow-Origin”,这个就是最常见的跨域问题,那什么叫跨域呢?通俗点说其实就是后端不信任前端,其中从日志中也能看出:

所以后端就会把前端的这次请求给拦截掉,跨域可以这样理解:来自一个ip端口的页面(Vue项目),要访问另一个ip端口的资源(springboot请求接口),则会产生跨域访问,所有前后端分离的项目都会存在跨域访问的问题。
解决跨域问题:
要想解决跨域问题,需要在后端增加这么一个配置类:
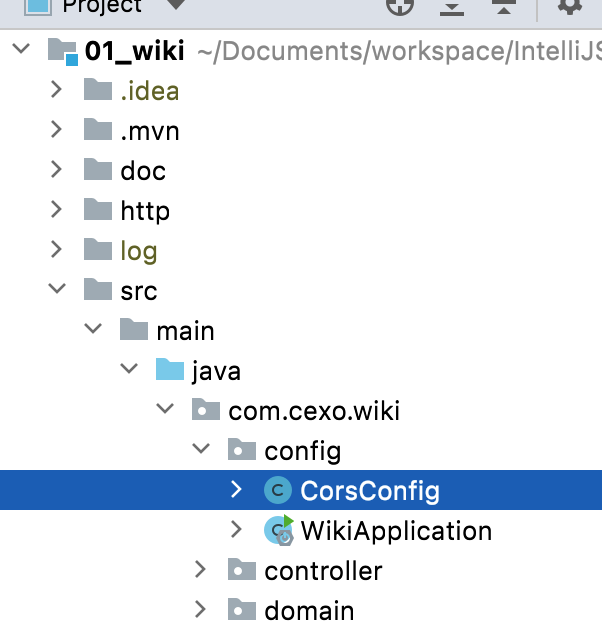
package com.cexo.wiki.config;

import org.springframework.context.annotation.Configuration;
import org.springframework.web.cors.CorsConfiguration;
import org.springframework.web.servlet.config.annotation.CorsRegistry;
import org.springframework.web.servlet.config.annotation.WebMvcConfigurer;

//解决跨域问题
@Configuration
public class CorsConfig implements WebMvcConfigurer {

    @Override
    public void addCorsMappings(CorsRegistry registry) {
        registry.addMapping("/**")
                .allowedOriginPatterns("*")
                .allowedHeaders(CorsConfiguration.ALL)
                .allowedMethods(CorsConfiguration.ALL)
                .allowCredentials(true)
                .maxAge(3600); // 1小时内不需要再预检(发OPTIONS请求)
    }

}
其中:
addMapping:映射的请求地址,/**表示针对所有的接口,比如目前的ebook接口。
allowedOriginPatterns:允许来源。
allowedHeaders:允许所有的头信息。
allowedMethods:允许所有的请求方式,如GET、POST等。
allowCredentials:允许前端带上凭证,如带上它的cookie信息等,
maxAge: 配置预检的时间,啥叫预检呢?在调用电子书接口之前,前端会偷偷发一个OPTIONS请求,这个请求它是不会处理业务逻辑的,它只是检查一下该接口是否存在、是否正常,只有预检成功了才会真正发起接口的请求,而配置3600的意思是如果成功发送OPTIONS请求之后,1小时之内则就不再发OPTIONS请求了。
配置了跨域请求之后,重启再来运行一下,就正常了:
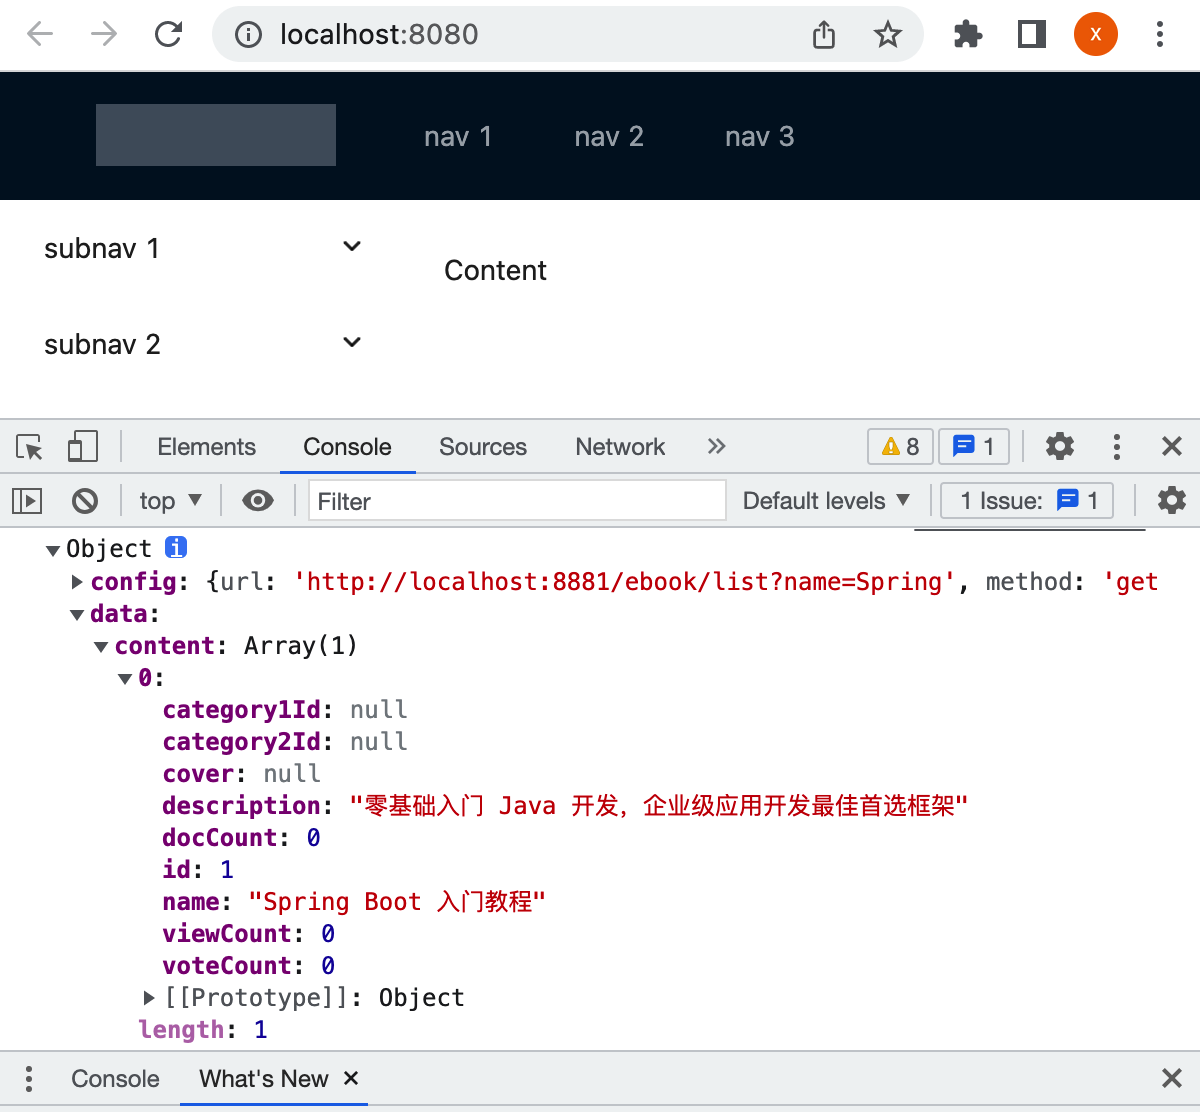
成功解决。
Vue3数据绑定显示列表数据:
概述:
数据双向绑定是Vue的核心功能,前端拿到后端的数据之后,要把它展示到页面上,
Vue2代码结构示例:
在正式学习Vue3的数据绑定之前,先来大概了解一下Vue2的数据绑定的结构:
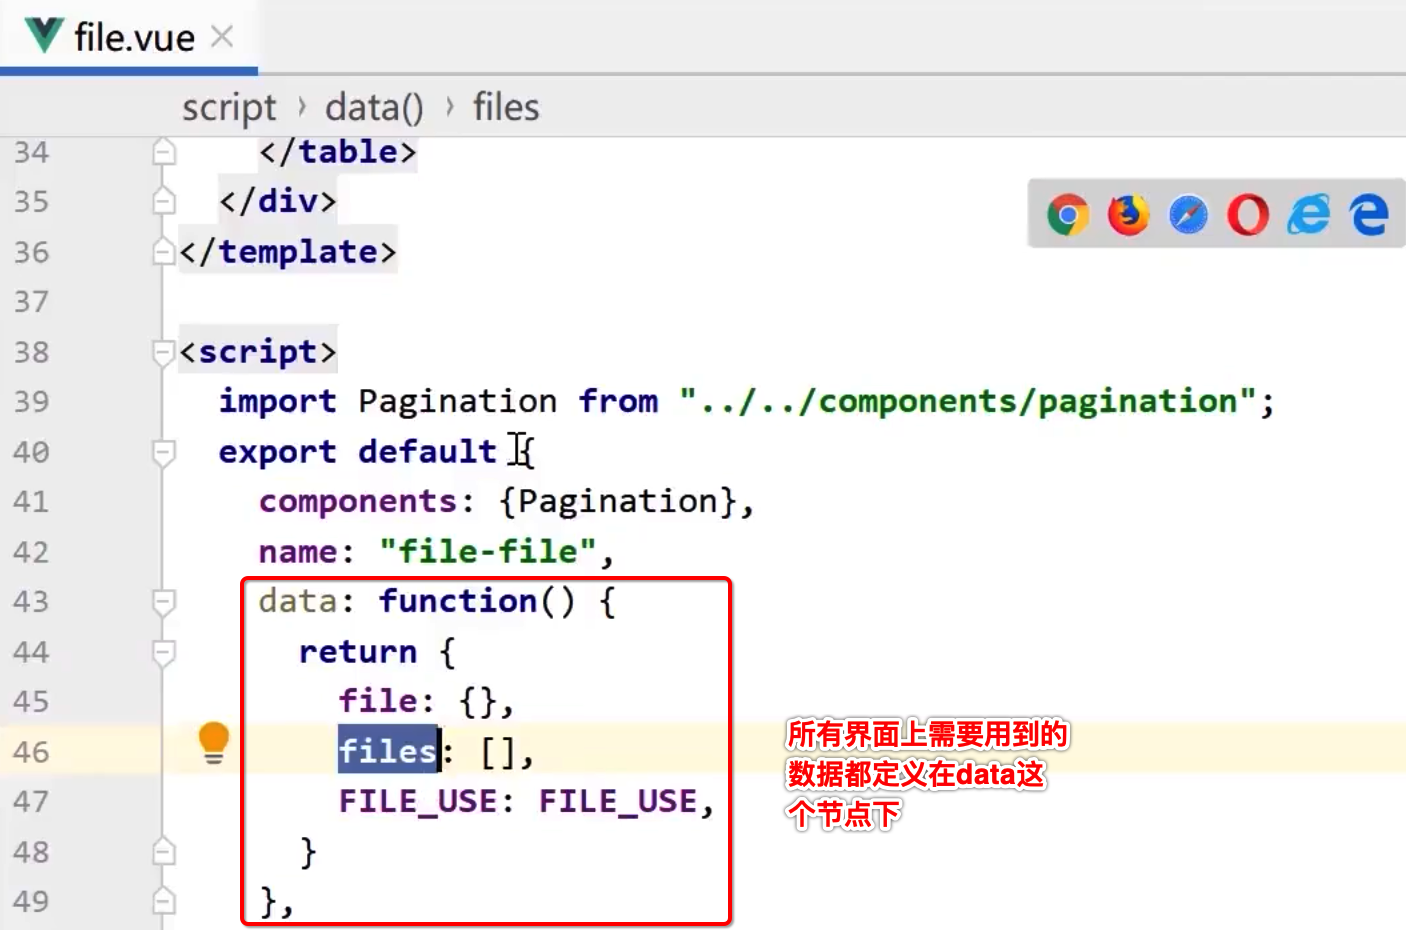
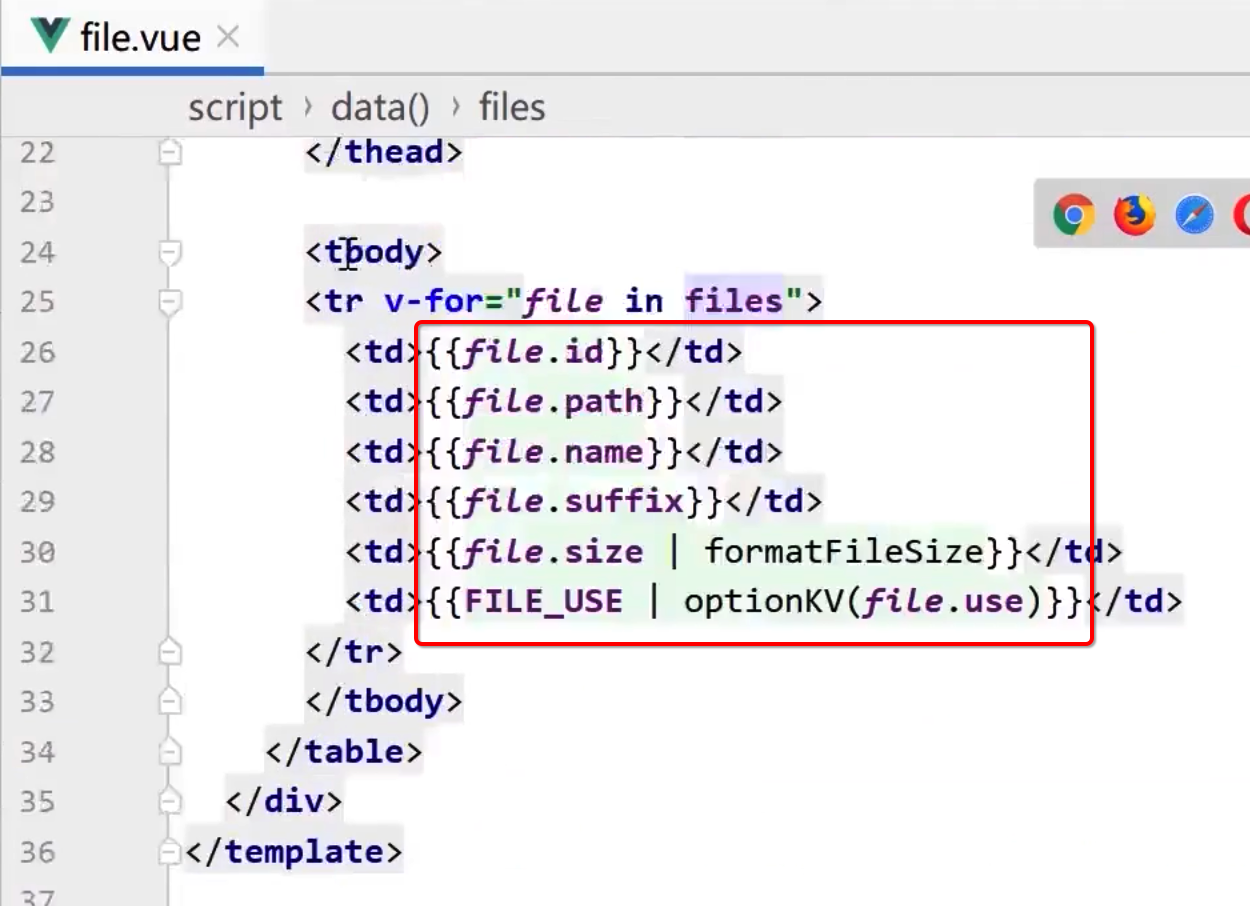
而这些数据会被用在界面上:
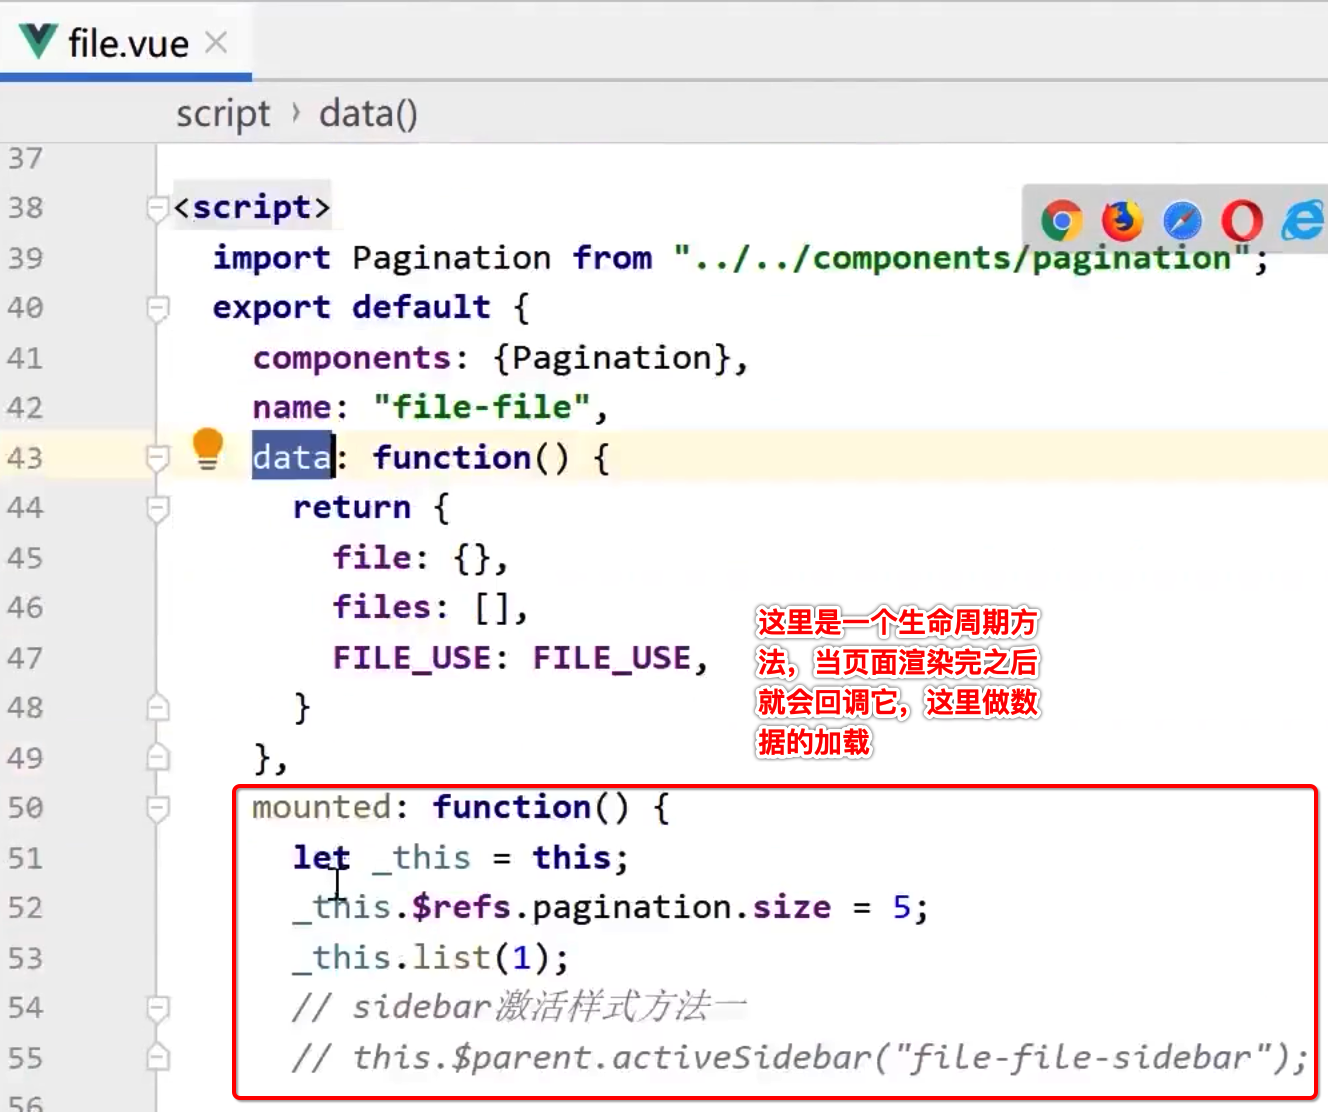
而其中它是调用了list()方法进行数据的获取,具体这个方法的定义是在另外一个methods中:
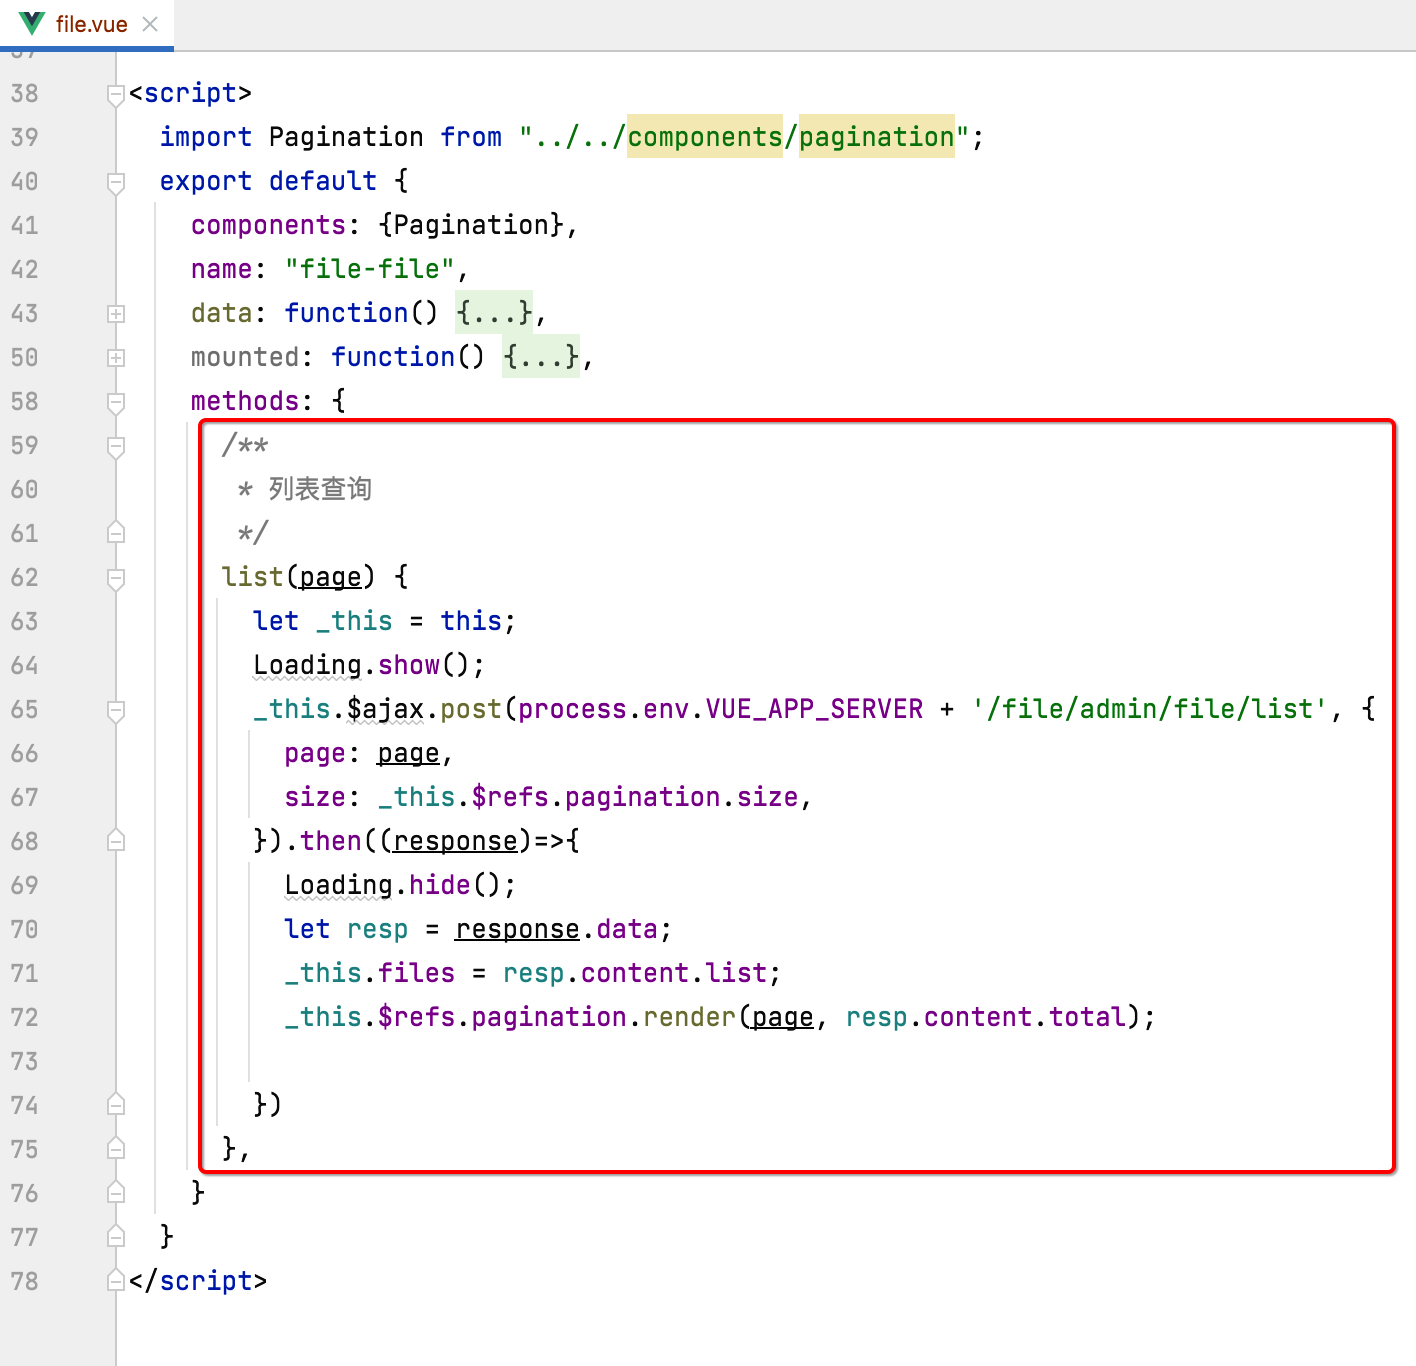
有木有发现,数据定义是在data里,而它数据的赋值是在methods的方法调用中进行,但是!!!到了Vue3之后,data、mounted、methods这三个方法合成了一个了,就是之前咱们已经见过的setup方法:
所以接下来对它进行一个了解。
Vue3的setup()生命周期方法了解:
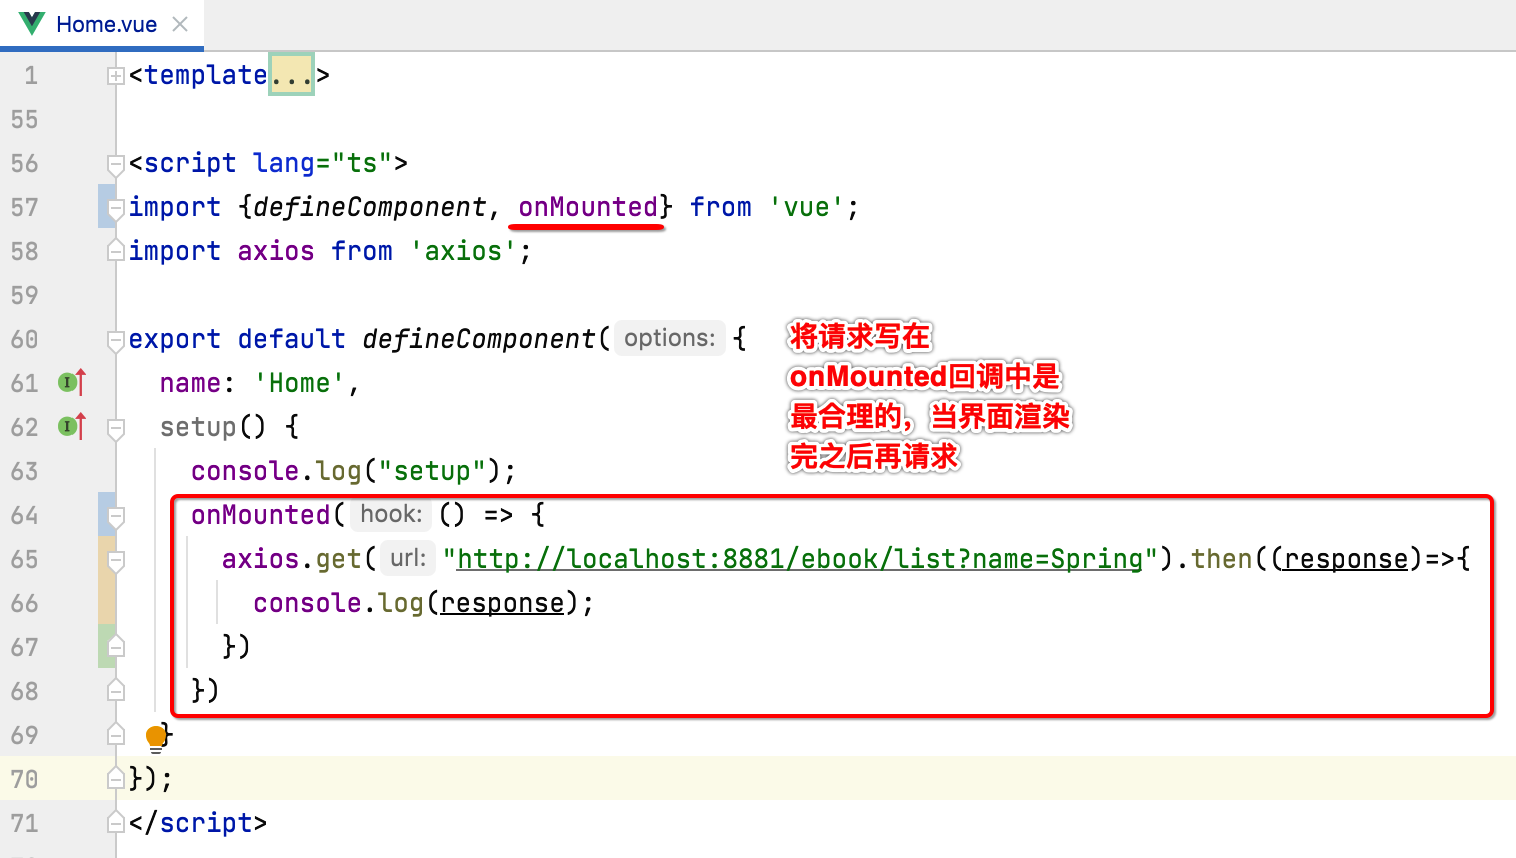
在setup中,像Vue2中的mounted也有类似的,这样写写:
这里为了看执行顺序,我们在onMounted中加入一个日志:
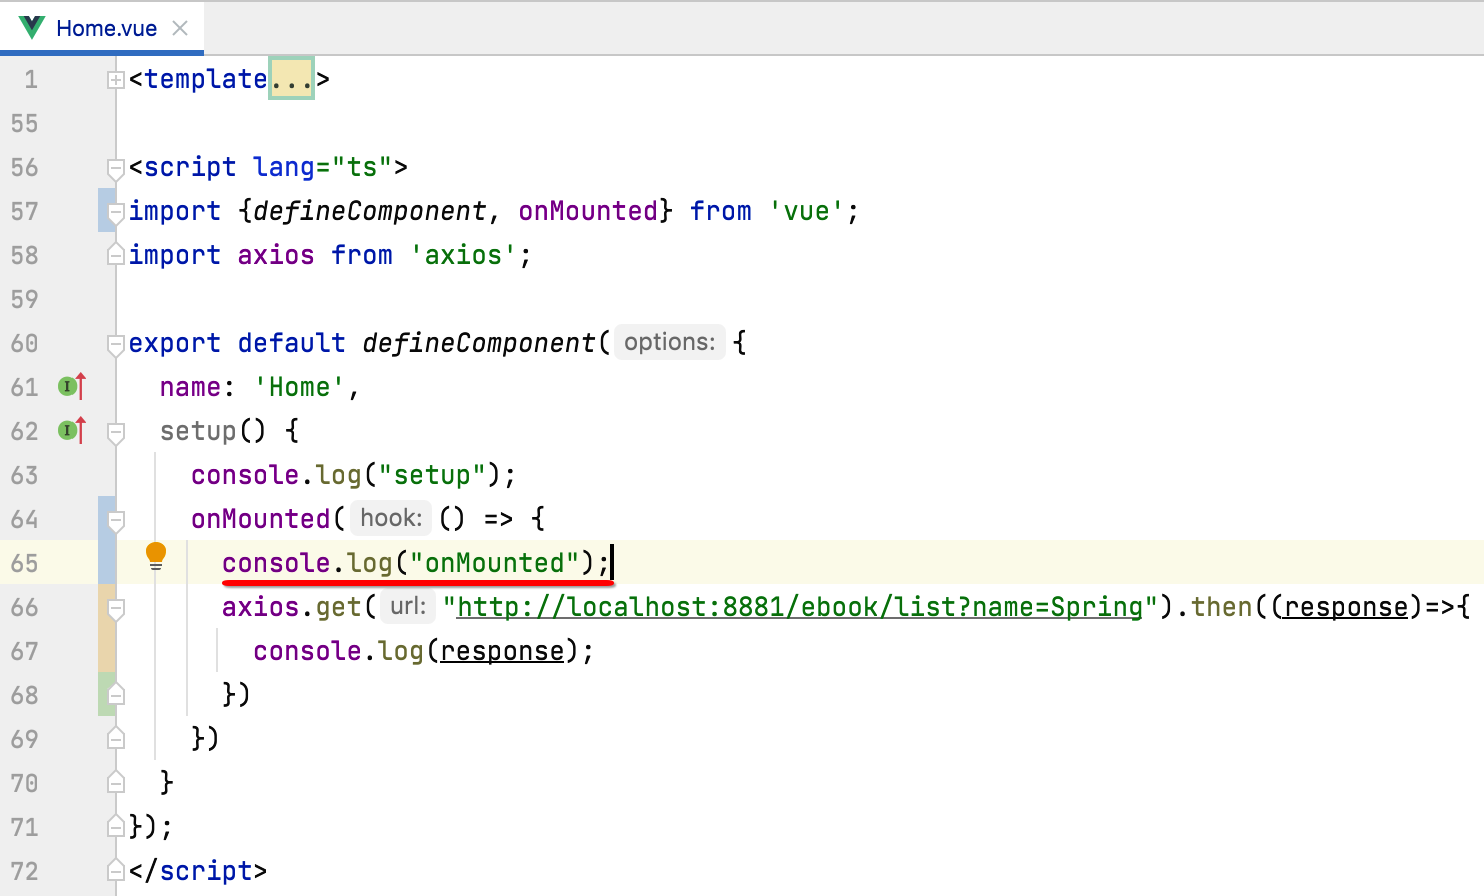
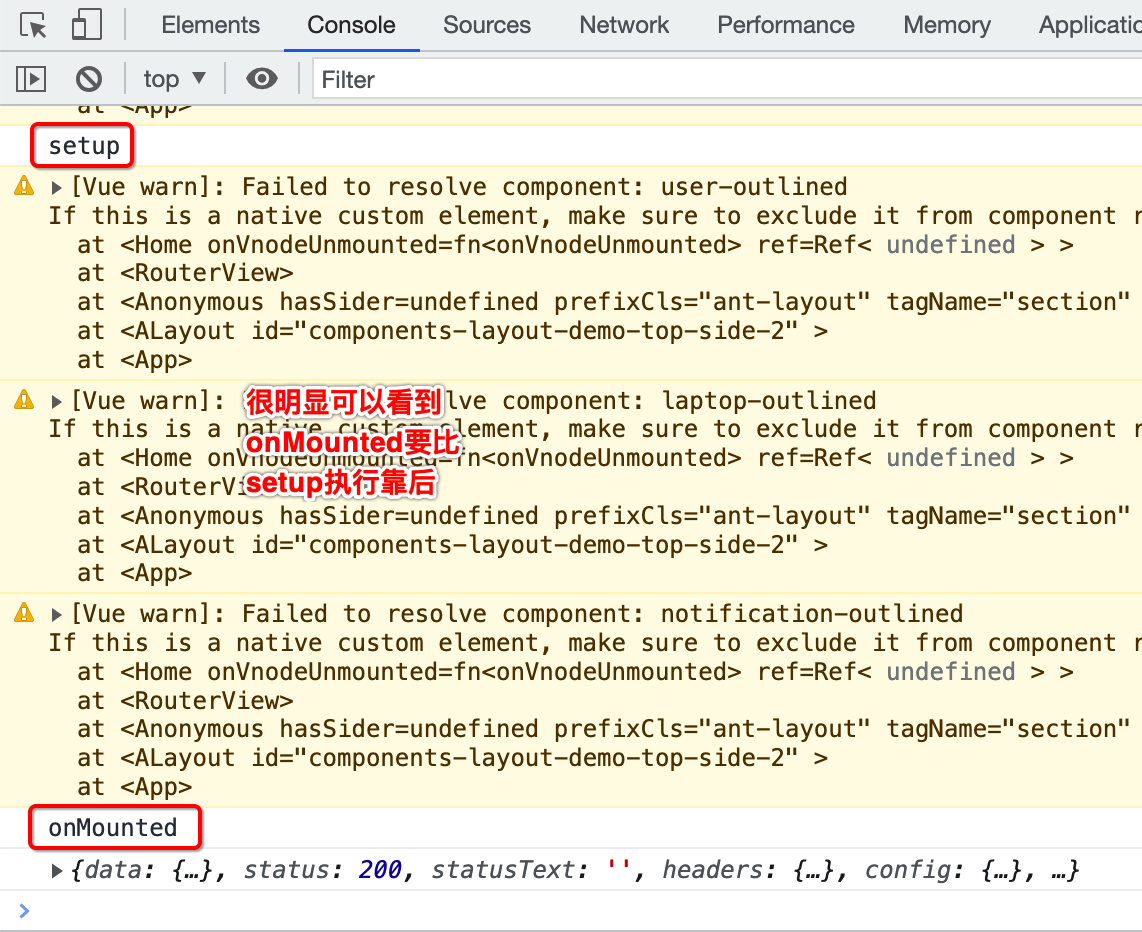
运行看一下:
使用Vue3 ref实现数据绑定:
接下来咱们则将查出来的数据渲染到界面上,怎么做呢?当然先解析请求回来的数据: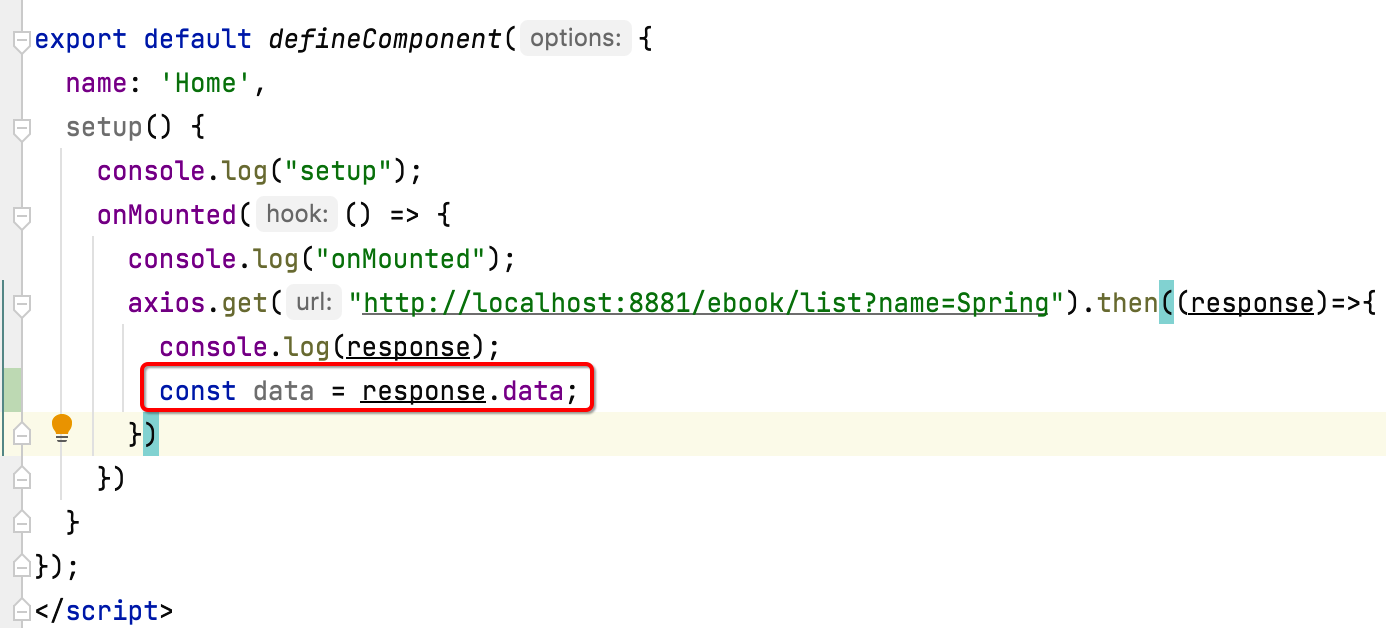
而content节点才是我们想要的电子书的列表数据: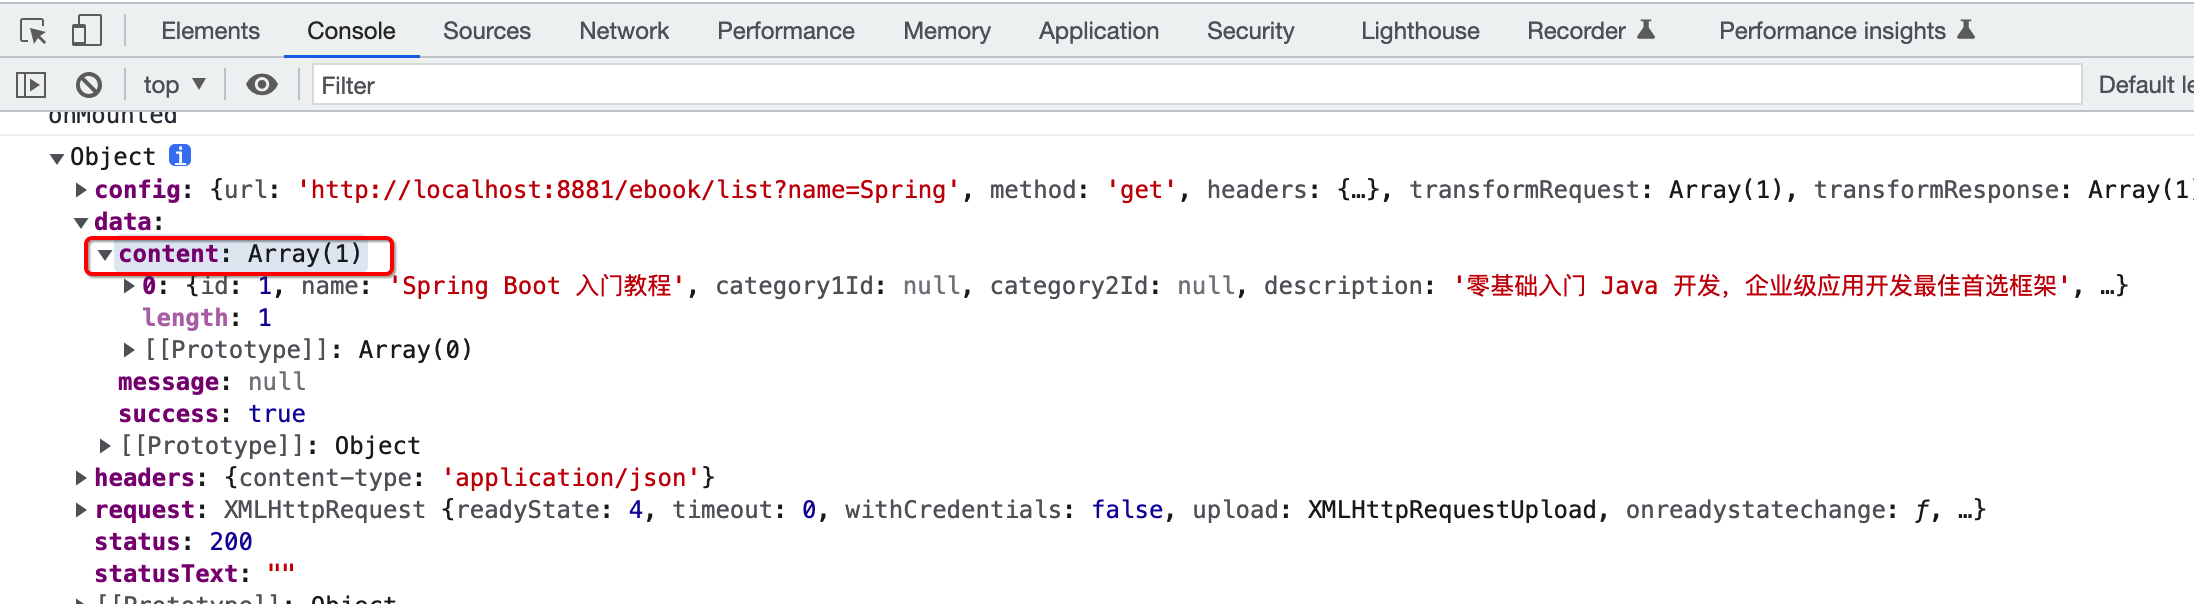
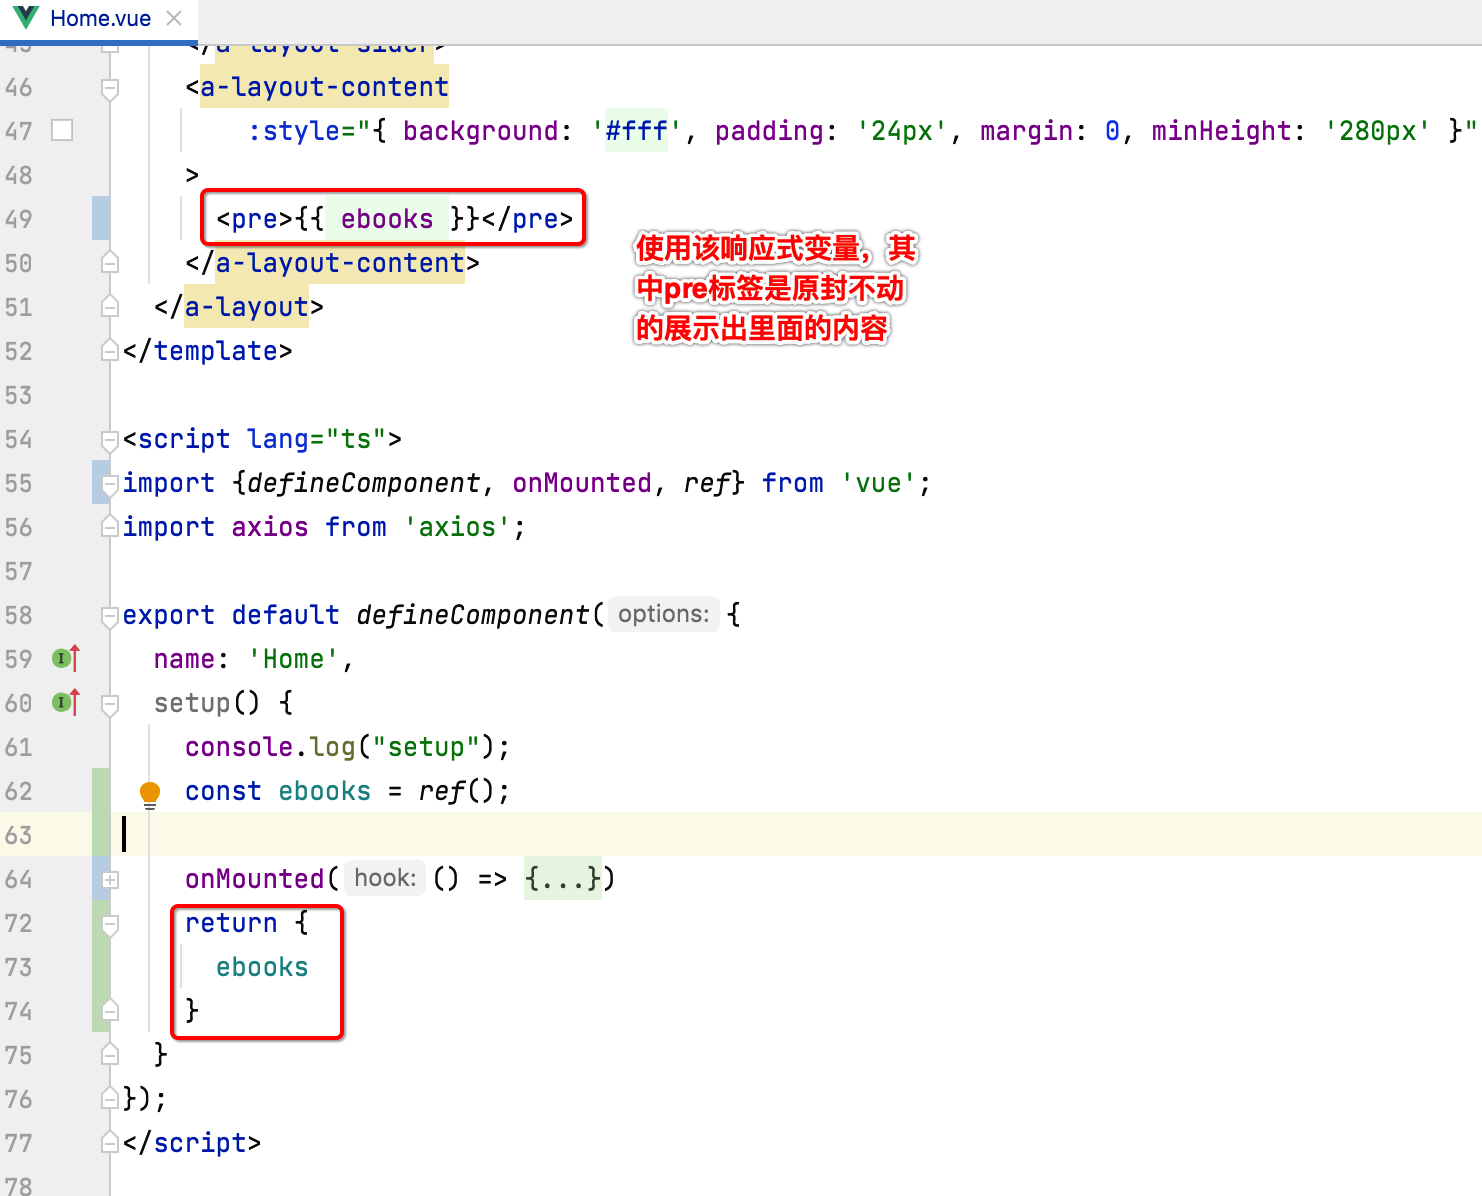
那么我们解析这个列表数据之后,如何显示在页面上呢?这里就需要使用到Vue3中的ref来实现数据绑定了,具体看一下的写法:

其中ref在Vue3中就是用来定义响应式数据用的,最后还有一个注意点,就是需要将数据从setup方法中return出去,这样html才能拿到响应式的变量,如下:
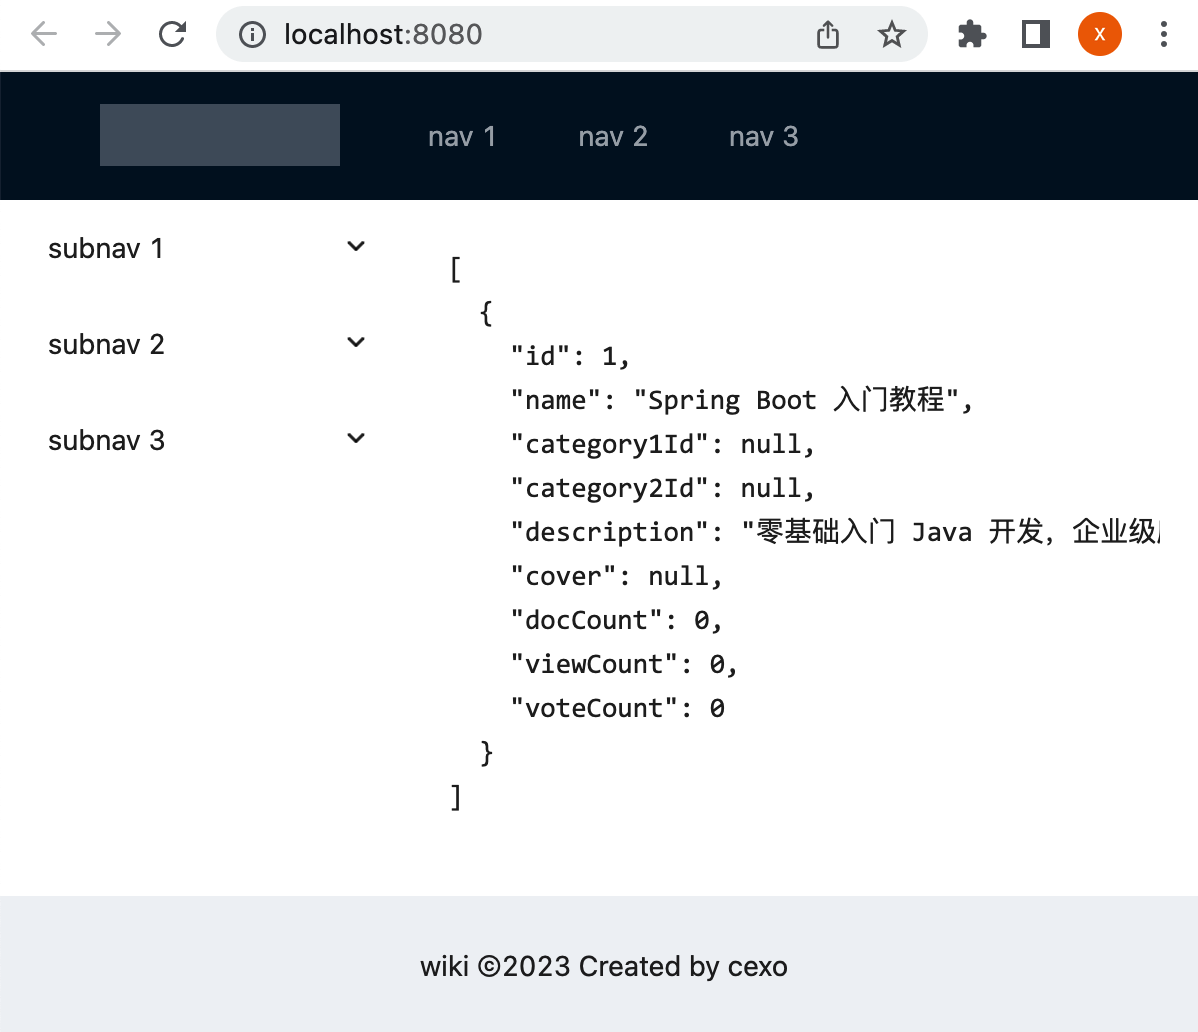
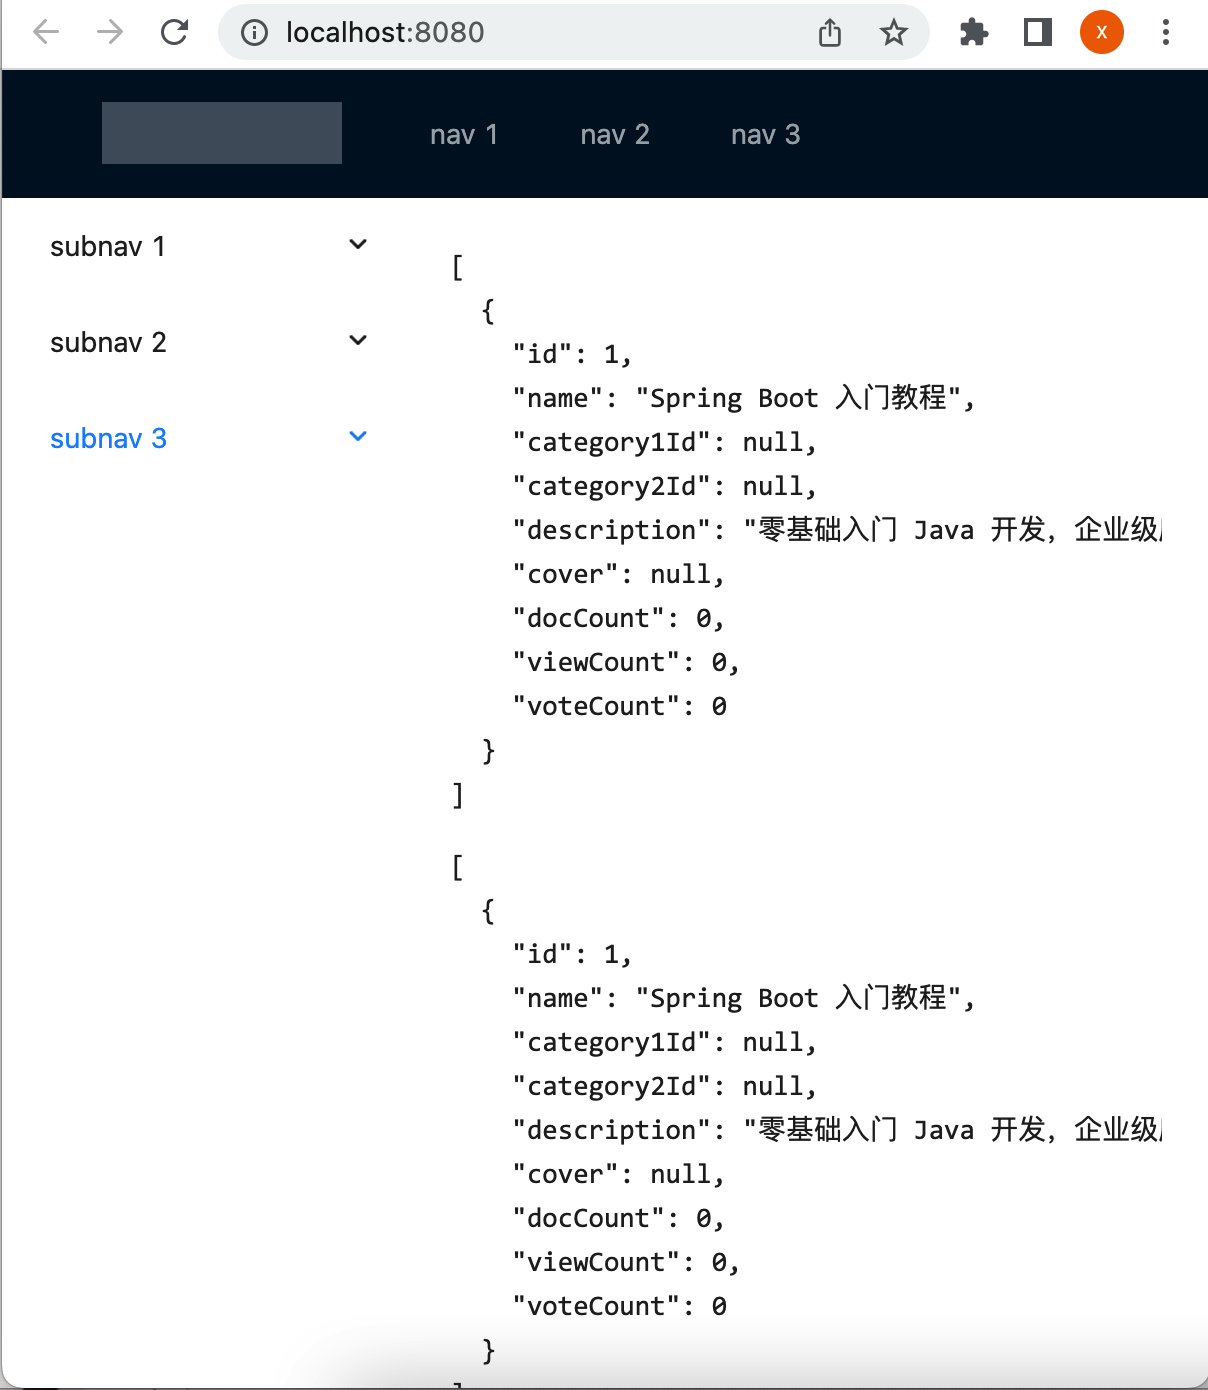
这时运行看一下:
使用Vue3 reactive实现数据绑定:
除了上面这种ref()实现数据的绑定之外,还有另外一种,使用reactive,它相对而言稍麻烦一些,如下:
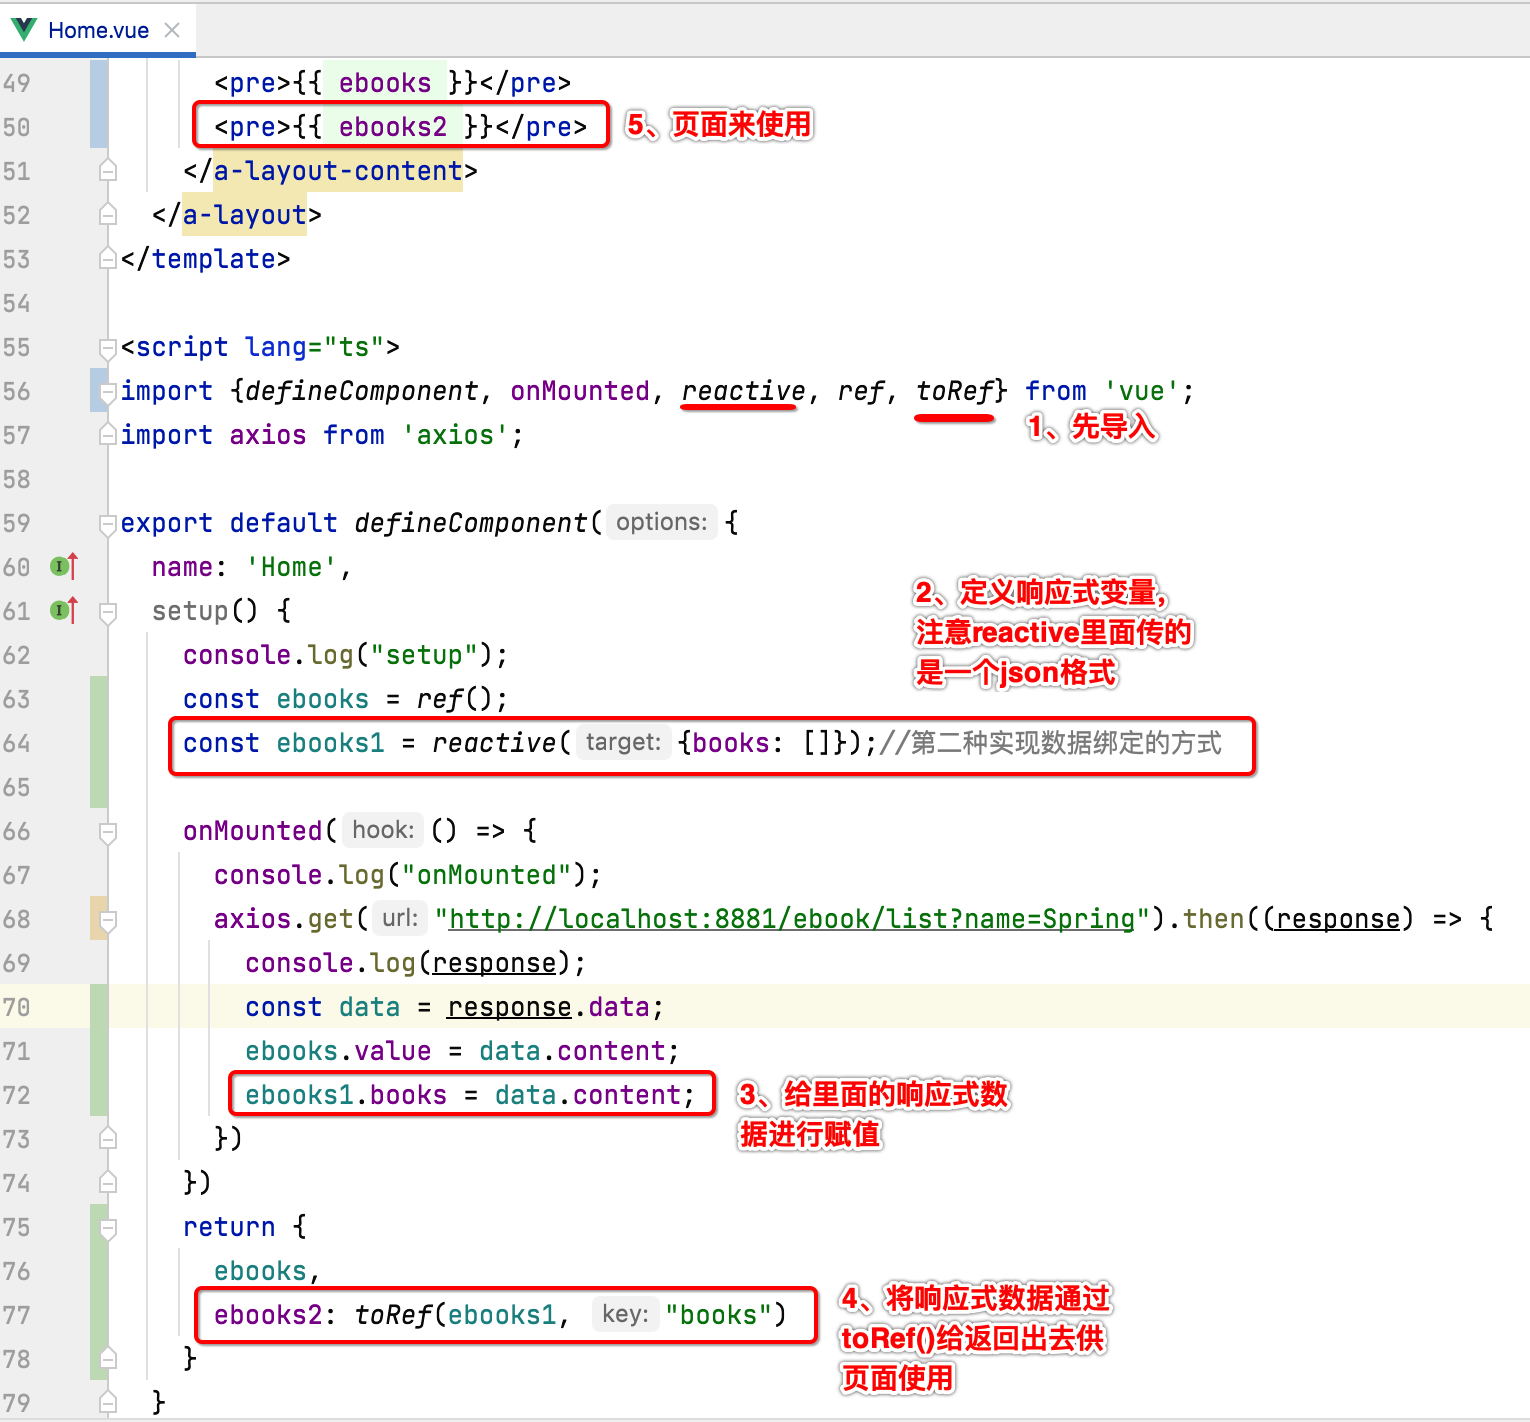
此时运行发现也能正常显示出来:
总结:
关于ref和reactive这两种绑定数据的方式,可以任选其一,不过通常在一个项目使用一种既可,我们这里使用稍简单一点的ref来进行界面数据的绑定了。
电子书列表界面展示:
找Ant Design Vue现成的组件:
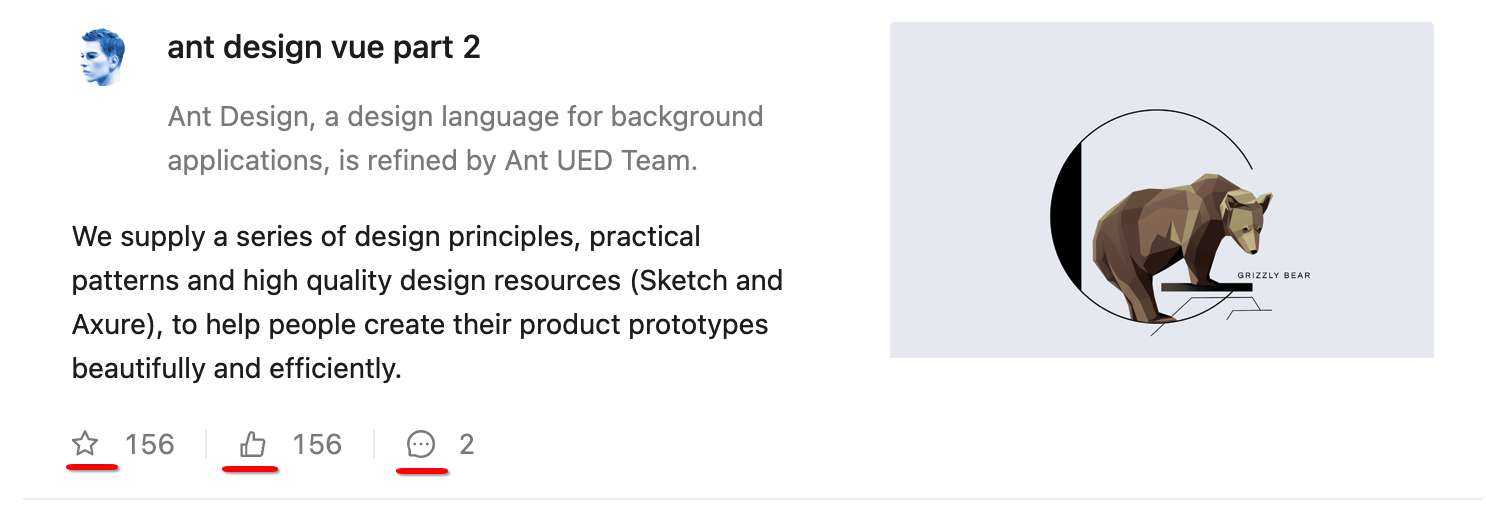
现在咱们已经可以成功的将后端的列表数据展现在h5界面上了,但是样式不对,接下来咱们上Ant Design Vue中来找相关的列表组件样式:
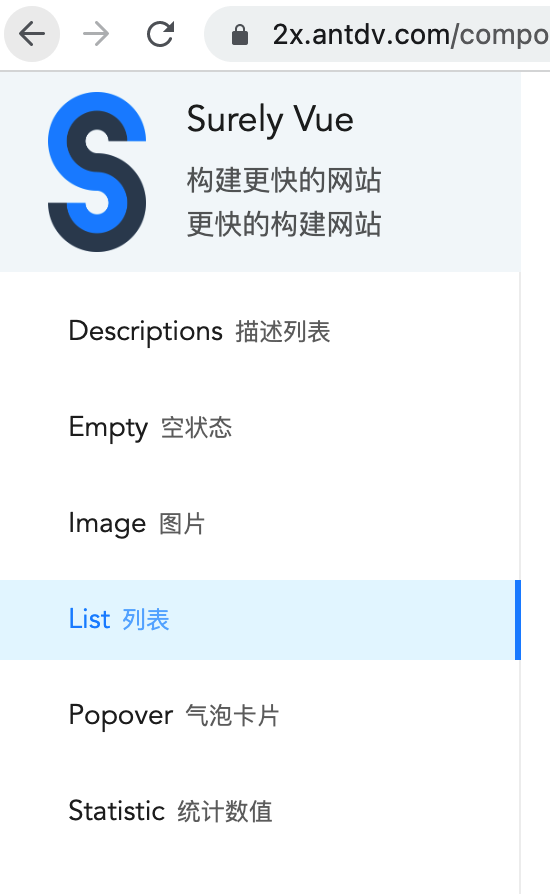
往下拉可以找到这么一个列表样式:
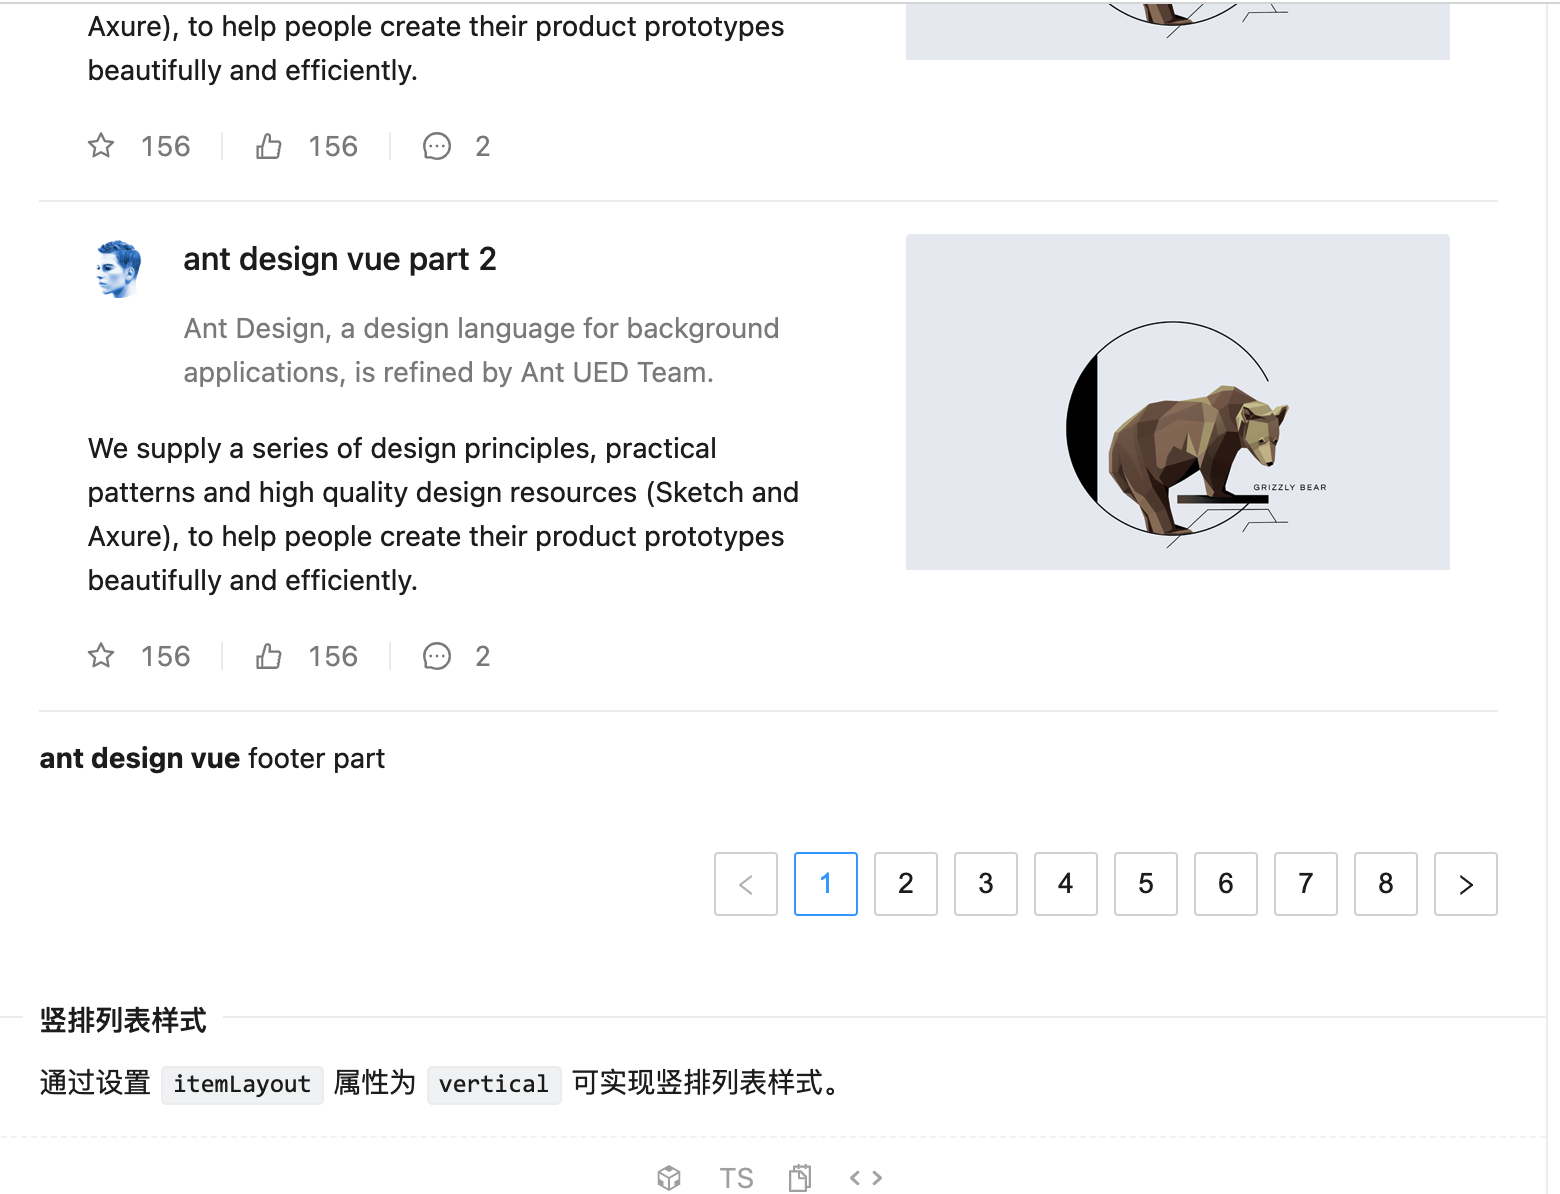
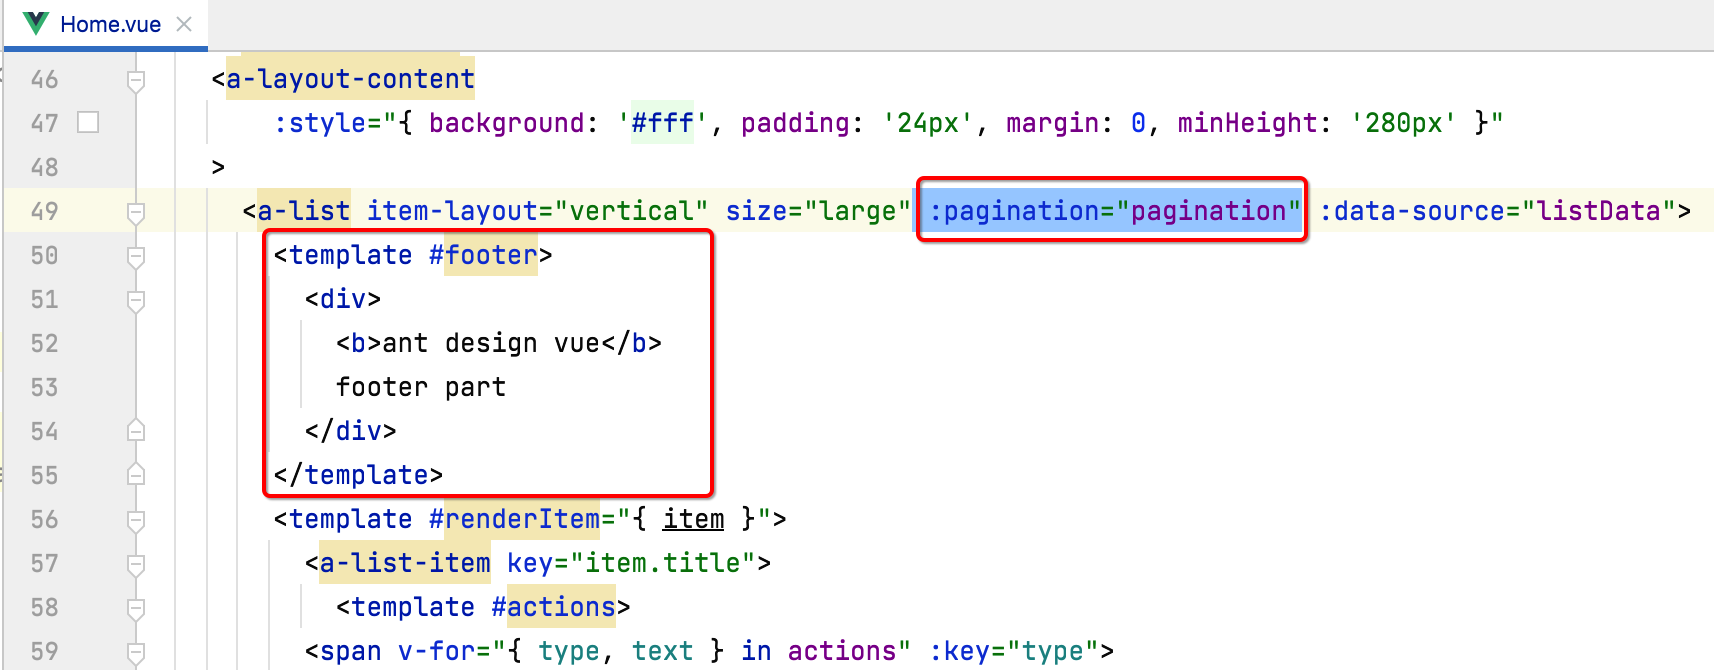
其中分页效果也已经有了,我们可以基于它来进行改造。
将Ant Design Vue样式集成到工程中:
接下来我们拷贝一下代码,将其弄到我们的vue页面中,整个Home.vue的代码如下:
<template>
<a-layout>
<a-layout-sider width="200" style="background: #fff">
<a-menu
mode="inline"
:style="{ height: '100%', borderRight: 0 }"
>
<a-sub-menu key="sub1">
<template #title>
<span>
<user-outlined/>
subnav 1
</span>
</template>
<a-menu-item key="1">option1</a-menu-item>
<a-menu-item key="2">option2</a-menu-item>
<a-menu-item key="3">option3</a-menu-item>
<a-menu-item key="4">option4</a-menu-item>
</a-sub-menu>
<a-sub-menu key="sub2">
<template #title>
<span>
<laptop-outlined/>
subnav 2
</span>
</template>
<a-menu-item key="5">option5</a-menu-item>
<a-menu-item key="6">option6</a-menu-item>
<a-menu-item key="7">option7</a-menu-item>
<a-menu-item key="8">option8</a-menu-item>
</a-sub-menu>
<a-sub-menu key="sub3">
<template #title>
<span>
<notification-outlined/>
subnav 3
</span>
</template>
<a-menu-item key="9">option9</a-menu-item>
<a-menu-item key="10">option10</a-menu-item>
<a-menu-item key="11">option11</a-menu-item>
<a-menu-item key="12">option12</a-menu-item>
</a-sub-menu>
</a-menu>
</a-layout-sider>
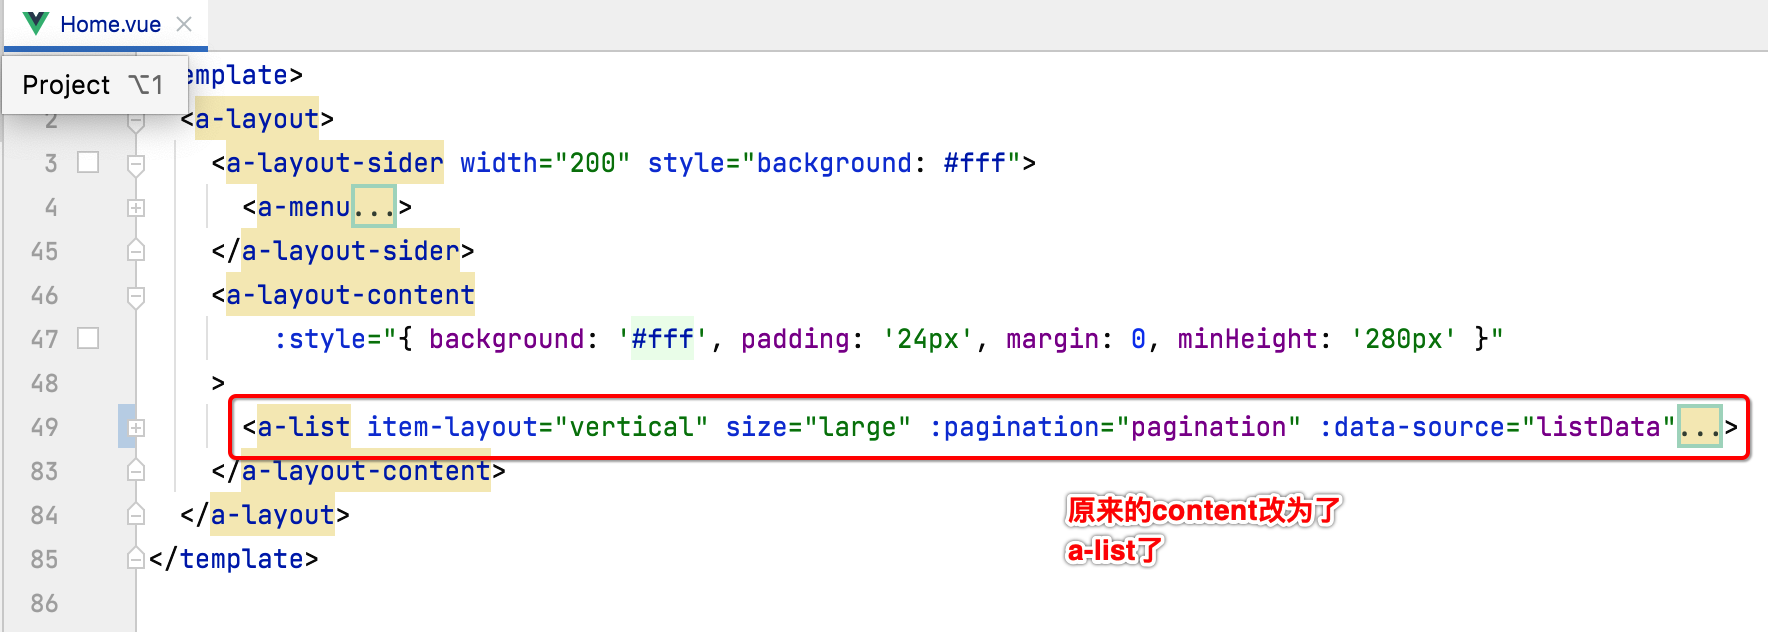
<a-layout-content
:style="{ background: '#fff', padding: '24px', margin: 0, minHeight: '280px' }"
>
<a-list item-layout="vertical" size="large" :pagination="pagination" :data-source="listData">
<template #footer>
<div>
<b>ant design vue</b>
footer part
</div>
</template>
<template #renderItem="{ item }">
<a-list-item key="item.title">
<template #actions>
<span v-for="{ type, text } in actions" :key="type">
<component v-bind:is="type" style="margin-right: 8px"/>
{{ text }}
</span>
</template>
<template #extra>
<img
width="272"
alt="logo"
src="https://gw.alipayobjects.com/zos/rmsportal/mqaQswcyDLcXyDKnZfES.png"
/>
</template>
<a-list-item-meta :description="item.description">
<template #title>
<a :href="item.href">{{ item.title }}</a>
</template>
<template #avatar>
<a-avatar :src="item.avatar"/>
</template>
</a-list-item-meta>
{{ item.content }}
</a-list-item>
</template>
</a-list>
</a-layout-content>
</a-layout>
</template>
<script lang="ts">
import {defineComponent, onMounted, reactive, ref, toRef} from 'vue';
import axios from 'axios';
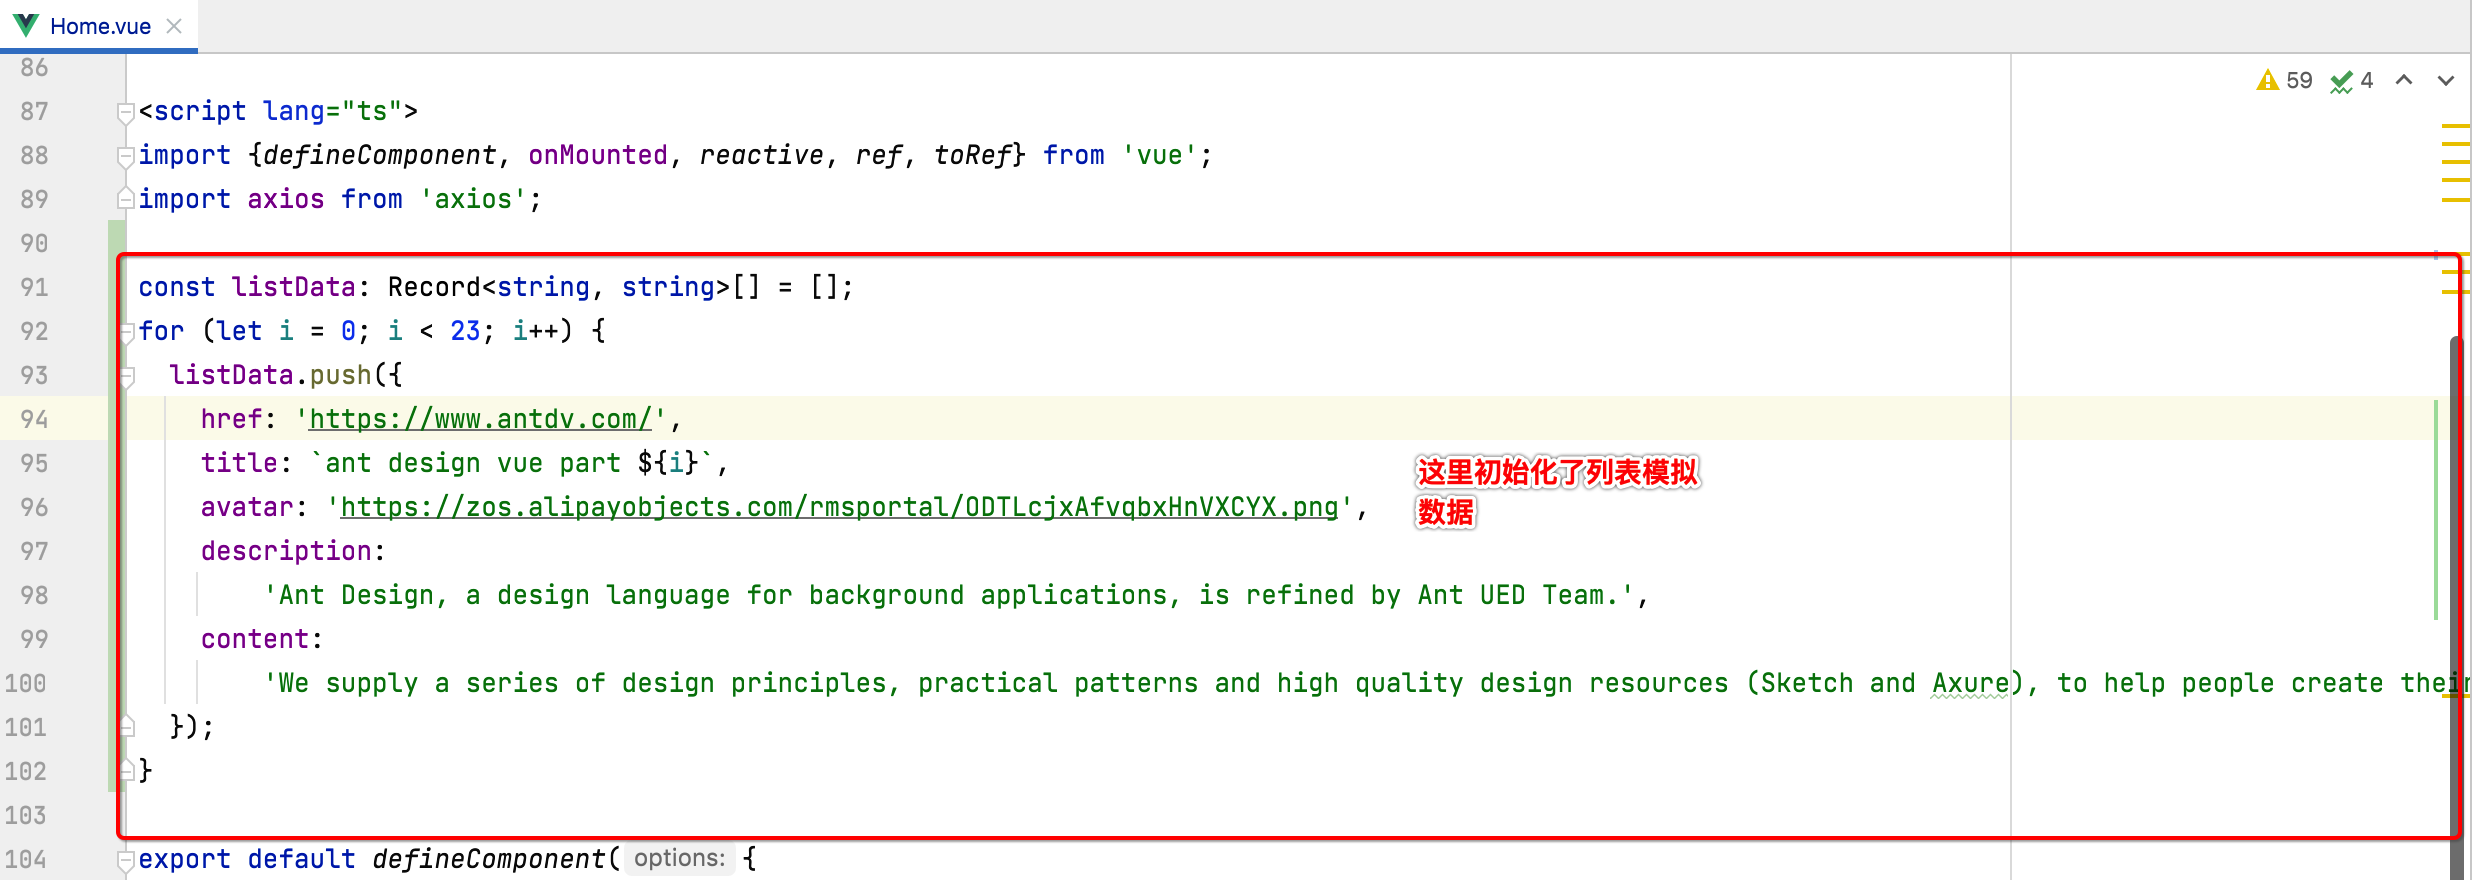
const listData: Record<string, string>[] = [];
for (let i = 0; i < 23; i++) {
listData.push({
href: 'https://www.antdv.com/',
title: `ant design vue part ${i}`,
avatar: 'https://zos.alipayobjects.com/rmsportal/ODTLcjxAfvqbxHnVXCYX.png',
description:
'Ant Design, a design language for background applications, is refined by Ant UED Team.',
content:
'We supply a series of design principles, practical patterns and high quality design resources (Sketch and Axure), to help people create their product prototypes beautifully and efficiently.',
});
}
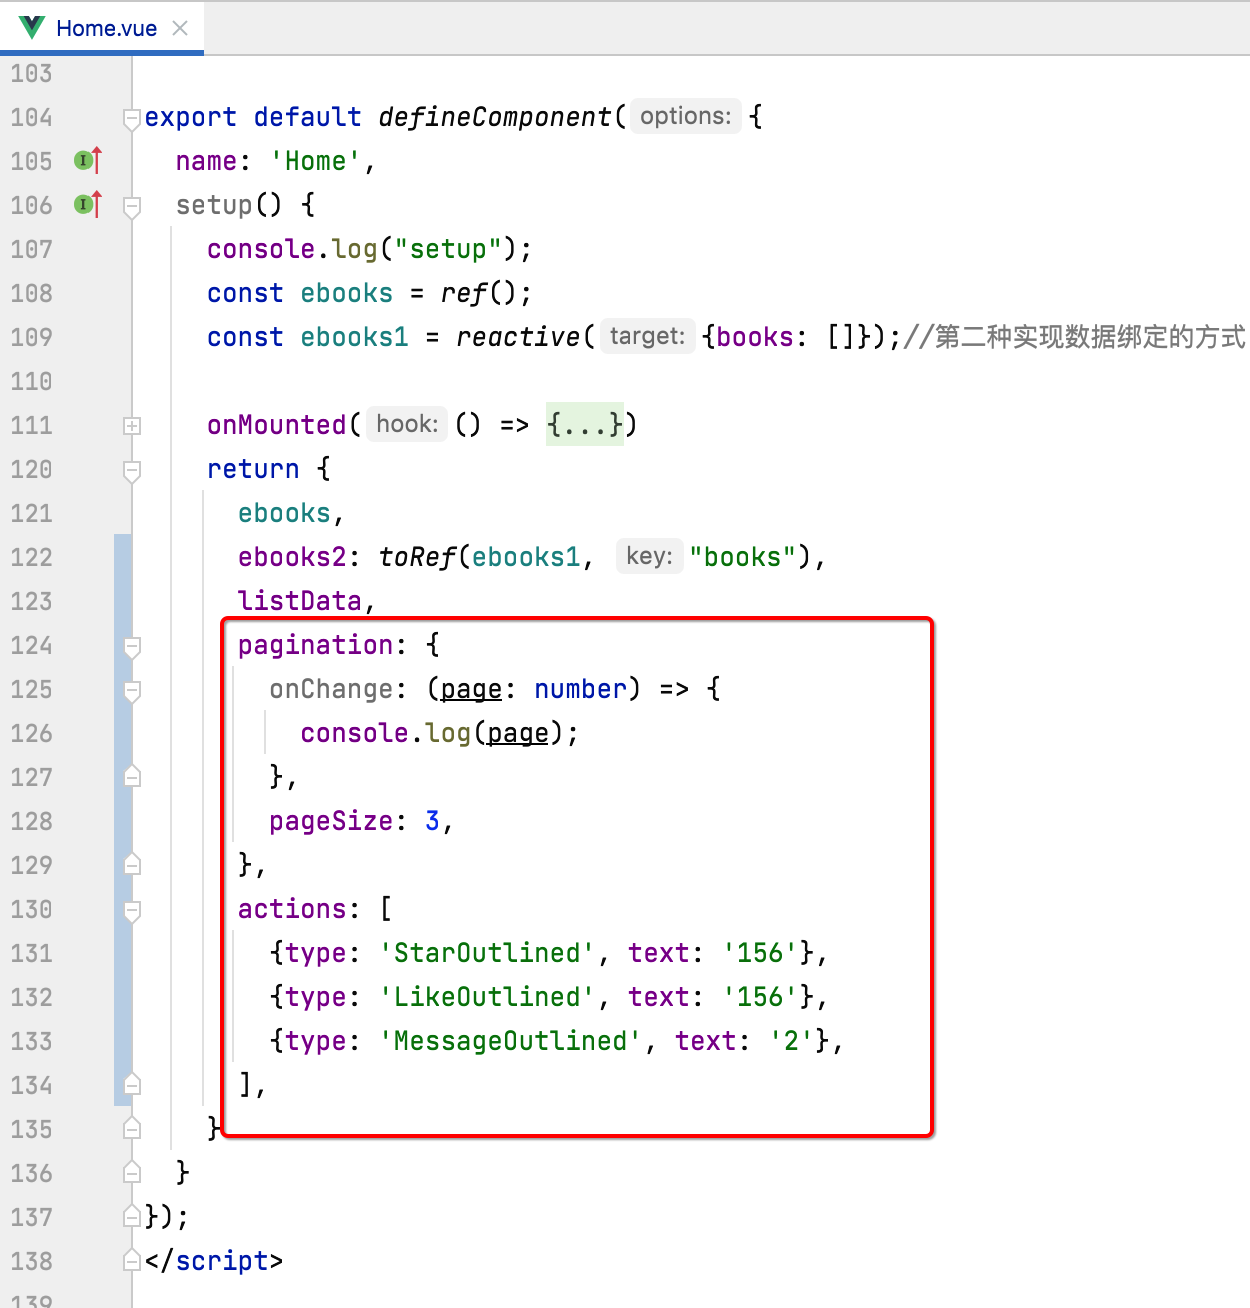
export default defineComponent({
name: 'Home',
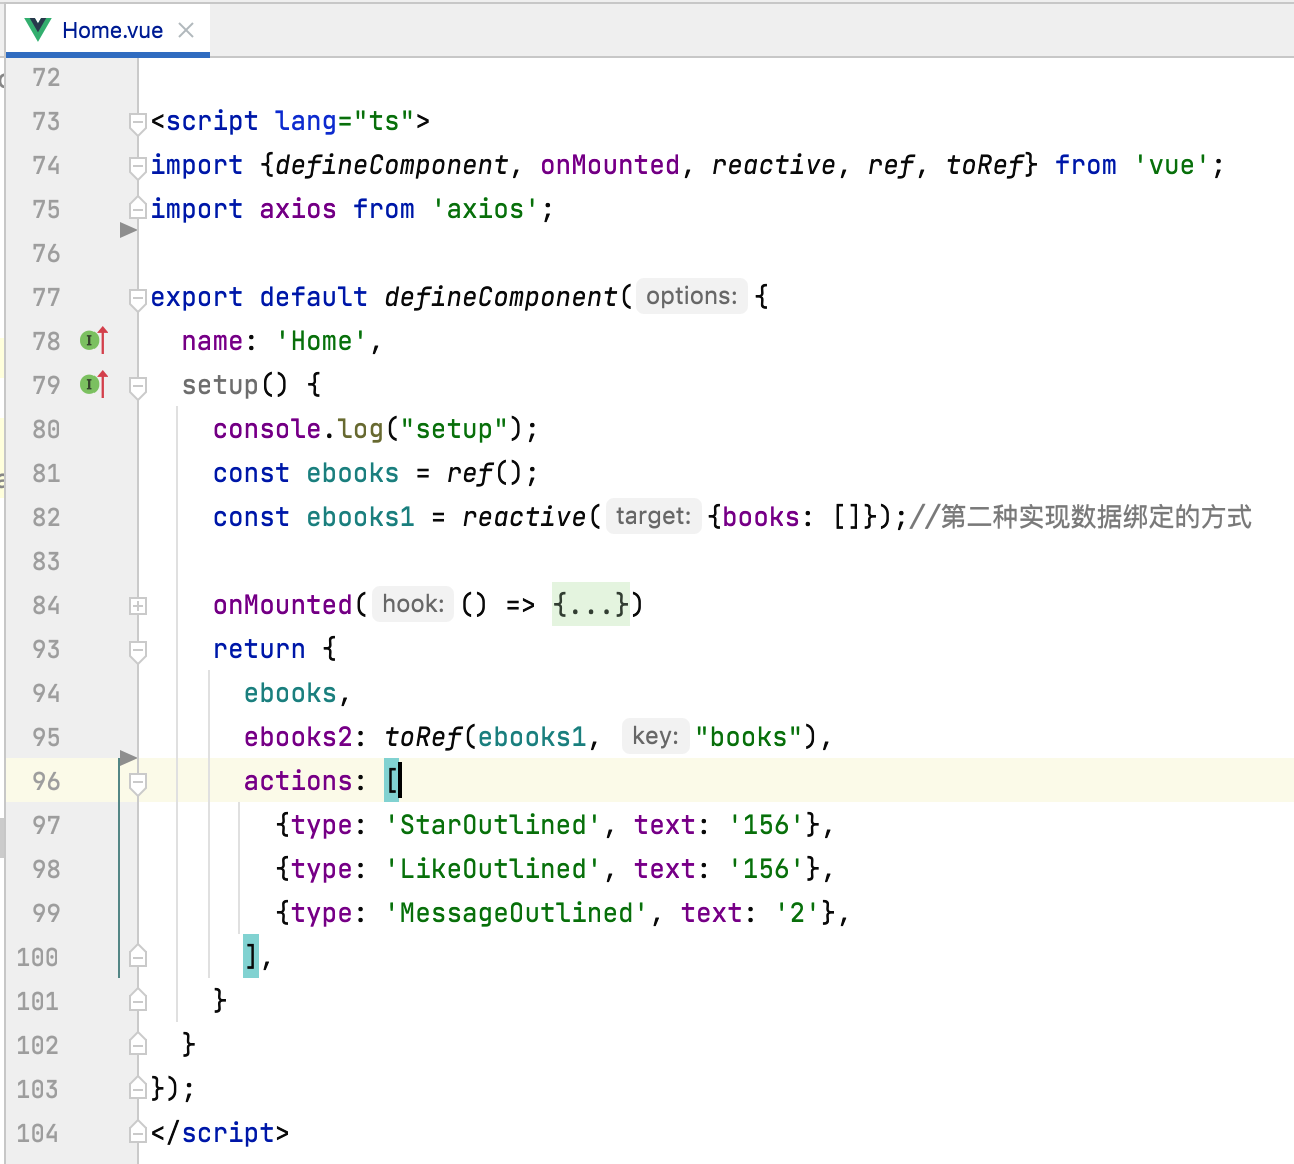
setup() {
console.log("setup");
const ebooks = ref();
const ebooks1 = reactive({books: []});//第二种实现数据绑定的方式
onMounted(() => {
console.log("onMounted");
axios.get("http://localhost:8881/ebook/list?name=Spring").then((response) => {
console.log(response);
const data = response.data;
ebooks.value = data.content;
ebooks1.books = data.content;
})
})
return {
ebooks,
ebooks2: toRef(ebooks1, "books"),
listData,
pagination: {
onChange: (page: number) => {
console.log(page);
},
pageSize: 3,
},
actions: [
{type: 'StarOutlined', text: '156'},
{type: 'LikeOutlined', text: '156'},
{type: 'MessageOutlined', text: '2'},
],
}
}
});
</script>
其中主要是改了这几块,代码是原封不动的从Ant Design Vue中来拷贝的:
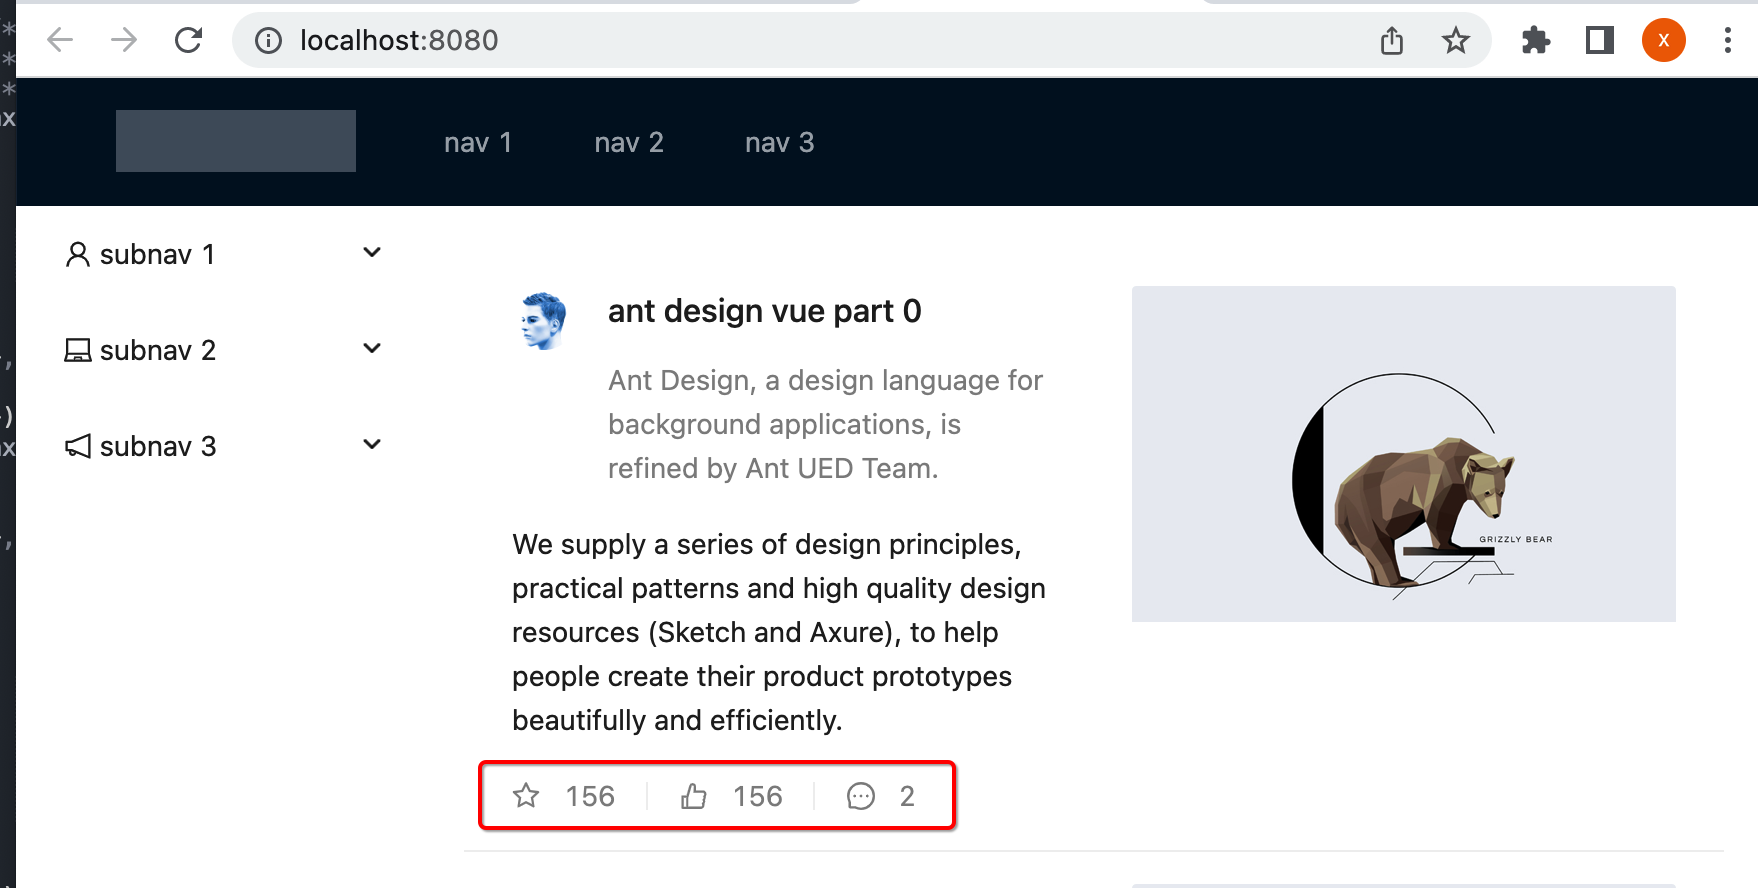
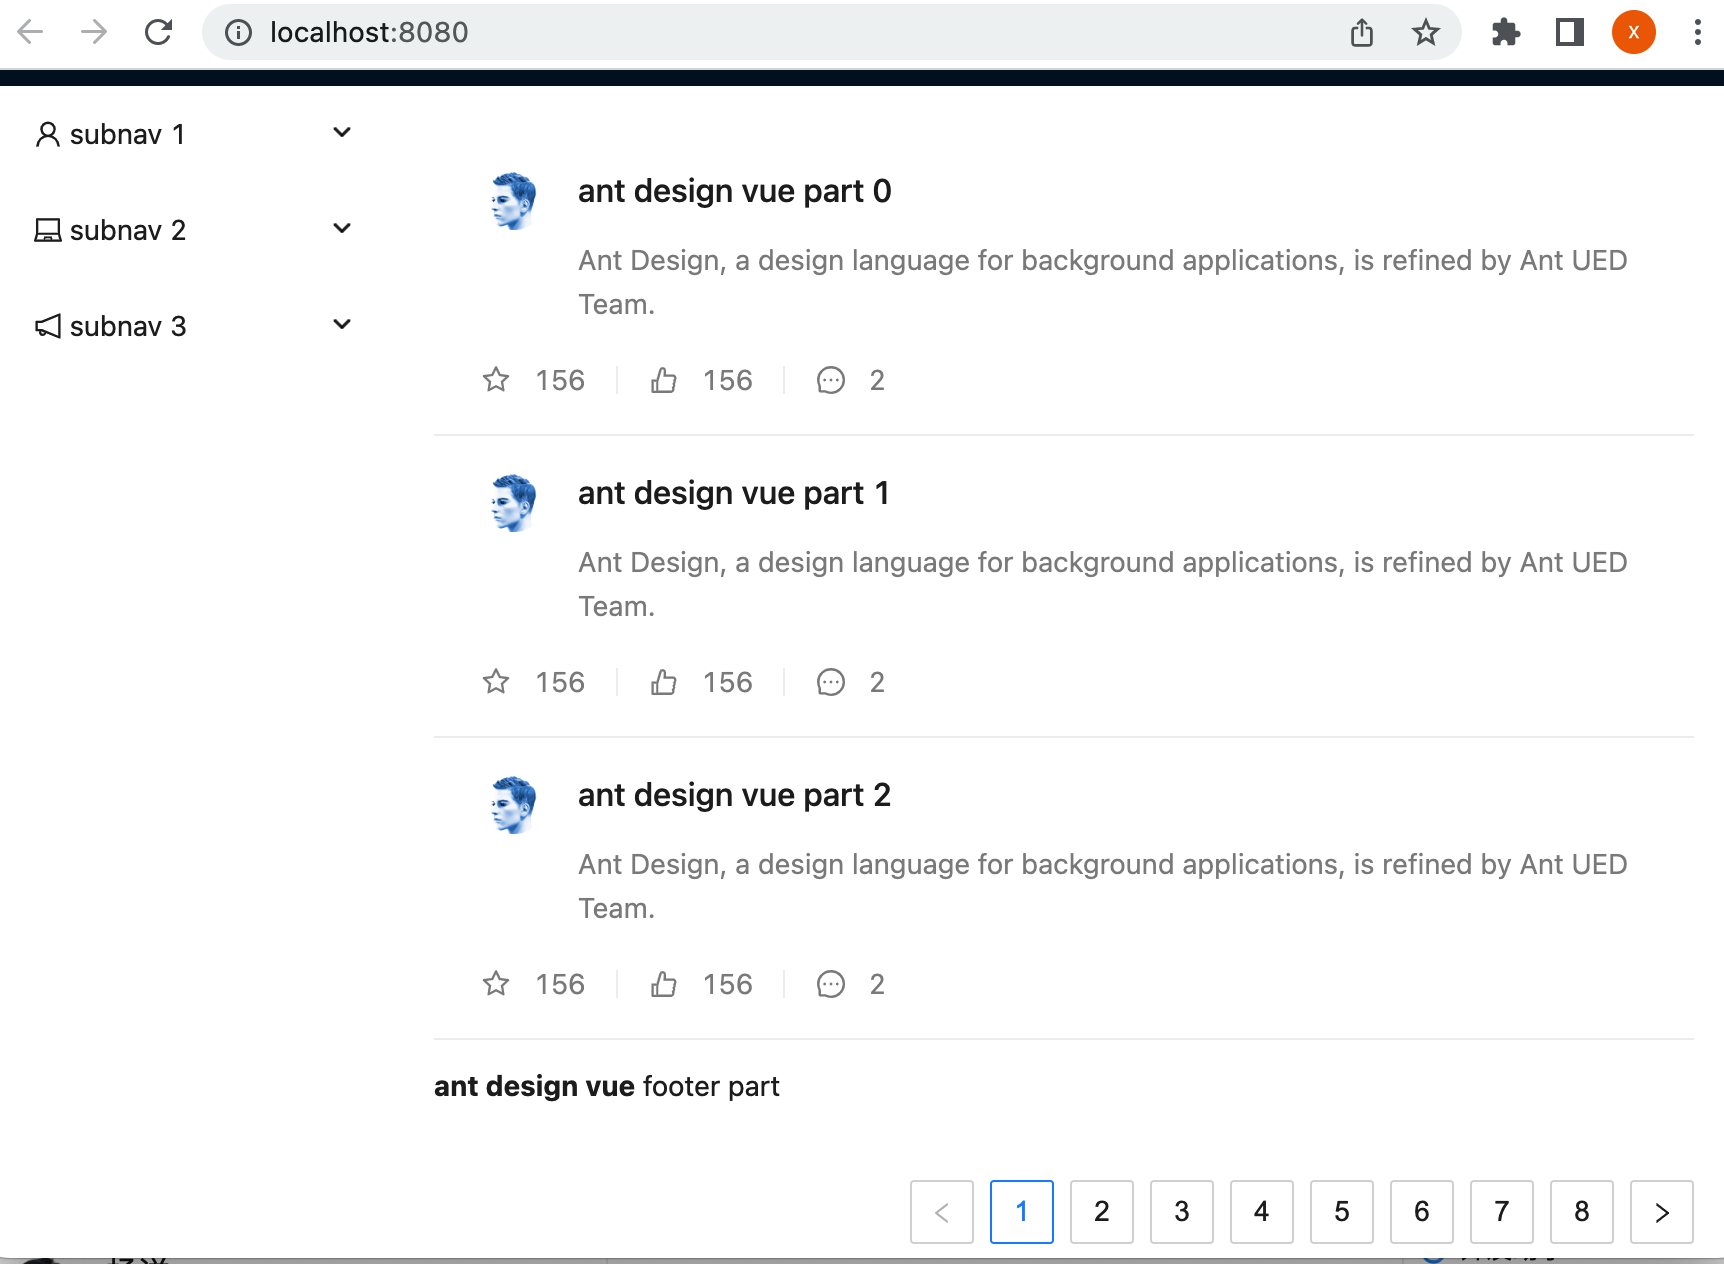
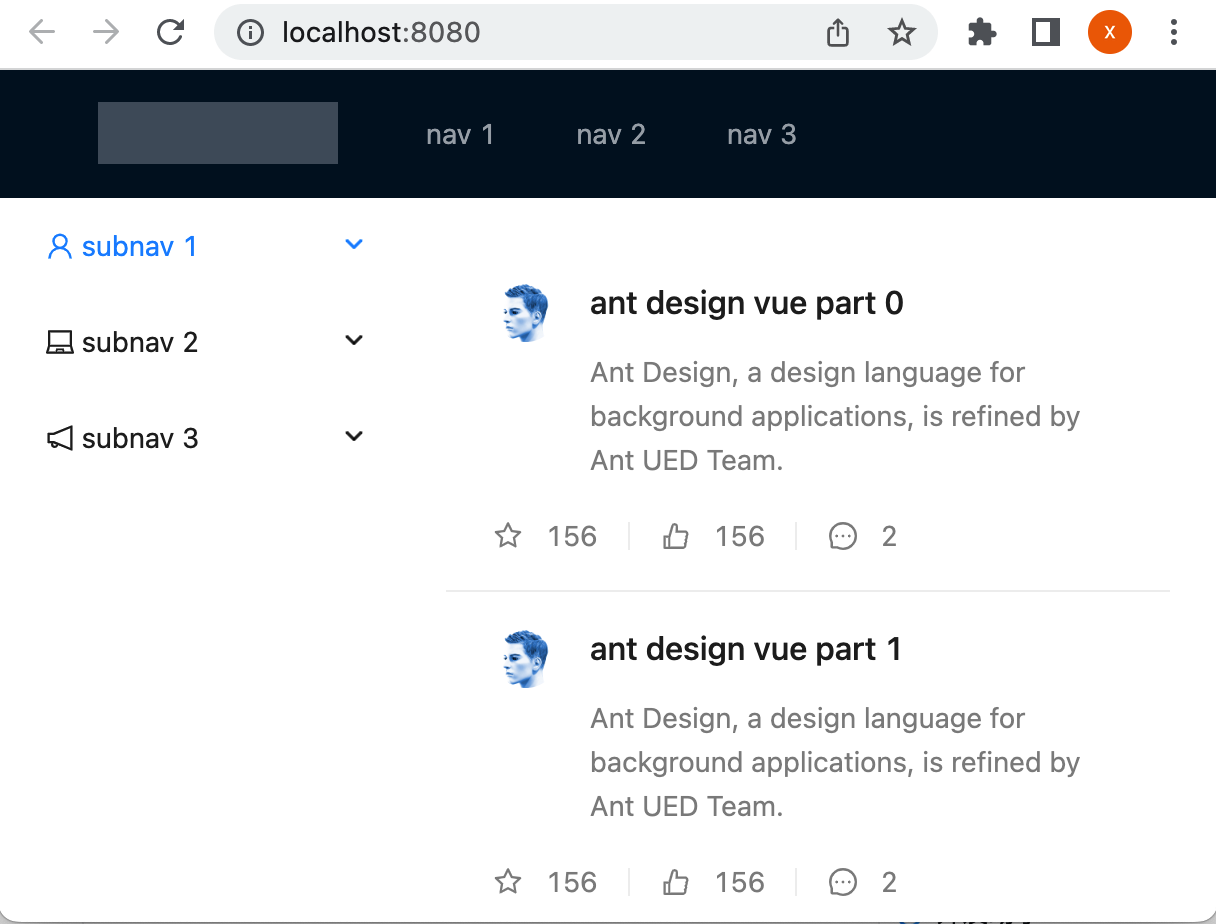
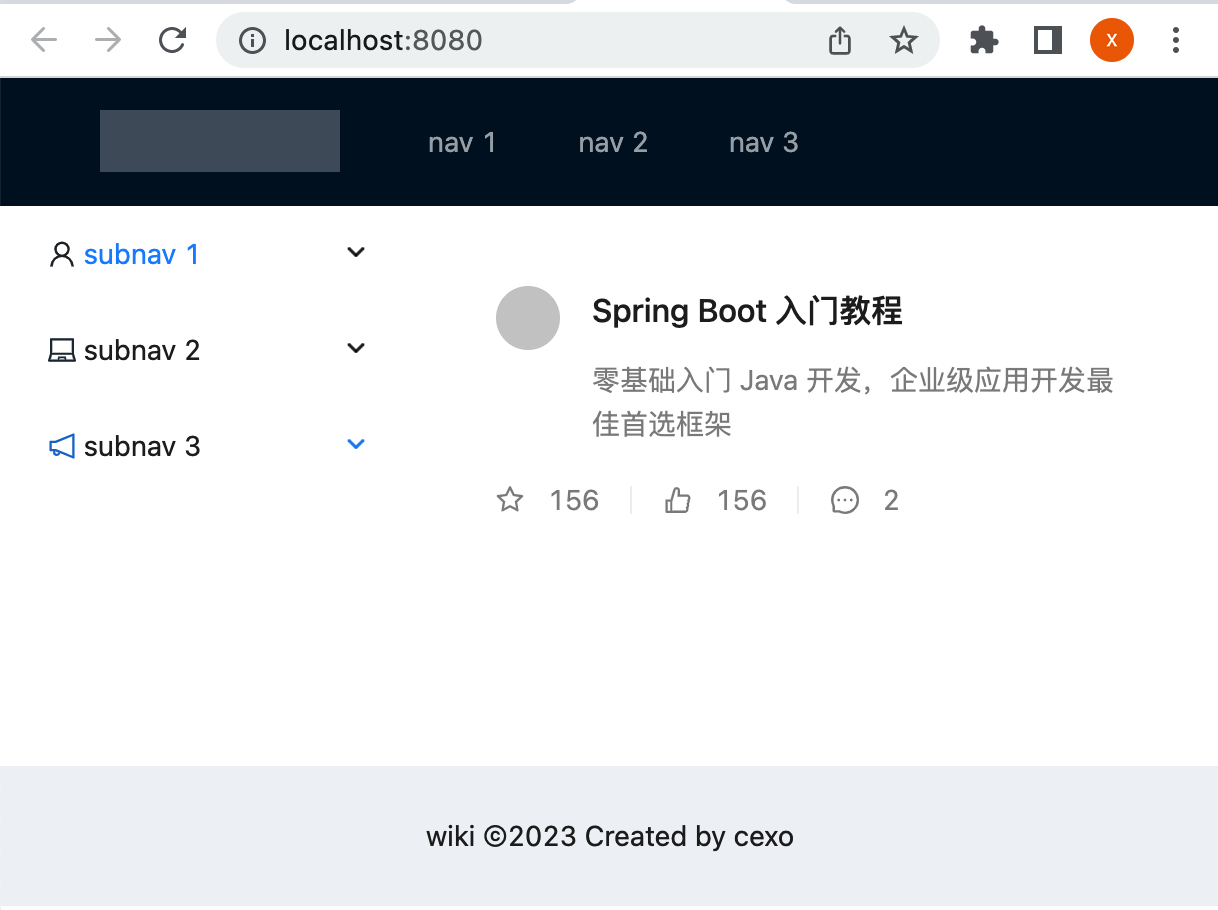
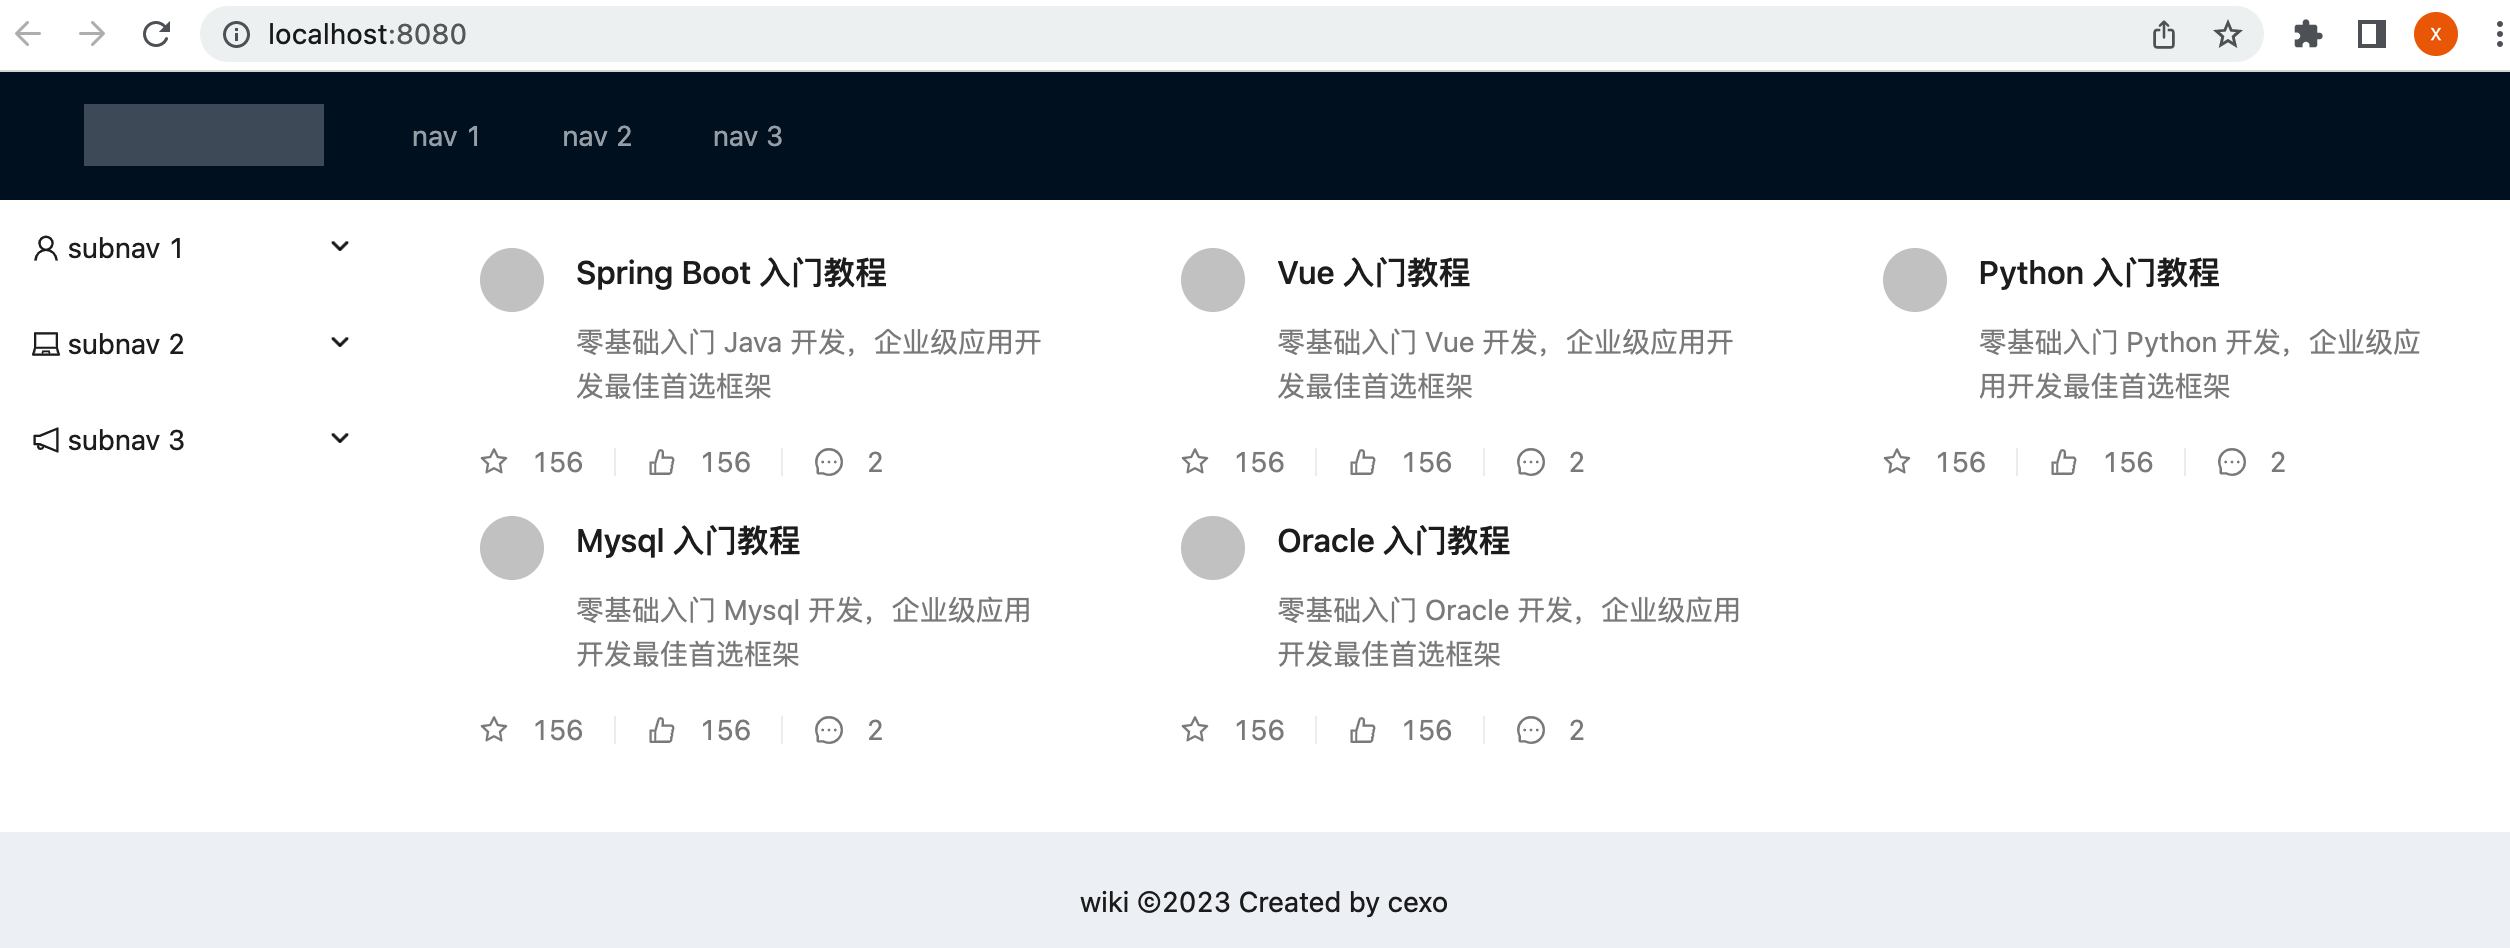
此时预览一下效果:
效果还挺赞的。
解决图标显示不出的问题:
对于目前集成的效果中,有一个样式上的问题,就是对于这块的图标木有显示出来:
看看目前长的样子:
接下来解决它,其实是因为我们没有安装图标库,从官网了解一下:
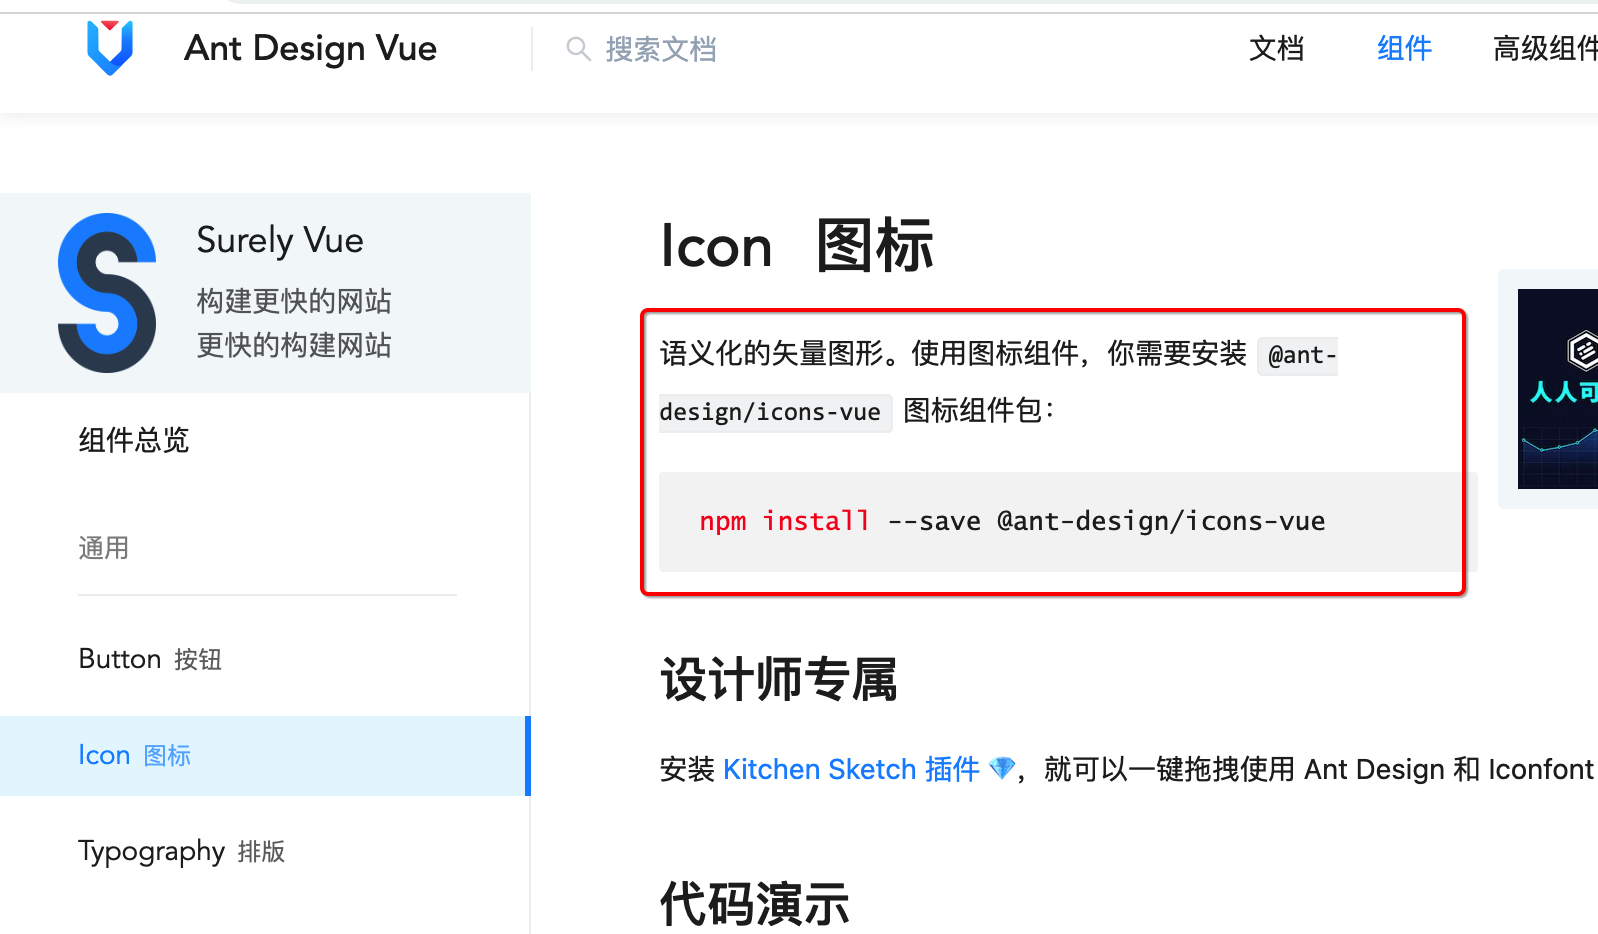
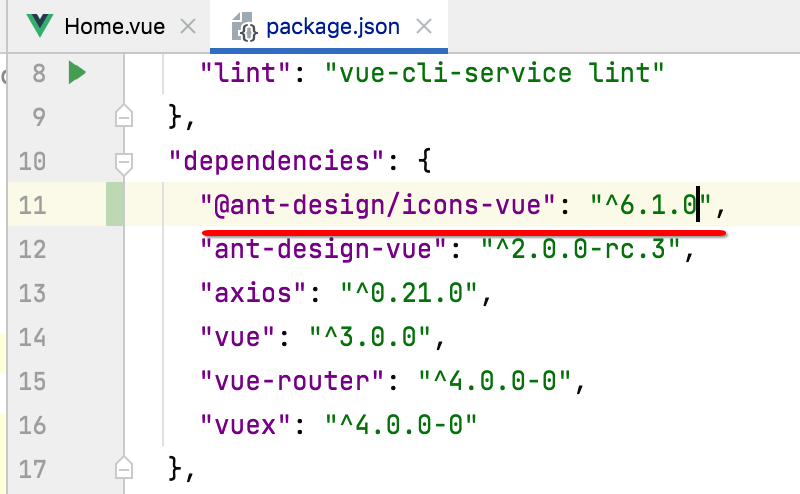
所以安装一下:
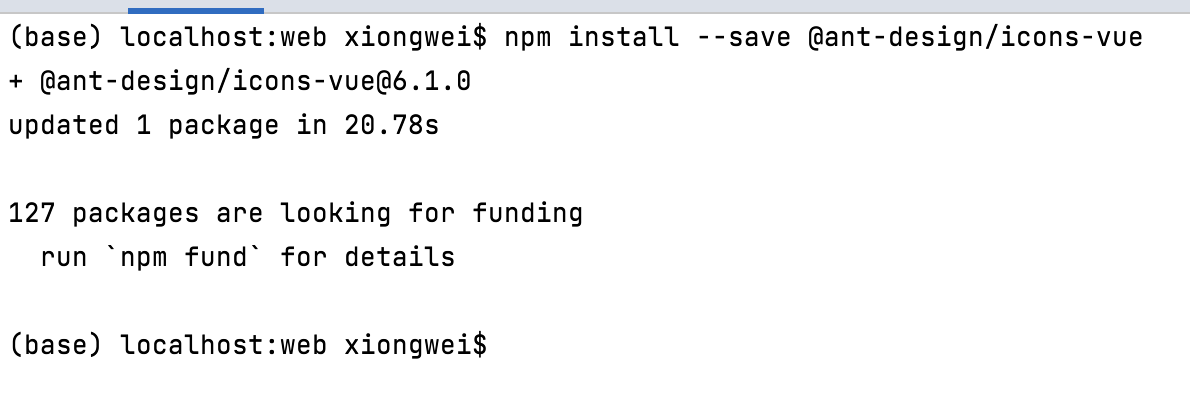
此时在package.json中就多了这么一个依赖了:
接下来则需要将图标导入进来,具体如下:
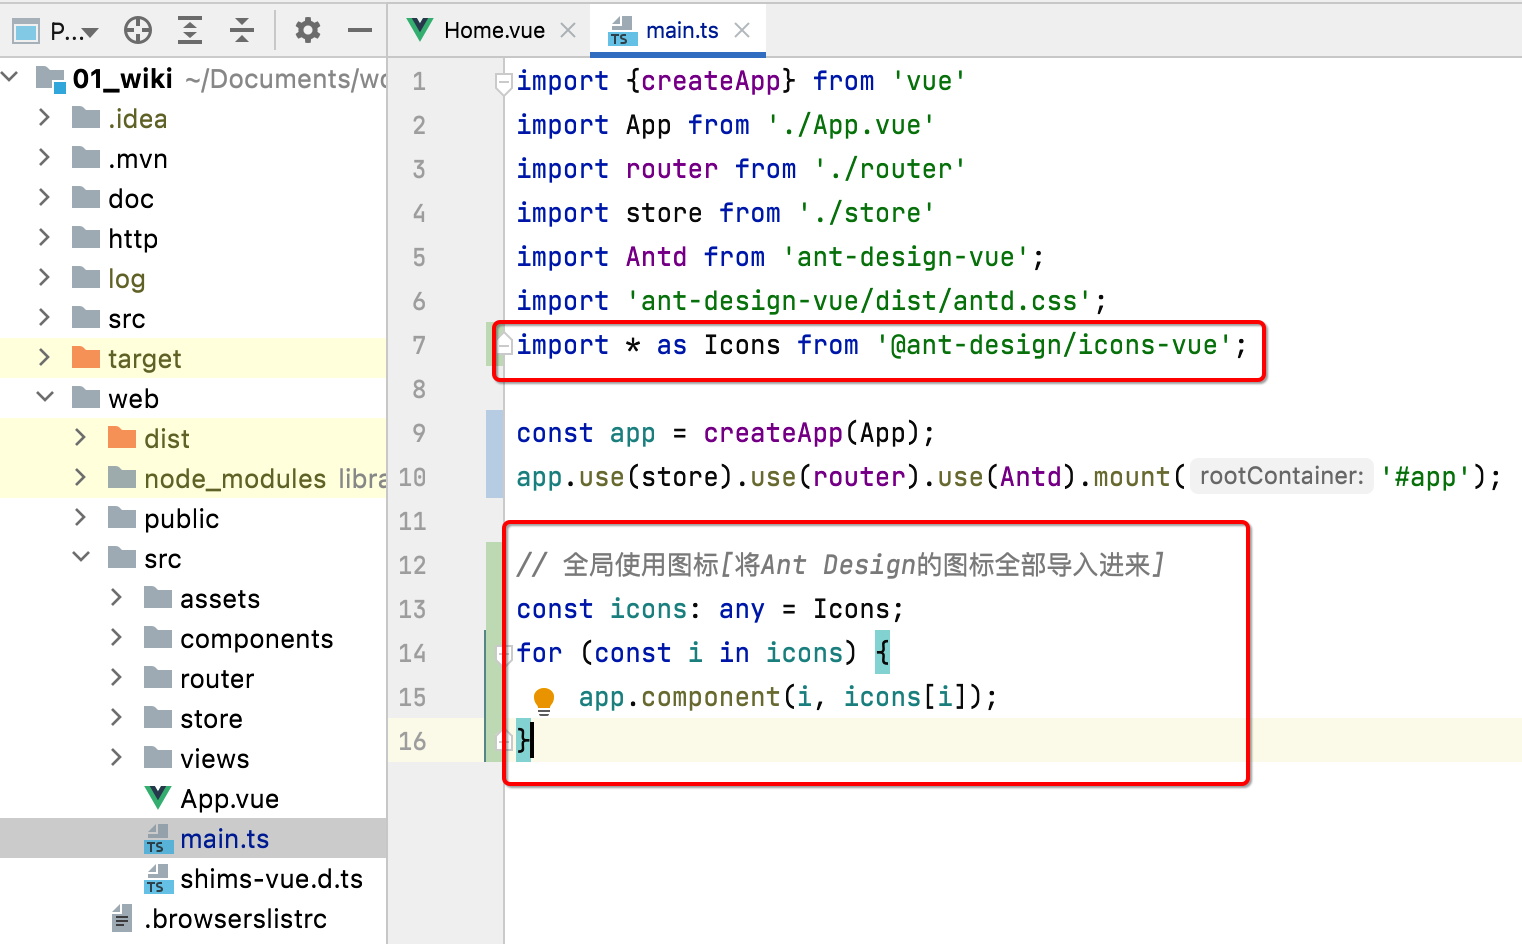
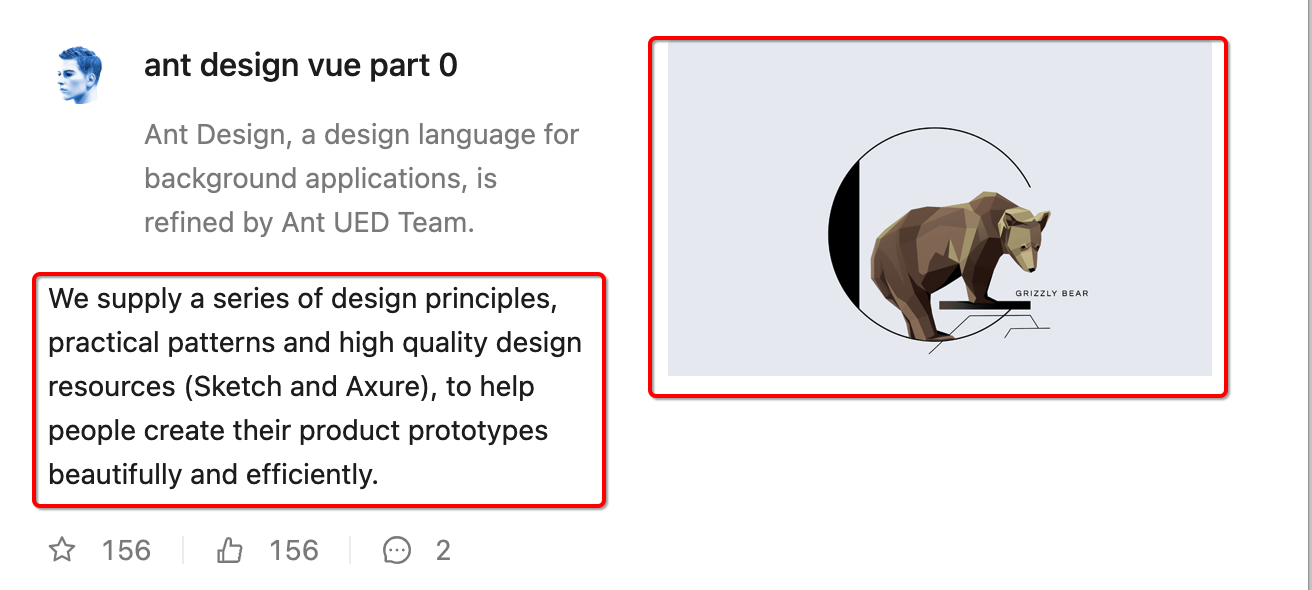
这样图标就可以正常的显示了:
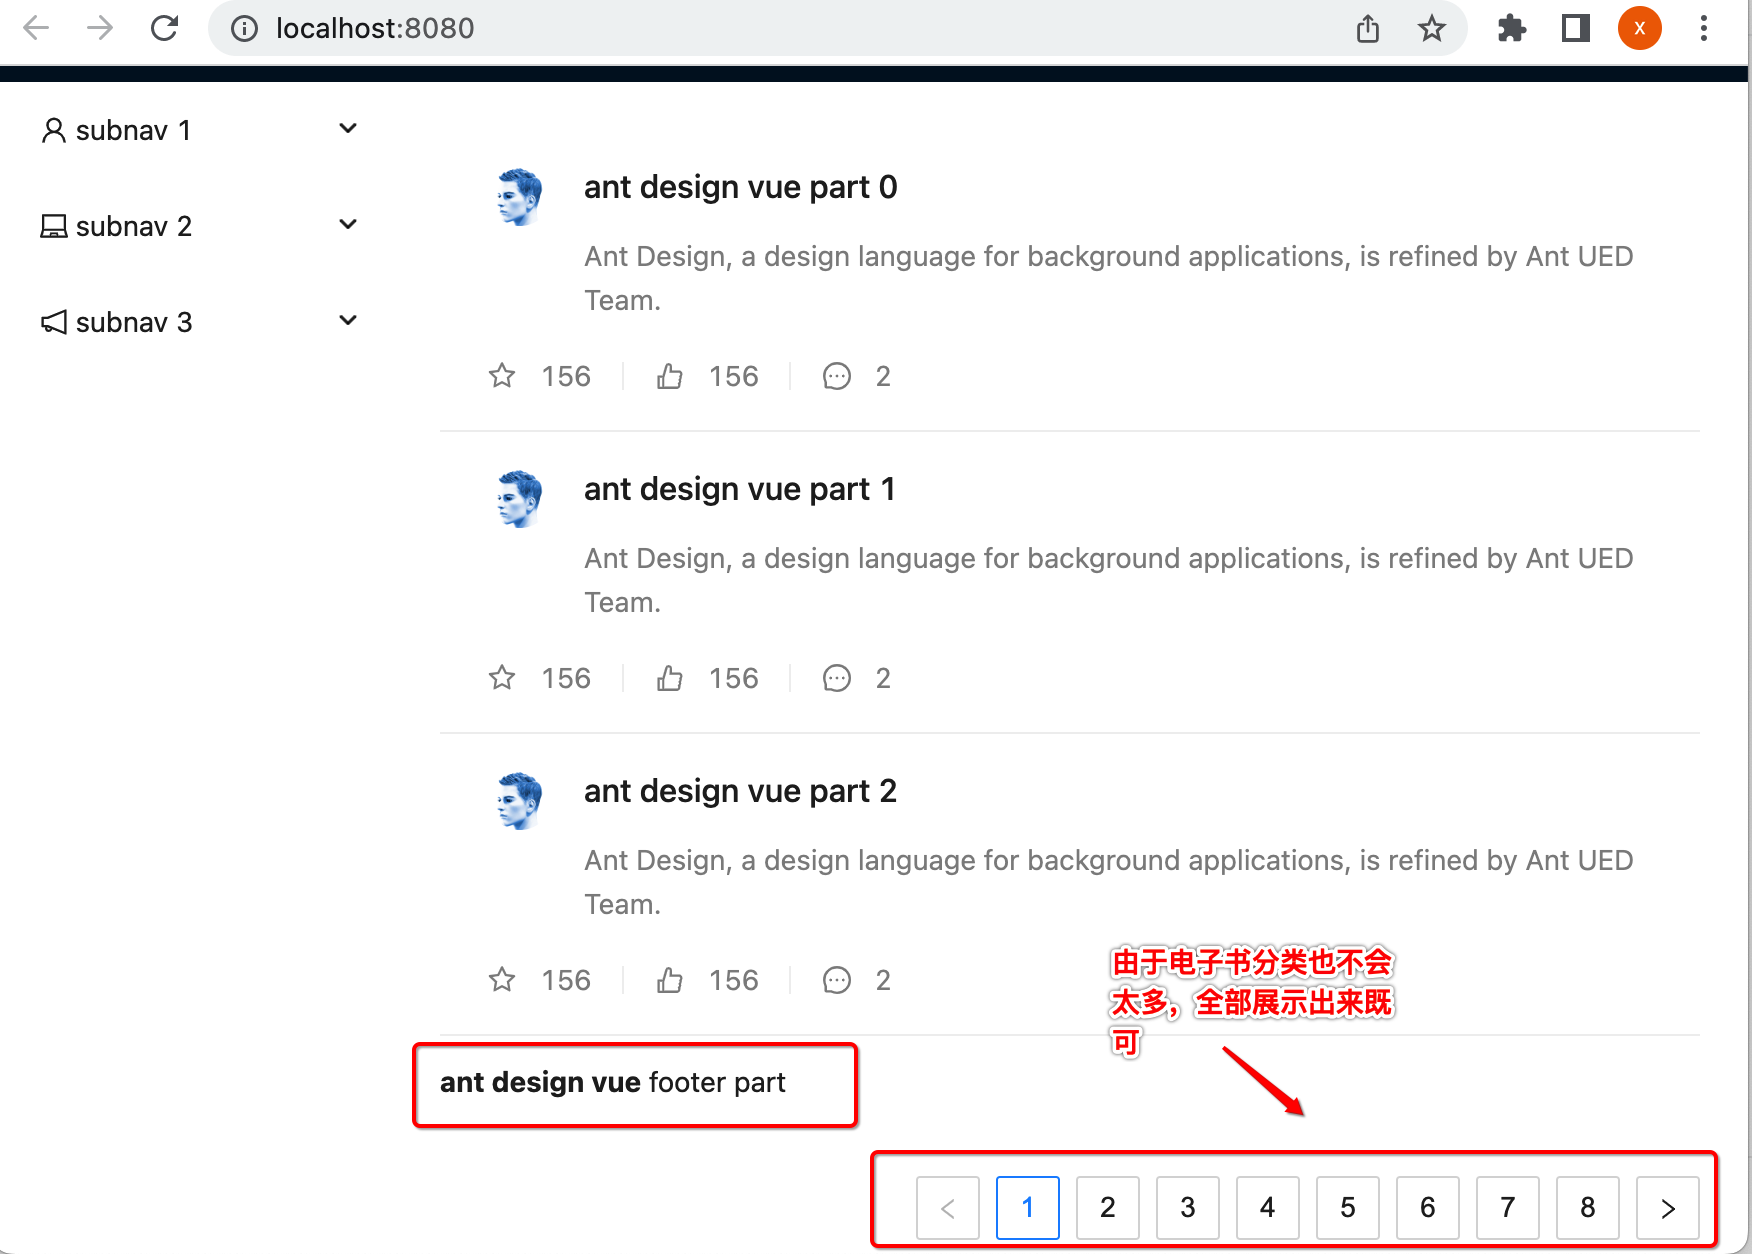
删除多余的列表元素:
接下来将界面上不需要的元素给删除,首先是这两块:
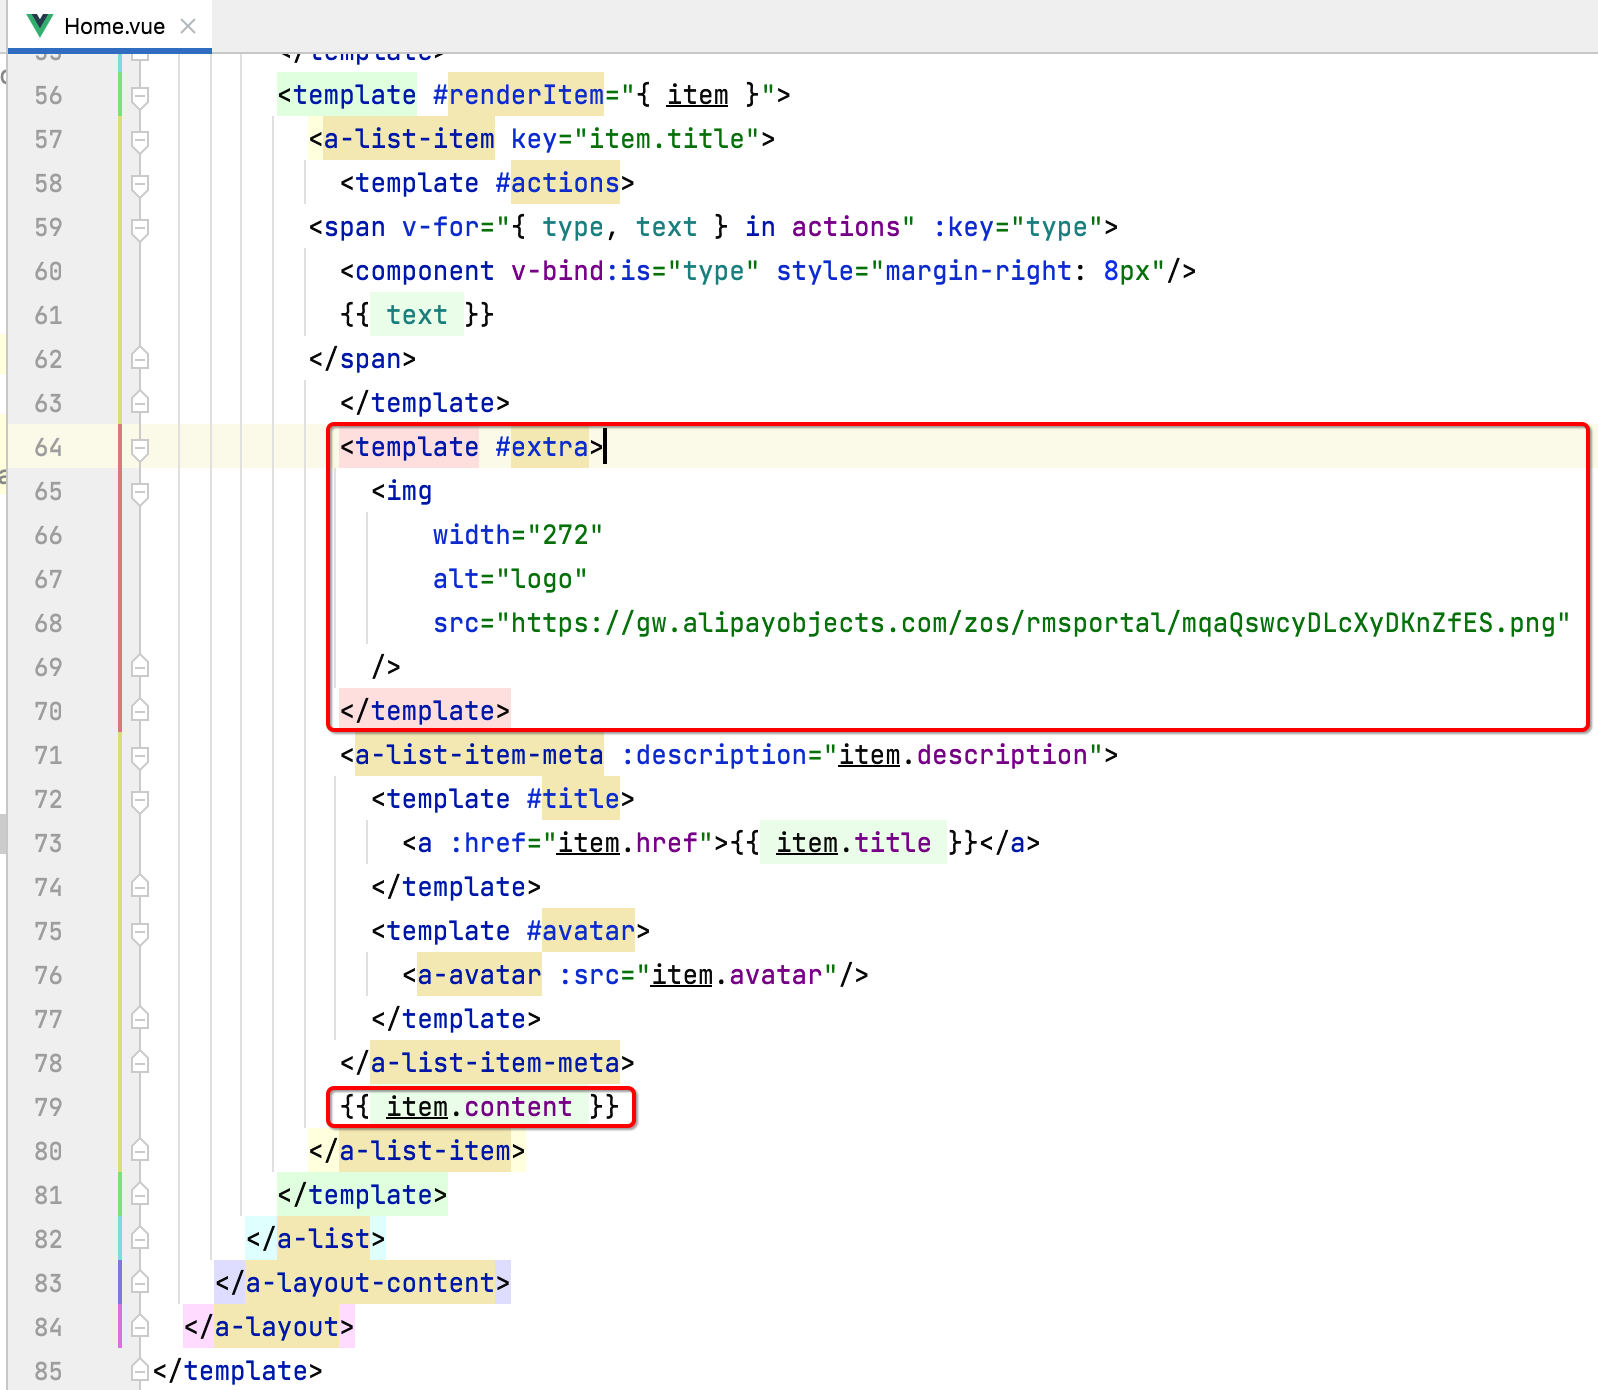
将其删掉:
预览一下:
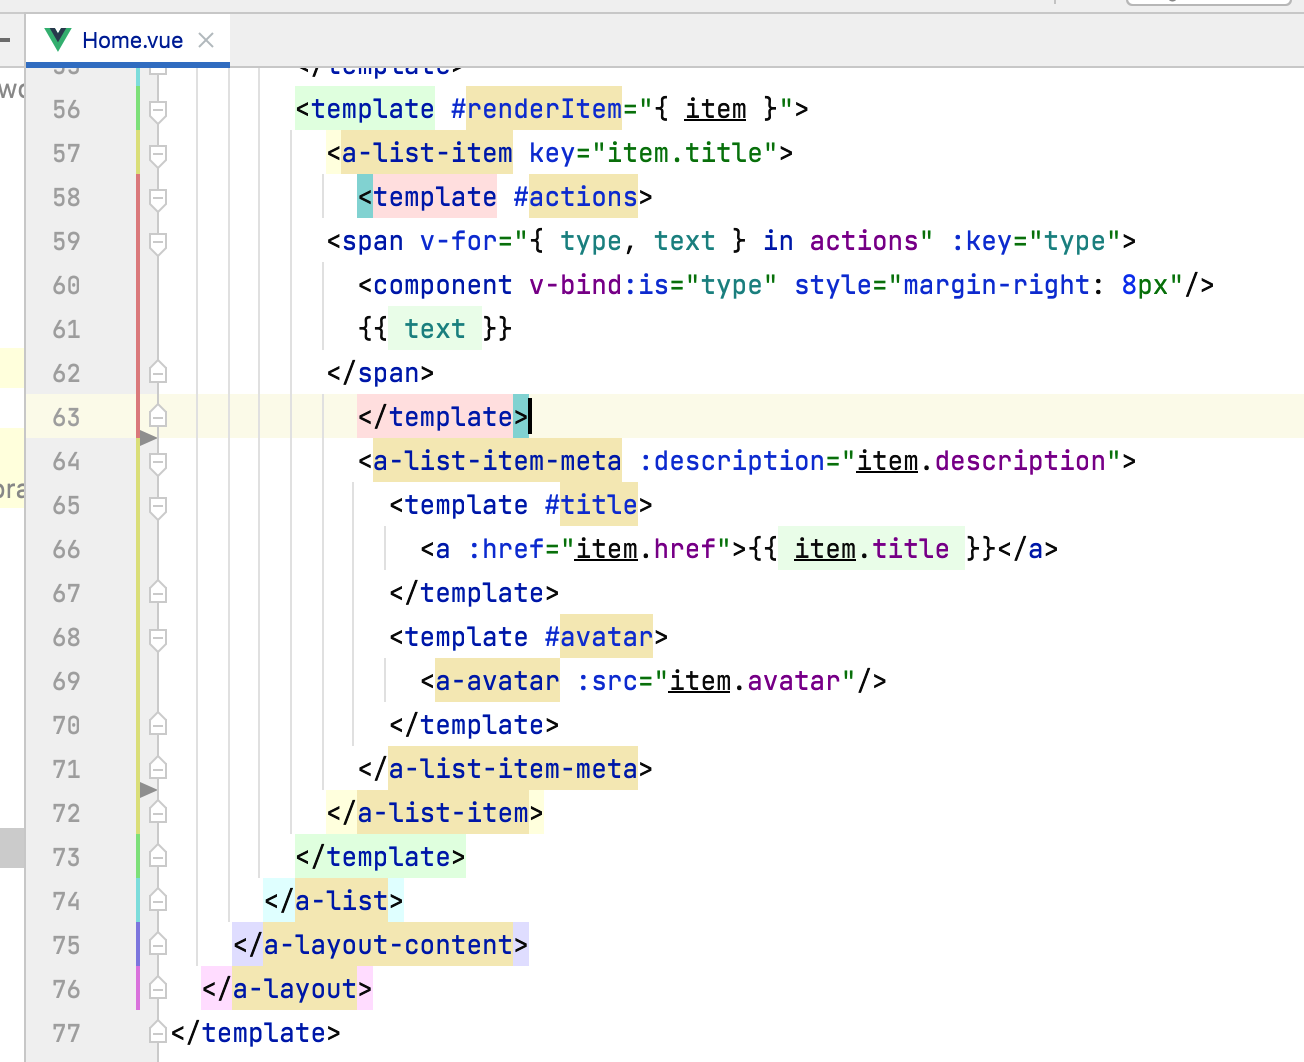
接下来将这两块去掉:
将其删掉:

再预览一下:
将列表数据按组件样式显示在界面上:
接下来则将改一下数据源,改成咱们的电子书列表,如下:
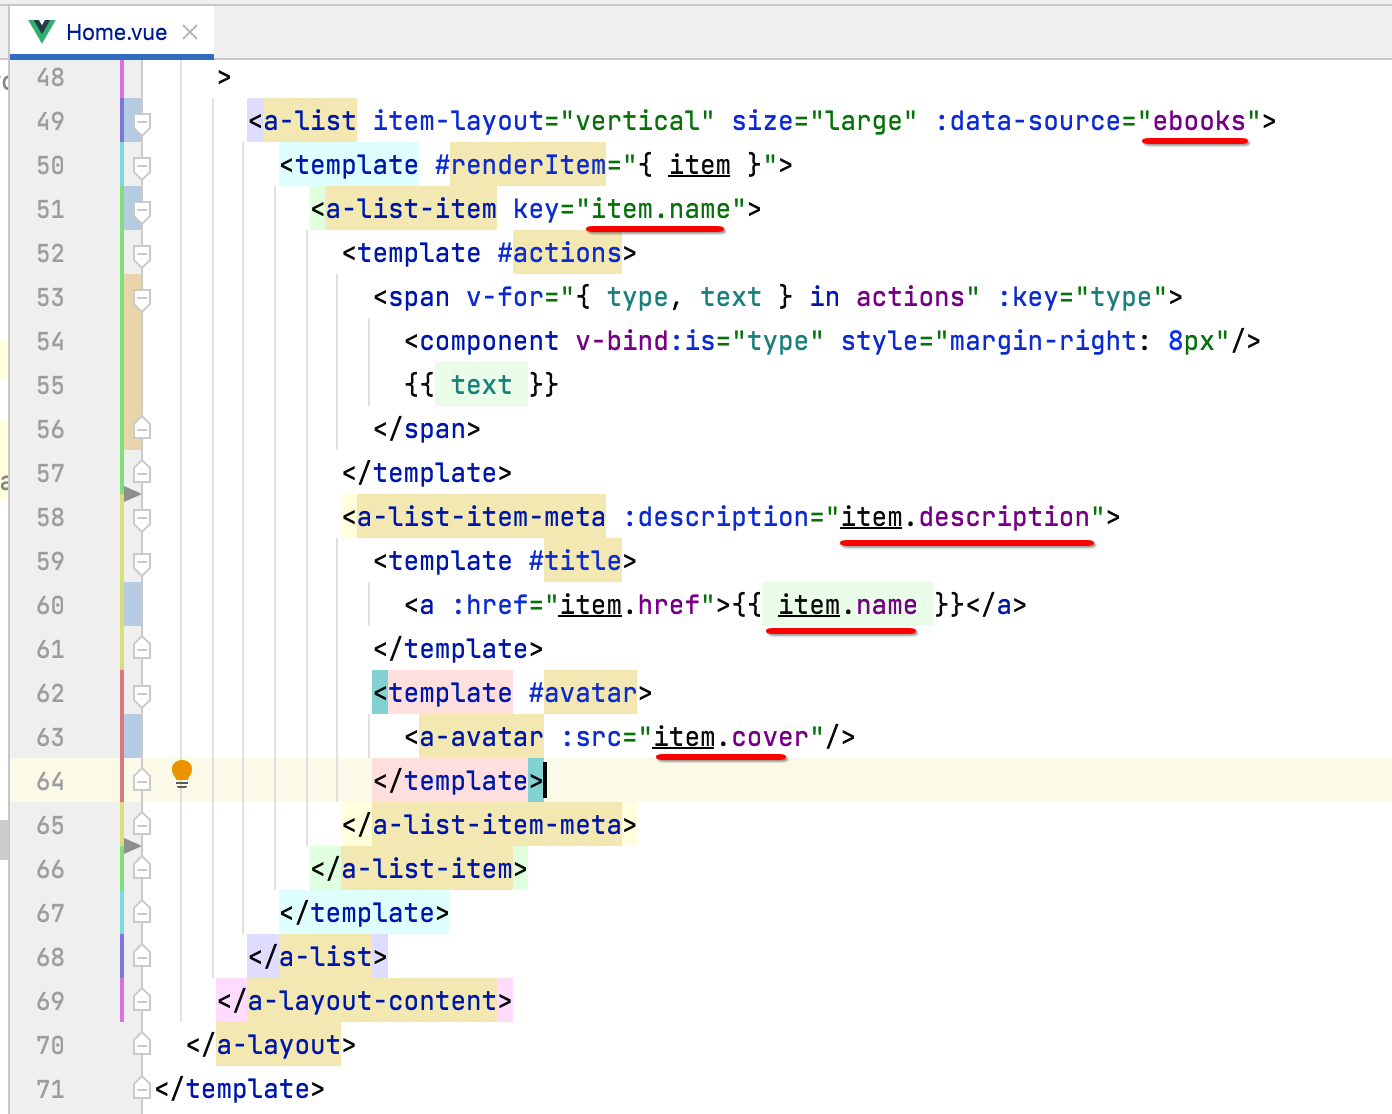
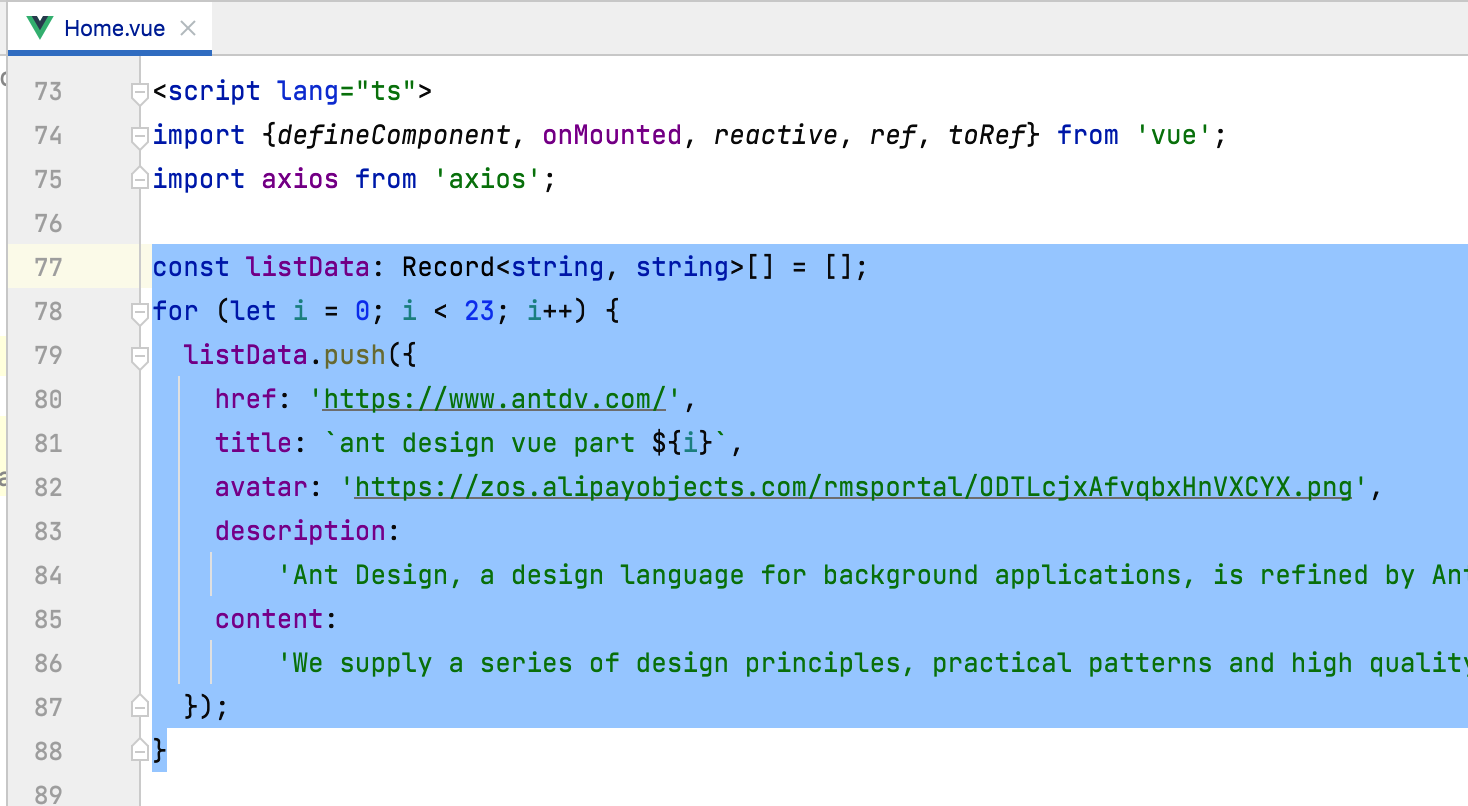
此时咱们不可以把Ant Design Value拷过来的假数据源代码给去掉了:
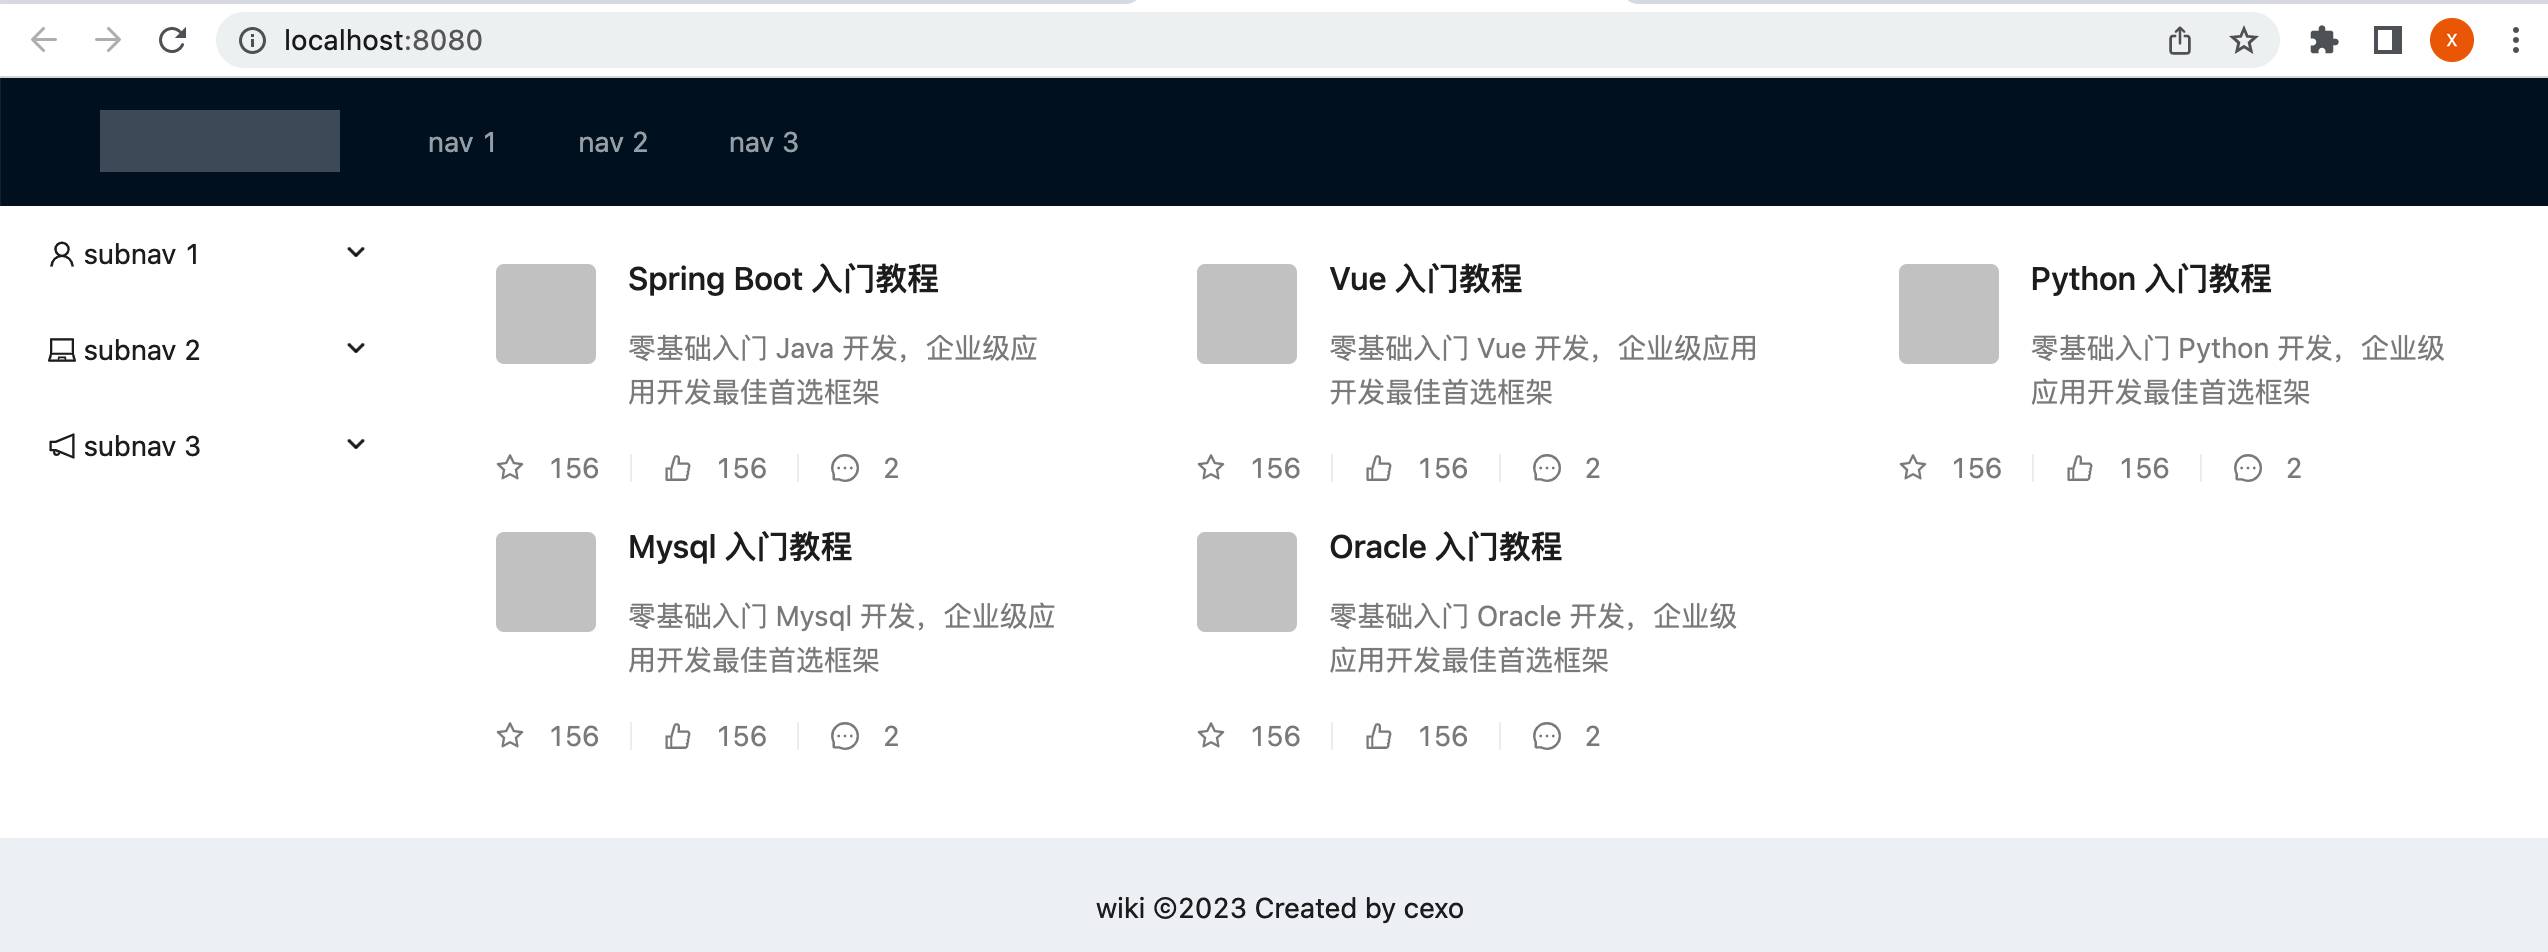
预览看一下:
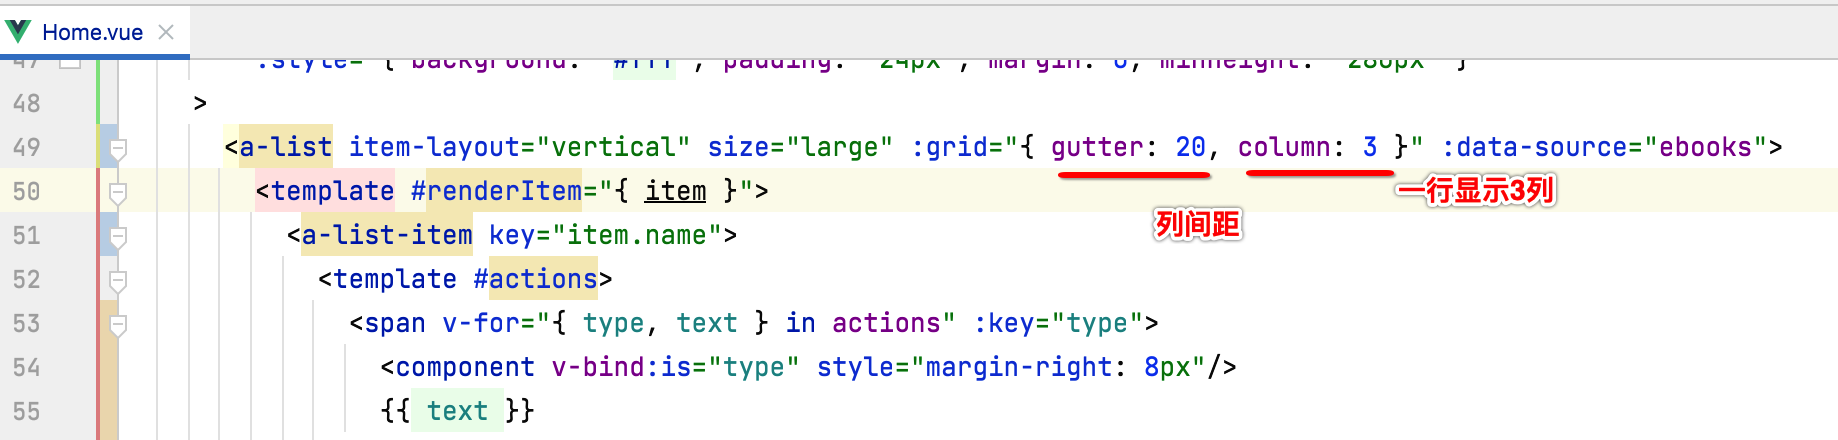
配置列表一行显示三个电子书:
目前一行只显示一个,咱们需要配置一下,比较简单:
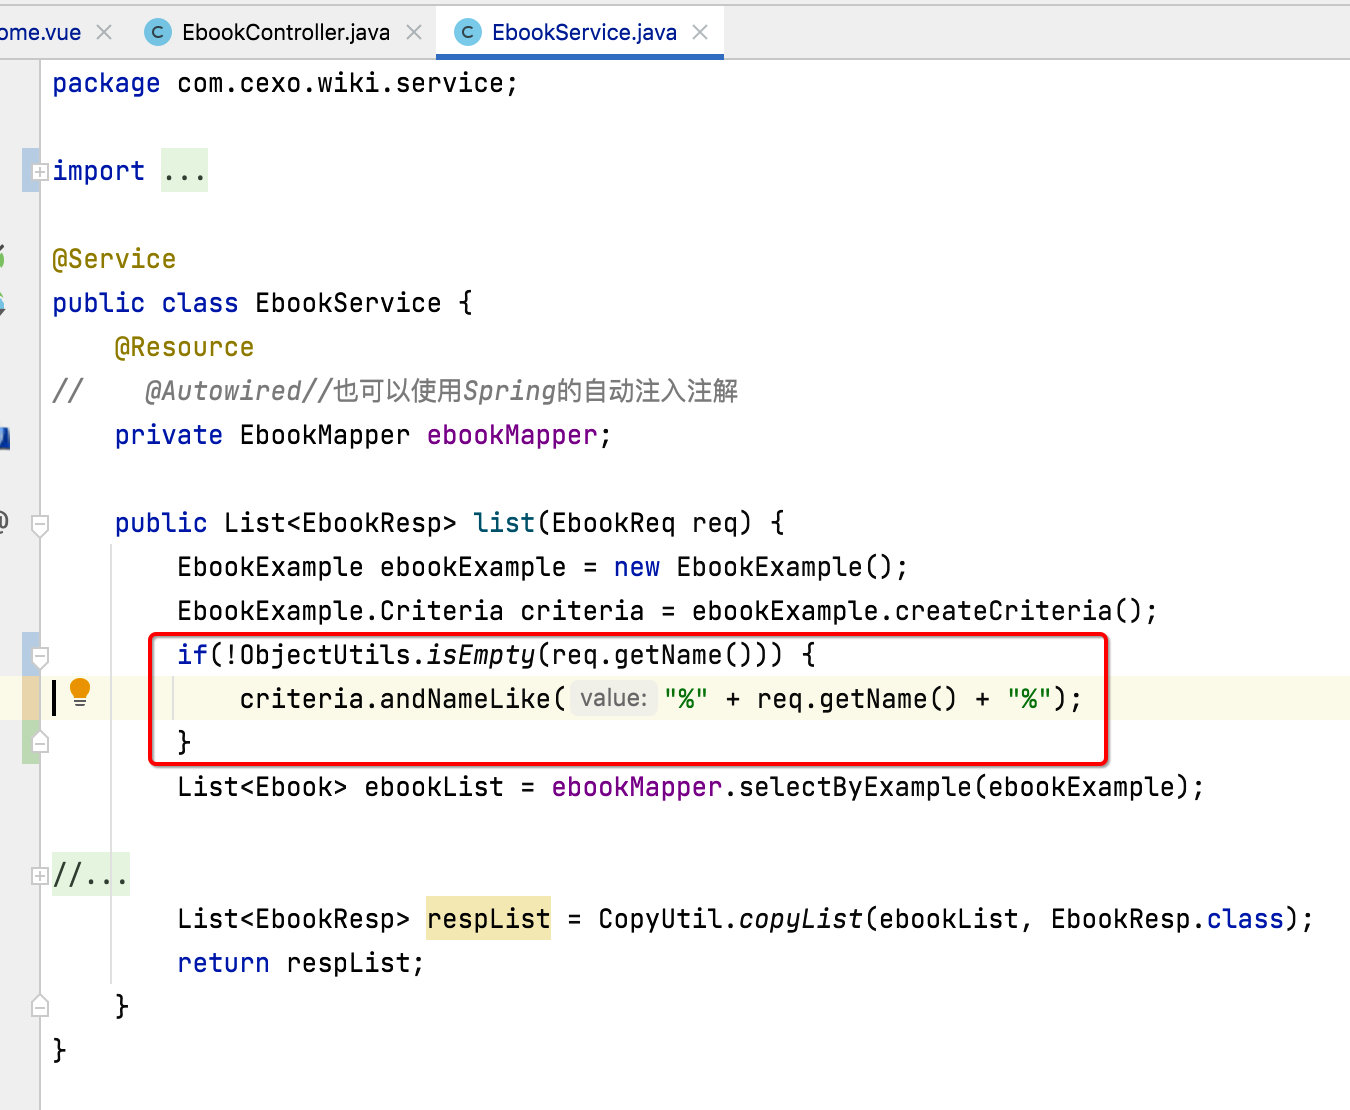
目前由于接口请求只返回了一条数据,所以为了看到效果,咱们将接口请求的条件去掉一下:
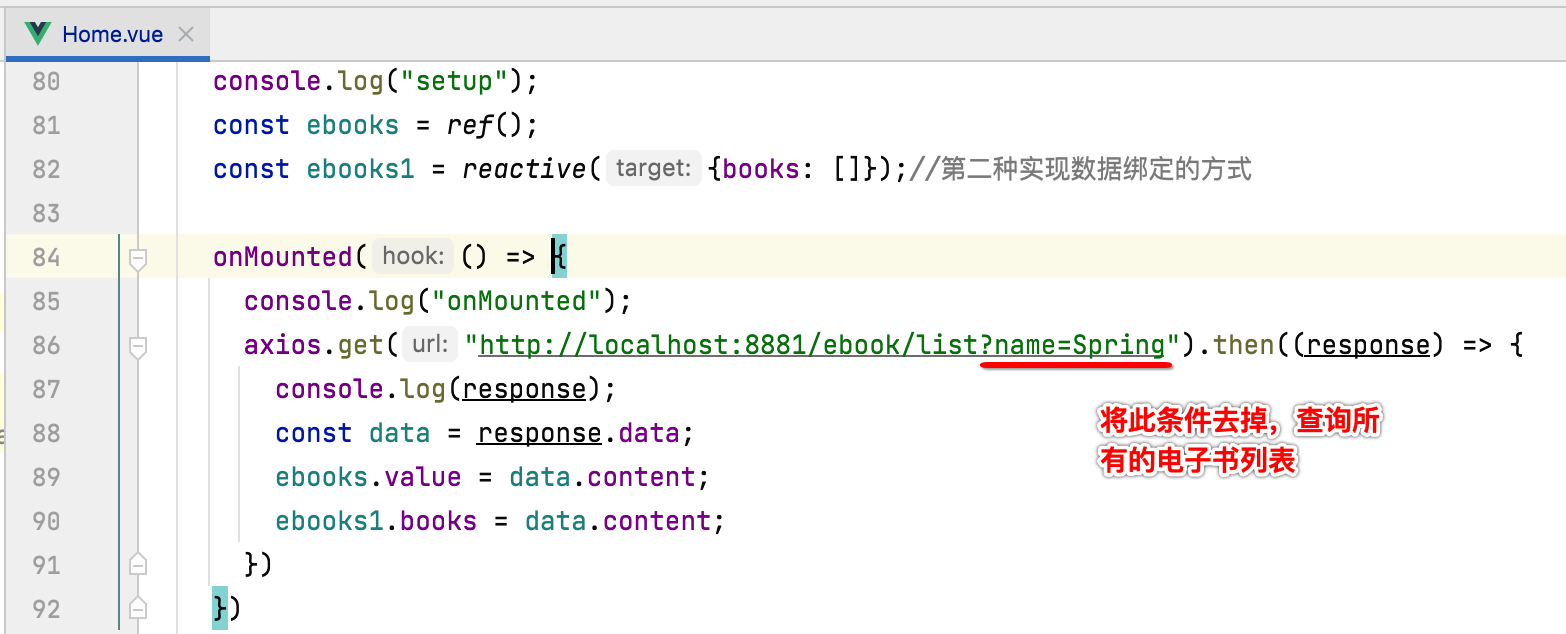
此时接口就需要更改了,也比较简单:
热部署一下,此时再预览效果就可以看到了:
修改图标的样式:
最后咱们来修改一下图标的样式,通过开发者工具可以看到它的css标识:
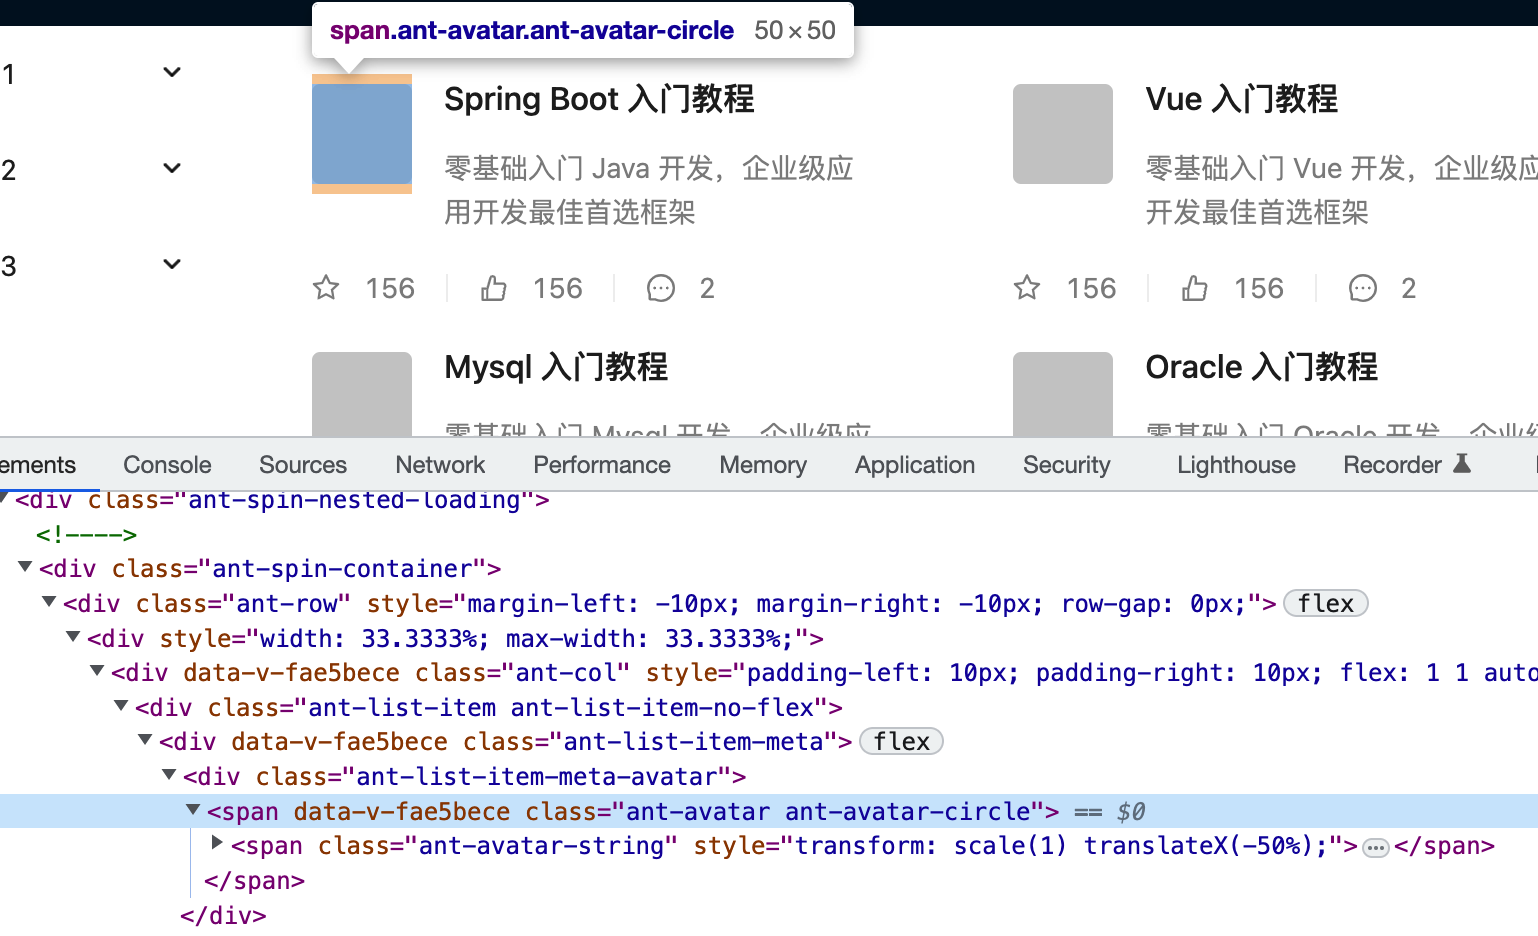
所以css样式可以这样写:
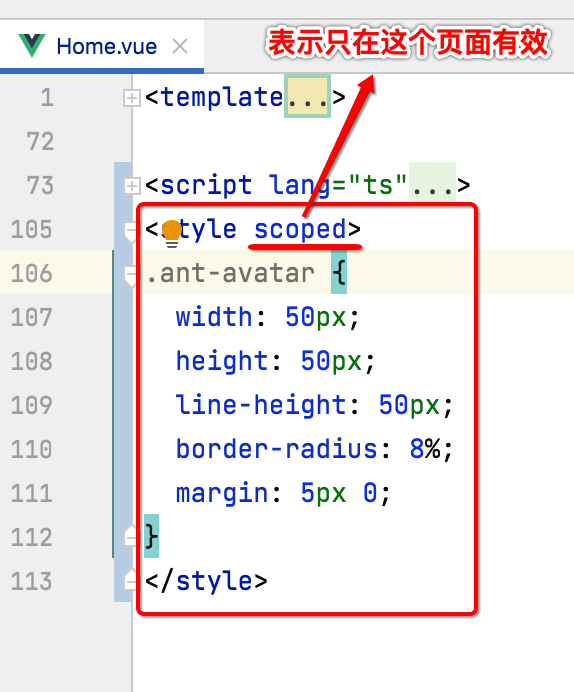
.ant-avatar {
  width: 50px;
  height: 50px;
  line-height: 50px;
  border-radius: 8%;
  margin: 5px 0;
}
再预览一下:
Vue CLI多环境配置:
多环境配置:
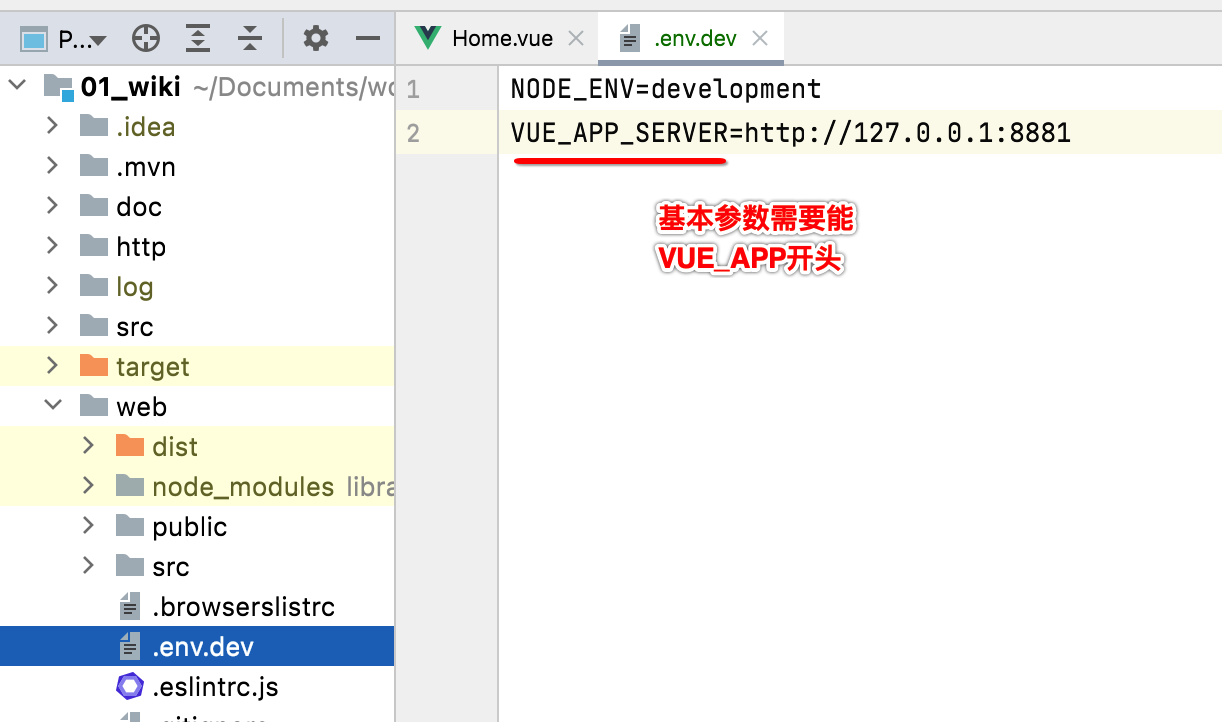
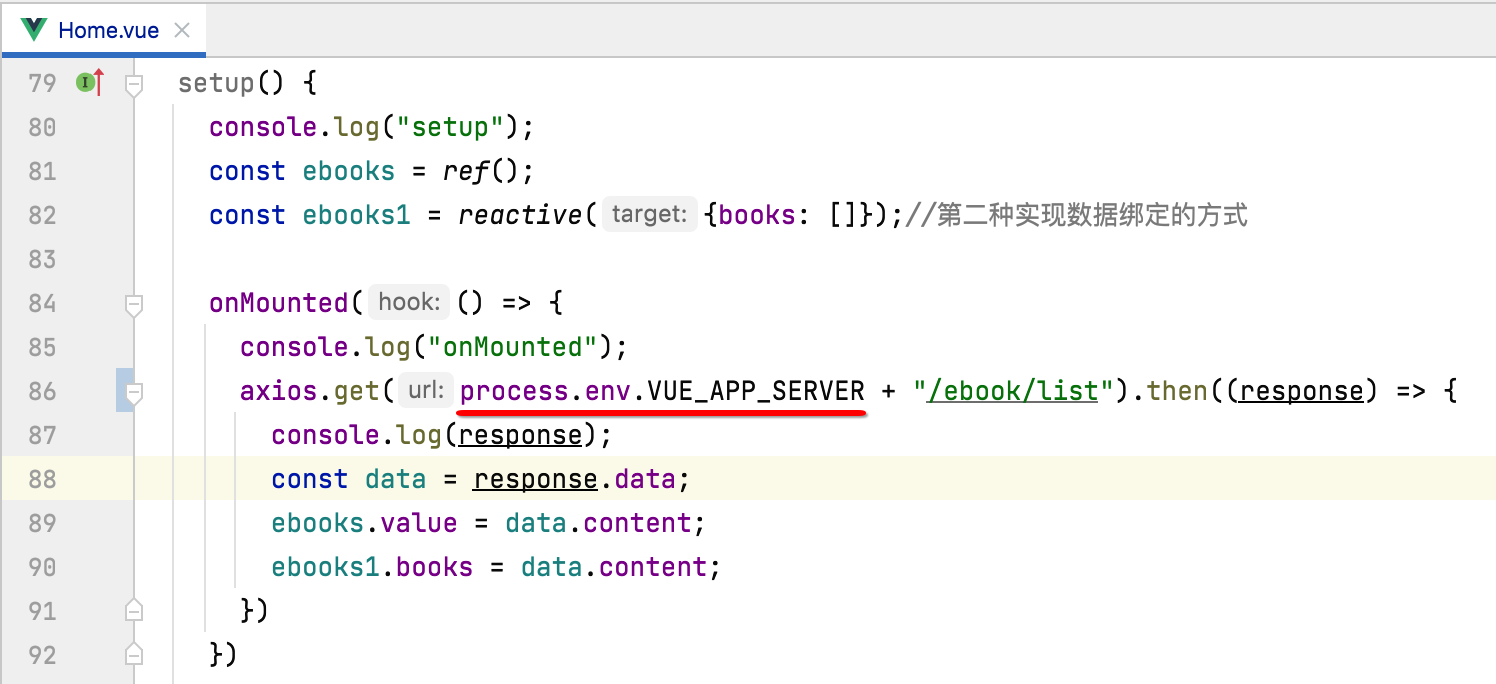
目前咱们有一个细节问题,就是我们在请求接口时,其baseUrl是写死的:
通常应该是需要区分环境动态配置的,比如测试和线上两个环境,在Vue中对于环境的配置很简单,比如先配置开发环境,新建".env.dev"这么一个文件:
接下来再来配置一下正式环境:
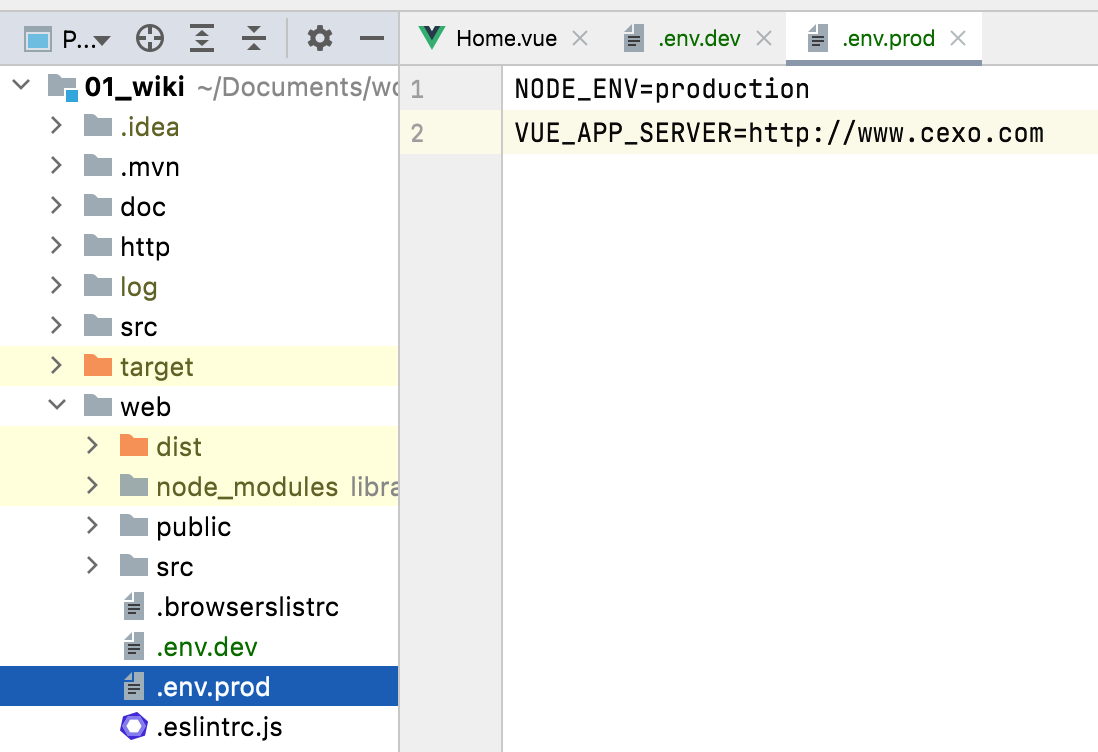
线上环境是随意写的,我也没有真正的云服务器,这里仅是功能测试用。目前我们启动的命令中没有区分环境:
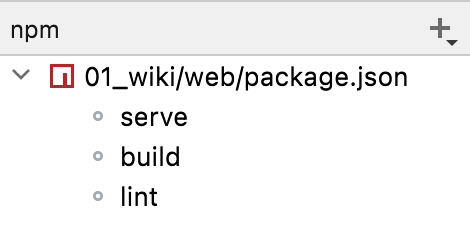
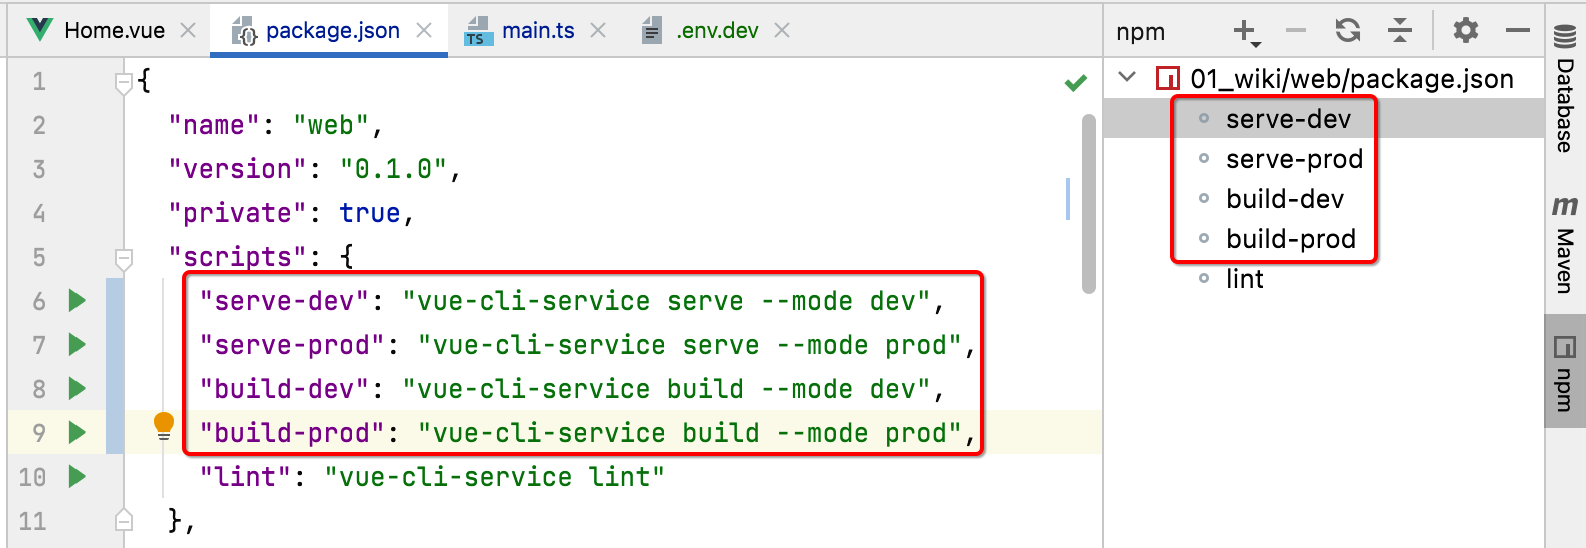
接下来则需要改造一下,让其在打包编译时能够根据环境来:
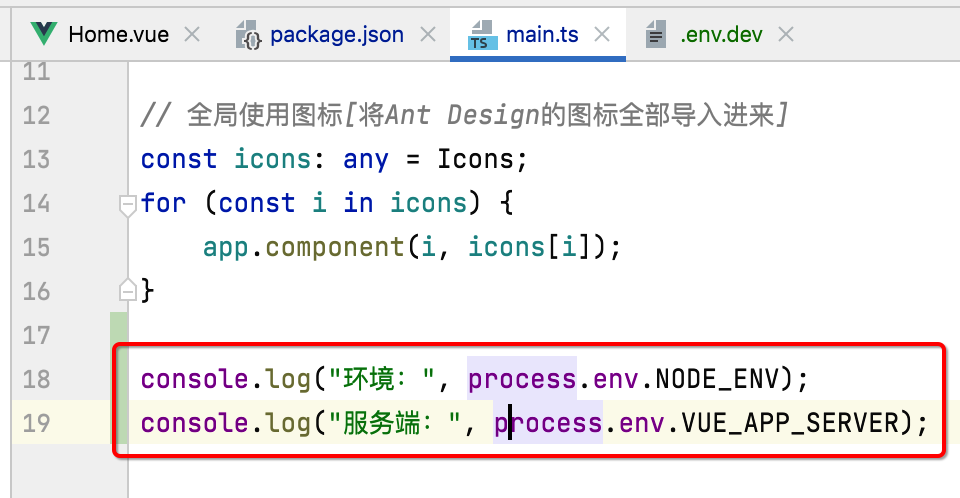
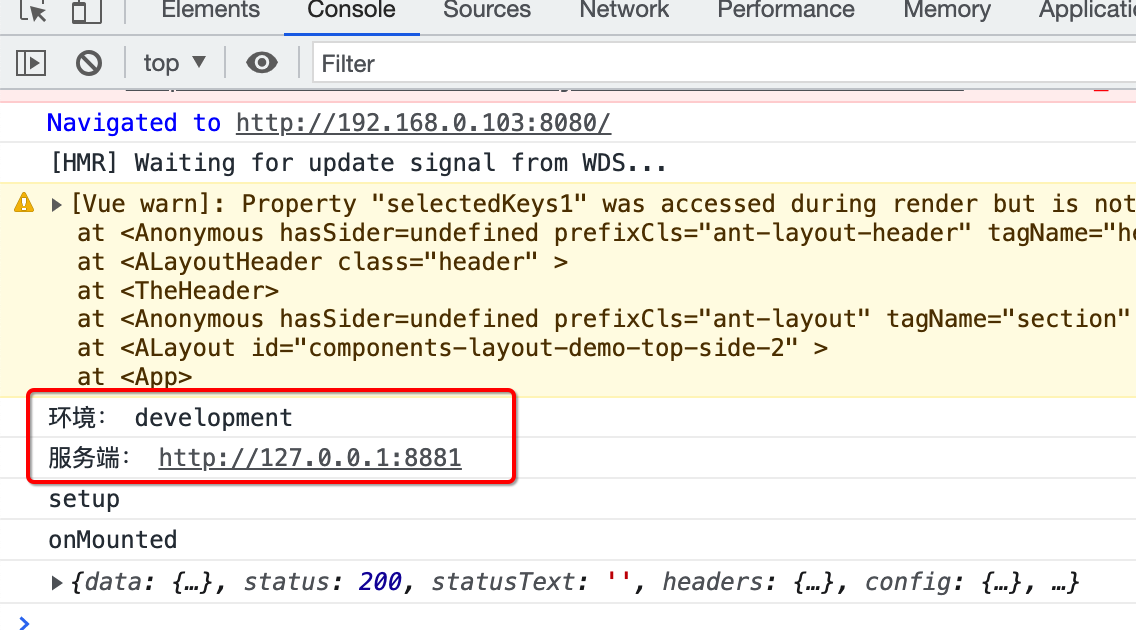
接下来为了测试,通过日志打印来验证一下是否多环境配置生效了:
先来编译开发环境,然后刷新一下界面,此时到控制台上看一下日志输出:
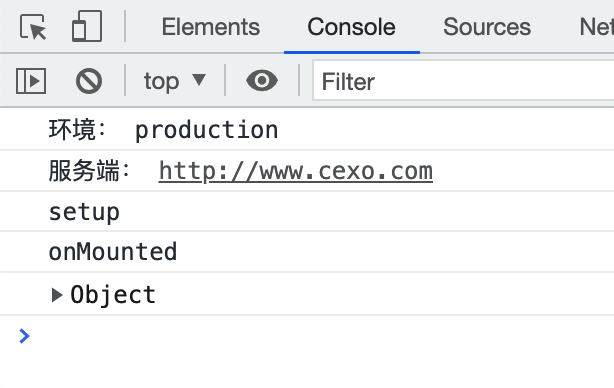
然后再编译正式环境,再刷新界面看日志输出:
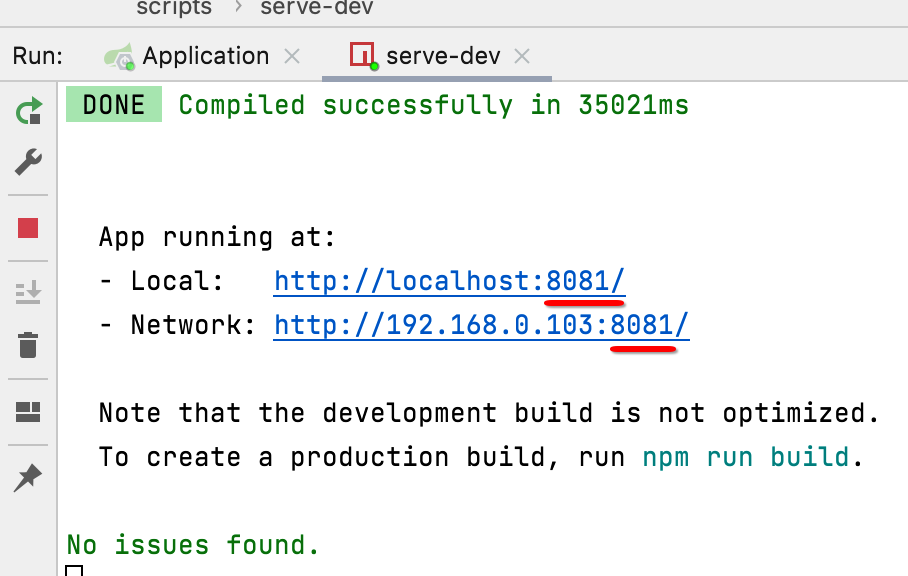
Vue CLI修改启动端口:
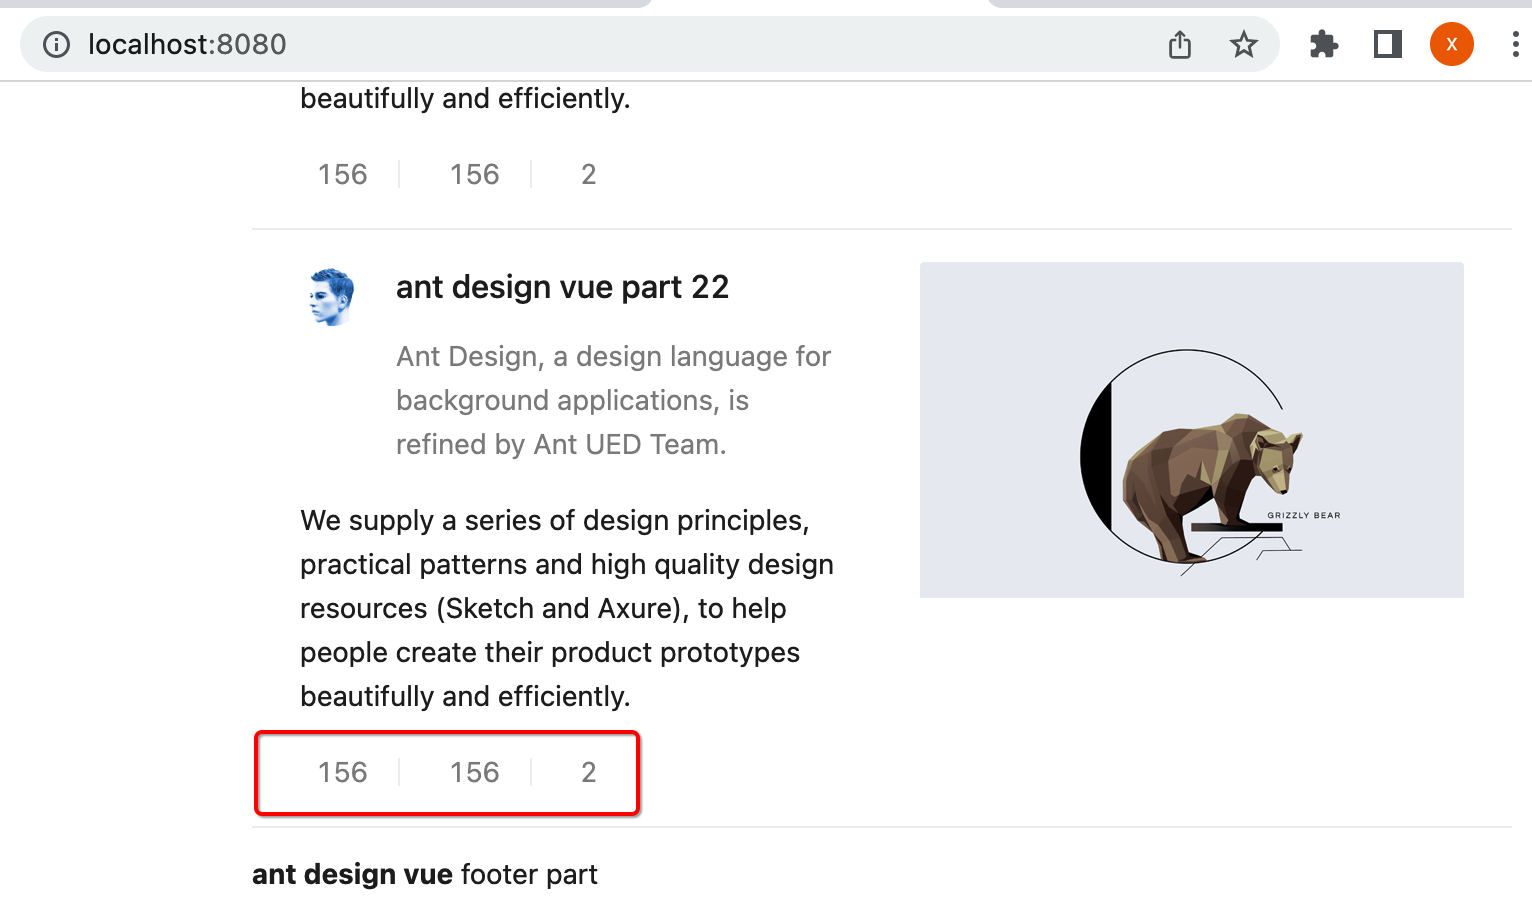
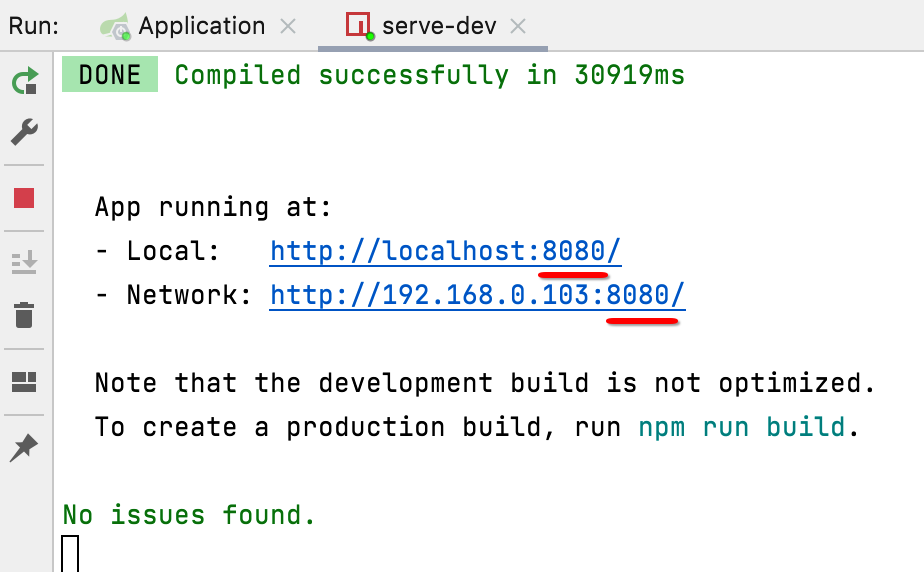
对于Vue项目的编译启动后,其默认的端口号是8080对吧:
那如果想要更改端口号咋改呢?其实很简单,修改编译启动命令:
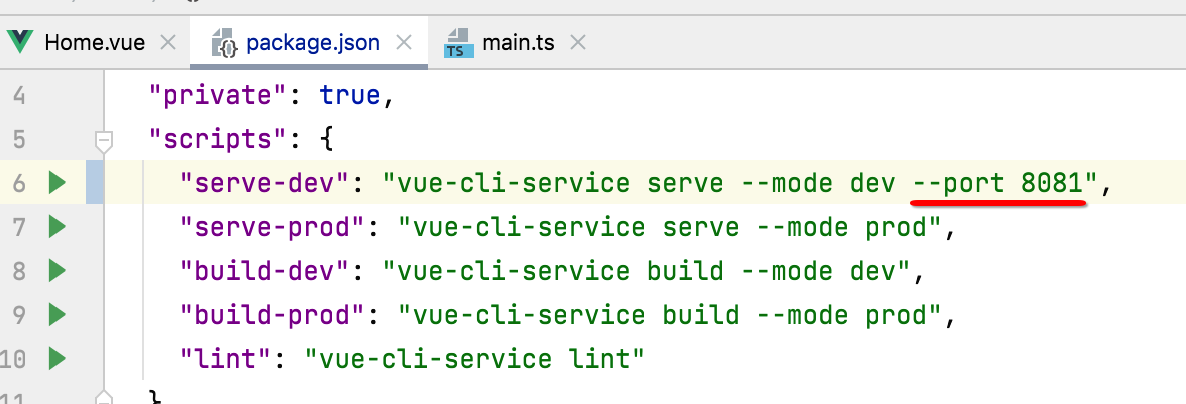
再启动,端口号就变了:
这里我们还是将其改回到8080。
axios增加baseUrl:
目前多环境已经配置好了,但是还木有用到请求接口上,咱们来将baseUrl给改活,如下:
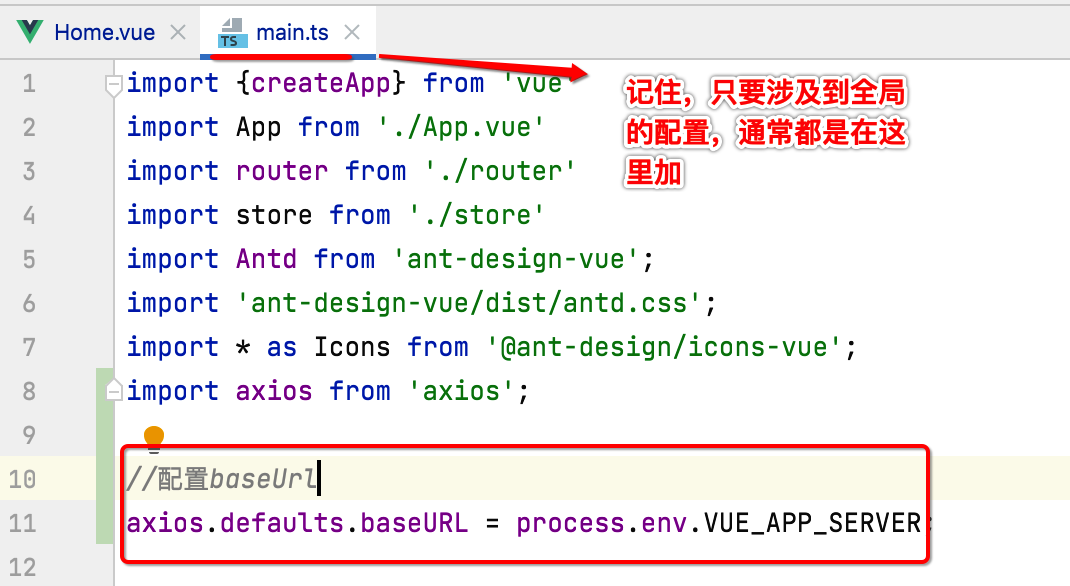
另外还有一个优化的空间,就是每一次接口请求都需要加这个baseUrl,而baseUrl是不会变的,那么,有木有axios有木有一个全局配置baseUrl的地方从而可以让我们在写请求地址时就不用拼baseUrl了?答案是有的,如下:
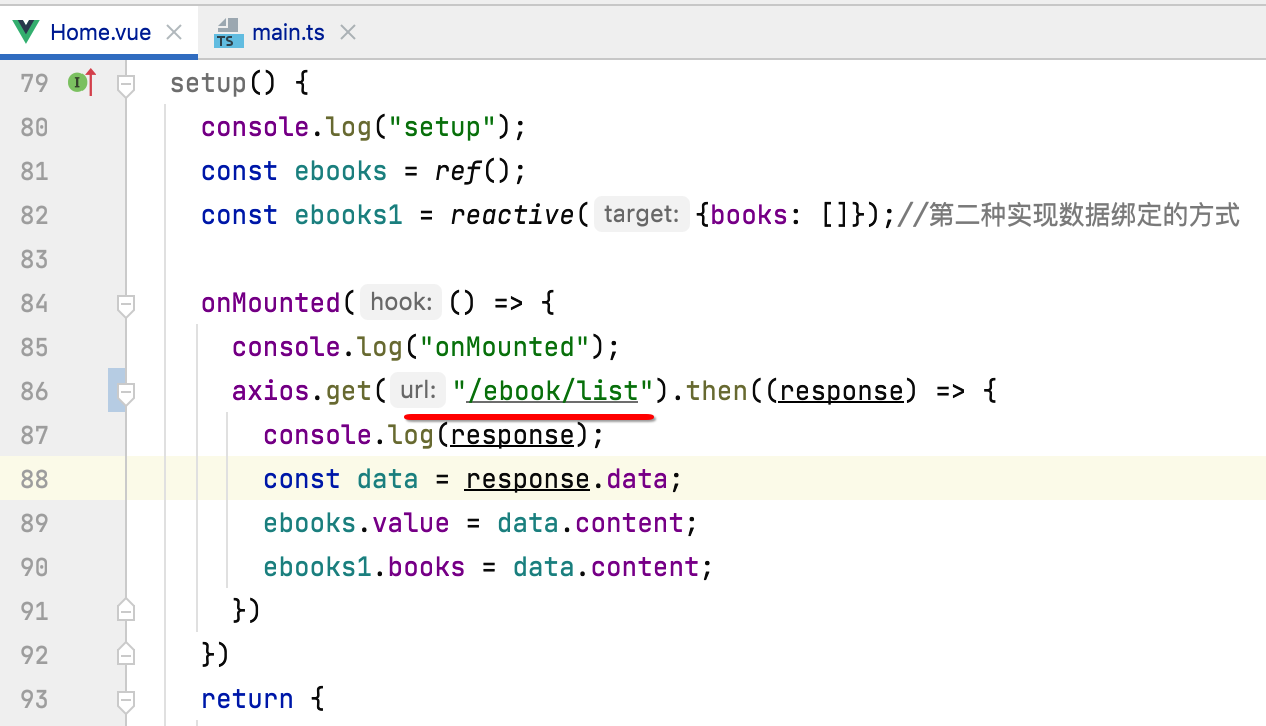
此时我们在写请求时就方便多了,直接:
使用Axios拦截器打印前端日志:
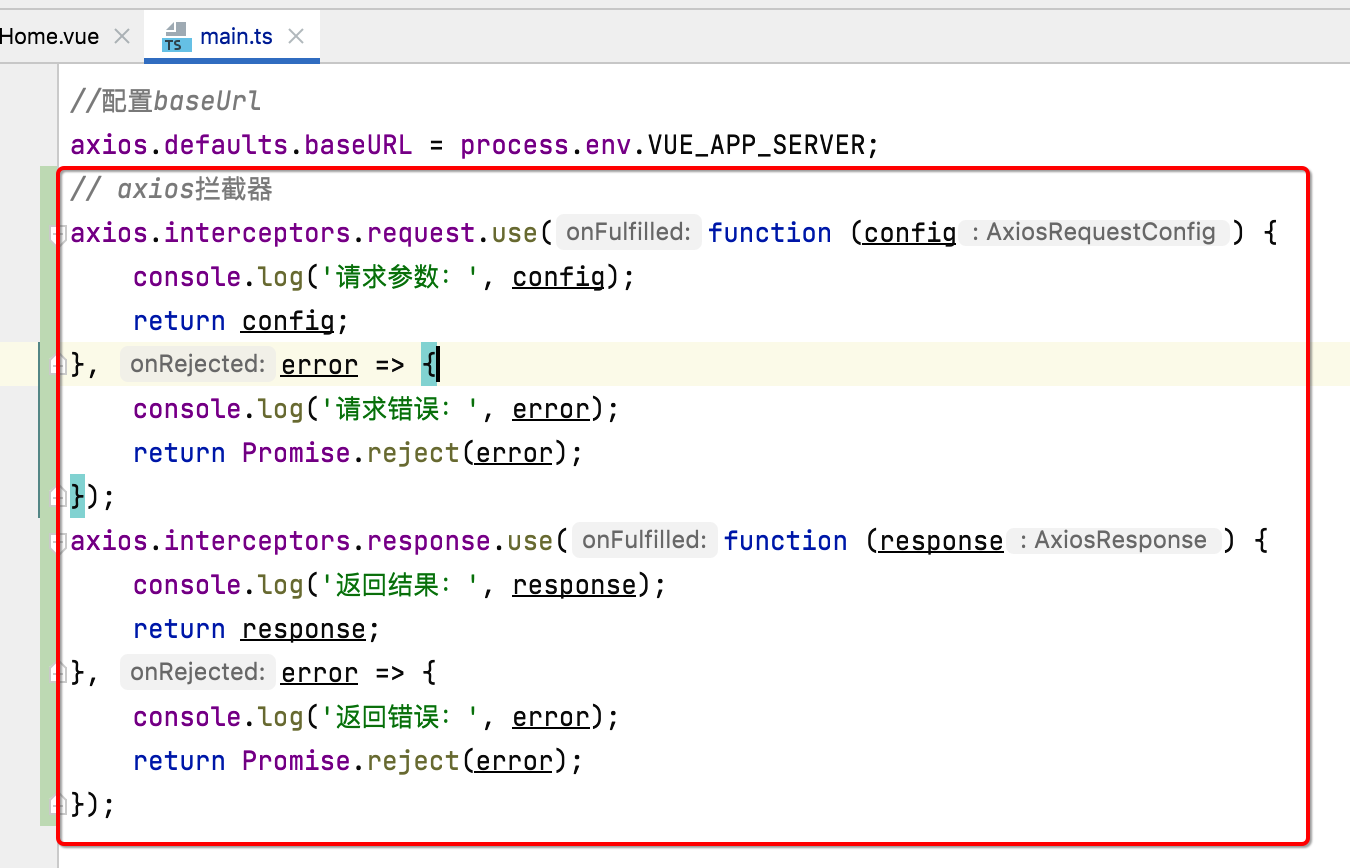
对于前端接口的访问,为了方便调试,我们需要将请求的入参及出参打印出来,如果每个接口加那太繁锁了,所以此时可以用到Axios的拦截器功能,而具体接口日志的日志打印的代码也不需要手敲,直接拷贝用就可以了:
// axios拦截器
axios.interceptors.request.use(function (config) {
    console.log('请求参数:', config);
    return config;
}, error => {
    console.log('请求错误:', error);
    return Promise.reject(error);
});
axios.interceptors.response.use(function (response) {
    console.log('返回结果:', response);
    return response;
}, error => {
    console.log('返回错误:', error);
    return Promise.reject(error);
});
将它放到main.ts中【是不是只要涉及到全局通用的配置都得有到这个文件?】:
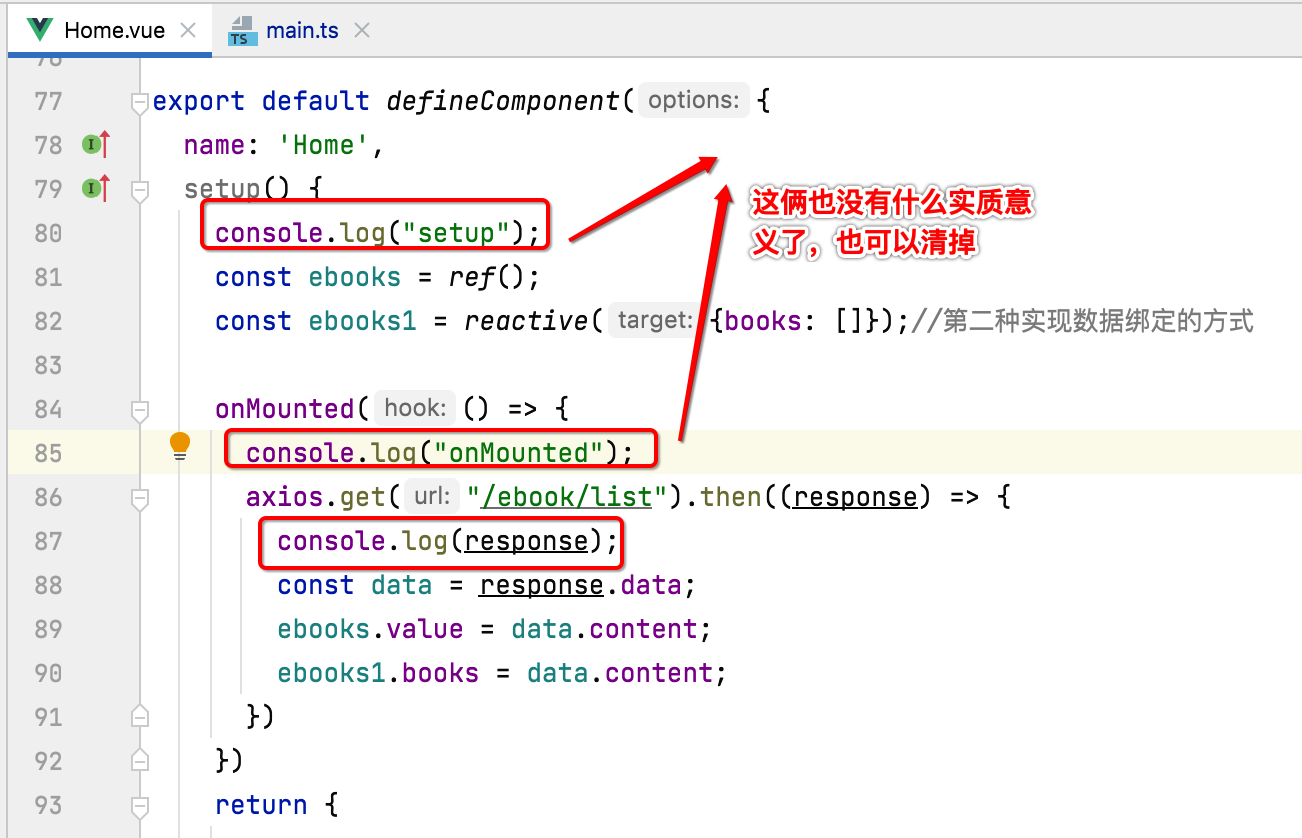
好,接下来测试一下效果,由于已经有了reponse的拦截日志打印,所以我们可以将这块的打印给去掉了:
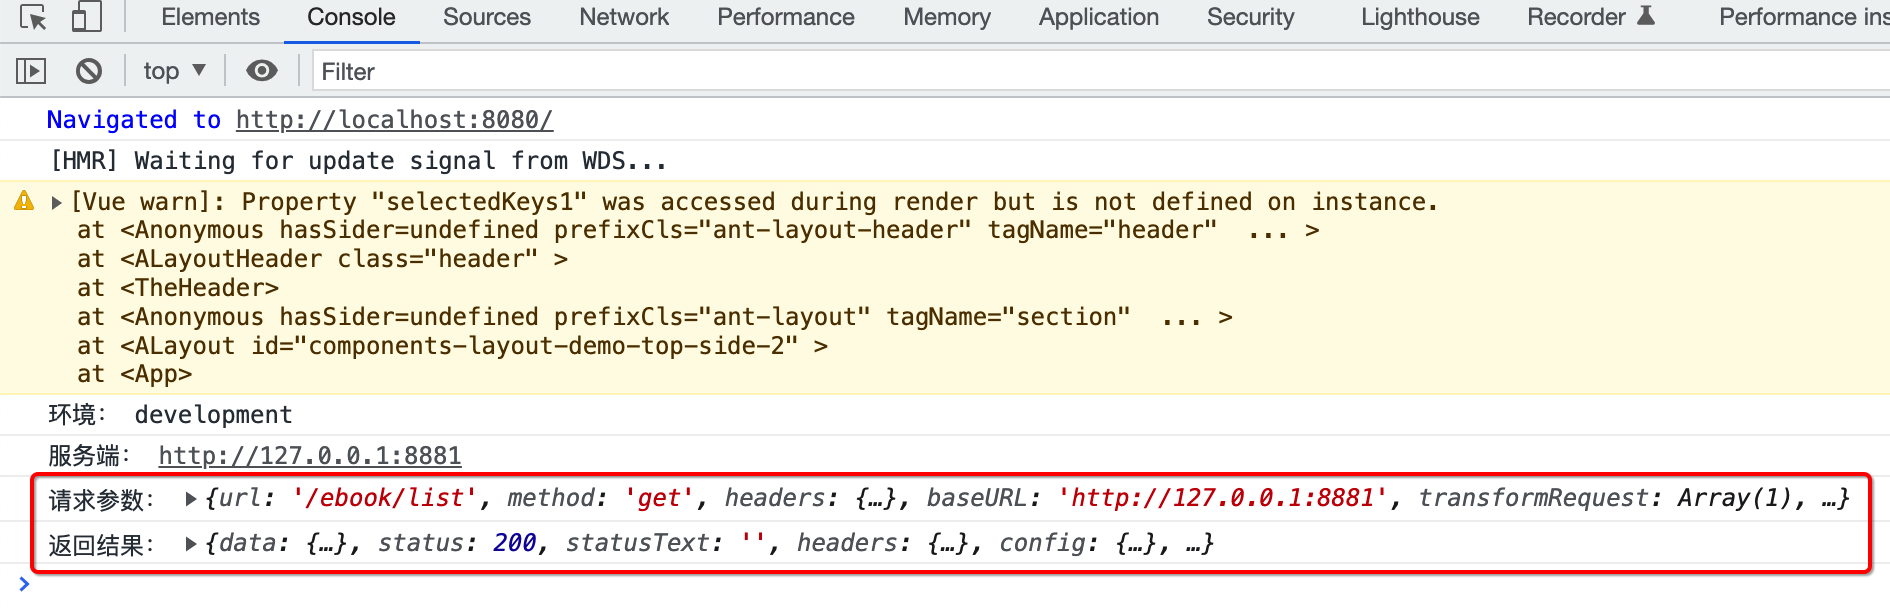
编译运行:
SpringBoot过滤器的使用:
接下来则需要学习一些SpringBoot非常有用的功能,第一个是过滤器,用它可以打印接口的耗时情况,具体使用如下:
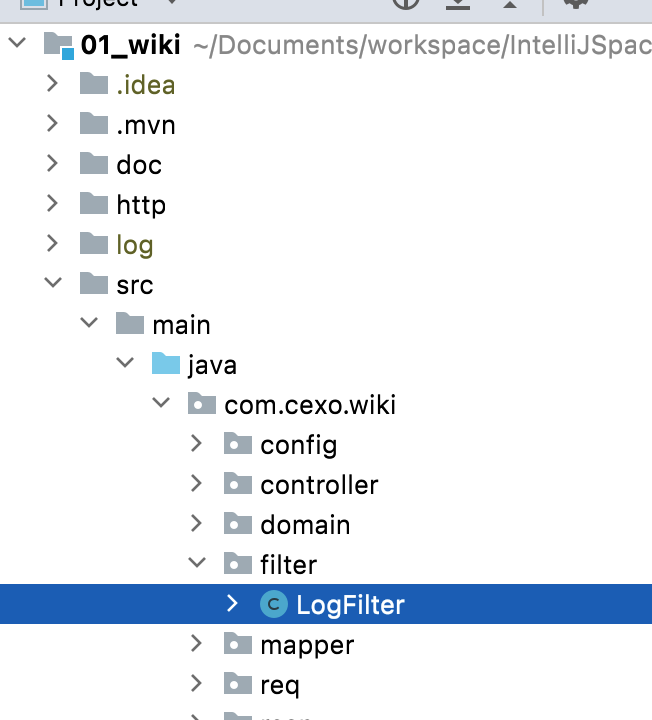
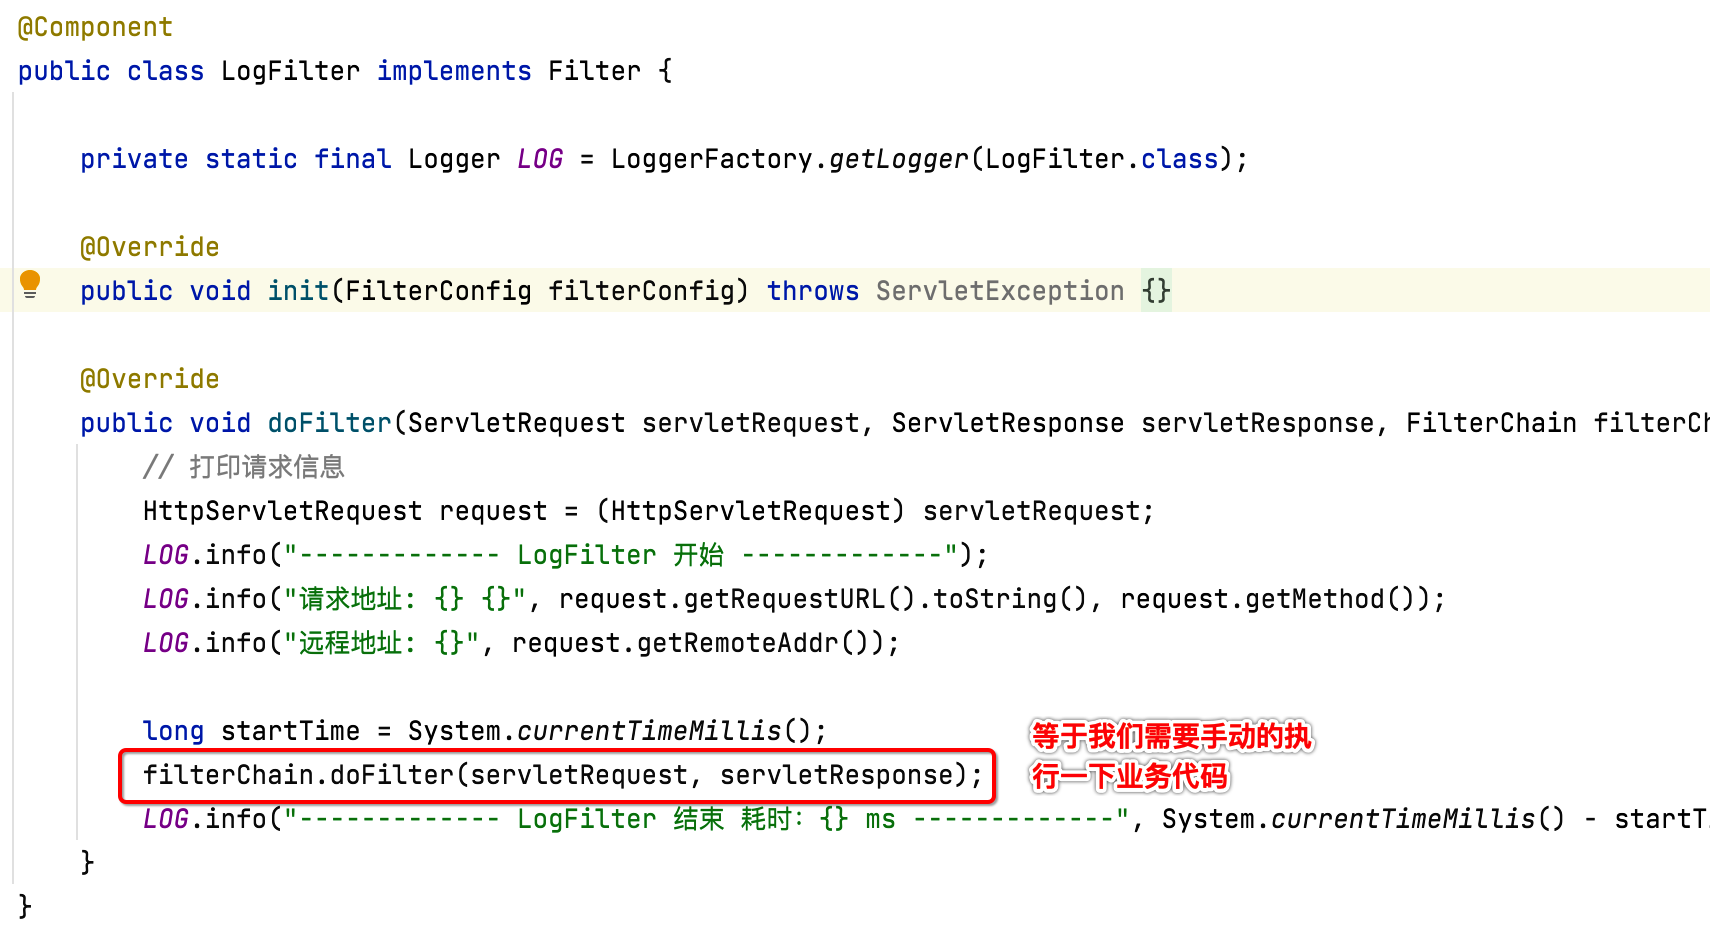
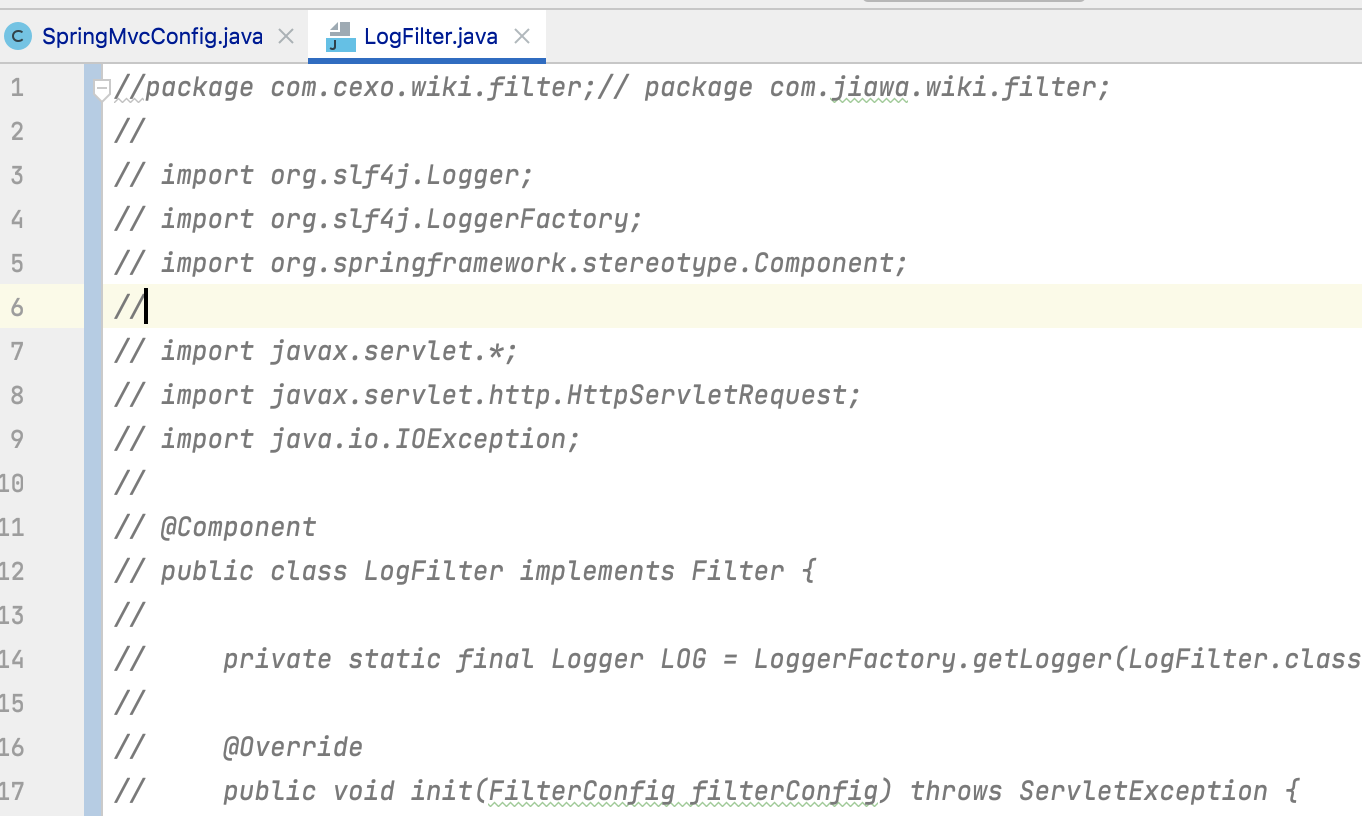
其具体的代码:
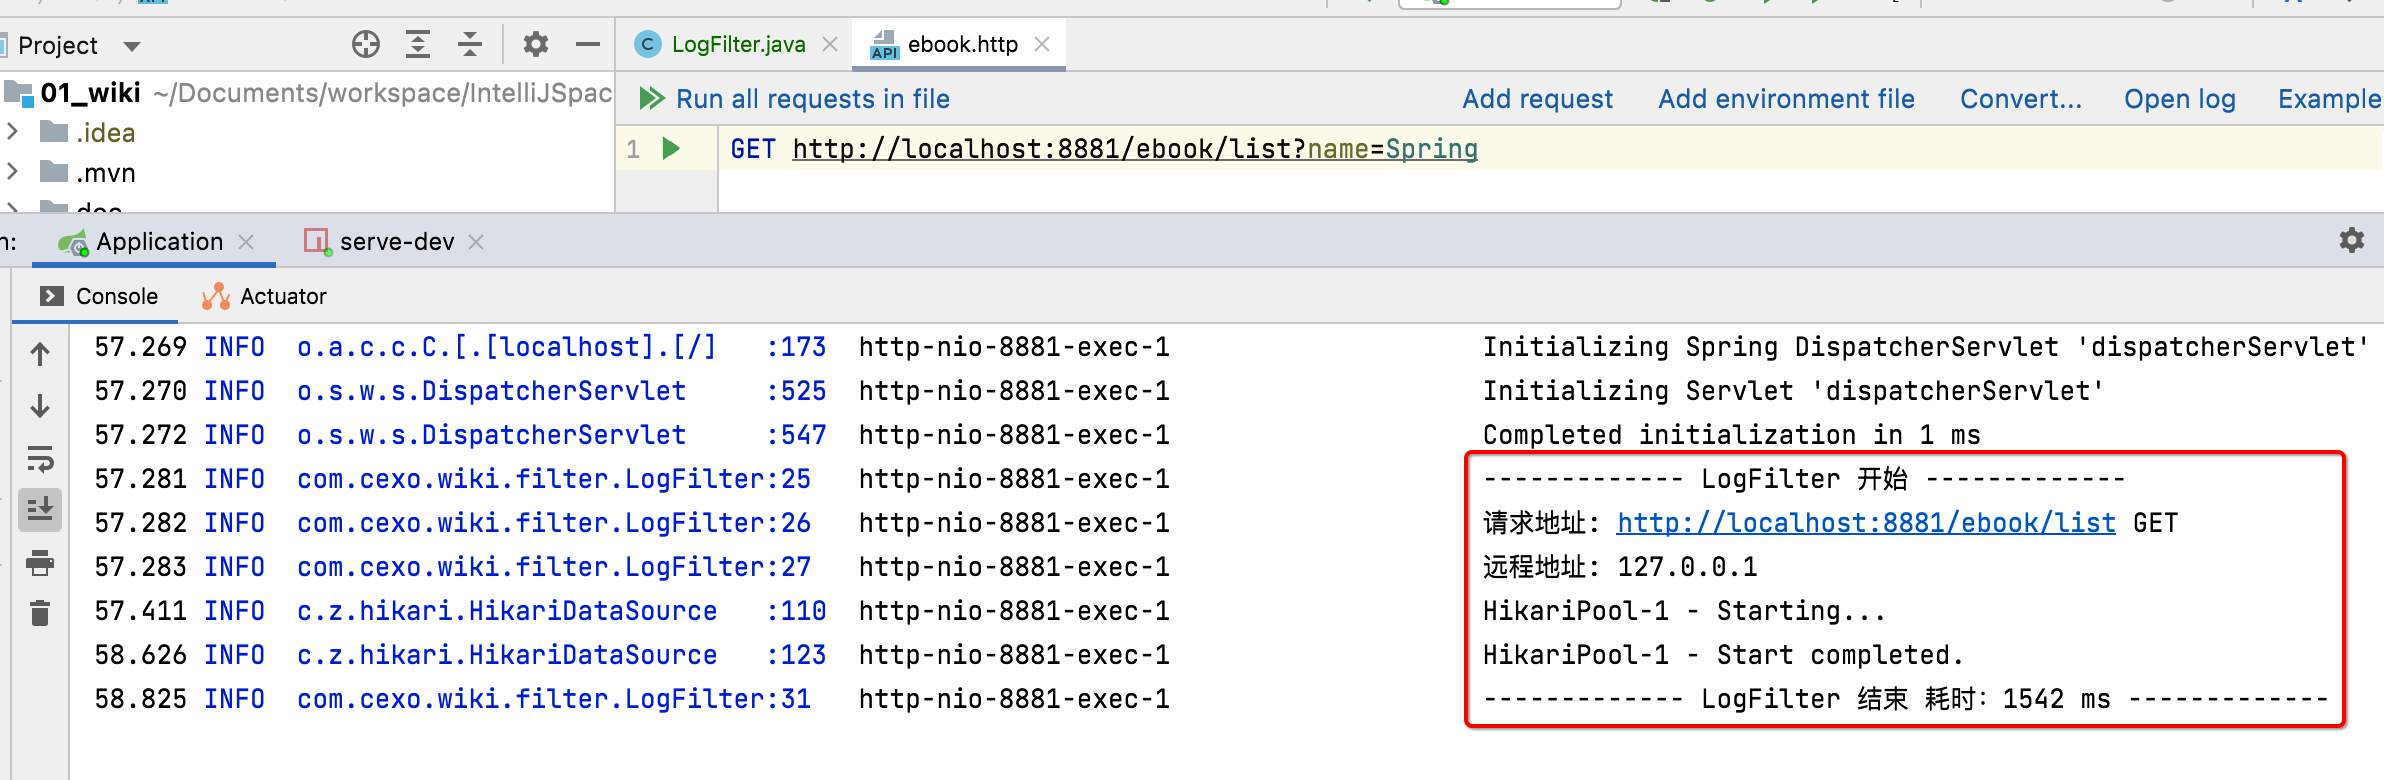
package com.cexo.wiki.filter;

import org.slf4j.Logger;
import org.slf4j.LoggerFactory;
import org.springframework.stereotype.Component;

import javax.servlet.*;
import javax.servlet.http.HttpServletRequest;
import java.io.IOException;

@Component
public class LogFilter implements Filter {

    private static final Logger LOG = LoggerFactory.getLogger(LogFilter.class);

    @Override
    public void init(FilterConfig filterConfig) throws ServletException {

    }

    @Override
    public void doFilter(ServletRequest servletRequest, ServletResponse servletResponse, FilterChain filterChain) throws IOException, ServletException {
        // 打印请求信息
        HttpServletRequest request = (HttpServletRequest) servletRequest;
        LOG.info("------------- LogFilter 开始 -------------");
        LOG.info("请求地址: {} {}", request.getRequestURL().toString(), request.getMethod());
        LOG.info("远程地址: {}", request.getRemoteAddr());

        long startTime = System.currentTimeMillis();
        filterChain.doFilter(servletRequest, servletResponse);
        LOG.info("------------- LogFilter 结束 耗时:{} ms -------------", System.currentTimeMillis() - startTime);
    }
}
其中看到了一个当年学习java web的身影了,还是很亲切的:
接下来编译,然后测试一下效果:
SpringBoot拦截器的使用:
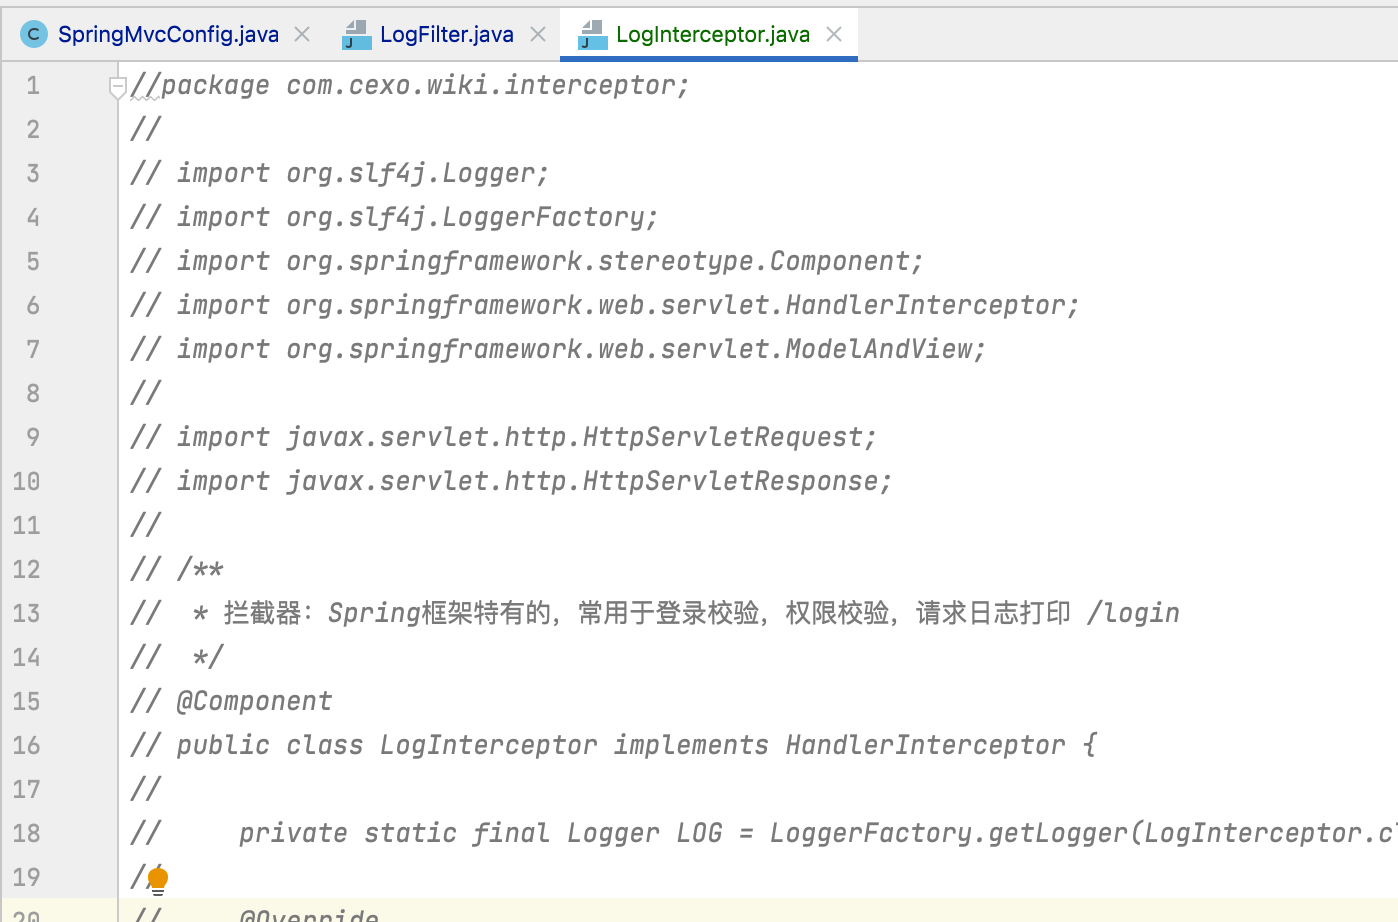
接下来再来学习一个拦截器的功能,其实验效果也是打印接口耗时,感受一下它跟filter的不同,先新建一个拦截器类:
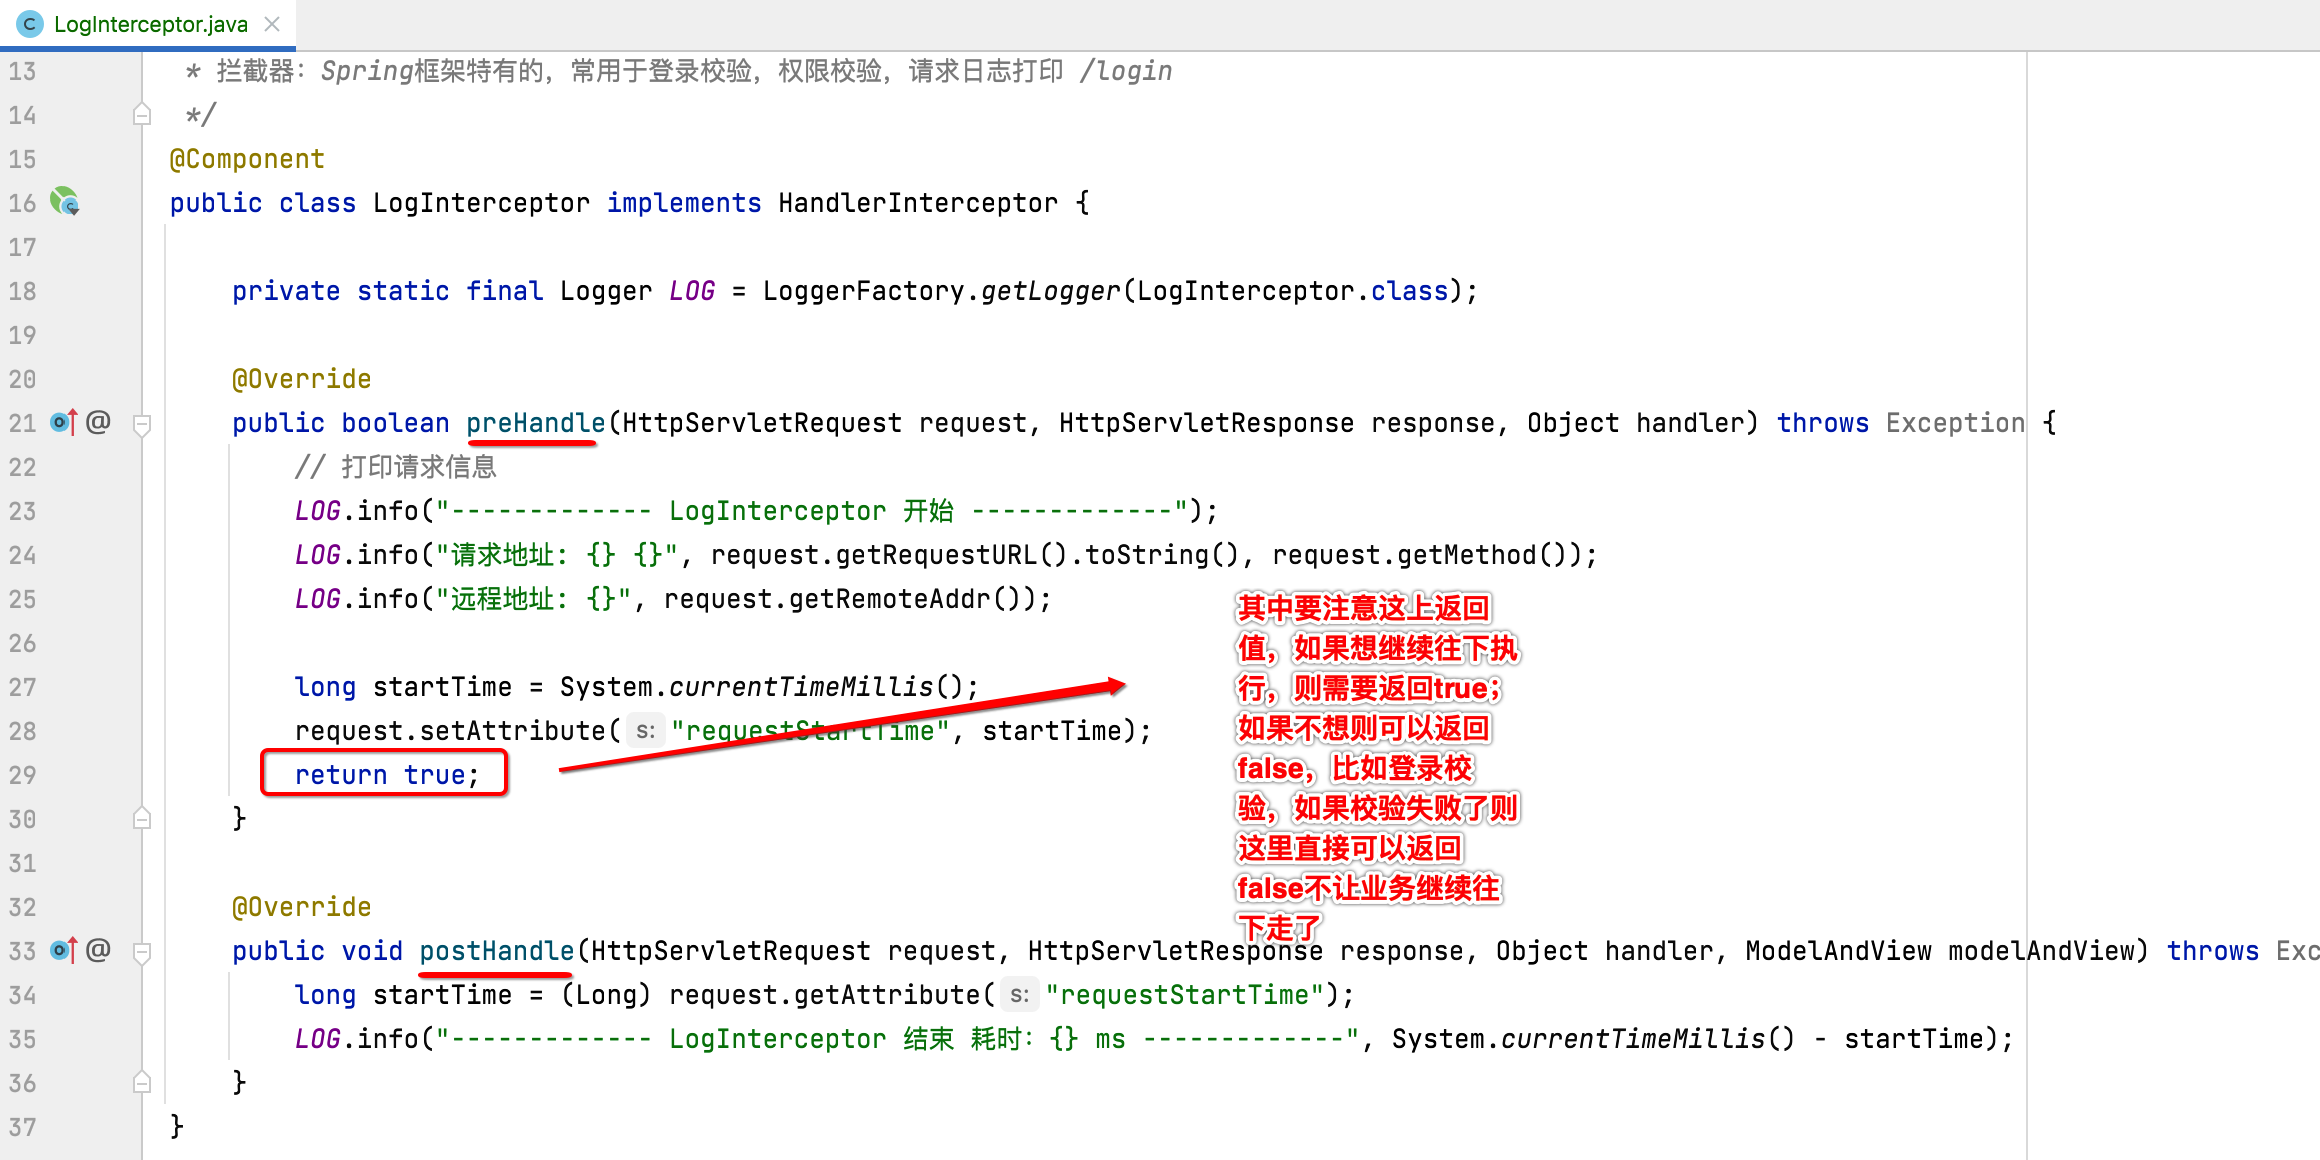
package com.cexo.wiki.interceptor;

import org.slf4j.Logger;
import org.slf4j.LoggerFactory;
import org.springframework.stereotype.Component;
import org.springframework.web.servlet.HandlerInterceptor;
import org.springframework.web.servlet.ModelAndView;

import javax.servlet.http.HttpServletRequest;
import javax.servlet.http.HttpServletResponse;

/**
 * 拦截器:Spring框架特有的,常用于登录校验,权限校验,请求日志打印
 */
@Component
public class LogInterceptor implements HandlerInterceptor {

    private static final Logger LOG = LoggerFactory.getLogger(LogInterceptor.class);

    @Override
    public boolean preHandle(HttpServletRequest request, HttpServletResponse response, Object handler) throws Exception {
        // 打印请求信息
        LOG.info("------------- LogInterceptor 开始 -------------");
        LOG.info("请求地址:{} {}", request.getRequestURL().toString(), request.getMethod());
        LOG.info("远程地址:{}", request.getRemoteAddr());

        long startTime = System.currentTimeMillis();
        request.setAttribute("requestStartTime", startTime);
        return true;
    }

    @Override
    public void postHandle(HttpServletRequest request, HttpServletResponse response, Object handler, ModelAndView modelAndView) throws Exception {
        long startTime = (Long) request.getAttribute("requestStartTime");
        LOG.info("------------- LogInterceptor 结束 耗时:{} ms -------------", System.currentTimeMillis() - startTime);
    }
}
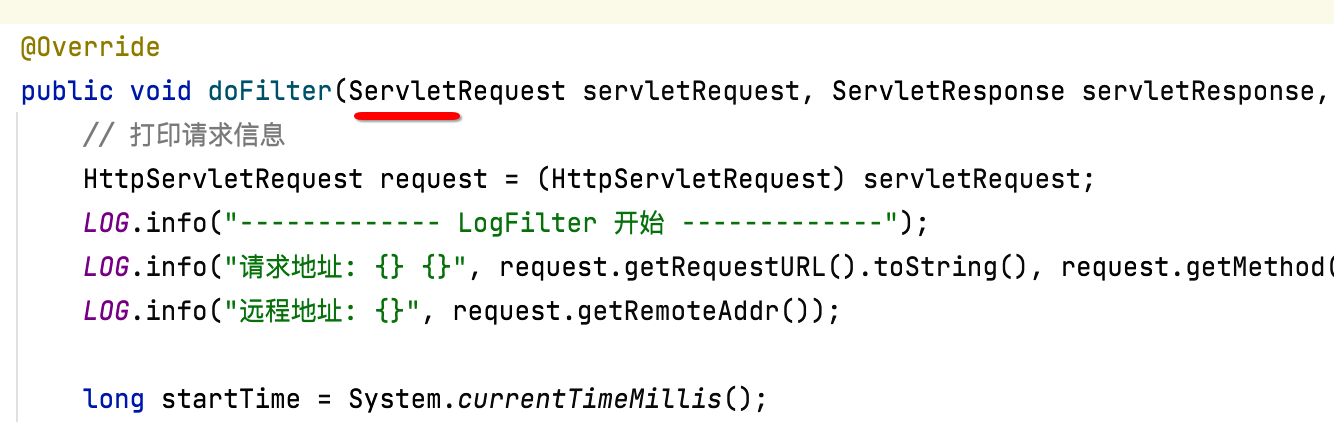
其中有木有感受到跟filter的区别?拦截器中木有涉及到业务代码的调用,回忆一下之前学习的filter:
而拦截器完全不需要管业务代码的执行,只有在业务代码执行前和执行后的两个回调中来处理拦截的逻辑:
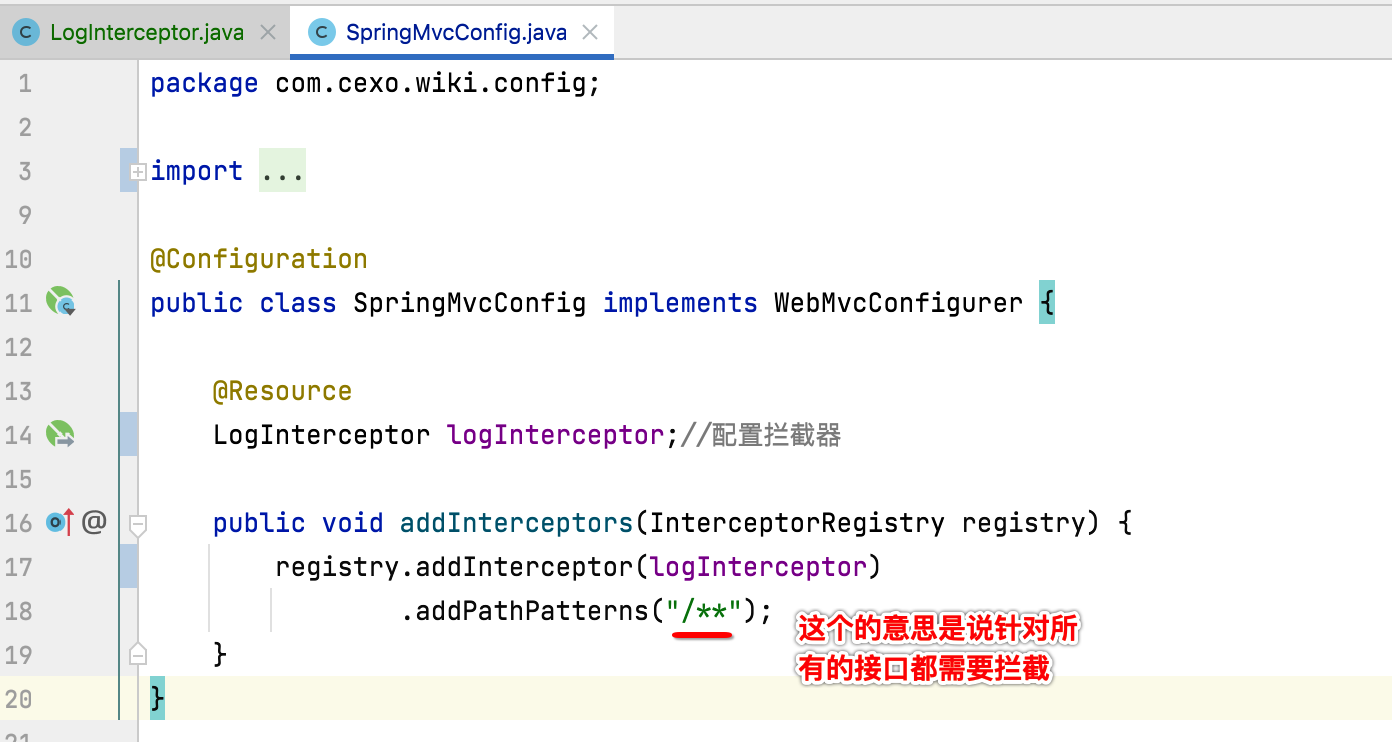
最后要想让这个拦截器生效,还需要有一个配置类:
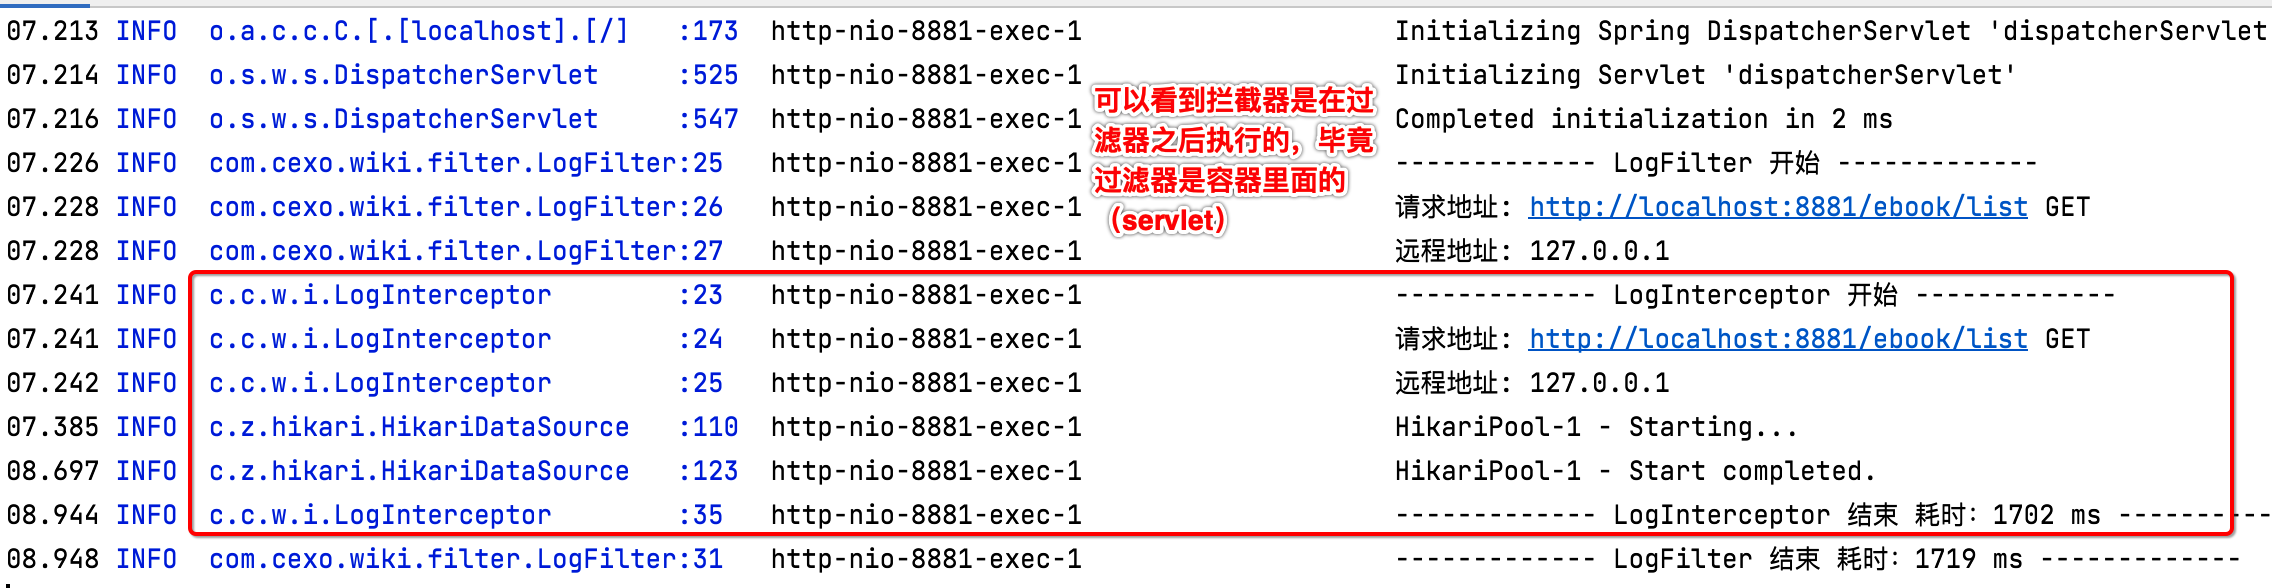
重新运行看一下效果:
SpringBoot AOP的使用:
最后再来看一个AOP的效果,说到Spring都会提到它,同样使用AOP来打印接口耗时、请求参数、返回参数,下面来看一下如何来集成。
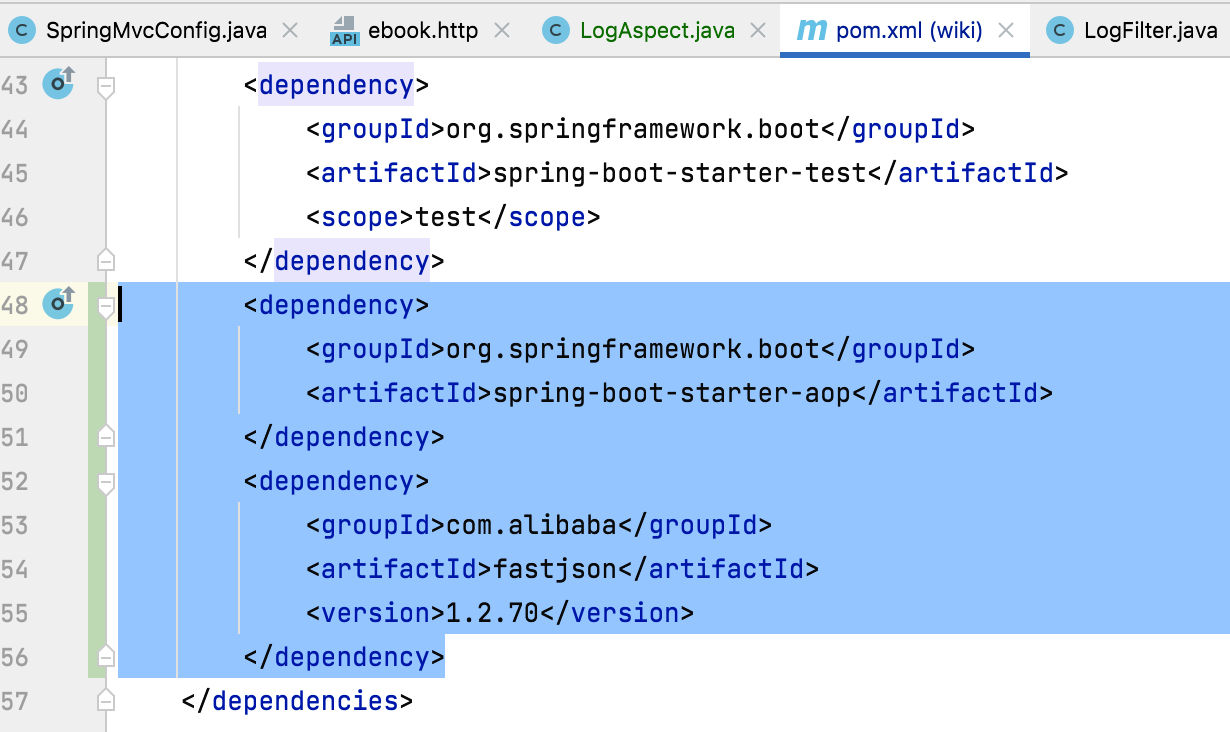
1、增加依赖:
        <dependency>
            <groupId>org.springframework.boot</groupId>
            <artifactId>spring-boot-starter-aop</artifactId>
        </dependency>
        <dependency>
            <groupId>com.alibaba</groupId>
            <artifactId>fastjson</artifactId>
            <version>1.2.70</version>
        </dependency>
2、添加AOP类:
这块代码也直接copy既可:
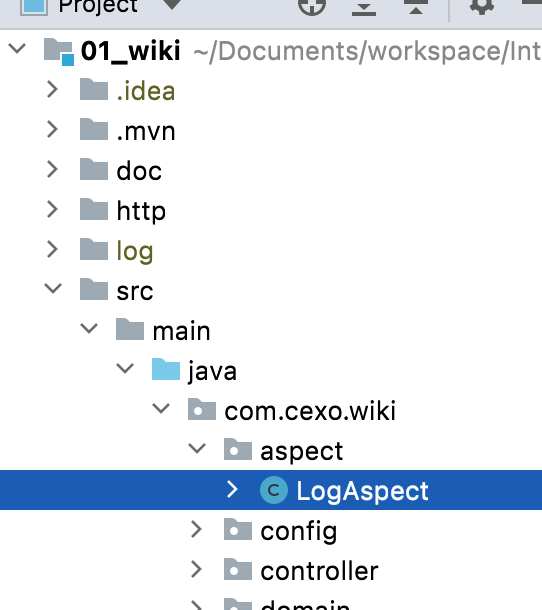
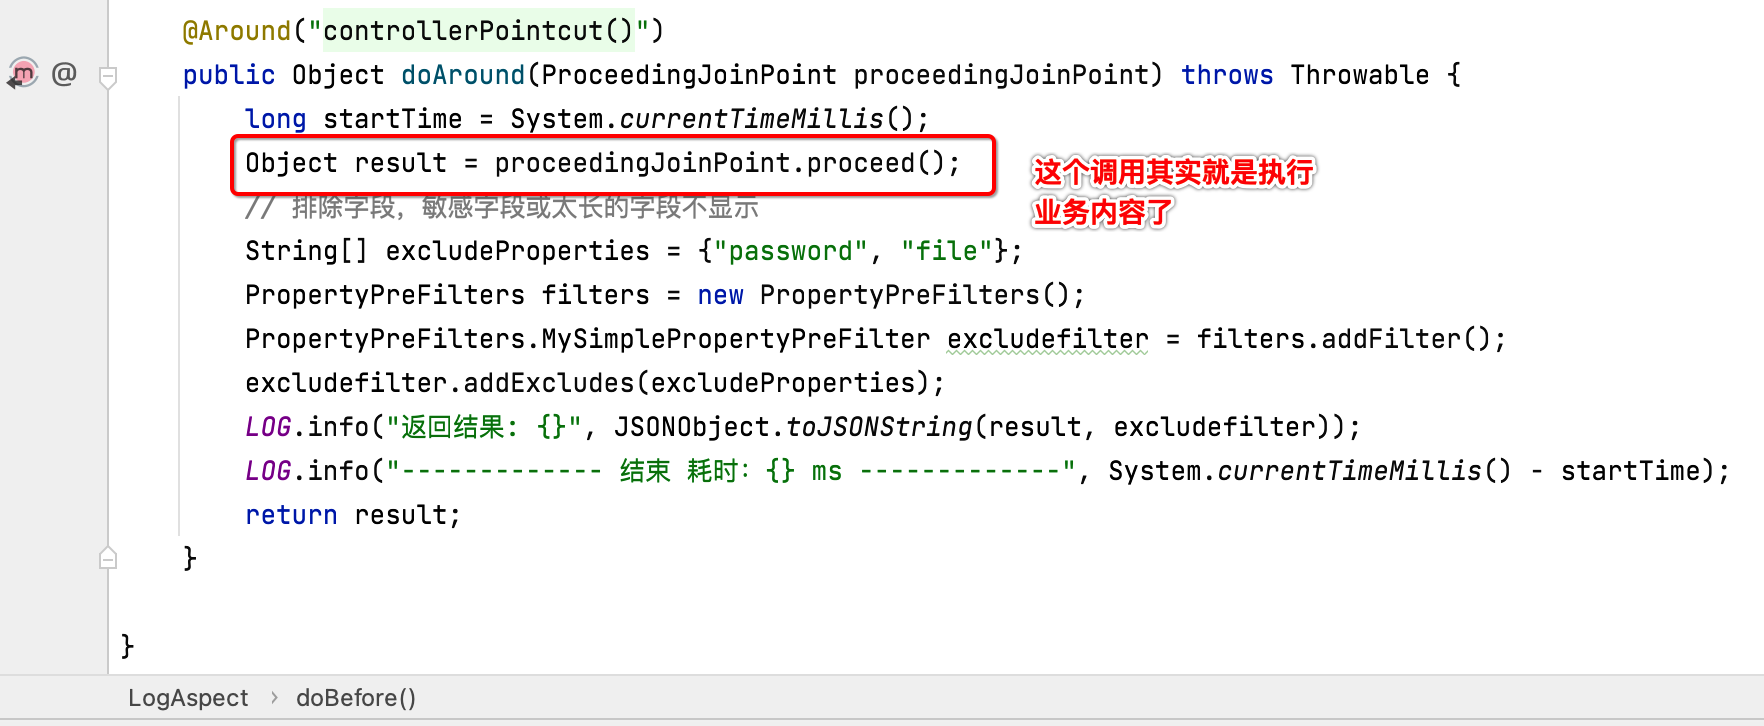
package com.cexo.wiki.aspect;

import com.alibaba.fastjson.JSONObject;
import com.alibaba.fastjson.support.spring.PropertyPreFilters;
import org.aspectj.lang.JoinPoint;
import org.aspectj.lang.ProceedingJoinPoint;
import org.aspectj.lang.Signature;
import org.aspectj.lang.annotation.Around;
import org.aspectj.lang.annotation.Aspect;
import org.aspectj.lang.annotation.Before;
import org.aspectj.lang.annotation.Pointcut;
import org.slf4j.Logger;
import org.slf4j.LoggerFactory;
import org.springframework.stereotype.Component;
import org.springframework.web.context.request.RequestContextHolder;
import org.springframework.web.context.request.ServletRequestAttributes;
import org.springframework.web.multipart.MultipartFile;

import javax.servlet.ServletRequest;
import javax.servlet.ServletResponse;
import javax.servlet.http.HttpServletRequest;

@Aspect
@Component
public class LogAspect {

    private final static Logger LOG = LoggerFactory.getLogger(LogAspect.class);

    /**
     * 定义一个切点
     */
    @Pointcut("execution(public * com.cexo.*.controller..*Controller.*(..))")
    public void controllerPointcut() {
    }

    @Before("controllerPointcut()")
    public void doBefore(JoinPoint joinPoint) {

        // 开始打印请求日志
        ServletRequestAttributes attributes = (ServletRequestAttributes) RequestContextHolder.getRequestAttributes();
        HttpServletRequest request = attributes.getRequest();
        Signature signature = joinPoint.getSignature();
        String name = signature.getName();

        // 打印请求信息
        LOG.info("------------- 开始 -------------");
        LOG.info("请求地址: {} {}", request.getRequestURL().toString(), request.getMethod());
        LOG.info("类名方法: {}.{}", signature.getDeclaringTypeName(), name);
        LOG.info("远程地址: {}", request.getRemoteAddr());

        // 打印请求参数
        Object[] args = joinPoint.getArgs();
        // LOG.info("请求参数: {}", JSONObject.toJSONString(args));

        Object[] arguments = new Object[args.length];
        for (int i = 0; i < args.length; i++) {
            if (args[i] instanceof ServletRequest
                    || args[i] instanceof ServletResponse
                    || args[i] instanceof MultipartFile) {
                continue;
            }
            arguments[i] = args[i];
        }
        // 排除字段,敏感字段或太长的字段不显示
        String[] excludeProperties = {"password", "file"};
        PropertyPreFilters filters = new PropertyPreFilters();
        PropertyPreFilters.MySimplePropertyPreFilter excludefilter = filters.addFilter();
        excludefilter.addExcludes(excludeProperties);
        LOG.info("请求参数: {}", JSONObject.toJSONString(arguments, excludefilter));
    }

    @Around("controllerPointcut()")
    public Object doAround(ProceedingJoinPoint proceedingJoinPoint) throws Throwable {
        long startTime = System.currentTimeMillis();
        Object result = proceedingJoinPoint.proceed();
        // 排除字段,敏感字段或太长的字段不显示
        String[] excludeProperties = {"password", "file"};
        PropertyPreFilters filters = new PropertyPreFilters();
        PropertyPreFilters.MySimplePropertyPreFilter excludefilter = filters.addFilter();
        excludefilter.addExcludes(excludeProperties);
        LOG.info("返回结果: {}", JSONObject.toJSONString(result, excludefilter));
        LOG.info("------------- 结束 耗时:{} ms -------------", System.currentTimeMillis() - startTime);
        return result;
    }

}
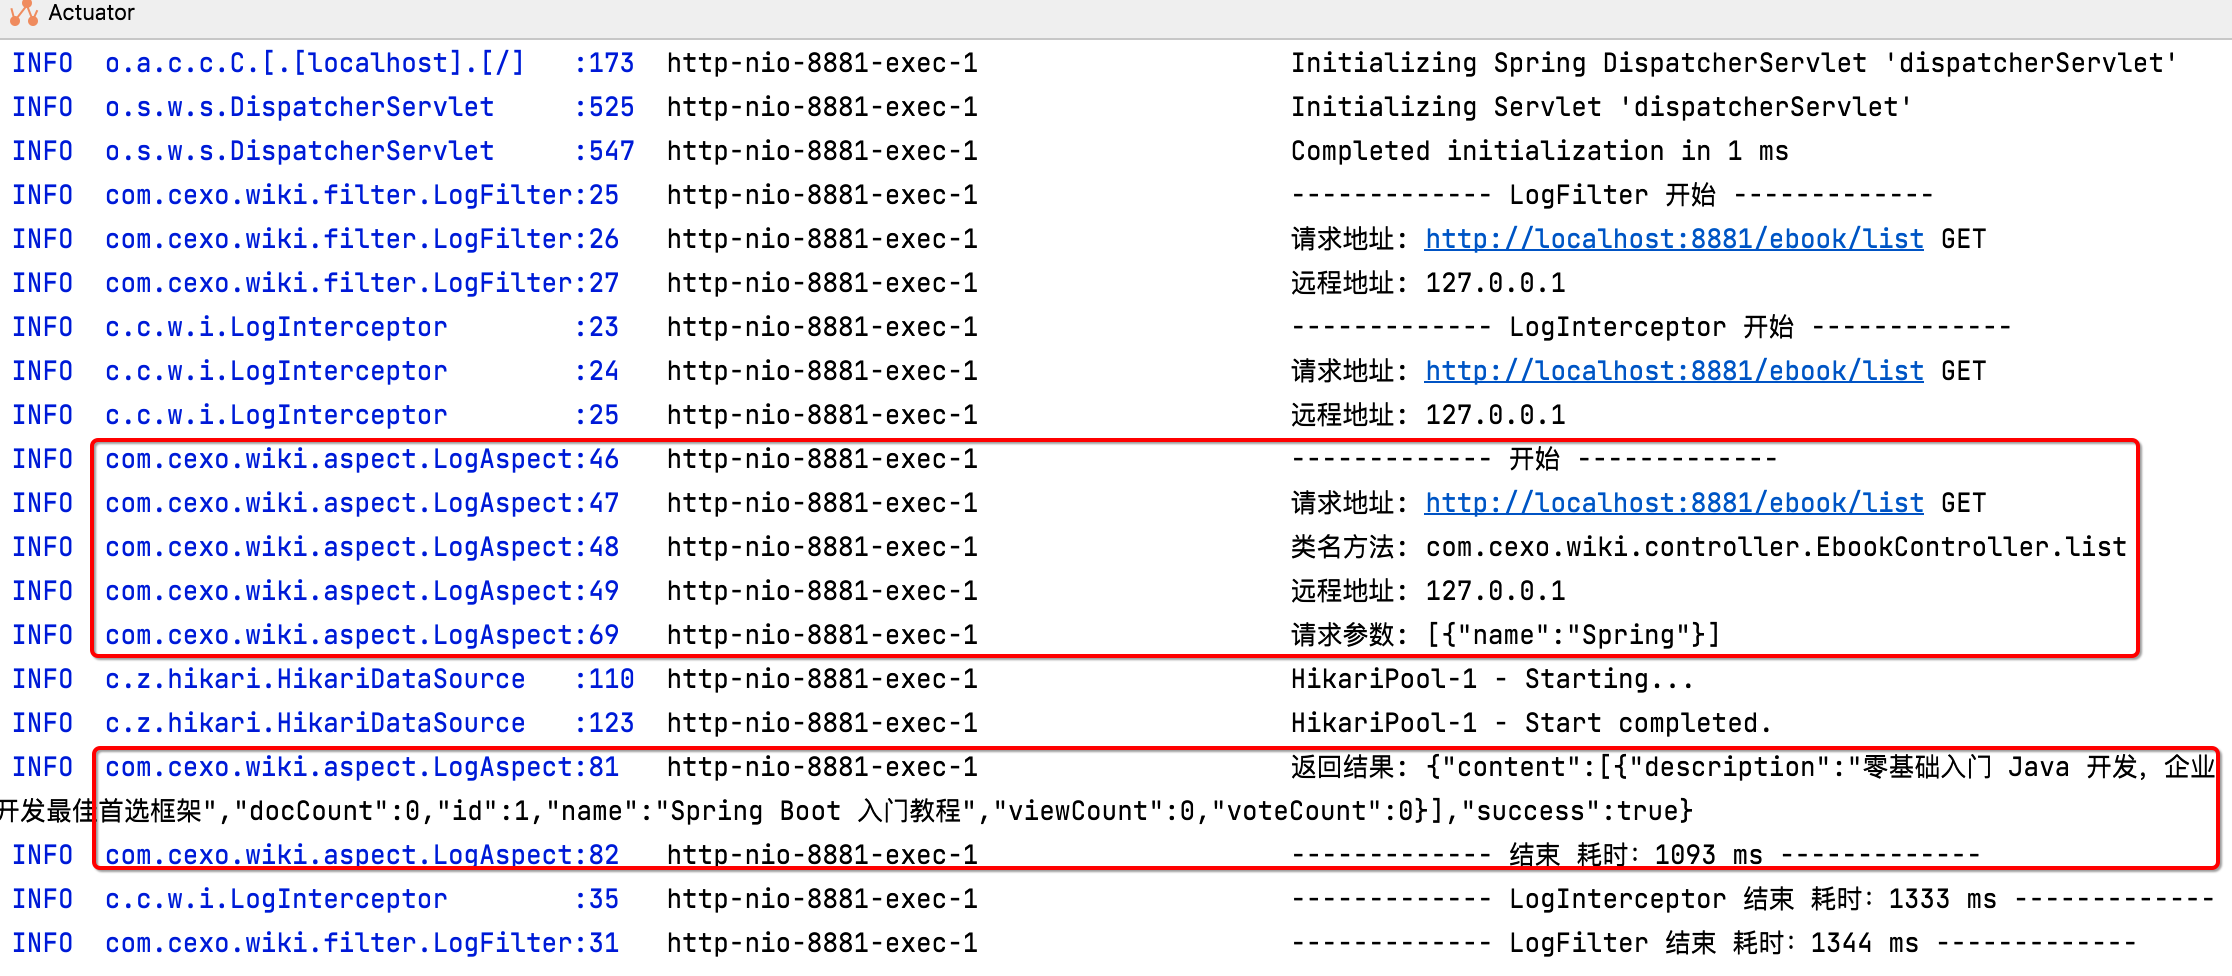
3、运行:
接下来运行看一下效果:
4、理解AOP代码:
接下来咱们来熟悉一下这块AOP的代码。
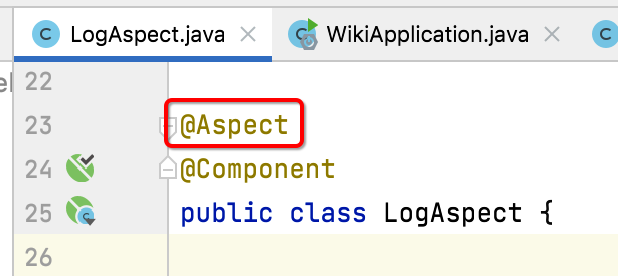
1、@Aspect注解:
要想让此类成为切面,则需要加上这个注解:
2、@Pointcut切点:
定义一个切点:
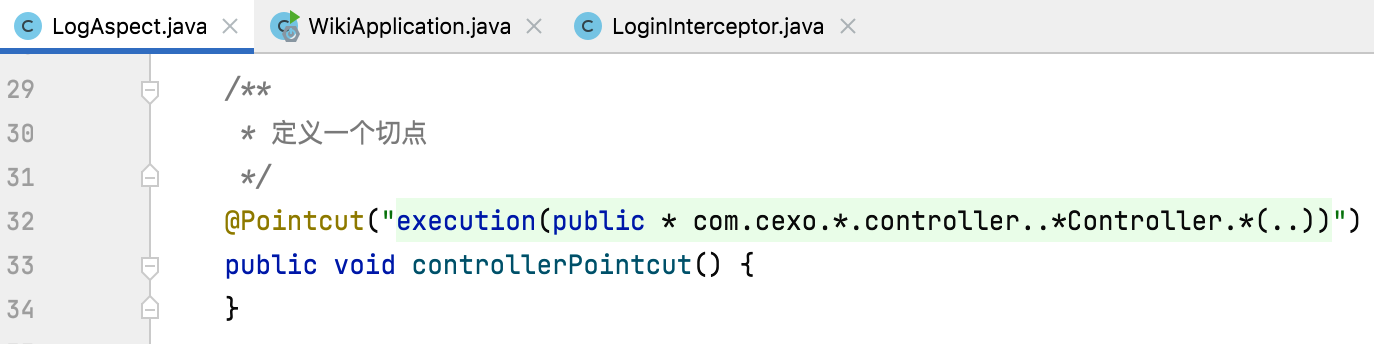
也就是这里配置的是哪些接口会被这个切面给拦截到,我们这里配置的是所有Controller定义的接口。简单理解这个切点的含义就是针对所有的Controller所有的方法,所有的参数都会进入到这个AOP里面。
3、@Before:
它表示前置通知:
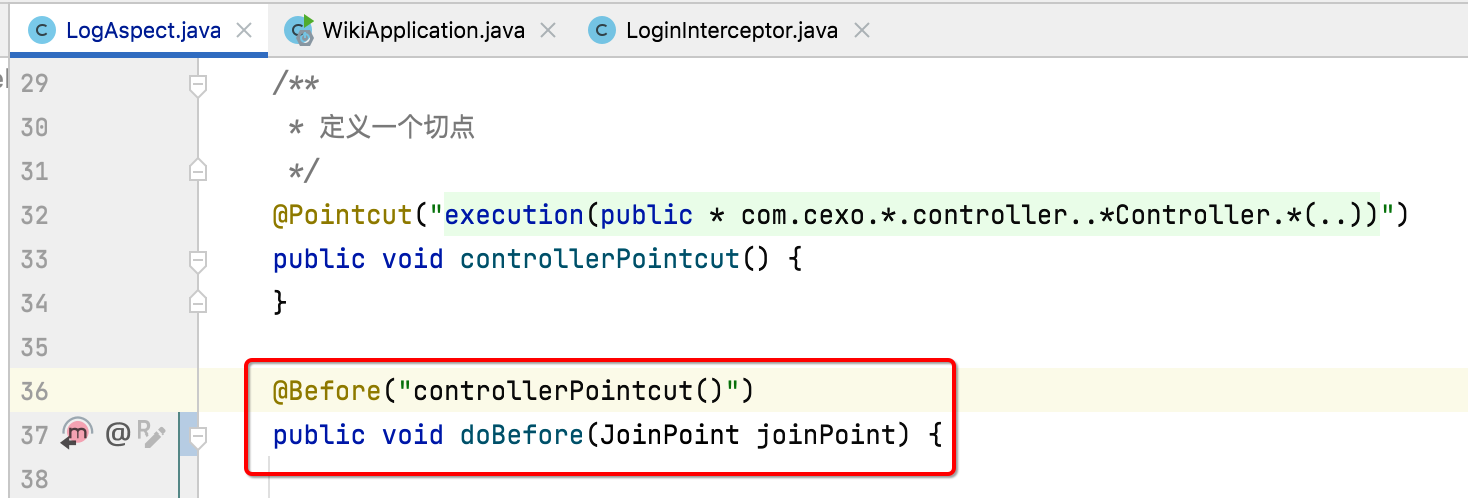
也就是业务代码执行之前需要做的事情就放到这个方法里面,其中AOP跟过滤器有一点不同,就是它拿到的参数是通过这个连接点jointPoint:
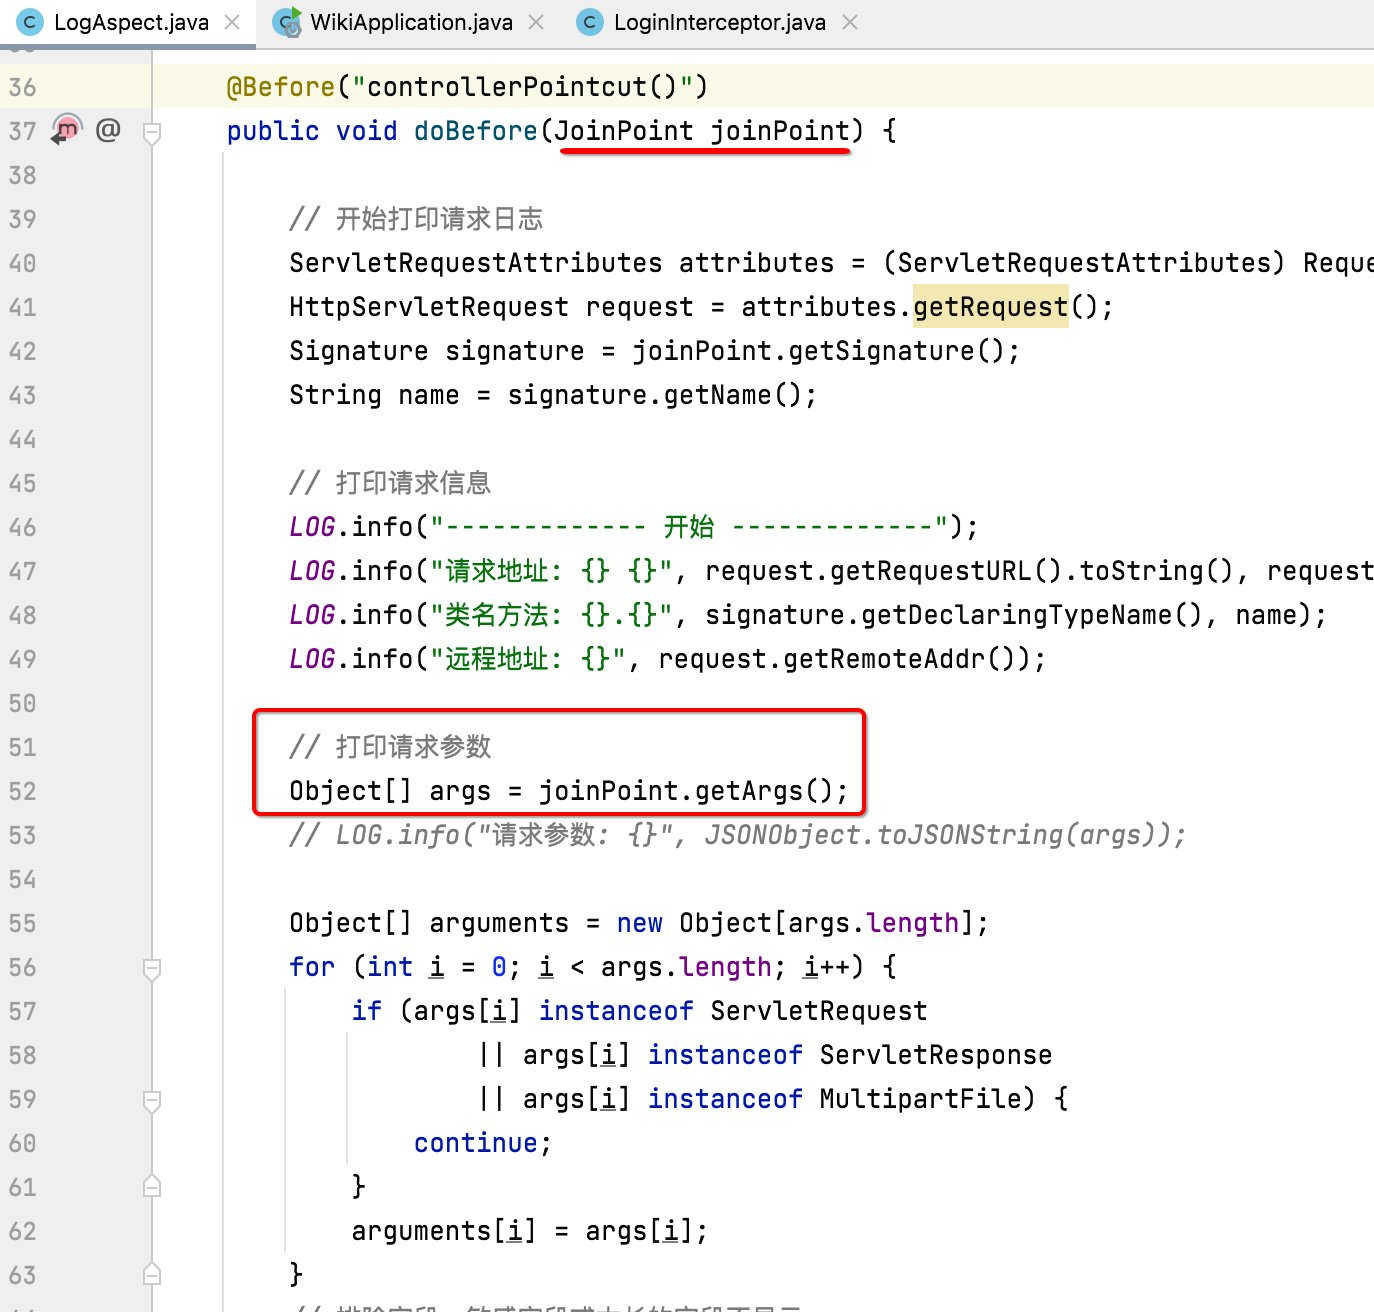
通过它,就可以拿到方法中的参数,比如:
另外有一些敏感字段是不应该打印出来的,此时就可以通过这种方式将其过滤掉:

4、@Around:
环绕通知:
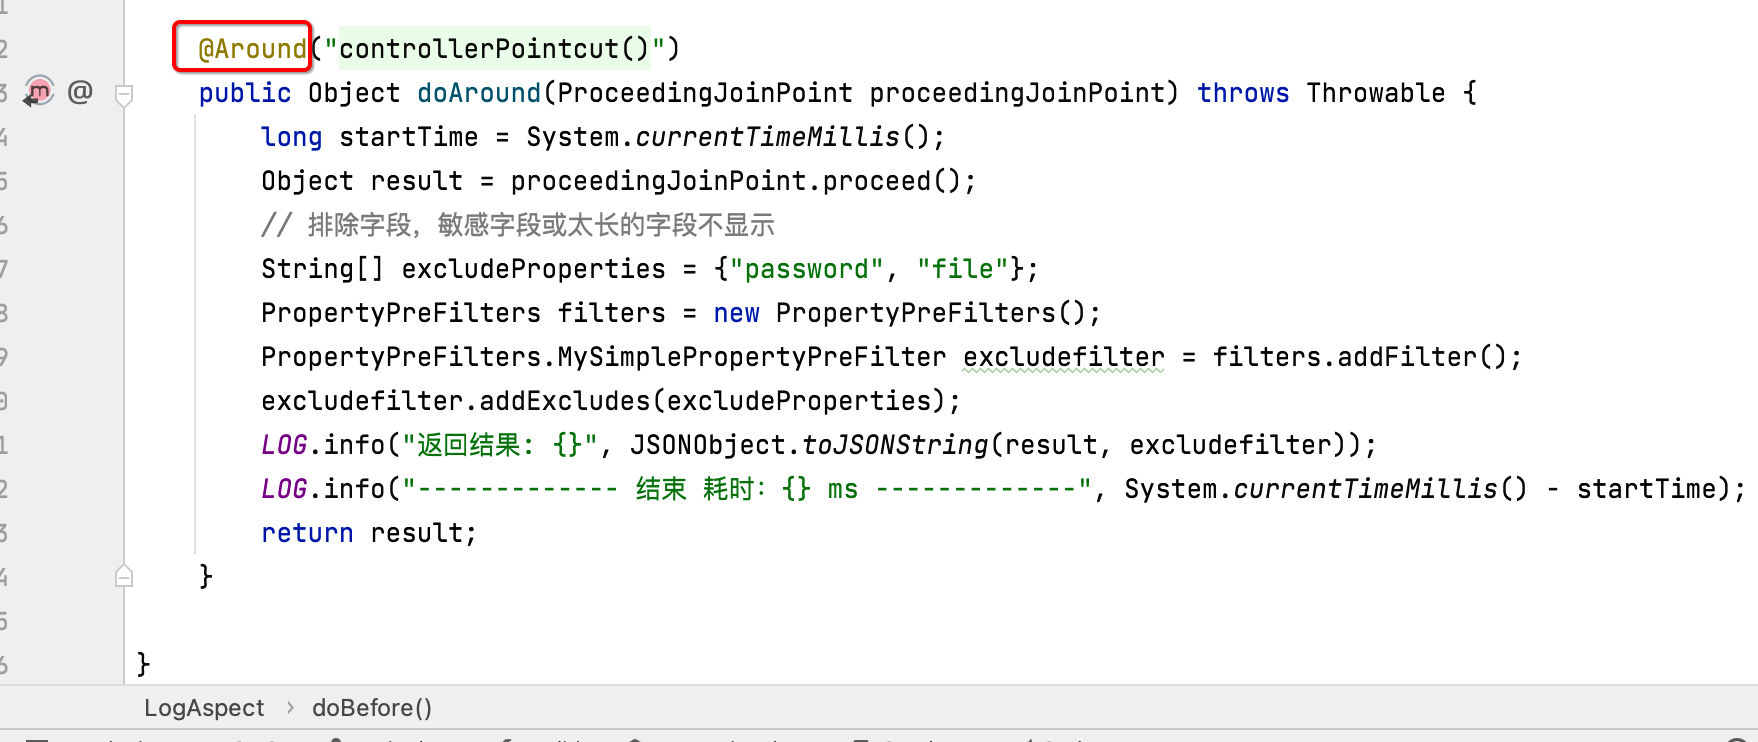
环绕的意思是在接口执行的业务内容的前面执行一点东东,后面执行一点东东,也就是:
有点像过滤器:
5、切面:
整个切点加上通知(前置通知、环绕通知)就构成了一个切面,也就是Aspect的意思了。
目前过滤器、拦截器、AOP都有接口耗时打印的功能,咱们保留一个既可,这里保留AOP的方式,其它两个暂且可以注释掉。


 浙公网安备 33010602011771号