路飛之VUE
---恢复内容开始---
内容详细:
1. vue init webpack luffy
2. 安装依赖:
cd luffy
npm install vuex --save 用于:多组件之间数据共享
npm install vue-cookies --save 用于:操作cookie
npm install axios --save 用于:发送ajax请求
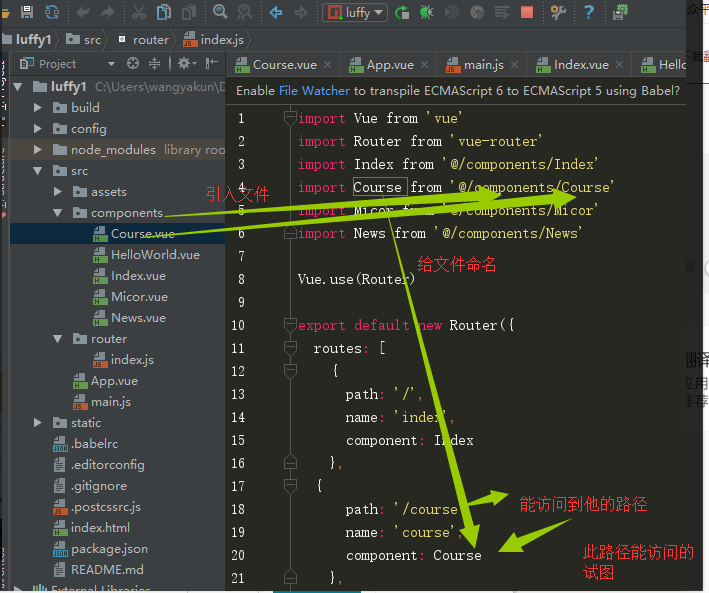
3.创建路由
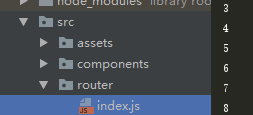
文件写在这里边
注意路由都写在 router:[ 写在这里 以逗号分隔 ]
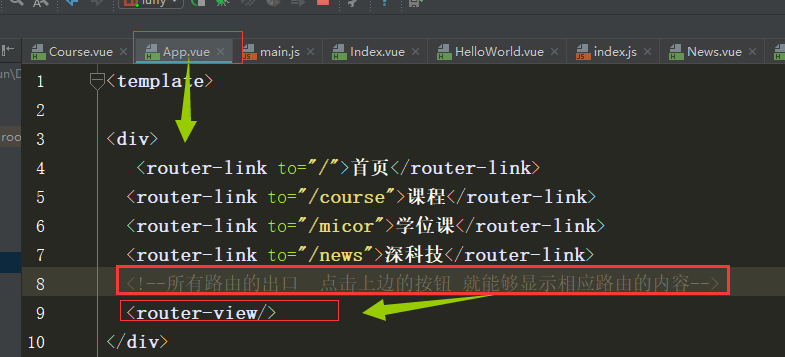
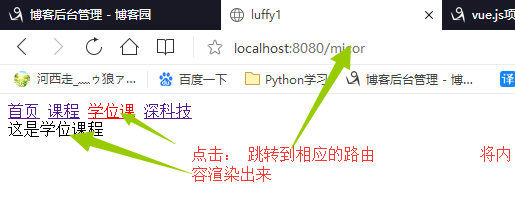
在 App.vue中的配置
显示的页面效果
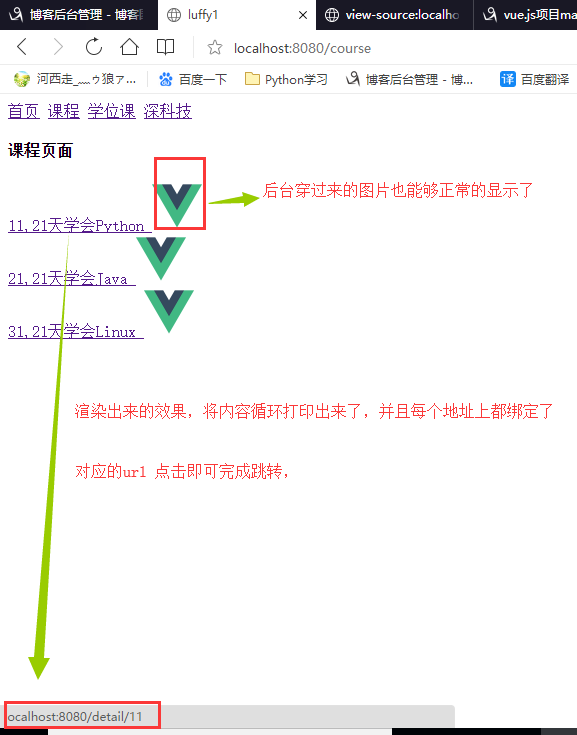
第二步:显示类表详情
用v-for 循环显示页面内容并且设置页面标签绑定的url 涉及到显示传过来的图片,每段文字绑定链接,在for循环中绑定链接 路由中接收id
<template>
  <div>
    <h4>{{msg}}</h4>
    <div v-for="item in courseList">
      <!--第一种方式   有path:的形式来拼接路径-->
      <!--<router-link :to="{ path:'/detail/'+ item.id }">{{item.id}},{{item.name}}-->
        <!--<img class="img" v-bind:src="item.img" alt=""></router-link>-->
      <!--第二种方方式,用name  和params的方式来拼写链接   这里的to  需要绑定       详解请见下文-->
      <router-link :to="{ name:'detail',params:{id:item.id}}">{{item.id}},{{item.name}}
        <img class="img" v-bind:src="item.img" alt=""></router-link>
       <!--因为图片是从后端传送过来的,所以这里要写  v-bind:来绑定用户发送过来的数据  -->
      <router-link to="{name}"></router-link>
    </div>
  </div>
</template>

<script>
  export default {
    name: 'Course',
    data() {
      return {
        msg: '课程页面',      #这里的逗号不能忘记
        courseList:[]
      }
    },
//访问这个地址的时候,就会
    mounted() {
      this.init()
    },
//这个函数的意思是要想执行后边的methods中的函数必须先执行它  而这个往往会调用methods中的函数
    methods: {
      init() {
        this.courseList = [
//          用户发送的静态文件这里要在前边写上  require  这里注意写法
          {id: 11, name: '21天学会Python', img: require('../assets/logo.png')},
          {id: 21, name: '21天学会Java', img: require('../assets/logo.png')},
          {id: 31, name: '21天学会Linux', img: require('../assets/logo.png')},
        ]
      }
    }
  }
</script>

<!-- Add "scoped" attribute to limit CSS to this component only -->
<style scoped>
.img{width:50px;height:50px
}
</style>
路由在index.js文件中的写法
  {
      path: '/detail/:id ',
      name: 'detail',
      component: Detail
    },

//////  与上例中的router-link对比这计
 <router-link :to="{ name:'detail',params:{id:item.id}}">{{item.id}},{{item.name}}
        这个name就相当于上边的name  这里parmas中的的id的值就相当于上边的后边的  /:id
        <img class="img" v-bind:src="item.img" alt=""></router-link>
效果
第三步:获取url中的id并显示相应的内容 显示课程推荐并可以点击显示推荐的内容
知识点:: 这里用到了主动给url 重定向 如何取出用户输入的url中的参数 params的值
<template>
  <div>
    <h4>{{msg}}{{currentCouersId}}</h4>
    <li>课程名称:{{CoureDtail.title}}</li>
    <li>课程简介:{{CoureDtail.summary}}</li>
    <h4>课程推荐</h4>
    <ul v-for="item in recoments">
      <!--<li><router-link :to="{name:'detail',params:{id:item.id}}" >{{item.id}}{{item.name}}</router-link></li>-->
    //点击触发下边定义好的事件,并将参数传给事件

      <li @click="CourentChangeId(item.id)">{{item.id}}{{item.name}}</li>

    </ul>

    </div>
  </div>
</template>

<script>
  export default {
    name: 'Detail',
    data() {
      return {
        msg: '课程详细',
//能够从url中去取出  自己在路由中定义的  名字为id的params(参数) 注意这里写的是route   用于显示课程推荐的的详情
        currentCouersId:this.$route.params.id,
        CoureDtail: {
          title:'',
          summary:''
        },
        recoments:[
          {id:100,name:'vue'},
          {id:200,name:'sql'},
        ]
      }
    },
    mounted(){
      this.init()
    },
    methods:{
      init(){
        this.CoureDtail={
          title:'21天学会python',
          summary:'休想',
        }
      },
      CourentChangeId(id){
//        1 主动将课程内容根据课程id进行更新
        this.currentCouersId=id
//       2 再次执行一个init方法将数据刷新上去
        this.init()
//       注意这里写的是router  要与上边区分开来
//   重要     将url 进行重定向  相当于django中的 redirect
        this.$router.push({name:'detail',params:{id:id}})
      }

    }
  }

</script>

<!-- Add "scoped" attribute to limit CSS to this component only -->
<style scoped>


</style>
第四部:登录
使用vuex组件来生成一个全局的store组件 这个全局的组件中有他的属性和方法, 所以 在任何一个组件中都可以进行调用
使用vue-cookies 组件来对用户登录的数据进行记录和查询
自己写的store组件 重要:
import Vue from 'vue'
import Vuex from 'vuex'
import Cookie from 'vue-cookies'
Vue.use(Vuex)
export default new Vuex.Store({
// 组件中通过 this.$store.state.username 调用 全局属性
state: {
username: Cookie.get('username'),
token: Cookie.get('token'),
//配置全局的api,当我组件中用到相关api 的使用就可以按照此方法引入数据
apiList: {
auth: 'http://127.0.0.1:8000/api/v1/auth/',
courses: 'http://127.0.0.1:8000/api/v1/courses/',
pricePolicy: 'http://127.0.0.1:8000/api/v1/price_policy/',
shopCar: 'http://127.0.0.1:8000/api/v1/shop_car/',
}
},
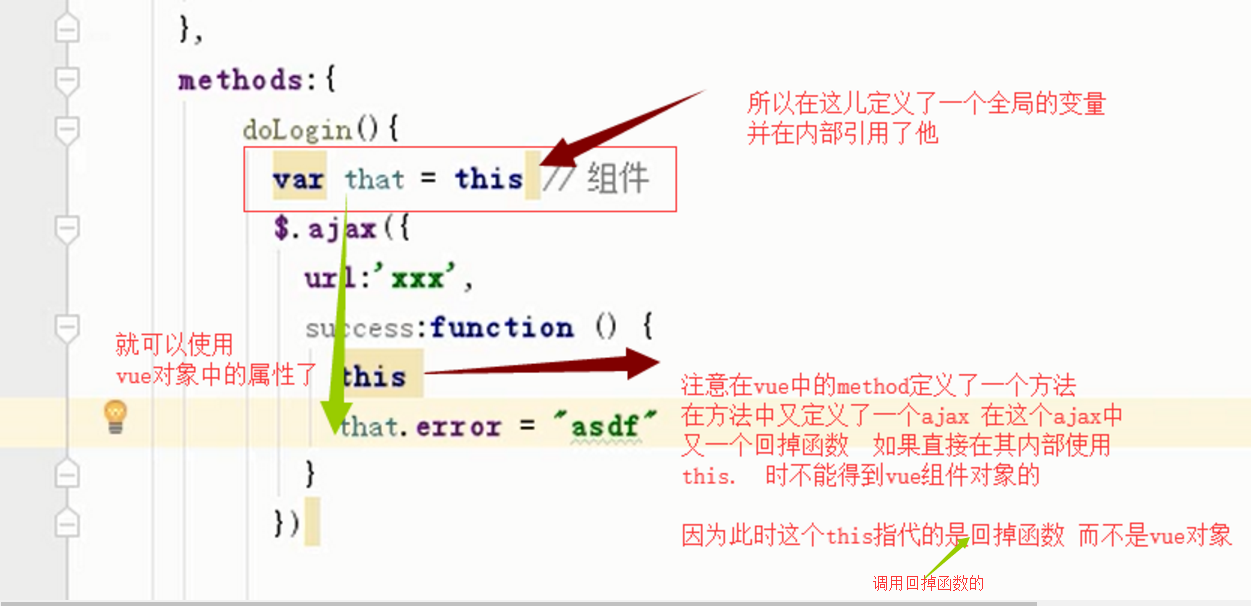
mutations: {
// 组件中通过 this.$store.commit('saveToken',{username:'alex',token:'sdfsdfsdf'}) 调用 全局的方法
////////////////////////////解读///////////////////////////
![]()
/////////////////////结束////////////////////////
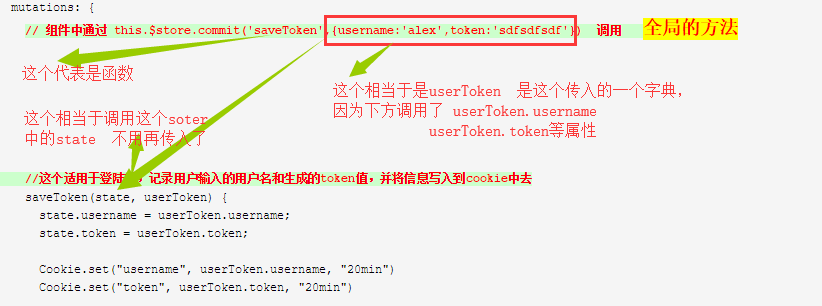
    //这个适用于登陆的,记录用户输入的用户名和生成的token值,并将信息写入到cookie中去
    saveToken(state, userToken) {
      state.username = userToken.username;
      state.token = userToken.token;

      Cookie.set("username", userToken.username, "20min")
      Cookie.set("token", userToken.token, "20min")

    },
    //这个是用于注销的,将信cookie中和state中的息全部清除
    clearToken(state) {
      state.username = undefined
      state.token = undefined

      Cookie.remove('username')
      Cookie.remove('token')

    }
  }
})
这里就引入了store中定义的url而且可以url的后边添加params
代码


import Vue from 'vue'
import Vuex from 'vuex'
import Cookie from 'vue-cookies'

Vue.use(Vuex)

export default new Vuex.Store({
  // 组件中通过 this.$store.state.username 调用
  state: {
    username: Cookie.get('username'),
    token: Cookie.get('token'),
    //白名单
    apiList: {
      auth: 'http://127.0.0.1:8000/api/v1/auth/',
      courses: 'http://127.0.0.1:8000/api/v1/courses/',
      pricePolicy: 'http://127.0.0.1:8000/api/v1/price_policy/',
      shopCar: 'http://127.0.0.1:8000/api/v1/shop_car/',
    }
  },
  mutations: {
    // 组件中通过 this.$store.commit('saveToken',{username:'alex',token:'sdfsdfsdf'})  调用
    //这个适用于登陆的,记录用户输入的用户名和生成的token值,并将信息写入到cookie中去
    saveToken(state, userToken) {
      state.username = userToken.username;
      state.token = userToken.token;

      Cookie.set("username", userToken.username, "20min")
      Cookie.set("token", userToken.token, "20min")

    },
    //这个是用于注销的,将信cookie中和state中的息全部清除
    clearToken(state) {
      state.username = undefined
      state.token = undefined

      Cookie.remove('username')
      Cookie.remove('token')

    }
  }
})
所在目录结构

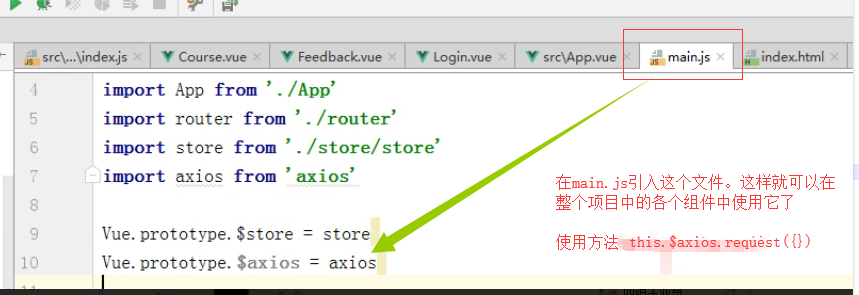
写完store之后在main.js注册上
import Vue from 'vue'
import App from './App'

import router from './router'

import store from './store/store'
//这就话相当于给Vue加上一个内部的属性store
// 这样就在全局声明了这个内容
Vue.prototype.$store = store
Vue.config.productionTip = false

/* eslint-disable no-new */
new Vue({
  el: '#app',
  router,
  //在在这里加上store这样就可以在全局中各个视图组件中使用这个store
  store,
  components: { App },
  template: '<App/>'
})
走完这两部之后就可以在全局中使用store中的属性和方法了
在App.vue中使用
<template>

<div>
   <router-link to="/">首页</router-link>
  <router-link to="/course">课程</router-link>
  <router-link to="/micor">学位课</router-link>
  <router-link to="/news">深科技</router-link>
  <!--判断当$store中的username的值不是空的时候(默认为空)表示用户已经等路  -->
  <div v-if="this.$store.state.username">
        <a>{{this.$store.state.username}}</a>
        <a v-on:click="doLogout">注销</a>
      </div>
  <!--这里还有一个else方法呢,用于当用户没有登录的情况下-->
      <div v-else>
        <router-link to="/login">登录</router-link>
      </div>
  <!--<router-link to="/logout">注销</router-link>-->
  <!--所有路由的出口  点击上边的按钮 就能够显示相应路由的内容-->
  <router-view/>
</div>

</template>

<script>
export default {
  name: 'App',
   methods: {
     doLogout() {
//      调用全局store中的方法,执行注销登录的操作
       this.$store.commit('clearToken')
     }
   }
}
</script>

<style>
#app {
  font-family: 'Avenir', Helvetica, Arial, sans-serif;
  -webkit-font-smoothing: antialiased;
  -moz-osx-font-smoothing: grayscale;
  text-align: center;
  color: #2c3e50;
  margin-top: 60px;
}
</style>
在login.vue中使用
<template>
  <div>
    <span>用户名</span>
    <input type="text" v-model="username" >
    <span>密码</span>
    <input type="password" v-model="password">
    <button @click="doLogin">提交</button>{{error}}
          <a>{{username}}</a>
    </div>

  <!--<span>{{password}}</span>-->
  </div>
</template>

<script>
  export default {
    name: 'Login',
    data() {
      return {
        username: '',
        password: '',
        error: '',
      }
    },
    mounted() {
    },
    methods: {
      doLogin() {
//判断是否用户名密正确,这里使用的是  === 三个等号
        if (this.username === 'alex' && this.password === '123') {
//调用store中的一个全局的方法,给用户的cookie中写入内容
          this.$store.commit('saveToken',{username:this.username,token:'qwertyui'})
          this.$router.push({name: "index"})
        }
        else {
          this.error = '登录失败'
        }

      }
    }
  }
</script>

<style scoped>
.img{width:50px;height:50px
}
</style>
第五步:切换效果
            课程详细页面:tab切换
            1. HTML
                <h1>tab切换</h1>
                <div class="tab-menu">
                  <div>
          //设定点击事件,当被点击的时候,就将这个标签的值设置为ture  详细看下边的方法
                    <a v-on:click="changeTab('detail')">课程概述</a>
                    <a v-on:click="changeTab('chapter')">课程章节</a>
                    <a v-on:click="changeTab('review')">用户评价</a>
                    <a v-on:click="changeTab('question')">常见问题</a>
                  </div>
                </div>

                <div>
//判断变量中的值是true还是false  当是true的时候  显示  false的时候不显示
                  <div v-show="tabs.detail">课程概述内容</div>
                  <div v-show="tabs.chapter">课程章节内容</div>
                  <div v-show="tabs.review">用户评价内容</div>
                  <div v-show="tabs.question">常见问题内容</div>
                </div>
            2. 变量和函数
                export default {
                  name: "detail",
                  data(){
                      return {
//变量,将一个的值设置为true其他的全部设置为false
                        tabs: {
                          detail: true,
                          chapter: false, //chapter
                          review: false,
                          question: false,
                        },
                      }
                  },
                  mounted(){
                    this.init()
                  },
                  methods:{
//方法,点击标签触发事件
                    changeTab(name) {
                        for (let item in this.tabs) {
                          if (item === name) {
                            this.tabs[item] = true
                          } else {
                            this.tabs[item] = false
                          }
                        }
                      }
                  }
                }
            3. 样式
                .tab-menu {
                    border-bottom: 1px solid #ddd;
                    padding-top: 30px;
                    text-align: center;
                  }

                  .tab-menu a {
                    display: inline-block;
                    padding: 20px;
                    border-bottom: 2px solid transparent;
                    cursor: pointer;
                  }

                  .tab-menu a:hover {
                    border-bottom: 2px solid darkseagreen;
                  }
第六步:
第七部:基于router的拦截器实现用户登录成功后才能访问页面
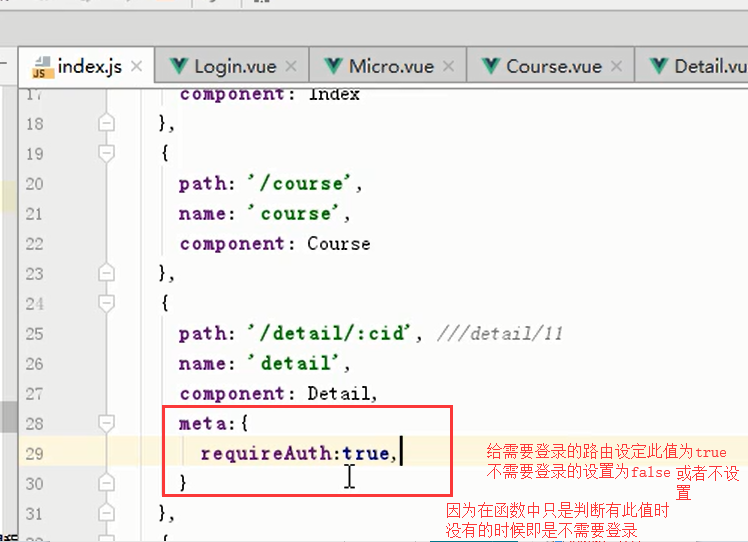
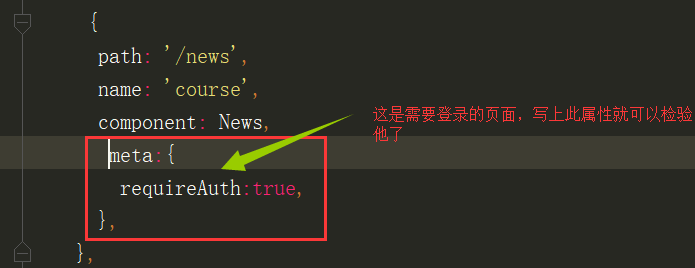
在index.js中设置需要登录和不用登录的url
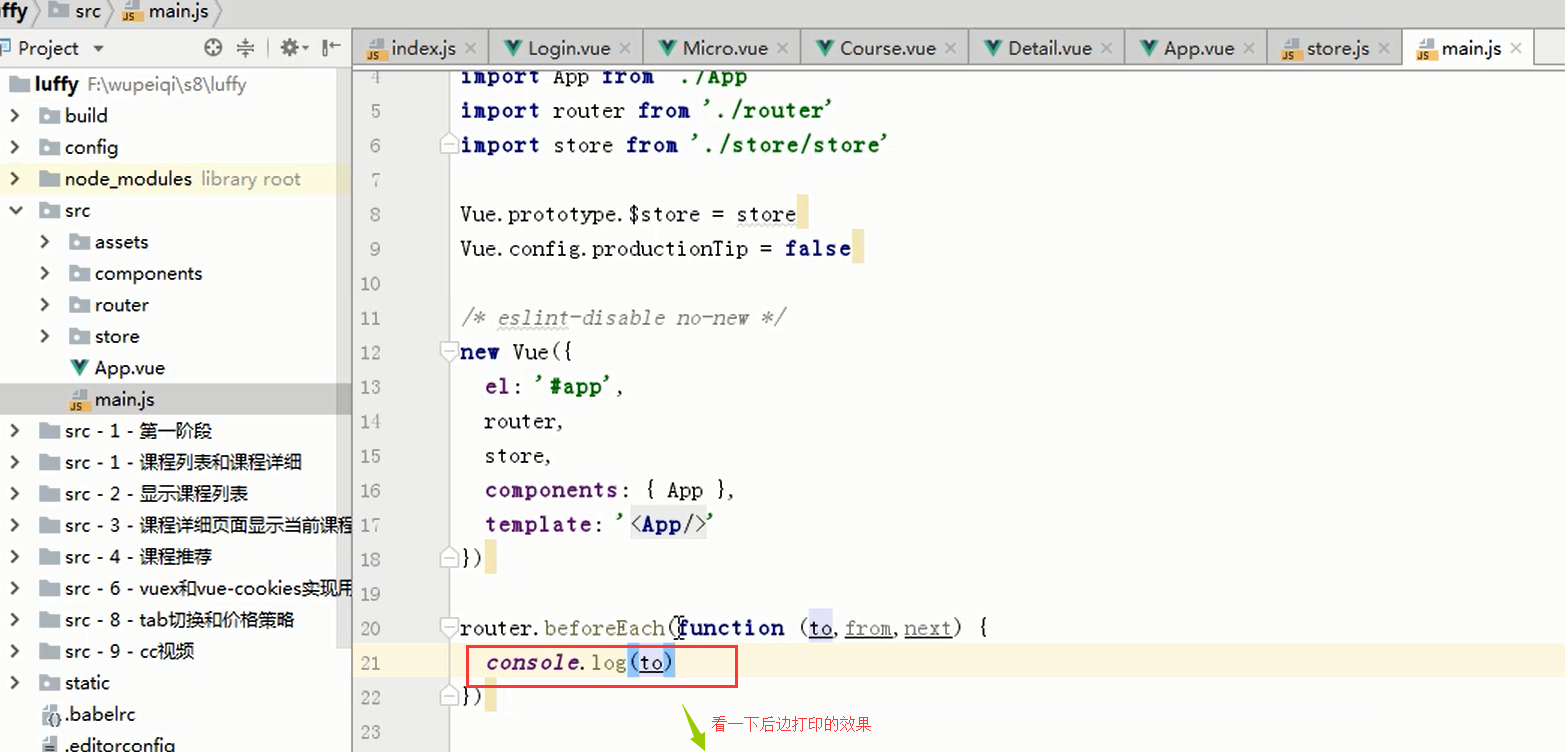
main.js中的代码
// The Vue build version to load with the `import` command // (runtime-only or standalone) has been set in webpack.base.conf with an alias. import Vue from 'vue' import App from './App' import router from './router' import store from './store/store' //这就话相当于给Vue加上一个内部的属性store // 这样就在全局声明这个属性,放到了 $store中了, // 所以可以在内部的视图中使用this.$store来访问store中的内容 Vue.prototype.$store = store Vue.config.productionTip = false /* eslint-disable no-new */ new Vue({ el: '#app', router, //在在这里加上store这样就可以在全局中各个视图组件中使用这个store store, components: { App }, template: '<App/>' })
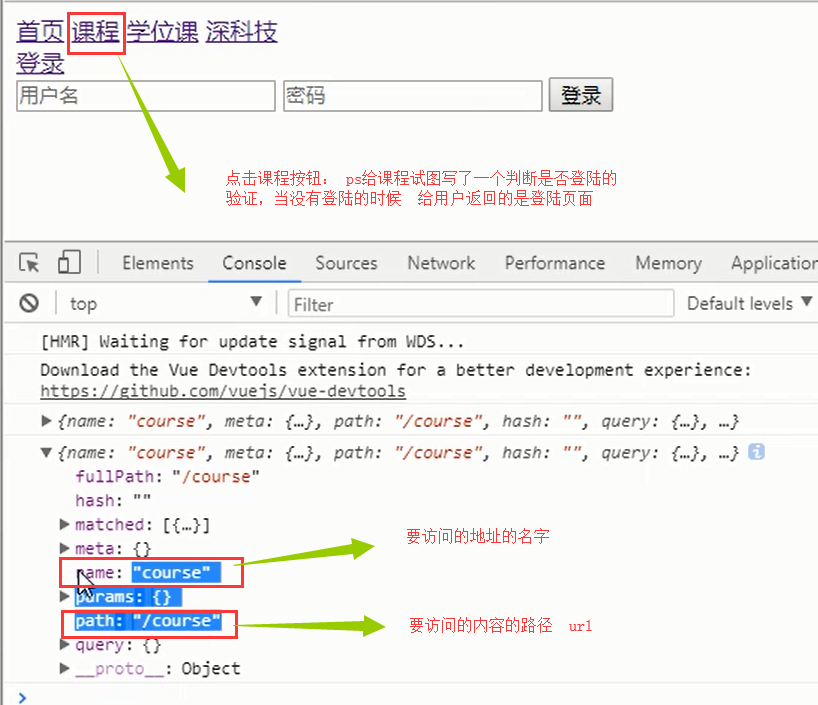
//这里是进行拦截代码 router.beforeEach(function (to,from,next) { if(to.meta.requireAuth){ // 需要登录的路由 //因为上边有一个import store的过程, // 所以就可以直接试用他。不用写成this.$store if (store.state.token) { // 已经登录,可以去继续访问 next() } else { // 未登录 next({ name: 'login' }) } }else{ // 不需要登录的路由 next() } } )
注意this
axios的使用
1先给项目安装依赖
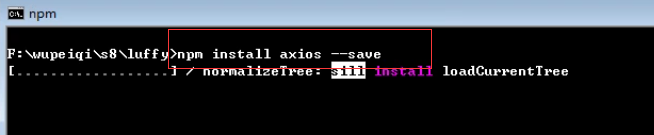
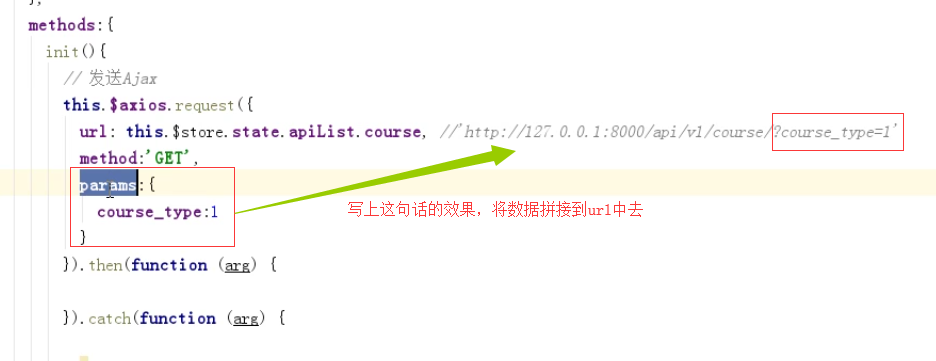
类似于ajax 通过axios 来发送ajax请求
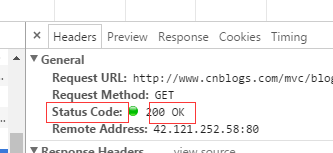
<template>
  <div>
    <h1>{{msg}}</h1>
    <div v-for="item in courseList">
      <!--<router-link to="/detail">{{item.id}} {{item.name}} <img class="img" v-bind:src="item.img" alt=""></router-link>-->
      <!--<router-link :to="{path: '/detail/'+item.id }">{{item.id}} {{item.name}} <img class="img" v-bind:src="item.img" alt=""></router-link>-->
      <router-link :to="{ name:'detail',params:{cid:item.id} }">{{item.id}} {{item.name}} <img class="img" v-bind:src="item.img" alt=""></router-link>
    </div>


  </div>
</template>

<script>
  export default {
    name: "Course",
    data(){
      return {
        msg:'课程列表',
        courseList:[],

      }
    },
    mounted(){
      this.init()
    },
    methods:{
      init(){
        // 发送Ajax
        var that = this
        this.$axios.request({
          url: this.$store.state.apiList.course,
          method:'GET',
          params:{
            course_type:1
          }
          #当成功的时候,就返回的数据的status_code为200的时候,数据就存放在then中  类似于ajax中的 success
        }).then(function (arg) {
          console.log('then',arg)
          that.courseList =arg.data.data
        }).catch(function (arg) {
          console.log('catch',arg.response)
        })
      }

    }

  }
</script>

<style scoped>
  .img{
    width: 30px;
    height: 30px;
  }

</style>


 浙公网安备 33010602011771号