指令常作用在Html的标签上,实现对应的功能
1.文本指令
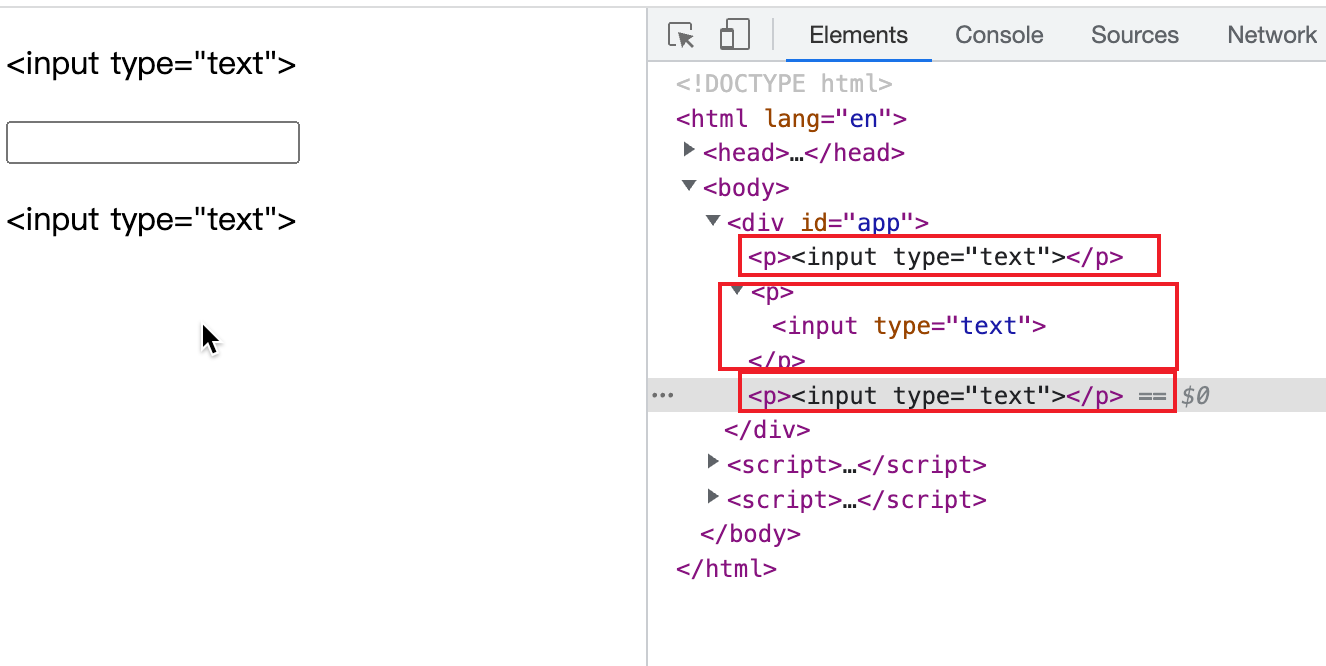
- v-html:将变量代指的字符串通过html代码渲染在页面
- v-text:将变量代指的字符串通过普通文本显示在页面
v-text完成的功能和{{}}是一样的,区别在于v-text是绑定一个标签,而后者是写在标签之间
<!DOCTYPE html>
<html lang="en">
<head>
    <meta charset="UTF-8">
    <title>Title</title>
    <!-- 引入vue.js-->
    <script src="js/vue.js"></script>
</head>
<body>
<div id="app">
    <p>{{info}}</p>
    <!-- v-html-->
    <p v-html="info"></p>
    <!-- v-text-->
    <p v-text="info"></p>
</div>
</body>
<script>
    new Vue({
        // vue管理的区域,所有的vue语法仅在该区域内生效
        el: '#app',
        data: {
            info: '<input type="text">'
        }
    })
</script>
</html>
效果:
2.v-on:事件指令
使用方法:
v-on:事件名称=函数名
可以简写为:@事件名=函数名
当出发对应的事件时,就会执行对应的函数
2.1 click事件


 1 <!DOCTYPE html>
 2 <html lang="en">
 3 <head>
 4     <meta charset="UTF-8">
 5     <title>Title</title>
 6     <!-- 引入vue.js-->
 7     <script src="js/vue.js"></script>
 8 </head>
 9 <body>
10 <div id="app">
11     <button v-on:click="clickHandler">点我看美女</button>
12     <hr>
13     <img v-show="showPic" src="https://img1.baidu.com/it/u=641358881,2844098460&fm=253&fmt=auto&app=138&f=JPEG?w=500&h=727">
14 </div>
15 </body>
16 <script>
17     new Vue({
18         // vue管理的区域,所有的vue语法仅在该区域内生效
19         el: '#app',
20         data: {
21             showPic:false
22         },
23         // 定义函数的位置
24         methods:{
25             clickHandler(){
26                 this.showPic = true
27             }
28         }
29     })
30 </script>
31 </html>
2.2 其它事件
- dbclick:双击
- blur:失去焦点
- input:输入内容:主要针对input输入框
- chang:发生改变:主要针对input输入框
- mouseover,悬浮
- mouseout,离开悬浮
3.v-bind:属性指令
单向绑定 常用于标签的属性值进行操作,如class, value,style, href,id等,当Js中的变量发生改变,html中绑定的变量也会发生改变
使用方法:v-bind:属性名=变量
简写 :属性=变量
 1 <!DOCTYPE html>
 2 <html lang="en">
 3 <head>
 4     <meta charset="UTF-8">
 5     <title>Title</title>
 6     <!-- 引入vue.js-->
 7     <script src="js/vue.js"></script>
 8 </head>
 9 <body>
10 <div id="app">
11     <button v-on:click="clickHandler">点我随机看美女</button>
12     <hr>
13     <img v-show="showPic" style="width: 200px" v-bind:src="url">
14 </div>
15 </body>
16 <script>
17     new Vue({
18         // vue管理的区域,所有的vue语法仅在该区域内生效
19         el: '#app',
20         data: {
21             url: '',
22             showPic:false,
23             picList:[
24                 'https://img0.baidu.com/it/u=2676891553,2638377323&fm=253&fmt=auto&app=138&f=JPEG?w=889&h=500',
25                 'https://img0.baidu.com/it/u=2804713765,300474639&fm=253&fmt=auto&app=138&f=JPEG?w=500&h=767',
26                 'https://img1.baidu.com/it/u=2574408423,112333017&fm=253&fmt=auto&app=138&f=JPEG?w=500&h=800',
27                 'https://img0.baidu.com/it/u=1501084209,93021381&fm=253&fmt=auto&app=138&f=JPEG?w=889&h=500',
28
29             ]
30         },
31         // 定义函数的位置
32         methods: {
33             clickHandler() {
34                 // 设置一个定时器,每隔一秒变换一次
35                 setInterval(()=>{
36                     let index = Math.floor(Math.random()*this.picList.length)
37                     this.url = this.picList[index]
38
39                 }, 1000)
40                 this.showPic = true
41             }
42         }
43     })
44 </script>
45 </html>
3.1 class的三种绑定方式
- 字符串
- 数组(常用)
- 对象
<!DOCTYPE html>
<html lang="en">
<head>
    <meta charset="UTF-8">
    <title>Title</title>
    <!-- 引入vue.js-->
    <script src="js/vue.js"></script>
    <style>
        .size{
            font-size: 50px;
        }
        .back{
            background-color: greenyellow;
        }
        .color{
            color: red;
        }
    </style>
</head>
<body>
<div id="app">

    <div :class="class_str">俺是一个div</div>
</div>
</body>
<script>
    new Vue({
        // vue管理的区域,所有的vue语法仅在该区域内生效
        el: '#app',
        data: {
            // 1.通过字符串的形式控制样式
            // class_str:'size back color',
            // 2.通过类字符串列表控制样式(常用)
            class_str:['size', 'back', 'color'],
            // 3.通过对象的形式控制样式
            clas_str:{
                size:true,
                back:false,
                color:true
            }
        },

    })
</script>
</html>
3.2 style的三种绑定方式
- 字符串
- 数组
- 对象(常用)
<!DOCTYPE html>
<html lang="en">
<head>
    <meta charset="UTF-8">
    <title>Title</title>
    <!-- 引入vue.js-->
    <script src="js/vue.js"></script>
    <style>
        .size {
            font-size: 50px;
        }

        .back {
            background-color: greenyellow;
        }

        .color {
            color: red;
        }
    </style>
</head>
<body>
<div id="app">

    <div :style="style_str">俺也是一个div</div>
</div>
</body>
<script>
    new Vue({
        // vue管理的区域,所有的vue语法仅在该区域内生效
        el: '#app',
        data: {
            // 1.通过字符串控制样式
            style_str: 'font-size:50px; color:red;background-color:green',

            // 2. 通过数组控制样式
            // style_list:[{'font-size':'50px'}, {'color':'red'}, {'background-color':'green'}],
            style_list: [{fontSize: '50px'}, {color: 'red'}, {backgroundColor: 'green'}],  // 使用驼峰命名

            // 3. 通过对象控制样式
            style_object: {fontSize: '50px', color: 'red', backgroundColor: 'green'}

        },

    })
</script>
</html>
4.条件指令
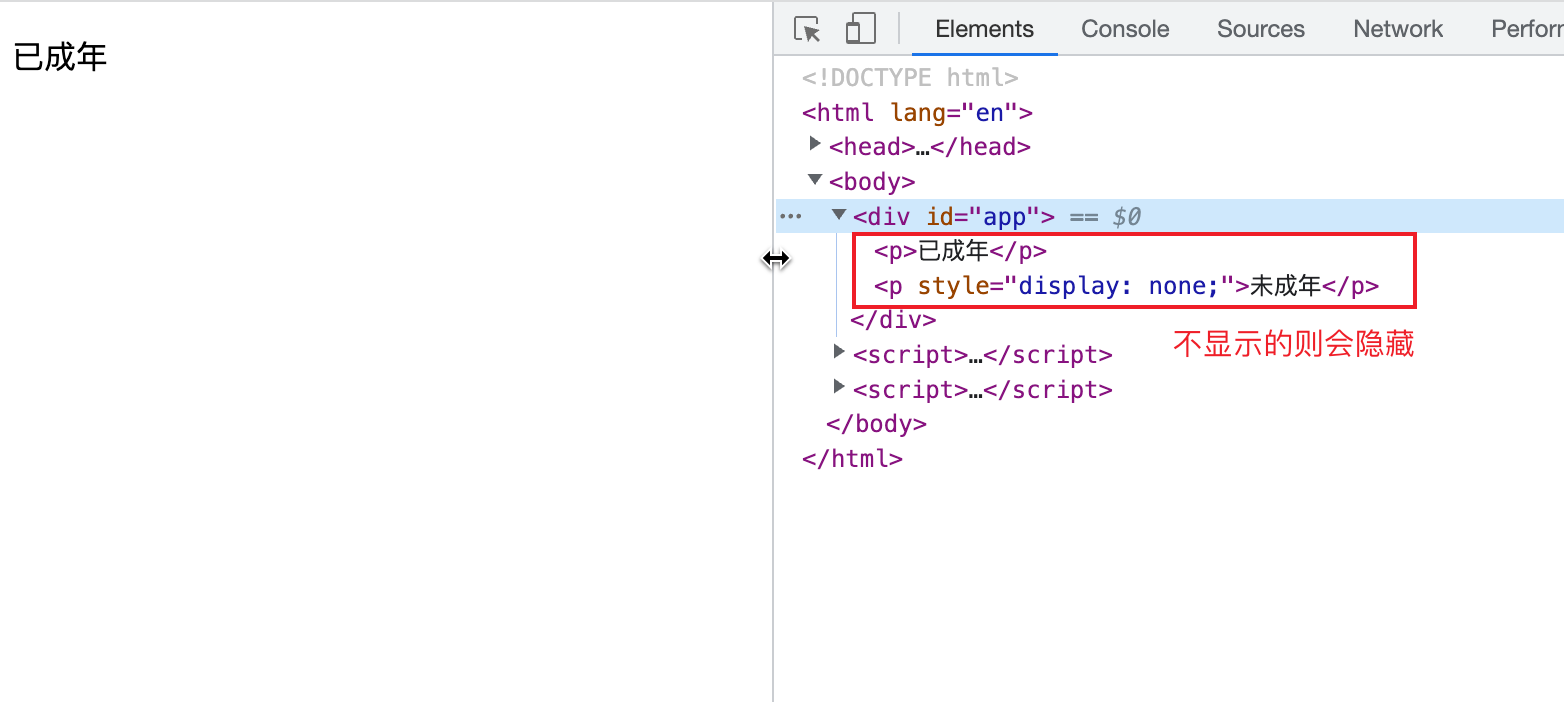
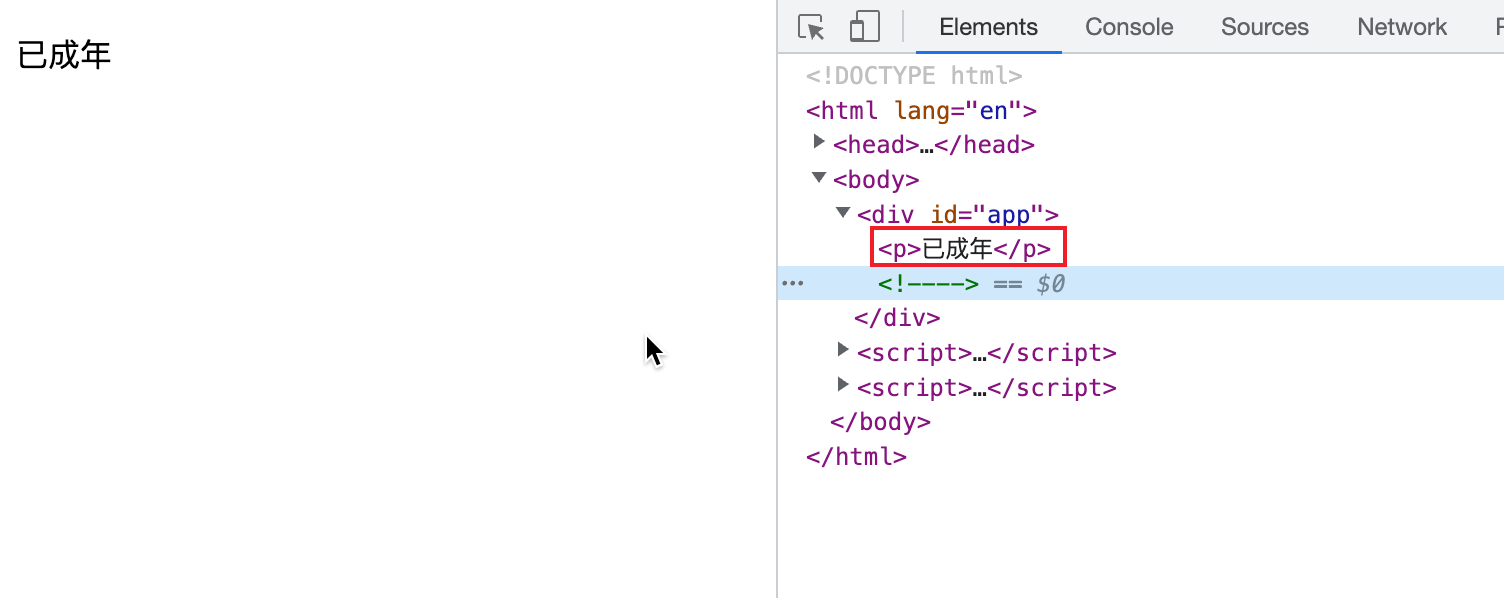
- v-show:可以放置布尔值或者表达式,如果为真,则显示对应的标签,否则不显示,所谓的不显示也只是隐藏
View Code<!DOCTYPE html> <html lang="en"> <head> <meta charset="UTF-8"> <title>Title</title> <!-- 引入vue.js--> <script src="js/vue.js"></script> </head> <body> <div id="app"> <!-- v-show --> <p v-show="age>=18">已成年</p> <p v-show="age<18">未成年</p> </div> </body> <script> new Vue({ // vue管理的区域,所有的vue语法仅在该区域内生效 el: '#app', data: { age: 20 } }) </script> </html>
显示结果:
- v-if:可以放置布尔值或者表达式,如果为真,则显示对应的标签,否则不显示,不显示的标签也不会加载
View Code1 <!DOCTYPE html> 2 <html lang="en"> 3 <head> 4 <meta charset="UTF-8"> 5 <title>Title</title> 6 <!-- 引入vue.js--> 7 <script src="js/vue.js"></script> 8 </head> 9 <body> 10 <div id="app"> 11 <!-- v-show --> 12 <p v-if="age>=18">已成年</p> 13 <p v-if="age<18">未成年</p> 14 </div> 15 </body> 16 <script> 17 new Vue({ 18 // vue管理的区域,所有的vue语法仅在该区域内生效 19 el: '#app', 20 data: { 21 age: 20 22 } 23 }) 24 </script> 25 </html>
v-if还可以搭配v-else-if,v-else使用,和python的if语句使用方法一致,在满足某个条件时则显示对应的标签。
View Code<!DOCTYPE html> <html lang="en"> <head> <meta charset="UTF-8"> <title>Title</title> <!-- 引入vue.js--> <script src="js/vue.js"></script> </head> <body> <div id="app"> <p v-if="score >=90">优秀</p> <p v-else-if="score >= 80">良好</p> <p v-else-if="score >=60">及格</p> <p v-else>不及格</p> </div> </body> <script> new Vue({ // vue管理的区域,所有的vue语法仅在该区域内生效 el: '#app', data: { score:99 }, }) </script> </html>
思考:v-show和v-if有什么区别,使用场景又是什么呢?
二者都是根据布尔值来决定是否将标签渲染在页面上,所不同的是v-show不显示的标签也会加载在页面,只是将标签隐藏了,而v-if则将不显示的标签不会加载
如果页面的标签会根据结果经常来回改变,则使用v-show,反之则使用v-if
5.循环指令
循环指令可以帮助我们遍历数组,对象或者数字
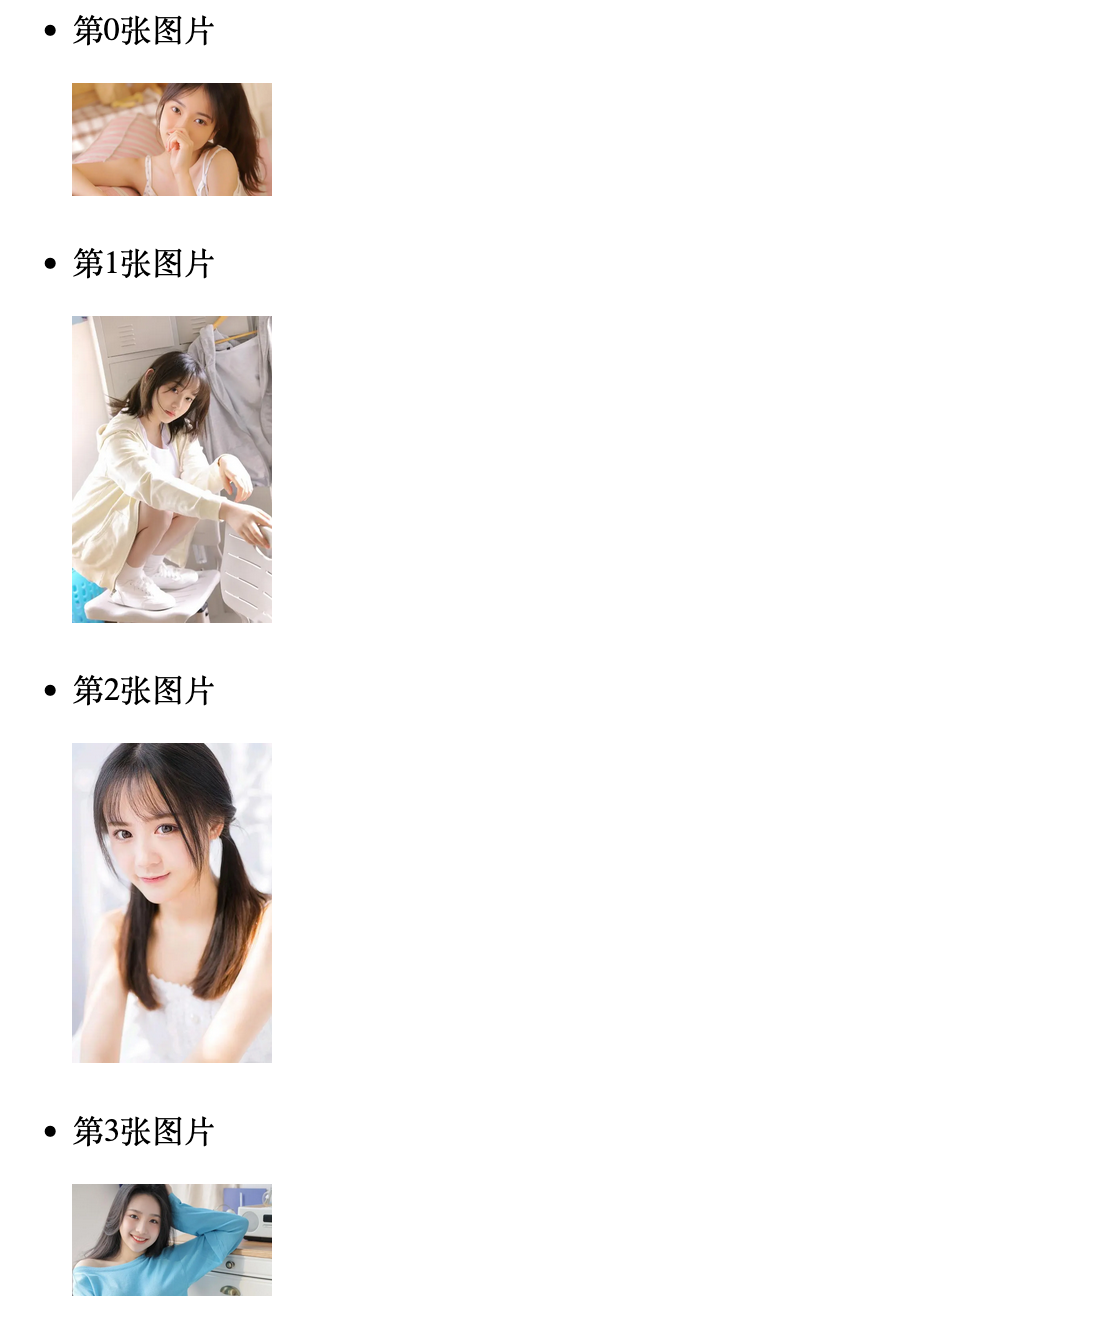
5.1 遍历数组
当只有一个参数的时候,得到的是数组中的元素,
有两个参数的时候,第一个是元素,第二个是下表
<!DOCTYPE html>
<html lang="en">
<head>
    <meta charset="UTF-8">
    <title>Title</title>
    <!-- 引入vue.js-->
    <script src="js/vue.js"></script>
</head>
<body>
<div id="app">
    <ul>
        <li v-for="(url,index) in picList">
            <p>第{{index}}张图片</p>
            <img :src="url" alt="" style="width: 100px">
        </li>
    </ul>

</div>
</body>
<script>
    new Vue({
        // vue管理的区域,所有的vue语法仅在该区域内生效
        el: '#app',
        data: {
            //    遍历数组
            picList: [
                'https://img0.baidu.com/it/u=2676891553,2638377323&fm=253&fmt=auto&app=138&f=JPEG?w=889&h=500',
                'https://img0.baidu.com/it/u=2804713765,300474639&fm=253&fmt=auto&app=138&f=JPEG?w=500&h=767',
                'https://img1.baidu.com/it/u=2574408423,112333017&fm=253&fmt=auto&app=138&f=JPEG?w=500&h=800',
                'https://img0.baidu.com/it/u=1501084209,93021381&fm=253&fmt=auto&app=138&f=JPEG?w=889&h=500',

            ]
        },

    })
</script>
</html>
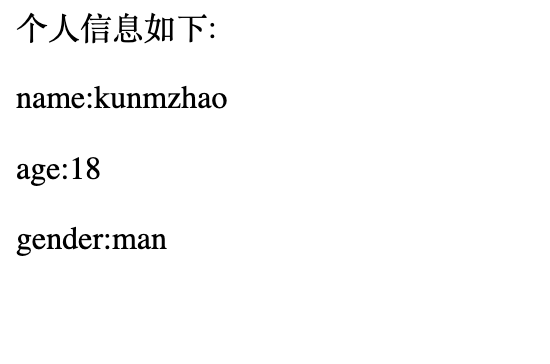
5.2遍历对象
当只有一个参数,返回的是一个值
当有两个参数,返回一个值,一个键,值在前,键在后
<!DOCTYPE html>
<html lang="en">
<head>
    <meta charset="UTF-8">
    <title>Title</title>
    <!-- 引入vue.js-->
    <script src="js/vue.js"></script>
</head>
<body>
<div id="app">
    <p>个人信息如下:</p>
    <p v-for="(value,key) in info">
        <span>{{key}}:{{value}}</span>
    </p>

</div>
</body>
<script>
    new Vue({
        // vue管理的区域,所有的vue语法仅在该区域内生效
        el: '#app',
        data: {
            // 遍历对象
            info:{
                name:'kunmzhao',
                age:18,
                gender:'man'
            }

        },

    })
</script>
</html>
5.3 遍历数字
数字遍历从1开始
<!DOCTYPE html>
<html lang="en">
<head>
    <meta charset="UTF-8">
    <title>Title</title>
    <!-- 引入vue.js-->
    <script src="js/vue.js"></script>
</head>
<body>
<div id="app">
    <p v-for="i in num">{{i}}</p>

</div>
</body>
<script>
    new Vue({
        // vue管理的区域,所有的vue语法仅在该区域内生效
        el: '#app',
        data: {
            // 遍历数字
            num: 6

        },

    })
</script>
</html>
6.v-model:双向绑定
只作用于表单中的input, textarea等
6.1 初步使用
<!DOCTYPE html>
<html lang="en">
<head>
    <meta charset="UTF-8">
    <title>Title</title>
    <!-- 引入vue.js-->
    <script src="js/vue.js"></script>
</head>
<body>
<div id="app">
    // 单向绑定
    <p>单向绑定<input type="text" :value="re">---> {{re}}</p>
    // 双向绑定
    <p>双向绑定<input type="text" v-model="res">  ---> {{res}}</p>

</div>
</body>
<script>
    new Vue({
        // vue管理的区域,所有的vue语法仅在该区域内生效
        el: '#app',
        data: {
            res:'',
            re:''
        },

    })
</script>


</html>
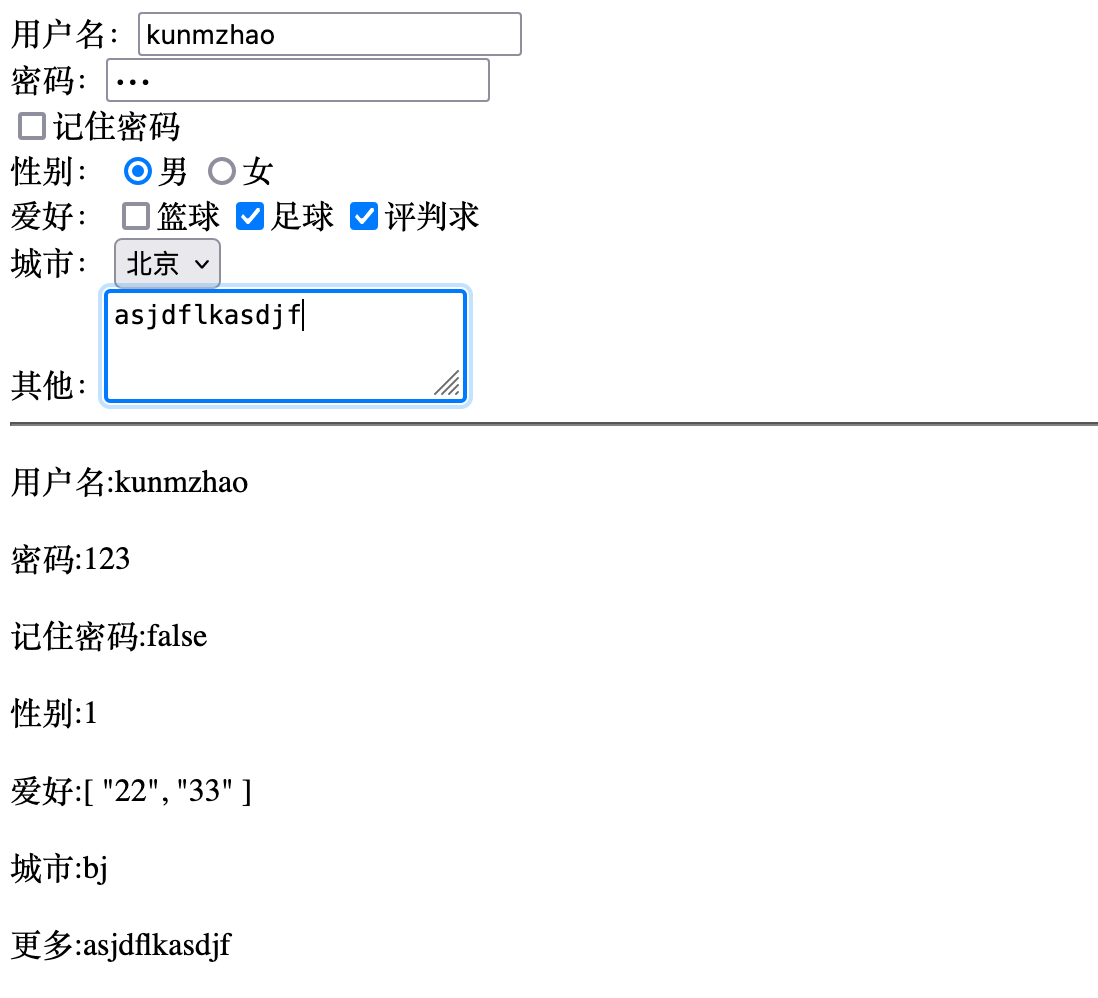
6.2 表单的更多操作
 1 <!DOCTYPE html>
 2 <html lang="en">
 3 <head>
 4     <meta charset="UTF-8">
 5     <title>Title</title>
 6     <script src="https://cdn.jsdelivr.net/npm/vue@2/dist/vue.js"></script>
 7 </head>
 8 <body>
 9 <div id="app">
10     <div>
11         用户名:<input type="text" v-model="user">
12     </div>
13     <div>
14         密码:<input type="password" v-model="pwd">
15     </div>
16     <div><input type="checkbox" v-model="memory">记住密码</div>
17     <div>
18         性别:
19         <input type="radio" v-model="sex" value="1">男
20         <input type="radio" v-model="sex" value="2">女
21     </div>
22     <div>
23         爱好:
24         <input type="checkbox" v-model="hobby" value="11">篮球
25         <input type="checkbox" v-model="hobby" value="22">足球
26         <input type="checkbox" v-model="hobby" value="33">评判求
27     </div>
28     <div>
29         城市:
30         <select v-model="city">
31             <option value="sh">上海</option>
32             <option value="bj">北京</option>
33             <option value="sz">深圳</option>
34         </select>
35     </div>
36     <div>
37         其他:<textarea v-model="more"></textarea>
38     </div>
39     <hr>
40     <p>用户名:{{user}}</p>
41     <p>密码:{{pwd}}</p>
42     <p>记住密码:{{memory}}</p>
43     <p>性别:{{sex}}</p>
44     <p>爱好:{{hobby}}</p>
45     <p>城市:{{city}}</p>
46     <p>更多:{{more}}</p>
47 </div>
48
49
50 <script>
51     var app = new Vue({
52         el: '#app',
53         data: {
54             user: "",
55             pwd: "",
56             memory:false,
57             sex: "2",
58             hobby: ["22"],
59             city: "sz",
60             more: '...'
61         },
62     })
63 </script>
64 </body>
65 </html>
6.3 v-mode进阶
数据进行双向绑定之后,只要修改输入框的值,就会更新数据,耗费资源
- lazy:输入框不再输入数据了,才会更改变量的值
- number:输入框输入的数据,只接受数据部分
- trim:去掉输入框前后的空白
<textarea v-model.lazy="more"></textarea>
<textarea v-model.number="more"></textarea>
<textarea v-model.trim="more"></textarea>
7.事件修饰符
事件修饰符放在事件之后,如
@click.once=函数
常用的修饰符:
- .stop:阻止事件冒泡,只处理自己的事件。父控件冒泡的事件不处理
- .self:只处理自己的事件,子控件冒泡事件不处理
- .prevent:阻止a连接的跳转
- .once:事件只触发一次
事件冒泡:默认情况下,子组件触发某个事件,父组件也会一起触发事件
7.1 stop
可以阻止事件冒泡:子控件不会向上冒泡
<!DOCTYPE html>
<html lang="en">
<head>
    <meta charset="UTF-8">
    <title>Title</title>
    <!-- 引入vue.js-->
    <script src="js/vue.js"></script>
</head>
<body>
<div id="app">

    <ul @click="handerul">
        <li @click.stop="handler">我是li</li>
        <li @click.stop="handler">我是li</li>
        <li @click.stop="handler">我是li</li>
        <li @click.stop="handler">我是li</li>
    </ul>
</div>
</body>
<script>
    new Vue({
        // vue管理的区域,所有的vue语法仅在该区域内生效
        el: '#app',
        data: {

        },
        methods:{
            handler(){
                console.log('点击了li')
            },
            handerul(){
                console.log('点击了ul')
            }
        }

    })
</script>
</html>
7.2 self
可以阻止冒泡事件:父组件不会接收子组件的冒泡
<!DOCTYPE html>
<html lang="en">
<head>
    <meta charset="UTF-8">
    <title>Title</title>
    <!-- 引入vue.js-->
    <script src="js/vue.js"></script>
</head>
<body>
<div id="app">

    <ul @click.self="handerul">
        <li @click="handler">我是li</li>
        <li @click="handler">我是li</li>
        <li @click="handler">我是li</li>
        <li @click="handler">我是li</li>

    </ul>
</div>
</body>
<script>
    new Vue({
        // vue管理的区域,所有的vue语法仅在该区域内生效
        el: '#app',
        data: {

        },
        methods:{
            handler(){
                console.log('点击了li')
            },
            handerul(){
                console.log('点击了ul')
            }
        }

    })
</script>
</html>
7.3 prevent
对于a连接,当我们点击的时候会触发跳转页面,prevent可以实现页面的不跳转
<!DOCTYPE html>
<html lang="en">
<head>
    <meta charset="UTF-8">
    <title>Title</title>
    <!-- 引入vue.js-->
    <script src="js/vue.js"></script>
</head>
<body>
<div id="app">
    <a href="https://i.cnblogs.com/" @click.prevent="handler">点我</a>
</div>
</body>
<script>
    new Vue({
        // vue管理的区域,所有的vue语法仅在该区域内生效
        el: '#app',
        data: {

        },
        methods:{
            handler(){
                console.log('点击了a')
            },

        }

    })
</script>
</html>
7.4 once
事件只执行一次,刷新页面之后,可以再次执行一次
<!DOCTYPE html>
<html lang="en">
<head>
    <meta charset="UTF-8">
    <title>Title</title>
    <!-- 引入vue.js-->
    <script src="js/vue.js"></script>
</head>
<body>
<div id="app">
    <button @click.once="handler">点我 秒杀</button>
</div>
</body>
<script>
    new Vue({
        // vue管理的区域,所有的vue语法仅在该区域内生效
        el: '#app',
        data: {

        },
        methods:{
            handler(){
                alert('秒杀成功')
            },

        }

    })
</script>
</html>
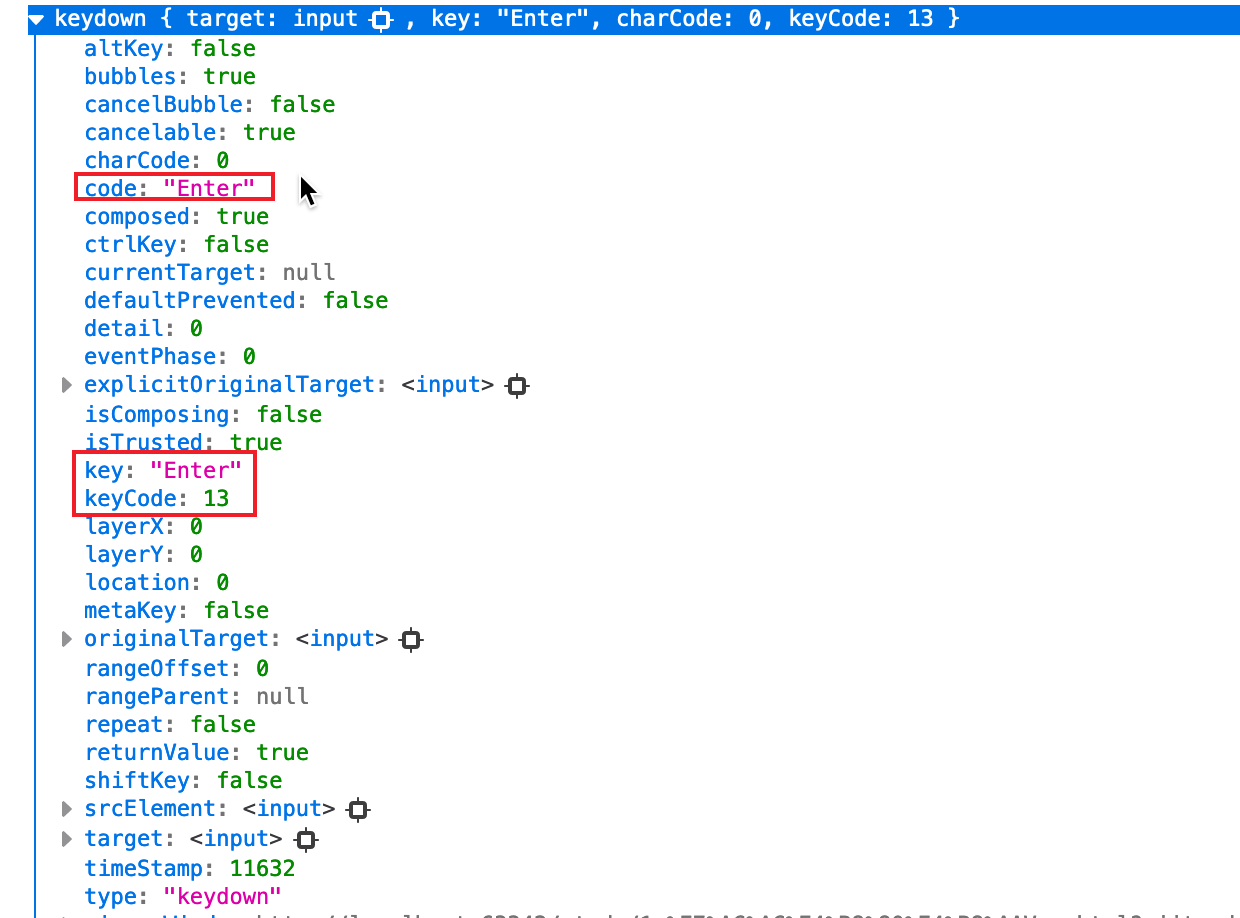
8. 按键修饰符
对于键盘的事件,默认会有一个参数传递给函数,包含着摁键的全部信息
- keydown:键盘按下
- keyup:键盘抬起
<!DOCTYPE html>
<html lang="en">
<head>
    <meta charset="UTF-8">
    <title>Title</title>
    <!-- 引入vue.js-->
    <script src="js/vue.js"></script>
</head>
<body>
<div id="app">
<!--    <input   @keydown="handler"></input>-->
    <input   @keydown.enter="handler"></input>
</div>
</body>
<script>
    new Vue({
        // vue管理的区域,所有的vue语法仅在该区域内生效
        el: '#app',
        data: {

        },
        methods:{
            handler(event){
                console.log(event)
                if (event.key=='Enter'){
                    console.log('enter')
                }
            },

        }

    })
</script>
</html>
9. 案例
案例一:实现一个购物车,刷新则显示购物信息
 1 <!DOCTYPE html>
 2 <html lang="en">
 3 <head>
 4     <meta charset="UTF-8">
 5     <title>Title</title>
 6     <!-- 引入vue.js-->
 7     <script src="js/vue.js"></script>
 8 </head>
 9 <body>
10 <div id="app">
11
12     <button @click="clickHandler">刷新购物车</button>
13     <div v-if="info.length">
14         <table border="1px">
15             <tr>
16                 <th>序号</th>
17                 <th>商品名称</th>
18                 <th>价格</th>
19             </tr>
20             <tr v-for="(item,index) in info">
21                 <td>{{index+1}}</td>
22                 <td>{{item.name}}</td>
23                 <td>{{item.price}}</td>
24             </tr>
25         </table>
26     </div>
27     <div v-else>
28         空空如也
29     </div>
30
31 </div>
32 </body>
33 <script>
34     new Vue({
35         // vue管理的区域,所有的vue语法仅在该区域内生效
36         el: '#app',
37         data: {
38             info: []
39         },
40         methods:{
41             clickHandler(){
42                 this.info = [
43                     {name: 'Threadripper 3990x', price: 29999},
44                     {name: 'NVIDIA RTX 8000', price: 59999},
45                     {name: 'ROG ZENITH II EXT', price: 9999},
46                 ]
47             },
48         }
49
50     })
51 </script>
52 </html>
案例二:实现一个筛选功能
 1 <!DOCTYPE html>
 2 <html lang="en">
 3 <head>
 4     <meta charset="UTF-8">
 5     <title>Title</title>
 6     <!-- 引入vue.js-->
 7     <script src="js/vue.js"></script>
 8 </head>
 9 <body>
10 <div id="app">
11     <p>
12         <label><input type="text" v-model="content" @input="handler"></label>
13     </p>
14     <ul v-if="!content">
15         <li v-for="item in info">{{item}}</li>
16     </ul>
17     <ul v-else>
18         <li v-for="item in filter_info">{{item}}</li>
19     </ul>
20
21
22 </div>
23 </body>
24 <script>
25     new Vue({
26         // vue管理的区域,所有的vue语法仅在该区域内生效
27         el: '#app',
28         data: {
29             content:'',
30             info:[
31                 '中',
32                 '中国',
33                 '中国人',
34                 '中国心',
35                 '中国的',
36                 '我是中国人'
37             ],
38             filter_info:[]
39         },
40         methods:{
41             handler(){
42                 this.filter_info = this.info.filter((item)=>{
43                     return item.indexOf(this.content) > -1
44                 })
45                 // for (const infoKey in this.info) {
46                 //     if (this.info[infoKey].indexOf(this.content) > -1){
47                 //         this.filter_info.push(this.info[infoKey])
48                 //     }
49                 // }
50             }
51         }
52
53     })
54 </script>
55 </html>
案例三:
  1 <!DOCTYPE html>
  2 <html lang="en">
  3 <head>
  4     <meta charset="UTF-8">
  5     <title>Title</title>
  6     <!-- 引入vue.js-->
  7     <script src="js/vue.js"></script>
  8 </head>
  9 <body>
 10 <div id="app">
 11     <table border="1px">
 12         <tr>
 13             <th>商品名称</th>
 14             <th>价格</th>
 15             <th>数量</th>
 16             <th><input type="checkbox" v-model="selectAll" @click="selectHandeler">选择</th>
 17         </tr>
 18         <tr v-for="(item, index) in goods_list">
 19             <td>{{item.name}}</td>
 20             <td>{{item.price}}</td>
 21             <td>
 22                 <button @click="delCount(index)">-</button>
 23                 {{item.count}}
 24                 <button @click="addCount(index)">+</button>
 25             </td>
 26             <td><input type="checkbox" v-model="item.is_selected" @click="handler(index)"></td>
 27         </tr>
 28     </table>
 29     <div>
 30         <p>商品列表:{{goods_list}}</p>
 31         <p>总价格:{{price}}</p>
 32     </div>
 33 </div>
 34 </body>
 35 <script>
 36     new Vue({
 37         // vue管理的区域,所有的vue语法仅在该区域内生效
 38         el: '#app',
 39         data: {
 40             goods_list: [
 41                 {name: '西游记', price: 99, count: 1, is_selected: false},
 42                 {name: '水浒传', price: 990, count: 2, is_selected: false},
 43                 {name: '后楼梦', price: 9900, count: 3, is_selected: false}
 44             ],
 45             price: 0,
 46             selectAll:false
 47         },
 48         methods: {
 49             // 计算购物车的总数量
 50             totalPrice(){
 51                 this.price = 0
 52                 for (const goodsListKey in this.goods_list) {
 53                     if (this.goods_list[goodsListKey].is_selected) {
 54                         this.price += this.goods_list[goodsListKey].price * this.goods_list[goodsListKey].count
 55                     }
 56                 }
 57             },
 58             // 物品是否勾选
 59             handler(index) {
 60                 this.goods_list[index].is_selected = !this.goods_list[index].is_selected
 61                 let count = 0
 62                 this.goods_list.forEach((value, index)=>{
 63                     if (value.is_selected){
 64                         count++
 65                     }
 66                 })
 67                 if (count === this.goods_list.length){
 68                     this.selectAll = true
 69                 } else{
 70                     this.selectAll = false
 71                 }
 72                 this.totalPrice()
 73             },
 74             // 减少物品数量
 75             delCount(index) {
 76                 if (this.goods_list[index].count >1){
 77                     this.goods_list[index].count--;
 78                     this.totalPrice(index)
 79                 } else{
 80                     alert('购买数量不能低于一个')
 81                 }
 82             },
 83
 84             // 增加物品数量
 85             addCount(index) {
 86                 this.goods_list[index].count++;
 87                 this.totalPrice()
 88
 89             },
 90             selectHandeler(){
 91                 this.selectAll = !this.selectAll
 92                 if (this.selectAll){
 93                     this.goods_list.forEach((value, index)=>{
 94                         value.is_selected = true
 95                     })
 96                 } else{
 97                     this.goods_list.forEach((value, index)=>{
 98                         value.is_selected = false
 99                     })
100                 }
101                 this.totalPrice()
102             }
103         }
104     })
105 </script>
106 </html>


 浙公网安备 33010602011771号