


Linux下ISCSI服务器搭建与客户端使用案例
1.分配一块盘
fdisk /dev/sda
partprobe
blkid
...
/dev/sda2: PARTUUID="31551f8f-26b9-42b6-bdae-25a563bfa6d3" #分配了这个
2.安装启动服务
yum -y install targetd targetcli
systemctl restart targetd
systemctl enable targetd
3.配置服务端
3.1创建块存储
[root@iscsi-server ~]# targetcli
Warning: Could not load preferences file /root/.targetcli/prefs.bin.
targetcli shell version 2.1.53
Copyright 2011-2013 by Datera, Inc and others.
For help on commands, type 'help'.

/> ls
o- / ......................................................................................................................... [...]
  o- backstores .............................................................................................................. [...]
  | o- block .................................................................................................. [Storage Objects: 0]
  | o- fileio ................................................................................................. [Storage Objects: 0]
  | o- pscsi .................................................................................................. [Storage Objects: 0]
  | o- ramdisk ................................................................................................ [Storage Objects: 0]
  o- iscsi ............................................................................................................ [Targets: 0]
  o- loopback ......................................................................................................... [Targets: 0]
/>
/>
/> cd /backstores/block #创建一个名为testBlock1的存储块
/backstores/block> create testBlock1 dev=/dev/vdb
Created block storage object testBlock1 using /dev/vdb.
3.2创建iSCSI target与创建LUN
/> cd iscsi
/iscsi> ls
o- iscsi .............................................................................................................. [Targets: 0]
/iscsi> create wwn=iqn.2018-10.com.example:server #创建服务端target iqn
Created target iqn.2018-10.com.example:server.
Created TPG 1.
Global pref auto_add_default_portal=true
Created default portal listening on all IPs (0.0.0.0), port 3260.
/iscsi> ls
o- iscsi .............................................................................................................. [Targets: 1]
  o- iqn.2018-10.com.example:server ...................................................................................... [TPGs: 1]
    o- tpg1 ................................................................................................. [no-gen-acls, no-auth]
      o- acls ............................................................................................................ [ACLs: 0]
      o- luns ............................................................................................................ [LUNs: 0]
      o- portals ...................................................................................................... [Portals: 1]
        o- 0.0.0.0:3260 ....................................................................................................... [OK]
/iscsi>
/iscsi> cd iqn.2018-10.com.example:server/tpg1/luns #创建lun
/iscsi/iqn.20...ver/tpg1/luns> create storage_object=/backstores/block/testBlock1 lun=0
Created LUN 0.
3.3 配置访问控制列表(ACL)
/>
/> cd /iscsi/iqn.2018-10.com.example:server/tpg1/acls
/iscsi/iqn.20...ver/tpg1/acls> create wwn=iqn.2018-10.com.example:client1 #为名称是iqn.2018-10.com.example:client1的客户端添加访问权限
Created Node ACL for iqn.2018-10.com.example:client1
Created mapped LUN 0.
/iscsi/iqn.20...ver/tpg1/acls> create wwn=iqn.2003-01.org.linux-iscsi.bolin-iscsi-server.x8664:sn.ffc93e13edbe:client #为第二个客户端添加访问权限
Created Node ACL for iqn.2003-01.org.linux-iscsi.bolin-iscsi-server.x8664:sn.ffc93e13edbe:client
Created mapped LUN 0.
3.4 退出保存配置
/> exit
Global pref auto_save_on_exit=true
Configuration saved to /etc/target/saveconfig.json
4.windows客户端连接
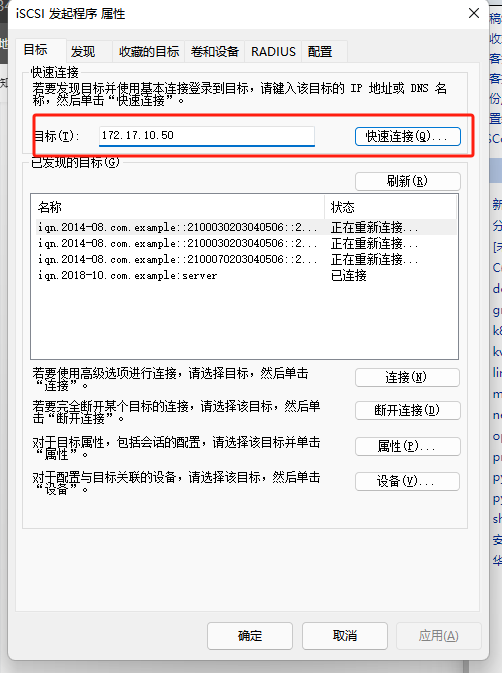
4.1发现服务
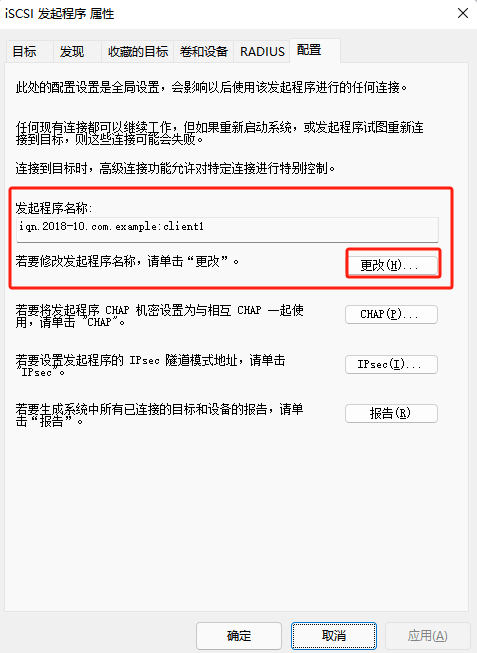
4.2修改发起程序名称
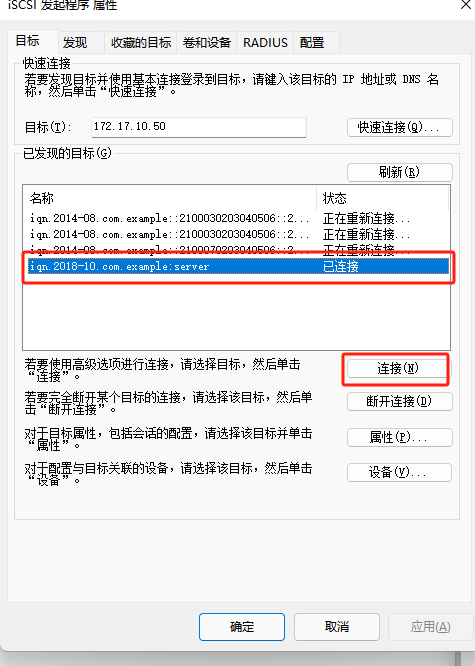
4.3连接
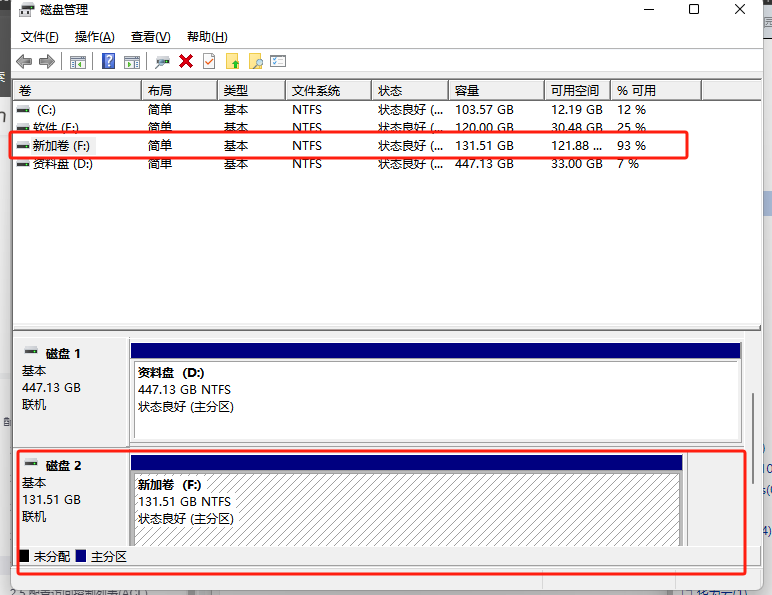
4.5磁盘管理进行添加
5.linux客户端连接
1.1 Linux客户端
[root@iscsi-client ~]# yum install -y iscsi-initiator-utils
1.2 添加客户端名称
iSCSI协议是通过客户端的名称来进行验证,而该名称也是iSCSI客户端的唯一标识,而且必须与服务端配置文件中访问控制列表中的信息一致,否则客户端在尝试访问存储共享设备时,系统会弹出验证失败的保存信息。
[root@iscsi-client ~]# cat /etc/iscsi/initiatorname.iscsi
InitiatorName=iqn.2018-10.com.example:client1  #添加客户端名称
[root@iscsi-client ~]# systemctl restart iscsid
[root@iscsi-client ~]# systemctl enable iscsid
1.3 挂载设备
[root@iscsi-client-bolin ~]# man iscsiadm | grep \\-mode
       -m, --mode op
            iscsiadm --mode discoverydb --type sendtargets --portal 192.168.1.10 --discover
            iscsiadm --mode node --targetname iqn.2001-05.com.doe:test --portal 192.168.1.1:3260 --login
            iscsiadm --mode node --targetname iqn.2001-05.com.doe:test --portal 192.168.1.1:3260 --logout
            iscsiadm --mode node
            iscsiadm --mode node --targetname iqn.2001-05.com.doe:test --portal 192.168.1.1:3260
通过客户端暴露的ip地址及端口号,discover服务端target iqn
[root@iscsi-client ~]# iscsiadm --mode discoverydb --type sendtargets --portal 192.168.60.85:3261  --discover
192.168.60.85:3261,1 iqn.2018-10.com.example:server
登陆iqn, 登陆成功后自动扫描出target服务端允许本客户端访问的所有lun
[root@iscsi-client ~]# iscsiadm --mode node --targetname iqn.2018-10.com.example:server --portal 192.168.60.85:3261 --login
Logging in to [iface: default, target: iqn.2018-10.com.example:server, portal: 192.168.60.85,3261] (multiple)
Login to [iface: default, target: iqn.2018-10.com.example:server, portal: 192.168.60.85,3261] successful.
此时,客户端可以看到除了系统盘外已经多出来了一块磁盘
[root@iscsi-client ~]# lsscsi -i
[8:0:0:0]    disk    LIO-ORG  testBlock1       4.0   /dev/sda   360014050a542edca1a14a8e955839726
[root@iscsi-client ~]# lsblk
vda      253:0    0  10G  0 disk
└─vda1   253:1    0  10G  0 part  /
sda       65:32   0  10G  0 disk
原文链接:https://blog.csdn.net/qq_34680541/article/details/133020271


 浙公网安备 33010602011771号