Android Tint
Android Tint
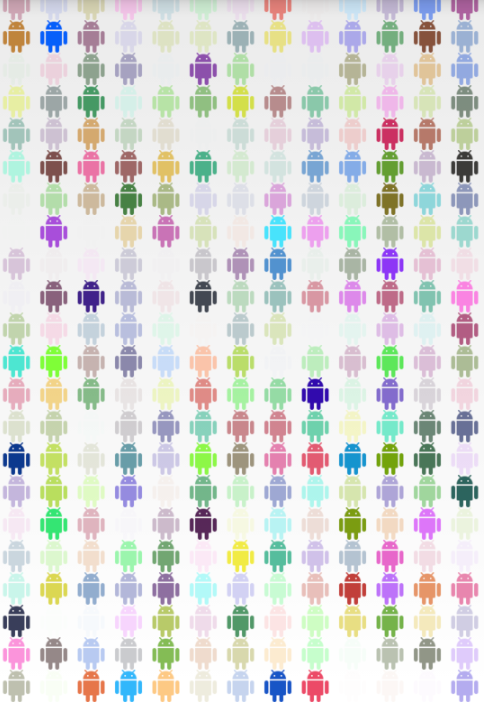
如果要实现下图效果,第一时间想到的是让 UI 切图,第二时间想到的是自己会被 UI 打死,第三时间想到的是自己会被命名累死。
 

那么,这该如何快速高效的实现呢? 其实 Android 已经替我们想好了,那就是 Android Tint。Tint 意为着色器,即给图片上色。这样做的好处就是,你不需要再做一张图片,在 APK 包中最占大小的就是图片了,使用 Tint 可以大大减小包大小。
上图只是在 GridView 中展示 ImageView ,随机生成颜色给原始图片 ic_android_black_24dp 着色而已,资源图片下载自 Android Meterial Icons。
这里我们使用 support-v4 包中的 DrawableCompat 来实现着色,核心代码如下:
/**
* 给 drawable 着色
*
* @param drawable 需要着色的 drawable 对象
* @param colors   ColorStateList 对象,代表需要着色的颜色
* @return
*/
public static Drawable tintDrawable(Drawable drawable, ColorStateList colors) {
   //这里需要对 drawable 对象执行 mutate() 操作
   //该操作能防止一个屏幕里多次使用同一个图片,对其中一个图片操作时影响其他图片
   //当然,你也可以在getResource().getDrawable()的时候就执行
   final Drawable wrappedDrawable = DrawableCompat.wrap(drawable.mutate());
   DrawableCompat.setTintList(wrappedDrawable, colors);
   return wrappedDrawable;
}
注1:如果使用项目中自带的 ic_launcher.png 使用着色器会使部分细节消失,具体原因不明,留待研究。
注2:ImageView 的 adjustBounds 属性的应用场景有待研究。
如果要实现图片的按压,或者选中效果,同样可以使用 tint 来实现。只需要定义一个 selector.xml 即可
<?xml version="1.0" encoding="utf-8"?>
<selector xmlns:android="http://schemas.android.com/apk/res/android">
    <item android:drawable="@color/colorAccent" android:state_pressed="true" />
    <item android:drawable="@color/colorPrimary" />
</selector>
ImageView image = (ImageView) findViewById(R.id.iv);
Drawable drawable = getResource().getDrawable(R.mipmap.ic_android_black_24dp);
ColorStateList colors = ColorStateList.valueOf(R.drawable.selector);
image.setBackgroundDrawable(tintDrawable(drawable,colors));
具体的点击效果这里就不展示了,大家可以去尝试一下。


 浙公网安备 33010602011771号