

SpringBoot集成Junit4单元测试
1、pom添加测试依赖
     <dependency>
            <groupId>junit</groupId>
            <artifactId>junit</artifactId>
        </dependency>
        <dependency>
            <groupId>org.springframework.boot</groupId>
            <artifactId>spring-boot-test</artifactId>
        </dependency>
        <dependency>
            <groupId>org.springframework</groupId>
            <artifactId>spring-test</artifactId>
            <version>4.3.3.RELEASE</version>
        </dependency>
有时候可能需要其他依赖,缺少依赖会报错,根据错误提示按需加载依赖即可
2、创建测试类
IDEA创建测试类:
按住ctrl + shift + T 选择需要测试的方法和测试类保存的位置,创建测试类,
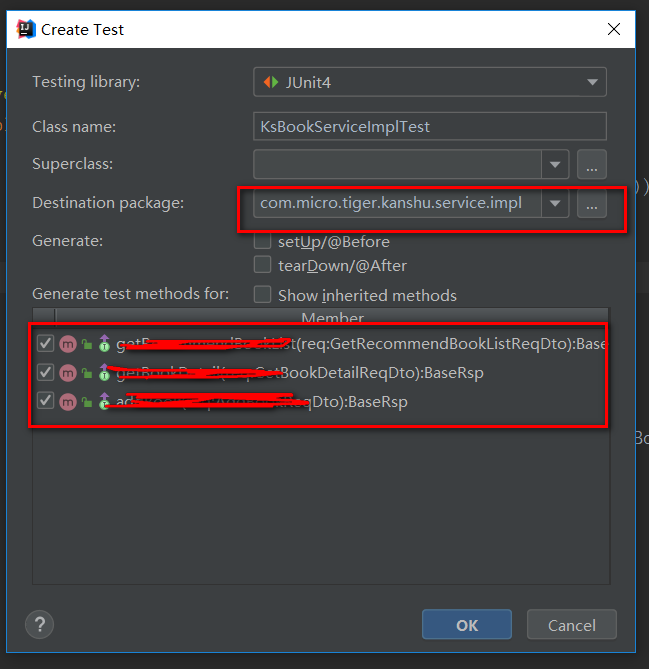
若不出现可能需要配置Junit,配置过程详见:https://blog.csdn.net/jiaotuwoaini/article/details/52767007
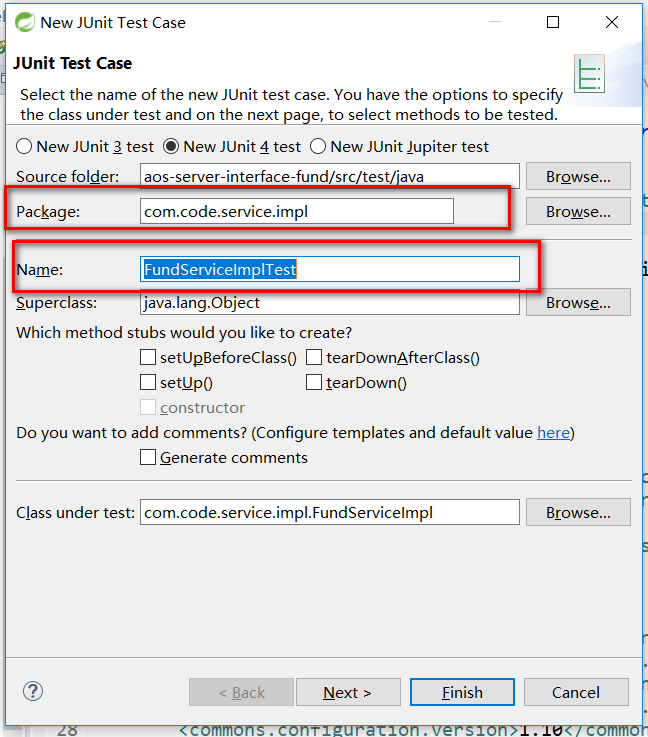
Eclipse创建测试类:
类上右键 -> new -> Junit Test Case
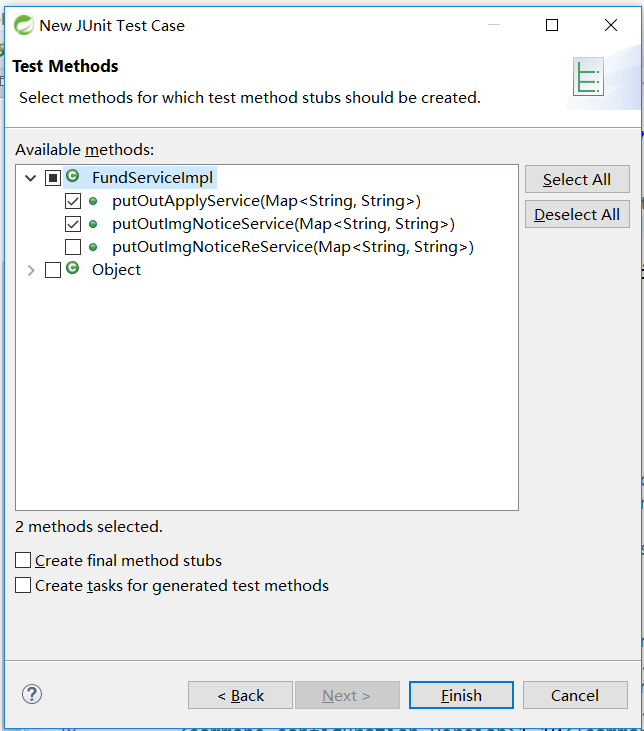
选择需要测试的方法以及保存位置
3、添加测试注解:
package com.micro.tiger.member.service.impl;

import org.junit.Test;
import org.junit.runner.RunWith;
import org.springframework.beans.factory.annotation.Autowired;
import org.springframework.boot.test.context.SpringBootTest;
import org.springframework.test.context.junit4.SpringRunner;

import javax.xml.ws.Service;

import static org.junit.Assert.*;

@SpringBootTest//SpringBoot测试注解
@RunWith(SpringRunner.class)//junit测试使用Runner
public class MemberCommandServiceImplTest {

    @Autowired
    private Service service;

    @Test
    public void memberLoginOrRegister() {
         //需要测试的内容
    }
}
一切准备就绪直接在此类中右键Run即可。SpringBoot自动添加依赖。
总结:
SpringBootTest注解:
@RunWith就是一个运行器
@RunWith(JUnit4.class)就是指用JUnit4来运行
@RunWith(SpringJUnit4ClassRunner.class),让测试运行于Spring测试环境
@RunWith(Suite.class)的话就是一套测试集合
@SpringBootTest 可以默认,可以自己指定Class等属性会按照指定注入依赖
SpringBoot升级之后测试页随之变得简单了,避免自己写ClassPathXmlApplicationContext的烦恼。
以上信息属个人理解,希望对大家有帮助。如果有更好的建议可以在评论区一起交流。

 浙公网安备 33010602011771号