SurfaceView+ANativeWindow+ffmpeg播放视频并解决花屏问题
一、概述
在Android中使用SurfaceView+ANativeWindow+ffmpeg播放视频非常简单。主要关注一下步骤以及里面的坑就行
步骤:
-
- 创建一个Activity并写一个自定的View继承SurfaceView,并重写SurfaceHolder.Callback的onSurfaceCreated、onSurfaceChanged、onSurfaceDestroy
class YPlayView(context: Context?, attrs: AttributeSet?) : SurfaceView(context, attrs), Runnable,
    SurfaceHolder.Callback {
init {
        holder.addCallback(this)
    }

    override fun surfaceCreated(holder: SurfaceHolder) {
        Log.e(TAG, "surfaceCreated")
        mSurface = holder.surface
        Thread(this).start()
    }

    override fun surfaceChanged(holder: SurfaceHolder, format: Int, width: Int, height: Int) {
        Log.e(TAG, "surfaceChanged")
    }

    override fun surfaceDestroyed(holder: SurfaceHolder) {
        Log.e(TAG, "surfaceDestroyed")
        releaseANativeWindow()
    }
- 创建一个ANativeWindow
nwin = ANativeWindow_fromSurface(env, surface);
    if (nwin == NULL) {
        LOG_E("ANativeWindow 为 NULL");
        return;
    }
ANativeWindow_setBuffersGeometry(nwin, outWidth, outHeight, WINDOW_FORMAT_RGBA_8888);
- 准备数据,并显示。ps:此处准备数据是通过ffmpeg读取视频文件的AVFrame获取
void y_native_window_playback::RenderView() {

    ANativeWindow_setBuffersGeometry(nwin, outWidth, outHeight, WINDOW_FORMAT_RGBA_8888);
    //初始化像素格式转换的上下文
    SwsContext *vctx = NULL;
    char *rgb = new char[outWidth * outHeight * 4];

    AVPacket pkt;
    AVFrame *frame = av_frame_alloc();
    while (isRunning) {
        LOG_E("开始执行渲染操作");
        int d_result = demuxer.Read(&pkt);

        if (!decoder.Send(&pkt)) {
            av_packet_unref(&pkt);
            LOG_E("AVPacket送入解码器失败");
            MSleep(10);
            continue;
        }

        while (decoder.Receive(frame)) {
            if (ANativeWindow_lock(nwin, &wbuf, 0) == 0) {
                if (outWidth != wbuf.stride) {//逻辑内存和物理内存不一致
                    outWidth = wbuf.stride;
                }
                vctx = sws_getCachedContext(vctx,
                                            frame->width,
                                            frame->height,
                                            (AVPixelFormat) frame->format,
                                            outWidth,
                                            outHeight,
                                            AV_PIX_FMT_RGBA,
                                            SWS_FAST_BILINEAR,
                                            0, 0, 0
                );
                if (!vctx) {
                    LOG_E("sws_getCachedContext failed!");
                } else {
                    uint8_t *data[AV_NUM_DATA_POINTERS] = {0};
                    data[0] = (uint8_t *) rgb;
                    int lines[AV_NUM_DATA_POINTERS] = {0};
                    lines[0] = outWidth * 4;
                    int h = sws_scale(vctx,
                                      (const uint8_t **) frame->data,
                                      frame->linesize, 0,
                                      frame->height,
                                      data, lines);
                    if (h > 0) {
                        uint8_t *dst = (uint8_t *) wbuf.bits;
                        // 检查缓冲区是否有效
                        if (wbuf.bits == NULL) {
                            ANativeWindow_unlockAndPost(nwin);
                            return;
                        }
                        memcpy(dst, rgb, outWidth * outHeight * 4);
                        ANativeWindow_unlockAndPost(nwin);
                    }
                }
            }

        }

    }

}
- 创建一个Activity并写一个自定的View继承SurfaceView,并重写SurfaceHolder.Callback的onSurfaceCreated、onSurfaceChanged、onSurfaceDestroy
二、里面的坑
坑1:通过ffmpeg将数据由YUV转为RGB再显示效率非常的慢,程序运行后打开视频,会发现即使不设置sleep时间。视频似乎也能正常播放(正常速度)。
以下这段代码效率不高,慎用。如果项目中对性能要求高就不要用。改用OpenGL ES直接渲染YUV数据,这个效率比较高。
            uint8_t *data[AV_NUM_DATA_POINTERS] = {0};
                    data[0] = (uint8_t *) rgb;
                    int lines[AV_NUM_DATA_POINTERS] = {0};
                    lines[0] = outWidth * 4;
                    int h = sws_scale(vctx,
                                      (const uint8_t **) frame->data,
                                      frame->linesize, 0,
                                      frame->height,
                                      data, lines);
坑2:播放视频花屏。
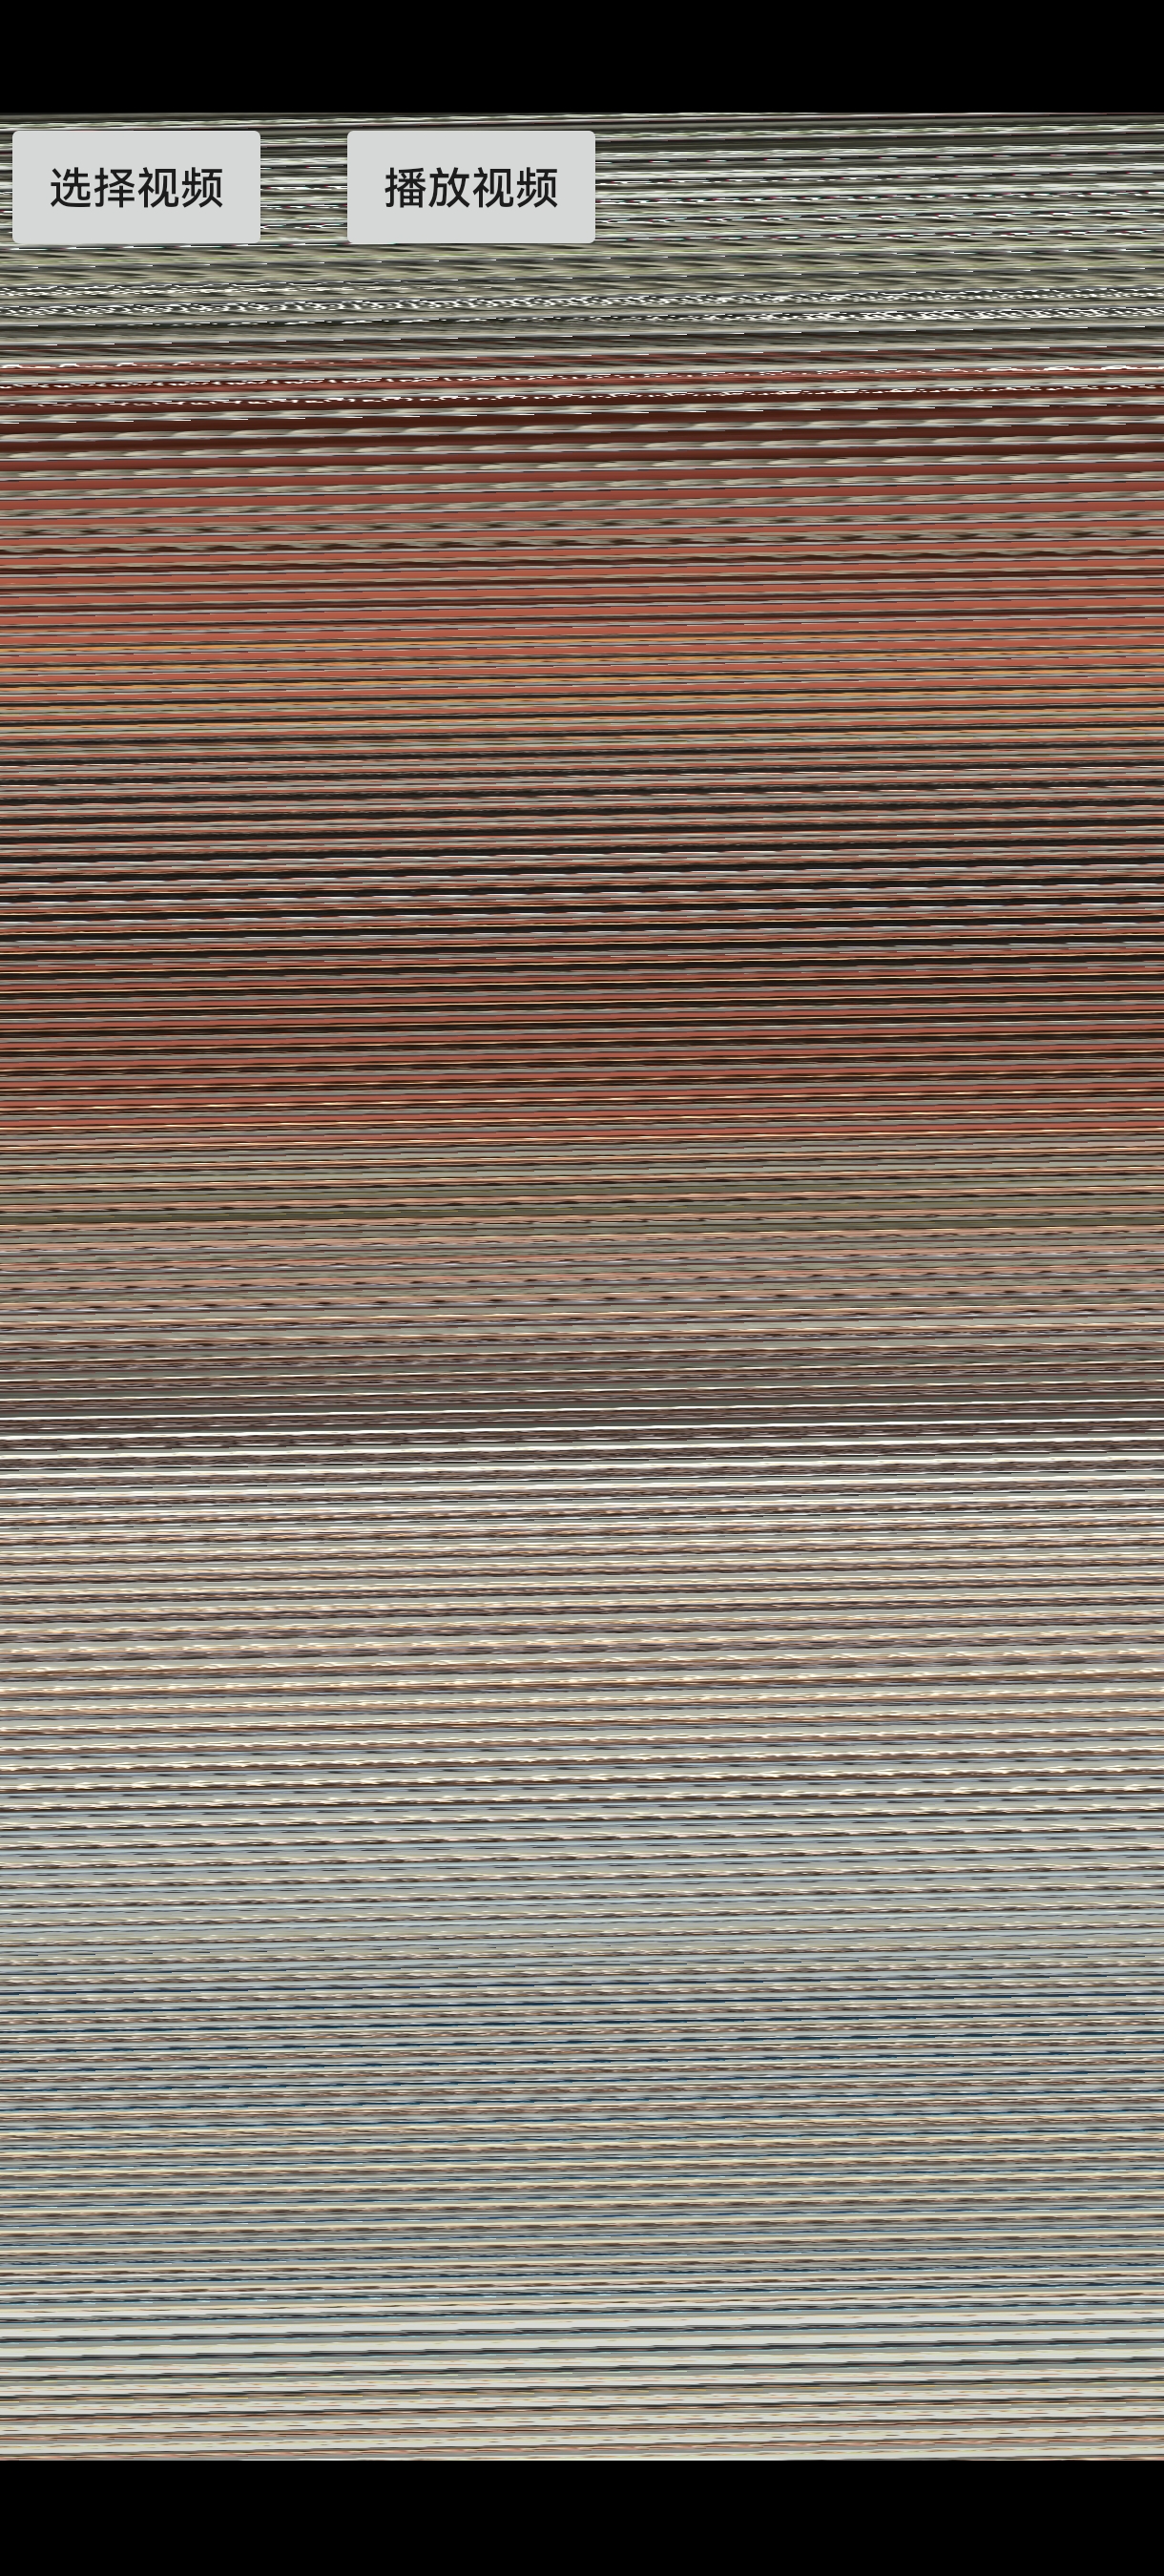
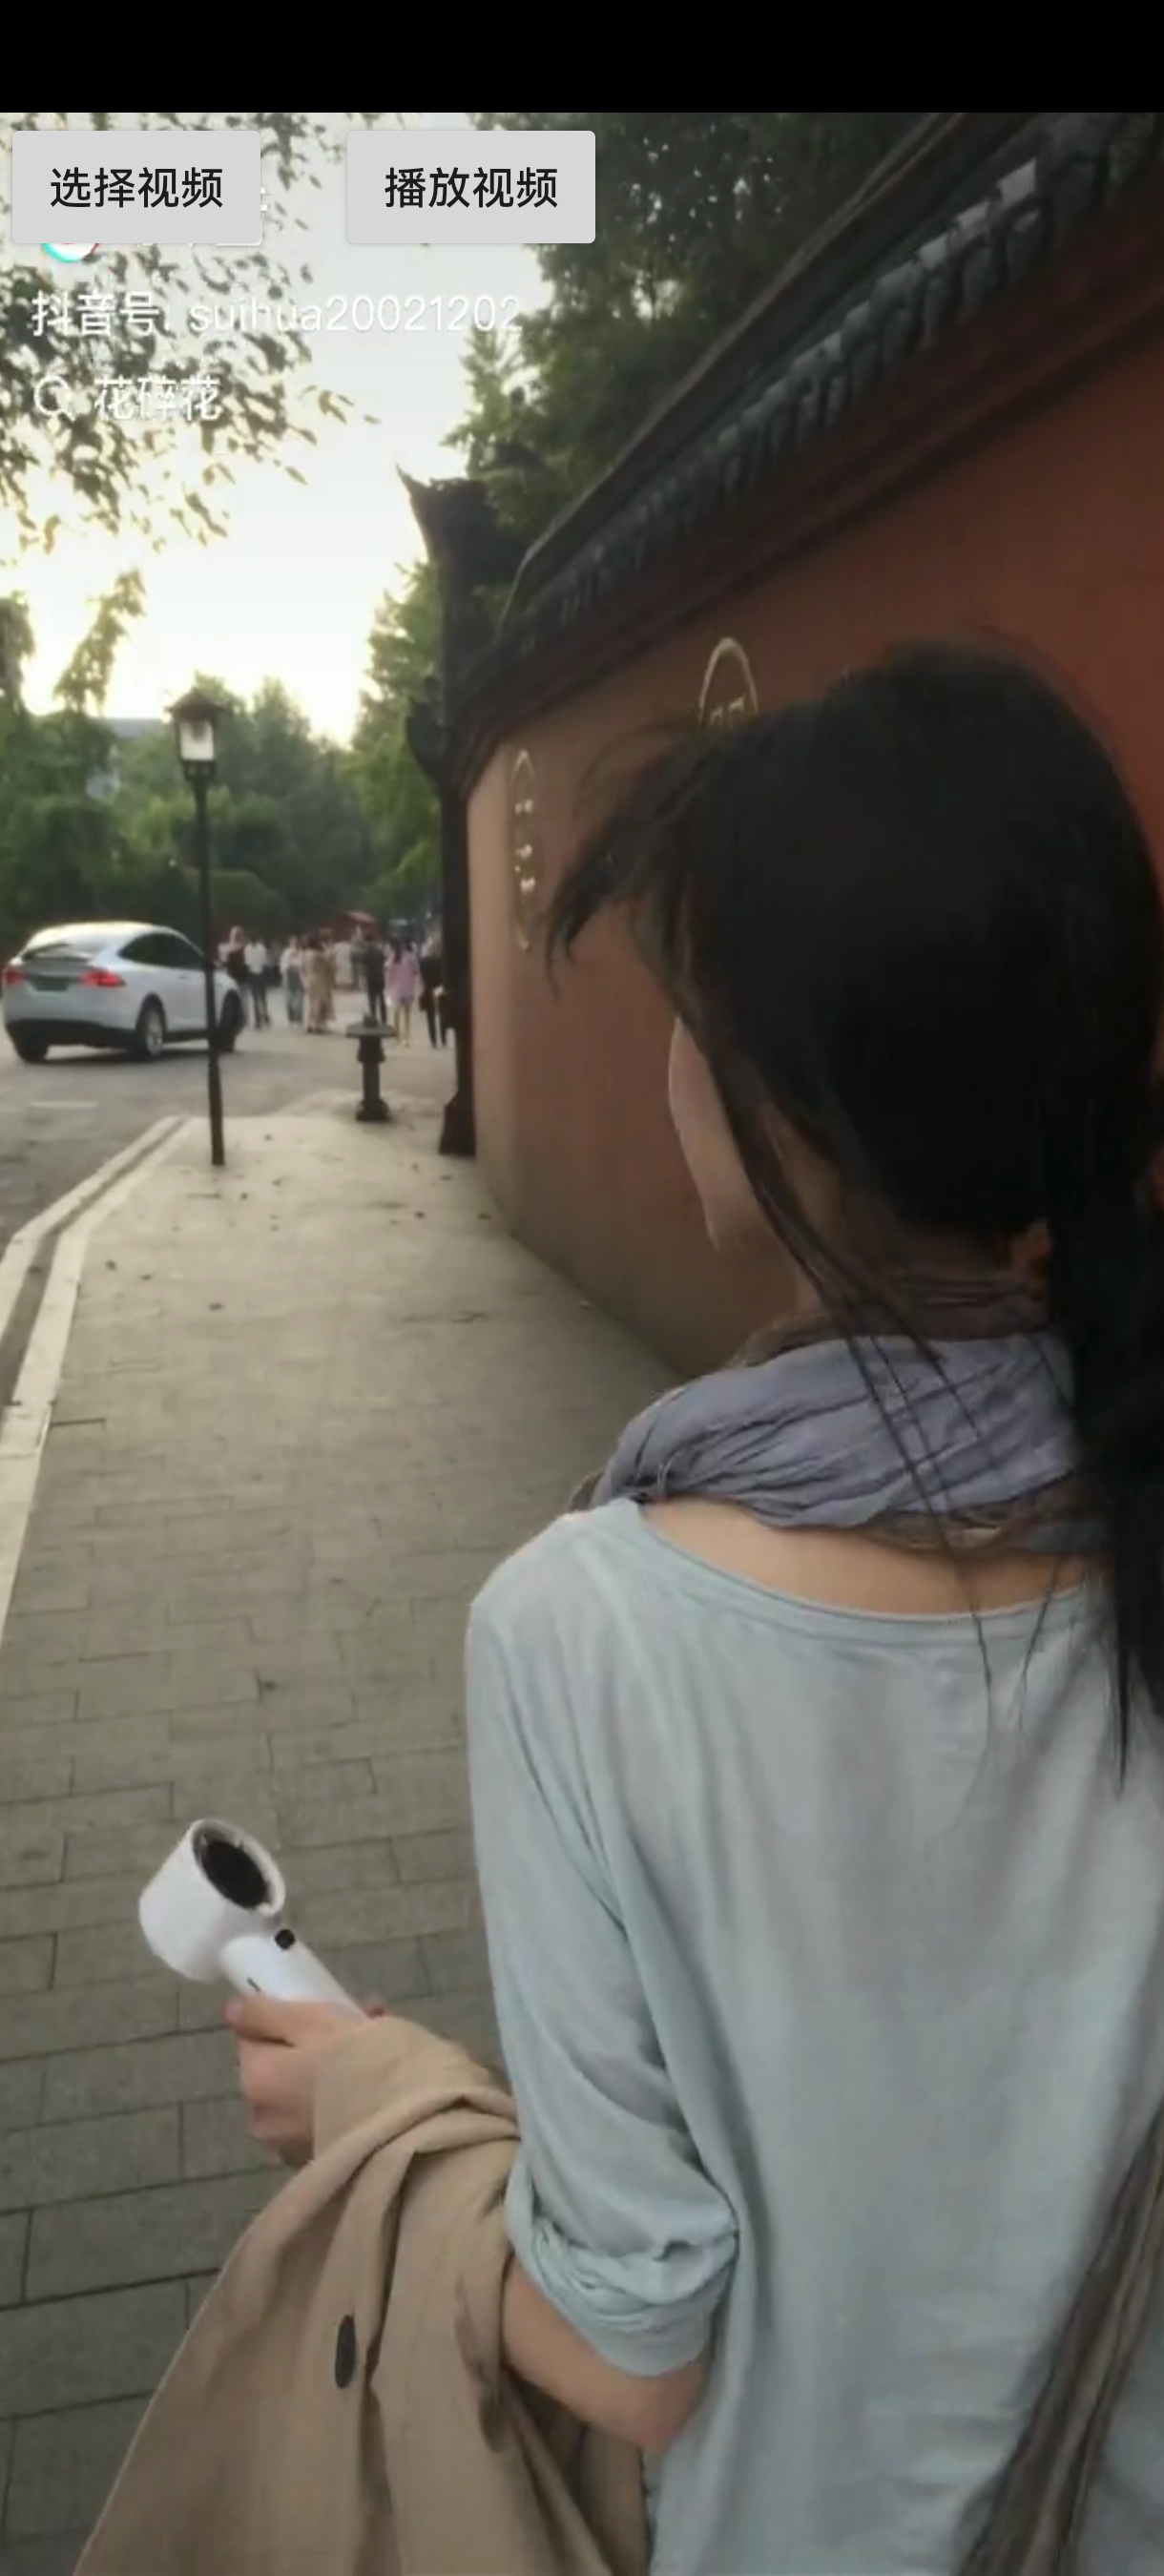
现象:设定surface的宽高的时候,使用的是屏幕的宽高。但是ANativeWindow_Buffer wbuf;的wbuf.width!=wbuf.stride(步长)导致视频错乱花屏。
现象如下图:
异常图片

正常图片

解决办法:1.判断buffer缓冲区的宽度和步长是否一致,如果不一致就就把步长赋值给输出宽度。2.采用逐行copy的方法。此处采用的是第一种方案,效率更高些
if (ANativeWindow_lock(nwin, &wbuf, 0) == 0) {
   if (outWidth != wbuf.stride) {//逻辑内存和物理内存不一致
       utWidth = wbuf.stride;
   }
}


 浙公网安备 33010602011771号