

Install NGINX, PHP-FPM (5.6) on CentOS 6
Installing NGINX with PHP on CentOS 6 can be a hassle depending on the install and packages you use.
We've made a short and easy guide to install a minimal NGINX web server with PHP-FPM (5.6) support ready to go.
This is beind done in a fresh CentOS 6.6 64-bit Minimal installation.
First do a yum update (optional):
yum update -y
Once that's done install the latest Webtatic repository which holds our recommended PHP 5.6 and NGINX 1.8 packages:
rpm -Uvh https://mirror.webtatic.com/yum/el6/latest.rpm
rpm -Uvh http://dev.mysql.com/get/mysql57-community-release-el6-9.noarch.rpm
新:
yum install epel-release
rpm -ivh http://rpms.famillecollet.com/enterprise/remi-release-7.rpm
rpm -Uvh https://mirror.webtatic.com/yum/el7/latest.rpm
rpm -Uvh https://mirror.webtatic.com/yum/el7/webtatic-release.rpm
rpm -Uvh https://mirror.webtatic.com/yum/el7/webtatic-release.rpm
rpm -Uvh http://dev.mysql.com/get/mysql57-community-release-el7-9.noarch.rpm
Now install Nginx:
yum install nginx18 -y
Start the service and make it run after boot:
service nginx start
chkconfig nginx on
Now we can install PHP-FPM, we do not need the regular PHP package installed. If you need any modules such as MySQL, just do "yum install php56w-mysql":
yum install php56w-fpm -y
Start the service and run at boot:
service php-fpm start
chkconfig php-fpm on
Now we need to edit a part of the nginx.conf at /etc/nginx/nginx.conf. Look for the following section and change it accordingly to below (bolded text):
# pass the PHP scripts to FastCGI server listening on 127.0.0.1:9000
#
#location ~ \.php$ {
# root html;
# fastcgi_pass 127.0.0.1:9000;
# fastcgi_index index.php;
# fastcgi_param SCRIPT_FILENAME /scripts$fastcgi_script_name;
# include fastcgi_params;
#}
Uncomment the location section and edit the fastcgi_param script location from /scripts to our public directory like what is bolded below:
# pass the PHP scripts to FastCGI server listening on 127.0.0.1:9000
#
location ~ \.php$ {
root html;
fastcgi_pass 127.0.0.1:9000;
fastcgi_index index.php;
f#astcgi_param SCRIPT_FILENAME $document_root$fastcgi_script_name;
include fastcgi_params;
}
Save the nginx.conf file now once those are changed and restart nginx.
service nginx restart
Now lets make a phpinfo page to confirm that PHP is working correctly with Nginx and as an index page. Make a new "index.php" in the /usr/share/nginx/html/ directory with the following contents:
<?php
phpinfo();
?>
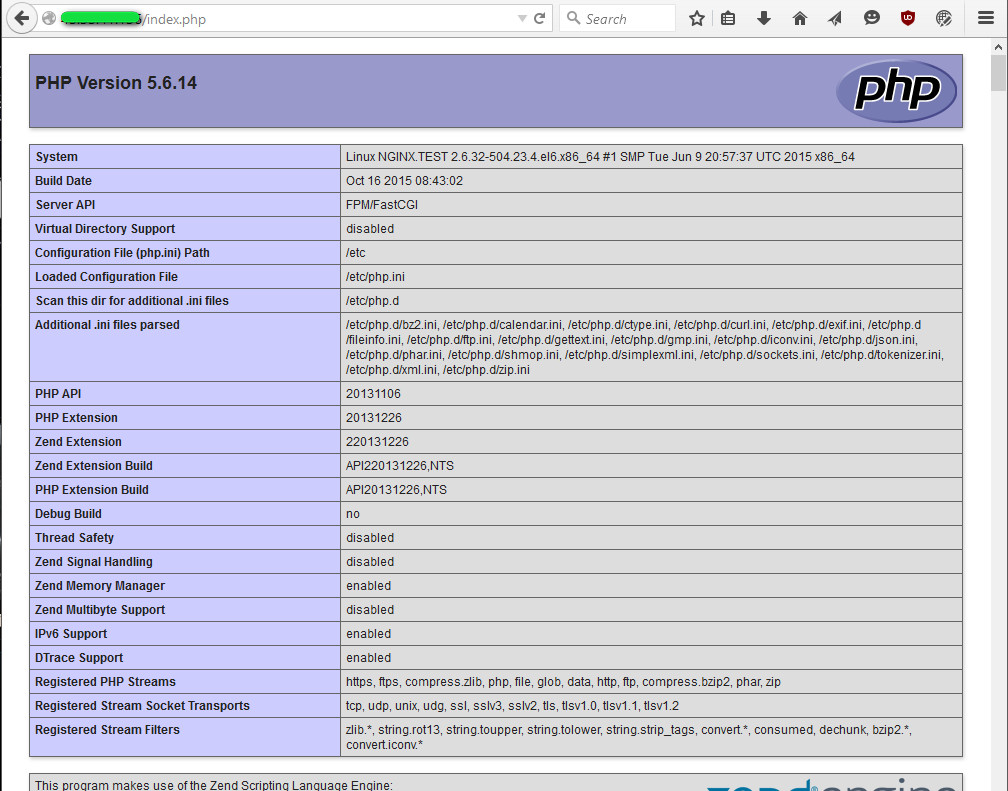
Save the file as "index.php" in /usr/share/nginx/html/, delete the index.html in the same directory, then visit the page in your web browser (http://your_server_ip/index.php). You should see the phpinfo() page with all of the information there like the screenshot below.
Create an IPTables firewall rule to allow access to port 80 (web server):
iptables -I INPUT 5 -p tcp -m tcp --dport 80 -j ACCEPT
service iptables save
yum install php56w-mbstring
yum install php56w-gd
yum install php56w-curl
yum install php56w-mysql
It's recommended to disable SELinux as it may cause some permissions issues. Type "setenforce 0" in SSH then edit the "/etc/selinux/config" file and change "enabled" to "disabled".
Done!
卸载php7
yum remove php
yum remove php*
yum remove php-*
yum remove php7
yum remove php70
yum remove php7.0
yum remove php-common
yum remove php*
yum remove php-*
yum remove php7
yum remove php70
yum remove php7.0
yum remove php-common

 浙公网安备 33010602011771号