OpenCV 指纹验证、识别 - 指南
2025-09-13 20:30 tlnshuju 阅读(429) 评论(0) 收藏 举报目录
一、指纹识别技术原理
1、什么是指纹识别
在计算机视觉领域,指纹识别是基于生物特征的身份认证技术,通过提取指纹独特的纹路特征(如端点、分叉点、岛状纹等),与预存的指纹模板进行比对,实现个人身份的精准确认。
指纹作为人体固有生物特征,具有唯一性(全球 60 亿人中无完全相同指纹)和稳定性(成年后指纹纹路终身不变),这使得指纹识别在安防、金融、考勤等领域广泛应用。在 OpenCV 框架中,指纹识别主要依赖 “特征提取 - 特征匹配” 两大核心流程:
- 特征提取:通过图像处理算法(如 SIFT、ORB)从指纹图像中提取具有辨识度的关键点及其描述符(如纹路方向、局部纹理信息);
- 特征匹配:利用高效匹配算法(如 FLANN、暴力匹配)计算待识别指纹与模板指纹的特征相似度,根据阈值判断是否为同一指纹。
2、指纹识别核心步骤
(1)图像采集
通过指纹传感器(如光学扫描仪、电容式传感器)获取原始指纹图像,需保证图像清晰(分辨率通常为 500-1000DPI),避免因手指潮湿、污渍导致的图像噪声。
(2)图像预处理
原始指纹图像常存在噪声、对比度低、边缘模糊等问题,需通过以下操作优化:
- 灰度化与二值化:将彩色图像转为灰度图,再通过阈值分割(如 Otsu 算法)将指纹纹路与背景分离,得到黑白二值图像;
- 去噪处理:使用高斯滤波(
cv2.GaussianBlur)去除高频噪声,保留指纹纹路细节; - 图像增强:通过直方图均衡化(
cv2.equalizeHist)提升对比度,突出指纹的脊线(深色)与谷线(浅色)差异; - 形态学操作:用膨胀(
cv2.dilate)和腐蚀(cv2.erode)修复纹路断裂,填补微小空洞,确保纹路连续性。
(3)特征提取
从预处理后的图像中提取 “指纹特征点”(指纹识别的核心依据),常用算法为 SIFT(尺度不变特征变换):
- 关键点检测:通过高斯差分金字塔检测图像中尺度不变的关键点(如纹路端点、分叉点);
- 描述符生成:对每个关键点周围的像素区域进行梯度计算,生成 128 维的特征描述符(确保旋转、缩放后仍能匹配)。
(4)特征匹配
将待识别指纹的特征描述符与指纹库中的模板描述符进行比对,常用 FLANN(快速最近邻搜索库)匹配算法:
- K 近邻匹配:对每个待匹配特征,在模板中寻找 2 个最近邻特征(
k=2); - Lowe’s 比率筛选:若最近邻特征的距离小于次近邻距离的 0.8 倍,视为有效匹配(排除误匹配);
- 相似度计算:统计有效匹配点数量,数量越多,说明两幅指纹的相似度越高。
(5)结果判断与输出
设定匹配阈值(如有效匹配点≥80),若待识别指纹与某模板的匹配点数量超过阈值,则判定为 “匹配成功”,输出对应身份信息;若所有模板的匹配点均低于阈值,则判定为 “未匹配”,提示 “指纹库中无该身份”。
二、指纹识别案例实现(单指纹验证)
1、案例需求
通过 OpenCV 实现 “单指纹与模板指纹的匹配验证”:导入 1 张待验证指纹图(test_fingerprint.bmp)和 1 张模板指纹图(template_fingerprint.bmp),通过 SIFT+FLANN 算法判断是否为同一指纹,输出验证结果。
2、完整代码
import cv2
# 辅助函数:显示图像(按任意键关闭窗口)
def show_image(window_name, image):
cv2.imshow(window_name, image)
cv2.waitKey(0)  # 等待按键输入,0表示无限等待
cv2.destroyWindow(window_name)  # 关闭当前窗口,避免内存泄漏
# 核心函数:指纹验证(待验证图vs模板图)
def fingerprint_verify(test_img, template_img):
"""
参数:
test_img: 待验证指纹图像(cv2.imread读取的numpy数组)
template_img: 模板指纹图像(cv2.imread读取的numpy数组)
返回:
result: 验证结果("验证通过"/"验证失败")
match_count: 有效匹配点数量
"""
# 1. 图像预处理(灰度化、去噪、增强)
def preprocess_image(img):
# 转为灰度图(指纹识别无需彩色通道)
gray = cv2.cvtColor(img, cv2.COLOR_BGR2GRAY)
# 高斯去噪(核大小5×5,标准差1.5)
blurred = cv2.GaussianBlur(gray, (5, 5), 1.5)
# 直方图均衡化(提升对比度)
equalized = cv2.equalizeHist(blurred)
return equalized
# 预处理待验证图和模板图
test_processed = preprocess_image(test_img)
template_processed = preprocess_image(template_img)
# 2. SIFT特征提取
sift = cv2.SIFT_create()  # 初始化SIFT特征检测器
# 检测关键点并计算描述符(参数1:图像,参数2:掩码,None表示全图检测)
kp_test, des_test = sift.detectAndCompute(test_processed, None)
kp_template, des_template = sift.detectAndCompute(template_processed, None)
# 处理无特征点的异常情况(图像过模糊或无指纹)
if des_test is None or des_template is None:
print("警告:待验证图或模板图未检测到有效特征点!")
return "验证失败", 0
# 3. FLANN特征匹配
# FLANN匹配器配置(平衡速度与精度)
FLANN_INDEX_KDTREE = 1
index_params = dict(algorithm=FLANN_INDEX_KDTREE, trees=5)  # 索引算法参数
search_params = dict(checks=50)  # 搜索精度(checks越大越准,速度越慢)
flann = cv2.FlannBasedMatcher(index_params, search_params)
# K近邻匹配(k=2,取Top-2匹配做筛选)
matches = flann.knnMatch(des_test, des_template, k=2)
# 4. 筛选有效匹配点(Lowe's比率准则)
valid_matches = []
for m, n in matches:
# 最近邻距离 = threshold:
result = "验证通过"
else:
result = "验证失败"
return result, match_count
# 主函数:程序入口
if __name__ == "__main__":
# 1. 读取图像(确保文件路径正确,若在当前目录直接写文件名)
test_path = "test_fingerprint.bmp"  # 待验证指纹路径
template_path = "template_fingerprint.bmp"  # 模板指纹路径
test_img = cv2.imread(test_path)
template_img = cv2.imread(template_path)
# 2. 检查图像是否读取成功
if test_img is None:
raise FileNotFoundError(f"错误:未找到待验证指纹图!路径:{test_path}")
if template_img is None:
raise FileNotFoundError(f"错误:未找到模板指纹图!路径:{template_path}")
# 3. 显示原始图像
show_image("待验证指纹", test_img)
show_image("模板指纹", template_img)
# 4. 执行指纹验证
verify_result, match_count = fingerprint_verify(test_img, template_img)
# 5. 输出结果
print("=" * 50)
print(f"有效匹配点数量:{match_count}")
print(f"指纹验证结果:{verify_result}")
print("=" * 50)
# 彻底关闭所有窗口
cv2.destroyAllWindows()

调试模式:

三、指纹识别案例实现(多指纹库匹配)
1、案例需求
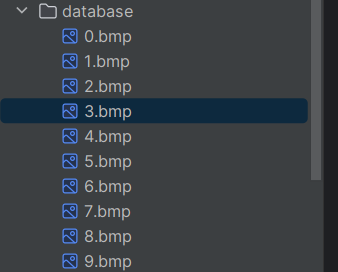
构建小型指纹库(fingerprint_db文件夹,包含 10 个模板指纹,命名格式为 “0.bmp”“1.bmp”…“9.bmp”),导入 1 张待识别指纹图(unknown_fingerprint.bmp),与指纹库中所有模板比对,找到匹配度最高的模板,输出对应身份信息(如 “0→张三”“1→李四”)。


2、完整代码
import cv2
import os
import re
# 辅助函数:显示图像
def show_image(window_name, image):
if image is None:
print(f"警告:无法显示图像 {window_name}(图像为空)")
return
cv2.imshow(window_name, image)
cv2.waitKey(0)
cv2.destroyWindow(window_name)
# 函数1:计算两张指纹图的有效匹配点数量
def calculate_matches(test_path, template_path):
"""
参数:
test_path: 待识别指纹文件路径(字符串)
template_path: 模板指纹文件路径(字符串)
返回:
match_count: 有效匹配点数量(整数)
"""
# 读取图像
test_img = cv2.imread(test_path)
template_img = cv2.imread(template_path)
if test_img is None or template_img is None:
return 0  # 图像读取失败,返回0个匹配点
# 图像预处理(灰度化、去噪、增强)
def preprocess(img):
gray = cv2.cvtColor(img, cv2.COLOR_BGR2GRAY)
blurred = cv2.GaussianBlur(gray, (5, 5), 1.2)
equalized = cv2.equalizeHist(blurred)
return equalized
test_processed = preprocess(test_img)
template_processed = preprocess(template_img)
# SIFT特征提取
sift = cv2.SIFT_create()
kp_test, des_test = sift.detectAndCompute(test_processed, None)
kp_template, des_template = sift.detectAndCompute(template_processed, None)
if des_test is None or des_template is None:
return 0
# FLANN匹配与筛选
FLANN_INDEX_KDTREE = 1
index_params = dict(algorithm=FLANN_INDEX_KDTREE, trees=5)
search_params = dict(checks=60)
flann = cv2.FlannBasedMatcher(index_params, search_params)
matches = flann.knnMatch(des_test, des_template, k=2)
# 筛选有效匹配
valid_matches = [m for m, n in matches if m.distance  max_matches:
max_matches = match_count
best_template_name = filename
# 正则提取模板文件名中的ID(如"0.bmp"提取"0")
if best_template_name == "":
return 9999  # 无有效模板文件
id_match = re.match(r"^(\d+)\.bmp$", best_template_name)
best_id = int(id_match.group(1)) if id_match else 9999
# 设定阈值:匹配点<60视为未匹配
if max_matches < 60:
best_id = 9999
return best_id
# 函数3:根据ID获取身份姓名
def get_name_by_id(person_id):
# 身份映射字典(ID→姓名)
id_to_name = {
0: "张三", 1: "李四", 2: "王五", 3: "赵六", 4: "孙七",
5: "周八", 6: "吴九", 7: "郑十", 8: "Alice", 9: "Bob",
9999: "未找到匹配身份"
}
return id_to_name.get(person_id, "未找到匹配身份")
# 主函数:多指纹库匹配流程
if __name__ == "__main__":
# 配置路径(根据实际情况修改)
test_fingerprint_path = "unknown_fingerprint.bmp"  # 待识别指纹路径
fingerprint_db_folder = "fingerprint_db"  # 指纹库文件夹路径
# 1. 读取并显示待识别指纹
test_img = cv2.imread(test_fingerprint_path)
if test_img is None:
raise FileNotFoundError(f"错误:未找到待识别指纹!路径:{test_fingerprint_path}")
show_image("待识别指纹", test_img)
# 2. 查找指纹库中匹配度最高的模板
print("\n" + "=" * 50)
print("正在与指纹库模板比对...")
best_id = find_best_match(test_fingerprint_path, fingerprint_db_folder)
print("=" * 50)
# 3. 获取并输出身份信息
person_name = get_name_by_id(best_id)
print(f"\n最终识别结果:")
print(f"匹配身份ID:{best_id}")
print(f"对应姓名:{person_name}")
# 关闭所有窗口
cv2.destroyAllWindows()


 浙公网安备 33010602011771号