
(1)介绍
MyBatis的注解方式就是将SQL语句直接写在接口上。这种方式的优点是,对于需求比较简单的系统,效率较高。缺点是,当SQL有变化时需要重新编译代码,一般情况下不建议使用注解方式。
(2)@Select注解
以下案例使用了案例1中的UserMapper接口:
1、将UserMapper.xml文件中的select节点注释(id为getUserById)
2、在UserMapper.java接口中的getUserById方法上使用@Select注解
package com.cmy.mapper;

import com.cmy.entity.User;
import org.apache.ibatis.annotations.Select;

//mapper接口 分别存在 增/删/改/查的函数
public interface UserMapper {
     void addUser(User user);//增加用户
     void addUserById(User user);//增加用户时,获取ID
     void deleteUser(int userid);//删除用户
     void updateUser(User user);//修改用户
     @Select("select * from account where id=#{userid}")
     User getUserById(int userid);//根据Id获取用户
3、运行Demo测试代码中的selectUser方法

通过以上案例可以看出,在简单的SQL操作中,使用注解无疑使程序 变得更简单。
@Select注解与@Results注解的联用
XML中的resultMap元素有一个对应Java的注解@Results,使用这个注解来实现属性映射。
以下案例使用了案例2中的StudentMapper.java接口
1、将StudentMapper.xml文件中的select节点和resultMap注释掉
2、在StudentMapper.java接口中添加@Select注解和@Results注解
public interface StudentMapper {
    @Results(id = "studentMap",value = {
        //id=true代表为数据表中的主键
        @Result(property = "stuid",column = "uid",id = true),
        @Result(property = "stuname",column = "username"),
        @Result(property = "password",column = "password")
    })
    @Select("select * from user where uid=#{stuid}")
    Student getStudentById(int stuid);
}
3、在使用@Results注解的时候,大家可能会担心,是不是要在每一个方 法上都 这么写。完全不需要,我们可以设置@Results注解的id属性,在其它 方法中使用 @ResultMap注解引入既可
4、注意点:我们使用注解的方式将原本在StudentMapper.xml文件中的SQL字句 转放到StudentMapper.java接口中,那么,我们在configuration.xml文件中 <mapper>节点的指向需要指向StudentMapper.java接口。

否则:将会抛出如下异常。
Type interface com.cmy.mapper.StudentMapper is not known to the MapperRegistry.
接口StudentMapper没有在MapperRegistry中注册!
(4)@Insert、@Delete、@Update注解的使用
以下代码均在案例1的基础之上完成。
1、注释掉UserMapper.xml中的insert、delete、update节点
2、将configuration.xml文件中mapper节点指向到UserMapper.java接口上。

3、在UserMapper接口中使用@Insert/@Delete/@Update注解。
public interface UserMapper {
     @Insert("insert into account(name,money) values(#{name},#{money})")
     void addUser(User user);//增加用户
     @Insert("insert into account(name,money) values(#{name},#{money})")
     @Options(useGeneratedKeys = true,keyProperty = "id") //指定获取新插入记录的主键值
     void addUserById(User user);//增加用户时,获取ID
     @Delete("delete from account where id=#{userid}")
     void deleteUser(int userid);//删除用户
     @Update("update account set name=#{name},money=#{money} where id=#{id}")
     void updateUser(User user);//修改用户
(5)关联映射:@One


(6)关联映射:@Many


(7)添加(@Insert)并且返回主键

(8)修改@Update

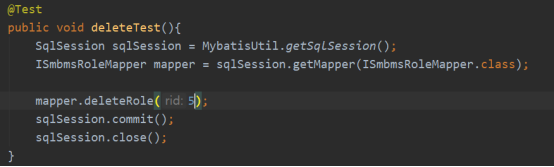
(9)删除@Delete


 浙公网安备 33010602011771号