


Material Designer的低版本兼容实现(六)—— Ripple Layout

新版的Android5.0添加了涟漪效果,虽然开源的库提供了各种控件便于大家使用涟漪效果。但是仍旧不可能满足所有需求,因此我今天改出来一个类叫做,LayoutRipple,其实感觉跟应该叫RippleLayout。在这个layout被选中的时候会触发涟漪效果,比较适合list中的item。下面说下怎么用这个类。
一、下载开源项目并添加支持
https://github.com/shark0017/MaterialDesignLibrary
在新建的工程中添加这个项目为library。
二、将layout放入布局文件
因为这个控件提供了各种属性,所以要用这些属性就必须要自定义命名空间。
xmlns:materialdesign="http://schemas.android.com/apk/res-auto"
<RelativeLayout xmlns:android="http://schemas.android.com/apk/res/android"
    xmlns:tools="http://schemas.android.com/tools"
    xmlns:materialdesign="http://schemas.android.com/apk/res-auto"
    android:layout_width="match_parent"
    android:layout_height="match_parent"
    android:paddingBottom="@dimen/activity_vertical_margin"
    android:paddingLeft="@dimen/activity_horizontal_margin"
    android:paddingRight="@dimen/activity_horizontal_margin"
    android:paddingTop="@dimen/activity_vertical_margin"
    tools:context="com.example.hhh.MainActivity" >

    <com.gc.materialdesign.views.LayoutRipple
        android:layout_width="wrap_content"
        android:layout_height="wrap_content"
        android:layout_centerVertical="true" >

    </com.gc.materialdesign.views.LayoutRipple>

</RelativeLayout>

刚放进去仅仅是个很小的控件,需要说明的是这个控件继承自RelativeLayout。
为了便于操作我在里面放一个textView,这样看起来就挺好的了。

<RelativeLayout xmlns:android="http://schemas.android.com/apk/res/android"
    xmlns:tools="http://schemas.android.com/tools"
    xmlns:materialdesign="http://schemas.android.com/apk/res-auto"
    android:layout_width="match_parent"
    android:layout_height="match_parent"
    android:paddingBottom="@dimen/activity_vertical_margin"
    android:paddingLeft="@dimen/activity_horizontal_margin"
    android:paddingRight="@dimen/activity_horizontal_margin"
    android:paddingTop="@dimen/activity_vertical_margin"
    tools:context="com.example.hhh.MainActivity" >

    <com.gc.materialdesign.views.LayoutRipple
        android:layout_width="match_parent"
        android:layout_height="40dp"
        android:layout_centerVertical="true" >

        <TextView
            android:layout_width="wrap_content"
            android:layout_height="wrap_content"
            android:layout_centerHorizontal="true"
            android:layout_centerVertical="true"
            android:text="默认样式" />
    </com.gc.materialdesign.views.LayoutRipple>

</RelativeLayout>
现在当我们点击上去,就会出现了涟漪效果。

三、在布局文件中设置各种属性
当然,我们的需求可不仅仅是有涟漪效果,那么我们来看看目前这个项目提供了什么属性给我们吧(可能后续我还会添加新的属性)。
rippleBorderRadius:边界的弧度数。默认是0,可以设定数字
这个layout是矩形的,但是可以给ripple添加显示的范围,如果我们添加了弧度,那么ripple的显示范围会变为一个圆角矩形。
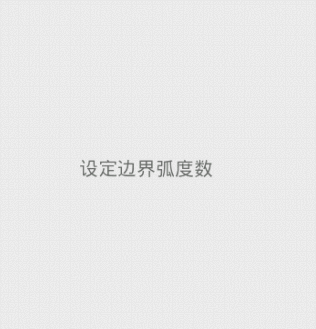
<RelativeLayout xmlns:android="http://schemas.android.com/apk/res/android"
    xmlns:tools="http://schemas.android.com/tools"
    xmlns:materialdesign="http://schemas.android.com/apk/res-auto"
    android:layout_width="match_parent"
    android:layout_height="match_parent"
    android:paddingBottom="@dimen/activity_vertical_margin"
    android:paddingLeft="@dimen/activity_horizontal_margin"
    android:paddingRight="@dimen/activity_horizontal_margin"
    android:paddingTop="@dimen/activity_vertical_margin"
    tools:context="com.example.hhh.MainActivity" >

    <com.gc.materialdesign.views.LayoutRipple
        android:layout_width="200dp"
        android:layout_height="200dp"
        android:layout_centerVertical="true"
        materialdesign:rippleBorderRadius="50"
        materialdesign:rippleSpeed="10" >

        <TextView
            android:layout_width="wrap_content"
            android:layout_height="wrap_content"
            android:layout_centerHorizontal="true"
            android:layout_centerVertical="true"
            android:text="设定边界弧度数" />
    </com.gc.materialdesign.views.LayoutRipple>

</RelativeLayout>
clickAfterRipple:在涟漪显示结束后产生click事件。默认是true,可以设定true/false
如果是true,那么当涟漪显示结束后才会触发这个控件的click时间,否则当你一点击就会立刻触发click事件
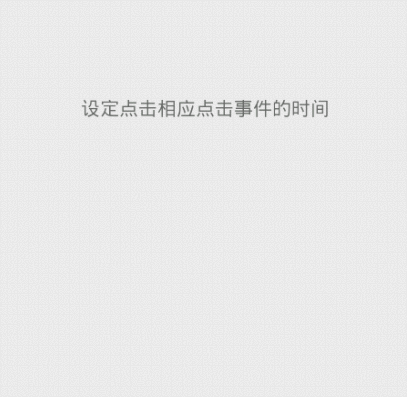
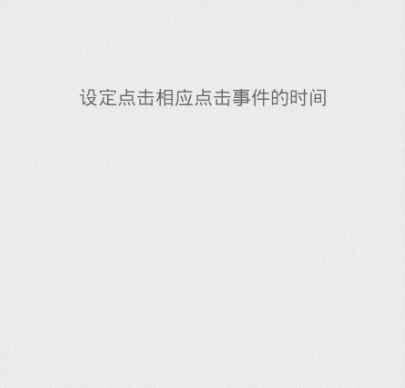
<RelativeLayout xmlns:android="http://schemas.android.com/apk/res/android"
    xmlns:tools="http://schemas.android.com/tools"
    xmlns:app="http://schemas.android.com/apk/res-auto"
    android:layout_width="match_parent"
    android:layout_height="match_parent"
    android:paddingBottom="@dimen/activity_vertical_margin"
    android:paddingLeft="@dimen/activity_horizontal_margin"
    android:paddingRight="@dimen/activity_horizontal_margin"
    android:paddingTop="@dimen/activity_vertical_margin"
    tools:context="com.example.hhh.MainActivity" >

    <com.gc.materialdesign.views.LayoutRipple
        android:layout_width="match_parent"
        android:layout_height="60dp"
        android:layout_centerVertical="true"
        android:onClick="buttonListener"
        app:clickAfterRipple="false">

        <TextView
            android:layout_width="wrap_content"
            android:layout_height="wrap_content"
            android:layout_centerHorizontal="true"
            android:layout_centerVertical="true"
            android:text="设定点击相应点击事件的时间" />
    </com.gc.materialdesign.views.LayoutRipple>

</RelativeLayout>
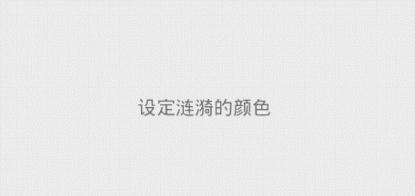
rippleColor:涟漪的颜色。默认是暗色,可以设定@clor/xx或是#xxxx
设定的是点击后出发的水波纹的颜色
 通过:app:rippleColor="#22ff00ff" 进行设置
<RelativeLayout xmlns:android="http://schemas.android.com/apk/res/android"
    xmlns:tools="http://schemas.android.com/tools"
    xmlns:app="http://schemas.android.com/apk/res-auto"
    android:layout_width="match_parent"
    android:layout_height="match_parent"
    android:paddingBottom="@dimen/activity_vertical_margin"
    android:paddingLeft="@dimen/activity_horizontal_margin"
    android:paddingRight="@dimen/activity_horizontal_margin"
    android:paddingTop="@dimen/activity_vertical_margin"
    tools:context="com.example.hhh.MainActivity" >

    <com.gc.materialdesign.views.LayoutRipple
        android:layout_width="match_parent"
        android:layout_height="60dp"
        android:layout_centerVertical="true"
        app:rippleColor="#22ff00ff">

        <TextView
            android:layout_width="wrap_content"
            android:layout_height="wrap_content"
            android:layout_centerHorizontal="true"
            android:layout_centerVertical="true"
            android:text="设定涟漪的颜色" />
    </com.gc.materialdesign.views.LayoutRipple>

</RelativeLayout>
 通过:app:rippleColor="@color/blue" 进行设置
<RelativeLayout xmlns:android="http://schemas.android.com/apk/res/android"
    xmlns:tools="http://schemas.android.com/tools"
    xmlns:app="http://schemas.android.com/apk/res-auto"
    android:layout_width="match_parent"
    android:layout_height="match_parent"
    android:paddingBottom="@dimen/activity_vertical_margin"
    android:paddingLeft="@dimen/activity_horizontal_margin"
    android:paddingRight="@dimen/activity_horizontal_margin"
    android:paddingTop="@dimen/activity_vertical_margin"
    tools:context="com.example.hhh.MainActivity" >

    <com.gc.materialdesign.views.LayoutRipple
        android:layout_width="match_parent"
        android:layout_height="60dp"
        android:layout_centerVertical="true"
        app:rippleColor="@color/blue">

        <TextView
            android:layout_width="wrap_content"
            android:layout_height="wrap_content"
            android:layout_centerHorizontal="true"
            android:layout_centerVertical="true"
            android:text="设定涟漪的颜色" />
    </com.gc.materialdesign.views.LayoutRipple>

</RelativeLayout>
rippleSpeed:涟漪扩散的速度。默认是20,可以设定的是数字
通过这个属性我们可以改变涟漪的扩散速度,数字越大速度越快,也就是涟漪显示的时间越短

上面左边图片速度为:10,右边图片速度为:60
<RelativeLayout xmlns:android="http://schemas.android.com/apk/res/android"
    xmlns:tools="http://schemas.android.com/tools"
    xmlns:app="http://schemas.android.com/apk/res-auto"
    android:layout_width="match_parent"
    android:layout_height="match_parent"
    android:paddingBottom="@dimen/activity_vertical_margin"
    android:paddingLeft="@dimen/activity_horizontal_margin"
    android:paddingRight="@dimen/activity_horizontal_margin"
    android:paddingTop="@dimen/activity_vertical_margin"
    tools:context="com.example.hhh.MainActivity" >

    <com.gc.materialdesign.views.LayoutRipple
        android:layout_width="match_parent"
        android:layout_height="60dp"
        android:layout_centerVertical="true"
        app:rippleSpeed="10">

        <TextView
            android:layout_width="wrap_content"
            android:layout_height="wrap_content"
            android:layout_centerHorizontal="true"
            android:layout_centerVertical="true"
            android:text="设定涟漪的扩散速度" />
    </com.gc.materialdesign.views.LayoutRipple>

</RelativeLayout>
英因为它继承自RelativeLayout,所以自然有RelativeLayout的各种属性啦。比如设定background

<RelativeLayout xmlns:android="http://schemas.android.com/apk/res/android"
    xmlns:tools="http://schemas.android.com/tools"
    xmlns:app="http://schemas.android.com/apk/res-auto"
    android:layout_width="match_parent"
    android:layout_height="match_parent"
    android:paddingBottom="@dimen/activity_vertical_margin"
    android:paddingLeft="@dimen/activity_horizontal_margin"
    android:paddingRight="@dimen/activity_horizontal_margin"
    android:paddingTop="@dimen/activity_vertical_margin"
    tools:context="com.example.hhh.MainActivity" >

    <com.gc.materialdesign.views.LayoutRipple
        android:layout_width="match_parent"
        android:layout_height="60dp"
        android:layout_centerVertical="true"
        android:background="@color/orange">

        <TextView
            android:layout_width="wrap_content"
            android:layout_height="wrap_content"
            android:layout_centerHorizontal="true"
            android:layout_centerVertical="true"
            android:text="设定layout背景色" />
    </com.gc.materialdesign.views.LayoutRipple>

</RelativeLayout>
四、通过代码来设置各种属性
package com.example.hhh;

import com.gc.materialdesign.views.LayoutRipple;

import android.os.Bundle;
import android.support.v7.app.ActionBarActivity;
import android.view.View;
import android.widget.Toast;

public class MainActivity extends ActionBarActivity {

    @Override
    protected void onCreate(Bundle savedInstanceState) {
        super.onCreate(savedInstanceState);
        setContentView(R.layout.activity_main);
        LayoutRipple layoutRipple = (LayoutRipple)findViewById(R.id.layout);
        layoutRipple.setRippleBorderRadius(30);//设定边界弧度
        layoutRipple.setClickAfterRipple(false);//设定在点击后立刻响应
        layoutRipple.setRippleColor(0xffff0000);//设定涟漪的背景色
        layoutRipple.setRippleColor(getResources().getColor(R.color.blue));//通过资源设定涟漪背景色
        layoutRipple.setRippleSpeed(3);//设定涟漪的扩散速度
        layoutRipple.setBackgroundColor(0xffff0000);//设定layout的背景
        layoutRipple.setBackgroundColor(getResources().getColor(R.color.blue));//通过资源设定layout的背景
    }

    public void buttonListener(View v) {
        Toast.makeText(getApplicationContext(), "click", 0).show();
    }
}
布局文件:
<RelativeLayout xmlns:android="http://schemas.android.com/apk/res/android"
    xmlns:tools="http://schemas.android.com/tools"
    xmlns:app="http://schemas.android.com/apk/res-auto"
    android:layout_width="match_parent"
    android:layout_height="match_parent"
    android:paddingBottom="@dimen/activity_vertical_margin"
    android:paddingLeft="@dimen/activity_horizontal_margin"
    android:paddingRight="@dimen/activity_horizontal_margin"
    android:paddingTop="@dimen/activity_vertical_margin"
    tools:context="com.example.hhh.MainActivity" >

    <com.gc.materialdesign.views.LayoutRipple
        android:id="@+id/layout"
        android:layout_width="match_parent"
        android:layout_height="60dp"
        android:layout_centerVertical="true"
        android:onClick="buttonListener">

        <TextView
            android:layout_width="wrap_content"
            android:layout_height="wrap_content"
            android:layout_centerHorizontal="true"
            android:layout_centerVertical="true"
            android:text="设定layout背景色" />
    </com.gc.materialdesign.views.LayoutRipple>

</RelativeLayout>
源码下载:


 浙公网安备 33010602011771号