

经典笔记
Linux启动过程详细教程
https://www.vzeo.com/news/xuetang/800713.html
https://blog.csdn.net/qq_45172832/article/details/125974231
https://xinqiu.gitbooks.io/linux-insides-cn/content/Booting/linux-bootstrap-1.html
https://www.cnblogs.com/lcw/p/3337937.html
kdump
https://eternalcenter.com/kdump-centos-7-rocky-linux-8-rhel-7-rhel-8/
https://blog.csdn.net/SGchi/article/details/135393035
kernel.panic=0
kernel.unknown_nmi_panic=1
kernel.panic_on_unrecovered_nmi=1
kernel.panic_on_io_nmi=1
kernel.softlockup_panic = 1
kernel.hung_task_panic=1
kernel.sysrq = 1
kernel.nmi_watchdog = 1
kernel.watchdog_thresh = 1
kdump
https://cloud.tencent.com/developer/article/2013235
https://zhuanlan.zhihu.com/p/620257814
https://github.com/huataihuang/cloud-atlas-draft/blob/master/os/linux/kernel/tracing/kdump_over_nfs.md
https://juejin.cn/post/7117909467072561183
https://blog.csdn.net/anyegongjuezjd/article/details/128377989
https://linux.cn/article-8737-1.html
网卡驱动
http://cstechcn.com/forum.php?mod=viewthread&tid=128&page=1
硬盘类型
https://www.cnblogs.com/yanling-coder/p/13084124.html
进程通信
好的,我会为你提供每种进程通信方法的具体例子以及相应的shell验证方法。

管道(Pipes):
例子:在父进程和子进程之间通过管道传递数据。

bash
// pipe_example.c
#include <stdio.h>
#include <unistd.h>

int main() {
    int pipefd[2];
    char buf[20];

    pipe(pipefd);

    if (fork() == 0) {
        // Child process
        close(pipefd[1]); // Close unused write end

        read(pipefd[0], buf, sizeof(buf));
        printf("Child received: %s\n", buf);
        close(pipefd[0]);
    } else {
        // Parent process
        close(pipefd[0]); // Close unused read end

        write(pipefd[1], "Hello, child!", 13);
        close(pipefd[1]);
    }

    return 0;
}
验证方法:

bash
gcc pipe_example.c -o pipe_example
./pipe_example
命名管道(Named Pipes):
例子:通过命名管道在两个进程之间传递数据。

bash
# 创建命名管道
mkfifo mypipe

# 在一个终端中执行读取命令
cat < mypipe

# 在另一个终端中执行写入命令
echo "Hello, named pipe!" > mypipe
信号(Signals):
例子:使用kill命令向进程发送信号。

bash
# 在一个终端中运行一个长时间的进程
sleep 1000

# 在另一个终端中发送信号(SIGINT)给上述进程
kill -SIGINT <pid>
共享内存(Shared Memory):
例子:通过共享内存在两个进程之间传递数据。

bash
// shm_example.c
#include <stdio.h>
#include <stdlib.h>
#include <sys/shm.h>

#define SHM_SIZE 1024

int main() {
    key_t key = 1234;
    int shmid;
    char *shmaddr;

    shmid = shmget(key, SHM_SIZE, IPC_CREAT | 0666);
    shmaddr = shmat(shmid, NULL, 0);

    printf("Enter a message: ");
    fgets(shmaddr, SHM_SIZE, stdin);

    printf("Message written to shared memory: %s", shmaddr);

    shmdt(shmaddr);

    return 0;
}
验证方法:

bash
gcc shm_example.c -o shm_example
./shm_example
消息队列(Message Queues):
例子:通过消息队列在两个进程之间传递数据。

bash
// msgq_send.c
#include <stdio.h>
#include <stdlib.h>
#include <sys/msg.h>

struct msgbuf {
    long mtype;
    char mtext[100];
};

int main() {
    key_t key = 1234;
    int msgid;
    struct msgbuf message;

    msgid = msgget(key, IPC_CREAT | 0666);

    message.mtype = 1;
    printf("Enter a message: ");
    fgets(message.mtext, sizeof(message.mtext), stdin);

    msgsnd(msgid, &message, sizeof(message), 0);
    printf("Message sent to message queue.\n");

    return 0;
}
验证方法:

bash
gcc msgq_send.c -o msgq_send
./msgq_send
这些例子提供了不同进程通信方法的基本示例,并提供了相应的shell验证方法。你可以根据需要在你的系统上尝试运行这些例子,并观察它们的行为好的,我会为你提供每种进程通信方法的具体例子以及相应的shell验证方法。

管道(Pipes):
例子:在父进程和子进程之间通过管道传递数据。

bash
// pipe_example.c
#include <stdio.h>
#include <unistd.h>

int main() {
    int pipefd[2];
    char buf[20];

    pipe(pipefd);

    if (fork() == 0) {
        // Child process
        close(pipefd[1]); // Close unused write end

        read(pipefd[0], buf, sizeof(buf));
        printf("Child received: %s\n", buf);
        close(pipefd[0]);
    } else {
        // Parent process
        close(pipefd[0]); // Close unused read end

        write(pipefd[1], "Hello, child!", 13);
        close(pipefd[1]);
    }

    return 0;
}
验证方法:

bash
gcc pipe_example.c -o pipe_example
./pipe_example
命名管道(Named Pipes):
例子:通过命名管道在两个进程之间传递数据。

bash
# 创建命名管道
mkfifo mypipe

# 在一个终端中执行读取命令
cat < mypipe

# 在另一个终端中执行写入命令
echo "Hello, named pipe!" > mypipe
信号(Signals):
例子:使用kill命令向进程发送信号。

bash
# 在一个终端中运行一个长时间的进程
sleep 1000

# 在另一个终端中发送信号(SIGINT)给上述进程
kill -SIGINT <pid>
共享内存(Shared Memory):
例子:通过共享内存在两个进程之间传递数据。

bash
// shm_example.c
#include <stdio.h>
#include <stdlib.h>
#include <sys/shm.h>

#define SHM_SIZE 1024

int main() {
    key_t key = 1234;
    int shmid;
    char *shmaddr;

    shmid = shmget(key, SHM_SIZE, IPC_CREAT | 0666);
    shmaddr = shmat(shmid, NULL, 0);

    printf("Enter a message: ");
    fgets(shmaddr, SHM_SIZE, stdin);

    printf("Message written to shared memory: %s", shmaddr);

    shmdt(shmaddr);

    return 0;
}
验证方法:

bash
gcc shm_example.c -o shm_example
./shm_example
消息队列(Message Queues):
例子:通过消息队列在两个进程之间传递数据。

bash
// msgq_send.c
#include <stdio.h>
#include <stdlib.h>
#include <sys/msg.h>

struct msgbuf {
    long mtype;
    char mtext[100];
};

int main() {
    key_t key = 1234;
    int msgid;
    struct msgbuf message;

    msgid = msgget(key, IPC_CREAT | 0666);

    message.mtype = 1;
    printf("Enter a message: ");
    fgets(message.mtext, sizeof(message.mtext), stdin);

    msgsnd(msgid, &message, sizeof(message), 0);
    printf("Message sent to message queue.\n");

    return 0;
}
验证方法:

bash
gcc msgq_send.c -o msgq_send
./msgq_send
这些例子提供了不同进程通信方法的基本示例,并提供了相应的shell验证方法。你可以根据需要在你的系统上尝试运行这些例子,并观察它们的行为
dbus
find /proc/*/fd -type l -a ! -path "/proc/self/fd*" -printf "%h\n" | awk -F/ '{print $(NF-1)}' | sort -n | uniq -c | awk '{printf $2 " "; system("[ -d \"/proc/"$2"/fd\" ] && find /proc/"$2"/fd -type l | wc -l || echo 0")}'|sort -k 2 -n
find /proc/PID/fd -type l | xargs -I {} sh -c 'echo {} $(readlink -f {})' | awk '{print "FD:", $1, "=>", $2}'

cat /proc/*/task/*/status|awk '/State:.*Z/,/TracerPid:/'|grep -E "^PPid"

cat /proc/*/stat|grep -Po '\([0-9a-z/]+\)'|sort -n |uniq -c

cat /proc/*/status|grep -E 'State:.*Z.*' -A 10 -B 2|grep -Ei '^ppid.*'|awk '{print $2}'|xargs -i{} -t  kill  {}

cat /proc/*/status|grep -E 'State:.*Z.*' -A 10 -B 2

@@@@@@@@@@@@@@@@@@@@@@@@@@@@@@@@@@@@@@@@
#!/bin/bash
#

# mongo状态检查 执行后发截图
/qaxdata/s/services/mongo/27017/bin/mongo $(/qaxdata/s/services/etcd/etcd_2483/bin/etcdctl --endpoints=127.0.0.1:2483 get --prefix=true da.xian.test|egrep "mongo:\/\/"|tail -n 1|sed 's#^mongo://#mongodb://#g'|sed 's/\(.*\?\)?.*/\1\?replicaset=mongorepl\&authSource=admin/g') --quiet --eval "rs.isMaster().ok"

/qaxdata/s/services/mongo/27017/bin/mongo $(/qaxdata/s/services/etcd/etcd_2483/bin/etcdctl --endpoints=127.0.0.1:2483 get --prefix=true da.xian.test|egrep "mongo:\/\/"|tail -n 1|sed 's#^mongo://#mongodb://#g'|sed 's/\(.*\?\)?.*/\1\?replicaset=mongorepl\&authSource=admin/g') --quiet --eval "rs.status().ok"

/qaxdata/s/services/mongo/27017/bin/mongo $(/qaxdata/s/services/etcd/etcd_2483/bin/etcdctl --endpoints=127.0.0.1:2483 get --prefix=true da.xian.test|egrep "mongo:\/\/"|tail -n 1|sed 's#^mongo://#mongodb://#g'|sed 's/\(.*\?\)?.*/\1\?replicaset=mongorepl\&authSource=admin/g') --quiet --eval "rs.printSecondaryReplicationInfo()"


# kafka状态检查 001上执行
export JAVA_HOME=/qaxdata/s/services/apps/jdk/jdk
export JRE_HOME=$JAVA_HOME/jre
export CLASSPATH=$JAVA_HOME/lib:$JRE_HOME/lib:$CLASSPATH
export PATH=$JAVA_HOME/bin:$JRE_HOME/bin:$PATH


/qaxdata/s/services/kafka/kafka_29092/kafka/bin/kafka-topics.sh --zookeeper 127.0.0.1:22181/kafka29092 --describe --topic=__consumer_offsets


/qaxdata/s/services/apps/zookeeper22181/zookeeper/bin/zkCli.sh -server 127.0.0.1:22181 ls /kafka29092/brokers/ids|tail -n 1


# etcd状态检查 001上执行
ETCDCTL_API=3 /qaxdata/s/services/etcd/etcd_2483/bin/etcdctl  --endpoints=$(/qaxdata/s/services/etcd/etcd_2483/bin/etcdctl --endpoints=127.0.0.1:2483 get  --prefix=true da.xian.test|egrep "etcd:\/\/"|tail -n 1|grep -oP "(?<=etcd://)[^/]+") endpoint health


# 检查日志
find /qaxdata/s/services/logs/vector-xian-29000/default   -type f -name "log.2024-04-15-11"|xargs -I {} sh -c "grep ERROR {}|grep -Ei 'timeout|no route to host' > /dev/null && echo {} "


/qaxdata/s/services/etcd/etcd_2483/bin/etcdctl --endpoints=127.0.0.1:2483 get --prefix=true da.xian.test|egrep "tcp:\/\/" |tail -n 1|grep -oP "(?<=tcp://)[^:]+"


# 检查minio
source $(systemctl list-units |grep minio|awk '{print $1}'|xargs -I {} systemctl cat {}|grep EnvironmentFile |tail -n 1 |awk -F'=' '{print $2}') &&  $(dirname $(systemctl list-units |grep minio|awk '{print $1}'|xargs -I {} systemctl cat {}|grep ExecStart|tail -n 1 |awk -F'=' '{print $2}'|awk '{print $1}'))/mc  config host add minio https://127.0.0.1:9345  $MINIO_ACCESS_KEY $MINIO_SECRET_KEY && $(dirname $(systemctl list-units |grep minio|awk '{print $1}'|xargs -I {} systemctl cat {}|grep ExecStart|tail -n 1 |awk -F'=' '{print $2}'|awk '{print $1}'))/mc admin info minio
#!/bin/bash

function check_mongo(){
  MONGO_DB_VALUE=$( /qaxdata/s/services/etcd/etcd_2483/bin/etcdctl --endpoints=127.0.0.1:2483 get --prefix=true da.xian.test.project.zion.styx.appraisal.db --print-value-only)
  MONGO_URI=$(echo "$MONGO_DB_VALUE" | sed 's#^mongo://#mongodb://#g')
  if [ -z $MONGO_URI ]
  then
          exit 1
  fi
  if [[ $MONGO_URI =~ .*"?".* ]]
  then
      MONGO_URI="${MONGO_URI}&replicaset=mongorepl&authSource=admin"
  else
      MONGO_URI="${MONGO_URI}?replicaset=mongorepl&authSource=admin"
  fi
  PRIMARY_HOST=$(/qaxdata/s/services/mongo/27017/bin/mongo $MONGO_URI --quiet --eval "rs.isMaster().primary"|tail -n 1)
  echo $PRIMARY_HOST
cat > da.xian.test.project.zion.styx.appraisal.db.js << EOF
var config = rs.config();
config.members.forEach(function(member) {
  print("Member " + member.host);
  if (member.host === "$PRIMARY_HOST") {
         print("Member " + member._id + " is the primary");
     } else {
         print("Member " + member._id + " is not the primary, setting priority to 0");
         // 将非主节点的优先级设置为0
         member.priority = 0;
  }
});
rs.reconfig(config);
var config = rs.config();
config.members.forEach(function(member) {
  print("Member " + member.priority);
});
EOF
    /qaxdata/s/services/mongo/27017/bin/mongo $MONGO_URI < da.xian.test.project.zion.styx.appraisal.db.js
}

check_mongo
现象:
应用 8g
mongo 7g
k8s 2g
minio 1.5g

排查执行命令:
1,获取kubelet pprof
a,开启kubemaster proxy
# kubectl proxy

Starting to serve on 127.0.0.1:8001

b,获取pprof 新shell tty窗口执行
# curl -s http://127.0.0.1:8001/debug/pprof/allocs > kubelet.allocs
# curl -s http://127.0.0.1:8001/debug/pprof/heap > kubelet.heap
# curl -s http://127.0.0.1:8001/debug/pprof/profile > kubelet.profile
# curl -s http://127.0.0.1:8001/debug/pprof/block > kubelet.block
# curl -s http://127.0.0.1:8001/debug/pprof/goroutine  > kubelet.goroutine
# curl -s http://127.0.0.1:8001/debug/pprof/mutex > kubelet.mutex
# curl -s http://127.0.0.1:8001/debug/pprof/trace > kubelet.trace

2,获取docker pprof
# curl --unix-socket /var/run/docker.sock -X GET http://localhost/debug/pprof/allocs > docker.allocs
# curl --unix-socket /var/run/docker.sock -X GET http://localhost/debug/pprof/heap > docker.heap
# curl --unix-socket /var/run/docker.sock -X GET http://localhost/debug/pprof/profile > docker.profile
# curl --unix-socket /var/run/docker.sock -X GET http://localhost/debug/pprof/block > docker.block
# curl --unix-socket /var/run/docker.sock -X GET http://localhost/debug/pprof/goroutine > docker.goroutine
# curl --unix-socket /var/run/docker.sock -X GET http://localhost/debug/pprof/mutex > docker.mutex
# curl --unix-socket /var/run/docker.sock -X GET http://localhost/debug/pprof/trace > docker.trace


3,获取minio pprof
# /qaxdata/s/services/minio/bin/mc admin profile start --debug  --type cpu,mem,block minio
# /qaxdata/s/services/minio/bin/mc admin profile stop minio
# ls -l profile.zip


4,获取mongo连接数和内存信息判断是否是索引占用
a,mongo连接数
# ss -tlna|grep 27017|wc -l

b,mongo认证信息
# /qaxdata/s/services/etcd/etcd_2483/bin/etcdctl --endpoints=127.0.0.1:2483 get --prefix=true da.xian.test|egrep "mongo:\/\/"|tail -n 1


mongo://admin:OEiUmqOjZrewq9b___Aa1@xiantest04v.xian.zzt.360es.cn:27017/da_xian_test_upgrade_service?alias=upgrade-service&create_table=true&replicaSet=mongorepl

c,登陆mongo
# /qaxdata/s/services/mongo/27017/bin/mongo
MongoDB shell version v4.2.21
connecting to: mongodb://127.0.0.1:27017/?compressors=disabled&gssapiServiceName=mongodb
Implicit session: session { "id" : UUID("457fa509-d993-42ec-9c08-e1f76d582a6f") }
MongoDB server version: 4.2.21
mongorepl:PRIMARY> use admin
switched to db admin
mongorepl:PRIMARY> db.auth('admin','OEiUmqOjZrewq9b___Aa1')
1
mongorepl:PRIMARY>

d,获取mongo连接数
mongorepl:PRIMARY> db.serverStatus().connections
{
    "current" : 129,
    "available" : 4871,
    "totalCreated" : 8745,
    "active" : 1
}

e,查看mongo内存
mongorepl:PRIMARY> db.serverStatus().mem
{ "bits" : 64, "resident" : 157, "virtual" : 1705, "supported" : true }

f,查看mongo stat信息 (mongodb://用户:密码@机器:port/?authSource=admin&replicaSet=mongorepl)
/qaxdata/s/services/mongo/27017/bin/mongostat --uri="mongodb://admin:OEiUmqOjZrewq9b___Aa1@xiantest04v.xian.zzt.360es.cn:27017/?authSource=admin&replicaSet=mongorepl"
insert query update delete getmore command dirty used flushes vsize  res qrw arw net_in net_out conn       set repl                time
    *0   317     *0     *0       0    15|0  0.2% 0.2%       0 1.67G 157M 0|0 1|0   126k    125k  130 mongorepl  PRI Jan 24 19:13:18.016
    *0   294     *0     *0       0    14|0  0.2% 0.2%       0 1.67G 157M 0|0 1|0   118k    171k  130 mongorepl  PRI Jan 24 19:13:19.019
    *0   372     *0     *0       0    15|0  0.2% 0.2%       0 1.67G 157M 0|0 1|0   147k    139k  130 mongorepl  PRI Jan 24 19:13:20.013
    *0   315     *0     *0       0    12|0  0.2% 0.2%       0 1.67G 157M 0|0 1|0   125k    124k  130 mongorepl  PRI Jan 24 19:13:21.015
    *0   351     *0     *0       0    13|0  0.2% 0.2%       0 1.67G 157M 0|0 1|0   138k    132k  129 mongorepl  PRI Jan 24 19:13:22.014
    *0   333     *0     *0       0    16|0  0.2% 0.2%       0 1.67G 157M 0|0 1|0   133k    131k  130 mongorepl  PRI Jan 24 19:13:23.020
    *0   295     *0     *0       0    14|0  0.2% 0.2%       0 1.67G 157M 0|0 1|0   117k    119k  130 mongorepl  PRI Jan 24 19:13:24.015
    *0   314     *0     *0       0    22|0  0.2% 0.2%       0 1.67G 157M 0|0 1|0   127k    130k  130 mongorepl  PRI Jan 24 19:13:25.014
    *0   304     *0     *0       0    26|0  0.2% 0.2%       0 1.67G 157M 0|0 1|0   123k    131k  130 mongorepl  PRI Jan 24 19:13:26.017
    *0   351     *0     *0       0    15|0  0.2% 0.2%       0 1.67G 157M 0|0 1|0   140k    134k  130 mongorepl  PRI Jan 24 19:13:27.022


提供分析需要:
1,profile文件
kubelet.allocs
kubelet.heap
kubelet.profile
kubelet.block
kubelet.goroutine
kubelet.mutex
kubelet.trace
docker.allocs
docker.heap
docker.profile
docker.block
docker.goroutine
docker.mutex
docker.trace
profile.zip

2,ss -tlna|grep 27017|wc -l截图

3,mongo连接数截图

4,查看mongo内存截图

5,查看mongo stat信息截图


临时处理:
1,修改kubeleet上报频率降低gc
sed -Ei '/--node-status-update-frequency=30s --housekeeping-interval=1m/! s/"$/ --node-status-update-frequency=30s --housekeeping-interval=1m"/' /var/lib/kubelet/kubeadm-flags.env

2,重启kubelet
systemctl restart kubelet

3,等待k8s node正常(判断依据 STATUS ready)
# kubectl get node
NAME                            STATUS   ROLES    AGE   VERSION
xiantest04v.xian.zzt.360es.cn   Ready    master   42h   v1.19.15

4,等待k8s plane正常(判断依据 STATUS Running)
# kubectl get pods -n kube-system
NAME                                                    READY   STATUS    RESTARTS   AGE
coredns-74d9df68f9-hcnxt                                1/1     Running   11         42h
coredns-74d9df68f9-wct9k                                1/1     Running   11         42h
kube-apiserver-xiantest04v.xian.zzt.360es.cn            1/1     Running   12         42h
kube-controller-manager-xiantest04v.xian.zzt.360es.cn   1/1     Running   12         42h
kube-flannel-ds-66zfq                                   1/1     Running   13         42h
kube-proxy-57fst                                        1/1     Running   0          36m
kube-scheduler-xiantest04v.xian.zzt.360es.cn            1/1     Running   12         42h

5,重启业务pods
kubectl get pods -n default |grep -v -E 'Completed|STATUS'|awk '{print $1}'|xargs kubectl delete pods -n default --grace-period=0 --force=true

6,验证业务pods重启正常(没有非running即为全部正常)
kubectl get pods -n default |grep -v -E 'Completed|STATUS'|grep -v Running

7,验证业务
curl --location --request POST 'https://127.0.0.1:30001/FileV1/BatchGetFileSecurity' --header 'Content-Type: text/plain' --data '{"keys":[{"key":{"md5":"k63h+mx1SnGzadaEri2Jgg==","sha1":"Jl/3TiblnuQJjTs7+yXgLrfBLXQ="}}]}}' -k

返回存在查杀级别信息即为正常:
"level":0,"sublevel":0,"src":0,"white_channel":0

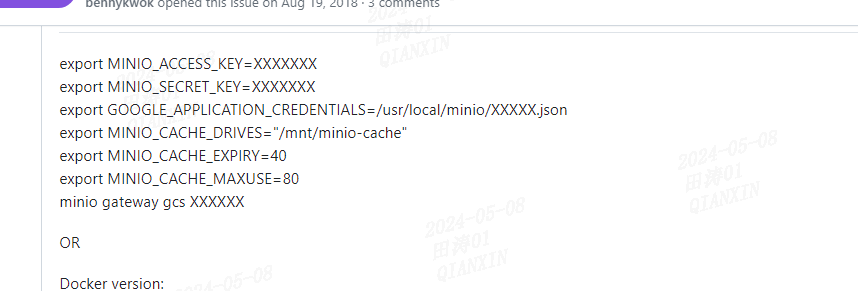
https://github.com/minio/minio/issues/6314
https://zhuanlan.zhihu.com/p/374939519
https://blog.csdn.net/Dream_Leaf/article/details/111530899
https://github.com/lkiesow/minio-rpm/blob/master/minio.conf
https://git.shivering-isles.com/github-mirror/minio/minio/-/tree/RELEASE.2020-10-18T21-54-12Z/docs/disk-caching
pprof
https://www.cnblogs.com/hobbybear/p/18059425
https://zhangguanzhang.github.io/2020/06/25/kubernetes-pprof/#/kubectl-收集
rabbitmq
https://www.cnblogs.com/ygbh/p/13519014.html
https://blog.csdn.net/Fe_cow/article/details/101074049
https://juejin.cn/post/7049160818834800677
https://pika.readthedocs.io/en/stable/examples/direct_reply_to.html
https://refblogs.com/article/681
cpu wait time
https://www.atatus.com/blog/iowait-and-linux-performance/
https://istart.studio/Linux性能分析/
https://www.alibabacloud.com/help/zh/ecs/support/query-and-case-analysis-linux-cpu-load
https://shansan.top/2021/10/07/io-bound-cpu-bound-with-average-load/
https://whatsrtos.github.io/Linux/Linux-Performance/
https://www.brendangregg.com/perf.html
https://www.site24x7.com/learn/linux/troubleshoot-high-io-wait.html
https://developer.aliyun.com/article/1275060
https://www.alibabacloud.com/help/zh/well-architected/latest/performance-monitoring-indicators
https://www.alibabacloud.com/help/zh/ecs/support/query-and-case-analysis-linux-io-load?spm=a3c0i.23458820.2359477120.58.38076e9biPxe2Z
pprof分析
https://www.cnblogs.com/hobbybear/p/18059425
mongo分析
https://www.cnblogs.com/abclife/p/17861735.html
https://nixum.gitbook.io/note/mongodb
https://blog.csdn.net/July_whj/article/details/124110597
https://blog.csdn.net/weiyuanke/article/details/72724052
https://www.yisu.com/jc/783911.html
https://www.cnblogs.com/zmc60/p/16245528.html
https://blog.csdn.net/MoonshineWoo/article/details/103034014
dbus
https://www.jianshu.com/p/f298d58ecb2d
https://developer.aliyun.com/article/1463286
https://blog.51cto.com/u_15127660/4527503
https://segmentfault.com/a/1190000023501116
https://blog.csdn.net/qq_41673920/article/details/131945450
https://just4coding.com/2018/08/01/dbus-api/
https://manpages.ubuntu.com/manpages/focal/zh_TW/man1/busctl.1.html
https://www.infoq.cn/article/as0wwpb1md7eavb6gkzk
https://linuxgeeks.github.io/2015/10/24/132143-认识并管理systemd服务和单元/
https://note.iawen.com/note/system/service
高级dbus
https://zhuanlan.zhihu.com/p/533845321
根据流量找服务
https://wiki.deepin.org/zh/04_常见问题FAQ/Linux查看进程占用网速和流量使用情况
sudo配置和检查
https://www.baeldung.com/linux/edit-etc-sudoers-using-script
https://zhuanlan.zhihu.com/p/632737024
sudo验证
https://developer.aliyun.com/article/989644
簡單haproxy配置
https://brinnatt.com/further/第-9-章-linux-haproxy-服务基础配置/
perf使用
https://arthurchiao.art/blog/trace-packet-with-tracepoint-perf-ebpf-zh/
Linux 阻塞与唤醒实现原理
https://smartkeyerror.com/Linux-Blocking
https://androidperformance.com/2022/01/21/android-systrace-cpu-state-runnable/#/关于我-amp-amp-博客
https://www.flftuu.com/2019/03/01/k8s调度权重/
https://dev.to/cylon/kubernetesdiao-du-175h
https://cloud.tencent.com/document/product/457/45634
https://blog.csdn.net/weixin_44729138/article/details/120296621
ACK专有集群证书更新说明
https://help.aliyun.com/zh/ack/ack-managed-and-ack-dedicated/user-guide/renew-cluster-certificates
https://blog.csdn.net/qq_36864672/article/details/130162568
https://cloud.tencent.com/developer/ask/sof/116410780
https://www.jianshu.com/p/10269275239d
https://kubernetes.io/zh-cn/docs/tasks/administer-cluster/kubeadm/kubeadm-certs/
https://blog.csdn.net/qq_34556414/article/details/114057422
https://kubernetes.io/docs/tasks/tls/certificate-rotation/
https://www.cnblogs.com/layzer/articles/kubernetes_time_100.html
https://kubernetes.io/docs/tasks/tls/managing-tls-in-a-cluster/
https://sysin.org/blog/kubernetes-kubeadm-cert-100y/#2-2-修改证书有效期为-100-年(默认为-1-年)
https://discuss.kubernetes.io/t/couldnt-get-current-server-api-group-list-client-certificate-in-etc-kubernetes-kubelet-conf-is-expired/27339
https://knowledge.broadcom.com/external/article/318821/kubectl-generates-an-unauthorized-or-x50.html
https://kubernetes.io/docs/reference/access-authn-authz/certificate-signing-requests/
https://kubernetes.io/docs/tasks/tls/certificate-rotation/
chronyd
https://www.cnblogs.com/f-ck-need-u/p/17718706.html
https://docs.oracle.com/en/learn/ol-chrony/#more-learning-resources
https://wiki.crowncloud.net/?How_to_Sync_Time_in_CentOS_Stream_9_using_Chrony
find ./ -name "dataspack-*" -print0 | xargs -0 -I {} sh -c  "echo {} | tee -a dataspack-list.txt && tar -tvf {} | tee -a dataspack-list.txt"
find ./ -name "part-*" -print0 | xargs -0 -n 15 sh -c 'echo "$@"'|awk '{print "tar zcvf dataspack-"NR".tar.gz "$0"&& rm -f "$0}'
find ./ -name "part-*" -print0 | xargs -0 -L 15 |awk '{print "tar zcvf dataspack-"NR".tar.gz "$0}'|grep -Eo 'part[a-z0-9.-]+.tar.gz'|wc -l
性能
https://ivanzz1001.github.io/records/post/linuxops/2017/11/19/linux-performance-debug
http://mysql.taobao.org/monthly/2015/05/02/
https://lrita.github.io/images/posts/linux/Linux_CPU_Usage_Analysis.pdf
https://www.cnblogs.com/softcloud/p/16649326.html
判断numa和内存
https://github.com/plantegg/programmer_case/blob/main/CPU/十年后数据库还是不敢拥抱NUMA.md
https://zhuanlan.zhihu.com/p/458308735
http://www.anger6.com/2022/01/17/high_performance/性能分析---内存篇page_fault/
https://feichashao.com/dirty_ratio_and_dirty_background_ratio/
https://hotttao.github.io/posts/linux/linux_perf/42_sar/
https://www.jianshu.com/p/ea7ed85918ac
https://developer.aliyun.com/article/55820
https://developer.aliyun.com/article/1263587
dbus
https://blog.51cto.com/u_15127660/4527503
反汇编
https://blog.csdn.net/weixin_35895431/article/details/116715446
https://carlyleliu.github.io/2021/链接装载与库(二)目标文件/
https://github.com/JnuSimba/LinuxSecNotes/blob/master/Linux 系统底层知识/ELF 文件简介.md
https://zhuanlan.zhihu.com/p/602452644
https://blog.csdn.net/mayue_web/article/details/128863698
https://xuezhaojiang.github.io/LinuxKernel/lab7/lab7.html
https://juejin.cn/post/6844903572920877070
https://blog.51cto.com/u_16213416/7057067
进程通信
https://www.cnblogs.com/LUO77/p/5816326.html
https://www.cnblogs.com/machangwei-8/p/10388824.html
gdb调试cp
https://blog.csdn.net/cloudeagle_bupt/article/details/103025935
mongo引擎优化
https://cloud.tencent.com/developer/article/1857119
https://cloud.tencent.com/developer/article/1753161
https://www.cnblogs.com/abclife/p/16256071.html


 浙公网安备 33010602011771号