
Azure Monitor (4) Azure Monitor与飞书告警集成
《Windows Azure Platform 系列文章目录》
有个客户需求,客户希望把Azure Monitor告警与飞书集成。
主要分为三个步骤:
一.创建飞书机器人
二.创建Azure Logic App
三.Azure Monitor告警调用Logic App
一.创建飞书机器人
(1)我们打开飞书,点击创建群组
(2)在飞书群右上角,选择...>设置,然后点击群机器人
(3)在群机器人面板,单机添加机器人,然后选择自定义机器人
(4)在机器人配置页,设置机器人名称和描述,然后单击添加

(5)单击完成
二.创建Azure Logic App
(1)飞书发送的HTTP Post,Body如下:
{
    "msg_type": "text",
    "content": {
        "text": "Hello Azure, this is a test message from Feishu bot!"
    }
}
(2)Azure Alert的Web Hook,json schema和飞书支持的schema并不相同。我们这里需要通过Azure Logic App转换一下schema
(3)Azure Alert支持的schema如下:https://learn.microsoft.com/zh-cn/azure/azure-monitor/alerts/alerts-logic-apps?tabs=send-email
(4)我们先创建一个Logic App,选择consumption plan,步骤略。也可以参考上面的url
(5)我们在Logic App Designer里,点击Add a trigger,选择When a HTTP request is received

(6)将下面的Common schema,粘贴到request Body JSON schema里
{
    "type": "object",
    "properties": {
        "schemaId": {
            "type": "string"
        },
        "data": {
            "type": "object",
            "properties": {
                "essentials": {
                    "type": "object",
                    "properties": {
                        "alertId": {
                            "type": "string"
                        },
                        "alertRule": {
                            "type": "string"
                        },
                        "severity": {
                            "type": "string"
                        },
                        "signalType": {
                            "type": "string"
                        },
                        "monitorCondition": {
                            "type": "string"
                        },
                        "monitoringService": {
                            "type": "string"
                        },
                        "alertTargetIDs": {
                            "type": "array",
                            "items": {
                                "type": "string"
                            }
                        },
                        "originAlertId": {
                            "type": "string"
                        },
                        "firedDateTime": {
                            "type": "string"
                        },
                        "resolvedDateTime": {
                            "type": "string"
                        },
                        "description": {
                            "type": "string"
                        },
                        "essentialsVersion": {
                            "type": "string"
                        },
                        "alertContextVersion": {
                            "type": "string"
                        }
                    }
                },
                "alertContext": {
                    "type": "object",
                    "properties": {}
                }
            }
        }
    }
}
如下图:

(6)然后再点击Designer里的+,选择Add an Action。如下图:

(7)选择HTTP,点击HTTP

(8)在HTTP配置里,URI输入飞书告警机器人Web Hook的URL
(9)Methon选择Post
(10)Header里,设置Content-Type,值为application/json
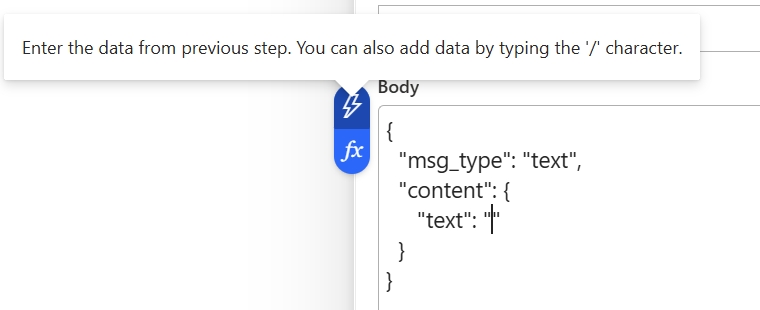
(11)Body里,输入下面的信息
{
  "msg_type": "text",
  "content": {
     "text": ""
  }
}
(12)把光标移动到上面的text后面的双引号中间,然后点击下图闪电图标
(13)点击上图的闪电图标后,下图会显示When a HTTP request is received,这表示从第一个步骤(When a HTTP request is recived)里获得数据
会显示第一个步骤的schema,我们可以点击下图的see more,查看到更多的schema数据

(14)我们点击上图的alerId,效果如下。表示第一个步骤的schema,作为变量,输入到Body里
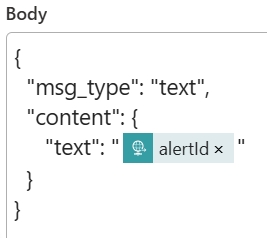
(15)我们重复上面的步骤,设置text的值如下:
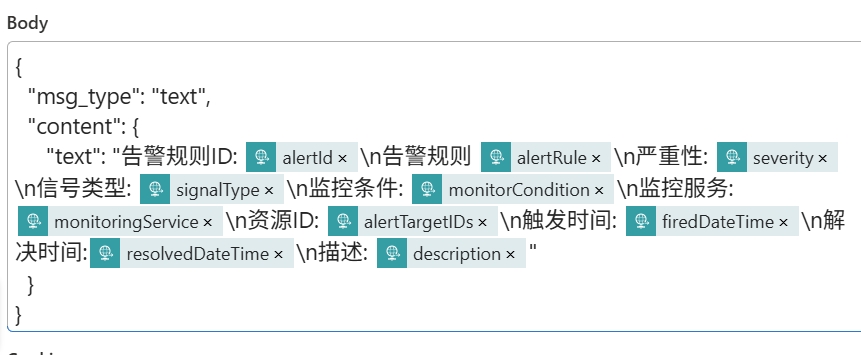
也可以复制下面的内容
{
  "msg_type": "text",
  "content": {
     "text": "告警规则ID: @{triggerBody()?['data']?['essentials']?['alertId']}\n告警规则 @{triggerBody()?['data']?['essentials']?['alertRule']}\n严重性: @{triggerBody()?['data']?['essentials']?['severity']}\n信号类型: @{triggerBody()?['data']?['essentials']?['signalType']}\n监控条件: @{triggerBody()?['data']?['essentials']?['monitorCondition']}\n监控服务: @{triggerBody()?['data']?['essentials']?['monitoringService']}\n资源ID: @{triggerBody()?['data']?['essentials']?['alertTargetIDs']}\n触发时间: @{triggerBody()?['data']?['essentials']?['firedDateTime']}\n解决时间:@{triggerBody()?['data']?['essentials']?['resolvedDateTime']}\n描述: @{triggerBody()?['data']?['essentials']?['description']}"
  }
}
(16)最后记得保存。如下图:

三.Azure Monitor告警调用Logic App
(1)我们登录Azure Portal,搜索Alert

(2)点击create alert rule。截图略
(3)scope选择订阅,condition选择条件,
(4)Action点击Create action group
(5)在Action Group里的Action里,选择Action Type为Logic App,选择之前的Logic App。其他步骤略。
(6)最后创建完毕
(7)我们还可以对这个logic App进行测试,我们找到Action Group。如下图:

(8)按照下面的步骤进行测试

(9)测试成功后,在飞书机器人里会显示告警信息


 浙公网安备 33010602011771号